BM-SYSTEMS specialists explained in detail to the readers of Zarplata magazine the features of drawing up work schedules in 1C programs.
Software capabilities to automate the accounting and planning of employee working hours according to various work schedules are provided by the configurations “1C: Salary and Personnel Management 8” and “1C: Production Enterprise Management 8”. Let's consider the sequence of actions for automated scheduling of work in 1C programs.
At the time of creation of materials, such versions of configurations as “Salaries and Personnel Management”, edition 2.5 (2.5.27) and “Manufacturing Enterprise Management”, edition 1.2 (1.2.33) are also relevant.
General list of procedures for drawing up work schedules in the 1C program .
Planning employee working time in 1C software products involves performing a number of sequential actions:
1. Fill out the production calendar (done annually).
2. Enter all the work schedule templates used in the company (this is done when you start working in the program and as new schedules appear).
3. Configure the entered work schedule templates (the settings are performed when entering each new schedule).
4. Fill out work schedules for the coming year (done annually)
5. Assign an appropriate schedule to each employee (done regularly in ongoing HR work).
Let's look at each necessary action in more detail.
Filling out the production calendar
To correctly record employees' working hours, it is necessary to fill out the production calendar annually. Information about public holidays, weekends and pre-holiday days is entered manually on the basis of decrees of the Government of the Russian Federation on the transfer of weekends in the coming year. After entering this information, you can print and check the correctness of completion using the summary data on the number of working and holiday days/hours per month. So what exactly needs to be done? Below is the sequence of actions for filling out the production calendar for the coming year, as well as the view of the working window.
1. Set the period for filling the calendar
2. By clicking on the “Fill by default” button, you can activate the function of automatically filling working time data into the calendar
3. Print and check the result
4. Adjust the data if necessary by clicking on the right mouse button
5. Save your changes.
(Menu Enterprise / Production calendar)
Entering chart templates used in the company
The program allows you to enter various work schedule templates:
Five days;
Six days;
Part-time (reduced) working hours;
Replaceable;
Summarized working time recording schedules;
Schedules by calendar days;
The number of charts that can be registered in the program is unlimited. Below is the sequence of steps to introduce a new template.
1. Add a new work schedule
2. Use the “Chart Filling Assistant” to correctly enter a new schedule
3. Or “Graph Filling Assistant” for a previously entered schedule.
(Menu Company / Opening hours)
Setting up and filling out charts
To set up a work schedule, use the “Schedule Filling Assistant”. The program offers you two options: setting up using an existing template and setting up manually.
Setting up by template. The assistant will prompt you to fill out a chart based on one of the predefined templates:
-- “Five-day 40 hours”: from Monday to Friday - 8 hours, on pre-holiday days - 7 hours;
-- “Six-day week 40 hours”: from Monday to Friday 7 hours, on Sat 5 hours on pre-holiday days, respectively - 7 and 4 hours;
-- “In two days” and “In three days” – shift schedules with a 24-hour shift at a specified frequency starting from the start date. For these schedules, evening and night hours can be provided - 2 and 10 hours per shift;
-- “Calendar days” – every day 8 hours.
note:When creating a schedule using the “Five-day 40 hours” or “Six-day 40 hours” template, holidays are taken into account; in other templates, holidays are not taken into account.
After filling out the template, if necessary, you can adjust the completed schedule manually.
Manual setting. If you need to enter a more complex schedule than those suggested in the templates, when starting the “Graph Filling Assistant”, select the “Manual Configure” method for filling out the schedule. In this case, the assistant will prompt you to configure the following settings:
Let's consider the possibilities of setting chart parameters manually:
1. In the “Schedule type” field, indicate the length of the working week in days – “Five-day” or “Six-day”.
To reflect shift work mode, select the “Shift” schedule type.
If you select the “Calendar days” schedule type, data on working hours will be filled in based on the fact that all days of the year are working days.
2. In the “Hours per week” field, indicate the length of the working week in hours. This parameter is used when converting an employee's monthly or daily rate into an hourly rate, for example, to pay for night hours.
3. When checking the “Summarized working time recording” checkbox, holidays marked in the production calendar are not taken into account.
Checking the box also affects the calculation of some accruals: for example, “Payment based on average earnings” when paying for business trips in this case will use the average hourly earnings, rather than the average daily earnings.
4., 5. The “Keep records of night hours” and “Keep records of evening hours” checkboxes are selected when it is necessary to include night and/or evening hours in the schedule.
The number of night and evening hours per day is determined according to the schedule.
6. The “Take into account holidays” checkbox is selected when, when filling out the schedule, it is necessary to take into account holidays as non-working days.
For the “Five-day”, “Six-day” and “Calendar days” schedule types, on the day before a holiday, working hours are reduced by 1 hour.
For “Shift” schedules, pre-holiday days are not reduced.
7. When you check the “Part-time” checkbox, you must also select the type of part-time: “Part-time” or “Reduced work week”
If you plan to assign a tariff rate to employees working on this schedule based on a full-time work schedule, then you must select the method for calculating the time standard “According to a different schedule” and select a full-time work schedule.
After you fill out all the necessary data, proceed to the next stage of entering information in the assistant by clicking the “Next” button.
Depending on the type of schedule selected in step 1, a certain form for setting up a schedule opens.
If you have selected the “Shift” schedule type, a shift setup form is displayed in which you need to describe the cyclicity of shift work, including weekends. For example, “In a day or two”:
If you have selected the schedule type “Five-day”, “Six-day” or “Calendar days”, a form for entering hours by day of the week is displayed:
If you indicated the need to take into account night and evening hours, the system will prompt you to fill out an extended (detailed) schedule form:
Methodological notes on drawing up work schedules in 1C program configurations were prepared by the HR Accounting and Payroll Automation Department of the BM-SYSTEMS company.
The production calendar is approved annually by government decree. This resolution also postpones holidays if necessary.
In the program, filling out the production calendar is mandatory, since otherwise the system will not be able to correctly perform many of its functions. If you try to use a functionality that requires a completed production calendar, the program will generate an error. The work schedule is used when making payments to employees, maintaining staffing tables, calculating working and banking days, and in many other actions.
In our article we will show an example of filling out a production calendar in the 1C 8.3 Accounting 3.0 program. The mechanism is standard and is universal for most configurations and versions of platforms. Using it, the employee work schedule is filled out in 1C.
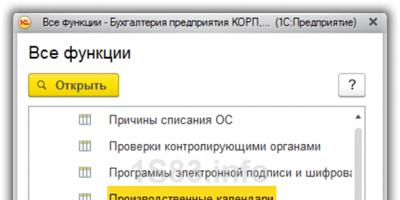
Where can I find the production calendar in 1C 8.3? Go to the "All functions" menu if it is available to you. Otherwise, your account may not have all the rights, or this menu may not be enabled in the settings (in the main menu: Options - Tools).
In the window that opens, go to the directories and open “Production calendars”.

You will see a list of previously created work schedules. By default, we already have one called “Russian Federation”. We will open it exactly. This calendar is national, is filled out on the basis of current legislation and stores data for several years at once.

In the form that opens, indicate the year for which you want to fill out the production calendar in 1C. In our case, this is 2017.

Initially, our calendar was not full. This is evidenced by the fact that all dates are marked in red. To automatically fill out the calendar, click on the corresponding button.
For the current year, the calendar is automatically filled in from approved information about working days, holidays and the transfer of holidays; for future years - in accordance with the Labor Code of the Russian Federation.
The default completed production calendar will look like the image below. Day transfers are displayed on the right side.

- Working days are marked in black;
- dark red - Saturdays;
- red - Sundays;
- blue – pre-holiday shortened days;
- and pink ones are festive.
Sometimes enterprises approve their own production calendars and postpone holidays. Below we describe how this can be done in 1C.
Changing days
To change a day, select it and click on the “Change day” button. After this, a drop-down list will open in front of you, where you can select a new type.

Transfer days
To transfer a day, also select it in the calendar and click on the button of the same name. A form will open in front of you in which you need to indicate on what day the transfer will be made, and then click on the “OK” button.

3.1, as practice shows, raises a lot of questions. And what do accountants come up with in a program for setting up and calculating payroll for employees who work in shifts. And, therefore, in this article, I would like to pay special attention to this issue.
Since performing the correct initial settings in the program is 95% of success for the correct automatic calculation of payroll, as well as the correct calculation of contributions and personal income tax and, therefore, the correct completion of regulated reports 6-NDFL, calculation of insurance premiums, 2-NDFL and etc. So, let's imagine a situation where employees work in shifts of two working days, 12 hours each with two days of rest. This mode involves the work of two employees alternately, so we will set up two schedules, each shift will have its own. In our example, it turns out that there are two shifts, but in practice there could be three or four, with a shift of a day or two. Therefore, no matter how many shifts there are in an enterprise, so many schedules need to be set up.
In the 1C: ZUP 3.1 program in the menu setting, employee work schedules, you need to create a graph and name it, for example: First shift 2 to 12(Fig.1).
Now, let's look at how to set up the first shift schedule through the properties (Fig. 2, point 1). Check the box - by cycles of arbitrary length(Fig. 2, point 2). When setting up, accounting for holidays will predetermine holidays in the schedule as weekends. Let's assume that in our example, employees work on holidays, so for our example there is no need to set the flag (Fig. 2, point 3). The affixed flag is summarized accounting, will allow processing to be reflected for the selected period of time (Fig. 2, paragraph 4). We determine which hours are included in a twelve-hour shift. Night time, according to Part 1, Art. 96 TK, opening hours from 22.00 to 06.00. Therefore, if the shift falls during these hours, then it is necessary to set the flag - night hours(Fig. 2, point 5).

You need to determine the method of payment for night hours when filling out the initial program settings on the tab - hourly wage – additional payment is used for night work(Fig. 3).

If the initial setup was made without the possibility of calculating payment for night hours, then you can always return to it during the work when enabled in the program - all functions – processing – initial program settings(Fig.4).

The work shift is from 12.00 to 24.00, which means that 2 hours out of 12 working hours are night time. The work schedule table should be filled out - one repeating fragment of the work schedule: 10 hours during the day and 2 hours at night. The second day is filled in the same way. Days 3 and 4 are days off. Therefore, we fill in the day (3,4), and set the night and day hours in the turnout field - zero(Fig.5).

To create a work schedule for the 2nd shift, you should either set a different reference date, or swap working days and weekends (Fig. 6).

Save with the button – OK, the schedule is automatically filled in for the entire current year. Please note that in January the first shift starts working on January 1, and rests on January 3 and 4 (Fig. 7).

Accordingly, when filling out the second schedule (Fig. 6), we call it: Second shift 2 to 12, employees hired according to it will work on January 3 and 4, and rest on January 1 and 2, respectively (Fig. 8).

That's all for today! I hope this article will be useful to you in maintaining records in your enterprise. I will be very grateful if you write your comments, since only feedback from you will allow me to understand how relevant this issue is or not. Or maybe it still needs to be discussed in more detail, or you have related questions that need to be addressed in future articles. In any case, only you, dear readers, are my guide!
The timesheet in 1C ZUP 8.3 is kept for those employees whose wages depend on the amount of time worked (temporary workers).
There are two ways to record time worked:
- Accounting for deviations from planned time. In this case, all absences from work (time off, vacation, sick leave, etc.) are recorded. This accounting method also reflects unplanned work (overtime).
- This method reflects not only unplanned work and absences, but also time worked according to the schedule - continuous registration.
If you are wondering where to find the time sheet in 1C Accounting 8.3, I won’t bother you - it’s not there. For the purposes of extended accounting for salary, the 1C ZUP 8.3 solution is specially purchased. We'll talk about her.
The first thing you need to do is for the current year (for the year the timesheet is kept). From the Setup menu, select Production Calendars.
If the calendar has not been previously created, it must be created and filled out automatically, checking for correctness and making changes if necessary.

Opening hours
After filling out the production calendar in 1C ZUP, you need to create and fill out employee work schedules. To do this, go to the “Settings” menu and select “Employee work schedules”. 
The schedule can be filled out automatically and adjusted if necessary.

Work schedules can be set for employees using documents such as “Hiring” and “Personnel Transfer”.
ZUP has the ability to massively change the work schedule of employees.
In such situations, when an employee’s working conditions have changed for a certain period of time (for example, a shortened day), individual schedules are indicated for them. Setting up individual schedules is located in the “Salary” menu. If an employee has an individual schedule for a certain period, the program will not take into account the main one.
Filling out a time sheet in 1C ZUP
The timesheet in 1C ZUP 8.3 is located in the “Salary” section, item “Timesheets”. The timesheet uses the designations that are found in the “Types of Use of Working Time” directory. If it is necessary to indicate several types of time, each of them is indicated on a separate line.
The timesheet can be filled out automatically, adjusting the data if necessary. Some enterprises use ACS (access control and management systems). The whole point is that all inputs and outputs are recorded using an electronic access system. This data can be uploaded to a timesheet, eliminating the need to maintain it manually.

In order to be able to change the data in the timesheet regarding the work schedule, in the program settings you need to uncheck the “Check that actual time matches the planned one.” Otherwise, if the timesheet indicates working hours, for example, on a day off according to the work schedule, the document will not be posted.
It should be remembered that when maintaining both timesheets and reflection documents at the same time, the timesheet will have the highest priority when receiving time worked for payroll calculation.
Form T-13
In 1C ZUP 3.1, there is a printed form “T-13” for viewing time worked. You can generate this report from the “Salary” section by selecting “Salary reports”. The report you need will be called “Time Sheet T-13”.