Lesson objectives:
1. To develop in students curiosity, fantasy, imagination, creative technical and artistic thinking;
3. Develop creative thinking in the process of completing tasks;
4. Continue introducing the “quilling” technique;
5. Arouse the desire to create a collective composition to decorate the classroom interior. Develop the ability to collaborate with peers.
Tasks:
1. Create conditions for the moral education of students;
2. Contribute to the development of the creative abilities of the individual;
3. Continue to teach the skills and abilities of traditional artistic processing of materials of various types.
4. Teach children to create flowers using the loop quilling technique
Visual aid:pworks made using quilling technique
Equipment: double-sided colored paper in green and yellow; paper for quilling, colored cardboard for the background, comb, scissors, stationery knife, toothpick, PVA glue, frame for work (candy box).
During the classes
I. Organizational moment
II. Communicating lesson objectives
III. Lesson topic message
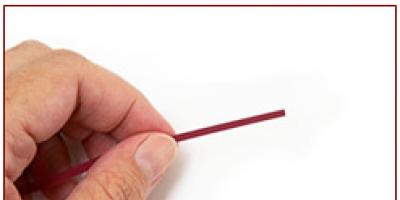
Today we will talk about the loop quilling technique, for which you can successfully use a regular comb. Using this technique you can decorate cards very beautifully. And it’s nice that it won’t take too much time to complete the quilling lessons, and the result will be beautiful and original. I suggest you make cute and modest wild daisies or any other flowers for your panel.
1. First, let's prepare the background for our future work. Cut out a rectangle from colored cardboard to the size of the box.
2. Now let's make daisies. Take strips of white paper 5 mm wide. For the cores, cut strips of yellow paper 15 mm wide. We cut yellow strips along the entire length of the sheet. To make the middle of the chamomile fluffy, cut the strips as small as possible, but not all the way - to create a fringe. Then we will tightly screw the yellow cores onto a toothpick. Glue the edge of the strip, straighten it - and the yellow heart of a white flower is ready.
3.
Well, the comb’s finest hour has come! With its help we will make petals. First fix the strip with glue around one clove (see photo). And then we will increase each new turn by one clove until we form a petal of the desired size. For each flower we will need 7-8 petals.
Glue the center of the flower onto the background with PVA glue, and place the petals around it. Repeat this three times for each flower.
4.
Let's take the comb again and make leaves from green paper in the same way. Then we will make curls from the same green paper. This can be done in two ways: we wrap either the two ends of the strip alternately around a toothpick and then unravel them, or we wind the strip on only one side. You can see the approximate arrangement of the elements of our panel in the photo or use your imagination and create your own composition.
Cleaning the workplace.
V. Reflection What did you like? What didn't you like? What was difficult?
Theme: Flower panel. Date of:_____________________________
Lesson objectives: Secondary comprehension of already known knowledge; Create conditions for the moral education of students;
Tasks:
- Continue to introduce the quilling technique
- Develop skills and abilities to work with paper;
- To develop creative thinking in the process of completing tasks, imagination through the poem “White Daisies”, the creative abilities of each child;
- To cultivate in students the qualities of accuracy and composure when performing work techniques, hard work, and the ability to listen.
Visual aid: p
Equipment: quilling paper, colored cardboard for the background, scissors, stationery knife, toothpick, PVA glue.
During the classes
I. Organizational moment
II. Communicating lesson objectives
III. Lesson topic message
IV. Updating basic knowledge and correcting it.
V. Trial application of knowledge and model exercises
Safety instructions: rules for working with scissors.
1. First, let's prepare the background for our future work. Cut out a rectangle from colored cardboard.
2. Today we will remember how to roll paper strips, what materials and tools are used in this technique.
Take strips of paper 5 mm wide. For the cores, cut strips of yellow and white paper 15 mm wide. We cut yellow and white strips along the entire length of the sheet. To make the center fluffy, cut the strips as finely as possible, but not all the way - to create a fringe. Then we will tightly screw the cores onto a toothpick. Glue the edge of the strip, straighten it - and the flower heart is ready.
3. We make standard curls from paper of different colors, giving them the shape of a drop.
We assemble a pattern - a flower - from the blanks. Insert the core into the middle.
IV. Consolidation. Analysis of the work done.
Cleaning the workplace.
V. Reflection What did you like? What didn't you like? What was difficult? What new did you learn?
Theme: Flower panel. Date of:_____________________________
Lesson objectives:
Tasks:
Visual aid: pWorks made using the quilling technique.
Equipment:
During the classes
I. Organizational moment
Safety instructions: rules for working with scissors.
- Glue the edge of the strip.
IV. Consolidation. Analysis of the work done.
Cleaning the workplace.
V. Reflection
Theme: Flower panel. Date of:_____________________________
Lesson objectives: application of knowledge in the quilling technique in the process of making a flower panel.
Tasks:
- Continue learning how to make basic shapes (tight spiral, loose spiral, drop, arrow) and use them to create various compositions (from simple to complex);
- Increase the level of development of motor skills, thinking, attention, memory, eye, creativity;
- Cultivate perseverance and accuracy when performing work,develop the ability to work together.
Visual material:work done using the quilling technique.
Equipment: paper for quilling, colored cardboard for the background, scissors, stationery knife, toothpick, stencil, PVA glue, needles for fixing curls.
During the classes
I. Organizational moment
II. Communicating the objectives and topics of the lesson
III. Updating basic knowledge and correcting it.
IV. Application of knowledge and model exercises
Safety instructions: rules for working with scissors.
1. Today we continue to develop skills in working with paper using this technique.
2. There are 20 basic quilling elements in total, but the principle remains the same: fold, pinch - using your imagination, you can always come up with new quilling elements.
3. Current teacher briefing:
- Checking the organization of workplaces
- Checking compliance with safety rules when performing a task
- Providing assistance according to student needs.
4. Training exercises:
- Take a strip of paper with two fingers
- Twist the paper tightly around the toothpick
- When the diameter of the roller becomes 3-4 mm, you can tighten it by hand
- We twist the thick disk with our hands, intercepting it with our fingers so that the paper tape does not unravel.
- Relax your fingers slightly, allowing the paper tape to unravel a little, or place it in the stencil.
- Glue the edge of the strip.
- Now we squeeze the workpiece with two fingers to get a shape - an eye, an arrow, a drop, etc.
Let's get to work (Ongoing instruction from the teacher as students complete independent work).
IV. Consolidation. Analysis of the work done.
Cleaning the workplace.
V. Reflection What was difficult? What new did you learn? What did you like? What didn't you like?
Topic: Grapes (lesson one) Date:___________________________
Lesson objectives: repetition of material already covered, developing interest in the subject, creating conditions for the moral education of students;
Tasks:
- Continue to introduce the quilling technique
- To develop skills in working in paper rolling techniques;
- Develop the imagination, thinking, and creative abilities of every child;
- Promote the development of fine motor skills of the hands and eye.
- To develop accuracy and composure when performing work techniques, communication skills, listening skills, activity and the ability to work in a team.
Visual aid: pWorks made using the quilling technique.
Equipment: paper for quilling, colored cardboard for the background, scissors, stationery knife, toothpick, stencil, PVA glue, needles for fixing curls.
During the classes
I. Organizational moment
II. Communicating the objectives and topics of the lesson
III. Updating basic knowledge and correcting it.
IV. Application of knowledge and model exercises
1. Today we continue to develop skills in working with paper using this technique.
The beauty of products made using the quilling technique fascinates, inspires, and creates a wonderful mood. Let's remember where we start?
2. Let's repeat the technique of twisting curls:
- Take a strip of paper with two fingers
- Twist the paper tightly around the toothpick
- When the diameter of the roller becomes 3-4 mm, you can tighten it by hand
- We twist the thick disk with our hands, intercepting it with our fingers so that the paper tape does not unravel.
- Relax your fingers slightly, allowing the paper tape to unravel a little, or place it in the stencil.
- Glue the edge of the strip.
- Now we squeeze the workpiece with two fingers to make a drop.
Let's get to work (Ongoing instruction from the teacher as students complete independent work).
Today we are starting to work on a technique that has an interesting feature. When making blanks for grapes, we will use a stencil (demonstration of a special stencil for quilling). Rules for working with a stencil. Safety briefing.
In today's lesson we will make preparations for grapes. For this we need stripes of purple and lilac colors.
IV. Consolidation. Analysis of the work done.
Cleaning the workplace.
V. Reflection What was difficult? What new did you learn? What did you like? What didn't you like?
Topic: Grapes (lesson two) Date:___________________________
Lesson objectives: To develop students' curiosity, fantasy, imagination, creative technical and artistic thinking
Tasks:
- Continue to introduce the quilling technique
- To form an emotional attitude to reality, moral and aesthetic responsiveness to the beauty in life;
- Develop musical and creative thinking in the process of completing tasks;
- Continue introducing the quilling technique;
- Arouse the desire to create a collective composition to decorate the classroom interior. Develop the ability to collaborate with peers.
Visual aid: pWorks made using the quilling technique.
Equipment:
During the classes
I. Organizational moment
II. Communicating the objectives and topics of the lesson
III. Updating basic knowledge and correcting it.
IV. Application of knowledge and model exercises
1. Today we continue to develop skills in working with paper using this technique.
2. We make standard curls from green paper, giving them the shape of a droplet.
We assemble a pattern from the blanks - leaves, grouping them from individual elements - droplets.
3. Let's repeat the technique of twisting curls:
- Take a strip of paper with two fingers
- Twist the paper tightly around the toothpick
- When the diameter of the roller becomes 3-4 mm, you can tighten it by hand
- We twist the thick disk with our hands, intercepting it with our fingers so that the paper tape does not unravel.
- Relax your fingers slightly, allowing the paper tape to unravel a little, or place it in the stencil.
- Glue the edge of the strip.
- Now we squeeze the workpiece with two fingers to make a drop.
Let's get to work (Ongoing instruction from the teacher as students complete independent work).
For the first work, we choose simple patterns and basic shapes used in quilling.
In today's lesson we will make blanks for grape leaves and assemble them from individual elements onto a strip (petiole). For this we need green stripes.
IV. Consolidation. Analysis of the work done.
Cleaning the workplace.
V. Reflection What was difficult? What new did you learn? What did you like? What didn't you like?
Topic: Grapes (lesson three) Date:___________________________
Lesson objectives: Teach how to build a composition correctly, correctly place accents in design
Tasks:
- Continue to introduce the quilling technique
- To form an emotional attitude to reality, moral and aesthetic responsiveness to the beauty in life;
- Create conditions for the moral education of students;
- Promote the development of creative abilities of the individual;
- Continue to teach skills in traditional artistic processing of various types of materials.
Visual aid: pWorks made using the quilling technique.
Equipment: quilling paper, toothpick, stencil, PVA glue, needles for fixing curls.
During the classes
I. Organizational moment
II. Communicating the objectives and topics of the lesson
III. Updating basic knowledge and correcting it.
IV. Application of knowledge and model exercises
1. Today we continue to complete our work and the main task is to collect the entire composition into a single work.
Let's get to work (Ongoing instruction from the teacher as students complete independent work).
We have already made berries collected in a brush and leaves. Putting the picture together. Glue leaves and berries. We glue the berries in several layers or in two tiers. First, in one layer, and then on top of the joints in the first layer, glue the remaining berry rolls. At the top of the bunch we glue a brown spiral branch. The vine is ready.
Or
IV. Consolidation. Analysis of the work done.Cleaning the workplace.
V. Reflection What was difficult? What new did you learn? What did you like? What didn't you like?
Lesson plan on the topic "Paper fantasies", technique: quilling, slide presentation in Microsoft PowerPoint
Technique : quilling
Content
History of quilling
Quilling technique
Quilling Tools
Quilling paper
Quilling technique
Goals:
Educational: To contribute to the formation of ideas about a new type of decorative and applied art - quilling. Introduce students to quilling techniques.
Developmental: Develop the imagination, thinking, and creative capabilities of every child; develop interest in the subject; develop students' skills and abilities in working with paper, eye, fine motor skills.
Educating: To cultivate in students the qualities of accuracy and composure when performing work techniques, diligence, listening skills, communication skills, neatness, activity, work culture, and the ability to work in a team.
Methodological equipment of the lesson:
Posters
Samples of work in this technique
Film about introducing the Quilling technique
Equipment and tools: paper strips 5-7 mm wide, colored paper, template blanks, simple pencils, wooden rods with a split end, cardboard, glue, scissors, toothpicks, glue jars, napkins.
Teaching methods:
Story
Demonstration of finished works
Conversation explaining new material
Demonstration of work techniques
Independent work
Form of lesson organization: Work in a group, presentation of your works (mini-exhibition).
Vocabulary work:
Quilling
paper rolling
paper filigree
paper lace.
Lesson type: Learning new material, a lesson - creativity.
During the classes
Organizational part
Greetings
Checking student attendance
Checking students' readiness for the lesson
Lesson topic message: The first material for a child’s creativity is paper. Paper is an unusually expressive and malleable material. You can create a whole world out of it. There are many types of paper plastic. The most famous in our country is the Japanese art of folding figures from a sheet of paper - origami. Today I will introduce you to another technique that is still little known among us - the art of paper rolling or, as it is called in the West, quilling.
Learning new material: Quilling is based on the ability to twist long and narrow strips of paper into spirals, modify their shape and create three-dimensional or planar compositions from the resulting parts.
1. History of quilling
In English, this needlework is called “quilling” - from the word “quill” or “bird feather”. Unlike origami, which originated in Japan, the art of paper rolling originated in Europe in the late 14th and early 15th centuries. In medieval Europe, nuns created elegant medallions by twisting paper with gilded edges onto the tip of a bird's feather. When viewed closely, these miniature paper masterpieces created the complete illusion that they were made of thin gold strips. Unfortunately, paper is a short-lived material and little has survived from medieval masterpieces. However, this ancient technique has survived to this day and is very popular in many countries around the world. Paper rolling quickly spread in Europe, but because paper, especially colored and high-quality paper, was a very expensive material, paper plastic art became an art for ladies from wealthy sections of society.
Nowadays, paper rolling is widely known and popular as a hobby in Western European countries, especially in England and Germany. But this art became most widespread when it “moved” to the East. The richest traditions of the finest graphics and plastic arts, papermaking and working with it have given the art of paper sculpture a new life.
In South Korea, there is an entire Association of Paper Art Lovers, uniting followers of various areas of paper art. In the 15th century it was considered art. At 19 - ladies' entertainment. For most of the 20th century it was forgotten. And only at the end of the last century quilling began to turn into an art again.
In England, Princess Elizabeth was seriously interested in the art of quilling, and many of her creations are kept in the Victoria and Albert Museum in London. We associate paper with the idea of fragility and fragility. But quilling refutes this statement - you can put, for example, a cup or a heavy book on a filigree volumetric stand, and not a single curl of paper lace will be harmed. You can assemble a candy vase from paper elements and safely use it for its intended purpose - it will not fall apart or break. In general, quilling is an opportunity to see the unusual possibilities of ordinary paper.
It should be noted that the Korean school of quilling (they call it paper rolling) is somewhat different from the European one. European works, as a rule, consist of a small number of parts; they are laconic, reminiscent of mosaics, and decorate postcards and frames. Europe is always in a hurry, so it loves fast technology. Eastern masters create works that resemble masterpieces of jewelry. The finest voluminous lace is woven from hundreds of small details. Masters of the Eastern school prefer to perform twisting using a thin awl. A replacement can be made from a thick needle and cork. Also, children are good at winding on a toothpick.
Paper. The paper must be colored on both sides. Ready-made cut strips of paper can be bought in specialty stores.
If this is not possible, then you can cut the strips yourself. The width of the quilling strips is usually 3-7 mm.
Quilling technique
Take a strip of paper with two fingers.

Pull the end of the strip with pressure with two fingers of your other hand, running your nail along it so that the end bends slightly.

The curved tip is easier to wrap around the awl. Twist a few turns tightly.

When the diameter of the roller becomes 3-4 mm, it can already be removed from the awl and further turned by hand.

Twist the thick disk with both hands, constantly intercepting it with your fingers so that the paper tape does not unravel.


The entire strip is folded.
Now relax your fingers slightly, allowing the paper spiral to unravel a little.

Glue the end of the strip with PVA glue.


Now squeeze the workpiece with two fingers. The result is a “drop” blank.

Workpieces can be given a variety of shapes by performing compressions and indentations.
These are “drop” and “petal” blanks.
2. Quilling tools
To master the paper rolling technique, you do not need any special tool. At the initial stage, a visit to a regular department store is quite enough. Here is a short list of what you need to start learning:
Awl. It is advisable to purchase an awl with a diameter of about one millimeter. Usually the awl has a cone shape, which can be inconvenient. In this case, you can use any hardened rod of suitable diameter. An awl (rod) is used to wind a spiral from a paper strip. In this case, it is necessary to control the tension force of the paper; the handle of the tool should be comfortable for this purpose.
Tweezers. The tips should be sharp and aligned exactly. To perform high precision work. Notches at the end are undesirable because... may leave marks on paper. The squeezing force should be comfortable for your hands, providing a secure grip with the least amount of pressure.
Scissors. Like tweezers, they must have pointed ends. For maximum precision cutting of fringes.
Glue. There are no special recommendations. However, it should dry quickly enough and not leave marks. Try starting with PVA.
When marking a future composition, you will need the simplest drawing tools: a compass, a ruler, a pencil.
3. Quilling paper
Ready-made cut strips of paper can be bought in special stores that sell products for cards, etc. If this is not possible, then pass sheets of colored paper through a paper shredder or cut them. The standard width of quilling strips is 3 mm, but this is not a necessary condition. Another very important point. If you make strips yourself, then the weight of the paper is important - at least 60 grams per square meter (usually the weight is indicated on paper packages), otherwise it will not curl neatly and keep its shape.
4. Quilling technique
At first glance, the paper rolling technique is simple. A strip of quilling paper is rolled into a tight spiral. It will be convenient to start winding by twisting the edge of the paper quilling tape onto the tip of a sharp awl. Having formed the core of the spiral, it is advisable to continue working without using a quilling tool. This way you can feel with your fingertips whether the roll is being formed uniformly and adjust the effort as you go. The result should be a dense spiral less than a centimeter in diameter. It will be the basis for the further diversity of all forms. After which the paper spiral unfolds to the required size, and then the required quilling figure is formed from it.
The tip of the paper is grabbed by a drop of glue. Rolls can be given a variety of shapes by performing compressions and indentations.
There are a total of 20 basic elements for quilling, but the principle remains the same: fold, pinch - using your imagination you can always come up with new quilling elements yourself.
Safety briefing
Rules for working with scissors:
Store scissors in a designated place.
Place them with their sharp ends closed and facing away from you.
Pass the scissors to each other, rings first.
Training exercises
Twist a spiral from strips of white paper, try to make a “drop”, “eye” and other shapes.
Practical work
Independent work of students
Students work in pairs, follow a model, or come up with a composition on their own.
Ongoing teacher instruction (as students complete independent work)
Checking the organization of students’ workplaces;
Checking compliance with safety regulations when performing a task;
Instruction on how to complete the task in accordance with the instructional and technological map; providing assistance to poorly prepared students.
Cleaning workplaces
Summing up the lesson
Exhibition of student works
Teacher's final words
So our unusual lesson has come to an end. We have done a lot of work today.
What new things did you learn during the lesson? What did you study? What did you like about the lesson? How did your creativity show up in class? What's your mood now?
I believe that the goals set at the beginning of the lesson were achieved.
I hope that the knowledge you acquired today has enriched you and will help you in solving creative problems.
State Institution City Center for Technical Creativity of Aktobe
Open lesson
mug "QUILING"
Subject : Greeting cards for
circle leader "Quilling"
Description of material:
The presented summary of an open quilling lesson is designed for work with children of primary and secondary school age (9 - 14 years old). This material is offered to additional education teachers and teachers of educational institutions.
Subject: Greeting cards for
Target:
from paper.
TASKS:
Educational:
Educational:
Educational:
Methodical techniques:
Type and form of lesson :
- Combined
Lesson time: 45 min.
- exhibition of illustrations
- presentation;
Materials and tools:
thick paper (120-200g.)
PVA glue;
officer line;
toothpicks;
master glue;
Vocabulary work:
- quilling;
- paper rolling;
- paper filigree;
- paper lace.
Equipment:
DURING THE CLASSES:
Organizing time.
Greetings:
|
On the window, on the shelf, needles grew and satin flowers - scarlet and red. |
TO actus |
|
Rye is earing in the field. There, in the rye, you will find a flower. bright blue and fluffy, It’s just a pity that it’s not fragrant. |
IN asilek |
|
There is a cockerel in the garden - a lilac comb, and a fighting tail, a crooked sabre |
AND rice |
|
Yellow flowers have varnished cheeks, five-fold corollas, and the leaves are changeable. |
L Utik |
|
White peas on a green stem. |
L andysh |
|
There are some sweets and there is such a flower, and threads from which you will wind up a ball |
AND rice |
|
A spring flower has Signs so as not to be mistaken: The leaf is like garlic, And the crown is like that of a prince! |
N harcissus |
|
Everyone is familiar with us: Bright as a flame, We are namesakes With small nails. Admire the wild Scarlet... |
G butts |
|
QUILLING |
|
- Patience and work will grind everything down.
- Who does not work shall not eat.
- The master's work is afraid.
- Finished the job - go for a walk safely.
- It is not the gods who burn the pots.
- Time for business, time for fun.
- The owner is the one who works. .
- Labor feeds, but laziness spoils.
In English this is called "quilling"-from the word "quill" or "bird feather" Unlike origami, which originated in Japan, the art of paper rolling originated in Europe in the late 14th and early 15th centuries. In France and Italy, paper filigree, beginning in the 15th century, was used by monks to decorate and frame sacred images, creating elegant medallions by twisting paper with gilded edges onto the tip of a bird's feather. When viewed closely, these miniature paper masterpieces created the complete illusion that they were made of thin gold strips.
Paper rolling quickly spread in Europe, but because paper, especially colored and high-quality paper, was a very expensive material, paper plastic art became an art for ladies from wealthy sections of society. Connoisseurs of this art are considered to be such crowned heads as the daughter of George III (King of Great Britain) Elizabeth, who is said to have given her doctor a screen made using the quilling technique, Queen Mary Tudor of England and Queen Alexandra of Denmark, as well as such intellectuals as Jane Austen and Brontë sisters. From England, quilling migrated to North America with the colonialists, and here in the first half of the 19th century, some cabinetmakers made boxes and boxes with inserted walls, decorated using the paper filigree technique, as if it were a mosaic. This unusual treatment is called mosaic.
Beginning in the late 19th century, the popularity of quilling gradually waned, almost to the point of oblivion, only to be re-emerged today in a more modern form, but with a charm and sophistication equal to that of centuries past. This technique has many fans all over the world. In England, in 1983, the Quilling Union of England was created, a real quilling corporation that receives letters from all continents. On her initiative, the First International Quilling Festival was organized in 1992, during which one could admire ancient products and modern creations. Two major exhibitions on quilling were held: the first in 1927 in London, the other in 1988 in New York, at the Florian-Papp Gallery, where real masterpieces were put up for sale. Unfortunately, paper is a short-lived material and little has survived from medieval masterpieces. However, this ancient technique has survived to this day and is very popular in many countries around the world.
Children, the holiday of March 8 is approaching, and all of you, of course, want to make gifts for this holiday. It is generally accepted that the best gift for women is flowers. There are more than 270 thousand of them in the world. These are indoor, field, garden and there are even flowers on ponds. You can grow flowers for her in a pot, or you can make a bouquet of flowers from paper and attach the bouquet to a greeting card.
Sunflower
Our sunflower, like the sun. Happy to see yellow petals. The sunflower seeds look through the windows and wink at us
Snowdrop
A flower grows through the snow, towards the sun's rays, small and delicate, white snowdrop.
Daisies
The daisies bloomed - summer has come.
Chamomile blooms in the meadow A modest little white flower, which dropped a petal from a yellow pocket.
Cornflowers The blue sky fell on the meadow, Everything around became blue, blue, Flowers bloomed in the meadow, by the blue river, Like the blue sky - cornflowers
As soon as the sun rises, the poppy will bloom in the garden. The cabbage butterfly will land on the flower. Look - the flower has two more petals.
Bell
Blue bell, Why are you standing there? Come with me! It's scary in the field. It's soon evening. I'll take you home.
Forget-me-nots
Blue forget-me-nots - Unusual flowers: Even if they are very small - They have a miracle of beauty.
Asters
The sun in the sky was surprised: What kind of miracle happened, Maybe the stars were lit? The asters have bloomed! A hundred shades and varieties of these joyful flowers: Pink, red, the most beautiful!
Lilies
Slender, delicate stem, Very unusual - This is a lily flower, Excellent among all. A symbol of nobility, a symbol of beauty, the flowers of the whole earth respect the lily. Well done!
PVA glue;
tool for winding strips;
officer line;
toothpicks;
master glue;
What is composition? Composition is a combination, putting together different parts into a single whole in accordance with some idea. Now we will continue to work on the composition that we chose to design the greeting card. We wind the strips of paper using a tool, form the desired shape, and attach the parts to the postcard using master glue. The greeting card is ready.
a) in Europe at the end of the 14th - beginning of the 15th century
a) bird feather
a) 3, 5, 7 mm
a) a tool for winding paper strips, a ruler, scissors, PVA glue, paper, master glue.
Did you like the lesson?
Lesson summary:
View document contents
"Open lesson of the Quilling circle"
State Institution City Center for Technical Creativity
Open lesson
mug "QUILING"
Subject : Greeting cards for
additional education teacher,
circle leader "QUILING"
Aktobe 2016
Description of material:
The presented summary of an open quilling lesson is designed for work with children of primary and secondary school age (9 - 14 years old). This material is offered to additional education teachers and teachers of educational institutions.
Subject: Greeting cards for
Target:
nurturing in children a sense of beauty and love for their native nature.
2. comprehensive development of children in the process of mastering techniques
quilling techniques as an artistic method of design
from paper.
create conditions for students to develop creative abilities in practical activities, continue to study the technology of making greeting cards using quilling techniques.
TASKS:
Educational:
To cultivate artistic taste and a creative attitude to work, perseverance in achieving goals, accuracy, frugality, conscious compliance with safety rules when working with cutting and piercing objects.
achieve maximum independence of children's creativity;
Fostering a value-based attitude towards person-to-person communication, the ability to empathize with failure and rejoice in the success of another - the ability to work in a team.
Labor and aesthetic education, instilling work culture skills, nurturing perseverance and hard work.
Educational:
To develop visual-figurative thinking, cognitive interest, rational use of time and memory, precision of movements, artistic taste, creativity.
Students study the history of the development of the ancient quilling technique.
Creating conditions for the development of creativity.
Educational:
Improve technical skills in working with paper using the quilling technique.
Learn to make flowers based on an idea of the appearance of the plant (corolla, stem, leaves);
Training in technological sequence and labor techniques, developing fine motor skills of the hands;
To consolidate the acquired theoretical knowledge in the process of creative activity, to develop the ability to follow oral instructions.
Methodical techniques: reciting poems, looking at illustrations, conversation, showing a sample and basic twisting techniques, explaining how to create crafts, analyzing children's work.
Type and form of lesson :
Combined
Conversation, game, practical work.
Lesson time: 45 min.
Methodological equipment of the lesson:
samples of work in this technique;
exhibition of illustrations
presentation;
Materials and tools:
thick paper (120-200g.)
for flowers and leaves: strips of colored office paper;
PVA glue;
tool for winding strips;
officer line;
toothpicks;
master glue;
Vocabulary work:
quilling;
paper rolling;
paper filigree;
paper lace.
Equipment:
Sound recordings “Sounds of the surrounding world”, projector.
DURING THE CLASSES:
Organizing time.
Greetings:
Hello guys! Hello, dear guests!
Today we have gathered with you for another club lesson. To find out the name of the circle we will play a riddle game.
Do you like to solve riddles? (Yes)
I will ask riddles about flowers. Having guessed, put the first letter of the answer in a row, as a result the name of the circle will appear in front of you.
| On the window, on the shelf | TO actus |
| Rye is earing in the field. | IN asilek |
| There is a cockerel in the garden - | AND rice |
| Yellow flowers - | L Utik |
| White peas | L andysh |
| There are some sweets and there is such a flower, and threads from which you will wind up a ball | AND rice |
| The spring flower has | N harcissus |
| Everyone knows us: | G butts |
| Read the key word from the first letters of the riddles | QUILLING |
Read, what is the name of our circle? (Quilling)
What are we doing at the circle? - we cut strips, make parts from strips, collect flowers and leaves from certain parts - we do quilling or paper rolling. We make snowflakes to decorate rooms for the New Year, paintings, postcards, take part in competitions, and use our imaginations.
Well done! We are working with you. Can a person live without work?
What proverbs do you know about work?
|
Without oud you can't even pull a fish out of the pond.
Patience and work will grind everything down.
Who does not work shall not eat.
The eyes are afraid, but the hands are doing.
The master's work is afraid.
Finished the job - go for a walk safely.
It is not the gods who burn the pots.
Time for business, time for fun.
They get healthy from work, but from laziness they get sick.
The owner is the one who works. .
Labor feeds, but laziness spoils.
Speaking of hardworking people... one cannot help but recall the founders of the quilling technique, those who stood at the very beginning. Let's remember the history of quilling, or as this technique is also called - paper rolling, paper filigree, paper lace.
In English this handicraft is called "quilling"-from the word "quill" or "bird feather" Unlike origami, which originated in Japan, art of paper rolling originated in Europe in the late 14th and early 15th centuries. In France and Italy, paper filigree, beginning in the 15th century, was used by monks to decorate and frame sacred images, creating elegant medallions by twisting paper with gilded edges onto the tip of a bird's feather. When viewed closely, these miniature paper masterpieces created the complete illusion that they were made of thin gold strips.
Paper rolling quickly spread in Europe, but because paper, especially colored and high-quality paper, was a very expensive material, paper plastic art became an art for ladies from wealthy sections of society.
Connoisseurs of this art are considered to be such crowned heads as the daughter of George III (King of Great Britain) Elizabeth, who is said to have given her doctor a screen made using the quilling technique, Queen Mary Tudor of England and Queen Alexandra of Denmark, as well as such intellectuals as Jane Austen and Brontë sisters. From England, quilling migrated to North America with the colonialists, and here in the first half of the 19th century, some cabinetmakers made boxes and boxes with inserted walls, decorated using the paper filigree technique, as if it were a mosaic. This unusual treatment is called mosaic.
Since the end of the 19th century, the popularity of quilling gradually declined, almost to the point of complete oblivion, only to be revived again in our days.
in a more modern form, but with a charm and sophistication equal to that of centuries past. This technique has many fans all over the world. In England, in 1983, the Quilling Union of England was created, a real quilling corporation that receives letters from all continents. On her initiative, the First International Quilling Festival was organized in 1992, during which one could admire ancient products and modern creations.
Two major exhibitions on quilling were held: the first in 1927 in London, the other in 1988 in New York, at the Florian-Papp Gallery, where real masterpieces were put up for sale. Unfortunately, paper is a short-lived material and little has survived from medieval masterpieces. However, this ancient technique has survived to this day and is very popular in many countries around the world.
But this art became most widespread when it “moved” to the East. The richest traditions of the finest graphics and plastic arts, papermaking and working with it have given the art of paper sculpture a new life.
In South Korea, there is an entire Association of Paper Art Lovers, uniting followers of various areas of paper art.
We also do quilling in our circle and do it with pleasure.
Topic message and purpose of the lesson
Children, the holiday of March 8 is approaching, and all of you, of course, want to make gifts for this holiday. It is generally accepted that the best gift for women is flowers. There are more than 270 thousand of them in the world. These are indoor, field, garden and there are even flowers on ponds. You can grow flowers for her in a pot, or you can make a bouquet of flowers from paper and attach the bouquet to a greeting card.
We will continue to work on making the postcard.
The teacher invites the children to recite poems about the types of flowers with which they decorated their cards.
Sunflower
Our sunflower ,
like the sun.
Happy to see yellow petals.
Looking at the seeds through the window
And they wink at us
Snowdrop
Grows through the snow
To the sun's rays, flower,
Small and tender
Belenky snowdrop.
Daisies
Little sun on my palm -
White chamomile on a green stem.
Yellow hearts with a white rim...
How many of them there are in the meadow, how many of them there are by the river!
The daisies bloomed - summer has come.
Bouquets are made from white daisies.
In a clay jug, jar or cup
Large daisies crowd cheerfully
Chamomile blooms in the meadow
A modest white flower,
What's in the yellow pocket?
Dropped a petal.
Cornflowers
The blue sky fell on the meadow,
Everything around became blue, blue,
They bloomed in the meadow, by the blue river,
Like blue skies, flowers - cornflowers
As soon as the sun rises -
The poppy will bloom in the garden.
Cabbage Butterfly
It will fall on the flower.
Look - and the flower
Two more petals.
Bell
blue bell,
Why are you standing?
Come with me!
It's scary in the field.
It's soon evening.
I'll take you home.
Forget-me-nots
Blue forget-me-nots -
Unusual flowers:
Even if they are very small -
They have a miracle of beauty.
Asters
The sun in the sky was surprised:
What a miracle happened
Maybe the stars were lit?
The asters have bloomed!
One hundred shades and varieties
These joyful flowers:
Pink, red
The most beautiful!
Lilies
Slender delicate stem,
Very unusual -
This is a lily flower
Excellent among all.
Symbol of nobility,
Symbol of beauty,
Respect the lily
There are flowers all over the earth. Well done!
PRACTICAL INDEPENDENT WORK:
Let's get to work, don't forget about TB. Let's repeat! Safety precautions when working with paper, glue, scissors
hand scissors closed, rings forward;
do not leave scissors open;
use glue very carefully;
do not allow glue to get into your eyes; (in case of contact, rinse immediately with warm water)
Upon completion of work, wash your hands thoroughly.
Everyone on their desks has everything they need for work:
strips of colored office paper,
PVA glue;
tool for winding strips;
officer line;
toothpicks;
master glue;
What is composition? Composition is a combination, putting together different parts into a single whole in accordance with some idea. Now we will continue to work on the composition that we chose to design the greeting card. We wind strips of paper using a tool, form the desired shape, and attach the parts to the postcard using master glue. The greeting card is ready.
An exhibition of student work is held.
We finished work today. Look at what beautiful crafts you have made, such cards can now be given as gifts.
Guys, what new did you learn at today's event?
1) Where and when did the art of paper rolling originate….
a) in Europe at the end of the 14th - beginning of the 15th century
2) Translated from English, “quill” means……
a) bird feather
3) How wide should the stripes be to work using the quilling technique?
a) 3, 5, 7 mm
4) List the tools needed to work in the quilling technique...
a) a tool for winding paper strips, a ruler, scissors, PVA glue, paper, master glue.
Did you like the lesson?
Lesson summary:
A gift made with your own hands is pleasant both for the one who made it and for the one who receives such a gift. After all, it was made with great love! I hope that the knowledge acquired today will help in solving creative problems. I want to wish you to always learn something new, share knowledge with friends and, of course, finish what you start. Thanks for the work. See you at the next lesson.
Anna Lata
Summary of a quilling lesson for older children
Lesson notes on artistic development older children
Goals:
Educational:
To contribute to the formation of ideas about a new type of decorative and applied art - quilling.
Introduce children with technique quilling.
Developmental:
Develop the imagination, thinking, and creative capabilities of every child;
Develop interest in the subject;
Develop children skills and abilities to work with paper, eye, fine motor skills. Educating:
Educate children qualities of accuracy and composure when performing work techniques, diligence, ability to listen, communication skills, accuracy, activity, work culture, ability to work in a team.
Methodological equipment lesson:
Posters
Samples of labor objects
Instruction Cards
Equipment and tools: paper strips 5-7 mm wide, ballpoint pen refills with a split end, cardboard, glue, scissors, toothpicks.
Teaching methods:
Story
Demonstration of finished works
Conversation explaining new material
Demonstration of work techniques, independent work
Forms of organization lesson:
Work in small groups,
Defense and presentation of your works.
Vocabulary work:
Quilling,
Paper rolling,
Paper filigree,
Paper lace.
Type classes:
Learning new material, occupation - creativity.
During the classes:
Organizational part
Topic message classes:
An interesting material for a child's creativity is paper. Paper is an unusually expressive and malleable material. You can create a whole world out of it. There are many types of paper plastic. The most common types of paper plastic are: Japanese art of folding figures from a sheet of paper - origami, end-on, sculptural, strip plastic. Today I will introduce you to another technique that is still little known among us - the art of paper rolling or, as it is called in the West quilling.
Learning new material:
Quilling- is based on the ability to twist long and narrow strips of paper into spirals, modify their shape and create three-dimensional or planar compositions from the resulting parts.
In English, this type of needlework is called “quilling” - from the word “quill” or “bird feather”. Unlike origami, which originated in Japan, and other types of plastic arts, the art of paper rolling arose in Europe in the late 14th and early 15th centuries. In medieval Europe, nuns created elegant medallions by twisting paper with gilded edges onto the tip of a bird's feather. When viewed closely, these miniature paper masterpieces created the complete illusion that they were made of thin gold strips. Unfortunately, paper is a short-lived material and little has survived from medieval masterpieces. However, this ancient technique has survived to this day and is very popular in many countries around the world. Paper rolling quickly spread in Europe, but because paper, especially colored and high-quality paper, was a very expensive material, paper plastic art became an art for ladies from wealthy sections of society.
Nowadays, paper rolling is widely known and popular as a hobby in Western European countries, especially in England and Germany. But this art became most widespread when it “moved” to the East. The richest traditions of the finest graphics and plastic arts, papermaking and working with it have given the art of the paper plate a new life.
In South Korea, there is an entire Association of Paper Art Lovers, uniting followers of various areas of paper art.
In the 15th century it was considered art. At 19 - ladies' entertainment. For most of the 20th century it was forgotten. And only at the end of the last century quilling began to turn into art again.
In England, Princess Elizabeth was seriously interested in art quilling, and many of her creations are kept in the Victoria and Albert Museum in London. We associate paper with the idea of fragility and fragility. But quilling refutes this statement - you can put, for example, a cup or a heavy tome on a filigree volumetric stand, and not a single curl of paper lace will be harmed. You can assemble a candy vase from paper elements and safely use it for its intended purpose - it will not fall apart or break. All in all, quilling- this is an opportunity to see the unusual possibilities of ordinary paper.
Let's start with the basics:
Tool for quilling It is a plastic or metal stick with a split end. It is sold in specialized stores. You can make a similar tool yourself. And some even get by with a regular toothpick. In our work we will use a ballpoint pen with a slot at the end.
Paper. The paper must be colored on both sides. Ready-made cut strips of paper can be bought in specialty stores. If this is not possible, then you can cut the strips yourself. Strip width for quilling 3 mm, but this is an optional condition, the stripes can be a little wider (up to 7mm).
Glue. Used for gluing parts to the base. It is best to use PVA glue.
Toothpick. Used for applying glue.
Tweezers. For laying small parts.
Stencil with circles. To control the size of circles.
IN quilling There are quite a large number of basic elements, and each element takes a few seconds to produce.
Place the end of the paper strip between the split ends of the tool. Start rolling the strip of paper by passing it between your thumb and forefinger, maintaining the same tension. Continue rolling the paper until the end. Then turn the tool upside down and remove the curl.
The curl will unwind a little. Now use a toothpick to glue the tip of the strip to the curl. You only need a little bit of glue. Here it is, our initial shape is a circle.
In order for the flower petals to be the same size, it is advisable to control the size of the original circles using a stencil with circles.
You can give paper different two-dimensional and three-dimensional forms: squares, ovals, stars, cones, hemispheres. Acting as elements of the composition, these figures can represent tree leaves, flowers, candlesticks and much more. There are many standard shapes, but you can always come up with new ones yourself (Annex 1).
What can you use the resulting droplets and leaves for? They can be used to decorate an album, photo frame, postcard, make a Christmas tree decoration, a hot stand, decorative dishes, or a picture. An interesting effect will be achieved if the work combines drawing and quilling.
We place the resulting blanks on a pre-prepared base. (cardboard) and glue it.
The core of the flower can be double. To create such a core, a strip of paper is used, finely cut on one side. Next, we use the same twisting technique as for the petals. You can use several colors of paper. Then the strip is glued together from strips of two colors.
Training exercises.
Twist a spiral from strips of white paper, try to make a “drop”, “eye” and other shapes.
Practical work.
Safety briefing.
Rules for working with scissors: Keep scissors in a specific place. Place them with their sharp ends closed and facing away from you. Pass the scissors to each other, rings first.
Independent work children.
Children work in pairs, follow a model, or come up with a composition on their own.
Current teacher training (as children do independent work) checking the organization of workplaces children;
checking compliance with safety regulations when performing a task;
instructions on how to complete the task in accordance with the instructional and technological map; providing assistance to poorly prepared children.
Cleaning workplaces.
Summing up the lesson.
Exhibition of works children.
Final word from the teacher.
Our unusual experience has come to an end class. We have done a lot of work today.
What new things did you learn for yourself? class? What did you study? What did you like about class?
Tasks:
Teach children to make “loose rolls” of a certain size from 2 strips of paper glued together, using measuring rulers with circles. Continue to learn how to give rolls the basic shapes of “drop”, “curved drop”, “eye”, “crescent”, “triangle”. Practice the ability to make tight rolls for a bunny's tail; peephole, animal noses. Develop interest in the activity, the desire to complete the work started.
Expand and activate children's vocabulary on the topic: bast, ice
Equipment and materials:
pictures of a bast and ice hut, colored cardboard with silhouettes - blanks of houses, samples of different versions of a bunny, fox, Christmas tree, houses using the quilling technique, strips of white, yellow, orange, green, blue, quilling machine, toothpicks, PVA glue, napkins.
On the board there is a picture with footprints of a hare and a fox. Teacher: “Oh, guys, whose tracks are these? Look, the tracks lead to the houses. Who do you think lives in them and why?” (Children reason).
That's right, in one of them lives a hare, he has a bast hut, and in the other, icy one, there is a fox. And we found ourselves in the fairy tale “Zayushkina’s Hut”.
Is reading poem:
At the edge of the forest,
In his bast hut
The hare lived peacefully with his scythe,
Next to the red fox.
But the lazy fox
Didn't want to bother -
Build a house with bast,
And moved into the ice one.
Guys, when the bunny lived in his house, how did he feel? What was his mood? When the fox lived in her house, how did she feel? What fox? (cunning, red-haired). What was the fox's mood when she chased the hare out? That's right, angry, angry. And the bunny was scared of the fox, what was his mood? That's right, sad (the bunny was sad and cried).
TRIZ elements
Educator: How can we reconcile the fox and the hare? How to make sure that everyone feels good and everyone is in a cheerful, joyful mood, like in this picture? (Children's answers). Today we will depict these animals using the quilling technique. Considering options for making a fox and a hare. Clarification of details. A reminder of how to make them. Reminder of the rules for working with the tool.
Sequence of work:
For the hare:
1. From 2 strips of white paper glued together, roll up a “loose roll” and give it the basic shape of a “drop” (torso).
2. Twist loose rolls from white strips and give them the basic shapes of “drop”, “curved drop”, “crescent” (head, paws).
3. From 2 strips of white and pink glued together, roll a “loose roll”, starting with a pink strip, give it the basic shape of “eyes” (ears).
4. Twist a “tight roll” (tail) from half a white strip.
5. Twist “tight rolls” (nose, eye) from halves of black and pink strips.
For the fox:
1. From 2 strips of orange paper glued together, roll a “loose roll” and give it the basic shape of a “drop” (torso).
2. Twist loose rolls from orange strips and give them the basic shapes of “drop”, “curved drop”, “crescent”, “triangle” (head, neck, paws, tail).
3. Twist “tight rolls” (nose, eye) from halves of black and pink strips.
Children to the music make quilling blanks and glue them.
Low mobility game “Animal Family”
Tell me, who does the animal family consist of? (Mom, dad and baby)
I will turn you into baby animals of different animals, and you will play a little, and then tell me who your dad and mom are. (I dress the children in hats with pictures of baby animals.)
I put on a hat, turn it into a bunny... etc.
Educator:
Scattered across the lawn
Bears, foxes and bunnies.
They began to spin merrily,
The animals began to have fun.
One - jump, two - jump.
Freeze quickly, my friend. (children move in accordance with the text)
The teacher, addressing one of the children: “Who are you? Who is your family? (I am a little fox. My mother is a fox, and my father is a fox.) Sit down, sit down. I take off my hats and turn them into children.
At the end, the teacher and the children analyze the work and highlight the characteristic features of the characters created.
I ran through the snow in winter,
and covered all traces.
Red fur, and the tail is beautiful!
Oh, you little fox!
He is afraid of everyone in the forest:
Wolf, eagle owl, fox.
Runs from them, escaping,
Hare with long ears
Subject: "Zayushkina's hut" (II)
Tasks:
Teach children to decorate animal houses by rolling strips of paper into the basic shapes “loose roll”, “eye”, “curl”. Practice composing quilling elements into a single composition “Zayushkina Hut”, supplementing the work with quilling and appliqué details. Develop interest, imagination, creativity.
Equipment and materials: pictures of a bast and ice hut, colored cardboard with silhouettes - house blanks, samples of different options for making Christmas trees, houses using the quilling technique, strips of white, yellow, green, blue, a quilling machine, toothpicks, PVA glue, glue brushes, oilcloths, napkins , snowflakes made using creative punch, blue sand for snow, glitter.
Educator: Today we will decorate the ice and bast hut of our animals. How can you show that the hut is icy? You can make icicles and decorate them with a snow pattern. What basic forms can be used for this? (Eye, free spiral, curl, etc.)
Is reading poem:
The hare galloped through the forest
The hare was looking for food.