– this is the main attribute of a hockey player, determining the individual style of play and the nuances of technique. She always finds herself at the epicenter of the struggle. Even the most modern models Composites do not always withstand powerful puck hits and damage from skate blades. Budget wooden clubs even count consumables because of frequent breakdowns. Therefore, athletes pay Special attention preservation and extension of the gaming resource of your equipment.
A proven method used by hockey players all over the world is stick wrapping. special tape. It allows you not only to effectively protect your equipment from damage, but also to improve its gaming characteristics.
Why wrap the blade of a putter?
During play, the entire surface of the hook is subject to intense wear. Therefore, the primary function of the winding is protection against mechanical damage. protects the end of the hook from friction on the ice, and side surfaces from puck hits and cuts from skates. The winding layer distributes pinpoint impacts, reducing the likelihood of pen breakage due to powerful hits from the puck.
The second function of such protection is to improve the playing qualities of the stick. The hook wrap allows you to better feel the puck and control it more accurately on the ice. Surface integrity, no chips or deep scratches, prevents snow from sticking, which in turn improves puck reception, guaranteeing powerful and sharp hits.
How to properly wrap the blade of a putter?
You can wrap the hook in different ways. Most hockey players prefer to cover the entire surface of the hook with tape: from heel to toe. Someone is just wrapping work area: middle, forefoot or heel. We will show you how to make professional protection for the entire surface of the hook.

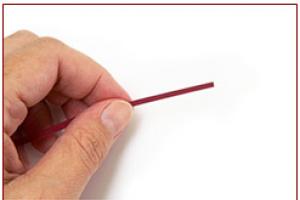
A special fabric tape is used for winding. Manufacturers offer two types of this material: for the hook and for wrapping the handle (upper grip). This is important to take into account because... tapes differ in adhesion properties.

The winding begins from the heel, carefully winding the tape and laying it overlapping.

The overlap can be complete, when a new turn of the tape almost completely overlaps the previous one, and partial, when the previous turn overlaps by less than a third. With full overlap, the winding layer is thicker, the hook is more reliably protected from impacts, but the tape consumption is greater.

The toe of the hook can be left open or wrapped completely. If you decide not to wrap the end, it is important to break the tape at the top end of the stick so that the tip does not unwind when rubbed against the ice.

When the hook is completely sealed, the winding continues beyond the toe.

The edge is smoothed and the excess is carefully trimmed with scissors.

The prepared stick is ironed with a puck from toe to heel on both sides. This is necessary in order to get rid of air cavities and improve the adhesion of the glue.
Professional handle wrapping
Hockey players wrap the top of the stick to ensure a secure overhand grip and prevent hand slipping and shaft twisting. Rigidly fixed upper grip minimizes energy loss during execution strong blows and improves stick control during active play.
Handle wrapping technique

We start wrapping the handle from the top of the club. We make several turns.

Without tearing off the tape, unwind it 30-50 cm and roll it into a tight braid.

We wind the braid onto the shaft at regular intervals of 2-3 cm.

Without breaking the tape, we wind it up. We wrap the braid, applying tape with small overlaps.

We reach the end of the handle and tear off the tape.

At the top of the handle, we use several layers of tape to form a knob, which will prevent the club from slipping out when holding it with one hand.
Currently, all the equipment for this glorious game can be selected at https://ultrasport.ru/konki/, however, we will tell you how you can do it yourself from quite simple materials make a hockey stick that will serve faithfully for more than one season.
Prepare for work wooden beam, it is best if it is oak. The width of the workpiece should be 60 mm, length - approximately 1 m, thickness - 30 mm.

First of all, measure 50 cm from one of the ends and make a mark. Boil water in a large saucepan (about 50 liters) and immerse the marked part of the timber. Your task is to steam the wood, a kind of “cooking”, so that later this part of the timber can be bent.
After steaming, remove the piece of wood from the water and saw it lengthwise, going 35 cm deep. Then this section of the block will need to be quickly bent in the required direction, and then quickly secured using supports prepared in advance. You can use the most various devices for fixing, the most important thing is to think through everything in advance, because after you take the piece of wood out of boiling water, it will immediately begin to cool and then bending it will be problematic.
Then wait for the wood to dry - this will take some time. The future club should be dried in a dry room, where there are no sudden temperature changes or drafts.
Remove the workpiece from the clamps and begin modifying it. The end of the bow that you sawed will need to be drilled and riveted. For this purpose, use metal washers and soft wire. Plane both sides of the curved bow with a plane until its thickness is 15 mm. Take note: if you are not lucky enough to use durable oak raw materials, then leave the shackle thicker, then it will last longer.

If you are on vacation and decide to play hockey, then you can use the materials at hand. Take a tree branch - not too thin, but at the same time not too thick. It is best to use a willow branch. Cut out a hook approximately 30 cm long; the handle can be any length. Carefully chop the hook with an ax and then plan it with a knife to get a playing surface.
At the request of readers
HOCKEY STICK
Making a stick is a difficult and painstaking process. It’s not for nothing that athletes say that a hockey stick should be as strong as steel and flexible as a walnut branch. Making a stick strong and flexible at the same time is not an easy task. Here you will need, in addition to necessary materials and tools, even greater precision and accuracy when gluing the stick.
A hockey stick should not have metal parts: all its parts are made only of wood.
The stick handle and boss (see drawing) can be made of birch or beech, the hook can be made of hardwood: beech or ash. Options for selecting wood in a hook are shown in the drawing.
The boss is glued in to give the stick elasticity and flexibility.
To glue individual parts of the stick, you can use BF-2 glue or ■ Super Cement. It is not advisable to use carpenter's or casein glue, because both of these glues are susceptible to dampness.
Brewed HTDI WOOD COMPOSITION) B
Having made the components of the ilyushka: handle, boss and hook, proceed to gluing these parts.
First glue the boss to the handle as shown in the drawing. Then use a jigsaw to cut out a groove for the hook. This is a very important operation, and it must be performed very carefully. Any unevenness left by the file can later lead to breakage of the club.
The part of the hook that connects to the handle and boss is sharpened to a cone. Lubricate the parts of the hook and handle to be glued together with glue and insert the hook into the groove of the handle. Clamp the club into a press or clamp and let the glue dry.
After gluing, use a plane to smooth the side surfaces of the hook, bosses and handle so that they do not have protrusions or roughness.
Clean the putter sandpaper and varnish the hook and handle to a height of 30-40 cm. The handle is not varnished in the grip area.
The stick will look more impressive if there is an inscription on its handle.
The drawing shows the numbers of clubs from 1 to 3. In general, there are only nine of them.
The club number depends on individual characteristics hockey players (skating style, height, manner of dribbling the puck, etc.).
For those who hold the club not far from themselves, you need a club with a small number.
The length of a stick is considered normal if its handle reaches the chin of a hockey player standing on skates.
S .chRNE"gchb
PAPER SPHERE
To make a ball segment, take a hoop whose diameter corresponds to the diameter of the future sphere. Pull a piece of chintz over it evenly, like a hoop. In the center of the circle, the fabric will sag by 5 - 7 mm from its own weight. Place stands under the hoop and stick several layers of newspaper (3 - 5 mm thick) on top of the circle. To avoid wrinkles, use warm paste. Do not touch the circle until the paper
will dry out. Under the weight of the wet paper, the fabric will stretch and the workpiece will take on a spherical shape. Remove the dried sphere from the hoop and prime it. Seal the unevenness with a paste that is prepared from a mixture of one part by weight of sifted chalk and one part of paper dust, prepared from newsprint soaked for 24 hours, wrung out, dried and ground into powder. Mix the mixture well and fill it with a paste made from one fifth by weight of potato flour and a tenth of ready-made wood glue. Paint the sphere with nitro enamel.
COPPER WIRE
Openwork hardware(candlesticks, lamps, flower pendants) are firmly part of our everyday life. Light and elegant, they fit well into the interior of a modern apartment.
Annealed copper wire 0 3-5 mm, a simple device (rollers, pyramids and a cone), a soldering iron and, of course, artistic taste and rich imagination you will need in order to create a cozy home environment in the room.
Lamps and candlesticks are best made from annealed copper wire. To do this, the wire is rolled in rollers (see figure on page 16).
The steel or duralumin base of the rollers (Fig. 1) is drilled through hole and a groove for fixed and movable fixation of the vats (and the yaok is a bearing mounted on the axle). The non-moving roller is secured to the base with a nut, and the movable roller is secured with a bolt and a locking screw (Fig. 4). The roll axes (Fig. 3) are machined from bronze, and the locking screw is made from steel. Roll the wire like this: clamp the cracker (Fig. 2) in a vice, install the bearings at the required distance. Then take the wire by one end with pliers and pull it between the bearings. The operation is repeated until a flat plastic tape of the required thickness is obtained (the thickness of the tape is determined by the distance between the bearings).
If the wire does not roll well, it is annealed a second time. You can bend the wire into rings of various diameters on a pyramid (Fig. 5).
To extrude various spherical surfaces (for example, plates for candlesticks), another device is needed, consisting of a matrix of an arbitrary truss and a pressing punch (Fig. 6).
Cut a circle of the required diameter from soft metal 0.5-1 mm thick. Place the workpiece circle coaxially on the one clamped in the chuck lathe matrix. Then use the lathe tailstock taper to press the punch against the die. To give the workpiece a plate shape, use a flat file with a bevel on the end. Clamp a thick stop plate in the tool holder of the lathe. Hold the file handle with one hand and the working part with the other. Moving the file along the stop, carefully press on the rotating workpiece until a plate of the desired shape is formed from the round plate (workpiece).
From rolled wire you can make not only candlesticks and lamps, but also animal figurines, contour models of cars and even small scenes from fairy tales.
N. SHCHERBAKOV, Moscow
The young man came to the stadium. Today he is participating in a hockey match. You can immediately notice this: he has skates in one hand and a stick in the other. And he made it himself, with his own hands.
Young hockey players surround their friend and meticulously examine his “creation.” The stick is very good, it will be handy to play with!
Each of you, young hockey fans, can make such a stick for yourself. You will need little material for this: wood, glue, insulating tape and a leather strap.
ice hockey stick / bandy stick
Make a hockey stick from dry ash, beech or birch wood. Before processing the blank, carefully inspect the wood. It must be healthy, straight-layered, without rot, cracks or other defects. You can also use wood with small, fused knots, but in such a way that when cutting the material they do not extend to the edge of the hook or handle. The selected workpiece must correspond in length, width and thickness to this size - 1500 X X 100 X 15 mm.
Now it's time to start processing the board. It is usually finished with a plane or on a woodworking machine. Bring the blank to the required dimensions (1250 X 70 X 12 mm), and then steam one end of it for one to two hours in hot water(90-100°). When the wood has steamed well, immediately remove it from the water and begin bending the hook. Bending is done on a wooden or metal block, the working part of which is made in the shape of the curved part of the hook. When the club takes the shape of a dummy, secure it in this position with clamps (metal clamps) and leave it until completely dry. Then remove the stick, glue on pads if necessary and finalize it to the dimensions shown in Fig. 1.
To ensure that the parts of the club stick together well, use waterproof resin glue. If you can’t get it, you can glue the clubs with casein glue. Thoroughly sand the surface of the stick with sandpaper and cover with hot drying oil.
Wrap the hook with insulating tape in two layers in the places shown in Fig. 2. A leather strap, 8-10 mm wide and 1.5-2 mm thick, should tightly cover the body of the hook. It must be woven as shown in Fig. 2. Secure the end of the strap with a nail in the middle part of the inner edge of the hook. A properly made stick should weigh no more than 450 grams.

There are three types of ice hockey sticks - for a player, a goalie and a children's one. The stick consists of a handle and a blade, which are cut separately and glued together, as shown in Fig. 3. For gluing strength, the surfaces of the hook wedge and the wedge slot in the handle must be well adjusted to each other.

The wood and glue used are the same as in the manufacture of ball hockey sticks. Since the hook is made separately from the handle, there is no need to bend the wood.
The player's clubs come in four different numbers. They differ in the angle at which the hook is set. The angle is chosen depending on the player’s place in the team and his individual data (128°, 130°, 132° and 135°). The goalie stick blade can also be positioned at different angles (122°, 125° and 128°). The kids' stick has a blade angle of 130° to 140°.
The final finish on ice hockey sticks is the same as on bandy sticks.
Remember - the strength of the stick largely depends on the quality of gluing of the parts. They need to be pulled tightly together and held in this position throughout the drying period. When using resin glue, strictly follow the gluing technology ( temperature regime, time, etc.).