Pickled garlic, prepared at home, is a rare appetizer for meat dishes, jellied meat, and borscht. The recipes I offer are quick and not complicated, they will take very little time. In combination with various herbs and spices, the taste of the vegetable will become softer, not as hot as fresh. In addition, you won't have bad breath, which is why many people refuse this healthy vegetable. If you want to eat garlic and not have to pay anything for it, make pickled garlic for the winter. The cloves will lose their “evil” aroma, but their beneficial properties will be completely preserved.
Garlic is prepared peeled, cloves and whole heads.
What can be added to the marinade:
Seasoning hops-suneli, sweet and bitter peppers of any kind, bay leaf, soy sauce, dill, currant leaves. Many people prefer the market version, with beets.
You can diversify each of the proposed recipes yourself with additives and get a different taste of the marinade.
How to quickly pickle garlic cloves
Here is a classic recipe for preparing a delicious preparation. To speed up marinating, disassemble the head into cloves.
For the marinade:
- Water - a glass.
- Salt - table salt, without a slide, spoon.
- Sugar – 2 tablespoons.
Quick marinating recipe:
- To quickly clean the head, scald it, then immediately pour cold water over it. After manipulation, it will not be difficult to disassemble into cloves.
- Place the cloves tightly in the jar (I recommend taking small ones).
- Cook the marinade: add spices for the marinade to boiling water, when it boils again and the salt and sugar dissolve, pour in the vinegar.
- Immediately turn off the heat and pour the contents of the jars over the top.
- Leave on the table, covered with a towel.
- When the workpiece has cooled, move it to the cold (cover with a napkin, but it’s too early to close the lids, the garlic must ripen).
- After a week, the cloves will be ready. Cover with nylon lids and leave in a cool place. I noticed that the longer it sits, the tastier the pickled garlic is.

Recipe for pickling cloves for the winter
Another quick recipe for pickling cloves. You will get delicious crispy garlic cloves.
Required:
- Garlic – 500 gr.
For the marinade:
- Water – 100 ml.
- Vinegar – 100 ml.
- Khmeli-suneli - 2 small spoons.
- Bay leaf – 3 pcs.
- Peppercorns – 4 pcs.
- Salt – 10 gr.
- Sugar – 30 gr.
Preparation:
- Cook the marinade by adding spices from the list of ingredients. Cool.
- Boil salted water in a separate saucepan and add the cloves.
- After 3 minutes, catch and rinse with cold water.
- Fill the jar with cloves and pour the cooled marinade over it.
- Cover the jars with paper or a napkin. Wait 4 days, then start testing.

Pickled garlic with beets - a recipe like at the market
It’s incredibly difficult to pass by jars of garlic in pink beetroot marinade at the market. Why not find out the recipe and make a couple of jars for the winter at home? Hold, prepare and enjoy. Make it with whole heads, as they sell in the market.
Take:
- Garlic - kilogram.
- Large beets – 1-2 pcs.
- Water – 2 glasses.
- Table vinegar – 2 large spoons.
- Salt – 2 large spoons.
- Sugar - a spoon.
- Dill umbrellas.
How to pickle garlic heads with beets:
- I advise you to take small garlic heads, they will marinate faster. Place them in a saucepan, clearing the top of any unnecessary husks. Pour boiling water over it for 10 minutes.
- After the specified time, drain the liquid and place from a colander into a pan. Cool the heads.
- It’s more convenient to make homemade preparations in a saucepan, but you can also do it in jars or containers, preferably small ones, for a couple of servings.
- Add dill to the garlic.
- Peel and chop the beets into strips. Toss in the heads.
- Prepare the marinade by boiling water and adding spices. Pour vinegar when the water is already boiling.
- Cool the marinade and pour into a container. Close the lid and forget for 10-14 days. Train your will, although it is very difficult.
- The marinade will begin to ferment; if there is a lot of foam, remove it. After the fermentation process is complete, you can taste the garlic. From the pan, if marinated in it, transfer the pickled garlic into jars. Find a cool place for storage.

Marinate whole heads in Georgian style
You will need:
- Heads of garlic – 1 kg.
- Salt – 4 tablespoons.
- Granulated sugar - 5 tablespoons.
- Tarragon.
- Vinegar – 400 ml.
- Water – 400 ml.
How to do:
- Take young garlic, peel a little, but not completely, so that the cloves do not fall apart.
- Scald, arrange and sprinkle generously with salt while they are hot. Don’t be afraid to over-salt, the vegetable doesn’t take on excess.
- Place the cooled heads in a large jar in layers.
- The first layer is the heads, then the tarragon. Fill the jar to the top.
- Dilute the vinegar with cold water and pour into a container.
- Cover the neck with gauze or a napkin. Leave to marinate for 1-2 weeks.

Korean pickled garlic
Another dish that you can’t pass by at the market is the Korean version of garlic appetizer. Ripe garlic is used for harvesting, but young garlic is preferable, as it has a less strong smell.
Tip: An elegant marinade will make a wonderful garlic-flavored sauce. It can be used separately from garlic, stored in a jar. It will be used as a salad dressing and with meat.
- Garlic cloves, unpeeled – 1 kg.
- Vinegar 9% - a cup (200-230 ml.).
- Soy sauce – 4 cups (800 ml).
- Seasoning for Korean carrots - optional.
- Chili pepper, onion, carrot - also based on desire.
Step by step recipe:
- Don't brush your teeth; you can do it before eating if you want.
- Place in a jar and fill it with cold water. After 30 minutes, drain the water and measure the volume. Write it down so you don’t forget; we’ll need this number when we start seasoning the preserves with soy sauce.
- After draining the liquid, pour in vinegar. If cloves remain on the surface, add water.
- Cover with a napkin and place in a dark place for 7 days. Check periodically, if the vinegar level drops below the garlic level, add a little vinegar, or press down with pressure.
- After a week, boil soy sauce for 10 minutes (remember, we measured the amount) with spices as desired.
- At this stage, carrots, onions and hot peppers, cut into rings, are added to the pickled garlic.
- Pour the hot sauce into a jar, filling it 1/3 full.
- Cool the sauce, this will help the cloves come out crispy.
- Drain the vinegar from the jar and add sauce instead.
- Save the vinegar, I wrote above, it will be useful for dressing salads and cooking meat.
- Close the jars with lids and refrigerate for 3 weeks. The garlic will be ready a little earlier, but it’s better to wait.
Video recipe for delicious homemade pickled garlic with beets
The recipe for preparing pickled garlic for the winter is so simple that even novice harvesters can do it. Have a delicious winter evening!
What to do with a large garlic harvest? Definitely pickle!
Is pickled garlic a delicacy or a snack? It’s difficult to call a product a delicacy that can be easily found in barrels and jars at the grocery market. Despite this, pickled garlic is considered a pleasant addition to dishes. This category also includes sauerkraut and pickled cabbage, pickled cucumbers, Korean carrots, and pickled ginger.
Recipe for pickled garlic cloves in jars for the winter
This recipe requires more time to prepare the ingredients, but then you can enjoy the delicacy without any extra hassle.
Ingredients:
- garlic - 700 g
- water - 500 ml
- sugar - 25 g
- salt - 20 g
- vinegar - 80 ml
- black peppercorns - 1 teaspoon
- hot capsicum - 1-2 pods (1 per jar)
- dill umbrella - 1 per jar
Preparation:
- Sterilize jars and lids in the oven.
- Peel the garlic and cut into slices.
- Clean each slice and cut off the bottom.
- Wait until the water is bubbling vigorously, place a colander with garlic in it and blanch the cloves for 60 seconds.
- Remove the garlic and place it in cold water.
- Wait for the garlic to cool.
At this time, start preparing the marinade:
- Place water (500 ml) on the stove.
- Dissolve salt, sugar, peppercorns in it.
- Boil.
- Remove from heat, add vinegar, stir.
Place food in the jar in the following order:
- dill umbrella
- garlic to the middle of the jar
- hot pepper pod
- remaining garlic
- Fill the jars with hot marinade.
- Seal and turn the lids down.
- When the jars have cooled a little, put them on the floor and wrap them in a blanket. Then place it in storage.

Recipe for pickled garlic for the winter, whole heads, like at the market
Whole marinated garlic is good because it has a rich taste, and there are fewer hassles with cleaning during cooking. But you still have to peel such garlic, just before eating.
Note! The market usually sells red or pink garlic. This kind of garlic can be obtained by marinating it together with beets.


 Pickled garlic with beets “like at the market”
 Pickled garlic: quick recipe
This recipe for pickled garlic is considered quick because it does not require much time to “bring it to taste.” Garlic can be consumed after 3 days. For those who like it more vigorously - in 5 days. Also, the recipe does not require sterilization and rolling into jars.
You need to store the snack in the refrigerator or in another place where it will definitely not ferment or spoil.
Advice! Add spices to your taste, but keep in mind that there should be a lot of them. Otherwise, the garlic simply won’t have time to marinate in such a short time.
Ingredients:
- unpeeled garlic - 1.2 kg
- water – 250 ml
- vinegar - 185 ml
- salt - 25 g
- sugar - 55 g
- black peppercorns - 10 pieces
- cloves - 5 pieces
- coriander - 1/4 teaspoon
- rosemary - a pinch
- nutmeg - a pinch
- bay leaf - 3 pieces
Preparation:
- Peel the garlic from all excess and divide into cloves.
- Fill jars that have been previously disinfected at high temperature with garlic.
- Dissolve salt, sugar and other spices in water.
- Bring to a moderate boil.
- Quickly add vinegar and remove from heat.
- Pour the freshly prepared hot marinade over the garlic, close the jars and refrigerate for 72 hours.

Garlic, pickled with cloves for the winter without sterilization
Garlic without sterilization can be prepared according to some of the recipes above. There is one big advantage to this cooking method: you don’t have to worry too much. However, the jars will still have to be sterilized!
Helpful information! Sterilization involves processing jars in a special way, in which they are boiled in a large container for 5-30 minutes.
Sometimes sterilization is necessary. For example, when you make jam without sugar, or the same garlic without a bite. But in most cases, this stage can be omitted.
This recipe is extremely simple.
Ingredients:
- garlic - 1 kg
- water - 250 ml (or more)
- bite – 150 ml
- ground coriander - 1 whisper
- bay leaf - 3 pieces
- hot capsicum - 2 pieces
- salt - 30 g
- sugar - 65 g
- ground cumin - 1/2 teaspoon
Preparation:
- Peel the garlic from all excess, leaving clean cloves.
- Prepare containers for garlic in a special way.
- Fill it with garlic.
- Start preparing the marinade:
- Chop the hot pepper into rings.
- Dissolve sugar, salt and other spices in water.
- Boil for 3 minutes.
- At the end, remove from the stove and add vinegar.
- Pour the still hot marinade over the garlic.
- Cover the jars with lids, turn them over and leave to cool.

 The marinade turns out clear and very tasty
 Pickled garlic cloves with beets for the winter
This recipe is very similar to the recipe for pickling garlic “as in the market”, but there are still differences
Ingredients:
- garlic - 1 kg
- beets - 200 g (2 pieces)
- sugar - 70 g
- salt - 30 g
- vinegar - 150 ml
- cinnamon - a pinch
- cloves - 5 boxes
- black peppercorns - 6-7 pieces
Preparation:
- Carefully peel the garlic, separating the cloves.
- Also peel the beets, cut them into slices, then cut each slice in half.
- Place garlic and beets in sterilized jars in layers.
- Cook the marinade:
- Dissolve salt, sugar and spices in a container with water.
- Cook after boiling for 2 minutes.
- Remove from heat and carefully add vinegar.
- Add hot marinade to garlic and beets.
- Seal the jars, invert and remove.


Korean pickled garlic
This recipe is quite simple. You don't have to prepare the marinade with spices separately.
Ingredients:
- garlic - 1.5 kg
- water - optional
- table vinegar - 300-400 ml
- soy sauce - 1 liter (less may be needed)
Preparation:
- Peel the garlic well, leaving cloves.
- Place the garlic all the way to the top in the jars. Fill approximately 2/3 of the volume of the jar with table vinegar. Fill the rest with boiled hot water.
- Close the lids and store in a dark, cool place for a week. For example, in the refrigerator.
- After a week, take out the jars of garlic, open them, and drain the marinade.
- Disinfect the jars, boil the soy sauce for a quarter of an hour, then cool.
- Place garlic into jars 1/2 full.
- Fill with warm sauce and seal with lids.
- Place in a cool, dry place.

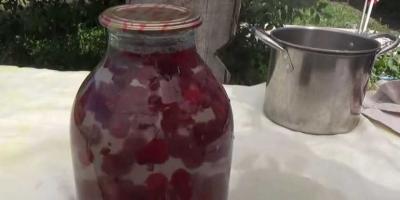
Pickled garlic with red currants without vinegar
This recipe is especially relevant in the summer, when there is nowhere to put a large harvest of currants. Ginger will add piquancy and spiciness to the appetizer, and the absence of vinegar will also make it very healthy.
Ingredients:
- garlic - 10 heads
- water - 600 ml
- red currant – 500 g
- ginger - 100-150 g (to taste)
- salt - 10 g
- sugar or honey - 60 g
Preparation:
- Peel the garlic as usual, separate the cloves and peel them.
- Wash the ginger, but do not peel it, because the peel contains most of the nutrients. Cut into medium cubes.
- Sort red currants, remove bad berries, branches, debris and leaves. Rinse.
- Make the marinade:
- Dissolve sugar or honey in water, add a few pinches of salt.
- Then stir all the garlic into the liquid.
- Boil garlic with marinade for 60 seconds.
- At this time, distribute the currants and ginger equally.
- When the marinade has cooled slightly, pour it into jars along with the garlic.
- Seal the jars tightly.
- Then move to a cool, dry place for storage.
Tip #1! You can use both garlic heads and cloves in this recipe. This will not cause a difference in taste.
Tip #2! If you are worried about preparations without vinegar, you can additionally sterilize the jars with marinade and currants for 10-15 minutes and only then roll them up.
 Preparations with pickled garlic and red currants
 Pickled garlic: Georgian recipe
Georgian recipes often feature a spice such as tarragon. This is not lemonade; another name for tarragon is tarragon. The herb is aromatic, strong-smelling. Georgians love to make drinks with it and use it for pickling.
There are no strict restrictions on quantity in this recipe, only the proportion applies: the ratio of water to vinegar should be 1:2. That is, 1 part water and two parts vinegar.
Ingredients:
- peeled garlic - 1 kg
- water - optional
- wine vinegar - optional
- salt, sugar - to taste
- tarragon - optional
Preparation:
- The garlic, peeled in advance, is transferred with chopped tarragon into jars, alternating: a layer of garlic, a layer of herbs, and so on.
- The bite is mixed with water in the previously stated proportion, salt and sugar are dissolved, and brought to a temperature of 90-95 degrees.
- This marinade is used to fill food jars.
- Cover the top loosely with a lid and put it in a cool place. Ideally - in the cellar, for 14 days.
- After time has passed, the jars are opened, the contents are checked, and, if everything is in order, the lids are screwed on tightly.

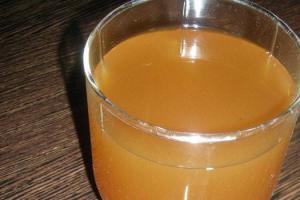
Pickled garlic in beet juice for the winter
If you want more garlic and less beets, then we present to your attention a simple recipe for making pickled garlic in raw beet juice. According to this recipe, the garlic turns out to be the most delicate, and the taste of beets is almost not felt.
Ingredients:
- beets - 2 pieces
- garlic - 500 g
- salt - 20 g
- sugar - 50 g
- table or apple vinegar - 60 ml
- water - 500 ml
Preparation:
- Peel the garlic, separate the cloves.
- Blanch the garlic in boiling water for 2-4 minutes.
- Then immediately cool the garlic cloves by dipping them in ice water.
- At the same time, you can start preparing the marinade:
- Grind the pre-peeled beets on a coarse grater.
- Using gauze, squeeze out the juice.
- Dissolve salt and sugar in water, combine with beet juice.
- Boil at a vigorous boil for a quarter of an hour.
- Add vinegar, stir, remove from stove.
- Place the garlic cloves in jars.
- Fill the container with hot marinade.
- Screw the lids on the jars and remove them until they cool.

 It would be nice to add some spices to this recipe.
 Pickled garlic in red currant juice
Garlic in red currant juice is pickled in the same way as in beet juice. Only if the beets are crushed using a grater, then to chop the currants you will need a blender, meat grinder or food processor.
Advice! Please note that the marinade with beets is more spicy, and with red currants it is sour. Therefore, you can reduce the amount of vinegar and add spices: rosemary, coriander, cloves.


Pickled garlic: cold method
The difference between the cold method and the hot method is that the marinade is used to pour the garlic after it has completely cooled. This garlic should be infused in a dark, dry and cold place for at least 60 days (2 months). If this takes a long time for you, then use the standard, hot marinating method. Hot pickled garlic can usually be eaten after 2 weeks.
Any recipe for pickling garlic can be instantly turned into a cold one if you pour the cloves not with hot marinade, but with one that has cooled to room temperature. This is the whole secret.

 cold pickle both individual cloves and whole heads of garlic
 Pickled young garlic: a recipe for the winter
Young garlic, although still very soft and tender, is still suitable for pickling. Any marinade for young garlic will work, as will any marinating method. It is advisable to additionally subject young garlic to additional sterilization, since its antiseptic properties are still weak, and it may deteriorate during storage.


Pickled garlic for the winter with khmeli-suneli
Oriental spice - khmeli-suneli, traditionally used for meat, fish, and vegetable dishes. Garlic is also great for pickling along with cloves, coriander, and black pepper. The seasoning has a pronounced taste and aroma and goes well with lemon juice.
Pickled garlic in apple cider vinegar for the winterApple cider vinegar is often used to replace regular vinegar. It is believed that apple cider vinegar is less caustic and harmful. Of course, if we are talking about high-quality vinegar, or homemade one. Low-quality store-bought apple cider vinegar is most often a mixture of apple juice and table vinegar.
Since apple cider vinegar can be replaced with regular table vinegar, any recipe from this article will suit you for making pickled garlic. Just replace one vinegar with another.
Advice! The best possible combination can be achieved by adding apple cider vinegar to the recipe for pickled garlic with currants, suneli hops, or beets.
Garlic pickled in cloves for the winter with pomegranate
Garlic marinated with pomegranate has a pronounced sweet and sour taste, quite pleasant and piquant at the same time.
Ingredients:
- garlic - 500 g
- ripe pomegranate - 1 medium
- wine or apple vinegar - 100 g
- water - 300 ml
- salt - 15 g
- sugar - 30 g
Preparation:
- Peel the garlic and separate the cloves.
- Also peel the pomegranate in any way convenient for you, and separate the grains.
- Expose jars to high temperatures (boiling, heating over steam or in the oven)
- Place garlic cloves and pomegranate seeds in layers in jars.
- Prepare the marinade by mixing the remaining ingredients except vinegar.
- Boil the marinade for 3 minutes, remove from heat.
- Add apple cider vinegar and stir
- Pour in freshly prepared marinade and screw on the lids.

 Pomegranate with garlic - a successful combination of flavors
 Recipe for pickling garlic in plastic buckets
Pickling in buckets is convenient when you need a large volume of finished products at once. There are no problems with banks here. Sterilizing buckets is simple: scald them with boiling water several times. It's enough.
Advice! It is better to use plastic buckets that are hermetically sealed. The volume of such buckets is usually 10 liters. They most often sell mayonnaise, pickled herring, cucumbers, and cabbage.
Video: How to cook Pickled Garlic?
Every housewife strives to prepare not only appetizing, but healthy winter pickling. For example, garlic pickled in any way has a number of advantages over fresh vegetables. It has a milder taste, it does not have such bitterness, and most importantly, smell, which means the “aromatic” consequences of its use are not the same as after eating fresh - you can safely eat the snack and not worry about the freshness of your breath. Don't know how to pickle garlic? Everything is simple here! The main thing is to choose a suitable fruit, which should not be very young, but not very old either.
Pickled garlic is an original appetizer or an interesting product for preparing other dishes.
You can prepare it in different ways, the main thing is to choose a vegetable without any defects.
We calculate the ingredients for 2 kg of garlic:
- 280 ml vinegar;
- hot pepper pod;
- two spoons of granulated sugar;
- horseradish root;
- two carnations.
Cooking method:
- Pour four glasses of filtered water into a container and set it to boil. Then add vinegar and add prepared seasonings.
- Boil the marinade for several minutes and cool to 40 ºС.
- Peel the garlic, distribute it among containers, fill it with brine and roll it up.
- During the pickling process, the garlic will change its color to green. Don't be alarmed, this is a normal process.
You can eat a delicious snack after a month.
Winter preparation recipe
They marinate the spicy vegetable with aromatic herbs and serve it with dishes of any meat and fish, and even just with cheese.
To complete the recipe you will need a kilo of garlic and four 350 ml glass jars.
Ingredients:
- 500 ml olive oil;
- four pods of hot pepper;
- three tablespoons of herbal mix (you can take Provençal);
- 180 ml vinegar;
- 8 bay leaves.
Algorithm of actions:
- Peel the heads of garlic and divide them into cloves. The jars need to be sterilized and a bay leaf and a burning pod should be placed in each one. Then fill them tightly with garlic cloves.
- Now pour boiling water over them and after ten minutes drain the water. Instead, pour 45 ml of vinegar.
- Pour 350 ml of water, oil into the pan, add herbs, two tablespoons of sweetener and the same amount of salt. From the moment of boiling, let the brine stand for a couple of minutes and immediately pour the contents of the jars with it.
- We tighten the containers and after cooling, store the preservation in a cool room. In three weeks the snack will be ready.
Whole heads
All fans of such a spicy vegetable will definitely like our next recipe. Pickled garlic is not only appetizing, but also does not spoil the freshness of your breath, unlike fresh one. We marinate the garlic heads, and the calculation of spices is based on one kilogram of the vegetable.

Ingredients:
- 420 ml each of bite and water;
- half a cup of regular sweetener;
- two buds of cloves;
- ten peas of aromatic pepper;
- two bay leaves.
Cooking method:
- Place dry buds, whole spiced peas and fragrant leaves into a glass container.
- Then we pass the plant heads through boiling water and also distribute them into containers.
- Now prepare the brine. For this purpose, pour water and vinegar into a small bowl, let the mixture simmer for five minutes along with the sweetener and a spoonful of regular fine salt.
- Distribute the liquid among the containers, twist them well, wrap them up and let them cool. https://www.youtube.com/watch?v=nYTm6dNFFeQ
Instant pickled garlic
If you can’t wait to taste a delicious snack almost tomorrow, then the following recipe is definitely for you. Just three days - and you will be able to enjoy the taste of your favorite delicacy. One 350 ml jar requires half a kilogram of garlic.
Ingredients:
- 100 ml vinegar;
- a pinch of cinnamon and rosemary;
- Bay leaf;
- half hot pepper.
Ingredients:
- Divide the garlic into cloves, place it in any container, pour boiling water and leave for a few minutes. Then we take it out, rinse it with cool water and put it in a jar together with chopped hot pepper.
- Pour half a cup of water into a saucepan, add a spoonful of sugar and half a spoonful of salt, as well as other spices and seasonings.
- As soon as the brine begins to boil, boil for a minute and pour it over the vegetables. We tighten the container and after cooling, put it in the cold for two to three days.
How to marinate in Ukrainian
Garlic is pickled not only in Ukraine, but also in other countries, but we want to offer a recipe specifically for Ukrainian cuisine. Garlic turns out to be piquant and spicy in taste; such an appetizer will always find a place on the holiday table. For the recipe, take five garlic heads and three small jars.

Ingredients:
- red chili pod;
- whole peppercorns, an umbrella of allspice dill, currant leaves;
- two small spoons of regular fine salt and white sugar;
- 2 large spoons of vinegar.
Cooking method:
- We peel the garlic. To prevent the cleaning process from taking a lot of time, the vegetable can be divided into slices, pour boiling water over them, and then give them time to cool. The film will be removed in one motion.
- We fill the jar with garlic cloves, and put everything else there, with the exception of bulk ones.
- Now the brine. Pour about a liter of water into a saucepan, add the bulk ingredients and as soon as their granules dissolve, pour the composition into jars. We wait ten minutes and return the liquid to the saucepan, but along with the specified amount of vinegar.
- Pour the hot solution into the garlic and seal the containers. That's all. Ukrainian appetizer is ready.
Marinated with beets
Pickled garlic for the winter, cooked with some beets, not only tastes delicious, but also looks more attractive. For the recipe you need to take a kilo of vegetables and one beet. The latter can be cut into thin strips or simply grated.
Ingredients:
- 55 ml vinegar;
- a couple of peppercorns;
- laurel;
- carnation.
Cooking method:
- Soak the peeled garlic cloves in hot water for a couple of minutes and put them in a jar along with the chopped beets. Add laurel and other spices.
- Pour a spoonful of salt and the same amount of sweetener into the water and heat for five minutes. Then pour vinegar and after a minute remove the solution. Water it over the garlic.
- We cork the jar, wrap it up and wait for it to cool. https://www.youtube.com/watch?v=3XLczqDIEW8&t=4s
Pickled garlic cloves for the winter without sterilization
Spicy garlic can be obtained without sterilization. The appetizer is sweet and sour and moderately spicy. This savory vegetable can be served as a regular appetizer or used in preparing various dishes.

Ingredients:
- 650 g garlic;
- tsp ginger;
- two tsp. thyme (dried);
- eight peppercorns;
- two bunches of parsley;
- four bay leaves;
- two dill umbrellas;
- six tablespoons of vinegar.
Cooking method:
- Pour boiling water over the garlic cloves prepared for further procedures, dry them and put them in jars along with chopped parsley and dill umbrellas.
- In two liters of water, stir four tablespoons of regular sugar and three tablespoons of salt. Add thyme, bay leaf, peppercorns. As soon as the brine boils, add vinegar and add ginger. Cook for a minute and pour the prepared solution over the garlic.
- Screw the container tightly and cool under a warm blanket.
With chili pepper
Lovers of everything spicy and spicy will definitely love our recipe for pickled garlic with chili peppers. To prepare, take a jar and as much garlic as can fit in it.
Ingredients:
- chili (to taste);
- ½ spoon of vinegar essence (70%);
- sunflower oil.
Cooking method:
- We peel the vegetable and place it in a clean, sterilized container.
- For the marinade, take a liter of water, boil it along with vinegar and a spoonful of salt.
- Pour the hot solution over the garlic, cover with a lid and leave for a week.
- Then drain the brine, finely chop the chili and simmer it in hot oil for a minute.
- We send the oil and pepper to the garlic, tighten the jar and as soon as the appetizer has cooled, put it in a cool place. We wait one week, after which you can open the blank and try. https://www.youtube.com/watch?v=jGREZyHfvRs
In onion skins
You can also pickle garlic in onion skins. The appetizer turns out both tasty and beautiful. For the recipe, take a kilogram of vegetables.

If you are against vinegar, then replace it with lemon juice.
Ingredients:
- 110 ml bite;
- seven peppercorns;
- eight bay leaves;
- 3 g cinnamon;
- six onions;
- a spoonful of salt and two spoons of sugar.
Cooking method:
- Remove the skins from the onions, wash them and dry them. Divide the garlic into cloves and peel off the film.
- We scald the garlic cloves with boiling water, rinse them and place them together with the onion skins in jars.
- Pour a little more than a glass of water into the container, add sugar and salt. Cook until the loose granules are completely dissolved.
- Then add vinegar and after a minute turn off the burner. Pour the hot solution onto the vegetable, tighten the container and leave the preparation for three weeks.
Recipe in Georgian
The recipe for pickled garlic in Georgian calls for the use of tarragon, which gives the appetizer a pleasant piquancy and sour taste. Also, for the marinade, it is permissible to replace part of the water with pomegranate juice, thanks to which the taste will become even more intense.
Ingredients:
- kilo of garlic;
- 280 ml wine vinegar;
- 180 ml each of water and pomegranate juice;
- tarragon, peppercorns and red pepper to taste.
You can marinate garlic not only with the addition of pomegranate juice, but also with grape juice. The taste of this preparation is sweeter.
Cooking method:
- Place the vegetable cloves, tarragon and pepper in jars in layers.
- To make the brine, combine water and juice. Boil the mixture and stir four tablespoons of salt in it. Then add vinegar.
- Pour the prepared marinade into the garlic, tighten the container and leave it indoors for two months.
There are many other options for pickling garlic. Everyone chooses for themselves what kind of snack they want to get in the end - spicy, sour or sweeter. But do not forget that despite the delicious taste and undeniable benefits of such a vegetable, it can only be eaten in limited quantities.
Spicy tomato sauce, which many of our compatriots close for the winter and call adjika, has almost nothing to do with this Georgian seasoning. Real Georgian adjika is made without tomatoes. The required ingredients in its composition are hot pepper, herbs, and salt. Additionally, the recipe list may include garlic, sweet peppers, nuts, various seasonings, and rarely sugar and vinegar. Georgian adjika for the winter can be prepared from fresh or dried ingredients. Usually it is made without heat treatment, sometimes dried in the oven. The conditions for its storage depend on the composition of the seasoning and the method of preparation, but it always has a long shelf life, at least a year. It is used for preparing various dishes and is never superfluous in the kitchen. If your family has lovers of spicy foods, you should definitely prepare Georgian adjika for future use.
Cooking features
Some of the features of preparing adjika in Georgian for the winter have already been mentioned in the introduction, but there are other important points that are worth learning about before starting to prepare this seasoning.
- Adjika requires processing a significant amount of hot pepper and garlic. These ingredients are not harmless. They can seriously burn your skin. You can only work with them wearing gloves. If pepper enters the respiratory tract, it can cause coughing. When working with it, it will not hurt to protect your respiratory organs with a respirator or gauze bandage. After the cooking process, wash your hands thoroughly with soap; before doing this, do not touch your face, especially your eyes.
- Dry Georgian adjika is prepared from dried or even dried pepper. To do this, the pods are hung by the stalks in a warm and well-ventilated place, protected from direct sunlight.
- The seeds of pepper and its partitions have the most pungent taste. To obtain adjika with a milder taste, peppers are seeded before use. To obtain a very hot seasoning, peppers are processed together with their seeds.
- If you want to make adjika identical to traditional Georgian, refuse to use kitchen gadgets, and finely chop the ingredients and grind them in a mortar. If authenticity is not important to you, you can grind the products using a blender, coffee grinder, meat grinder, or hand garlic press.
- For dry adjika, just wash and dry the jars. For adjika made from raw vegetables and fresh herbs, the jars must be sterilized and the lids boiled. It is advisable to close adjika with metal lids to ensure a tight seal, but when storing the seasoning in the refrigerator, you can get by with nylon ones.
Real Georgian adjika is an extremely hot and salty seasoning; it must be used with caution so that it emphasizes and does not interrupt the taste of ready-made dishes. This spicy spice is contraindicated for people with gastrointestinal ulcers.
Georgian adjika with garlic and walnuts
Composition (per 0.7–0.8 l):
- hot capsicum – 0.5 kg;
- walnut kernels – 100 g;
- garlic – 0.4 kg;
- fresh cilantro – 0.2 kg;
- fresh parsley – 0.2 kg;
- hops-suneli – 50 g;
- coriander seeds – 20–25 g;
- salt – 60 g.
Cooking method:
- Wash the peppers and fresh herbs, place them on a clean cloth, and wait until they are completely dry.
- Peel the garlic.
- Dry the walnut kernels in a frying pan (without oil).
- Cut off the stems of the peppers. If you want a less spicy seasoning, cut the pods in half and remove the seeds.
- Grind all prepared ingredients through a meat grinder or finely chop and grind in a mortar and salt.
- Grind the coriander using a pepper mill or coffee grinder and add to the rest of the ingredients.
- Pour suneli hops and salt into the vegetable mixture, if you haven’t added it yet.
- Stir the seasoning until the salt is completely dissolved.
- Sterilize small jars, fill them with adjika, close tightly and store in the refrigerator.
The color of the adjika will depend on what color of pepper you used for it, but you shouldn’t expect it to be a bright red color: the herbs and seasonings will not allow it to remain that way.
Dry adjika in Georgian style
Composition (per 0.5–0.7 l):
- hot capsicum – 0.7 kg;
- khmeli-suneli – 75 g;
- coriander – 75 g;
- salt - to taste.
Cooking method:
- Wash the pepper. When it dries, string it onto a fishing line (by the stems) and hang it in a dry but well-ventilated area for 2 days.
- Remove the peppers and cut off their stems.
- Pass the pepper along with the seeds through a meat grinder or grind using a blender or coffee grinder.
- Pour coriander seeds into a mortar, add salt to them, and grind.
- Combine ground pepper, salt with coriander, suneli hops. Mix thoroughly.
All that remains is to pour the seasoning into a clean, dry jar and store it in a place protected from light and moisture. How much seasoning you get will depend on how juicy the pepper is and at what temperature it dries.
Green adjika
Composition (per 0.5 l):
- green capsicum (hot) – 0.2 kg;
- garlic – 0.2 kg;
- celery greens – 0.2 kg;
- cilantro – 150 g;
- parsley – 100 g;
- walnut kernels – 50 g;
- salt – 40 g;
- mint – 2–3 sprigs;
- ground black pepper - to taste.
Cooking method:
- Wash vegetables and herbs, dry, chop using a meat grinder.
- Fry the nuts in a dry frying pan and mash in a mortar.
- Combine the ingredients by adding pepper and salt.
- Stir until the salt dissolves.
- Place in a sterilized jar and screw tightly.
Georgian seasoning prepared according to this recipe can only be stored in the refrigerator.
Adjika in Georgian style with the addition of bell pepper
Composition (per 0.5 l):
- hot capsicum – 0.25 kg;
- sweet pepper – 0.25 kg;
- fresh basil – 100 g;
- fresh cilantro – 100 g;
- garlic – 0.3 kg;
- dried basil – 20 g;
- ground coriander – 40 g;
- salt – 100 g.
Cooking method:
- Peel the peppers from seeds and chop using a meat grinder or blender.
- Chop the herbs and garlic in the same way.
- Mix the pepper puree with the garlic mass and herbs, add dried basil, ground coriander and salt.
- Mix well and place on a baking sheet.
- Place the baking sheet in the oven. Without closing it or turning on convection, leave the adjika to dry at a temperature of 50–70 degrees for 1.5–2 hours. If your oven does not maintain the required temperature, dry the adjika for 6–8 hours in the kitchen.
- Transfer adjika into prepared jars and seal them.
The seasoning prepared according to this recipe should be stored in a cool place, ideally in the refrigerator.
Adjika in Georgian is a hot and spicy seasoning made from pepper and aromatic herbs, often with the addition of garlic, nuts, coriander and other ingredients. An essential ingredient is salt. In Georgia, adjika is prepared in large quantities for the winter. Our compatriots who are partial to Caucasian cuisine can also do this.