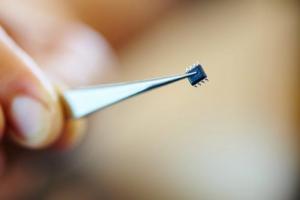
Unlike humans, robots are not limited to only vision, hearing, touch, smell and taste. There are robot sensors different types. Robots primarily use various electromechanical sensors to explore and understand the world and ourselves.
Reproduce the sense organs of a living being in this moment very difficult. Because of this, researchers and developers are turning to alternatives to biological senses.
What can humans feel that robots cannot feel?
With cameras, robots can “see” but have difficulty understanding what they see. The robot can receive an image from the camera consisting of millions of pixels. But without complex programming, it won't know what any of those dots represent.
Distance sensors indicate the distance to an object, but it is necessary to ensure that the robot does not crash into an obstacle or object. Researchers and companies are experimenting with different approaches to robot sensors. Additionally, sensors are being developed that allow the robot not only to “see” but to “understand” what it sees.
This may take long time before being able to distinguish objects placed on the table in front of him. Especially if they are located differently in the object database.
Robots are very bad at distinguishing between taste and smell.
A human can tell you “it tastes sweet” or “it smells bad” while a robot needs to do the analysis chemical composition. Substances then need to be searched in the database to determine what a person has labeled as tasting “sweet” or smelling “bad.”
Robotic sensors such as taste and smell sensors have received little development. Primarily because there was not much demand for a robot that can distinguish taste or smell.
Humans have many nerve endings throughout our skin, and we know when we have touched something or something has touched us. The robots are equipped with buttons or simple contacts placed in strategic places. For example, on the front bumper to determine if it comes into contact with an object.
Pet robots may have contacts or a group of sensors located on the head, legs or back, but if you try to touch an area where there is no sensor, the robot will not realize that it has been touched and will not respond. As research into humanoid robots continues, it is possible that robot sensors such as “electromechanical skin” will be developed.
What can robots feel that humans cannot?
A robot cannot tell you whether a substance tastes or smells good. Although the steps of analyzing the chemical composition can give it much more information than a normal person can know about its properties. If the robot is equipped with a carbon monoxide sensor, then it will be able to detect carbon monoxide.
This will increase safety since carbon monoxide is colorless and odorless to humans. The robot will also be able to tell you the pH level of a substance. Therefore, it can determine whether it is acidic or alkaline, and much, much more.

Humans use a pair of eyes to obtain visual information, although many people cannot accurately determine the distance to an object. A person can tell you that the tree is about 20 meters away. At the same time, a robot equipped with distance sensors can tell you that the tree is 21.1 meters away.
In addition, robots can provide accurate readings of various environmental factors that humans are unaware of or unable to perceive.
For example, a robot can tell you what its exact angular or linear acceleration is. Although most people most people will likely detect that it is moving or turning.
A person can tell you from experience that an object is hot or cold without touching it. While a thermal imager can provide a 2D thermal image of what is in front of it. Although humans have five basic senses, robot sensors come in an almost infinite variety.
What sensors are needed for your robot?
So what types of sensors are available, and what sensors does your robot need? You must first ask yourself what purpose the robot is needed for and what it should measure. Then below you can see what types of sensors there are for robots.
There is a good chance that none of the categories listed below will suit you, so try to identify the basic elements of the robot and break the task down into its components.
Sensors for robots are:
- contact
- remote
- positioning
- responsive to environmental conditions
- using rotation
- and others
Contact sensors.
— Button/contact switch.

Switches, buttons, and contact sensors are used to detect physical contact between objects and are not limited to just people pressing buttons.
The robot's bumper can be equipped with a touch sensor or a button. Additionally, “whiskers” (like those of an animal) can be used to detect an object at various distances.
- Advantages: very low price, easy integration, reliability.
- Flaws: measuring distance is limited.
— Pressure measurement sensors
A button that offers one of two possible readings (ON or OFF). As a result, the robot's sensor produces an output signal that is proportional to the force applied to it.
- Advantages: allows you to measure how much force is applied.
- Flaws: may be inaccurate and more difficult to use than simple switches.
Remote sensors
— Ultrasonic sensors

Sensors that use ultrasonic signals to measure the time between sending a signal and returning its echo are called ultrasonic. The robot's sensors in this case are based on studies of bats, dolphins and other animals.
Ultrasonic rangefinders can measure a range of distances, but are used particularly in the air and are dependent on the reflectivity of various materials.
- Advantages: mid-range measurement (several meters).
- Flaws: surfaces and environmental factors may affect readings.
— Infrared sensors

Infrared can also be used to measure distance. Some infrared sensors measure one specific distance, while others provide an output signal proportional to the distance to the object.
- Advantages: low cost, fairly reliable and accurate.
- Flaws: wider range than ultrasonic sensors.
— Laser
Lasers are used when high precision or long distance to an object is required, or when both are present. Scanning laser rangefinders use spin lasers (ultrafast lasers) to scan the distance to objects in two dimensions.

- Advantages: very accurate with a very large range.
- Flaws: much more expensive than conventional infrared or ultrasonic sensors.
— Encoders

Optical encoders often use a pair of LED photodiodes. A disk with holes is installed on the shaft, through which the signal from the LED enters the photodiode and the number of pulses is read.
A certain number of holes corresponds full angle traversed by the wheel. Knowing the radius of a wheel, you can determine the total distance traveled by that wheel. Two encoders give you relative distance in two dimensions.
- Advantages: if there is no slip, then the measurement accuracy is high. Often installed on the rear shaft of the engine.
- Flaws: Additional programming is required; more accurate optical encoders can be expensive.
— Linear potentiometer

A linear potentiometer is capable of measuring the absolute position of an object.
- Advantages: Accurately measures absolute position.
- Flaws: small range.
— Tension and bend sensors

A stretch gauge is made of a material whose resistance changes depending on how much it is stretched. A bend sensor is typically a sandwich of materials where the resistance of one of the layers changes depending on how much it has been bent.
They can be used to determine a small angle or rotation, such as how many fingers have been bent.
- Advantages: useful when the axis of rotation is internal or inaccessible.
- Flaws: low accuracy and the ability to measure only small angles.
— Stereo camera

Like human eyes, two cameras placed at a distance from each other can provide depth information (stereo vision). Robots equipped with cameras can be some of the most capable and sophisticated robots.
Camera, combined with the right software,can achieve good color and object recognition.
Advantages: possibility of providing detailed information and good feedback.
Disadvantages: difficulty in programming and using information.
Position sensors
— Indoor localization (room navigation)

An indoor localization system may use several beacons to triangulate (determine the relative positions of points on a surface) the robot's position in a room, while others use a camera and landmarks.
- Advantages: Great for absolute positioning
- Flaws: requires complex programming and the use of markers.
- GPS

GPS uses signals from multiple satellites orbiting the planet to determine their geographic coordinates.
GPS devices can provide geographic positioning with an accuracy of up to 5 meters, while more complex systems, including data processing and error correction, thanks to the use of other GPS units or IMUs, can have an accuracy of up to several centimeters.
- Advantages: does not require markers or other references.
- Flaws: can only work in open space.
Rotation sensors
— Potentiometer

A rotary potentiometer is essentially a voltage divider and provides an analog voltage corresponding to the angle of rotation of the knob.
- Advantages: easy to use, inexpensive, fairly accurate, provides absolute readings.
- Flaws: most are limited to 300 degrees of rotation.
— Gyroscope

The electronic gyroscope measures the rate of angular acceleration and provides the appropriate signal (analog voltage signal, serial communication, I2C, etc.). An electronic gyroscope uses piezoelectric plates.
- Advantages: lack of “mechanical” components.
- Flaws: The sensor is always subject to angular acceleration, while the microcontroller cannot always accept a continuous input signal, meaning values are lost, resulting in “drift” of values
— Encoders

Optical encoders use mini-infrared transmitter/receiver pairs. The number of breaks in the infrared beam corresponds to the full angle traversed by the wheel.
A mechanical encoder uses a very finely machined disk with just enough holes to read specific angles. Mechanical encoders can therefore be used for both absolute and relative rotation.
- Advantages: accuracy.
- Flaws: For optical encoders, the rotation angle is relative (not absolute) from the initial position.
Robot sensors that respond to environmental conditions
- Light sensor

A light sensor can be used to measure the intensity of a light source, whether natural or artificial. Typically its resistance is proportional to the light intensity.
- Advantages: usually very inexpensive and very useful.
- Flaws: cannot distinguish between the source or type of light.
— Sound sensor

The sound sensor is essentially a microphone that returns a voltage proportional to the level of ambient noise. More complex boards can use data from the microphone for speech recognition.
- Advantages: cheap and reliable sensor.
- Flaws: in order to decipher important information Requires complex software.
— Temperature sensors

Temperature sensors can be used to measure ambient temperature or difficult conditions, for example in heating elements, ovens, etc.
- Advantages: can be highly accurate.
- Flaws: more complex and accurate sensors may be more difficult to use.
— Thermal imaging camera

An infrared or thermal imaging sensor (camera) provides a complete 2D thermal image of whatever is in front of the thermal imaging camera. In this way, the temperature of the object can be determined.
- Advantages: It is possible to selectively measure the thermal activity of objects from a distance.
- Flaws: high price
— Humidity measurement sensors

Humidity sensors detect the percentage of water in the air and are often paired with temperature sensors.
— Barometric pressure sensor

A pressure sensor (which can also be a barometric sensor) can be used to measure atmospheric pressure. Hence can give an idea of the altitude of the UAV (unmanned aerial vehicle).
— Gas sensors

Gas sensors are used to detect the presence and concentration of various gases. However, they are needed only for specialized robotic systems.
- Advantages: These are the only robotic sensors that can be used for accurate gas detection
- Flaws: inexpensive sensors can provide false positives or are somewhat inaccurate and therefore should not be used for mission-critical applications.
— Magnetometers

Magnetometers can be used to detect magnets and magnetic fields. Can also detect polarity.
- Advantages: Helps detect ferromagnetic metals.
- Flaws: In some cases, the sensors may be damaged by strong magnets.
Sensors using rotation
— Compass

A digital compass is capable of using the Earth's magnetic field to determine its orientation relative to the magnetic poles. The compass tilt is compensated and takes into account the fact that the robot cannot move strictly horizontally.
- Advantages: provides absolute navigation.
- Flaws: higher accuracy increases the price.
— Gyroscope

Electronic gyroscopes are capable of determining the angle of inclination along one or more axes. Mechanical tilt sensors typically detect the robot's tilt using mercury in glass capsules or balls.
- Advantages: electronic gyroscopes have higher accuracy than mechanical ones.
- Flaws: higher cost.
— Accelerometers

Accelerometers measure linear acceleration. This allows you to measure gravitational acceleration or any other acceleration that the robot experiences.
It could be good option for a rough distance estimate if your robot cannot use environment to clarify the coordinates.
Accelerometers can measure acceleration along one, two, or three axes. A three-axis accelerometer allows you to measure all sensor angles in space.
- Advantages: they do not require any external references or markers to function, and can provide absolute orientation with respect to the Earth's gravitational field or define relative orientation.
- Flaws: they only estimate the distance traveled and cannot accurately determine it.
— IIB

An inertial measurement unit combines a multi-axis accelerometer with a multi-axis gyroscope and sometimes a multi-axis magnetometer to more accurately measure roll. Such robot sensors are quite complex.
- Advantages: this is a very reliable way to measure without using external references (other than magnetic field Earth)
- Flaws: can be very expensive and difficult to use.
And others

Current and voltage sensors measure the current and/or voltage of a specific electrical circuit. This can be very useful for determining how long your robot can work (measuring voltage battery) or if your motors are running too hard (current measurements).
- Advantages: they do exactly what they are intended to do.
- Flaws: can make changes to the measured voltage or current. Sometimes it is necessary to change the electrical circuit being measured.
— Magnetic sensors

Magnetic sensors and magnetometers are capable of detecting magnetic objects and may require contact with the object, or must be located relatively close to the object.
These robotic sensors can be used on an autonomous lawn mower to detect wires running through the lawn or to locate hidden wiring in the apartment.
- Advantages: usually inexpensive
- Flaws: generally must be located relatively close to the object, and unfortunately cannot detect non-magnetic metals.
— Vibration sensors

Vibration sensors are designed to detect vibration of an object using piezoelectric or other technologies.
— RFID technologies

RFID technology is a technology for wireless data exchange via a radio signal between an electronic tag that is placed on an object and a special radio-electronic device that reads the tag signal.
RFID devices can use both active (powered) and passive (unpowered) RFID tags, typically having a size and shape credit card, a small flat disk or addition to a keychain (other shapes are also possible).
When an RFID tag is within a certain distance from the RFID reader, a signal is generated with the tag's ID.
- Advantages: RFID tags are usually very low cost and can be customized.
- Flaws: not useful for measuring distance unless the mark is within range.
Practical part
A typical example demonstrating autonomous robot operation is a robot based on a Lego EV3 kit that moves along a line using one or two color sensors. In this case, the robot's sensors determine the brightness of the reflected light.
In this article we will look at several robot designs that implement the following behaviors:
1. It goes around an obstacle when it comes into contact with it with its “antennae”.
2. Avoids obstacles without contact (IR bumper).
3. It rests its “antennae” on the obstacle, moves back, makes a turn, then continues moving.
4. Avoids obstacles with a turn (IR bumper).
5. Follows the object while maintaining distance (IR bumper).
Before we start looking at the circuits, let's briefly look at the features of the L293 chip.
Fig.1. Pinout of the L293D chip
Inside it there are two drivers for controlling electric motors.
The motors are connected to the OUTPUT outputs. We have the ability to connect two DC motors.
The 8th and 16th pins of the microcircuit are connected to the power supply positive. Separate power supply is supported, i.e. The 16th pin (Vss) is intended to power the chip itself (5 volts), and the Vs pin (8th pin) can be connected to the power supply for the motors. The maximum voltage of the power section is 36 volts.
I will not separate them and will connect them in all circuits to a common power source.
The power supply negative or ground (GND) is connected to pins No. 4, 5, 12, 13. These contacts, in addition, provide heat dissipation for the microcircuit, so when soldering to the board, it is advisable to allocate an enlarged metallized area for these pins.
The microcircuit also has inputs ENABLE1 and ENABLE2.
To turn on the drivers, there must be a logical unit on these pins; in other words, we connect the 1st and 9th pins to the power supply positive.
There are also INPUT inputs for controlling motors. 
Fig.2. Table of correspondence between logical levels at inputs and outputs.
Above is a table from which you can understand that if a logical one is applied to the INPUT1 input, i.e. connect to the positive of the power supply, and the INPUT2 input to the negative, then motor M1 will begin to rotate in a certain direction. And if you swap the logical levels at these inputs, then motor M1 will rotate in the other direction.
The same thing happens with the second part, to which the M2 motor is connected.
It is this feature that is used in the presented robot schemes.
Scheme No. 1. The robot goes around an obstacle when it contacts it with its “antennae”.
Fig.3. Scheme No. 1. With mechanical obstacle sensors.
After power is applied, the motors will rotate in a certain direction, moving the robot forward. This occurs due to the fact that a signal is supplied to INPUT1 through resistor R2 high level, the same as at the INPUT4 input. Transistor VT1 is securely closed, the base is pulled to the power supply minus, and no current flows into the collector.
I will explain on the left side, because... both parts are symmetrical.
At the INPUT2 input, a logical 0 is set through resistor R3. Judging by the table (Fig. 2), the motor rotates in a certain direction. On the right side of the diagram, the same thing happens and the robot moves forward.
The circuit contains keys (SB1, SB2), which use SPDT switches. Paper clips are attached to them using hot glue and obstacle sensors are obtained. 
Fig.4. Antennae sensors are made from paper clips.
When such a sensor hits an obstacle, the key closes and the INPUT2 input is connected to the power supply positive, i.e. logical "1" is supplied. At the same moment in time, the transistor also opens, as a result of which the logical one at the INPUT1 input is replaced by a logical zero. When the button is pressed, the motor rotates in the other direction. Microswitches occur jerkily and the motor turns the robot away from the obstacle until the sensor stops contacting the obstacle.
As you may have guessed, the switches or the motors themselves need to be arranged crosswise.
Scheme No. 2. Robot avoids obstacles without contact (IR bumper)
Even more interesting behavior can be realized if TSOP receivers are used as sensors to receive infrared signals. This will be some kind of IR bumper.
So now the circuit looks like this.

Fig.5. Scheme No. 2. With infrared obstacle sensors.
The “IR receiving module” works like this: when an infrared signal arrives at the TSOP receiver, a negative voltage appears at its output, which unlocks the PNP transistor, and the current from the power plus is supplied to the input circuit of the microcircuit. If last time mechanical switches were used, with the so-called antennae made of paper clips, then new scheme will allow the robot not to crash into an obstacle, but to react to it from a certain distance. It looks like this:

The receiving part is designed in this way: two absolutely identical modules (left and right) fastened together (Fig. 8).
TSOP1136 with an operating frequency of 36 kHz were used as receivers. The pin locations are shown in the figure below. 
Fig.6. TSOP1136.
We've figured out the receivers, but to detect obstacles, you need to send infrared radiation at a certain frequency into the space in front of the robot. The operating frequency of receivers varies, in my case it is 36 kHz. Therefore, a pulse generator for this frequency was assembled on the NE555 chip, and infrared emitting diodes were connected to the output. 
Fig.7. NE555 emitter circuit.
A fragment of a breadboard is attached to the robot chassis, on which you can install the desired number of IR diodes.
It is advisable to put heat-shrinkable tubes or something similar on the diodes so that they shine forward and not in different directions. 
Fig.8. IR bumper.
After power is applied, the robot may move back, this is due to the too high sensitivity of the TSOP receivers. They perceive the reflected signal even from the floor, walls and other surfaces. Therefore, a trimming resistor is used in the IR signal emitter circuit (Fig. 7), with the help of which we reduce the brightness of the infrared diodes and achieve the desired sensitivity.
Scheme No. 3. Such a robot moves back from the obstacle, making a turn.
Let's look at another interesting scheme. 
Fig.9. Scheme No. 3.
When such a robot hits an obstacle with one of its antennae, it moves back, making a slight turn, then after a short pause the robot continues moving. The behavior is shown in the animation below:

This circuit is also fully compatible with the infrared bumper from the previous circuit.
Electrolytic capacitors appeared in the circuit between the emitter and the base resistors of transistors VT1 and VT2. Diodes VD1, VD2 and LEDs HL1, HL2 appeared.
Let's take a look at why these additional components are needed.
So, when switch SB1 closes, i.e. the first sensor, the current from the power supply positive through the diode VD1 and the current-limiting resistor R1 is supplied to the base of the transistor. It opens by changing the logical level at the INPUT1 input, and the level at the INPUT2 input also changes.
At this moment, current also flows to capacitor C1 and it charges. Motor M1 suddenly changes direction of rotation and the robot moves back away from the obstacle. In the video you can see that the second motor also changes direction of movement, but for a shorter period of time. This is due to the fact that when sensor SB1 is closed, the current from the power supply plus also flows to the right side of the circuit, through the HL2 LED. LEDs not only provide a short-term signal about a collision with an obstacle, but also act as a voltage absorber for the opposite half of the circuit. Simply put, when switch SB1 is closed, capacitor C2 charges less than C1. And when the key (sensor) SB2 is closed, the same thing happens, but on the contrary - C2 charges more (i.e., the voltage on its plates is greater). This allows you not only to move away from the obstacle, but also to turn slightly away from it. The angle of this turning depends on the capacitance of capacitors C1 and C2. Capacitors with a capacity of 22 uF, in my opinion, are optimal. With a capacitance of 47 µF the rotation angle will be greater.
You can also notice in the video that after the robot moves back from an obstacle, there is a short pause before it moves forward. This occurs due to the discharge of capacitors, i.e. at some point in time, the logical signals at the INPUT inputs are balanced and the driver for a second ceases to understand which direction to rotate the motor. But when C1 and C2 are discharged, the INPUT inputs will return to their original logic levels.
Diodes VD1 and VD2 prevent the discharge of capacitors through the LEDs HL1, HL2. Without LEDs the circuit does not work.
Scheme No. 4. Previous diagram with IR bumper.
This scheme differs from the previous one in that instead of mechanical sensors, infrared (IR bumper) sensors are used here. 
Fig. 10. Scheme No. 4.
The collectors of PNP transistors VT1 and VT2, when an obstacle is detected, will send a signal to the input circuit of the microcircuit. Then everything happens the same way as described earlier, only such a robot, when it detects an obstacle in front of itself, moves back, makes a turn, and then continues moving.
The behavior is shown in the animation below:

The robot will behave more abruptly if the capacitance of capacitors C1 and C2 is reduced to, for example, 1 µF (minimum capacitance 0.22 µF).
How to make a robot follow an object?
In all the schemes presented above, the sensors or the motors themselves must be arranged crosswise. And with a direct connection (when the left sensor “commands” the left motor, the right one - the right one), the robot will not avoid the obstacle, but rather follow it. Thanks to direct connection, you can achieve very interesting behavior of the robot - it will actively pursue an object while maintaining a certain distance. The distance to the object depends on the brightness of the IR diodes on the bumper (adjust). 
Some more photos:

The chassis uses metal parts from the designer. The breadboard flips out for easy battery replacement.

The robot is powered by 4 AA batteries.
The options for making a body and chassis for a robot are limited only by your imagination, especially since there are many on sale ready-made solutions. In my case, the circuit will be transferred to the board, because a bunch of wires is not aesthetically pleasing. Batteries with a recharging circuit will also be installed. And what other improvements can be made or new functions added - you can suggest all this in the comments.
This article has a video that describes in detail the operation of the circuits and demonstrates different variants robot behavior.
List of radioelements
| Designation | Type | Denomination | Quantity | Note | Shop | My notepad | |
|---|---|---|---|---|---|---|---|
| Circuit elements No. 1 and No. 2 (except for the IR bumper) | |||||||
| VT1, VT2 | Bipolar transistor | 2N3904 | 2 | To notepad | |||
| R1, R2, R4, R6 | Resistor | 10 kOhm | 4 | To notepad | |||
| R3, R5 | Resistor | 4.7 kOhm | 2 | To notepad | |||
| C1 | 100 µF | 1 | To notepad | ||||
| Elements of the “IR receiving module” in diagram No. 2, No. 4 | |||||||
| VT1, VT2 | Bipolar transistor | 2N3906 | 2 | KT361, KT816 | To notepad | ||
| R1, R2 | Resistor | 100 Ohm | 2 | To notepad | |||
| C1, C2 | Electrolytic capacitor | 10-47 uF | 2 | To notepad | |||
| Elements of the “IR signal emission module” Fig. 7 | |||||||
| R1 | Resistor | 1 kOhm | 1 | To notepad | |||
| R2 | Resistor | 1.5 kOhm | 1 | To notepad | |||
| R3 | Variable resistor | 20 kOhm | 1 | to adjust the brightness of FD1, FD2 | To notepad | ||
| C1 | Ceramic capacitor | 0.01 µF | 1 | To notepad | |||
| C2 | Ceramic capacitor | 0.1 µF | 1 | To notepad | |||
| FD1, FD2 | IR diode | 2 | Any | ||||

To gain experience in working with the Arduino board, so to speak, as a learning experience and just for fun, this project was created. The goal of the project was to create a car that can move autonomously, avoiding various obstacles without colliding with them.
Step 1: List of components and project cost
1. Toy car with radio control (radio controlled).
This thing costs about 20 bucks, if you have the opportunity to spend more, you can use it better.
2. Arduino Uno microcontroller - $25 
3. Motor shield for controlling electric motors - $20 
4. GPS for navigation. Adafruit Ultimate GPS Shield - $50 
5. Magnetometer as a compass for navigation. Adafruit HMC5883 Magnetometer - $10 
6. Ultrasonic distance sensor to avoid obstacles. HC-SR04 - $6 
7.LCD display to display status vehicle and information. LCD Display Blue 1602 IIC, I2C TWI - $6 (you can use another one)

8. Infrared sensor and remote control.
9. Arduino sketch (C++ program).
10. Thin wood board as a mounting platform.
11. Development boards. One is long and narrow, and the other is small, in order to separately install the magnetometer on it away from other elements.
12. Jumpers.
13. Ultrasonic sensor mounting kit - $12 
14. Soldering iron and solder.
So, in total, everything cost about $150, this is assuming you buy all these components, since you may already have some of these.
Step 2: Chassis and platform installation


The radio control was removed from an unwanted toy that cost 15 bucks.
The car here has two engines. Using one engine, the remote control controls the speed of the robot, and using the other, the steering is controlled.
A thin board was used as the mounting surface on which the development boards, Arduino, LCD, etc. The batteries are placed under the board and the wires are passed through the drilled holes.
Step 3: Program
Arduino is controlled via C++ program.
Source
RC_Car_Test_2014_07_20_001.ino
Step 4: LCD Display


During operation, the screen displays the following information:
Row 1:
1. TH - Task, heading to the current waypoint
2. CH - Current direction of the robot
Row 2:
3. Err - Compass direction, shows in which direction the robot is moving (left or right)
4. Dist - Focal distance (in meters) to the current waypoint
Row 3:
5. SNR - Sonar distance, that is, the distance to any objects in front of the robot
6. Spd - Robot speed
Row 4:
7. Mem - Memory (in bytes). Arduino memory has 2 KB
8. WPT n OF x - Shows where the robot is in the list of waypoints
Step 5: Avoid Colliding with Objects

To help the robot avoid obstacles, an ultrasonic “Ping” sensor was used here. It was decided to combine it with the Arduino NewPing library, since it is better than the simple PIng library.
The library was taken from here: https://github.com/fmbfla/Arduino/tree/master/NewPing
The sensor was installed on the robot's bumper.
Infrared receivers of the TSOP series (17xx, 21xx) have been used quite successfully in amateur robotics for a long time. They are used both for their intended purpose (to receive commands via the IR channel) and as inexpensive contactless obstacle sensors. Their advantage over conventional infrared phototransistors and photodiodes is better noise immunity, since TSOPs respond only to a signal with a certain frequency and duty cycle. The frequency of the received signal is indicated in the marking of IR receivers - the last two digits.
The undoubted advantages are also ease of connection and availability of purchase.
The presented IR sensor module is easy to replicate and essentially combines two units - a TSOP2136 with a harness and an electronic key for controlling infrared LEDs with the ability to adjust the brightness of the radiation.
The module can be used:
- As a command receiver via IR channel using the RC5 protocol.
- As a command transmitter via IR channel.
- As a transceiver for exchanging information via the IR channel (both for communication with a PC and other devices)
As a budget contactless obstacle sensor.
The TSOP wiring is standard with the addition of a matching resistor to the signal output. The infrared LEDs are connected via a BS170 field effect transistor. The brightness of the infrared LEDs is adjusted using a building resistor.
Let's consider the operation of the module as an obstacle sensor. As mentioned above, IR receivers of the TSOP series respond only to a certain signal, in our case it is a signal with a frequency of 36kHz and a duty cycle of 50%. The signal is generated programmatically by a microcontroller. The emitted signal, reflected from the surface of the obstacle, is captured by the receiver and processed by the microcontroller. By default, in the absence of a received signal, the TSOP output is present at a high logical level, otherwise - at a low level.
Thus, in MK signal processing:
There is no obstacle - 1 at the input of the MK port.
Obstacle - 0 at the input of the MK port.


The range of reliable detection of obstacles during the experiments was achieved up to 30 cm and depends on the accurate generation of the emitted signal, the emission power of the LEDs and the surface features of the detected obstacle (color, texture, material). A light object with high reflective properties can be detected from a longer distance.
For example, we used the MRC28 controller with a universal module. Test firmware was created using BASCOM-AVR. Hand as an obstacle =).
"Example of work infrared sensor obstacles based on TSOP2136
$regfile
= "m8def.dat" "using Mega8
$crystal
=
16000000
"quartz resonator frequency 16mHz
"Frequency generation 36kHz
"Configuring Timer1
Config
Timer1=
Counter, Edge = Rising , Prescale = 8 , Compare A = Toggle
" We calculate Compare1a
" clock frequency (kHz) / TSOPa frequency (kHz) / 2 = Compare
" 16000 / 36 / 2 = 222
Compare1a
=
222
"PortB.1 - signal output
"PinC.0 - read the TSOPa status
"Portd.0 - signal LED
Config
Pinb. 1 = Output
Config
Portd. 0 = Output
Config
Pinc. 0 = Input
Start
Timer1
Do
If
Pinc. 0 = 0 Then
Portd. 0 = 1
Else
Portd. 0 = 0
End
If
Loop
End
Tags for the article: