Gas is the main assistant to the cook and fireman; with it you will not be cold and hungry. Knowledge of safety rules and behavior patterns during emergency situations will protect you from troubles and help strengthen your “friendship” with the gift sent to us by Mother Nature. Still don’t know what to do when the gas tap in the kitchen leaks and how to check if there is a leak? Well, let's get down to business then.
You are probably aware that natural gas comes to our kitchens directly from the bowels of the earth, naturally, bypassing kilometers of pipes. The main flammable component of gas is methane. It is this that poses a threat to human life if it comes out of the pipeline. A 5% concentration of this substance in the air is enough, and if you do nothing, fire or explosion is inevitable. “Why does everything have to end in fire?” - you ask. As a rule, due to ignorance of the rules of behavior in such situations, people do not stop using electrical devices (sometimes they even turn on the light to understand what the bad smell comes from the kitchen), or even completely, when sometimes the gas tap in the kitchen goes bad, they bring a lit match to the stove to understand which burner is broken.
Worth paying attention! Natural gas, you may be surprised, has no smell, taste or color. Therefore, before pumping it into the pipes leading to consumers, it is odorized - saturated with a substance with a specific, unpleasant smell, which is harmless to humans and helps us find out about gas leakage from the system.
According to the rules for handling gas, the population is prohibited from dismantling or repairing pipes on their own. What should you do if the gas tap in the kitchen is leaking? First, open the doors and windows. Secondly, stop using electrical appliances. Third, call the appropriate service.
What to do if you suspect a gas leak, but you’re not sure about it; do you think it’s just your imagination? There is a way to check the correctness of this assumption. Make a soap solution and apply it to the faucet or areas where you think gas may be leaking. If there is indeed a breakdown, then bubbles should appear, and of substantial size. Do you have any doubts? Perform the operation again, because calling emergency services due to unfounded suspicions is also bad, isn’t it?

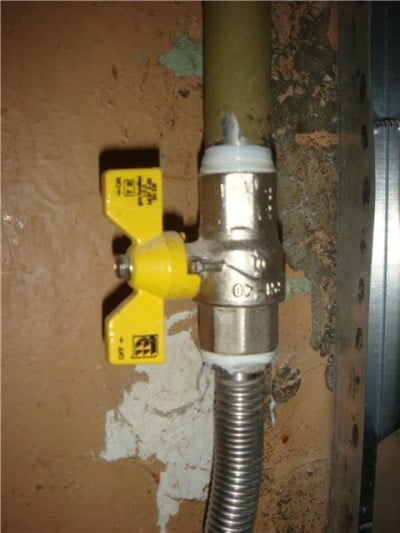
This is what one of the gas tap models looks like
Crane repair and lubrication
Naturally, according to the rules, it is better to invite a master, but many men consider themselves “savvy” enough to produce renovation work on one's own. Well, this can happen, especially if the owner of the house has already dealt with the repair of gas pipelines and specialized equipment.
Let's consider a mini-repair version - lubrication of the gas tap.
What will be needed to carry out the work?
- screwdriver;
- gag (made of wood or in the form of wet cloth in plastic bag);
- lubricant (graphite or grease);
- textile.
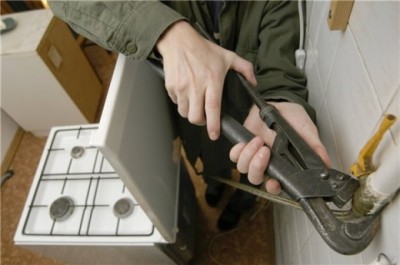
Make sure that nothing interferes with you, you should come close to the pipe, and if necessary, move the stove away
Of course, it is better to turn off the gas supply during lubrication. But it happens that this is not possible, then try to lubricate the tap without shutting off. Turn off household appliances, open the window, turn off the fire (candles should also not be used).
Using a screwdriver, unscrew the plug on the tap, remove the spring, and then the cone valve. Close the hole with a gag. Remove dirt and old grease from the valve and apply new mixture. Remove the gag (you need to do this very quickly), replace the bolt, spring and plug. Check the tightness in a way you already know with soap solution. Are there any bubbles? This means that you have successfully completed the job, the tap is lubricated and will work properly. If the leak does not stop, call the gas service immediately.
This is important to know! Allow specialists who have supporting documents to carry out such work, including a license, to connect any gas appliances. During the work, be nearby to come to the technician’s aid if necessary. “Armed” with soap, do not forget to check the quality of work.
The faucet has been replaced, all that remains is to paint the pipe
Now you know what to do and how to behave, if the gas tap in the kitchen is leaking, then your home will always be safe.
What should we do if we smell an unpleasant gas smell in the kitchen? There is a high probability that this is leaking from the gas valve, which is located directly in front of the device.
As soon as you hear the smell, you should call emergency services, because the gas is highly explosive.
But it’s also worth knowing how to deal with such situations yourself. If the faucet is to blame for the leak, then it is better to replace it, for polypropylene pipes will dofrialen 63 ball valve But simply lubricating the faucet may be enough.To do this, we will study in detail the instructions on how to carefully lubricate the faucet.
Tools and materials that we will need in our work:
Flat slot screwdriver
Rag
Gag
Graphite, solid oil or technical Vaseline
Soap
We proceed in order:
1. Examine the gas tap, paying attention to how the main part of the tap is made. It can be made in the form of a cone with a hole all the way through, or pressed with a twisting spring using a special plug.
2. Shut off the gas supply to the house or apartment as soon as possible, this will minimize the possibility of an accident. If you can’t turn off the gas, you can work like this. Just need to take into account important rules:
Unplug all electrical appliances;
Ask all uninvolved people to leave the room, if possible, the premises.
Make sure there is no open flame in the room and never smoke while working.
3. Next, unscrew and remove the valve from the faucet and gag it to reduce the gas flow. Carefully remove all old grease with a dry cloth and apply new grease without filling the holes.
4. After everything is done, you need to very quickly replace the gag in the gas tap with a bolt. Carefully twist the spring and clamp it with a plug. We resume the gas supply if you shut it off earlier.
5. Ventilate the room well. Then prepare a solution of soap and apply it to the tap. If there are no bubbles, then you have done the job. But still, when there are bubbles, try to assemble the faucet again and check for leaks in the same way. When the problem persists in this case, urgently call the gas service. Since even the smallest leak can lead to a destructive explosion.
A positive feature of Soviet gas taps is their long term operation and maintainability. However, such a faucet requires regular maintenance, since the tightness of such a device is ensured by grinding the faucet plug to the body; read more about this in our article.
The appearance of a gas smell in the area of the plug valve is not a reason to replace it, but you will still have to call a gas service representative to eliminate the cause of the leak.
This article describes step by step the process of revising the two most popular gas plug valves: coupling and tension. Please note that this article is not a call to action, but is offered solely for informational purposes, since gas-hazardous work must be carried out by specialized organizations that have the necessary permits. It will be useful to those who want to personally verify the quality of the tap inspection performed by the gas service.
Preparatory work
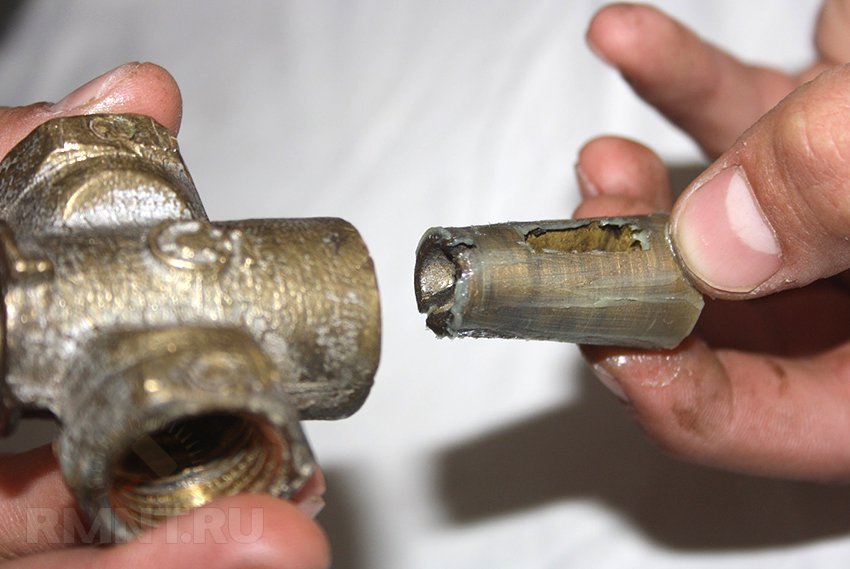
Before you begin inspecting the gas tap, you need to find out whether the tap is actually the source of the leak. To do this, you need to wash the tap by applying foam to the connections. We find places where gas is leaking to make sure that the valve is indeed the cause of the leak.
Note. Hose leading to gas equipment, was specially filmed to show that a gas leak from the outside very often means a leak in the tap itself. Therefore, the options are to lubricate the body with lubricant outer surface, seal with plasticine and others traditional methods do not completely solve the problem, but only create the illusion of security.
To carry out an inspection, there is no need to remove the gas valve from the gas pipeline. In this article, this is done solely for clarity of the process. However, it is necessary to shut off the gas supply to the gas pipeline and relieve the pressure, and also warn neighbors so that they turn off all gas-consuming appliances!
Necessary tool
To perform the audit you will need the following tool:
- wide flat screwdriver
- open-end wrench No. 17
- lubricant for gas valves
- rags

Note. In the absence of a special gas lubricant, it can be completely replaced with graphite lubricant. It is undesirable to use solid oil, since its properties are highly dependent on temperature.
Inspection process of a plug cone coupling valve
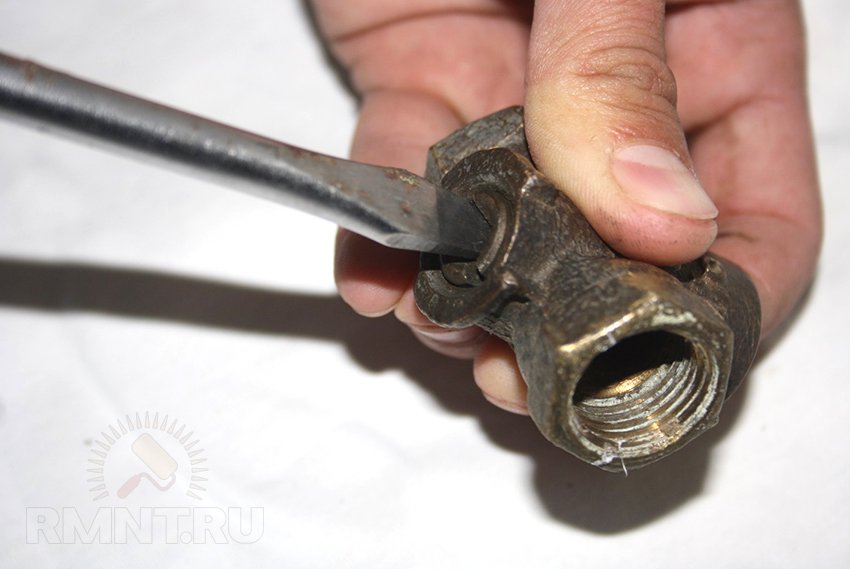
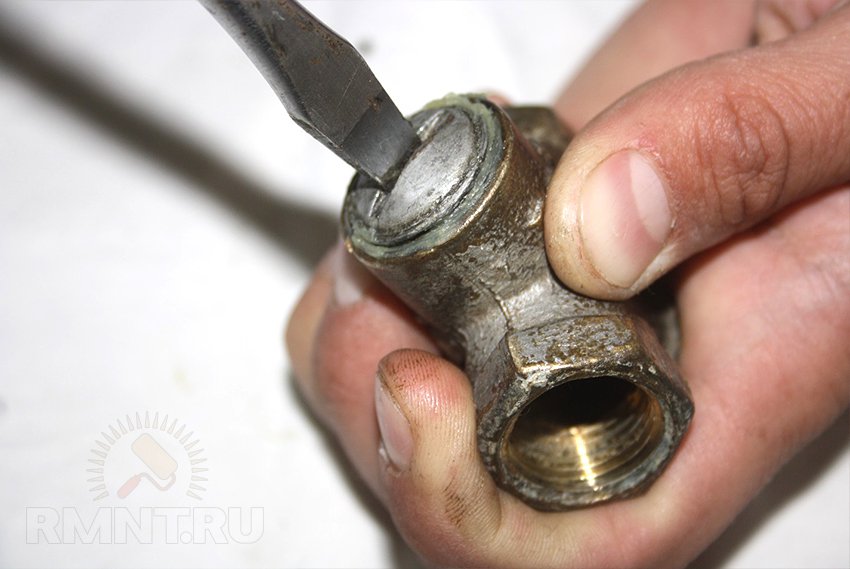
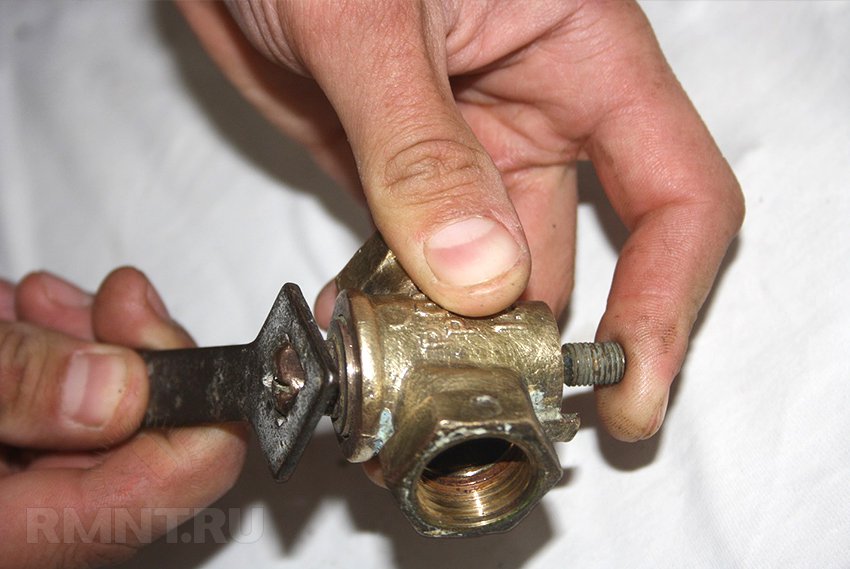
Use a flat-head screwdriver to unscrew the screw plug.
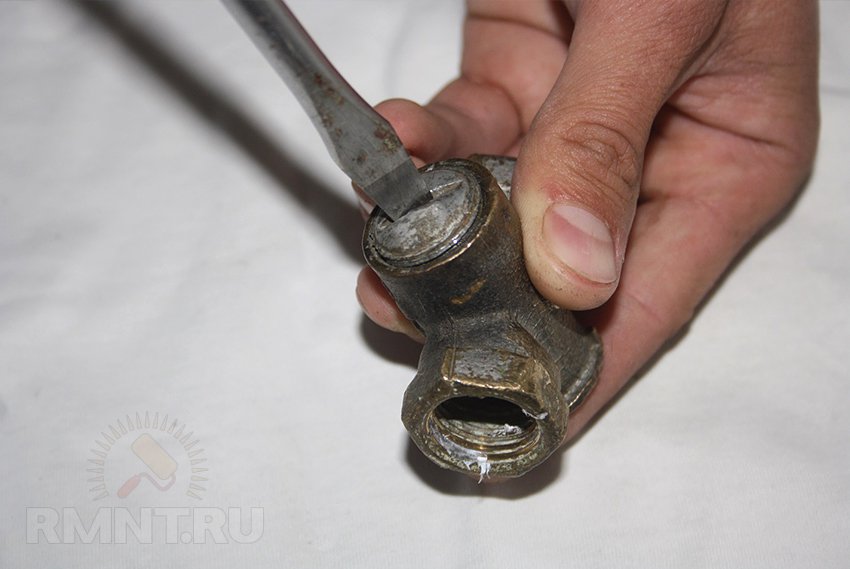
We take out the spring.
![]()
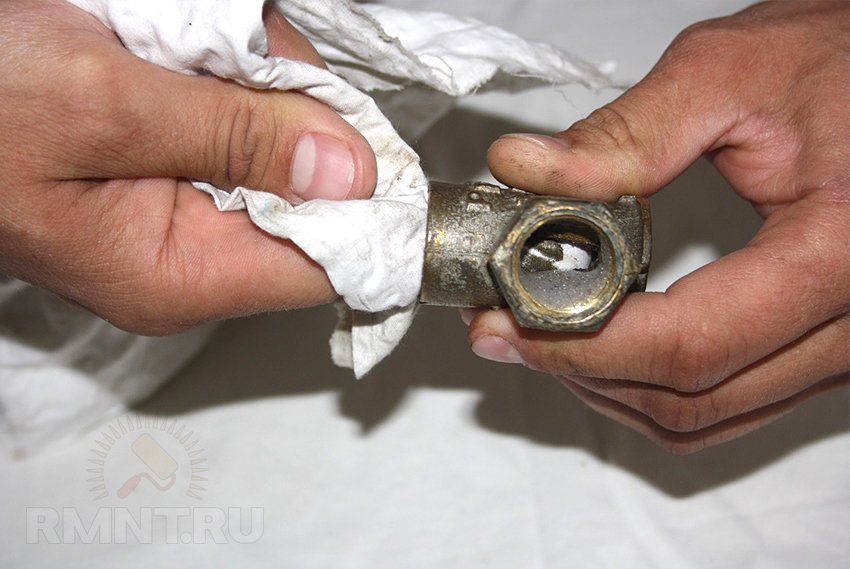
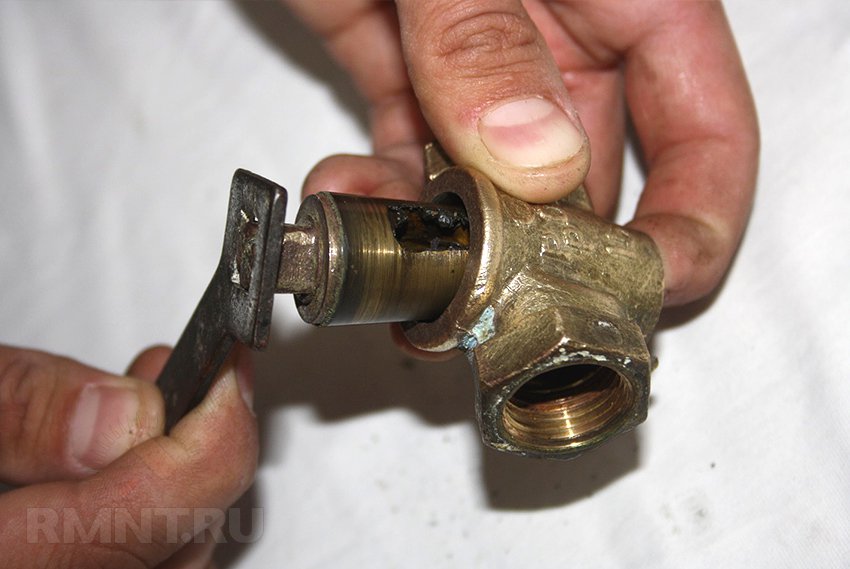
Use a flat-head screwdriver to slightly turn the tap plug, pressing on it. Use the finger of your other hand to hold the plug. When it jams, you can tap the screwdriver a little with a hammer.
Note. Don't damage it with a screwdriver inner surface tap and do not drop the plug to avoid scratches and nicks!
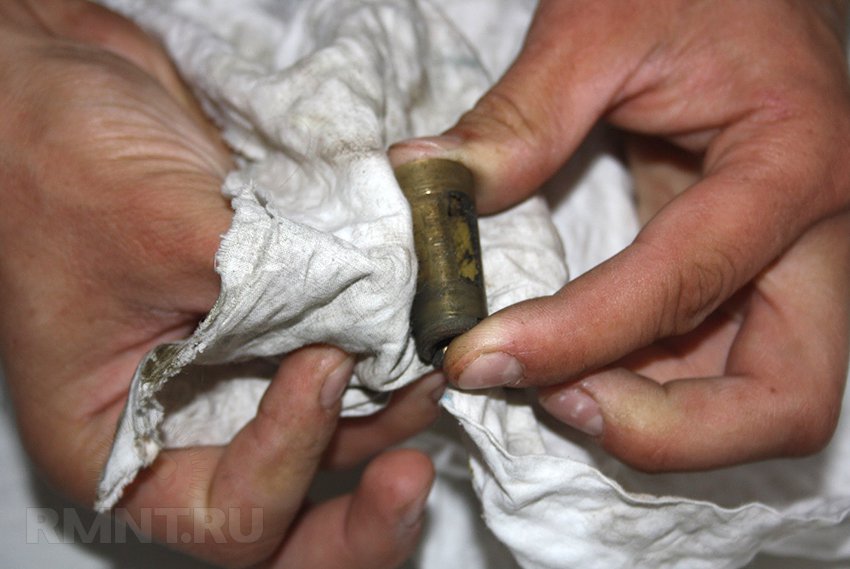
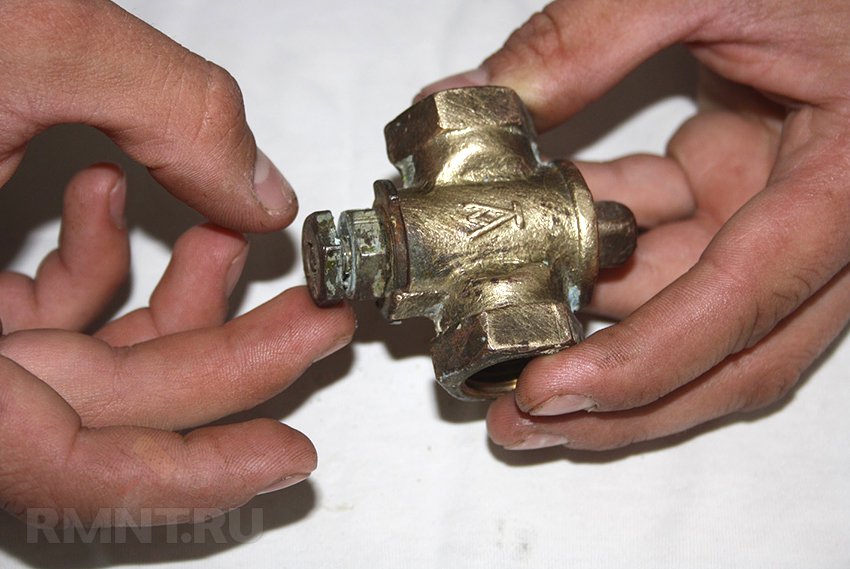
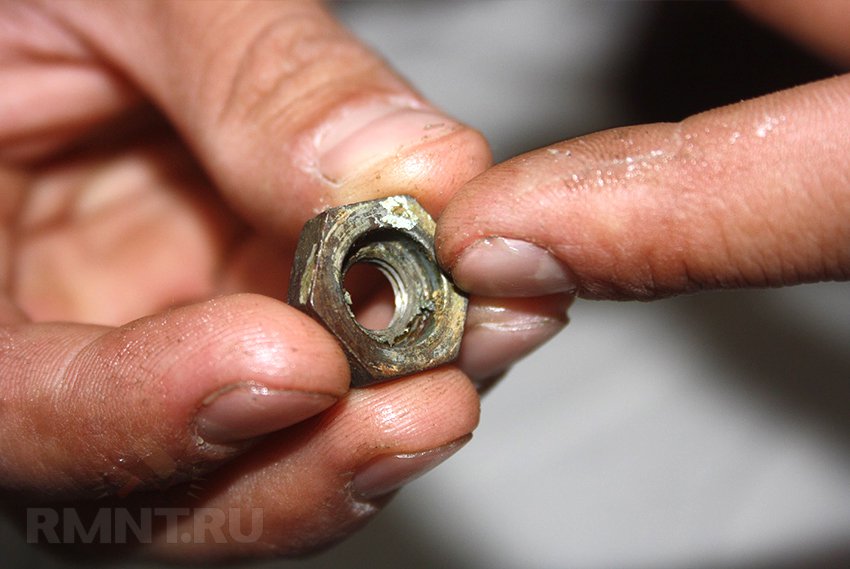
We take out the plug.


We wipe the faucet body and plug with a rag. Dried grease can be removed with gasoline or alcohol.
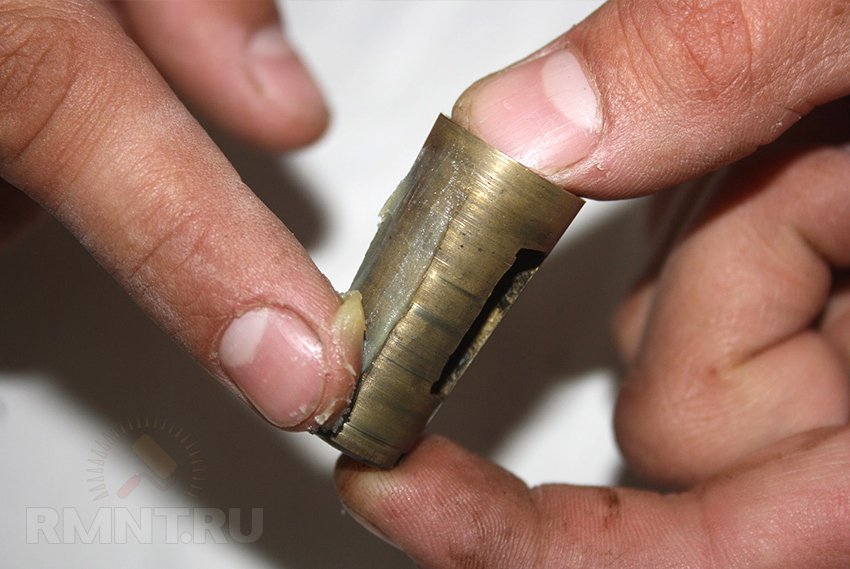
Using a screwdriver, remove the remaining old grease from the plug.

Apply a thin layer of lubricant to the plug.
Place the lubricated plug into the housing.
We fill the grease into the cavity where the spring is located.

Place the spring in the groove of the plug.

Lubricate the threaded plug and screw it into the housing several turns with a screwdriver. The spring should fit into the groove on the plug.
![]()
By tightening the screw plug with a screwdriver, we adjust the smoothness of the tap. We check by turning the plug with a screwdriver. The tap should not turn with force, but it should not move too easily.

The inspection process of a plug cone tap through tension
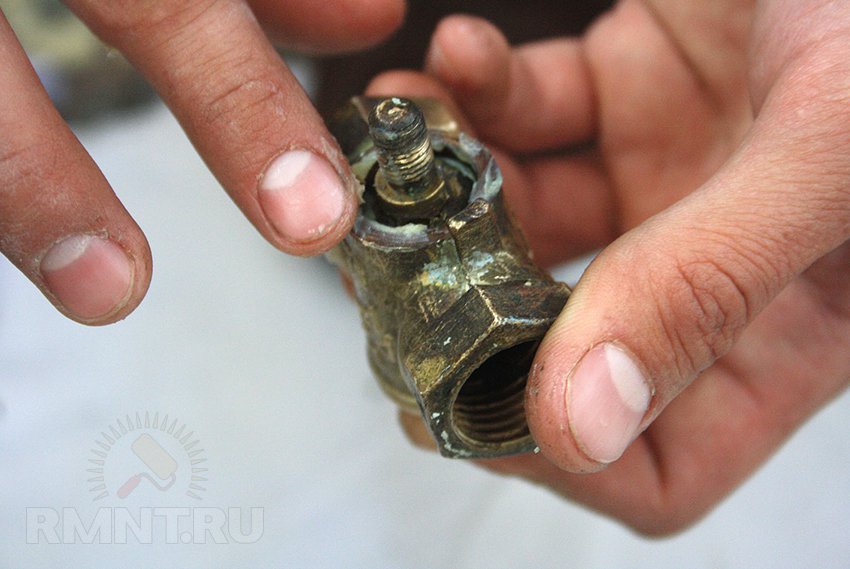
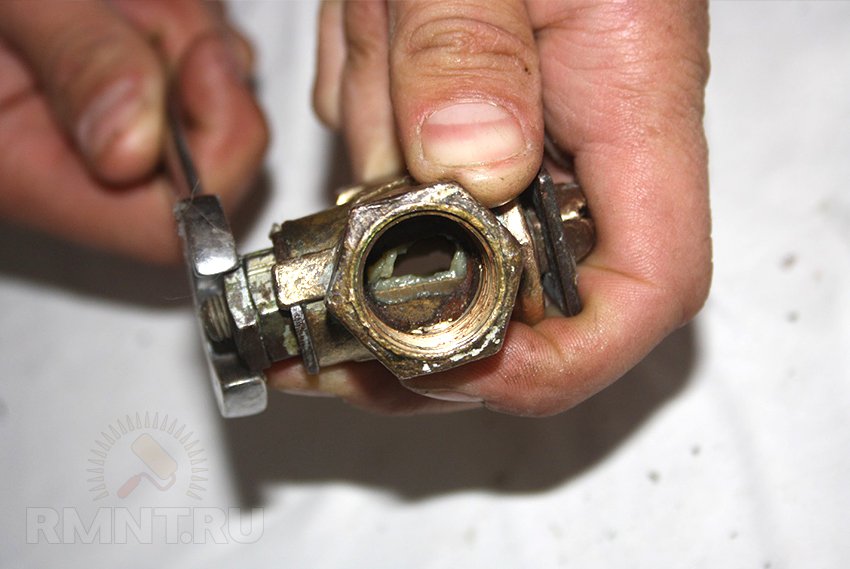
Holding the tap plug with a handle, use the 17th key to unscrew the locknut and the nut in turn.
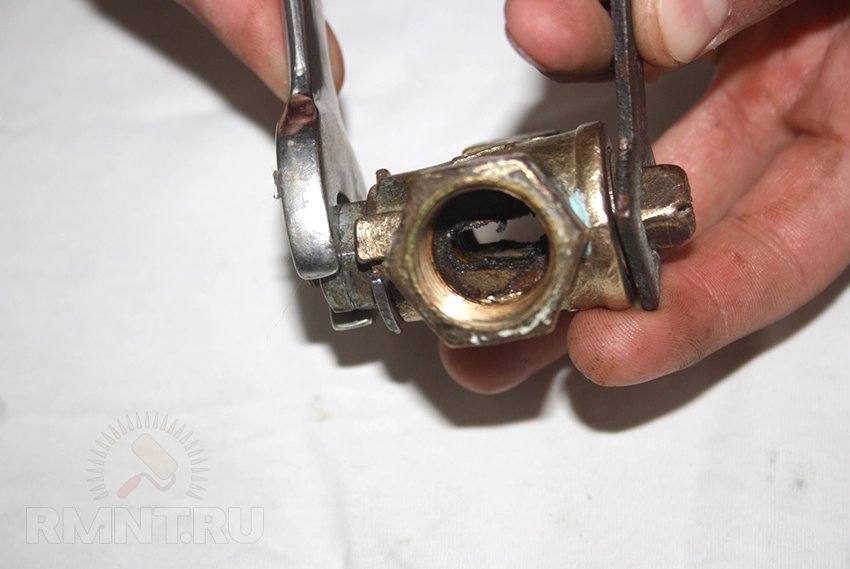
Remove the limit washer.

We press our finger on the pin of the cork, turning the cork with a handle. When the plug jams, you can lightly tap the stud with a hammer, after screwing the nut onto it first, so as not to damage the thread. You need to hit the nut!
We take out the plug.

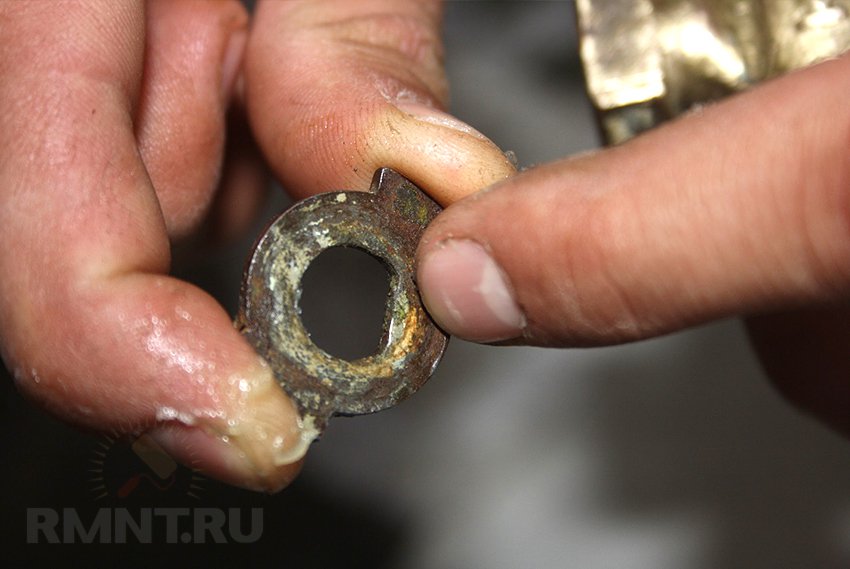
Cleaning the plug and body, followed by lubrication and assembly, is done in the same way coupling valve. We clean the restrictor washer from old grease.

Apply lubricant to the valve body where the limiting washer meets.
We put the limiting washer on the groove of the stud. To do this, place the tap plug in the half-open position.


Screw the nut through the slot onto the faucet plug.

By tightening the nut, we adjust the degree of tension of the tap. We check by turning the tap handle. The tap should not turn with force, but it should not move too easily. We tighten the locknut.
Once again we check the smoothness of the ride.
Results of the work done
After gas supply and control washing, no gas leaks were detected! The faucet is sealed and works much more pleasantly, without jamming!

Alexander Birzhin, rmtn.ru
If it’s quick and homey, then you can use a CV joint or lithol, but if you want it good, then...
Lubricant LZ-GAZ-41 (TU 0254-322-00148820-98) is intended for lubrication of plug valves of household gas equipment. Has the ability grind rubbing surfaces, improving the tightness of the taps as they operate.
LZ-GAZ-41 lubricant has high temperature and chemical resistance, is insoluble in water, non-aggressive towards valve materials household gas stoves.
LZ-GAZ-41 lubricant is made on the basis of mineral oil thickened with lithium-calcium soap with the addition of anti-corrosion and antioxidant additives and solid fillers - molybdenum disulfide and acetylene black.
When I needed such a thing, I went to "Gorgaz", (on Krasnoznamenaya Street) thinking of catching some repairman guy there and asking him for a little bit of this bullshit... After walking a little along the fence (they were having lunch or something) suddenly I discovered my brother as such a guy (IMG:style_emoticons/default/blink.gif) (I didn’t even know that he already worked there)... but another one might turn up. (IMG:style_emoticons/default/smile.gif)
Now there seems to be a store there, in the same building, but is there any lubricants there...?
By the way, there is no need for special heat resistance, the main thing is good seal and long-term reliability.
In principle, you can take a small file and plan a soft lead from a simple pencil.
Mix it with the same lithol or cyatim and it will be like a heat-resistant lubricant.
Graphite will not add any heat resistance.
The taps are lubricated with lubricant operating temperature up to 150 degrees, this is not a heat-resistant lubricant at all.
The durability of the lubricant is determined by the lather, not the graphite.
Theorists? Graphite grease is better. Even after many years of use, if it dries out, it can be removed more easily than a stuck-on regular one.
When operating with the oven door slightly open (when drying mushrooms, for example), more heat is supplied to the taps than usual. So it’s better not to engage in perversion, but to buy normal lubricant, since it’s quite inexpensive.
Even after many years of use, if it dries out, it can be removed more easily than a stuck-on regular one.
When operating with the oven door slightly open (when drying mushrooms, for example), more heat is supplied to the taps than usual. So it’s better not to engage in perversion, but to buy normal lubricant, since it’s quite inexpensive.
More, how much is it?
Mobilegriz is much better than the one from the gas workers.
What does graphite have to do with it? Drying depends on the base and soap.
More, how much is it?
No higher than 150 degrees in any case, otherwise the handles will burn and melt.
Mobilegriz is much better than the one from the gas workers.
I don’t understand, are you a gas fitter or an air conditioner?
Can you help me install a simple split system if I buy it? How much do your services cost? Look, outside and indoor unit I’ll install it myself where it’s convenient for me. I did all the electrical work myself. There are either four or five wires. I just need to connect the tubes, pump out the air, and make sure everything floats properly. I don't have such a tool.