
- glass or wooden watch blank

In my case, glass, thickness 4 mm, size 25x25cm
- very thick cardboard (thickness 2-3mm)
– a variety of metal accessories, which fantasy tells (washers, nuts, wire, gears)

- small screws and washers for them
— 12 large washers, diameter 18mm
- PVA glue
- putty
— acrylic paint spray black and gold
— contour on glass of any color
— acrylic lacquer-spray
- 2 printouts, slightly modified in Photoshop - background and numbers:


— glue "Moment Crystal"
The watch will consist of two main parts: the base and the dial. For the dial, we cut out a circle of diameter suitable for the base from cardboard and draw the necessary pattern with curls on it. Since it is difficult to cut through such cardboard, it is possible to cut it out in special workshops, but I had itching in all places and I didn’t have the strength to wait until they made it. I cut the workpiece with the help of such a device and a thin cutter to it:

Here's what happened:

We generously prime the workpiece with PVA glue on both sides so that it becomes "wooden". While it dries, put it aside.
Wash the glass blank with glass washing liquid. Cut out a circle from the printed page with mechanisms and front side cover with acrylic spray varnish. Then carefully glue the circle on the PVA, aligning the center of the workpiece and the printout. Carefully smooth the paper so that no bubbles remain. I smooth with a felt squeegee. While the paper dries, we beat off the "frame" along the edge of the workpiece using any contour on the glass. I have a Pebeo. This is how it looks like:

While the contour dries up, we take again the blank for the dial. We mark the places of "numbers" on it and paste big washers. I glued on "Moment Crystal":

Now let's start creating a relief on both blanks. On the dial with a palette knife and putty, we create a light relief along the curls and between the circles:

On the basis, we proceed a little more complicated. Cut out a cardboard circle with a radius slightly larger than the dial. We apply the circle tightly to the base (on the pasted picture with mechanisms) and “plaster” around it with the same putty and palette knife, creating a relief. Along the perimeter, we do not go beyond the frame beaten off by the contour. We remove the auxiliary cardboard circle and get the following picture:

When everything is dry, take a fine sandpaper and lightly go over the putty to make the relief more pronounced. We cover the blank of the dial with a completely black color using an acrylic spray:

On the base, cover the picture again with a cardboard circle and paint the remaining free space with a gold spray:


When the paint dries, we literally make a couple of gold puffs into the center of the dial to gild the middle. At the same time, dust will beautifully fall on the edges and the dial will become with the effect of bronze. We leave to dry.
On the base from a long distance, spray the black spray very lightly. Not covering everything. When it dries, we take some weak thinner (I took N4 pinene), apply it on a sponge and lightly wash off the black from the corners, exposing some gold. We also get the effect of bronze. The photo does not show the shine unfortunately:

Now, from the second printout, cut out the numbers and paste them into place. Then we fill these windows with numbers with a medium for stained glass paints on glass. I used IDEA Vetro Medium in its purest form. It freezes and will give an effect, like numbers under glass:

Leave the stained glass to dry at least overnight.
While you can do decorating the base. The most difficult stage is the "false" screws. For them, we take the usual small screws and bite off their caps with wire cutters. Then we glue a suitable washer to each hat:

We build / select all sorts of decorative differences and, together with the cogs, paint it in gold. We glue the hats in their places on the dial, and glue everything that we have prepared on the base:

Then we cover the base (only the base) with acrylic spray varnish. This will give a glossy base and a matte dial. Looks very nice.
We assemble the structure together, glue the dial to the base, paint the back of the base with black acrylic spray, attach the clock mechanism, hands, and enjoy the result:

Thank you for attention. All inspiration and creative victories!
Materials:
glass, cardboard, acrylic sprays, acrylic varnish, paper, metal, pva glue, moment glue, wire
In today's project we will make watches that can be useful for theatrical performances. The clock has a diameter of 1.5 meters and works using electronic components to set the time between different acts of a production or performance. Clock gears are driven by a pulley system.

Step 1: Model Concept

I was inspired to create this watch by a 3D animated screen saver from 3PlaneSoft.
It took 2 weeks to make the watch. The clock works like this: engine direct current voltage of 12 V is attached to the frame and serves to actuate a set of pulleys connected to the gears and clock hands. The actual gear ratio between the minute and hour hands is 12:1. For this purpose, a complex gear set with two gears with gear ratio 3.464:1. The pulley belts are made of 0.6 cm diameter latex tubing with both ends connected through a barbed fitting. The latex tubing can be stretched up to 125% to create enough tension to engage the pulleys, while not creating excessive tension that could cause the fitting to pop out. The control unit is designed so that the time can be set remotely and the clock can run forward and backward.
Watch
Step 2: Fabrication - Frame


The watch frame is made of pine boards with a section of 1 x 4. The main structure is a hexagon with reinforcing pads at the corners and forms fasteners that form a round shape. The sides of the hexagon are cut to a size of 0.75 meters at an angle of 60° at both ends. Two 1 x 4 vertical boards are attached to the 4 corners to create mounting points where cables will be attached to place the clock on the ceiling above the stage. The round mounts are made of 1.2 cm thick fibreboard. The cylindrical perimeter wall is made of Chipboard thickness 0.3 cm.
Step 3: Fabrication - Dial and Gears


The dial components, hands, Roman numerals and other details are made of 0.64 cm thick fiberboard and cut with a machine saw! The gears are made using a regular wheel, for which I used a protractor and 0.64 cm thick wood fiber board. The parts prepared for painting took up an entire garage. There are a lot of details! Three gears, Roman numerals, two hands and 12 sparkling details were coated with red Rustoleum primer. The rest of the parts were coated with Rustoleum black primer.
Step 4: Fabrication - Electrical


This project uses the following components:
- Hossen motor 12V DC / 15 rpm
- Potentiometer 100 kOhm - power 1/2 W
- Rocker switch DPDT 15A 125V
- Black plastic housing measuring 8.31 x 5.41 x 3.05 cm
- Round handle Ø 2.4 cm
- Power supply 12V DC / 2A
Thanks to the rocker switch, the engine can change the direction of rotation.
Step 5: Final Stage


Gears, Roman numerals, hands and 12 parts are covered on final stage Rustoleum copper primer. The main dial is painted with green paint with the addition of Brown to give an aged and slightly rusty look to your watch.
Experiment with color and make the clock to your taste. Good luck!
Today we continue a series of master classes on creating original wall clock in the style of steampunk do it yourself.
Hi all! Today we will make a wall clock.
We take it and clean it well. 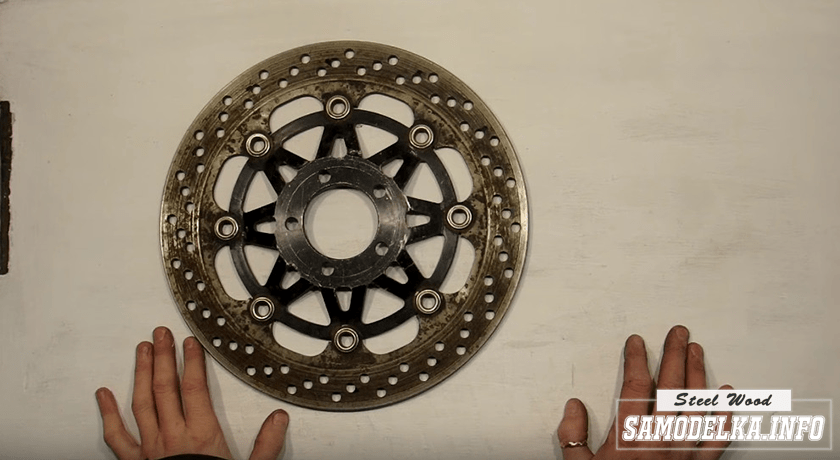 Now we need a conventional clockwork from chinese clock. It just gets into the disk.
  It remains to replace the hands of the clock. We will make them from transparent plastic 1 mm thick, which is used in advertising agencies. The width of the arrows at the base is 4 mm. Having drilled holes, we fasten the arrows to the clock mechanism.
  Now it remains to fix the mechanism inside the disk with hot glue. But first we paint the disk with black paint and go over the top with gilding over the entire disk.
  Next, we will make hour marks. To do this, take a thick copper wire with a diameter of 4 mm, we clean it, rivet it with a hammer.
  And we make 12 p-shaped brackets out of it.
  We fix them on the disk.
 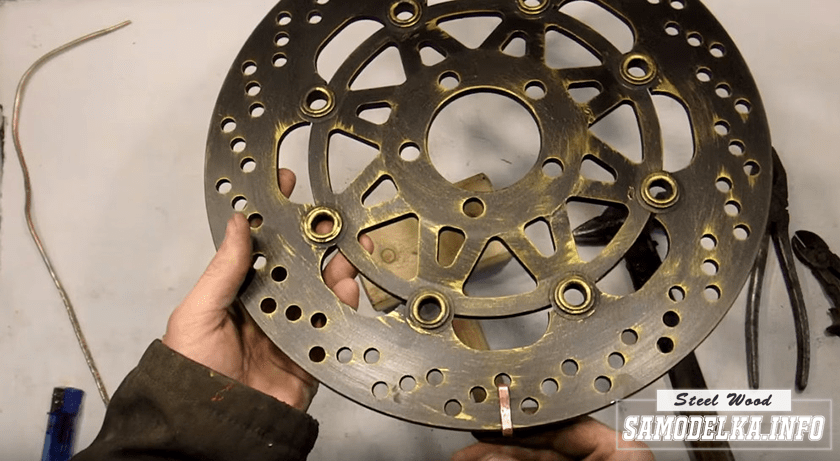 So that the marks do not fade, fill everything with a semi-matt varnish.
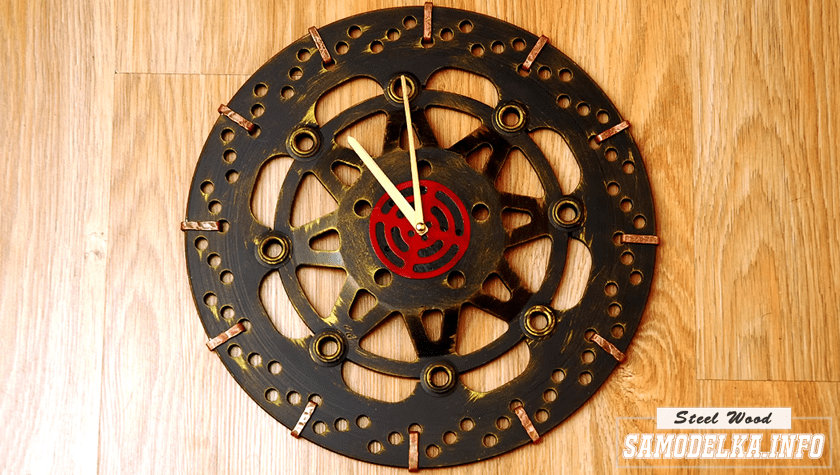
  The arrows are painted with gold paint. Next, use a knife to remove the plastic side from the clock mechanism. We take a part from the former, drill a 4 mm hole in the center, paint the part red and glue it to the clockwork. We put arrows. We got these hours.
 See my video for a detailed watch making process.
Steampunk style is gaining more and more popularity in the world of fashion. Only narrow circles of fans of this mysterious world are happy to share their thoughts about jewelry and accessories in steampunk style. They are discussed in in social networks and upload pictures of exclusive works of masters and amateurs.

What do you know about this trend? Little?
Then we offer to figure it out together and learn a little more about the SteamPunk style. Steampunk Jewelry SteamPunk.

William Gibson is considered the founder of the Steampunk style in world literature. In his work "The Machine of Differences", the author plunged the reader into a world where mechanical progress has stepped far ahead. steam engines and highly advanced mechanical machine technology drives a parallel reality. The world of cyberpunks, gears, levers and clamps is very vividly and in detail displayed in many paintings by artists, animators and directors.

As for the Steampunk SteamPunk jewelry, it is quite rough and aggressive jewelry. The main feature of which is its exclusivity. All jewelry works are handmade by craftsmen.
Incredible quantity small parts, flagella, gears, pebbles, buttons, glass, wire, in a word, everything that comes to hand, create in their totality works of art that fascinate with their rough beauty. Often used materials such as copper, iron, various non-precious metals and stones.


As you might have guessed, Steampunk jewelry is not found in mass production. But still in the Internet space there are enough shops offering the work of masters.
So it is very easy to buy Steampunk Steampunk jewelry today. Designer jewelry will be a great addition to your image.
Steampunk direction is so diverse that everyone can satisfy their request without difficulty.
Masters create their masterpieces for literally all occasions. These are earrings, bracelets, pendants, headbands, rings, brooches, decorated with clockwork.


