One great way to relax is to take a warm bath. Taking it with fragrant effervescent bombs made with your own hands is doubly pleasant. As they say, everything ingenious is simple, you can easily handle the production, plus this is a great gift for a friend or work colleague. And what a holiday for children the process of “launching a bomb” is difficult to even describe.
We are offering to you basic recipe, one of the simple ones. Use your imagination and experiment - change the color and aroma of the bomb, add healthy ingredients.
So, the bath bomb recipe:
- 30 g citric acid;
- 60 g soda;
- 40 g milk powder or starch;
- food coloring;
- 1.5 tbsp. l. oils (to your taste - peach, almond, olive, etc.);
- essential oil (7 drops);
- mold (also at your discretion).
How to quickly and easily make your own bath bombs:
- We put gloves on our hands.
- Let's start preparing the bomb - mix the dry ingredients, first grind the citric acid well in a coffee grinder. Mix oils and food coloring separately, a couple of drops is enough. Now combine the dry and wet ingredients, mix thoroughly so that there are no lumps and the components are evenly distributed. The consistency of the mixture resembles wet sand and sticks together well in your hands. If the mixture is too dry, carefully add water and stir quickly.
- Pack each layer fairly tightly into the bomb mold. You can first put dry herbs or flowers, berries, green tea, coffee beans, chocolate, whatever your heart desires, and then fill it. After a minute, remove the mold and let the bomb dry for several hours, but it is better to leave it to dry overnight.
- Voila, feel free to run a bath and lower the bomb. It will slowly dissolve with a quiet hiss and bubbles. But it will leave behind an incredible aroma in the air and a lot of useful substances in water. Moreover, the bombs make your skin soft and velvety, have a beneficial effect on hair growth, and are also excellent aromatherapy and relaxation at home.

Some tips:
- Ready bombs should be stored in cling film.
- If the bombs suddenly increase in size after being removed from the mold, do not be alarmed. You have added too much water or oil. Wrap the bomb tightly in a bag and place it in the freezer. Then feel free to use it.
- Bath bombs can make great gifts if you make them into beautiful packaging with your own hands.
DIY bath bomb
Now for a few recipes for making bath bombs. There is nothing complicated about this and all this can be done perfectly with your own hands, rather than buying in stores for a lot of money. I tried it myself and made amazing bombs with my favorite essential oils. Taking a bath with a scented “bomb” is a pleasure.
So, let's get started, to prepare 1 bomb we will need:
4 tablespoons of regular soda;
- 2 tablespoons of citric acid;
- 2 tablespoons of any oil (olive, almond, etc.);
- 2 tablespoons of filler (milk powder, cream powder, sea salt, herbs, etc.)
- 5-8 drops of your favorite essential oils;
- molds (you can use children's dishes or 2 identical round-shaped plastic mugs, which will need to be connected to each other to make it like a circle).
Next, mix soda, citric acid, oil, filler well in a convenient container. The mass should be slightly wet sand. Then we compact the resulting mass into molds and leave to dry for 8-10 hours. To ensure that the bombs are easily removed, you can first grease the molds with vegetable or olive oil.
The bomb is ready! As you can see, there is nothing complicated. Throw the bomb into the bath and enjoy :) Store the bombs in a dry place.
Another recipe for making mint bombs, the so-called “mint” bomb.
We will need:
- 4 tbsp. l. soda;
- 2 tbsp. l. citric acid;
- 2 tbsp. l. dry cream or milk powder;
- 2 tbsp. l. bath beads (optional);
- 1 tbsp. l. bath salts;
- 2 tbsp. l. olive oil;
- 20 drops of mint essential oil;
- 1 tbsp. l. mint herbs (sold at the pharmacy).
 Mix baking soda and citric acid in a convenient bowl and rub thoroughly with a spoon. Then add dry cream (milk) and mash well again. Then, add one by one olive oil and mint essential oil and mix everything again. Then add bath salt, dried mint and beads (optional) for the bath. Continuing to stir the resulting mixture with a spoon, spray it with a spray bottle to make it a little damp. There is no need to add a lot of water; the finished mixture should stick together. Now, put the resulting mixture into a greased mold and compact it well. You can try this by simply making different figures with your hands. Place the finished bomb on paper and dry for several hours.
Throw a bomb into the bath and have a lot of fun :)
And in the end, as I promised in the previous article on soap making, I am posting another recipe for making soap with my own hands, the so-called “puff soap”.
To prepare the top layer, grate baby soap or any other soap and melt it in a water bath. Add any dyes and essential oils. Then fill only half of the prepared mold with the resulting mass if the soap is two-layer and one-third of the mold if the soap is three-layer. To keep the soap layers together, smooth out the resulting first layer with a small spoon and let the layer cool. To prepare the second (third) layer, we do everything the same as for the first. After that, let the prepared soap cool and remove it from the mold. That's it, the puff soap is ready.
It's time to try making these bombs yourself.
I wrote earlier about what bath bombs are and why they are needed. Now I suggest making them yourself.
I managed to make the bomb the first time. Despite the fact that on various forums dedicated to making bombs, there are many beginners with unsuccessful experiences. The main thing is not to get upset. If the bomb didn’t work out, fell apart or crawled when drying, there is no need to throw it away. Can be crushed and used as an effervescent bath mixture. Not as original, but just as effective.
Classic composition for 1 bomb:
* 4 tbsp. soda,
* 2 tbsp. l. citric acid,
* 2 tbsp. base oil (olive, sea buckthorn, castor, almond, etc.),
* 2 tbsp. filler (milk powder, sea salt, zest, corn starch, clay, herbs, etc.). Remember, there should be 2 tablespoons of filler, no more, no less. For example, 1 tbsp. milk powder 1 tbsp. sea salt, or 2 tbsp. salt, or 2 tbsp. powdered milk, or in other combinations. If one dry component was reduced, the amount of the second increased by the same amount. It is important.
* 7-8 drops of essential oils,
* molds. I have children's sandbox molds. You can use different lids from creams (great for foot bath bombs) and so on.
Do not mix the mixture into several bombs at once; it hardens quickly.
A few words about base oil. I don’t recommend using sunflower oil, it goes rancid quickly. Linseed oil It will also go bitter quickly, but if the bombs will not be stored for a long time, then you can use it. Sea buckthorn oil turns the bathtub lightly Orange color, but if you wash it right away, then everything comes off without problems. The best is grape seed or olive oil. Almond is also often used. Castor oil is considered heavy, creating a very dense film on the surface. But if you take not 2 tablespoons, but only 1 teaspoon, then the unpleasant oil film becomes quite tolerable.
I even recommend taking 1 teaspoon of base oil instead of 2 tablespoons. This is more pleasant for the bather and also has a skin softening effect. In order to get a mass like wet sand, you can sprinkle the mixture with alcohol or vodka from a spray bottle (no more than 4-5 sprays!). It’s better to spray it once at a time, stir the mixture and add more if necessary. Over time, you will determine your quantity of zilch.
Now about the filler. I absolutely do not recommend using clay. In dry form it has a rather beautiful color, but in water, and even with oil, it turns out to be just gray, greasy water. Brrr! Potato starch is also blacklisted. Corn starch, like powdered milk, also makes the water cloudy, but they are more beneficial, the skin becomes tender and soft. You can use ground oatmeal, sugar, etc. The scope for flight of fancy is simply enormous.
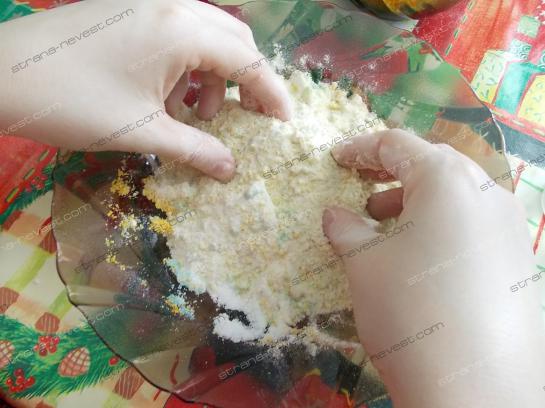
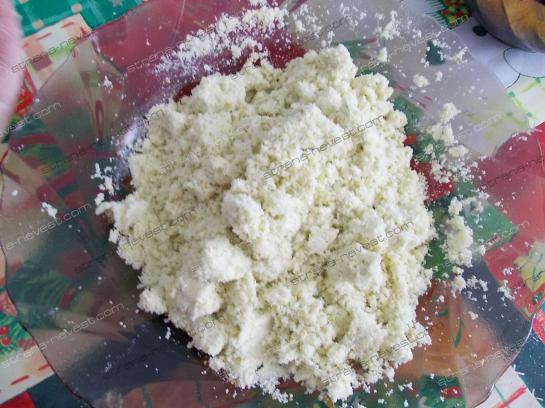
Let's start mixing the components. We take soda, citric acid (it would be better to grind it in a coffee grinder), oil, essential oils and filler - sea salt and tangerine zest. You need to be very careful with lemon juice, because... it irritates the mucous membrane and can cause an allergic reaction, so make sure there are no children or pets around and wear a respiratory bandage.
I sift through a sieve so that there are no lumps.
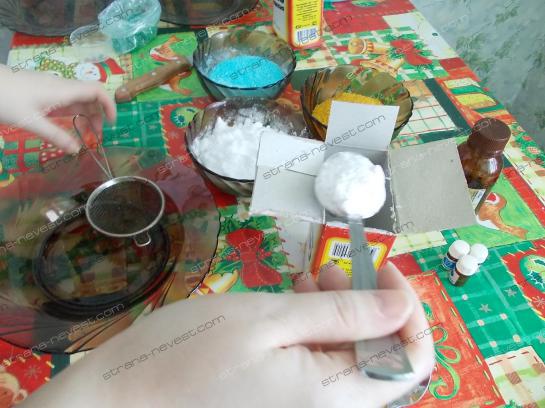
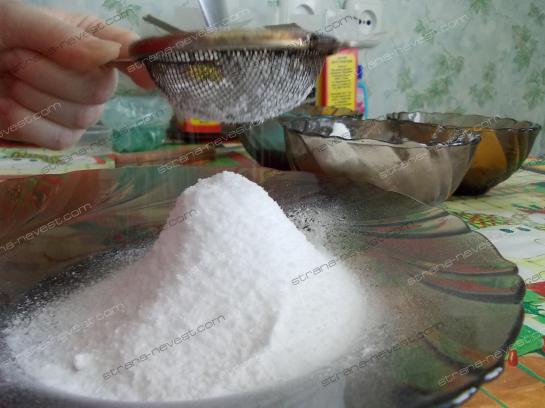
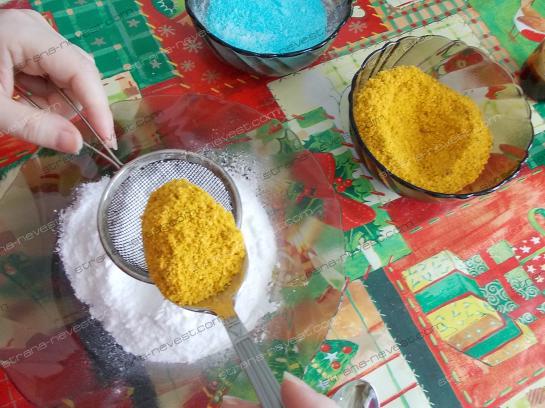
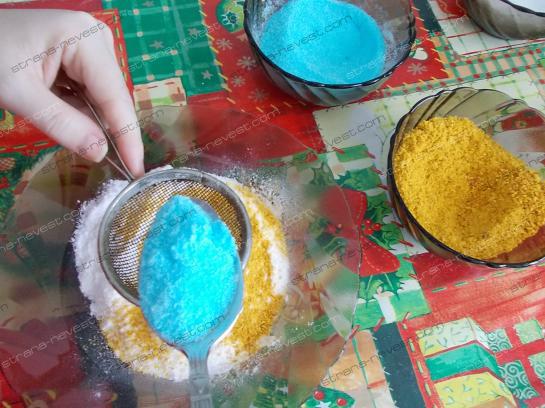
Mix and knead well, like dough.
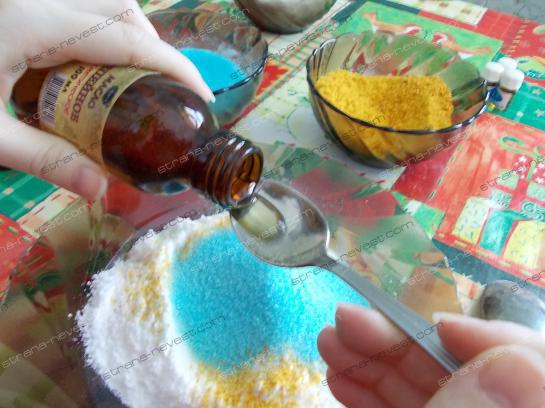
Then I add 2-3 splashes of vodka and mix again. You need to act quickly, because... the mass hardens quickly. The mass should look like wet sand. We determine the readiness of the mixture by squeezing it in our hand. It should form a tight lump that easily disintegrates when pressed with your finger. If it doesn’t work, stir the mixture further and add zilch.
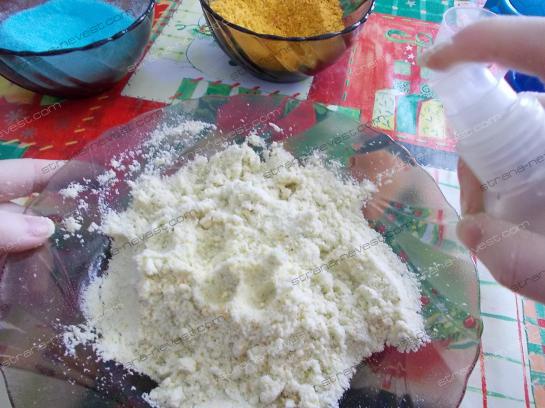
Check to see if the mass is ready.
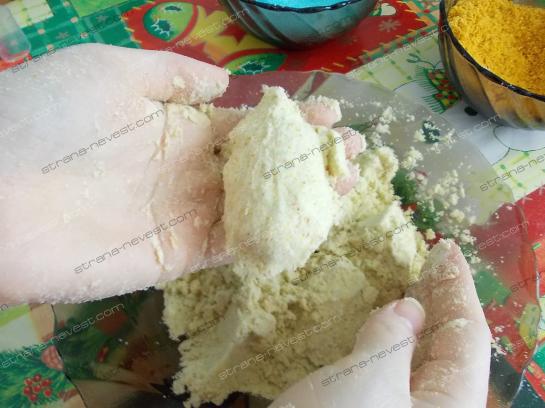
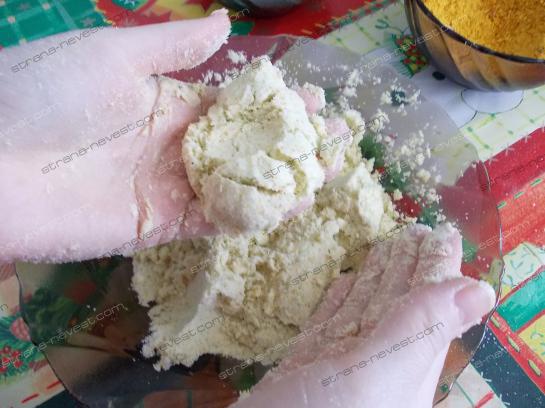
The mass is ready.
Press the mixture tightly into the molds. To decorate, I sprinkled unground sea salt on the bottom of the pan.

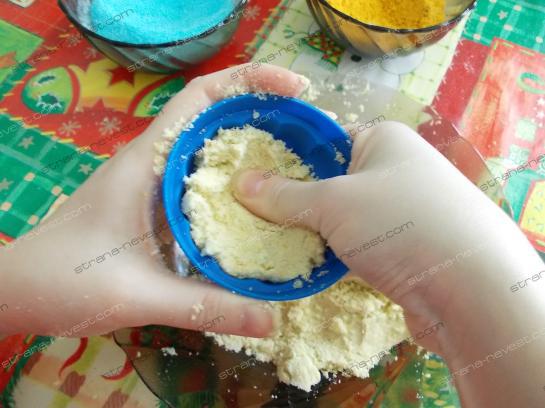
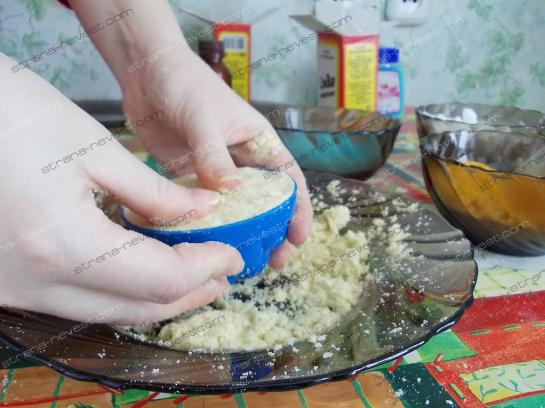
If there is any mixture left, fill out the appropriate form.
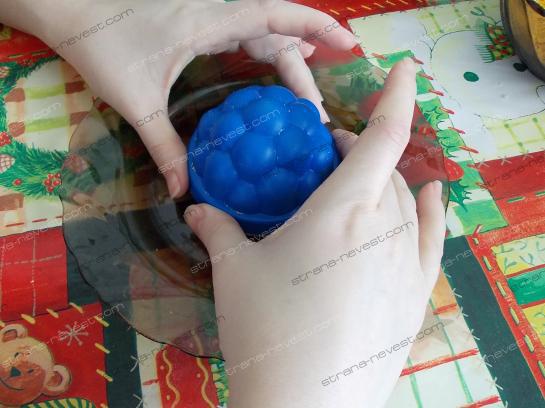
If the bomb is round and consists of 2 parts, then fill 2 halves of the molds with a slide (fill the sides of the mold well). We press the halves tightly against each other. After 2-3 seconds, carefully open the halves (be careful, it may crumble!) and set the bomb to dry. There should not be high humidity in the room in which the bomb is drying, otherwise the bomb will become saturated and float (a reaction will occur).
If, despite all your efforts, the bomb floated, i.e. began to hiss actively, quickly crumble it, add 1 tsp. dry component, knead again and fill the mold tightly. You can put it in for a couple of minutes freezer. Sometimes it helps. But I hope this just doesn't happen.
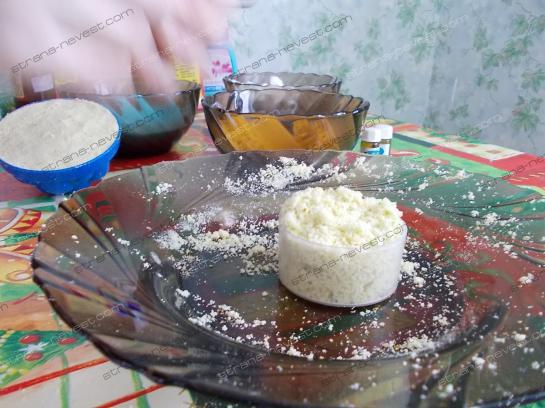
The bomb is ready. You can leave the bomb in the mold for literally one minute. It jumped out of my form on its own.
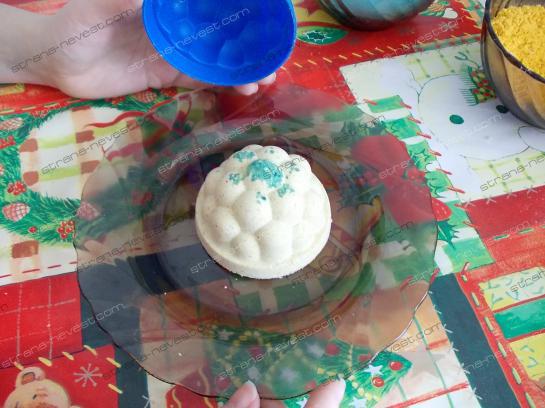
If you add various flowers to it to decorate the bomb, then before use it is recommended to soak them in oil for better adhesion of the components - otherwise it will simply crumble when drying.
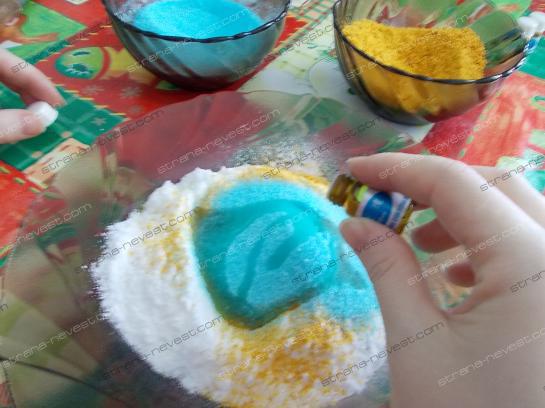
To get multi-colored bombs, the mixture must be divided into two parts. Add dye to one of them - these can be either food or natural ingredients. For example, cinnamon. You need to be very careful and careful with it, because... it irritates the skin and you can simply get burned. The most in a safe way will use colored sea salt.
There is one more component that may be present in the bombs. This is magnesia - Epsom salt - magnesium sulfate. It is added to make the bomb boil longer - from 1 teaspoon to 1 tablespoon. Although I get along just fine without it. But, as they say, there is no limit to perfection.
Using various fillers and oil, you can create bombs that have various properties: relaxing, anti-cold, soothing, tonic, etc.
Try it and you won't be able to stop! It is very exciting!
Roll in warm bath- what could be more pleasant? Maybe a bath with a fragrant bomb. Buying it can be expensive, but making it yourself is quite easy and even interesting. You can make your own bomb exactly according to the recipe or turn on your creativity and create your own unique options: add different aromatic oils and components that are beneficial for the skin: dead sea salts, oils, flower petals and everything like that.
You can find some of the bomb ingredients right in your kitchen, but if you want something more beneficial for your skin, you'll have to go to a health food store or visit a specialized body care section.
You can use your creations yourself or make a great gift for friends and family. Try to make a bomb exactly according to the recipe, and when you understand the technology, experiment with the components.
Step No. 1 Equipment
For a homemade bomb you will need:
- kitchen scales
- large mixing bowl
- cold water sprayer
- latex gloves to protect hands
- eye protection
- gauze dust mask
- sieve to sift the mixture
- molds for bombs (if you don’t find a spherical mold, you can use any options for baking, for ice cubes, etc.)
Step #2 Ingredients
- 300 g soda
- 150 g citric acid
- 5-10 ml essential or aromatic oil to choose from
- 5 ml of simple oil (this can be sunflower, olive, grape, sweet almond, jojoba oil or others, to choose from)
- food coloring in desired color
It's better to make smaller bombs because they stick better, but larger ones are more likely to fall apart.
One more thing: start with a small amount, because first you need to find the best consistency. When making bombs, everything is important, including weather conditions - when humidity is high, you need to add less water, otherwise the bomb will turn into a bubbling mass.
Step No. 3 Mix the ingredients
Sift the baking soda through a sieve into a large mixing bowl to ensure there are no lumps left. Mix baking soda and citric acid in a bowl.
Step #4 Add oil
Add the aromatic and regular oils to the bowl. Most essential oils won't make the mixture fizz, but some, especially citrus oils, will. If this happens, mix them as quickly as possible.

Don't mix fragrance and essential oils together - add one or the other.
Step #5 Separate the mixture
If you decide to make multi-colored balls, now is the time to divide the mixture into different containers to color them differently. In the photo, the mixture was divided into three parts.

Step No. 6 Paint
Now we begin to paint the mixture. If you are using food or cosmetic coloring, add it drop by drop to achieve the desired color. Mix the mixture quickly with your hands to prevent it from foaming.

If you are using powder dye, simply add a little at a time to the mixture and stir until you get the color you want.
Stir until the mixture is uniform and free of blemishes. You need to mix especially carefully if you are using powder dye. It is best to “rub” the mixture between your fingers.

If the mixture becomes wetter, do not leave it or it may settle. On the contrary, you need to do everything as quickly as possible.
Step #7 Add water
Add a little spray water, then stir continuously to avoid fizzing. Be careful not to add too much water - the mixture should still be a little crumbly but hold together if you just squeeze it in your hand.

Step No. 8 Fill out the form
Fill the mold with the mixture. If you are using two halves of a sphere, place the mixture in each half and press them together. Don't twist the halves, just press them tightly together. Wait a few minutes, then carefully remove the sealed mixture from the mold.

Step No. 9 Dry
Leave the finished bombs in a dry and warm place for several hours.

Step No. 10 Use it or give it away
That's it, your fragrant homemade bath bombs are ready. Just drop them in hot water and enjoy.
Remember: the fresher the bomb, the more fizzing it will be, and if you don't package your items, it's best to store them in a dry place. You can wrap them in cling film to keep them fresh longer.
Well, if you decide to give them as a gift, just choose a beautiful package and a ribbon, and the gift is ready.

DIY bath bombs are an unusual gift that you can give to your family and friends for almost any occasion. In addition, they perfectly relax and lift your spirits.
There is nothing complicated in their composition, and the preparation will be fun and interesting. There is a wide variety of complex and simple recipes. This article will cover all the details.

So, to make bath bombs you will need a kit the following materials: rubber surgical gloves to protect the delicate skin of the hands, glasses to protect the eyes from negative factors, a deep enamel bowl, a gauze mask, baking soda, lemon acid or analogues.

As well as a spray bottle and additional components (clay, a set of dried flowers, aroma oils, dyes (preferably food), instant coffee, ground oatmeal and whatever you like - your choice, any molds will do.

All the necessary components are listed, all you have to do is turn on your favorite music and start creating incredibly cool effervescent drinks to improve the quality of your skin and lift your mood!

Basic recipes for scented bath bombs
To start making complex recipes, it is advisable to master the basic ones. The basic scheme for preparing simple bombs:

First you need to put protection on your hands, over your eyes and tie an apron so as not to get dirty.


And finally, the completion of the process is dye (any). If you really want, you can pour dry flowers into the mixture. Now the main thing is to knead everything properly.

Fizzing bath bombs in two ways
Effervescent balls can be made in two ways: wet and dry. Dry method - compact the prepared mixture into a mold and allow time to harden.


Wet - add a couple of sprays of water from a spray bottle to the described scheme.

Whatever method you choose, the mass should crumble and stick together well.


Place the finished mixture in molds and leave to dry for half an hour. Then remove the bombs from the mold and leave to dry for a day. The finished pops can be wrapped in cling film and stored in a cool place, but make sure that they do not get damp.

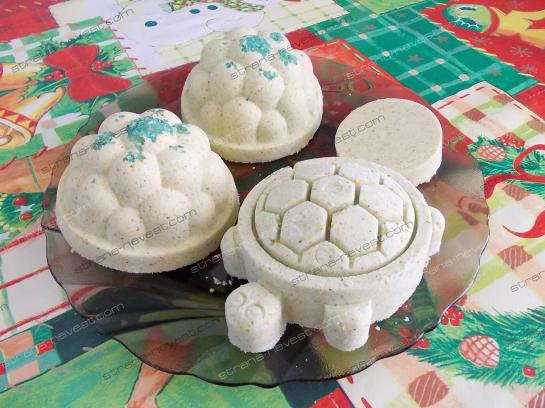
The shapes of the pops can be made in any way: heart, star, leaf, barrel, flower. All this depends on what molds are available.

Bombs for different skin types
Do you know that you can make effervescent drinks at home that are suitable for a certain skin type?

It turns out that there are many miracle recipes and here are the proven ones:

1) For oily skin: 4 tbsp. spoons baking soda, 2 tbsp citric acid, 1 tbsp sea salt, 1 tbsp. a spoonful of castor oil and a couple of drops of citrus oil.


For color, add food coloring or herbal decoction to the mixture. When the mixture is ready, you can put it in molds and let it dry. Now you can take out the finished pop and take a relaxing bath.

2) For dry skin: dry skin needs hydration, which is why in this recipe, special role will take oils and vitamins.

For the base you will need: 4 tbsp. spoons of baking soda, 2 tablespoons of lemon. Add grape oil, flaxseed oil, Aevit, essential oils - chamomile and geranium to the mixture. Place in molds, wait until it dries and you can use!

These simple recipes will help you relax after a hard day at work, lift your depressed mood, properly moisturize your skin, make it elastic and keep it young for many years.

With such a useful gift you will show sincere care to your loved ones.


Photos of homemade bath bombs