With an active volcano. The craft is made entirely from waste material.
One of the most interesting elements in the world of dinosaurs - a volcano. It’s real, Anya really likes it when we launch it. True, she hides the dinosaurs in caves in advance so that they do not die.
And today I want to tell you how to make a home volcano. By the way, the volcano is interesting not only from the point of view of play, but also from the point of view of child development. When you launch a volcano, you spend a small chemical experiment showing your child how baking soda and vinegar can interact together. You can tell an older child that the bubbles that are released are carbon dioxide.
First, I'll tell you how to make a reusable volcano that can be launched repeatedly. It will take some time to create it. At the end of the article I’ll tell you about one more thing - fast way creating a home volcano.
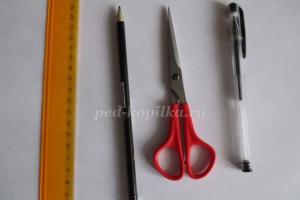
To create a volcano you will need:
- plastic bottle 1.5 l.;
- a plastic lid (for example, from sour cream, mayonnaise, or from a regular plastic disposable round jar);
- masking and regular tape;
- gypsum plaster (or salt dough);
- acrylic paint (or a mixture of gouache and PVA);
- base for the volcano (we use a plastic cookie base);
- paper or old newspapers;
- foil.
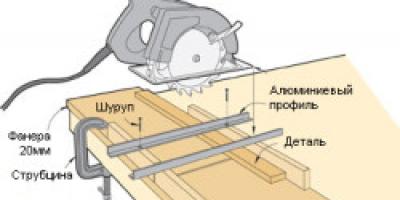
1. Cut plastic bottle desired height, set it to plastic cover and secure with tape.
You will have a solid base for the volcano.
2. Attach the future volcano to the plastic backing using tape. You can also use a piece of plywood as a base.
3. Shape the bottle into a cone.
To do this, we tore off small pieces of paper, crumpled them and laid them around the volcano and secured them with masking tape, gradually moving up. To prevent the paper from getting wet from the plaster, cover it with foil (we also secure the foil with masking tape).
4. Thin the gypsum plaster to the consistency of very thick homemade sour cream and cover the volcano with it. Try to give relief to the volcano: make something like grooves through which lava flowed and ledges.

Instead of gypsum plaster can be used - just cover the base of the volcano with it, giving the desired relief.
As an option, you can cover the volcano with paper soaked in glue using the papier-mâché technique.
5. Wait for the volcano to dry and paint it. Use different shades brown paint. Use red paint to paint traces of lava.

The volcano is ready!
For a volcanic eruption you will need:
- a teaspoon of soda;
- a drop of dishwashing detergent;
- red paint or red food coloring;
Let's get to the fun part! Inside the crater of the volcano, place a teaspoon of soda, add red food coloring or red gouache (we used gouache), add a drop of dishwashing detergent. You can pour a little water, but we did without it.
Carefully pour table vinegar into the crater of the volcano and the eruption begins!

Dishwashing liquid does chemical reaction more active - a lot of beautiful red foam (lava) is obtained.
And as promised, a simpler option for creating a volcano.
How to make a volcano from paper and plasticine
Roll a sheet of cardboard into a cone shape and cut off the top. This will be the shape for your home volcano. Cover it with plasticine on top so that the cardboard looks like a mountain. It is better to place the volcano on a plate or baking sheet so that nothing gets dirty during the eruption.
Place a jar inside the cone (for example, from under baby food or soap bubbles). First put the lava mixture (soda, paint, food coloring) into the jar.
That's it, the volcano is ready. This volcano is very quick to make; it is convenient when you want to show your child a real volcanic eruption right now.
We took the second option for creating a volcano from the book "".
Now you know how to make a volcano. You can conduct experiments!
For several weeks in a row we have been buying up all the soda and vinegar in all the nearby stores. And all because we decided to do all the experiments in which soda and acid were present. Svyatoslav has reached the age when he feels like a real experimenter. Conducting experiments is now his favorite pastime and exciting leisure time. And the younger one is already in a hurry to pull up a chair to the table and sit closer, accompanying everyone with funny exclamations.
It must be said that experiments are not only an interesting spectacle, but also a reason to reflect on what is happening (for an older child) and put forward hypotheses about why this happens. And sometimes repeat the experiment, changing the components. Sometimes the desired result does not occur, for example, due to a low acid concentration or excess air where it should not be. And then this is also a result, a reason for reflection, repeating the experience, and correcting inaccuracies.
For reference: The interaction of soda with vinegar is called a neutralization reaction. Its essence is that acid, when interacting with alkali (soda), neutralize each other, releasing carbon dioxide.
The main ingredients of all the experiments below are soda and acid. In some cases, I use citric acid at a concentration of 1-2 teaspoons per glass of water. And sometimes - 9% table vinegar.
So let's begin our journey through soda experiments.
1. Volcanic eruption.
This is one of my favorite childhood experiences! Everyone probably knows him, but for the sake of a complete collection I can’t help but include him here. After repeatedly repeating the violent reaction of soda with acid, the child, sooner or later, will have a question, why does this happen in nature? Tell him that the Earth is made up of a core, mantle and crust, and sometimes holes form in the Earth's crust called volcanoes. Through the mouth of a volcano, hot molten lava, as well as ash and gas, burst out from the depths of the earth. Also find on the map still active volcanoes or tell us about the most powerful eruptions that destroyed cities in ancient times.
For the experience you will need:
Tray or dish
Soda, vinegar, a little paint or dye, liquid soap.
Plastic bottle
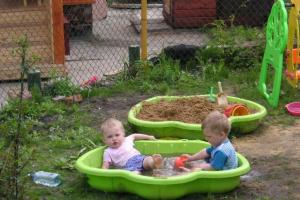
There are many ways to make a volcano. The most common one is to use a plastic bottle as a base, then sculpt a mountain around this bottle. This can be made from salt dough, hardening modeling mass, or plasticine.
Also, in warm weather, you can make a mountain out of sand right in the sandbox by placing a bottle inside.
What we do:
Pour soda and dye into a bottle, add a couple of tablespoons of detergent.
Then carefully add acids.
The volcano begins to spew soap foam.
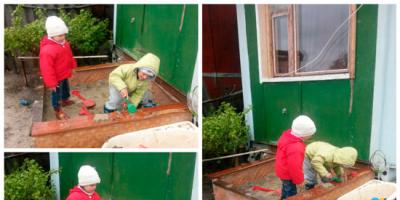
Our last volcano was sculpted from salted dough, tinted with cocao, with a depression made inside. Our volcano dried on the windowsill for about 5 days, after which it has been working in intense mode for a week, spewing lava every day.  And this is a photo from ours, taken a few years ago.
  2 experience. Inflate the balloon
What we do:
Fill approximately 1/3 of the bottle with acid.
Pour baking soda into the balloon through a funnel.
We put it on the neck of the bottle hot air balloon, and gradually pour the soda from the ball into the bottle.
Result:
The balloon begins to inflate due to the release of carbon dioxide. 

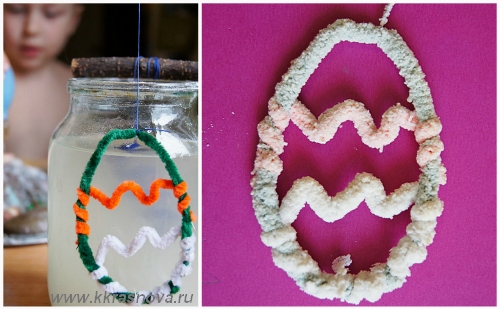
3 Growing crystals from soda
Pour hot water into a glass or jar. Add soda and stir. When the soda stops dissolving, it means there is enough “food”. I added about 15 tablespoons of baking soda just to be sure :)
We hang the objects on which we will grow the crystal on a thread. I used chenille wire, but you can hang any object. We tie the thread to a stick and place it on the jar. We wait about a day.
Why is this happening: As the liquid cooled, the soda stopped dissolving and began to settle on the thread with the figurine. When the water, saturated with soda, began to evaporate little by little, the crystals began to “grow.”
In winter we spent experience in growing crystals from salt And, Such crystals turn out to be even more interesting and “crystalline” than soda ones.

4 Drawing on soda
Using baking soda, dye and acid, you can create patterns. This is one of the unusual drawing methods that is worth trying.
There can be many variations of this drawing. First, you need to pour baking soda into a wide dish and distribute it evenly. And then there are variations.
Dyes: Can be diluted with water and dripped onto baking soda. Or you can use dry dyes and sprinkle them with a pattern, and only then drip in the liquid.
Acid: You can drop acid into the soda, or you can sprinkle crystals on the soda. citric acid and drip water.
And of course, you can use it as a source of liquid various devices: pipettes, syringes, syringes, spray from a spray bottle.
First, we dripped dyes diluted in water with dissolved citric acid onto the soda.  And in another version, they sprinkled soda with citric acid, then applied a pattern with dyes, and sprayed water into the dish with a spray bottle, and this is what happened.
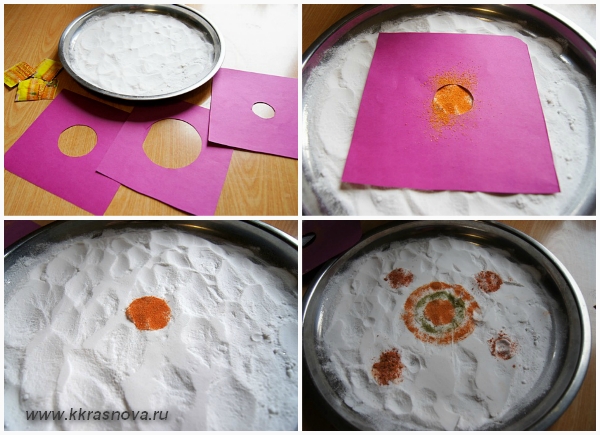
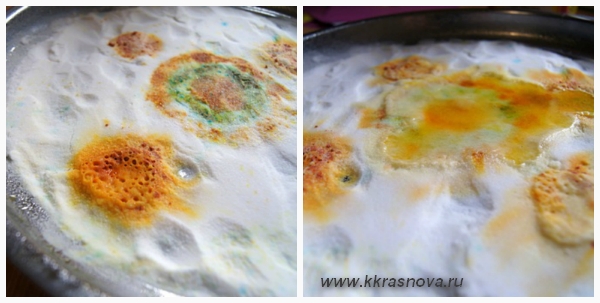
 After everything is mixed, you can take a stick and draw, mixing all the paints. The applied pattern does not spread, but “keeps its shape”
  And little Timofey really likes all our ugliness, and he, naturally, cannot resist touching it all :)
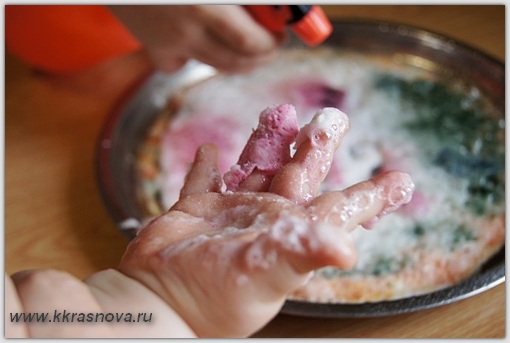
5. Soda bombs.
For this experiment, you need to make soda bombs in advance.
How to do: In a bowl, mix soda and gouache + a few drops of water to knead a thick mass. The mass should be sculpted well by hand. We make lumps from this mass and leave to dry for a day.
And this is what happens:  And you can throw these lumps into acidic water and watch how they begin to hiss and bubble and gradually color the water.
 Another unusual option Using these soda bombs means adding oil to a glass.
I poured citric acid and glitter into the bottom of the glass, added water and vegetable oil.
Then add a soda ball to the glass and watch the sparkles and droplets of oil fly. 
 This experience becomes even more spectacular if you throw an effervescent tablet instead of soda balls, watch this video
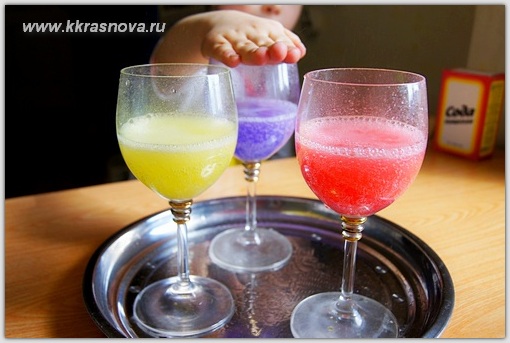
6. Soda ice
Many children love to freeze and melt ice, and by adding soda to the water, this process becomes even more interesting and unusual for the child.
First of all, you need to make a concentrated soda solution and distribute it into molds.
When the ice is ready, place it on a plate.
To melt the ice you will need hot water with dissolved citric acid, approximately 1-2 teaspoons per glass.
We give the child a syringe or douche and watch how the ice melts with splashes and bubbles. 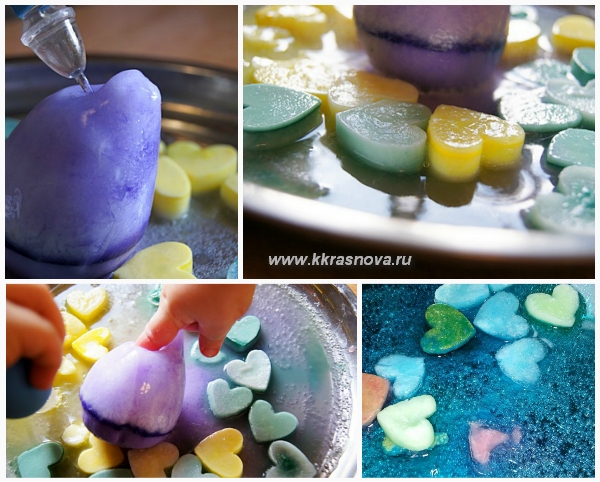 Variations: Add some treasures, for example, beautiful beads, to the ice molds before freezing, then the child will be even more enthusiastic about extracting them from pieces of ice.
7. Dancing rice
Add dark rice to the water (any grain can be used) - the grain settles to the bottom.
Then add a spoonful of soda and stir thoroughly. 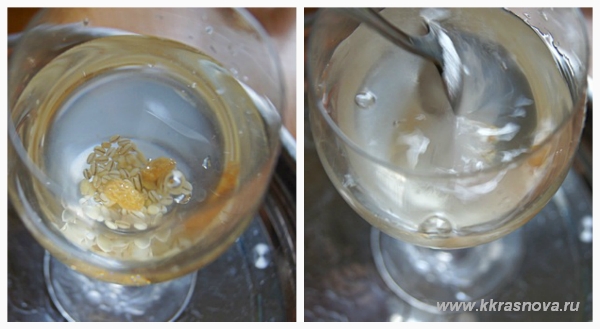 We begin to pour vinegar into the glass.
Each grain of rice is covered with small balls and begins to “dance” in the glass, rising up and then falling down.  After the dance begins to subside, you can add dye to the water and watch how it is distributed throughout the glass.
  8 Soda Explosion
This experience has become one of my favorite street experiences, on par with the volcano.
It's very easy to do:
IN paper towel add 2 tablespoons of baking soda and wrap.  Pour acid tinted with dye into the bag. Before pouring liquid into the bag, you must check the bag for the absence of small holes, otherwise the resulting carbon dioxide will begin to escape from the bag and an explosion will not occur. This is the reason why we didn't have this experience the first time!
When an experience does not work out for some reason, this is a great way to reflect with your child on why this happened, put forward hypotheses and remove obstacles.  The second time everything happened perfectly! The package explodes with a loud BANG and liquid flows out. There is no splash from the explosion, so you don’t have to run far :)
 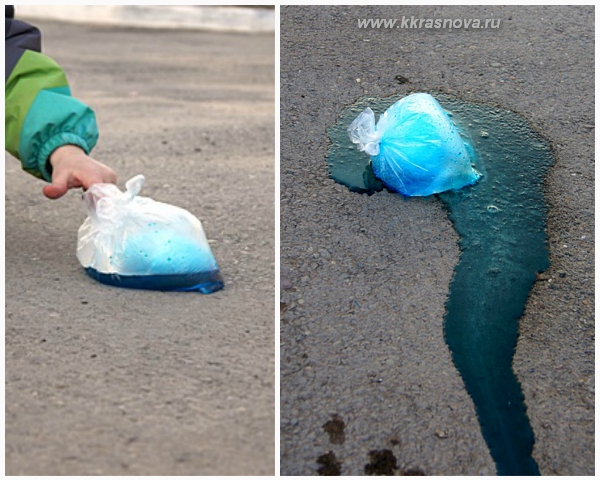 9 Rocket launch
Everyone probably remembers how champagne shoots into the ceiling if you shake the bottle. This is about the same thing: using baking soda and vinegar, you can launch a “rocket” in a room.
First, we try on the cork of the bottle; it should not fall inside. At the child’s request, we decorate the cork “to look like a rocket.”
Pour 1/3 of the table vinegar into the bottle.
In a piece toilet paper put a teaspoon of soda and roll it into a roll.  We put the package of soda into the bottle and close it with a stopper. We watch a rocket launch.
10 Make a carbonated drink.
We will need 2 straws for drinks. We make a cut on one of them and connect them so that the tube becomes even longer (of course, if necessary, in case one tube is not enough to connect two vessels)
Use an awl to make a hole in the bottle cap for the tube.
Insert the tube into the lid.  In a glass we prepare a drink that we will carbonate.
Place the free end of the tube into a glass of sweet water.
Pour 3 teaspoons of soda into the bottle, then add vinegar and quickly close the lid with the straw.
Alternatively, you can first pour the acid into the bottle and then throw in the package of soda, as in the previous experiment. Then the reaction will not begin so quickly, just enough time to screw the lid on.  Result: Carbon dioxide rushes into the glass through a tube, filling our water with air bubbles.
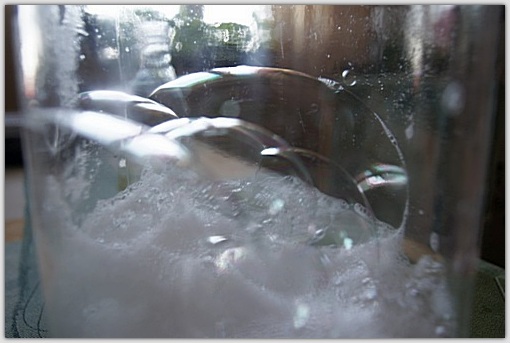
11. "Bubbles in a Jar"- this is one of the strangest experiences. But since such experience exists, we cannot ignore it.
I’ll say right away that we did it several times in different variations to get the promised result. But the result still turned out different.
So, for the experiment we will need a three-liter jar, soda, vinegar and soap bubbles. Pour baking soda into the bottom and add vinegar. The reaction begins with the release of carbon dioxide. Now let's take it bubble and begin to blow them into the jar.
Promised results— soap bubbles hang in the center of the jar due to a “cushion” of carbon dioxide!!! 
12. And finally, let's add a little fire. We watch how carbon dioxide extinguishes the fire. Give your child the opportunity to understand why this happens. 
And be sure to try "snow" from soda. See more about this
AND This is not all soda experiments! In the next article I will talk about experiments with soda that are carried out in Montessori classrooms.
Children are amazing experimenters. Their curiosity knows no bounds. And that is great! Parents should not only support the child’s desire to learn more, but develop this desire, give the little mind as much food for thought as possible, teach the child to think and draw conclusions.
Experiments and experiments carried out together with a child will not only give him bright, unforgettable impressions. It is experiments that teach a child to see the world in a special way, through the eyes of a researcher, to pose questions and find answers to them. And it’s not at all necessary to buy expensive kits to conduct experiments.” Young chemist" You can use what is in every home. For example, ordinary food vinegar and soda.
If the baby has never seen the reaction baking soda and vinegar, be sure to show him this phenomenon, which is familiar to you, but surprising to him. This process is called a neutralization reaction. Its essence is that acid (vinegar) and alkali (soda) neutralize each other, releasing carbon dioxide.
You can tell an older child that carbon dioxide is constantly present in the air. This is what we exhale. Plants convert carbon dioxide into oxygen, which we inhale.
We also find carbon dioxide in carbonated water: it makes the water prickly.
The release of carbon dioxide can be confirmed by the following experiment.
To carry out the experiment you need:
- A small balloon that is easily inflated: it must be inflated and deflated before the experiment;
- Soda – 2 teaspoons;
- Vinegar – 1/4 cup;
- Water – 3 tablespoons;
- Glass bottle;
- Scotch.
Dissolve baking soda in water and pour the mixture into glass bottle. Keep the ball and tape handy. Pour vinegar into the bottle and quickly place a ball on the neck of the bottle. Secure the ball tightly with tape to prevent it from being torn off. You will see carbon dioxide begin to fill the balloon.
Children's experience with vinegar and eggshells
An interesting experiment can be carried out by having vinegar and a raw egg on hand. It will be especially useful for those kids who do not see the value in morning procedures and do not want to do it in the morning.
Take egg and put it in a jar. Pour vinegar over the egg, close the lid and leave for 4-5 days. After the allotted time, carefully remove the egg, wash it and give it to the child. The egg shell became soft - the acid dissolved calcium, which provided hardness eggshells. What does this have to do with the reluctance to brush your teeth? The fact is that in the mouth, where the teeth are not brushed, the same acidic environment is formed as the one in which we placed the egg. And calcium, which gives strength to our teeth, dissolves in it just as well, although not so quickly. Therefore, if you want to have strong teeth, do not forget to brush them daily!
Childhood experience - a volcano made of soda and vinegar:
Using vinegar, soda and dye, you can show your baby a real volcanic eruption. The volcano, of course, needs to be made, but it’s not difficult for mom.
We take pieces of old used plasticine (you can also take new one, if you don’t mind), divide the plasticine into two parts. From one we make the bottom of the volcano: it must be of sufficient thickness. This can be entrusted to the child.
 From the second half we make a hollow cone, the upper hole of which will be the crater of the volcano. We connect both parts tightly so that the internal space is airtight.

 We place our volcano on a tray, tray or large plate.
 Add a tablespoon of baking soda and dye. If there is no dye, you can use red beetroot juice, although the lava will not be as bright.
 Pour a teaspoon of dishwashing liquid into the mouth. The volcano is ready to erupt. Pour 1/4 cup of vinegar into its mouth and the volcano wakes up!

Here we have a simple but interesting volcano made from soda and vinegar.
When Vladik and I started doing chemicals, our favorite substances for experiments were soda and vinegar. We used up a lot of soda,
Today, for convenience, I have collected in one article several simple experiments with soda, with which your little scientist can easily begin to get acquainted with chemistry.
By the way, it wouldn’t hurt to explain to your child how chemical transformations differ from physical ones.
Chemistry studies such transformations when, as a result of the interaction of substances, something new is obtained. For example, a nail remained in water and after some time a new substance formed - rust. A physical experience will be when transformations occur with one substance. For example, they put ice in a glass, then the ice melted - water was formed, and if the water was heated, there would be water vapor. Ice, water and steam are different states of the same substance - water. I think this will be clear.
Let's return to our soda. Chemists call it sodium bicarbonate or sodium bicarbonate, but you decide for yourself what to call this substance when conducting an experiment with a child.
Experience 1
Add a little vinegar to half a glass of water, and then pour half a teaspoon of soda into the glass. The solution immediately bubbles, as if boiling. As a result of the reaction, carbon dioxide is released. Why is this happening? Molecules of soda and vinegar come into contact in a glass and gas is released. Let's modify the experience a little.
How can a child talk about what a volcano is in an accessible and interesting way? You can, of course, arm yourself with books with cross-sectional pictures of a volcano and try to explain in words how magma is thrown out. Or you can make a volcano yourself at home. You will not only satisfy the curiosity of the young researcher, but also awaken interest in various sciences: geography, chemistry and geology.
Making a volcano at home is very easy. Simple products that can be found at home, and simple detergents allow you to create beautiful effects. It is recommended to conduct similar experiments with children six or seven years old: at this age they will be better able to understand the essence of the action taking place. Although such a spectacular spectacle will be interesting for both children and adults.
Purpose of the experiment- to form in children a basic understanding of the natural phenomenon “volcano”, to clearly show the interaction of alkali with acid (neutralization reaction).
Tasks:
- explain how volcanoes work and what danger they pose;
- tell what an acid-base environment is;
- arouse the child's interest in research;
- develop self-learning skills;
- Teach children about the existence of an acid-base environment.
Materials and tools:
- flask or bottle;
- cardboard for making a “mountain”;
- plasticine to give the volcano its shape;
- water;
- soda;
- lemon acid;
- orange or red food coloring or gouache;
- dishwashing liquid;
- container for mixing ingredients and spoon;
- stapler;
- Plastic container;
- small figures (different types of animals, trees, stones).
Progress of the experiment
1. Let's make a volcano.
First you need to find a suitable container. You can use either a flask or a small juice or yogurt bottle. To give the bottle the appearance of a mountain, we make a blank from cardboard. Cut out a circle and make one cut along the radius. Fold the circle into a cone and secure it firmly with a stapler. Cut off the top of the cone.
We insert our container inside the figure - we get the frame of a volcano. Using plasticine, you need to give the volcano a shape: coat the cardboard with plasticine, make a “crater”, masking the neck of the container.

We place the volcano blank in a plastic container (or in a basin). We create an environment using different types animals (dinosaurs, animals), trees, stones. We pour stones at the foot of the volcano, arrange trees, arrange animals.
2. Prepare 2 lava solutions
First solution: fill the container with 2/3 of water, add food coloring (or gouache), a few drops of dishwashing detergent (so that there is a lot of foam) and 5 tablespoons of soda.
Second solution: dilute citric acid (recommended ratio - 5 tablespoons to 1.5 cups of water).
3. Let's start the eruption
Mix the mixture thoroughly in the volcano container. Slowly pour the citric acid solution into the mouth.
Watch the magic happen: a dormant volcano awakens and turns into a fire-breathing mountain!
Experience result
Fiery red foam erupts from the crater of the volcano.
 Volcanic eruption (no dye)
Scientific explanation
The volcano erupts as a result of the interaction of two substances - soda and citric acid. In chemistry, this process is called a neutralization reaction. Acid and alkali (soda) neutralize each other, releasing carbon dioxide. CO₂ foams the mixture poured into the crater and causes the mass to overflow over the edges of the crater. Dish soap makes the lava bubble more. We recommend conducting another experiment with a volcano, but this time with glowing lava.