Anastasia Krasnoperova
Master Class"By manufacturing \"Merry little train\ with photographs of pupils.
Purpose: « Cheerful little train» , can be used by preschool teachers to design a group, as well as in direct educational activities.
Target: DIY manufacturing« Merry little train» with photographs of kindergarten students.
Tasks:
1. Ensuring individual comfort and emotional well-being each child in the group.
2. Develop children's speech activity, enrich vocabulary.
3. Fixing primary colors;
Application: the material is designed for preschool children
materials:
colored paper;
Colored cardboard;
PVA glue;
Step by step description
1. Choose the colors of the cardboard for manufacture of locomotives and wagons.


2. Cut out the details locomotive, glue them on whatman paper and cut them out locomotive.


3. Cut out wheels for trailers, flowers, circles (draw emoticons on circles). We glue the parts of the wheel.


4. Glue the wheels to the trailer.

5. We place photos of children in trailers.
6. We place « Cheerful little train» in the kindergarten group.
Related publications:
Such flower ball looks very festive and pretty. It can be used to decorate rooms for the holidays. Decor elements.
I bring to your attention a small Master Class according to my favorite decoupage. After I showed a few works on my blog.
In my last publication with a decoupage master class, I promised to tell you how to age a product with craquelure. At first, I just wanted to.
As part of theme week dedicated to Space and on the eve of Cosmonautics Day made with the guys middle group interesting creative.
Master class for parents and pupils "New Year's hat" Purpose: to create a festive mood, to develop creative abilities.
First you need to prepare everything necessary elements for application. Outlining with a simple pencil children's palms on colored paper.
Purpose: - to instill artistic and aesthetic taste, the ability to see beauty in the ordinary; Tasks: - to consolidate the ability to use a stapler;
Greetings, dear friends, readers of the Family and Mom blog! Today we have a craft on our website again and this time we will tell / show with the children how to make a cardboard train with our own hands for children with step by step photo instructions(or rather, from junk / improvised material that every mother has at home - juice / milk / kefir boxes).
If your child, like my children, loves everything related to trains / locomotives (the train from Romashkovo, Chuggintons and other cartoons with trains are among my children's favorites), then please him with such a cardboard train made by yourself, Moreover, it takes a minimum of time to produce it.
In such a homemade train, you can carry small toys - Lego men, toys from kinder surprises and others. The train made of cardboard has windows, a door, almost like in a real train. It can be decorated - pasted over with colored paper, painted with paints, felt-tip pens, but we did not decorate, because the children urgently needed to carry passengers and they could not wait any longer))
How to make a cardboard train with your own hands for children (photo instruction)
My kids have been sitting at home since the beginning of February (first because of the flu epidemic, and now due to the fact that in the Lenin group several children got into an infectious disease with an intestinal infection, so while they are sorting it out, my husband and I decided that the children are still stay at home).
While the children are at home, we come up with new games and activities every day, constantly looking for something interesting to have fun with. And just the other day, the kids played with Lego men, small toys (from Kinder surprises and other similar miniature ones), which “traveled” around the apartment)) The little men were tired of moving by car, so the children asked for help to build some new transport) ) We thought we thought and came up with the idea of quickly building a train out of cardboard with our own hands (juice / milk boxes), which will be discussed below.
To make a cardboard train, we need:
- long high cardboard box from juice / milk / kefir (we have a box of liter milk) - 2 pcs. (Depends on how long the engine you want to make - the more boxes, the longer the engine.
- Rope for connecting trains
- Scissors/knife
- Colored paper / felt-tip pens / paints for decorating the train (we left it like that, the kids had no time to wait - they had to carry passengers))
- Human passengers who will test the strength of transport))
How to make a cardboard train with your own hands for children:

That's all, do-it-yourself cardboard train for children is ready, now you can invite passengers to take their seats and go))
The article turned out to be useful How to make a do-it-yourself cardboard train for children (photo-instruction)? Please click the social networks button at the bottom of the page so that I know about it) In order not to lose the article, add the page to your bookmarks so that you can later do such a craft with your child. In order not to miss new interesting, useful articles, subscribe to blog updates at the bottom of this page!
Best regards, Olga
Many probably saw or even bought trains for their children, or maybe even whole railways as toys for their beloved children.
And if you try to make a steam locomotive with your own hands?
Materials for manufacturing locomotive:
Wooden block 50*50 or 100*100 at your discretion. long from 50 cm;
Pieces of wood (use pine, oak) details below;
sanding paper;
Making tools locomotive:
Clamp or vise;
A set of chisels;
Grinder or grinder;
Drills + feather drill + cutters;
Pencil.
Electric drill + desirable milling machine or engraver;
Making a locomotive
The initial stage of the manufacture of a steam locomotive
Prepare wooden block size 50 * 50 mm or other larger size.
Using a compass, mark a semicircle on the end of the bar from 2 sides.
Grind off a bar with a planer until a semicircle is formed. For these purposes, it is convenient to use a clamp or vice, but if you do not have them. you can try to cut it off without them, which of course will be a little more difficult.

Detail grinding
By using grinder or grinding machine grind the semi-circular bar first with a rough sanding paper with 60 grit, then fine sandpaper with 180 grit.

Manufacture of a locomotive hull
Mark the center of your block with a pencil, and use a spade bit to drill a hole in the top for the locomotive pipe.
Anything can be used as a steam locomotive pipe: decorative corks or something else, or you can, of course, carve the part on lathe, that's more interesting.

Making a steam locomotive cabin
Now let's start cutting out the cab on the train.
To do this, use a compass and a pencil.
We measure 1/3 of the entire length of the locomotive. and make a mark with a pencil.


Have you measured?
Now measure 1/3 of the end of the bar, and make 1 more mark.

Draw lines for the cut, and use a hacksaw to cut off the excess part, but do not throw it away, we still need it.
Finishing the surface can be done with a conventional planer.

Making a roof for a steam locomotive cab
Now, from the excess part from the previous step, we make a roof for the locomotive cab.
To do this, clamp the part in a vice and use a drill, router, or engraver to drill 2 through holes as it shown on the picture.
To do this, first mark up, the edge of each hole should be in the center of the bar.

Drilled?
Now turn the part over and again drill a few holes, as shown in the photo.

It is necessary to cut off the cut out part to give the part a rainbow shape.
Using a semicircular chisel, give the roof the correct shape.

Let's go back to the main body of the locomotive
Clamp the cut part in a vise or use clamps to secure it to the work surface.
Take a drill with a feather bit, and drill a hole 1-2 cm deep.

We continue to work on the locomotive
With a planer, cut a little around the edge of the semicircle to give the locomotive a more finished look, and use glue to glue the chimney pipe machined earlier on a lathe or something else.
We also glue the headlight, the headlight can be made from any rounded wooden object, for example, from old wooden candlesticks etc. On the edge can be machined on a lathe.

Assembling the cabin of the locomotive
We made a figurine for the roof of a train with you earlier. now you will need 2 more small peg bars. Prepare from them 2 suitable bars for the cabin walls.
Now we start gluing the parts.
Glue first side walls, then glue the roof. For glue, use either liquid nails suitable for wood, or use an electric glue gun.


Manufacture of containers for bogies and wagons for a steam locomotive
For the manufacture of cart containers, it is better to use oak bars.
Prepare such bars and drill 4 through holes in them for the axis of the pins, shown in the photo below, 2 on one side and 2 on the other.

We use wood to make wheels. hardwood, the wheels must be turned on a lathe. Although you can use parts, for example, from an old wooden or plastic massager.
If the wheels of the locomotive are fixed, then you can simply glue them with wooden pins, but if you plan to make the wheels movable, you need to choose a suitable metal pin, for example, you can make it from a nail and a key.

Glue the container of the cart to the body of the locomotive, and to the bar machined for the car.
Speaking of the wagon. earlier in the photo, it was shown the hitch for the wagon, which was in the cab, and in order to further connect the wagon to the steam locomotive, it is necessary to calculate and drill a hole in the wagon platform.

The final assembly of the steam locomotive with the wagon
Now that all the details of the locomotive are made, you can assemble it into a single whole.

And start painting.

A homemade train for your child is ready, you can carry it as a gift, there should be a lot of joy and emotions.
Kirill Chernov, Samara
Tatyana Gurova
Knocking, knocking wheels
Our the train rushes into the distance,
And the smoke from the locomotive
White veil.
He closed half the sky from us,
And the steam locomotive "Tu-tu, -
Buzzing, - "I'm up to dinner
I'll bring the kids.
I'll come to the station
Without delay, on time
Then I'll go to the depot
And I'll sleep there for an hour"
I. Shevchuk
We take a leaf paper A4 size and fold in half

Then, unfold the sheet and bend both sides to the middle

Form a rectangle and cut out of the strip window paper, paste

Then cut out the circles and also paste.

That's it, one trailer is ready. Other trailers are made according to this principle.

When we did train, the guys themselves cut out the windows from the strip paper, and the wheels are made of squares.

Related publications:
The path runs through the meadow, dives to the left, to the right. Wherever you look, flowers are around, Yes, knee-deep grass. Green meadow, like a wonderful garden, Pahuch and.
Making a flannelgraph. Master Class. Lushnikova M.V. - educator. I have long wanted to have a flannelgraph in my group, but get plywood.
Late autumn has come. The ground was covered with an autumn carpet. This inspired me to create an autumn gramophone and write a poem Poem.
PURPOSE: development of creative musical abilities in children. OBJECTIVES: - to give an initial idea of opportunities noise.
For work you will need: scissors, colored crepe paper, glue brush, glue, black cardboard, template cardboard, plank, stick for.
The little train is a frequent character in children's fairy tales and cartoons, a favorite hero of many kids. That is why mothers who are engaged in needlework often make crafts in the form of a colorful train. This product can be made from various materials, almost from all that surround us. For example, from felt, from photographs, and even from boxes that were lying around on your balcony. Such crafts can be done with children, it will have a wonderful effect on their mood and hand motility. Thanks to this master class, you will learn how to make a locomotive with your own hands.
The diaper option
Young mothers will definitely appreciate such a gift, because diapers will always come in handy when there is a one-year-old child in the house.
Necessary materials:
- diapers (20 pieces);
- elastic cord;
- rubber bands for money (22 pcs.);
- corrugated paper;
- skewer;
- satin ribbons;
- stapler;
- glue;
- pins.
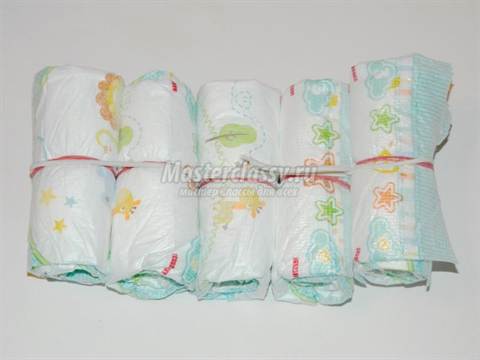
First, roll the diapers into a tube.
To prevent them from untwisting, fix in the middle with an elastic band for money.

Make sixteen tubes.


Tie two tubes together, then attach the following to them, wrap each in a circle.
On a note! If you just tie them with an elastic band, they will curl up and will not lie evenly and neatly.
Then press the diapers on top with a cardboard so that the last diaper does not rise up.

We tie with a ribbon. You can use any tape, as it will not be visible.

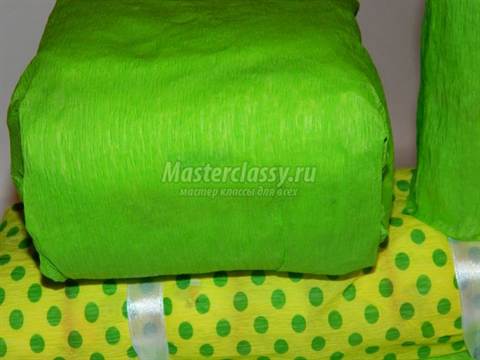
We proceed to the frame of the steam locomotive. Tie two pairs of tubes together with rubber bands and lay on crepe paper.

Pack the diapers in paper, glue the joints or staple them together. Then cut the cardboard so that it does not stick out from under the frame. Secure it with ribbons, before trying on the wheels.


Make a pipe for our train. Wrap one diaper with crepe paper, glue on top and at the joints. Insert a tube from a sheet inside the diaper office paper. It can be replaced with a skewer.

Using a narrow knife, make a hole in the paper between the two diapers and insert the tube.

To make a train cabin, fold four diapers in half and stack them on top of each other.

Wrap in paper.
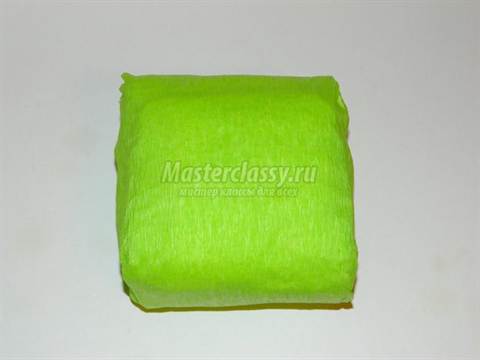
Put the cabin on the locomotive, secure with pins or glue.
For the wagon, make two pairs of knitted diapers. If desired, you can make trailers from cardboard.

Wrap with paper.

Make another trailer, but smaller. Fasten all the details with a satin ribbon. The diaper train is ready!

Thomas the Tank Engine
"Thomas the Tank Engine" is a popular modern cartoon that many children adore. Thomas is made from many materials: from mastic, from sweets, and also from paper. We will consider the latter option.


