A charming ant with a shaggy abdomen and legs. Summer is the brightest and most expressive time, and every child with great pleasure tries to reflect the impressions received at this time of year in their creative works.
Therefore, children with great pleasure make various summer crafts with my own hands, trying to preserve in them at least a small piece of lived sunny days and warm emotions.
As a basis for creativity, you can take the most different materials. In the summer, during picnics and trips to the bosom of nature, they become especially relevant. If desired, they can be turned into interesting, unexpected images.
One example of such work is the “Ant” craft. A child of any age, including younger ones, can make it with his own hands.
What you will need:
- two disposable red spoons (you can paint regular white spoons red with nail polish or plastic paint);
- black chenille wire;
- eyes for toys;
- polymer glue.

Let's get started.
We stack the spoons together with holders, with the wide part of each spoon facing the bend in one direction.

We fix the handles of the spoons together with black chenille, wrapping them.

For greater strength, you can pre-fasten the handles with polymer glue - then they will not slide relative to each other. We use several pieces of wire - at least three. You can use regular wire, or combine it with knitting yarn.
Glue toy eyes to the wide part of one of the spoons.

August 25th, 2011 , 08:35 pm
As promised, I’m telling you about the successful relocation of my ant family to a new anthill :)
The relocation began the day after I summed up the results in the last post. Since then, the ants have doubled their numbers and now number about a hundred Amazons :)
1. Soldier:)
Did you know that all the ants in the anthill are girls? Even the stern, warrior-looking soldiers are, in fact, soldiers. Ants need boys only at the time of reproduction and only once! (What if this time is unsuccessful?) During the breeding season, winged princes and princesses leave the anthill in search of a partner. After mating, princesses cast off their wings, and princes... skates: (And after this one time, the female lays eggs for about twenty years!!! By the way, no other insect on Earth lives as long as the queen ant. True, worker ants live from one up to five years.
The fertilized uterus, which has cast off its wings, begins to look for a suitable secluded place. If you find, pick up and put it in a test tube with wet cotton wool, you will become a myrmikiper;)
2. Soldier's love;) 
So, we felt a little cramped in the test tube. Camponotus fellah ants are quite large. The workers are about a centimeter in length, and the mother and soldiers are twice as large. More than forty workers with offspring could hardly fit in a test tube, and I decided to build a formicarium (an artificial anthill). The principle is simple - pour and drink, you need to cast a block from plaster or alabaster with ready-made passages and rooms that will have access to the arena, ventilation and the ability to moisten the structure. There is a sea of information on the Internet! And, with all this, the first time is always an action.
As always, before doing something new, I started by gathering materials. I bought a box of Ferrero chocolates, a box of beads, a hose, plasticine and a pack of plaster. I started by eating candy - it really helps my brain activity :)
3. The candy box will become the arena. The top is cut off so that the arena is well ventilated. The edges will be coated with lip gloss so that the ants cannot get out of it. 
4. I cut off the partitions in the bead box, cut out holes for ventilation, humidification and entry. I made a sketch of the interior. 
5. Based on the sketch placed under the glass, I sculpted it on the glass interior spaces so that they make the most of the depth of the box, but do not reach the back wall. One chamber stands separately - this is the humidification chamber. A tube for cocktails is inserted into it from above (the two chambers above it are shaped appropriately for the passage of the tube). 
6. Assembled model without plaster. 
7. To simplify the process of removing the casting from the box and to prevent plaster from leaking through the holes already made, I lined the bottom of the box with cling film. 
I suggested pouring the plaster into the box and covering it with glass with a plasticine mold, squeezing out the excess plaster. In fact, this is not the most good idea. At least it didn't work out for me. True, I have almost zero experience working with plaster. The first and last time I cast a plaster mold was when I worked as a polisher in a dental clinic almost twenty years ago. I then cut out a skull from wax, about five centimeters in size, and immortalized it in dental plastic. I lost it while moving, it's a shame :(
So, the first batch began to harden before I inserted the mold. This was a complete surprise for me and, in an attempt to complete the job, I crushed the glass:(...but still, we are not used to retreating... (c) Using a piece of plastic cut from a box of chocolates and the remains of plaster as glass , roughly imagining the time frame allotted to me, I still made the casting. The plaster was a little short. So that the front part turned out normally, I turned the mold over onto glass. back wall The plaster sagged and holes formed in a couple of places, but the front side was cast perfectly.
8. Cleaned the plasticine. 
I dug up some alabaster in the bins: covered up the holes and built up the sagging areas. When the casting had frozen, but had not yet dried: I used a knife to smooth out the unevenness and burrs, and cut passages to the ventilation.
9. Soaked the casting in water with detergent for dishes to wash out the fat absorbed from the plasticine from the plaster. 
I rinsed the casting thoroughly and left it to dry for several days.
10. I got a new piece of glass, assembled it with formica and glued it with silicone. 
11. To cover the ventilation, my daughter suggested a nylon mesh. The mesh turned out to be very thin, durable and, thanks to its special weaving, had non-sliding cells. Tanya glued the nets with hot glue. 
12. Pre-assembly 
13. Entering the arena 
Well, you can connect.
14. I cut a hole in the old arena and connected a new formica, after moistening it. 
I read a lot about how ants are not very willing to move into new house. To encourage relocation, many keepers are darkening the new Formica. I decided to give my ants a little time and leave everything as is. They didn't make me wait long :)
15. The scout examined the new home for a long time and carefully, constantly stopping, moving his antennae and cleaning them. 
16. - Are your nets strong? And then we have a cat :))) 
Quite quickly there were two scouts, then four. Then about six workers wandered aimlessly around the Formica for about an hour, scanning the space with their antennae and imitating daily life: they cleaned each other, tried to chew on the mesh and walls... Ultimately, a military expert soldier was invited for inspection and then it began!
They dragged the eggs, the larvae and cocoons were left in a test tube. They move them from place to place, look for eggs and drag them into formica. About 15 workers and one soldier are sitting with a queen in a test tube.
17. - Attention to those moving: proceed with your belongings to the blue corridor 
18. They dragged... uh... robot nannies :))) The workers dragged the crooked workers, I thought that they were dragging the newly hatched ones, but as soon as the crooked ones were released, they jumped to their feet and began to run. I think that they dragged nannies who never left the test tube. 
19. I didn’t see where their activation button is. Most often, after being released, the transported person stood up and began to run 
20.
21. But it happened that they forgot to press the activation button and the ant lay in the same position for half an hour 
There are three people in the arena: one soldier and two workers. The rest are all in formica. In one place they are trying to chew on the wall. It turned out that they were gnawing on the wall to get building materials for installing ventilation.
I missed how my mother was transferred. After she left, only larvae, cocoons, one soldier and a group of workers remained in the test tube.
22. The soldier met and fed each incoming porter. 
23. Drag cocoons 
24. The most difficult thing is to drag a larva larger than an ant 
The last larva was taken away. Three workers are sitting in a test tube, finishing something, and a half-soldier is sitting at the entrance. There is a soldier and one worker in the arena, the rest are all in uniform :)
I sealed up the two bottom ventilation holes. The ants collected fresh alabaster and reduced the remaining two ventilation holes by four times. All the pupae and larvae were taken out into the tube, only the eggs were left inside. They themselves also sit inside. The passages between the chambers are quite large. I hope that two holes will be enough for them. At least they stopped digging :)
25. They gnawed fresh alabaster... 
26. ...and sealed the upper holes 
27. I thought that all construction participants would remain with their mouths sealed:( 
28. But, no - with the help of their comrades, almost everyone got rid of the “fillings” in the very first hours after finishing the work 
All pupae were returned to Formica. There's no one in the arena... at all. One sits in a test tube. Sometimes a group of 3-4 workers visits him. They clean themselves there, “kiss” and leave, leaving one.
29. I removed the test tube, changed the arena and placed a large drinking bowl. Ant farm ready :) 
It is much better to observe and photograph ants through smooth glass. Finally was able to photograph the process of unpacking the newborn
30.
31.
32.
33.
34.
35.
And also the packaging...
36. I noticed that the worker was fiddling with the soldier’s larva, and it was moving somehow strangely... inside a thin cocoon! 
37.
38.
39. Ants build DNA models from eggs in the air. Probably ventilate 
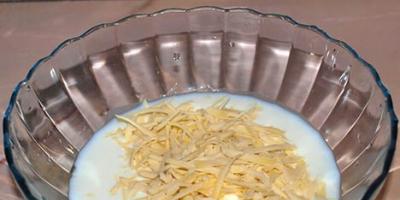
40. Open water For some reason, ants don’t really know how to drink. Maybe it's just mine? I had to put cotton wool in their drinking bowl. So they drink and don’t drown :) 
41. For honey syrup I set them plastic cover from bottled water. He poured boiling water over it, pressed a hole with his finger and dipped it in cold water. It turned out to be a tall saucer. 
42. It turns out that the larvae have such red fluff :) 
43. I am very pleased that my ants began to eat cat food. I think this is a very healthy food :) 
44. About social justice: A soldier washes away a worker;) 
45. - See you again :) 
If you've ever looked at an anthill and wondered what goes on inside, creating your own ant farm will satisfy your curiosity and provide an incomparable experience in studying the life of ants. By releasing ants into your farm, you will witness how tunnels and paths are built, and how important these little creatures begin to scurry back and forth, as if they are performing some kind of task. Read step 1 and you will learn how to build an ant farm using simple materials.
Steps
Part 1
Preparing materials and searching for ants- Airtight containers of different sizes are perfect for the project. This way you will have more options when choosing farm size.
- The jars must be free of cracks, patterns, etc. A simple, clean jar is best for observing ants.
- If you want a flat ant farm, go to your local pet store and buy a narrow aquarium. You can also order an aquarium for your farm online.
-
Prepare a mixture of soil and sand. Ants need to live in a moist environment that will allow them to dig and dig tunnels. If you want to collect ants in your yard or nearby area, it is best to use the same soil so that they live in their usual habitat. Dig up enough soil to fill the space in the jar. Use a fork or your own fingers to loosen the soil. Now mix 2 parts earth with 1 part sand. If the soil is initially sandy, less sand should be added.
- If you want to find ants far from home, the ground is no longer suitable. You can buy sand and fertilized soil from the gardening department and mix them together.
- If you order special ants from a farm, they must come with the correct habitat mixture.
- Your mixture should be moistened, but not soaking wet. If it is too dry, the ants will dry out, and if it is too wet, they will drown.
-
Find an anthill. There are many types of ants, but mostly they all live in the ground. Look for an anthill in your yard. You will recognize it as a volcano-shaped bump with a tiny hole at the top.
- You can also follow the ants to find the anthill. If you see a bunch of ants, follow them.
- Explore the anthill and make sure you are not dealing with biting ants. If you don't want to take risks, order ants online.
-
Collect the ants. Once you have found the ant colony, bring a jar with holes punched in the top (not the jar you need for the farm) and a large spoon, place the ants in the jar. 20-25 ants is a sufficient number to start with. Here's what to remember:
- The ants may not breed until you place a queen ant on the farm. She is the one who lays all the eggs. A cluster of worker ants on the surface is most likely sterile. Therefore, if you want to see the process of laying eggs, you will need a queen. In this case, you will most likely have to destroy the natural colony.
- If you are interested in researching the reproductive cycle, it is better to order ants along with the queen from a specialized farm. This way, you don’t have to dig deep into the anthill to find the right ant.
- If you set up a farm without a queen, the ants will likely die within 3-4 weeks, which is their natural lifespan.
Take two jars with lids. You will need a large jar and a smaller jar that will fit inside. The soil and ants will be located in the space between the large and small jar. The small jar is needed to leave space in the middle. This way, the ant colony will be able to build tunnels and lay eggs at the top edge, and the whole process will be clearly visible. If you skip this step, the ants will follow their natural instinct and burrow deep into the middle of the jar.
Part 2
Construction of a farmPart 3
Farm care-
Feed the ants and moisten the soil. Every few days, throw pieces of fruit, a few drops of honey or jam into the jar - ants love sugar! Do not overdo it. Ants usually get the moisture they need from their food, but if you see the soil becoming dry, soak a piece of cotton wool and place it on top of the jars for a few days.
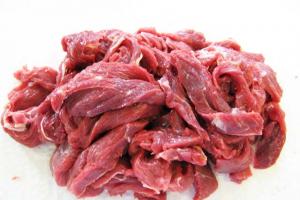
- Do not give ants meat or any other cooked food! Otherwise, your farm will attract other insects.
- Do not pour water into the jar. If it gets too wet, the ants may drown.
-
Close the jar unless you are watching ants. Ants dig tunnels at night, in the dark. To recreate a natural habitat, cover the jar with a black scarf or cardboard. If you forget to do this, the ants will be under constant stress and lose activity. In addition, they tend to be most time in the center of the jar, not near the glass.
Don't shake the jar. Ants are fragile creatures and rough handling can cause them to die from tunnel collapse. Handle your ant farm with care.
Store the truss in a warm room. Place it in a room with a constant temperature. Do not place the can under straight lines Sun rays, the glass of the jar may heat up and the ants will burn.
- Once you get the ants, distract them with sugar and water to reduce the aggression while you search for the queen. Do not overdo it!
- Red ants are usually very aggressive, while black ants are generally more passive.
- For greater effect, you can also plant grass seeds on top. Water the grass carefully to avoid drowning the ants.
- Don't knock over the jar in the house!
- A cardboard toilet paper tube makes an excellent pipe.
- If you are going away for a long time, it would be a good idea if you leave someone to look after the ants so that they do not die from desiccation or starvation.
- Don't touch the queen, otherwise the rest of the ants will bite you.
- Ants require the same care as cats or dogs. Pay attention to them!
Warnings
- You can feed the ant dead insects if you are sure they are not poisonous.
- Never mix two colonies with each other, they may start fighting to the death. Therefore, if you catch ants yourself, make sure that they are from the same anthill.
- Do not cover the farm; the ants may suffocate. If you must cover them, use toilet paper, wrap it with an elastic band around the neck of the jar and make holes using a pin or earring.
- Beware of bites. If you have the opportunity to use gloves, great! To treat bites, use anti-bite cream. Ask a pharmacist for help.
- All ants bite, some less often than others. If you keep red ants, remember that they bite and can sting severely. Be careful. Use gloves.
- Avoid ant species that are aggressive towards people and whose bites can be painful or dangerous.
Cats, dogs and hamsters are wonderful, but many people have such pets. What to do if you want something unusual, interesting and not too expensive? You can give yourself or your child a wonderful gift - an ant farm. The originality of this gift lies, first of all, in the fact that it is quite easy to make with your own hands.
Preparatory stage
To make an ant farm with your own hands, you need to do a little preparation. To start It’s worth deciding on the container in which we will place a restless family. An excellent ant farm can be obtained from a flat aquarium, but this requires additional costs. Craftsmen can make a container from plexiglass, fastening it with silicone glue. In this case, the design will be exactly the shape that suits you most.
The simplest version of an ant farm will be made from two containers for bulk products different sizes. These can be jars or boxes made of transparent material without drawing or damage, one of which fits freely inside the other. Both jars must have tight lids. You will populate a colony of ants in the space between two banks so that it is convenient to observe her life.
Soil or base for an anthill
The choice of filler for an ant farm depends on where you are going to get its inhabitants:

Be sure to take into account that the mixture of soil and sand should not only be well loosened, but also moistened. However, do not overdo it; if you make the mixture too wet, the ants will simply drown in it.
Do not fill the container to the very top with the mud mixture. Leave a few centimeters of free space. And do not compact the mixture, but simply shake it lightly so that the inhabitants can easily make passages for themselves.
How to collect ants
 The easiest way is to look for ants in your yard. There is nothing complicated about this, especially if you involve a restless child in the process. Small anthills are found very often; to find them, you just need to follow where the small workers so purposefully drag their finds.
To collect with an ant, take gloves, a scoop and a jar with a tight lid. You can make several holes in the lid with a thin needle for air access, but they must be so small that insects cannot crawl out. You can drop honey or jam at the bottom, then the ants will gather around the sweets and will not try to get out. Carefully dig up several inhabitants of the anthill and place them in a jar. Try to find the queen. She is much larger than other ants. 30 - 40 inhabitants are enough for your farm.
To populate a farm you created with your own hands, you need to take into account the following nuances:
- Only working insects can be collected on the surface of the anthill. They are unable to reproduce. To observe how ants lay eggs and care for them, be sure to obtain a queen queen. Alas, to do this you will have to dig the anthill quite deep.
- An ant farm inhabited only by worker ants will last no more than four weeks. This is their natural lifespan.
- In forest anthills you can find more large species insects than at urban sites. They are easier to keep an eye on.
How to care for an ant farm
It’s not enough to make a house for an ant family. To observe how ants live for a long time, you need to properly care for the farm:

Understand how making an ant farm yourself is not at all difficult. If you involve children in this process, then watching the little inhabitants will be even more interesting. The main thing is to act carefully so that the ants live where it is convenient for you, and not where they want.
Did you know that all the ants in the anthill are girls? Even the stern, warrior-looking soldiers are, in fact, soldiers. Ants need boys only at the time of reproduction and only once! (What if this time is unsuccessful?) During the breeding season, winged princes and princesses leave the anthill in search of a partner. After mating, princesses cast off their wings, and princes... skates: (And after this one time, the female lays eggs for about twenty years!!! By the way, no other insect on Earth lives as long as the queen ant. True, worker ants live from one up to five years.
The fertilized uterus, which has cast off its wings, begins to look for a suitable secluded place. If you find, pick up and put it in a test tube with wet cotton wool, you will become a myrmikiper;)
Soldier

So, we felt a little cramped in the test tube. Camponotus fellah ants are quite large. The workers are about a centimeter in length, and the mother and soldiers are twice as large. More than forty workers with offspring could hardly fit in a test tube, and I decided to build a formicarium (an artificial anthill). The principle is simple - pour and drink, you need to cast a block from plaster or alabaster with ready-made passages and rooms that will have access to the arena, ventilation and the ability to moisten the structure. There is a sea of information on the Internet! And, with all this, the first time is always an action.
The candy box will become the arena. The top is cut off so that the arena is well ventilated. The edges will be coated with lip gloss so that the ants cannot get out of it.

I cut off the partitions in the bead box, cut out holes for ventilation, humidification and entry. I made a sketch of the interior.

Based on the sketch placed under the glass, I sculpted the interior spaces on the glass so that they made maximum use of the depth of the box, but did not reach the back wall. One chamber stands separately - this is the humidification chamber. A tube for cocktails is inserted into it from above (the two chambers above it are shaped appropriately for the passage of the tube).

Assembled model without plaster.

To simplify the process of removing the casting from the box and to prevent plaster from leaking out through the holes already made, I lined the bottom of the box with cling film.

I suggested pouring the plaster into the box and covering it with glass with a plasticine mold, squeezing out the excess plaster. This is actually not a good idea. At least it didn't work out for me. True, I have almost zero experience working with plaster. The first and last time I cast a plaster mold was when I worked as a polisher in a dental clinic almost twenty years ago. I then cut out a skull from wax, about five centimeters in size, and immortalized it in dental plastic. I lost it while moving, it's a shame :(

So, the first batch began to harden before I inserted the mold. This was a complete surprise for me and, in an attempt to complete the job, I crushed the glass:(...but still, we are not used to retreating... (c) Using a piece of plastic cut from a box of chocolates and the remains of plaster as glass , roughly understanding the time frame allotted to me, I still made the casting. There wasn’t enough plaster. To make the front part look good, I turned the mold over onto the glass. On the back wall, the plaster sagged, holes formed in a couple of places, but the front side was cast perfectly.
Cleaned out the plasticine.
I dug up some alabaster in the bins: covered up the holes and built up the sagging areas. When the casting had frozen, but had not yet dried: I used a knife to smooth out the unevenness and burrs, and cut passages to the ventilation.
I soaked the casting in water with dishwashing detergent to wash out the fat that had been absorbed from the plasticine from the plaster.

I rinsed the casting thoroughly and left it to dry for several days.
I got a new piece of glass, assembled it with formica and glued it with silicone.

To cover the ventilation, my daughter suggested a nylon mesh. The mesh turned out to be very thin, durable and, thanks to its special weaving, had non-sliding cells. Tanya glued the nets with hot glue.

Pre-assembly

Entering the arena

Well, you can connect.
I cut a hole in the old arena and connected the new Formica, after moistening it.

I read a lot about how ants are not very willing to move to a new home. To encourage relocation, many keepers are darkening the new Formica. I decided to give my ants a little time and leave everything as is. They didn't make me wait long :)
The scout examined the new home for a long time and carefully, constantly stopping, moving his antennae and cleaning them.

Are your nets strong? And then we have a cat :)))

Quite quickly there were two scouts, then four. Then about six workers wandered aimlessly around the Formica for about an hour, scanning the space with their antennae and imitating everyday life: they cleaned each other, tried to gnaw on the mesh and walls... Ultimately, a military expert soldier was invited for inspection and then it began! They dragged eggs and larvae and the cocoons were left in the test tube. They move them from place to place, look for eggs and drag them into formica. About 15 workers and one soldier are sitting with a queen in a test tube.
Attention to those moving: please take your belongings to the blue corridor

They dragged... uh... robot nannies :))) The workers dragged the crooked workers, I thought that they were dragging the newly hatched ones, but as soon as the crooked ones were released, they jumped to their feet and began to run. I think that they dragged nannies who never left the test tube.

I didn't see where they have the activation button. Most often, after being released, the transported person stood up and began to run


But it happened that they forgot to press the activation button and the ant lay in the same position for half an hour

There are three people in the arena: one soldier and two workers. The rest are all in formica. In one place they are trying to chew on the wall. It turned out that they were gnawing on the wall to get building materials for installing ventilation. I missed how my mother was transferred. After she left, only larvae, cocoons, one soldier and a group of workers remained in the test tube.
The soldier greeted and fed each incoming porter.

Dragging cocoons

The most difficult thing is to drag a larva larger than an ant

The last larva was taken away. Three workers are sitting in a test tube, finishing something, and a half-soldier is sitting at the entrance. There is a soldier and one worker in the arena, the rest are all in formica :) I sealed up the two lower ventilation holes. The ants collected fresh alabaster and reduced the remaining two ventilation holes by four times. All the pupae and larvae were taken out into the tube, only the eggs were left inside. They themselves also sit inside. The passages between the chambers are quite large. I hope that two holes will be enough for them. At least they stopped digging :)
They gnawed fresh alabaster...

...and sealed the top holes

I thought that all construction participants would remain with their mouths sealed

But, no - with the help of their comrades, almost everyone got rid of the “fillings” in the very first hours after finishing the work

All pupae were returned to Formica. There's no one in the arena... at all. One sits in a test tube. Sometimes a group of 3-4 workers visits him. They clean themselves there, “kiss” and leave, leaving one.
I removed the test tube, changed the arena and placed a large drinking bowl. The ant farm is ready :)

It is much better to observe and photograph ants through smooth glass. Finally was able to photograph the process of unpacking the newborn