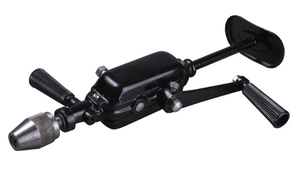
When performing carpentry and plumbing work, an appropriate tool is usually used, designed to perform specific tasks. However, there are situations when it is much more convenient and easier to use special machines. They allow you to optimize the process and save time in the same type of work. Therefore, questions about how to make a drilling machine from a drill very often arise among modern masters.
Necessity or luxury
First of all, it is worth saying that it is very convenient to use such a device when making holes in small horizontal planes. It almost completely eliminates the backlash that necessarily occurs during manual work. Even a small drilling machine from a drill significantly improves the accuracy of the hole made, minimizing the error. Also, such equipment saves a lot of time and effort if frequent use or monotonous work is necessary.
Almost all enterprises that carry out locksmith work are equipped with such units. The fact is that studies conducted in the field of labor protection have shown an increase in productivity and quality improvement when using them. Some of them even purchase a magnetic sole drilling machine in order to optimize production on large planes without the use of expensive equipment.
Why drill?
Currently, there are many designs for creating such equipment at home. However, most experts recommend making a drilling machine from a drill. This is due to the fact that this tool already fully contains all the necessary components and assemblies, and they do not have to be purchased separately. At the same time, the fixation on the structure is carried out so that it is easy to remove the drill for independent work. As a result, we do not lose a tool that can be used independently.

In order to create a drilling machine from a drill with your own hands, you need to purchase the tool itself. It is selected in accordance with the parameters that the finished device will have to have. At the same time, experts advise paying attention to products that have their own small backlash. Otherwise, the expediency of using it for work is called into question. You may also need:
- Guides. As they use systems used in furniture production, or metal strips.
- Bed. Most often, it is made from a metal plate or a wooden box, on which magnets or ballast are attached for weighting.
- Fasteners. When they make a drilling machine from a drill with their own hands, they immediately select couplings or clamps that are suitable for fixing a particular tool.
- wood or metal constructions- depending on what material is to be processed.
- The spring required to implement the reverse stroke.
- If a drilling machine on a magnetic sole is created, then the magnets themselves will be needed.
Tool
In this case, the selection of the tool used depends on the material for creating the frame. However, it is immediately worth noting that a corner for measuring the connection of elements at 90 degrees will be needed in any case. Even a mini-drilling machine requires great precision in its manufacture, since this will subsequently affect the quality of the holes made.

First of all, you need to decide on the designs of the final product and the material for its manufacture. However, there is no need to come up with overly complex technical solutions or expensive components. A typical drawing of a drilling machine from a drill is quite simple. It involves the creation of a strong and stable frame, on which a vertical tripod with a movable carriage is mounted. Considering this, Special attention it is worth paying attention to the implementation of moving the drill in a vertical plane, although the use of ready-made guides greatly simplifies this process. If you use the stand of a microscope, photographic enlarger or press as a frame, then the drawing will be based on their base, and the entire manufacturing process is greatly simplified.

Bed and tripod
Even a mini drill press needs a stable base. It not only must hold the entire structure, but can be equipped with various elements for fixing tools or other devices. Thinking through the device of a drilling machine, it is worth listening to the advice of experts. Many craftsmen recommend creating these devices from wood. Therefore, a wooden frame in the form of a small box is used for the bed. It has seats for mounting vise or other structures. If the product is planned to be used on large surfaces, then the bed is made of a solid plate with a drill hole. So you can implement the principle of drilling through.
Almost any device of a drilling machine involves the installation of a vertical tripod at an angle of 90 degrees to the bed. Therefore, it is very important to use an accurate measuring tool in the work. You also need to securely fix the tripod using additional mounts in the form of corners.
If the work involves drilling holes at a certain angle, then certain fixtures can be made in advance that will be mounted on the bed. Most often, in such cases, ready-made ball vices with an adjustable angle of inclination are used.

Creating a movement mechanism
When a homemade drilling machine is made from a drill, special attention must be paid to this stage. The fact is that the vertical stroke should be soft, without distortions, play or displacements. Given this, professional craftsmen recommend using ready-made guides in their work, which can be taken from other devices. You can also use systems made for pulling out drawers for cabinet furniture. They are quite reliable and can withstand heavy loads.
Installation of guides is carried out directly on a tripod or special strips attached to it. In this work, it is very important to use a measuring tool, since these elements must also be placed at an angle of 90 degrees with respect to the frame and parallel to each other. Even small distortions or displacements should not be allowed.
The second part of the guides is fixed on a special carriage, where the drill itself will be installed. It is made of wood and adjusted to the dimensions of the original instrument. Also, a small handle is attached to the carriage, with which the operator will control the movement process.
To implement the return movement and facilitate the control of the carriage stroke, a spring is installed on the machine. One of its ends is fixed at the top of the tripod, and the other is mounted on a movable mechanism. At the same time, the level of its tension is immediately checked, which, if necessary, can be changed by cutting the turns or stretching them. However, this setting is best done under load, which means that it is performed only after fixing on the drill carriage. Some masters recommend making the spring removable, it could be removed after work. So it will not stretch and weaken.

Drill fixation
Usually instructions telling how to make a drilling machine from a drill recommend creating special fastening systems, which in the end are very difficult to work with. However, if the tool is chosen correctly, then it can be fixed using conventional plumbing clamps used when creating a hose-to-pipe connection. In this case, it will be necessary to make certain changes to the shape of the carriage or even slightly correct the body of the drill.
It is very important that the tool is held tightly and moves in the clamp. Therefore, even at the stage of manufacturing the carriage, they practically do not leave free space for it, restricting it structurally from all sides. In fact, the carriage itself is a kind of bed for a drill, in which it will sit very tightly. Additional elements are needed only for the reliability of fixation. This approach greatly simplifies the design and allows you to quickly remove the tool if necessary.

Considering the material presented above, we can conclude that a drilling machine from a drill can be made independently and without large financial costs. At the same time, the final product will be maximally adapted to the performance of specific technical tasks and will be able to satisfy the relevant requests of the end user. However, it is worth considering the fact that factory designs usually have a smaller error and are able to perform accurate work with a minimum tolerance. Therefore, such devices are usually suitable for private use or in small workshops where high precision holes are not required.

9 Famous Women Who Have Fallen In Love With Women Showing interest in someone other than the opposite sex is not unusual. You can hardly surprise or shock someone if you admit it.

15 Cancer Symptoms Women Most Often Ignore Many of the signs of cancer are similar to those of other illnesses or conditions and are often overlooked. Pay attention to your body. If you notice.

How to look younger: the best haircuts for those over 30, 40, 50, 60 Girls in their 20s don't worry about the shape and length of their hair. It seems that youth was created for experiments on appearance and bold curls. However, already

What is it like to be a virgin at 30? What, I wonder, women who did not have sex until almost reaching middle age.

These 10 little things a man always notices in a woman Do you think your man knows nothing about female psychology? This is wrong. Not a single trifle will hide from the gaze of a partner who loves you. And here are 10 things.

Our ancestors slept differently than we do. What are we doing wrong? It's hard to believe, but scientists and many historians are inclined to believe that modern man sleeps in a completely different way from his ancient ancestors. Initially.
Do it yourself circular saw and other machines from a drill
Sometimes there is a need to saw a fairly solid board into several planks. Manually such work cannot be mastered, but bought from the factory circular machine for the sake of a single case is unprofitable. There is a very simple way out - it is done small size circular from conventional drill.

Design
It is better to make the machine small in order to put it on the shelf when there is no need for its presence. Its design is extremely simple:
- base made of thick board or piece of chipboard;
- working surface;
- racks;
- shaft with a circular saw;
- electric drive in the form of a drill.

The base is made from chipboard sheet 30 mm thick, it is enough to cut a piece 300x250 mm in size. For desktop choose a sheet of duralumin with a thickness of 4 mm - it is quite rigid and light, so as not to weigh down the entire structure. In the right place, we make a hole for circular saw about 160x10 mm in size.
The holder for the drill itself can be made independently - all the necessary dimensions and drawings are on the Internet, but a similar design for a shaft with a saw can be purchased at a store or at a clothing market. Shaft bearing must be selected dustproof- when a home-made machine will work, there will be a lot of small waste in the form of wood dust.
A circular saw from a drill is assembled according to the standard scheme: first, all the parts are fixed on the base, then the desktop is mounted and the drill is connected.
Security measures
When working on any machine, the following rules must be strictly observed:
- the place of the forthcoming work must be freed from unnecessary materials and tools;
- workpieces are fed smoothly without jerks and distortions, so that the cutting tool does not jam;
- the plane of rotation of the circular saw must be limited from above with a special protective cover ;
- the machine must be kept clean and cleaned after each use;
- if the mini-sawmill is not used for a long time, then lubricate all metal parts with machine oil.
This small machine can cut not only wooden boards. If you install special cutters on it, you can process parts made of brass and other non-ferrous metals, plastics or propylene.

Other homemade machines
Many users are interested in what else can be done with the help of improvised tools from a drill with your own hands? There are many answers - home craftsmen are already making various homemade products from a drill in garage workshops. A drill is a universal tool, so with a certain skill and imagination, you can make whatever your heart desires.
- winepress. you just need to purchase emery in the form of a circle and make a special holder in which the drill is attached.
- drillingmachine- there are special holders for vertical drilling or stand.
- Turningmachine small size for woodworking.
- Mini drill for various needs of the home master.
- To easily mow the grass around the plot, you can do it yourself drill trimmer .
- Bulgarian from a drill done quickly, just buy specific nozzles.
- Garage car repairmen install original winches to replace engines based on old, very powerful tools.
- Gardeners make holes for planting young trees with a homemade drill from a drill .
- When pouring the foundation for utility room in the private sector, some users use homemade vibrator. made from a drill to quickly compact a concrete structure.
original devices
You can continue the list of homemade products indefinitely, but we’d better talk in more detail about some homemade machines that can be made from any drill model.
A drill from a drill is not a fantasy, but a real and fairly versatile machine, assembled independently. The main thing is to order from Chinese engineers (if you could not find it in your city) flexible shaft from a standard medical unit. As a result, a drill appears in your arsenal, which can be used for engraving or drilling holes in small details or structures with special burs, where a standard drill cannot be used.

Lathe
woodworking or lathe for the home can easily be done on the basis of a drill. The tool must be fixed with special clamps rather rigidly, insert a special design into the cartridge holder with several sharp pins holding the workpiece from turning. The center of the rear holder (headstock) and the latch in front of the homemade lathe should be located on the same axis. Accuracy is necessary to prevent runout during rotation of the workpiece. After installing the part, tailstock firmly fixed with a special clip.
The third element of the machine is handyman in the form of a wooden block, on which a chisel or other tool for processing the workpiece will rest.

Important! When working on a lathe, do not forget about safety, be sure to wear safety glasses, the sleeves of clothing should fit tightly around the forearms.
Turning the machine for processing wooden blanks will work properly if the drill has a built-in electronic speed controller. By trial you establish optimal mode rotation for efficient wood processing. On such a woodworking device, you can make unique products for household needs: for example, a rolling pin or pestle with a mortar, a candlestick or a prefabricated chandelier.

The original winch based on the old one, but powerful drill will become indispensable assistant on the household, especially for those users who live in own house and eat household plot. A simple situation: in an outdoor shower, you decide to install a larger capacity, but it is problematic to raise it to such a height alone. Using a winch, this can be done within a few minutes. Only it is necessary to pre-calculate the weight of the container and the speed of rotation of the spindle.
According to garage craftsmen, a homemade winch easily lifts the engine from a car. Watch the video if you don't believe me:
Experts advise using a homemade device by installing a drill on the most minimum revolutions. This design can move objects with different masses, because craftsmen make winches even on the basis of an ordinary starter from a car.
How to make a drilling machine with your own hands
It is advisable to make a drilling machine with your own hands in those situations when in a home workshop or garage it becomes necessary to drill holes in parts of various configurations, as well as made of different materials. It should be noted that such a device makes it possible to obtain holes with a sufficiently high level of quality.

One of the options for homemade drilling machine
When you need a homemade drilling machine
In manufacturing or repair enterprises, where the drilling operation is considered the most common, it is used to perform it. special device, whose models can have different functionality. So, it can be a compact desktop drilling machine, which has a simple design, or equipment equipped with several work spindles and numerical control.

The main structural elements of a homemade machine
For drilling holes in various materials, which is performed in a home workshop or garage, you can use do-it-yourself equipment. Naturally, for home use, you need a simple device that can be made from components and materials found in almost any garage or home workshop.
And in this article we will not leave unanswered the question of how to make a drilling machine at home, while spending a minimum of money. The drawings and experience of many craftsmen who have already passed this path will help us in this.
The need for such mini drilling equipment for metal, wood or plastic most often arises among those who are accustomed to independently perform various repair work in your house or apartment. Also, quite often, radio amateurs are puzzled by the construction of miniature drilling machines.
It would seem that a conventional drill can be used to perform such an operation, but such a tool is not always able to provide the required quality and accuracy of drilling operations. Homemade drilling machine. in addition to its compactness, it has another important quality: drills of various types can be installed on it.

Simple mini drilling machine for small jobs
Drilling machine from a conventional drill
To make a small but functional drilling machine for your home workshop, you do not need to purchase special materials and components. The design of such a convenient and useful desktop device contains the following components:
- the base, which is also called the bed;
- a mechanism that ensures the rotation of the working tool (a conventional drill can be used as such a mechanism);
- supply device;
- a vertical stand on which the rotation mechanism is fixed.

Scheme of a homemade machine from a drill
The stand on which the drill will be mounted can be made from a chipboard sheet. This material quite capable of supporting the weight of such a device. The bed of such a mini machine should be more massive, as it protects the entire structure from vibrations, which can adversely affect both the quality and accuracy of the resulting hole, and the comfort of work.
As a material for the bed of such a drilling and welding machine, you can use an ordinary furniture plate, the thickness of which is more than 2 cm. It is most convenient to use the base of an old photographic enlarger for this, slightly modifying its design. Sometimes an old microscope is used, but this is a rather rare option, since such an assembly will not be large enough and its use will be limited.

Drilling machine from a school microscope
The quality and accuracy that a homemade drilling machine will provide depends mainly on how correctly and reliably the connection of its base and vertical rack is made. Important elements of such a micro machine are two guides along which the shoe with the drill attached to it will move. Such guides are best made from two strips of steel, which must be securely screwed to the rack with screws.
In the manufacture of the block, it is desirable to use steel clamps that will securely fix the drill on it. In addition, in order to avoid unwanted vibration processes during drilling, a thick rubber gasket must be installed at the junction of the block and the drill.
After that, you need to make a feed mechanism for such a mini machine, which should ensure the movement of the electric drill in the vertical direction. The manufacturing schemes for such a mechanism may be different, but it traditionally contains a lever and a spring in its design, which is attached at one end to the rack, and at the other end to the block with a drill. Such a spring gives the feed mechanism greater rigidity.
A drilling machine from a drill that is not planned to be removed from it can be made more convenient to use if you disassemble the native switch of the drill and mount a separate button on the frame of the mini equipment. This button will always be at your fingertips and will allow you to quickly turn the device on and off. As you can see, it is not difficult to make a drilling machine from a drill, for this it is quite enough to carefully read these instructions or watch the training videos in this article.
An example of a machine from a drill in more detail
As an example, consider in more detail one of the options for a home-made drilling machine from a drill. collected at home.

Self-assembled drilling machine from a drill
Making a machine tool using an asynchronous motor
The absence of an extra electric drill in the household is not a reason to abandon the idea of making a drilling machine with your own hands. To drive the rotation mechanism of such equipment, you can use any Electrical engine. Such engines, which were previously installed on various vehicles, are likely to be found in the garage or workshop of any home craftsman.
Asynchronous motors, which are equipped with washing machines, are best suited for the manufacture of a mini drilling machine. If you have such an engine, you can confidently use it to make home drilling equipment. Making drilling equipment with such an engine at home is somewhat more difficult than using a drill, but the power of such a machine will be much higher.
Given the fact that the weight of an induction motor is greater than that of a conventional drill, you will need a stronger base and stand to accommodate the feed mechanism.
In order for such a mini drilling and filler machine to vibrate less during operation, it is necessary to install the engine on a powerful base and place it as close to the rack as possible. But here it is important to maintain the correct distance, since the convenience of mounting the belt drive depends on it, due to which the rotation from the engine will be transmitted to the drilling head.
In order for you to make such a machine at home, you will need the following structural elements:
- gear;
- a hexagon on which a pulley will be put on;
- two bearings;
- tubes in the amount of two pieces, one of which must be with an internal thread;
- clamping ring, which must be made of durable steel.
The hexagon also connects to the metal tube, bearing and clamping ring. Such a connection must be very reliable so that the resulting node does not collapse during operation.

Drilling machine with asynchronous motor
The mechanism necessary to ensure the supply of a tool in such a mini machine should consist of a tube on which cuts are first made and gears. The tube will move by connecting its teeth with these files. An axle with a hexagon is then pressed into this tube, the height of which must correspond to the required tool feed.
An example of a drilling machine with an asynchronous motor
Consider one of the very serious options for a home-made drilling machine with an asynchronous motor, clearly not made by a beginner. Few home craftsmen take the risk of taking on the implementation of such a project, but if, as they say, it itchs, then nothing is impossible.

Difficult to manufacture homemade machine with an asynchronous motor
It is quite obvious that it is quite difficult to make such a machine, and then it is even more difficult to ensure the accuracy of its work. Therefore, the best option is to use an electric drill to make a home drilling machine.
Finally, we suggest watching a couple more videos in which the craftsmen demonstrate their home-made drilling machines. These videos once again prove that it is always possible to assemble the necessary equipment with your own hands, although sometimes it is not easy.
Homemade drilling machine from a drill
It does not always make sense and expediency to buy a factory-made drilling machine. You can make a vertical drilling machine from a drill with your own hands. To do this, you need a drill and materials for making a stand. Such equipment is recommended for use in home workshops or garages, when drilling is not the main operation or is performed quite rarely and the accuracy of the hole can be neglected.
To speed up the process, just buy a specialized drill stand in the tool store. The result is a semblance of a household-level vertical drilling machine, which is not inferior in drilling accuracy to machines for home workshops.
The photo shows factory-made drilling stands. They can be purchased at any online tool store for prices starting at $200.


The article is intended to give you ideas on how to make a drilling machine from a drill yourself, so we do not give a clear algorithm for its manufacture, because it is made from improvised materials: some masters will have it, others will not. Therefore, we give the main ideas, and everyone will apply their design solutions and make their own vertical home-made drilling machine.
If you are not looking for easy ways, then we will make a homemade rack. The rack can be made of wood or metal. Wood will be cheaper, easier to manufacture, but durability will suffer.


Metal ones are more complex, but they have an incomparably longer resource and strength characteristics. The choice of rack material also depends on the workpieces being processed: with constant drilling of metal, it is better to make metal.


Machine assembly
Metal racks are assembled from the corners for the carriage, square pipe 50x50 for the stand and 10x10 for the drill arm, strips for the base and lugs. The base and bracket are welded, after which all elements are assembled and bolted together. It is recommended to manufacture several brackets with different adapters (clamping rings) under different types drills. The carriage moves along the bar with the help of a steel cable wound around the handle drum. So that the carriage does not have play and does not fall down under its own weight, it is drilled, threaded and a bolt (or several bolts) is tightened. This selects the backlash between the carriage and the stand of the future drilling machine. The handle for moving the carriage is made from rolled products with a diameter of 6 - 8 mm.
By having several brackets with different clamping rings, it is possible to flexibly select drills and process almost any material.
In future homemade equipment can be upgraded and modified, for example, mark or install a scale that will indicate the length of the carriage movement. This helps when drilling blind holes.
There are several mounting methods:
- several clamps;
- on a metal bracket in the hole for the neck of the drill.
Video of a design option from a drill on a wooden stand.
The easiest way to make homemade drilling design at home
A homemade drilling machine from a drill will never replace a factory one and will always be inferior in build quality and drilling accuracy. The main advantage of homemade is its low price, the ability to drill holes when the factory machine is not available for one reason or another.
You may also be interested in articles:
 Homemade steering rack drilling machine
  Choosing a drilling machine
  Drill lathes How to make a homemade four-sided machine
Do-it-yourself drilling machine from a drill

Dear visitors of the site "Visiting Samodelkin", from the material presented by the author, you will learn how you can independently make a budget drilling machine from a conventional electric drill.
Every craftsman would like to have such a machine in his household, because in comparison with factory counterparts it will cost ten times cheaper, and if all spare parts and components are available, then it is generally free.
The author of this machine is Igor Stasyuk, for which many thanks to him, shared step by step photos machine assembly with the people. The design is quite interesting and at the same time simple. Corners and 4 legs are welded onto the base from a 3 mm metal sheet, a 500 mm rod from a professional square-section pipe is welded onto this plate, the slider is made of 2 corners welded into the pipe and put on the lifting column with a gap so that the slider can move up and down the column. lifting mechanism it is actuated by a cable stretched from the top point to the bottom, and on the slider the cable makes several turns.
And so, let's take a closer look at what exactly the author needed to assemble the machine? As well as the whole step-by-step process.
materials
1. sheet metal 3mm
2. armature
3. corner
4. cable
5. drill
6. workpiece vise
7. bolts, nuts, washers, engravers
8. drill clamp
9. paint
10.professional square pipe
11. drill
Tools
1. welding machine
2. grinder (UShM)
3. drill
4. file
5. vise
6. clamp
7. caliper
8. ruler
9. corner
10th level
11. sandpaper
12. brush
13. hacksaw
14. emery
The process of creating a drilling machine from a drill.
And so, first of all, the author makes the base of the machine from sheet metal 3 mm, cuts the workpiece with a grinder (angle grinder) And welds 2 corners and 4 legs from a steel bar or reinforcement into the lower part. The length of the legs should be the same so that there is no skew of the bed.

Welded corners and legs.

Making a slider! 2 corners are taken and applied to a square-section professional pipe that will serve as a lifting column and pulled together with a clamp.

At the edges, it is seized by welding in order to simply bait for now, and only then specifically boil a normal seam.

This is how the preparation turned out.

The lifting column is made of a professional square pipe 500 mm long.

A bracket with a movable shaft is welded onto the body of the slider, on which the turns of the cable will be made.

A thread is cut into the drilled hole.

Handles of the lifting mechanism are made of fittings.

On the shaft there is such a head, which will be the basis for the handles.

And so, 3 handles are welded for the convenience of raising and lowering the drill through the mechanism.

Installed on a lifting column.

At the end of the cable, such a loop is made.

Attention! The cable is attached at the bottom with a loop, then several turns are made on the shaft and a stretch is made in the upper part of the lifting column.

I hope the principle of lifting is clear and without explanation)


A square pipe is welded onto the corner.


Here is actually such a mount for an electric drill turned out.

Then a drill is installed and secured with a clamp of bolts and nuts.

Now let's go back to the lifting mechanism.

A nut is welded into the upper part of the lifting column and a bolt is screwed into it, a cable is fixed to the bolt itself, and when the bolt is tightened and unscrewed, the cable is tensioned to the optimum norm.

It is advisable to pre-lubricate the moving parts with grease or lithol.


These small vices can be purchased at the hardware store in the tools section.

All parts were sanded by the master with sandpaper, and then painted.


And now the vise is screwed into its rightful place. And now the Author is already drilling holes in the wooden handles for the machine.

Installation of wooden heads on handles.

Here is actually such a wonderful machine turned out by our master.

Do more creativity, grow above yourself, create and success will surely come to you.
This concludes the article. Thank you very much for your attention!
Come visit more often, do not miss the news in the world of homemade products!
The article is presented for informational purposes only!
A home drilling machine (simply a drill) is equipment that anyone who has ever mastered at least something once feels an urgent need for. Craftsmen sometimes make drills with 2-speed gear, part tables with more than 3 degrees of freedom, and even two-coordinate CNC drilling and milling machines, see fig. below. But in this publication we will consider the manufacture of a drilling machine with our own hands - one that simply drills and mills - but accurately, cleanly, and confidently keeps its accuracy for a long time subject to occasional short-term overload: stable processing accuracy is the main requirement for metal cutting equipment. Which in amateur designs is performed, unfortunately, most often only due to a random combination of circumstances.

Metal or wood?

Wooden drilling "machine"-monster
It always seems to beginners that woodworking is easy and simple. A damaged workpiece will fit into small crafts or fuel. Perhaps that is why a real craze has recently been observed: home-made machines with responsible wooden parts. As a result, monsters sometimes appear in the world, which, probably, would have surprised Archimedes, see fig. on right. However, remember: the best achievable accuracy on wood is +/- 0.5 mm. In metal cutting, the largest allowable error is 0.375 mm by default (in England and USA 0.397 mm = 1/64 inch). At this point, the question of using wood as the main structural material of the machine is closed without discussion that, they say, wood, moreover, is deformed, worn out and damaged by orders of magnitude lighter than metal. Well, for lovers of deep inner self-satisfaction in products - free will for their money and work.
Drill device
Fantasy is an indispensable condition for any creative success, but in mechanical engineering it is useless without precise calculations and reconciliation with proven solutions. The history of machine tool building goes back thousands of years - bow turning and drilling machines with a foot drive were used already at the end of the Stone Age. On the topic of this article, the tested sample is an industrial design desktop vertical drilling machine. We will refer to it, choosing and deciding how best to make a drilling machine with our own hands: there are single copies of drills in operation, which have exceeded 100, and they still hold accuracy.
The device of a desktop vertical drilling machine is shown in the figure:

Its main modules are a bed, a column, a console and a table for the part. The components of the main nodes are slightly highlighted in color, and their components are brighter in colors. The simplest table (not counting the wooden block) is a vise. The rotary-sliding table allows, in addition to drilling, to perform some milling operations. The frame is usually tightly attached to a workbench or other reliable support.

Screw clamp - fixing the console of the mini-drilling machine
In operation, the console is set in the required position according to the size and configuration of the workpiece using the lifting and turning mechanism of the slider, and fixed. The spindle is fed into the working stroke by a separate feed mechanism. In amateur and industrial designs for home use, the lifting and turning mechanism is most often the operator's hand, and the latch is the screw clamp of the slider, see fig. on right; in TB, both are acceptable. But what must certainly be in the design of a drilling machine according to the requirements of the same PB is a fender or just a fender: if you throw the feed handle, the spindle or carriage along with it should automatically bounce up to the stop. In home drills, the chipper is most often a spring installed in suitable place, see below.
Note: industrial production, sale and use at enterprises and in IP workshops of drilling machines without a fender are prohibited by the PTB.
Make or buy?
An electric drill is a ready-made drive, gear, spindle and chuck in a monoblock. Put it on the carriage of the machine - and you can drill. In terms of accuracy, the solution, generally speaking, is not optimal (see below), but in many cases it is acceptable, but it eliminates the need to order expensive turned parts of increased accuracy, see below. In view of what the beds for installing a drill are now sold, perhaps not on the street from trays; prices are affordable. When choosing one to make a drilling machine from a drill, be guided primarily by the mode of operation of the equipment; the price also depends on it:
- Episodic drilling / milling for yourself with the accuracy of what happens - a cast plastic or stamped steel frame. The feed mechanism is lever with a cranked lever (see below). Sliding bearings of the carriage (see below) steel on steel or with nylon liners. Prices are $20-$30.
- Regular drilling for yourself or to order with conventional machine-building precision. Processed materials - up to the hardness and toughness of conventional structural steel. Everything is the same, but plain bearings are steel on steel (worse) or with bronze bushings, and the frame is cast iron or (more expensive) composite is also vibration-absorbing. Prices are $30-$40.
- Regular drilling and milling of any materials that can be tooled with periodic overloads of the tool and / or with increased accuracy - plain bearings only bronze on steel, cast iron bed. The feed mechanism is rack and pinion (see more below); vibration-absorbing console. Prices are $60-$180.
Note: As a rule, a rotary-sliding table for the workpiece is optionally offered with drill stands, which allows for certain types of milling. Price within $20.
Choosing a bed
The frame for the drill (which sellers for some reason stubbornly call racks) must be chosen not by manufacturer (“China” - not “China”); Now the market is full of "German China", not to mention the products of the post-Soviet states. You need to check the design.
Firstly, specimens with plastic non-nylon sleeves of plain bearings are unequivocally rejected: the runout and drift of the drill by more than 0.5 mm will appear already on the 10th - 20th "hole" and will continue to increase. The second is the backlash of the console. We take it by the far end, shake it up and down and to the sides with the clamp clamped. There should not be a noticeable "talker" (the tactile sense of an untrained person feels a beating of 0.4-0.5 mm).
Next - inspection of the structure, see fig. below. For conventional drilling, the one shown in pos. 1. Perfect option- at pos. 2: drill collet clamp, shifting the column to the side reduces the vibration of the console by an order of magnitude, and by turning it sideways by 45 degrees, you can mill by hand with precision “as best you can” the part on a standard non-sliding table, removing a pair of table mounts, because at the same time, its manual displacement relative to the horizontal working axis of the console will be linear.

And here is a sample in pos. 3 do not take in any case. Firstly, the collar of his column is low and its fastening is unreliable. Secondly, longitudinal grooves under the table facilitate manual milling “how it goes”, but, unlike diagonal ones, they do not dampen vibrations of the bed. Moreover, they will concentrate where indicated by the arrows (the tide under the column is made too narrow) and from there they will go straight to the column and table.
What is cheaper?

Let's say the price of the frame you like does not suit you. Or a drill, if it is a "draft", with a percussion mechanism, which was in work on building structures and the beating of the cartridge can be seen by eye. Then, first of all, we find out if the master who owns a lathe of increased accuracy (not coarser than 0.02 mm) is within reach. Which, by the way, is not a fact - a high-precision machine is very expensive and never pays off on a stream of common orders. But let's say you found it. We take the drawing in Fig. on the right, we go to him and ask if he can carve it out of steel no worse than 30HGSA, and how much he will take for work. “This” is the drawings of the table drill spindle. The rest of its details can be carved on conventional machine, or find it in the ruins at the iron market or in your trash. Most likely, it will turn out that buying a bed + table is cheaper, and if you estimate the costs for the rest, then, perhaps, a drill with increased accuracy will be outlined. On sale there are; they can be recognized by the absence of a percussion mechanism and a collar specifically for installation in a bed: a turned steel cuff is put on it.
If you still do
However, there may be cases when a homemade drilling machine will either be cheaper or even for nothing, or the best drill on the frame will not replace it. The fact is that, in addition to bending and vibration loads, torsional loads are also transmitted from the working body (tools - drills, cutters). This is due to the difference in the lever arms from the axis of the column to the closest to it and the far edges of the tool; torsional loads from the cutter, gnawing the material with one edge, are an order of magnitude greater than from the drill. Therefore, it is unrealistic to obtain an accuracy of processing with a drill on a bed over 0.1 mm (why - see below), but let's say, a hole of 2.7 is needed for the M3 thread; under M2.5 - 2.2, and the processing error in this case is unacceptable. In general, it makes sense to make a drill with your own hands, despite the costs, if:
- You are a radio amateur and work with components with a pin pitch of 2.5 and 1.25 mm (“thousand-legs” with a pitch of 0.625 mm are already mounted only on a plane). Then you need a drilling machine for printed circuit boards with an accuracy of no worse than 0.05 mm;
- You are engaged in other fine work on wood and metal. For example, it is impossible to make a beautiful elegant box or a reliable hiding place in the house using only manual drilling;
- You drill / mill from time to time for yourself and the accuracy will suit you which will come out, and there is a lot of junk in the gas holders.
Note: in the latter case, you are lucky, suddenly an old children's bicycle is lying around somewhere. The tubes of its frame are of excellent steel, and the wheel hub is almost a finished spindle; on order, only an adapter with a Morse taper for a tool chuck remains. Working thoughtfully and carefully, an old bicycle can be turned into a drilling machine with an accuracy of approx. 0.1 mm, or actually a free drill stand, see for example. video:
Video: do-it-yourself drill stand
Layout
But, let's say we need higher accuracy, and we need to mill the grooves without losing it. In this case, the layout of the machine is of paramount importance.
The best option is the location of the spindle and the drive on opposite sides of the column, pos. 1 in fig. The heavy motor in this scheme acts as a counterbalance to earthquake-resistant buildings: it reflects vibration and torsional loads from the spindle in antiphase. In the area of the column from partially extinguish each other. The damping is maximum if the center of gravity of the carriage is exactly along the axis of the console, and the higher, the thinner the drill and the less pressure on it. That is, the accuracy of the machine for fine work increases, and at the same time, without loss of accuracy, it can withstand quite significant overloads.

Note 4: it is possible to make a drill for precise work with a direct drive to the spindle and the location of it and the drive on the same side of the carriage if there is a ready-made vibration damping frame, for example. from an old microscope (under 2), etc. optical devices.
In mini machines for printed circuit boards and jewelry work, an unpleasant effect is observed: in order to obtain an accuracy above 0.05 mm, the column has to be made disproportionately thick, pos. 3. This is due to the fact that its ability to absorb vibrations and torsional loads is determined by the cross-sectional area, which falls squarely with a decrease in the size of the part. For boards for components with a lead pitch of 2.5 mm, as well as small metalwork and carpentry work, an accuracy of 0.05 m is sufficient. At the same time, the main influence on its deterioration is exerted by loads bending the column. To parry them, it is enough to use a double column of a 10-14 mm bar from ordinary structural steel, pos. 4. If the usual accuracy of 0.375 mm is sufficient, then by doubling the column, a drilling machine for episodic work can be made even from a drill and plumbing propylene pipes, pos. 5. Its resource before loss of accuracy is small, but the material is also cheap and does not require processing to order.
Innings
An important role for the accuracy of drilling is also played by the device of the spindle feed mechanism (carriages in the machine from a drill): jerks and / or uneven feed force at least increase the runout of the drill. When drilling with a thin carbide drill, in this case, its removal, breakage and, as a result, irreparable damage to the labor-intensive workpiece are very likely.
In machines and beds for a drill of increased accuracy, a rack and pinion feed mechanism is used (on the left in the figure), which ensures its complete uniformity and, which is especially important for manual feed, precisely proportional return of the tool stop to the hand. This requires a rack and pinion with a well-defined tooth profile - involute. Otherwise, the feed will go jerky even with absolutely smooth pressure on the handle. It is unrealistic to make a pair of rack and pinion with the same involute teeth “on the knee”; picking up a suitable ready-made pair is unlikely, so rack and pinion feeders in homemade drills are extremely rare.

More often they make a simple single-lever feed mechanism, in the center in the figure, but this is far from optimal. At the beginning and at the end of the stroke, when smooth feed and drilling accuracy are especially important, it transfers the emphasis to the hand insufficiently, and excessively in the middle of the stroke, which increases the likelihood of the tool getting stuck in viscous material. From these shortcomings, the feed mechanism with a cranked breaking lever, on the right, is free; in addition, it additionally dampens console vibrations. The ratio of the shoulders of the knee take approx. 1:1.
Table with serving
Drilling thin brittle/ductile parts is more accurate, and the likelihood of drill breakage and breakage is less if the spindle is fixed and the table with the part is fed up to it, therefore, in many drills for fine work, the table is equipped with a separate feed mechanism. Due to the inertia of thinking, it is often also made rack and pinion, see for example. Further. But, given that the mass of the table in this case is much larger than such a part, a lever-feed table turns out to be no worse, but it is completely affordable for home production. Its device is shown in Fig.:

There is only one nuance: so that the clip does not lead during assembly, it is tightly inserted into the through hole of the base and welded from below (from the underside). You need to cook with an OMA-2 electrode or thinner with a direct current of 55-60 A with short diametrically opposite tacks (“pokes”). Dimensions of the table for printed circuit boards and jewelry work 60-150 mm in diameter; thickness 6-12 mm. Table shank diameter 12-20 mm; length by the feed stroke +(20-30) mm. The tube for the shank (wall thickness from 1.5 mm) is desirable to be machined or drilled and reamed so that the shank runs smoothly in it without noticeable play. The short lever arm is made approx. equal to the diameter of the table; long - whatever you want.
Console
Let's look again at Fig. with factory settings. The designs of their half-frame carriage consoles are similar; they are quite rational, but designed for automated and robotic production: precision casting and then finishing in place on a CNC machine and laser measurement.
A diagram of an analogue of a console with an amateur-designed semi-frame is given on the left in the figure:

The first thing that attracts attention is that you need to cut 5 parts from a thick steel sheet, trimmed (processed with an end mill) for evenness and parallelism of the sides. Second, the end sections of the inserts filled with dark gray must also be even, clean, and parallel. Those. and here without milling machine not enough. Finally, outside the production conditions, it is unrealistic to perform a sliding pairing of the slider and the guide carriage (shown by the arrow) with a backlash of less than 0.1 mm. Let's estimate the ratio of the lever arms - the transverse runout of the drill is more than 0.5 mm.
The design of the console of a drilling machine, which is not very technologically advanced in mass production, but adapted for manufacturing by handicraft methods, is shown on the right in Fig. (the feed mechanism and the drive with the bracket are conventionally not shown). Moreover, in it, the beating of the drill on the inhomogeneities of the material causes the carriage on the column and the guide to skew in opposite directions, and the lateral drift of the tool does not exceed the amount of play in the slip liners. Only one detail is cut out of a thick plate - slider 4. Its precise processing is necessary only in the area of \u200b\u200bclamping the column and installing the guide, and 3 bronze bushings-inserts will precisely fit any turner of average qualification in place if you give him a column and carriage guide (they can be machined with normal accuracy).
So that the entire assembly does not lead to welding, you need to cook as before. case: OMA-2 electrode or thinner, direct current up to 60 A. The seams are also welded alternately with tacks: a “poke” on one, the same on the same far one, located symmetrically. Then the tacking of the seam closest to the first, the same on the diametrically opposite one, etc., etc., until all the seams are welded.
Note: the accuracy of the machine with the described console will be higher if it is assembled not by welding, but by screws with gluing with high-strength glue for metal (cold welding). First, everything is assembled without glue, the clips are aligned for parallelism and the fasteners are tightened. Then the screws are turned out one by one, glue is dripped into the nest and tightly wrapped back. A dreary business, but in this way it is realistic to get a home-made drill with a drill runout of less than 0.02 mm. Unless, of course, the spindle and chuck are centered no worse.
Errors in design
All efforts to make a drilling machine with your own hands will go down the drain if fundamental mistakes were made during its design. The most common of them are shown in Fig.:

Typical mistakes in the manufacture of a drilling machine
Pos. 1 is the console or what? This frame will not withstand the standard load from the tool stop for a long time. There is no need to talk about accuracy. Pos. 2, in addition: it is impossible to make the column of the drilling machine tubular. The pipe holds bending loads, but is powerless against torsional loads, and only intensifies vibrations.
Pos. 3 - to make a drill from an old photographic enlarger, the temptation is great, especially since it was made with at least initial, but optical accuracy. But! The magnifier rod holder is not designed to support the tool. As a result, when drilling hardboard, the drill departure at a feed rate of 20 mm reaches 1.5 mm (!). And the bracket is silumin: this material does not absorb vibrations, gets tired quickly, and the bracket breaks in less than 200 holes even when drilling printed circuit boards.
Pos. 4 - doubling the column in the transverse direction does not give anything. The resistance of the machine to loads will be no higher than on a single pin of the same diameter. Pos. 5, in addition: the rebound spring, which is asymmetrical about the axis of the column, does not dampen vibrations and torsional loads, but enhances them. If so, it was necessary to put 2 identical springs on both racks. And it would be better to make a column, as shown here:
Video: do-it-yourself drilling machine from a drill
Pos. 6 - installation of the drive and spindle on one side of the column, and even asymmetrical, does not reduce, but enhances vibrations, because they are transferred to the column in phase, see above. Pos. 7 - where is the fender? Yes, it cannot be here, since the screw feed drive. With a screw, you can accurately set the slider (which is not here at all), which is home machine in general, it is not necessary, but in no case should the carriage be fed! This structure will be thrown a little bit with fragments of drills and chips, and the operator's eyes are in close proximity to the danger zone.
Structural analysis
We will consider examples of successful technical solutions, as well as not so significant design flaws, using the examples of several home-made drilling machines.

For a radio amateur, modeller, craftsman-miniaturist and / or jeweler, a simple mini-drilling machine with direct drive may be of interest (the drawings are given in the figure on the right). The design feature is that the drive motor is rigidly attached to the slider, and the feed is only from below by the table. The massive electric motor itself serves as a vibration damper and torsional load absorber, just like an anti-seismic load on high-rise buildings. Thanks to this, all parts, except for the Morse taper with an adapter to the motor shaft, can be performed with normal accuracy: the drilling accuracy is determined by the beating of the motor shaft + the beating of the cone with the adapter + the beating of the drill itself. A table with a rack and pinion feed mechanism can be easily changed to a lever one. It is better to use a collector DC motor: for asynchronous motors with a capacitor start, due to the unevenness of the rotating magnetic field and the sliding of the rotor in it, the rotation of the shaft is less uniform. In addition, the speed of rotation of the collector motor is well regulated even with a simple rheostat, and to adjust the speed of the asynchronous motor, you need to change the frequency of the supply current. The same is for synchronous with a magnetic rotor. The maximum speed of the motor shaft is 800-1500 rpm. Power on the shaft for drilling holes up to 3 mm - 20-30 W; for holes up to 6 mm - 60-80 W.
Note: this machine is not suitable for milling, because motor shaft bearings are not designed for lateral loads and the machine in this mode will quickly lose accuracy.
Here in fig. drawings of a fully functional mini-drilling machine of the same purpose, also with direct drive, are given:

It is equipped with a separate spindle, which allows, firstly, to fill a drill with a maximum diameter of 6 mm into the chuck No. 1a; for 8-10 mm drills, the engine is rather weak. Secondly, to make milling with dental burs. Apparently, the author of the design often uses this particular operation, on the basis of which the motor rotation speed was chosen. Without reducing it, it is necessary to drill on this machine with carbide drills, and to use ordinary drills, supplement the design with a speed controller; in this case, the motor needs at least 60 watts. A conspicuous drawback of this machine - a simple lever feed drive - can be easily eliminated: the feed lever is replaced with a cranked one without modifying the rest of the parts. To improve the accuracy of processing, it is also desirable to put the second rebound spring (pos. 14 in the figure and 9 in the specification; there and still confused) symmetrically to the first, at the other end of the spindle leash. A more serious design flaw is that the rebound springs are not involved in damping vibrations and torsional vibrations. At rotational speeds above 5000 rpm, their influence on accuracy practically does not affect, but already at 1500 rpm, the runout of the drill during the working stroke increases by approx. twice.
Drawings of a drilling mini-machine, conceived as a full-fledged structurally, but with annoying errors, are given in fig; the design of the carriage is similar to the console in the previous. designs.

Thanks to the installation of a strong rebound spring in the right place, it was possible to firmly fix the spindle in the carriage, which at first glance reduced the number of parts that require increased manufacturing accuracy. But only when feeding from below by a table, and even then, the fixation of the slider 5 and the carriage 4 with pairs of screws 17 and 16, respectively. unreliable and spoils the column; it would be better to use screw clamps. And when the released carriage is fed by the lever, only its joints prevent the carriage from turning. A play of any of the hinges of the lever of 0.02 mm, taking into account its ratio with the length of the knee shoulders, will give a lateral drift of the drill by 2 mm or more, which can only be parried by hand. In this machine, the console with an additional carriage guide, described above, would be most appropriate; in this case, it would be quite possible to achieve a runout of the tool due to backlashes in the interfaces of the parts of the machine itself no more than 0.02-0.03 mm.
On this fig. - drawings of a bed for a drilling machine from a drill with a semi-frame carriage, "almost like a real one."

Everything is good in it, and something is even better than the "firm": plates 5, which prevent the lateral displacement of the carriage, perfectly "catch" and suppress the vibrations of the instrument in their very bud. There is only one question: how to do all this if a machine park worthy of a small machine-building plant does not doze in the garage (shed) in anticipation of the master's hand? It is easier to make a drilling machine from a drill as shown in the video:
Video: homemade stand-machine for a drill
Involuntarily, an old Soviet joke comes to mind:
“Dear Comrade Leonid Ilyich honored with his visit a certain industrial enterprise. They are walking through the workshop, suddenly the general secretary stops the retinue with a wave of his hand, one approaches the worker at the machine:
- Comrade turner ...
- Yes, Petrovich, I ...
- Fine. Comrade turner Petrovich, tell me frankly - do you drink vodka?
- But how! We use!
- And if a bottle costs 10 rubles, will you still drink?
- Will.
- And 25?
- Will.
- And 50?
- Will.
- And 100?
- I will anyway.
- Petrovich, ... but where can I get so much money for my salary ?!
- Gee ... what does the loot have to do with it ... this little wick (shows) how it cost a half liter, and it will cost.”
Who is happy, who is alas, but those Petrovichs, general secretaries and industrial relations are no more. And it will not be - they turned out to be completely ineffective.
About steering drills

A fairly popular request on this topic is also "drilling machine from the steering rack of a car." It seems to be a ready-made converter of rotational motion into a linear one, and even with a geoid transfer characteristic: in order to “peck” a little with a drill, you do not need to “catch microns” with your hand. You just need to adapt the steering wheel to the rail, make a drill holder (see the figure on the right), and you're done, see video.
Good day everyone! I decided somehow to make wooden handles for my tools - files, chisels, cutters. I started thinking about how to make them. Just planing is too dreary, and it turns out ugly. That would be a wood lathe! And then it dawned on me. Why not? The main idea was drawn immediately, the details were thought out later. What happened as a result, I want to show you and tell you how I did it.
Materials and tools that I used
So, for the manufacture of the machine, I needed the following materials:- a plank of plywood, about 10 mm thick;
- a wooden block with a rectangular section of 35x50 mm or 40x60 mm, about 1 meter long;
- furniture driven nut - 4 pieces (thread size is the same as for studs);
- two threaded studs M6 - M10 plus three ordinary nuts for them and two bolts;
- a screw clamp, its length should be sufficient to clasp a hand-held electric drill with a margin;
- joiner's glue, self-tapping screws.

Making a lathe from a manual electric drill
We begin work with the manufacture of the machine frame. To do this, I cut out a board 60 centimeters long and 11-12 cm wide from plywood. I will immediately make a reservation about the dimensions. Variations are possible here. But you should not make the frame too long, as the machine will be quite light, and it will not be easy to work on it with long parts.
An important point is the ratio of the width of the plywood frame and the dimensions of the bar. It will be good if three bars fit on the width of the plywood board with the smaller side of the cross section (why this is so, you will understand later). So, if a bar like mine is 35x50 mm, then the width of the frame should be about 11 cm or a little more. If you take a bar 40x60 mm, then the frame is made 12 cm wide.

So, I sawed out the base of the frame 11 cm wide and 60 cm long. After that, I saw off the bar along the length of the base, that is, also 60 cm. I cut the second bar along the length of the drill body so that it does not reach the cartridge and subsequently does not prevent it from rotating.


Using wood glue, I connect the bars with the smaller sides of the section so that their ends are on the same line. I clamp the parts to be glued with clamps and let the glue harden. Our electric drive will be attached to this part of the frame, therefore, by attaching a drill to a short bar, I mark the place for the hole for the clamp. I drill a hole into which the existing collar can enter. In my case, the diameter is about 10 mm.


Next, I mark out a plywood plank to be placed in the middle of its width of a structure of two glued bars - a long and a short one. Along the middle line of the board I drill 7 - 8 holes for self-tapping screws evenly along the entire length.

Having attached the glued bars with clamps to the plywood base, I deepen the holes by drilling the bar. Now I insert the screws and twist them. The frame of the machine is ready.

After that, we proceed to the manufacture of the tailstock of the machine and the movable stop for the cutter. The tailstock will hold the rotating part from the side opposite to the drive. It must move along the frame and be fixed in the desired position depending on the length of the clamped part. The stop for the cutter must also move freely along the workpiece. For their manufacture, I used scraps of the same plywood and bar.


The movable base of the tailstock is a U-shaped structure of two bars and a plywood rectangle. To the surface of the plywood base of the headstock, using self-tapping screws, we fasten a plywood square of double thickness, obtained by gluing two square pieces of plywood. A centering bolt will be fixed in this square to clamp the workpiece. I put a single plywood rectangle on self-tapping screws and glue to the bars. You should get a structure that moves freely along the guide bar of the frame.


Let's move on to the power side. We fix the electric drill with a screw clamp on the frame bar. To clamp the workpiece, we need a threaded stud and nuts, ordinary and furniture hammered. Holding the pin in the drill chuck, mark the required length (4 - 5 cm) and cut it off.


We sharpen the end of the hairpin, using together emery and a drill, holding a piece of the hairpin in the cartridge. The end of the stud needs to be very sharp, as it will have to go into the wood, centering it. Next, we refine the furniture nut by turning its pointed clamps 180 degrees with pliers. With the help of this part, the part will be clamped and torque will be transmitted to it from the electric drill.


We assemble the structure by screwing the nuts onto the stud. The sharp end of the stud should protrude a little further (by 1 - 2 mm) than the sharp clamps of the furniture nut. This will make it easier to center the part. On the reverse side, the furniture nut is fixed with a regular one. We clamp the free end of the stud into the drill chuck. If necessary, we adjust the position of the drill, achieving the parallelism of the stud and the frame bar.
Now we need to move tailstock to the drive stud to locate the second centering bolt. We move the glued plywood square to the pointed pin, apply a light blow with a small hammer on it reverse side and get the required mark from a sharp hairpin.


We drill a hole of such a size that the sleeve of the second furniture nut enters it. We do not modify it, but use it in the normal mode, inserting the sleeve into the hole and hammering the latches with a hammer. Tighten the nut in a vise if necessary. We sharpen the second stud, screw it into the furniture nut on the tailstock and fix it with ordinary nuts. Having moved the headstock to the drive, we check and, if necessary, correct the alignment of the studs.
Similarly to the tailstock, we assemble the base of the stop for the cutter. The difference lies in the fact that the plywood shelf of the stop protrudes from one side. Here we will fasten a bar with self-tapping screws, on which the cutter will rest.
Reading 7 min. Published on 24.11.2018
It's no secret that in the workshop of every home craftsman there are tools that could rightfully go to "deserved rest". The hand of the owner does not rise to throw out of his life a tool that, on the one hand, is already outdated, on the other hand, can still solve this or that problem. Or it can serve as the basis for the “homemade” needed by the master.
So an old Soviet-era hand drill can serve as a nozzle for a screwdriver, a key for opening and closing bolts, a cable stripper and other devices. You can come up with many different tools, everything is limited only by your imagination.
And what owner would deny himself the pleasure of decorating his house or workshop with a vintage drill?
Key
For the "homemade key" we only need two gears, small and large flat from an old hand drill.
Just be sure to steel, not cast iron.
Additionally, small materials are required, which are in the house of every master.
Of course, it will not do without welding equipment, grinder, drill and small tools. The whole technology for making a homemade key consists of the following steps:
- Dismantling an old hand drill. By knocking out the cotter pins, we will release the small and large flat gears. Only these parts from the drill will be needed in the future.
- Using a grinding machine, we make a short axis. We press it into a large flat gear.
- Details are scalded with argon welding. If a conventional electrode is used, then after the welding process it is necessary to clean and plan the seam.
- Let's prepare two tires for the key - short and long (flat strips of metal). In both tires we drill holes equal in diameter to the axis of the shaft. On both tires, using a machine tool and a hammer, we make an L-shaped double bend at right angles, after slightly softening the metal by welding. On a longer tire - a deeper bend, on a short one - a slight one. This is done so that the short tire goes around the flat gear, and the long one around the small gear.
- Prepare a metal round timber (shaft) and two half-inch tubes. The round timber should go into the tube and rotate freely in it.
- We machine one side of the round timber on the machine so that its diameter is equal to the inner diameter of the small gear. We dress the aforementioned gear on the shaft made. With a drilling machine, we make two holes in the shaft and connect the round timber (shaft) and the small gear with a cotter pin.
- We collect the key in one design. We apply the gears between the two tires so that the bent shorter tire is on the side of the large flat gear. And the long one goes around the small gear. In this case, the short gear is set at an angle of 90 degrees to the axis of the large flat gear.
- The small and large gears of the drill must be in contact with the gear parts, i.e. to put it simply - to coincide in their course, thus transferring rotation to each other.
- We make welding, where we connect both ends of the long and short tires with a tube, inside of which there is a shaft with a short gear.
- It remains to make a handle. To do this, weld the second piece of the tube to the shaft.
- On the side of the short tire, a shaft with a large flat gear is turned by a grinder in the shape of a square. This is done in order to put on heads.
- The key with the help of an old drill is completely ready!
The wrench is specially made to unscrew and tighten bolts and nuts in hard-to-reach places. In doing so, we save our time and energy.
Video
Video on how to make a key from an old drill with your own hands:
Nozzle for screwdriver
 What else can be done from an old drill with your own hands?
With a little thought, you can make a nozzle for a screwdriver.
Such a simple design nozzle can be created without unnecessary difficulties.
The idea is good because there is no need to spend money on additional details. Everything you need is already in the design of the drill. All you need is a lathe, a grinder, a welding machine and, of course, a screwdriver, the nozzle on which we will now make:
- Remove the two covers from the drill body. We unscrew the stubborn part.
- We knock out the cotter pin from the small gear and remove it from the shaft on which the drill chuck is mounted.
- Using a grinding machine, we bore the conical tip of the shaft up to 10 mm.
- We insert the shaft back into the drill body, put on the gear and cotter pin.
- On the right side, we cut off the threaded shaft with a grinder.
- We screw the rubber handle (improved version) into the case on the right.
- Cut off the threaded part of the large gear shaft.
- A head must be welded to the shaft of a large gear.
- Screw the two covers back to the housing and lubricate the gears with a special graphite grease.
- The nozzle is ready to use!
The "homemade" mechanism allows you to screw in and unscrew bolts and nuts in hard-to-reach places. Increases torque by 6-7 times. Since the nozzle is longer than a simple screwdriver, the tool can be used on the farm, for assembling furniture, for car repairs, if the nut connection cannot be reached in another way.
It is worth paying attention to the fact that in this nozzle from a drill a working angle of 90 degrees is maintained, and this functional feature indispensable when working, where the space above the nut is limited and you can screw in and unscrew the nut only from the side. The nozzle is simple in execution, does not require additional investments, and will serve for many years.
Video
A detailed video on how to make the nozzle described above from a drill:
Restoration
 Can't give up an old but favorite instrument?
Give it a second life and the result will delight every time you pick up a tool.
In order to restore a hand drill, no special skill is needed. It is enough to carefully perform all the stages of work step by step:
- Unscrew all screw connections of the drill. Remove the handle and both covers. If you have difficulty loosening the screws, use any spray-type rust remover.
- Pull out all the cotter pins, freeing the gears. Remove the fast and slow rotation shafts.
We dismantle the stop, spindle, handle, drill chuck. Carefully remove the bearing so that the metal balls contained inside do not crumble. - We lay out all the parts and screws on the desktop. With a cloth moistened with a special anti-corrosion compound, we wipe each component of the tool. We remove the old oil from the gear and inside the housing. If necessary, use a metal brush.
- It's time for "water procedures" - carefully place all the parts of the drill (except for the wooden part of the handle) in a container with a rust neutralizer, such as VSN-1, for example. We leave for a couple of hours.
- We take out all the parts from the container, and again carefully clean each part from all sides with a brush with plastic bristles from rust residues. Do not forget about the screws, they also should not leave the hands of the "restorer"
- When you are sure that the rust is over, proceed to remove the remaining paint. To do this, you need a gel to remove paint and varnish coatings. Apply this gel with a brush to all parts where paint residue needs to be removed.
- Remove paint residue with a metal brush or spatula (in hard-to-reach places).
- Polish the surface of the covers, body and handle with a drill with a felt nozzle.
- If necessary, straighten the surface of the covers with a hammer.
- We start preparing for painting work. Seal the holes from the covers on the case with masking tape, place paper plugs inside the screw holes. Separately hang the body, handle, covers, stop and open each part with an aerosol putty from all sides. Wait for it to dry.
- Rub each detail with sandpaper and cover again with paint from aerosol can. Do this carefully and at a distance so that there are no smudges.
- Sand the wooden part of the handle and open it with varnish, or you can make a new one on a lathe.
- Let's start assembling. Lubricate the ball bearing with special graphite grease. We install it. We strengthen the small and large gears on the shafts with the corresponding cotter pins. We install the drill chuck and stop in place.
- We lubricate all the gears with a special graphite paste and close the case with covers on both sides. Screw in screws.
- We attach a handle with a wooden part to the body with a screw.
- Ready! The old tool has changed and pleases its owner!
A hand drill can remain not only a reliable assistant in the work of a home master, but also become a source of technical innovation. For creativity is inherent in every craftsman!
The most common drilling machine can be considered one that is made from an ordinary or electric drill. In such a machine, a drill can be placed both stationary and made removable. In the first case, the power button can be transferred to the drilling machine for greater convenience, in the second, the drill can be removed and used as a separate tool.
Components for a homemade drilling machine:
- Drill;
- Base;
- Rack;
- Drill mount;
- feed mechanism.
The base (frame) for a homemade drilling machine can be made of solid wood, chipboard or furniture board, but it is still better to use a channel, metal plate or tavr. To ensure the stability of the structure and obtain a good result, the frame must be made massive so that it can compensate for the vibration from drilling. The size for wooden satin is 600x600x30 mm, for metal - 500x500x15 mm. Mounting holes must be present on the base of the machine so that it can be fixed on a workbench.
The stand for the drilling machine can be made from timber, round or square steel pipe. You can also use an old frame of a photographic enlarger, an old school microscope or other device of a similar configuration with a large mass and high strength.
The drill is attached with clamps or brackets. It is better to use a bracket with a center hole, this will allow you to achieve more good results when drilling.

The device of the feed mechanism of the drill on the machine.
Through this mechanism the drill can move vertically along the rack, it can be:
- spring;
- Hinged;
- Similar to a screw jack.
Depending on the chosen mechanism, you will need to make a rack.
The photo diagrams and drawings show the main types of designs of home-made drilling machines that use a drill.


 Homemade machine from a drill with a hinged springless mechanism.


Video instruction for creating a homemade drilling machine with your own hands.
Video instruction on how to create a cheap drill press from a drill with your own hands. The bed and the rack are made of wood, the furniture guide serves as a mechanism.
Step-by-step video instructions for making a drilling machine from an old car jack.
How to make a spring-lever stand for a drill on a homemade machine.
Step by step instructions for making a steel rack.
The steering rack from the car is a fairly massive device, so the bed under it must be massive and attached to the workbench. All connections on such a machine are made by welding.

The thickness of the base should be about 5 mm, it can be welded from channels. The drain on which the steering rack is attached should be 7-8 cm higher. It is attached through the eyelets of the steering column.
Since such a home-made machine becomes massive, it is better to take out the control unit separately from the drill.
Video of a self-made drilling machine based on a steering rack from a car.
The assembly procedure for such a homemade machine:
- Preparation of details;
- Installing the rack on the frame;
- Assembly of the movement device;
- Installing the device on the rack;
- Drill installation.
All connections must be securely fastened, preferably by welding. If guides are used, then you need to make sure that there is no lateral play. For greater convenience, such a machine can be equipped with a vice for fixing the workpiece for drilling.
In stores, you can also find ready-made stands for a drill. When buying, pay attention to the dimensions of its frame and weight. Often inexpensive designs are only suitable for drilling thin plywood.
Homemade drilling machine based on an asynchronous motor.
You can replace a drill in a homemade machine with an asynchronous motor, for example, from an old washing machine. The manufacturing scheme for such a machine is complex, so it is better if it is done by a specialist with experience in turning and milling, assembling electrical circuits.
Scheme and device of a machine tool based on an engine from household appliances.
Below are all the drawings, parts and their characteristics, and specification.

A table of all the details and materials necessary for the manufacture of the machine with your own hands.
| Pos. | Detail | Characteristic | Description |
| 1 | bed | Textolite plate, 300×175 mm, δ 16 mm | |
| 2 | Heel | Steel circle, Ø 80 mm | Can be welded |
| 3 | Main rack | Steel circle, Ø 28 mm, L = 430 mm | One end is turned to a length of 20 mm and threaded M12 |
| 4 | Spring | L = 100–120 mm | |
| 5 | Sleeve | Steel circle, Ø 45 mm | |
| 6 | Locking screw | M6 with plastic head | |
| 7 | lead screw | Тr16х2, L = 200 mm | From the clamp |
| 8 | Matrix nut | Тr16х2 | |
| 9 | Drive Console | Steel sheet, δ 5 mm | |
| 10 | Lead screw bracket | Duralumin sheet, δ 10 mm | |
| 11 | Special nut | M12 | |
| 12 | Lead screw flywheel | Plastic | |
| 13 | washers | ||
| 14 | Four-strand block of the driving pulleys of the V-belt transmission | Duralumin circle, Ø 69 mm | Changing the spindle speed is done by moving the drive belt from one groove to another |
| 15 | electric motor | ||
| 16 | Capacitor block | ||
| 17 | Block of driven pulleys | Duralumin circle, Ø 98 mm | |
| 18 | Return spring limit rod | M5 screw with plastic mushroom | |
| 19 | Spindle return spring | L = 86, 8 turns, Ø25, made of wire Ø1.2 | |
| 20 | split collar | Duralumin circle, Ø 76 mm | |
| 21 | Spindle head | see below | |
| 22 | Spindle head console | Duralumin sheet, δ 10 mm | |
| 23 | Drive belt | Profile 0 | Drive V-belt "zero" profile, so the pulley block grooves have the same profile |
| 24 | Switch | ||
| 25 | Mains cable with plug | ||
| 26 | Tool feed lever | Steel sheet, δ 4 mm | |
| 27 | Removable lever handle | Steel pipe, Ø 12 mm | |
| 28 | Cartridge | Tool Chuck No. 2 | |
| 29 | Screw | M6 with washer |


The spindle head has its own base - a duralumin console and creates translational and rotational motion.
 Drawing of a spindle head for a homemade drilling machine.
 Materials and parts necessary for the manufacture of a spindle head.
| Pos. | Detail | Characteristic |
| 1 | Spindle | Steel circle Ø 12 mm |
| 2 | running bush | Steel pipe Ø 28x3 mm |
| 3 | Bearing 2 pcs. | Radial rolling bearing No. 1000900 |
| 4 | Screw | M6 |
| 5 | Washers | Bronze |
| 6 | Lever arm | Steel sheet δ 4 mm |
| 7 | Bush stopper | Special screw M6 with knurled button |
| 8 | screw | Low nut M12 |
| 9 | Stationary sleeve | Steel circle Ø 50 mm or pipe Ø 50x11 mm |
| 10 | Bearing | Angular thrust |
| 11 | Split retaining ring | |
| 12 | End bushing | Steel circle Ø 20 mm |


The connection depends on the motor itself.

How to make a drilling machine for printed circuit boards with your own hands.
To manufacture a drilling machine for printing circuit boards, a drive of a low-power device is required. As a lever, you can use a mechanism from a photo cutter, a soldering iron. The drilling site can be illuminated with an LED flashlight. In general, this machine is rich in flight of creative thoughts.


