These flowers can decorate gifts, rooms and/or postcards. Not only do they look beautiful, but they will forever "blossom".
And since plastic bottles are used in the manufacture, you are also helping nature - plastic products can decompose 450 - 1000 years. To date, about 90% of all plastic bottles not recycled and we want to change that.
Making beauty out of garbage beautiful and noble in relation to our planet. We offer you several color options made from plastic bottles.
Flowers from a plastic bottle. Option 1.

You will need:
Plastic bottles
Scissors
Lighter or candle
Pliers or tweezers
Tip: try to work indoors with good ventilation, on a balcony or outdoors. If you decide to make plastic flowers at home, then open the windows and leave them open during and, for some time, after work.
1. You can use the center, bottom and/or top of a plastic bottle.

First you need to draw a template for your flower and cut it out.


3. All flower petals need to be bent in one direction.

4. Get your lighter ready. Take the flower with pliers and bring it to the flame. As the flower begins to heat up, its petals will begin to deform.
Be careful not to overdo it with heat, otherwise you will spoil the flower.

One by one, form all the petals.
5. It is worth doing several of these blanks.

6. You have semi-finished products ready. Now they need to be connected together in the middle. Prepare 2-3 blanks. The connection can be made using the same heat.
You can also pre-make two holes in the middle of the blanks and sew them together, attaching a decorative button on top in advance.
Flower from a plastic bottle. Option 2.

1. You need to make 7 blanks, but each should be smaller than the previous one. To make them, first draw 7 patterns (see picture).

2. Trace the templates on the pre-prepared parts of the plastic bottles and cut out the quatrefoils.


3. In the middle of each workpiece, you need to make a small hole with an awl.

4. Now each blank needs to be melted over the fire. Use a lighter or a candle and, as in the first example, start heating the workpiece, while bending the petals up in turn.

5. Prepare a green plastic bottle to make a corolla of sepals. Make a whisk, like the previous parts, i.e. melt each petal a little and make a hole in the middle.


6. The flower stem with leaves is also made from a green bottle and wire. From the central part of the bottle you need to cut a spiral. Its width should be about 1 cm.

7. Prepare the wire. It must be wrapped with a spiral cut from a bottle. It is worth noting that when winding, you need to heat the spiral over the flame.


9. Press the beaters firmly against each other to release the end of the wire, which in turn needs to be bent into a loop.

10. cook from thick paper leaf stencil and use it to cut out the leaves from the green plastic bottle. Like the rest of the details, the leaves need to be melted and twisted a little (see picture).


Flower from plastic bottles. Option 3.

You will need:
Plastic bottles
Scissors
Spray paint cans
1. Prepare paints of two colors. With one can, paint the entire bottle, and with the other, draw several different stripes.

2. When the paint is dry, cut each bottle into 2 pieces (you can choose any size).

3. Start cutting out the petals. To do this, you need to make cuts on each part of the plastic bottle. Do this so that you get stripes resembling petals.

Plastic bottles. Flowers. Master Class. Option 4.

You will need:
Plastic bottles
Stationery knife
Bead
1. Prepare plastic bottles and cut off the bottom of each of them.

2. Hold the tips of the petals over the candle for a more realistic look.

3. Choose a paint color, like orange, and paint the flower. You can also color the tips of the petals by applying a thin green line.

4. Heat the dot in the middle and glue the twig to it.

5. Use green paint to color the small flower.

6. For beauty, you can attach a bead to the center of the flower.

7. Now you can connect all the details.

How to make flowers from plastic bottles. Option 5.

You will need:
Plastic bottles
Markers
Scissors
Decorations for flowers
Glue (preferably superglue)
Baking tray
Oven
1. Wash and dry the plastic bottle.
2. Cut off the bottom of the bottle with scissors. Feel free to experiment with the shape, but you should still end up with a flower-like shape.


3. Make sure the room is well ventilated. Prepare an old baking sheet and place the bottoms of plastic bottles on it.

Turn on the oven and bring the temperature inside to about 200 degrees. At this temperature, you need to hold a baking sheet with plastic flowers for about 10 minutes.
4. Remove the tray and let the molds cool. Remove them and start decorating to taste. You can use markers, or glue beads in the middle of the flower.


How to make a flower from a plastic bottle. Option 6.

You will need:
Plastic bottles
Stationery knife
Scissors
Acrylic paint and brush
Glue (glue gun is better)
Drill (for holes)
Buttons
Connecting rings
Candle, lighter or heat gun
baking sheet
Oven
Pliers
1. Cut off the bottom of the plastic bottle to get a flower-like shape.

2. With an awl, make 2 holes in each "flower" - the holes should be on opposite sides, on the edge of each petal. With the help of these holes it will be possible to connect all the flowers with rings.
3. Place the blanks on a baking sheet. While holding the flower with tweezers, start heating the flower with a flame or heat gun. Do it carefully and don't overdo it. It is also worth remembering about the safety and ventilation of the room.
The flower petals will begin to bend during heating, so stop heating when the petals are in the shape you want.


4. Start painting flowers with acrylics. Next, let the paint dry. It is not necessary to paint on both sides.

5. Make two holes in the middle of each flower to sew on buttons.
I offer you a master class of flowers from plastic bottles. There are a lot of options for such colors on the Internet, there are also master classes, but almost everywhere the nuances and subtleties are not shown. In this topic, we will consider how to make flowers from the bottom of a bottle, this is the easiest version of such flowers. I will try to describe and show the whole process in detail.
I was prompted to this job by a task in the kindergarten - to make crafts from "pokidkovih" (garbage, those that are thrown away) materials.
As it turned out, making such flowers is not very difficult. The material is available and cheap, in fact it is what you throw away. Trying and experimenting will not be expensive. I think older children can make such products on their own or with the help of their parents.
First you need to find how more bottles different color. Now I already know that most bottles are produced in a narrow color scheme: bottles are transparent (from water and drinks), blue (mostly pale of different shades), brown (mainly from beer), green (from beer and water) and white (mainly from dairy products). You will need a lot of green bottles, the expense for flower greens is large.

Rarely found, but you can find: yellow bottles (they sell Zhivchik drink) and black ones (he has energy drinks). There are also red bottles (also from energy drinks, but I did not find them). Mineral water is rarely found in bright blue bottles.

First, divide the bottles into parts and consider which piece will be used for what. The bottom will go to the base of the flower, a smooth cylindrical sidewall to fill the flowers.
Do not rush to throw away the conical parts, you can make beautiful bells out of them, as I will show in the next master class.

Cut out the bottom. We make the cuts of the petals as deep as possible.


Now cut out the filling of the flowers. It can be four-leaf, three- or five-leaf flowers. To your taste. It is better to fold several of them, with the petals shifted, then the flower will be more magnificent. The easiest way is to make a cliché out of paper and cut the number of colors according to the template.

Ready for the middle. Why do we cut out a strip (I do it in this flower from white plastic)
and cut it into noodles.

From green plastic we cut out a cup under a flower. There is no need to observe clear geometric shapes, on the contrary, unevenness and unevenness will decorate the flower.


There are blanks for the flower, now you can light a candle and proceed to the most exciting part.

First, we process the edges of the plastic. To do this, we bring the workpiece at the bottom of the candle where the flame is coldest. Carefully melt the edges starting from the recesses. At the same time, the petals are wrapped. If your workpiece is slightly bent, place it above the candle, first higher, in order to understand how the temperature will act, the workpiece will bend and twist. The main thing here is to capture the moment.


Similarly, we melt the flower from the bottom, we start the process from the recesses.
If you want the edges of the flower petals to bend more inward, with a tooth or evenly, bring the already melted petal vertically to the candle flame and wait until it begins to bend.

In order to make the middle of the flower, we first melt the cut strip along the edges well, and then twist it into a tube and melt its edge to fix the shape.
The middles can be made different, I will show examples below.


All parts are melted and the flower is ready for assembly.

We make leaves from green plastic. They can be cut into any shape you like.
We melt the edges of the sheet on the candle (at the bottom of the candle, near the wick itself).

And then we give the sheet a shape - we bend it.
To do this, bring the leaf over the flame of a candle. Remember the part will always bend towards the flame(i.e. down). This process is instant, do not overexpose the sheet, otherwise it will curl.


By the same principle, we melt and bend the inner flowers.
This is what the broken leaves look like.


Please note that green plastic is different shades, lighter and darker. Keep this in mind when building and planning.


We will collect flowers on a wire. I have - electrical wire braided (one and a half). I bought a double one, removed the general insulation and divided it into two. It is better to take the color of the wire brown or black, this color is better covered with a winding without bald patches.
The next step is to make holes. I have a thin soldering iron, I use it. For these purposes, you can use an awl or a nail, previously heated in a candle flame (we heat at the tip of the flame, where it is the hottest).

We twist the edge of the wire. On the wire we collect the flower in the desired sequence.


We are preparing the stem braid. To do this, we cut the cylindrical part of the bottle in a spiral, approximately into strips of 3-5 mm. To begin with, cut a couple of meters, no more, otherwise it will not be convenient to work, the tape is twisted. We do not cut the strip from the bottle, we will gradually cut it.


Let's start forming the stem.

To begin with, we wind a couple of turns on the wire and lightly melt it on the flame so that it shrinks and fixes.


Then we pull it to the base of the flower, they will tighten it and fix it.


We distribute the leaves, make holes in them at the base and put them on the wire. we wind the spine of the leaf with the same strip and melt it.


This flower will consist of three heads. We wind the wire from the branches onto the main one and rewind it with green tape.

Winding the ribbon around another flower:


This is how it turned out in general.


After all the stems and leaves are decorated, it is engaged in the middle.
Spectacular centers are made of black plastic. They can be made different, for example like this.


The middles can be made of white or transparent plastic.


Under the main flower from the bottom, you can put a base of smooth plastic. To do this, you need to cut the circle with noodles and melt its edges.

Below are examples of how flowers can be made.


Expanded variant:


In order to fix the centers, I use a hot glue gun. You can also simply glue them with super-glue or Dragon-type glue (I haven’t tried it, but they write this on the Internet).


Glue the middle, a couple of colors for example:


There is a double center here.


And this version of the same flower:


Here is our bouquet ready!
Many photos)


Flowers have to be placed somewhere. So that the craft is completely made of garbage, we will also make a vase.
To do this, take a green bottle, cut off the top of it.


We melt the bottle over the candles along the cut edge, and also bend it from all sides. We do as you like, just do not overdo it and do not overheat so that the plastic does not pull.
We make perforation with a soldering iron, which pattern you like)


This is how the vase turned out.


Flowers in a vase. Our kindergarten craft is ready)


At street lighting flowers look especially good, the petals gleam and reflect the sun's rays.


The stems and leaves are neat and stylish.


I really enjoyed this job, and I wish you the same!
Thank you for your attention!


1. Crafts from plastic bottles can be very beautiful - you just need to use containers made of plastic of a certain type and try to make not primitive flowers, but graceful ones.
Flowers from plastic bottles - elegant fantasies
This is proved by the designer Veronika Richterova, whom we have already talked about and presented her work more than once, as an example of high taste (strange as it may sound, if we are talking about crafts from plastic bottles), and also in this.
The master has wonderful works, looking at which it is impossible to believe that they are made of bottle plastic. They want to be seen and looked at. And this is quite possible not only in the pictures, but also if you make such crafts for the garden with your own hands to decorate your own site.

So, we take plastic containers not from under water or another drink, but from under shampoo, gel, other cosmetic or detergents.
It is desirable that the bottles for elegant flowers are initially in the color that you want. That is, so that crafts from plastic bottles do not have to be painted - it is unlikely that you will get a better color than it was given during production. In addition, there will be no need to worry that the paint will wash off in the rain or peel off in the sun. Of course, on the street, any plastic burns out over time. But when it fades, then paint it. At the same time, update your flower bed. For the centers of flowers, you can use decorative corks from containers.
Well, if there are curly scissors, the blades of which give a wavy edge. If there are no such scissors, you will have to try to cut the “wave” with ordinary scissors. In principle, it is not so difficult.

In principle, the pictures show very clearly how to make such flowers. Try not to cut small elements - then you will need to fasten them, and this is not always easy. If you need curved petals, hold the blank over the fire and shape them. But do not bring it too close to the fire - the plastic melts and burns very quickly, almost instantly.
2. But, by the way, this property of it can be successfully used to make a flower stem. You can simply take a hard metal wire or a small-diameter rod and, screwing strips of plastic (you can also use a regular bottle one here), melt it.
And more flowers from plastic containers so different! Let's try to do beautiful flower with delicate petals. It will be fantasy: it will remind someone of a cosmea, someone of a daylily, someone of heliopsis, zinnia, a Christmas star, etc.
Materials for 1 garden craft - flower
- plastic bottle - capacity 1 liter. Please note that best options bottles for such flowers are those whose necks are smooth. Basically, these are mineral water bottles;
- a ball made of polystyrene foam, expanded polystyrene, plastic, wood, etc. - diameter 25 - 40 mm;
- flexible metal wire;
- flower stem wire;
- paints.
- scissors, brush.
Flowers from plastic bottles - step by step MK
We use a plastic bottle that is well washed and dried.
Cut the bottle in half crosswise. We try to make the cut as even as possible - it depends on whether the flower petals will be the same in length. If you are making a flower with children, they may need help cutting the plastic.

We cut the plastic bottle into five or more parts. Here, too, we try to cut, observing uniform distance between the stripes - future flower petals.

We take each strip with our fingers and bend it outward from the neck.
From the strips cut out the petals of the desired shape. Here they are so graceful, pointed.

It's time to paint the flower blank. We tightly close the table with a layer of paper or an old oilcloth, prepare paints and brushes.
If we buy paint specifically for coloring plastic crafts, choose glossy - it gives a beautiful shine.
To enhance the effect, you can add glitters to the paint - special glosses. By the way, such glosses are not only in nail polish - they are introduced into interior paints and varnishes. Can be bought at construction stores or in shops that needlework masters love so much.

We make the background coloring of the flower the main color (in this case, red). The plastic is transparent, you can paint the workpiece on one side, but it is better to paint both - so the flower will look more elegant.

After the petals have dried, we draw the details with a different color of paint - paint the tips, put neat dots on some petals. To make it easier to draw a clear, even point, we do this not with a brush, but with the tip of a toothpick, knitting needles, barbecue sticks, etc.
We paint a small ball of foam or other material - it will be the convex center of the flower.

We fasten the ball to the center of the workpiece - we fasten it with wire, making holes with an awl, or glue it with glue for outdoor work. For example, very good in this regard

The stem for a flower can be made of wire by painting it in green color. And you can buy in a store that sells goods for florists, special stems for artificial flowers. Often they are in the form of a wire (called a gerbera) - you can make stems of any height.
Large flowers from plastic bottles are not uncommon, but try to "grow" huge flowers from this material, and you will see how your garden has changed thanks to them.
Huge flowers look fabulous and bring magic to the world around them.
Materials for huge magic flowers
For one such flower you will need:
10-12 plastic bottles with a capacity of 2 liters or 3-4 plastic water bottles with a capacity of 3-6 liters;
- Rim from the wheel of an old bicycle, you can teenage or children. If there is no rim from the wheel, you can take a children's gymnastic hoop, and instead of the knitting needles, tightly wind the wire or rope;
- durable metal bar (reinforcement) or wheel fork;
- thin flexible hose;
- paint - color depending on the color of the flower, as well as green;
- wire - for fastening. But if you have construction stapler, it will make the job much easier.


Plastic bottles or bottles are prepared - clean and dry. Working with them is, in principle, the same, just from 1 bottle of petals you get more.
We cut off the necks and bottoms from bottles / bottles.
We cut out large, simply huge flower petals - to the entire height of the containers.
Let's start painting the petals. We choose the color at will, the paint is suitable for the appearance. Here, paints are described in great detail, which are most often used for other plastic crafts.

You should not paint over the entire petal with one color - if you make it two-color, with veins, spots, it will look more lively. We use one paint light, the second we take darker. You can use three paints in one product, but not more, otherwise it will be too "full".
You can paint the petals on one side (the plastic is almost transparent), or on both sides.
How to attach flower petals to the base
First, we make the middle of the flower. To do this, cut out a circle from plywood or use the bottom of a plastic bottle. We paint the middle in the color we want. We attach to the spokes in the center.
To the middle, we begin to fasten the petals one by one. For reliability, we also fix each petal on a spoke or rim.
When all the petals are in place, we mask the fasteners in the middle with thinly cut strips from a plastic bottle. By the way, the voluminous middle of the flower is very beautiful.

How to make a flower stem
If there is a wheel fork, we turn it into a “stem” (we paint it green. If there is no fork, we put a rubber / plastic hose on the reinforcing bar, paint it green and also get a stem. True, you will have to tinker with mounting the head on such a stem flower You can make a bolt fastening or securely wind the parts with metal wire.
Huge magic flowers from plastic bottles look great both in groups and singly. We plant them and admire our work.
Crafts from plastic bottles are multifaceted in terms of subject matter: figurines of animals, insects, men are created from this material.
If you are going to connect the layers with the petals with wire, you will have to make holes in the plastic. With a red-hot nail or awl, you will do it instantly. So that the mount does not spoil the look of crafts from plastic bottles, make holes in those places that will be covered later with the next layer.
It is very easy to fasten the layers with staples, but for this you will need a construction stapler. By the way, the thing in the household is very useful - it fastens almost any materials.

We make the middle of the flower - for this you need to find and attach a suitable cap in the center of the craft or use some kind of ball (tennis, for example), cutting it in half.
It is not difficult to attach such flowers from plastic bottles to the surface - you can simply nail it or also use wire.
Plastic bottles, from which, most often, crafts for the garden are created, the material is convenient in terms of cutting, durability, etc. But often the flowers from it are “flimsy”, with thin petals that just scream: “We are made of plastic!”. 
Dense, evenly colored petals
In many cases, even staining does not save. It is especially disappointing when you make flowers from plastic bottles: beauty seems to be implied, but, frankly, it is not. What to do?

You can do as designer Lauren Karnitz creates amazing crafts for the garden and interior from PET bottles with denser plastic, namely from shampoo bottles, cosmetic and household products, milk, etc.
Another good thing about these bottles is that the plastic is already painted and the colors are very beautiful. That is, it remains only to work with scissors, then fasten the parts, and the craft for the garden is ready.
How to make lush flowers from plastic bottles
There are many techniques for creating plastic flowers for the garden, but there are those that allow you to make very lush heads. Here is one of them, very, by the way, simple.
- From round plastic bottles, cut fairly wide strips (4-5-7 cm).
- From one edge of the strips, cut out rather steep “waves” - these will be the petals.
- Pass the petals over the fire. Strongly "melt" the plastic is not worth it, you just need to warm it up a little so that the petals can be bent in the right direction.
- Now collect the strips in a "stack", forming a flower head. More stripes - more magnificent flower.
- Fastening - using a hot awl and wire. In principle, it will not be visible among the petals.
- The middle of the flowers can be made using corks.
Lilies from plastic bottles

Wonderful flowers from plastic bottles are obtained not only from round containers. For example, from an ordinary flat shampoo bottle you can make a bewitching lily. And you don’t have to bend the petals, giving them a shape: you just need to cut off the corners of the bottle - there is already a bend. If the result is not satisfactory, you can always correct the details of the flower over the fire.
Flowers from plastic bottles: Lotus 2 options
There are two options for creating lotuses from plastic bottles: one is easier, the other is more difficult.
Lotuses from plastic bottles - looks interesting
And, as often happens, more difficult option gives a more interesting effect: flowers from plastic bottles - tender lotuses - turn out to be lush, "full".

Although a simple option is interesting, especially if there are a lot of colors.
As for the material, it is better to use plastic bottles with dense light plastic - for example, milk or from shampoos and other cosmetic products.
Lotus with petals in several tiers
In general, the task of creating such flowers from plastic bottles is not particularly difficult. The only thing: you need a strong mount so that the lotus does not shatter into its components (petals). If you are going to decorate some small container with these flowers and you know for sure that you will move them, except that, occasionally, the petals into a flower can also be fastened with glue (hot, for example, or some kind of “thermonuclear” construction).

Such containers, which are, in fact, mini-reservoirs, are sometimes made to decorate a veranda, terrace, courtyard, etc.
But if you do everything "for real", spend a little time, make a hole at the base of each petal (with a hot nail) and tightly connect the petals into a flower with a wire (it will not be visible anyway).
Here's how to make the middle.


Lotus with petals in one tier

Making these flowers out of plastic bottles is easy. Cut off the top of the bottle, make petals along the edge of the cut. The flower stand is also the top of the bottle, but larger. We insert a flower with petals with a neck into the neck of the stand, inside - the middle, with the help of which the lotus in the stand will be firmly fixed.
Such simple flowers make wonderful borders for small flower beds.
We paint the petals in both cases with acrylic paint (lighter than aerosol, "spray"). The color can be white or pink (like most lotuses), although if you paint it yellow and decorate a decorative pond in your garden, you will get wonderful nymphs - water lilies (which, in fact, are the same lotuses, but not so "sung").
MagnoliaIt is best to start your first experiments in manufacturing with the most elementary crafts. Of course, luxurious roses and peonies look amazing, but it may happen that you simply won’t succeed in a beautiful but complex “make-up”. In order to master the "basics" we suggest you start with a simple magnolia. By the way, it will be possible to decorate trees and bushes with such flowers in winter, bringing the appearance of spring closer. Well, you can create beautiful composition at home, using all the same dry branches.
From each bottle (they need to be prepared as much as there will be magnolias), the upper wide part should be cut off along with the neck. In this neck, you will need to cut out 7 petals of the same size, and bend them a little inward. The cut parts should be held for a short time over the flame of a candle - so you do not cut your hands with them.
Of course, a magnolia can't be green, brown, or transparent, which is why the craft should be painted in your favorite shade of pink. For work, it is best to take acrylic paint, you can also use colored varnish or enamel. Do not be upset if you did not manage to evenly cover the surface with paint, on the contrary, they look more natural. If you don’t have special paints and varnishes, then you can take ordinary gouache, just remember that after it dries, you will need to open the magnolia with transparent varnish.

If you need to decorate flat surfaces e.g. table or wall country house, then learn how to make flower heads - it's extremely simple. By the way, for this craft, you need to use exactly the bottom, which is why you can arrange production without waste at all, making such heads in parallel with magnolias. We also draw attention to the fact that the beauty of the finished product will directly depend on the capacity of the container, so the most attractive ones will be obtained from five-liter eggplants.
Step back a couple of centimeters from the bottom of the bottle and cut off the bottom carefully. Cut the bottom along the lines to make blanks for the petals. The middle will be used as the core, it should be left untouched.
Cut out thin stamens from here - make very thin cuts to the middle of the bottom, then bend them inward, giving desired length and form. Give each blank a petal shape, be sure to melt the slices with a lighter flame.
If you are going to decorate a house with flowers, then you can use acrylic paints for coloring. decorative paints(they usually paint ceramics or glass). If the decor will "live" on the street, then it is best to take weather-resistant acrylic paints for outdoor work. Color the craft in the color you like.
Of course, this is only one option for making a flower head, and then you can call on your imagination to help, “playing” with the color, size, shape of the petals and stamens.
Flowers from plastic bottles - photo:

DIY plastic bottle flowers step by step
If you are already a more “advanced user”, then learn how to make multi-layer flowers - they look very attractive. You will need to learn how to properly shape the pieces using a candle flame, remembering that this type of work is best done outdoors or in a well-ventilated room.The first step is to make cardboard templates for flower details. They must be applied to plastic surface and circle with a marker, then cut out the desired number of parts. Bend each so that the parts are directed in one direction.
Grasp the petal with pliers or tweezers, whichever is more convenient for you, and slide the workpiece slowly over the flame of a candle or lighter. The shape will change, because under the influence of heat the plastic will melt. It’s just very dangerous to overexpose, because then the material can “fry”. Be sure to melt the cuts too, by running the flame along the contours. You need to carry out such a manipulation immediately with all the blanks.

Well, now all the flower layers will need to be put together. You can “plant” them on PVC glue, or you can make a couple of holes in each part and sew them together using a decorative button as a disguise.
How to make a flower from a plastic bottle
The flowers from plastic bottles master class will tell you about how you can make flowers on legs, finished goods you can put it in a vase or in some other way decorate the interior of the apartment.First of all, you need to draw 7-8 templates that will be the same in shape, but will decrease in size - it is this fact that will allow you to get a lush bud. You will also need templates for leaves and sepals.
Apply the contours with a marker to the plastic, cut it out, and then immediately disassemble it by color and size - this will greatly simplify the process of subsequent assembly. Using an awl, make a hole in each piece.

Hold each blank over the flame of a candle or lighter, then form softened petals - they should bend up. The center should not soften during this procedure, which is why it must first be closed with coins, which must be held with tweezers.
The sepals are made in the same way; a hole should also be made in the finished parts.
In order to make a stem, you need to take care of the braid. It should also be done on plastic base. Cut the remaining middle part of the green bottle into a spiral, it should be thin enough, about 1 cm. Also cut out the leaves.
Heat a spiral over the tongue of the candle and wrap it tightly around a piece of wire that will play the role of a stem. Do the same manipulation with the leaves, only it will be necessary not only to give the necessary shape, but also to “twist” the petioles.

First, put the sepals on the wire, then all the blanks for the bud (first, the largest ones should go in decreasing order), fix everything with a wire loop. In order to attach the leaves, it is necessary to slightly heat the parts that need to be glued.
Curly flowers from plastic bottles step by step
If there are columns or pipes in your interior, then they can also be adequately decorated - all you need is to make curly DIY plastic bottle flowers.

Cut off the bottom of a plastic bottle, cut it in a spiral to make a ribbon about 10 cm wide. Draw a pattern on the surface of the ribbon with a marker and cut out a branch. Melt the cut branches over the candle.
Use thick paper to cut out flower patterns, they should be different in size. Transfer the templates to plastic and cut out. Melt the parts over the tongue of the candle, make a couple of holes in each.
You will need wire to make a flower blank, string beads or beads that will play the role of the middle. Assemble all the components together.
In the leaves on the branches, make holes in any order for attaching flowers. Fix the flower and twist the wire around the branch. Bite off the excess with pliers and secure the end of the wire closer to the branch. Heat the ends of the branches over the flame and bend.

Gather all the parts together and wrap with wire, leaving a small loop.
Master the manufacture, it is also a wonderful interior decor.
Flowers from plastic bottles for the garden
This decor is perfect for personal plot, allowing you to make it original and exclusive. Your neighbors will probably be very interested to know how you can create such amazing beauty with your own hands.

cut into large petals from bottle plastic, paint them yellow on both sides. The easiest way to use the aerosol version (spray), but it is quite possible to paint with acrylic.
After the paint has dried, make holes at the base of the petals. Using wire, collect them into a sunflower. For the manufacture of the middle, the bottle bottom is just useful (its texture will benefit). Use a metal rod for the stem.
Make several of these sunflowers to create a garden arrangement. You can add pots, toy bees and barrels to them - you get a stylized apiary.
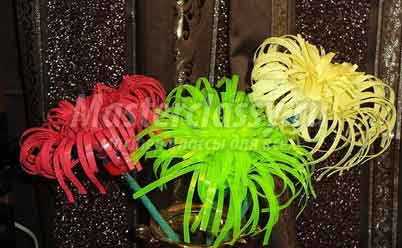
First of all, paint several vessels in different colors, it can be red, pink, white and yellow. Cut more thin "noodles". Fasten the noodle petals with wire and place in the cut off neck - then the flower will hold on better.
For the stem, you can take a tree branch, a metal rod or a thick wire. Wrap the stem suitable material, For example, plastic wrap, glossy paper, etc. or you can simply paint the stem in the desired color.
After you collect the chrysanthemum, you will need to stretch the petals from the unpainted side with a knife or wind them on a pencil so that they curl.

Flowers from plastic bottles - master class
To create a wonderful bell, you need to cut the bottle in two. Take the part where the cork is and carefully cut out the sharp edges. Warm it up a little on the fire - this will give the bell a beautiful shape.
Paint the flower in the desired color (it can be white. Purple, blue, you can dream up and completely cover it with spots), make a hole in the lid in order to then thread the stem. In order for the twig to look more like a real stalk, it can be painted with green paint.

Now you know, with your own hands and you can always decorate the interior of your home and garden.
Flowers from plastic bottles is not only a way to give a second life already unnecessary things, but also the opportunity to show your creative thinking, decorate your house or summer cottage.
And also - an idea for a gift, a way to relieve stress, it's no secret that a hobby manual labor calms the nerves. You can involve the kids in the process, they will not only help you with pleasure, but, perhaps, they will come up with something new. summer crafts, moreover, will be able to participate in competitions and exhibitions at school or kindergarten, and you won’t have to break your head urgently. Therefore, do not throw away old bottles, give them another chance to be useful, and not increase the mountains of hard-to-decompose garbage in landfills.
DIY plastic bottle flower: step by step

DIY plastic bottle flowers
And now we will learn how to make terry flowers from plastic bottles step by step. When you learn how to make a multi-row corolla and understand the principle, many more complex varieties of flowers will become available to you.
There is nothing complicated here. First, we make several gradually decreasing stencils of petals. For example, for a rose, let it be stencils with four petals. For their manufacture, it is convenient to take paper squares with gradually decreasing sides. To make the rose densely terry, you will have to take six or seven gradually decreasing squares.
We fold each square in half, then in half again, and then the resulting small square diagonally and cut out half of the petal, a little short of the center. When unfolded, we get a symmetrical four-petal corolla. The principle is the same as when cutting snowflakes out of paper. We do this with all the squares.

When the stencils are ready, we begin to make DIY plastic bottle flowers. First, we cut blanks from pre-prepared bottles. The number of containers needed will depend on the size of the flower. We cut off the bottom and neck of each bottle, so that only an even cylinder remains. Now cut it lengthwise, and we get a rectangular blank.
We cut it into squares according to the size and number of stencils, and from the small squares we cut out blanks for the flower using stencils. We make a hole in the center of each blank with a heated awl. It should not be too large in diameter so that it would be possible to string blanks on the wire, but the insulation in diameter would be larger.
Now we need to form the petals over the candle flame. This must be done quickly and carefully, without touching the flame itself. We form the softened plastic with our hands, bending and twisting. We do this with each layer of the whisk.
In addition to petals, we need a stem, leaves and sepals for a flower. For them, we take a green container, and we will also need a wire. A sufficiently thick copper or aluminum single-core wire in plastic insulation will do. For the leaf and sepals, we cut out the flat part of the green bottle in the same way, immediately draw a leaf on the plastic or make a pre-stencil and circle it. We cut out a leaf and form a candle over the flame. We cut out the sepals according to the stencil and, like the corolla, warm it over the candle and give it desired shape. For greater credibility, the leaves of the sepals can be made not with smooth edges, but with jagged ones. To decorate the stem, we cut the cylinder from the second green bottle into a spiral, the width of which is about one centimeter. We hold the wire and spiral over the flame of the candle and wrap our stem with a strip of green plastic. This should be done fairly quickly, because the strip, cooling down, loses its flexibility.

The stem should end with a piece of bare metal wire. We alternately string the sepals on it, and then one by one the layers of the corolla, starting with the largest and ending with the smallest. When everything is strung, with the help of round-nose pliers we bend the metal with a small loop. If the tail is too long, you can bite off the excess with wire cutters.
Now it remains to warm up the tip of the leaf and wrap it around the stem. Our rose is ready. It’s good if you have colored plastic, but you can also make very beautiful graceful flowers from transparent plastic. To do this, we use a heated awl, with which you can give texture to smooth transparent plastic. Glitter and clear polish will also come to the rescue, as well as a silver outline.

How to make flowers from plastic bottles
Using this master class, try to make DIY plastic bottle flower step by step and make sure it's pretty easy and simple. From such roses you can make an unfading bouquet, and flowers for necklaces, hairpins, brooches and earrings are also made according to this principle. useful to you when creating them. The rose probably has the most a large number of layers in a whisk.
For a tulip, only two are enough, moreover, of the same size. In general, two-layer whisks are the most common. Stamens can go in a separate layer, for which numerous cuts are made on a plastic mug from the edges to the center. Leaves are a separate topic, the methods of their manufacture are also very diverse.

So far, we have considered flowers of small or medium size. If we want to do flowers from plastic bottles for the garden, so that they are noticeable there, the size must be large enough. There can be two ways.
First: increase the size of the flower itself as much as possible, which is generally not difficult after you practice on small flowers first. The size will be limited only by the size of the containers you have available. And the second way: to collect fairly large branches from medium-sized flowers. Instead of stems, it is quite possible to use rather thick wire or even plastic or metal-plastic pipes here.
For flowers, as a starting material, you can use not only water containers, but also bottles of milk, shampoos, and detergents. Please note only that opaque dishes when heated can give a strong bad smell, therefore it is better not to heat the parts from it. When painting on the street, you can use not only acrylic paints, but also PF enamels. They have a smell, but on the street it's not so scary.

Now you know, how to make flowers from plastic bottles, but this is not the only way to dispose of them, there are many others great solutions e.g. butterflies, animals or or homemade furniture. From individual flowers, using LED lights, you can collect garlands to illuminate the recreation area.


