Some tools that greatly facilitate the life of a summer resident do not have to be bought. For example, you can not buy a walk-behind tractor, but make with my own hands. Typically, such products are created on the basis of a motorcycle or. Home-made equipment, like a factory motor cultivator, can be used for plowing the land, cultivating, hilling and transporting goods. To understand exactly how to do homemade walk-behind tractor, you need to learn about how each part of it is created.
The use of walk-behind tractors
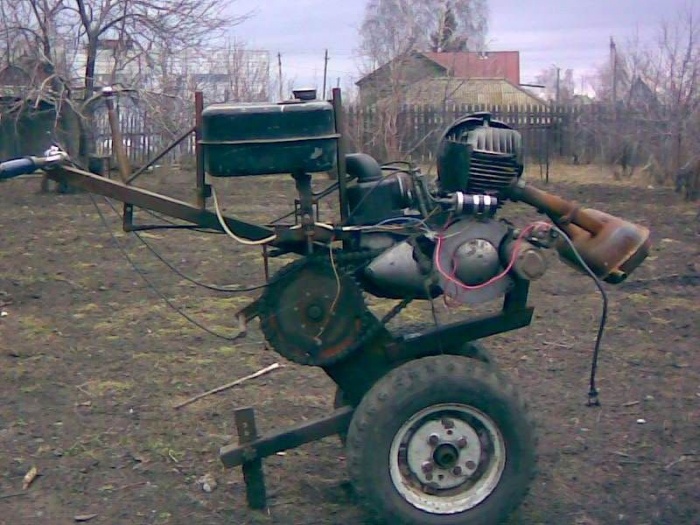
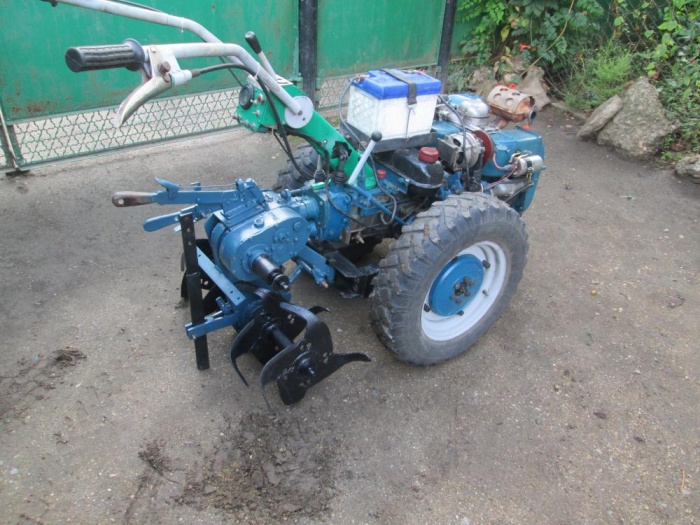
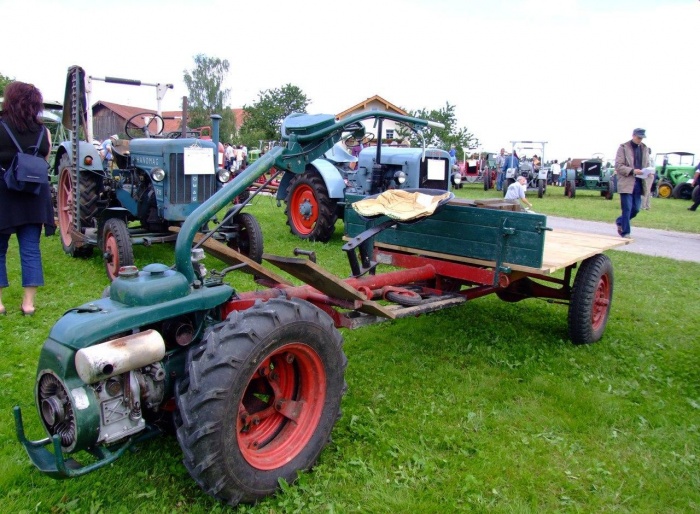
Since processing even a small area requires a lot of effort, many land owners are thinking about buying a walk-behind tractor. But the prices for powerful models are high, so home-made walk-behind tractors are often created (as in the photo). Such devices are used for plowing, hilling, mowing, and fertilizing. In addition, walk-behind tractors are used for snow removal and weeding. If you make a trailer, you can carry loads up to 200 kg with a walk-behind tractor.
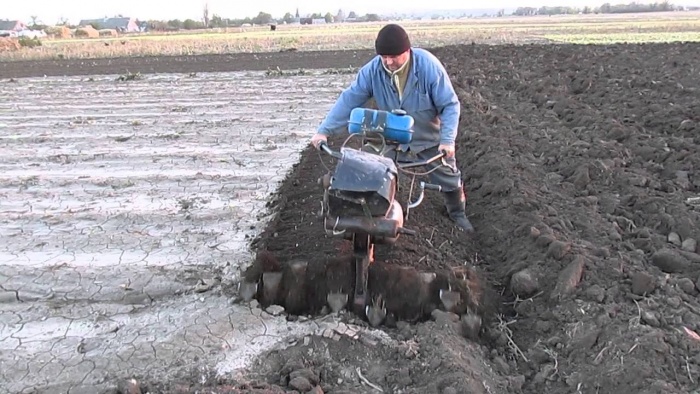
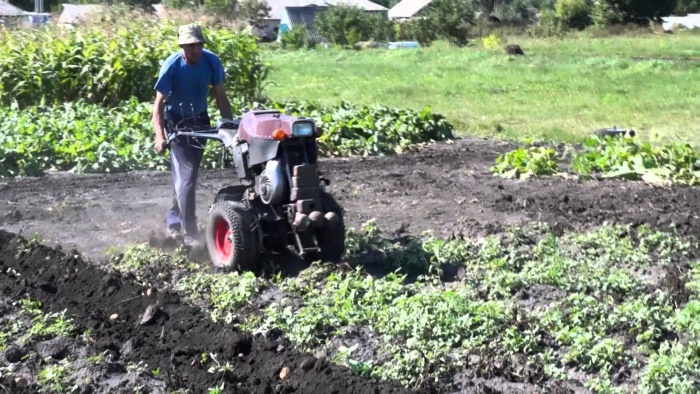
Light walk-behind tractors are usually equipped with only a cutter and a weeder. Products that have average weight, can be used with the use of cutters, a plow, a mower and a hiller. To understand which walk-behind tractor will be more convenient, it is worth considering the photos that show such devices.
Heavy products are characterized by such qualities as reliability, high cross-country ability and are equipped with non-removable wheels. They can be used with the following equipment:
- plow;
- harrow;
- cutter;
- rake;
- mower;
- snowplow;
- semitrailer.
A homemade plow for a walk-behind tractor and other parts can be made quite simply. When creating such elements, you can use photos of finished products.

The advantages of homemade walk-behind tractors
The main advantage of homemade units is that you do not need to spend a lot of money to create them. To create a homemade walk-behind tractor, it is enough to have the following materials and tools:
- welding machine;
- chainsaw or motorcycle engine;
- steel pipes;
- wheels off passenger car or sheet metal for the manufacture of grouser.
In addition, additional parts will be needed to connect the engine to the frame. Having all the above components, you can make a homemade walk-behind tractor with your own hands. In this case, such a device will perform all the functions that factory models perform. If desired, you can choose for the unit powerful engine so that the product is not inferior to modern walk-behind tractors.
Attachments for a homemade walk-behind tractor can be made independently or purchased ready-made.
Manufacture of the device frame
Before you make a homemade walk-behind tractor, you should prepare everything in advance necessary details and make a drawing. The frame is a supporting structure that is necessary to secure the rest of the walk-behind tractor. To create it, follow these steps:
- From metal pipe it is necessary to bend and connect the structure in the form of two spars, the edges of which are bent upwards.
- After that, the steering wheel from the Izh motorcycle is welded to the back side of the spar.
- To make the trailer more reliable, cross members are welded to the side members. They increase the rigidity of the structure. The front cross member will serve as a stop for the transmission chain tensioner.
- Near the bends of the rear edge of the spars, a metal plate must be welded. It will serve as a support for the battery.
Creation of the power part of the walk-behind tractor
The power part of the walk-behind tractor, transmission and frame for them are assembled according to several rules:
- The engine of the future device must be air-cooled. This is necessary at low speeds. Often, power units from scooters running on gasoline and having a capacity of about 13 horsepower are installed on home-made walk-behind tractors.
- The muffler for the engine is usually made independently from a metal pipe, the diameter of which is 70 mm. To do this, it is necessary to cut off about 25 cm of the pipe and fill it with sawdust or shavings. It is worth remembering that the configuration of the exhaust pipe must be such that the gases are vented to the side. If this is not foreseen, the exhaust will interfere with work while driving. The outlet should have a diameter of about 16 mm.
- The frame for installing the engine is created from a steel pipe with a diameter of 42 mm. In this case, the design is made in the form of a sled. Along the edges of the created structure, as well as in the center, brackets with holes for bolts are attached.
- After that, this frame is welded to the cross member of the sled. It should be positioned in such a way that the central bracket of the ball is directed downwards.
On the created frame, the engine is fixed.
It is worth noting that the engine from a motorcycle or chainsaw is well suited for the manufacture of a walk-behind tractor.
Features of work with homemade walk-behind tractors
The most common unit is the Arkhipov walk-behind tractor. Such products are created using a swivel between the tractor and attachments.
Due to this, less effort is spent during work, and the created furrow remains even when turning. When using such a unit, the plowing depth remains the same on the entire plot and no additional efforts are required for this.
Attachments and additional features
A homemade walk-behind tractor can become an indispensable device, since with it you can perform various works tillage in your area. As attachments for such units are often used:
- plow;
- cutter;
- harrow;
- rake.
All these tools are mounted on a special bracket that is installed behind the engine. Digging up potatoes occurs with the help of a special digger, which takes the tubers out of the soil without damaging them. If it is necessary to remove mowed grass or tops on the site, a canopy-rake is used.
With the help of additional equipment, the walk-behind tractor can be used not only for tillage, but also for cleaning the site. For example, if you attach a bulldozer knife to this unit, you can effectively remove snow. With the help of a roller with a brush, you can sweep garden paths.
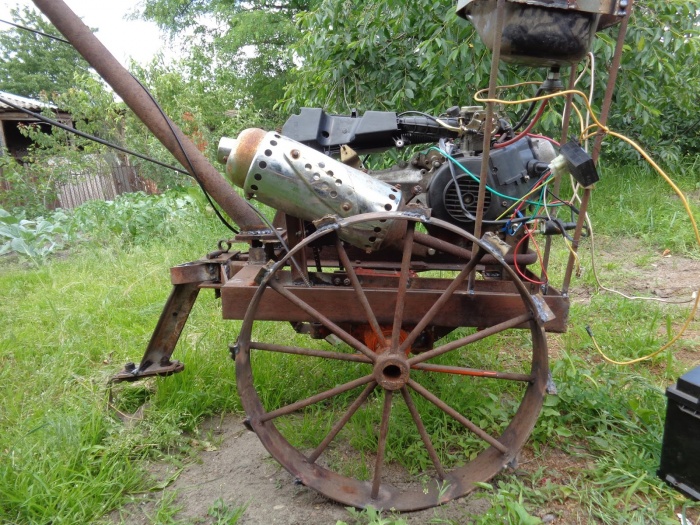
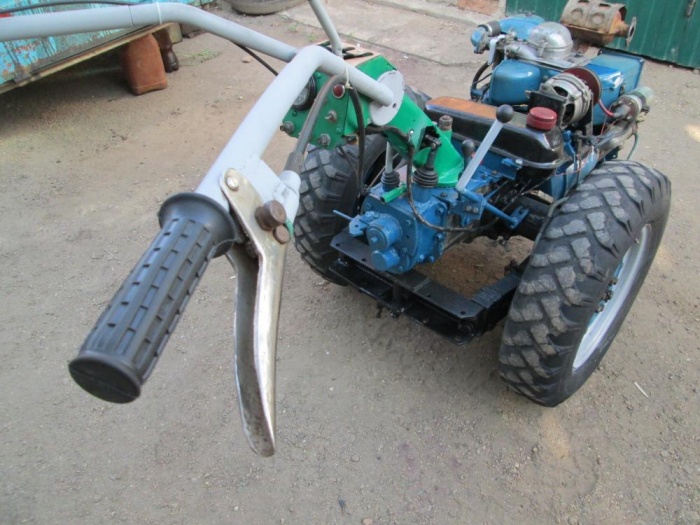
Thus, a do-it-yourself walk-behind tractor (as in the photo) can perform many functions and be used to perform almost all work performed on the site. It follows from this that it is not necessary to purchase the best walk-behind tractor to work on the site, since you can create such a design yourself.
Do-it-yourself trailer for a walk-behind tractor
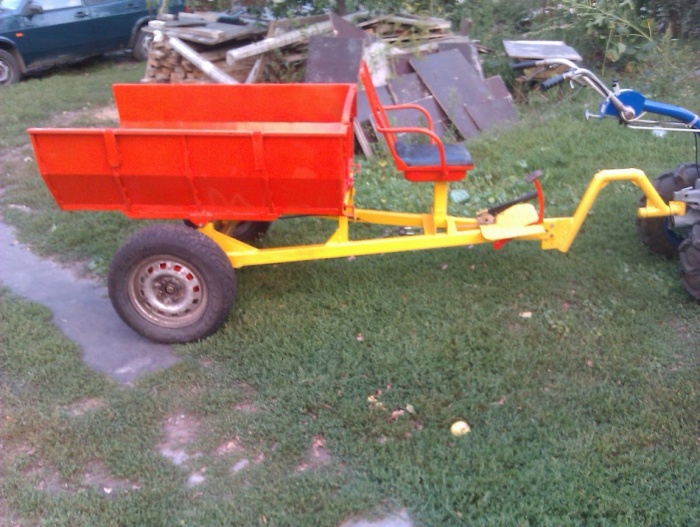
Homemade walk-behind tractor can be used not only for soil cultivation, but also for the transport of goods. In order not to spend money on a factory design, many create a trailer with their own hands. Homemade is created in several stages:
- First you need to make the wheels. It is quite difficult to make them yourself, so it is best to use wheels from a car or a motorized stroller. For the trailer, you need to get only 2 pieces.
- After that, you need to make a carrier, it consists of several elements: a swivel body and a drawbar. These elements are connected to each other by welding. The carrier is connected to the frame in such a way that the hinge body is inside the tubular body of the trailer frame. The design is fixed with a bolt near the thrust ring.
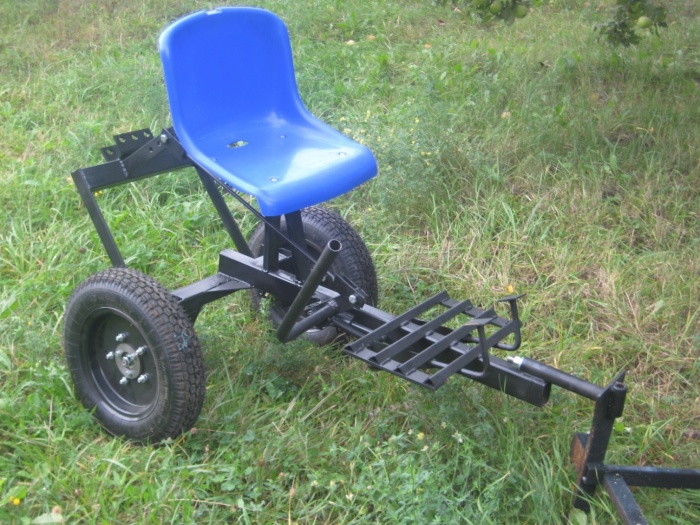
- The next step is the creation of the steps and the driver's seat. This is done using a board that has a thickness of 20 mm. If you want to make the seat more comfortable. It is worth using a ready-made plastic chair. Such a product is quite cheap and allows you to reduce the time to create a trailer for a walk-behind tractor.
- The next step is to create the trailer frame. The manufacture of this part of the structure is a rather complicated process, before which it is worth drawing up a drawing in advance. To create a frame, a pipe having a round or rectangular section can be used. The optimal diameter is about 60 mm. All parts of the frame are welded into a rectangle or square. It is worth noting that a square design is considered more stable. Such a trailer will be stable on the territory with hills and slopes. This is due to the fact that the load on the structure is distributed evenly.
- After that, the wheel base is created. It requires a steel rod with a diameter of 30 mm. The length of the rod must be calculated in such a way that the wheels do not come out due to the contours of the body. The created wheel axle is connected to the body of the longitudinal hinge and the side member by welding.
- The sides of the trailer and the bottom are knocked together from boards, the thickness of which is 20 mm. The corners of the wooden structure are reinforced metal products. Boards are fastened with self-tapping screws. To protect the material from pests and decay, it must be covered oil paint. To make the trailer more convenient, the tailgate is folding.
How to make a walk-behind tractor with your own hands? The walk-behind tractor is a universal device with which you can perform many agricultural works on suburban area. With this machine, you can plow and harrow the land, plant and harvest vegetable crops, clear the site of snow, transport small loads.
In agricultural equipment stores, such a device is very expensive. Therefore, you can make a walk-behind tractor with your own hands. Assembling its design is not so difficult. This does not require special knowledge and skills.
You can make a device from parts of old motorcycles, chainsaws and agricultural machinery. Home-made units in terms of quality of work are not inferior to industrial designs.
Motoblock manufacturing technology
Materials and tools:
- fittings;
- steel sheet 12 mm thick;
- steel pipe;
- gasoline engine from an old scooter;
- motor mounts;
- couplings;
- bearings;
- frames;
- control cables;
- rocker;
- handles;
- chains;
- welding machine;
- petrol cutter

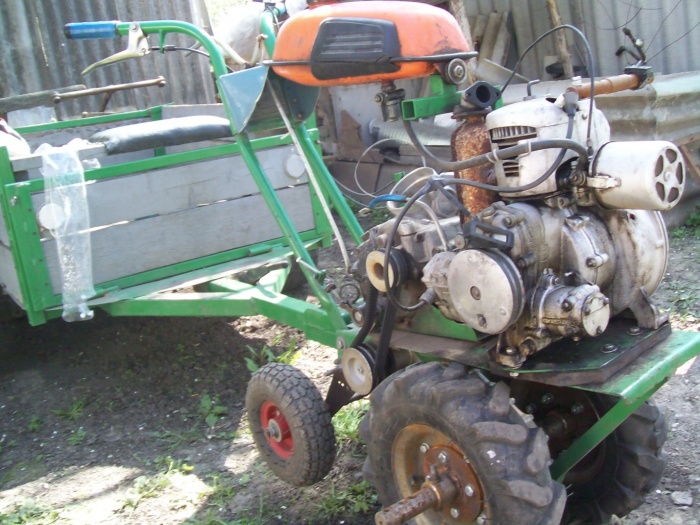
The main parts of a homemade unit can be taken from an old scooter. The unit has a simple design, high strength and versatility. This device will work on gasoline engine. The device includes in its design a trunk for transporting goods, a suspension for agricultural tools: a harrow, a plow, a cultivator.
The main structural element is the engine. It can be taken from an old scooter. Such an engine has high power and air-cooling elements are mounted in it, which prevent the cylinder head from overheating when operating at low speed and high load. If the motor does not have a cooling system, it will get very hot, which can lead to its failure.
From an old scooter, you can take motor mounts, chains, a frame, control handles and gear shift cables. The distance between the chains is 15.9 mm and 12.7 mm. The running axle has 12 teeth, the output shaft has 11 teeth, the secondary shaft has 20 and 60 teeth.
The remaining structural elements are created by hand. A wheel axle is made from reinforcement. From a pipe having a diameter of 60 mm, a frame is made by welding, having U-shape, and trunk.
With the help of three hinges of the main and control rods, the machine is connected to the steering wheel and the plow. Must be done homemade device gear shifting.
Connect with a welding machine steel pipe to the machine frame. At the end of the steel pipe there should be an axis on which a rocking arm is mounted, which is used to tension the control cables going to the gearbox.

Then you need to weld a piece of pipe to the rocker arm, which will serve as a control handle.
The running wheels are flat. They must be equipped with special lugs so that when moving on the ground they do not cause its compaction. In addition, this design of the wheels contributes to the loosening of the soil. The wheels are made using a power cutter from a steel sheet 12 mm thick.
As wheels, you can use ordinary wheels from a car, but they will compact the beds when the device is in operation.
Back to index
How to assemble a walk-behind tractor
Perform the assembly of the elements of the device. First, using a welding machine, an asterisk is attached to the drive shaft, then the housings with bearings, overrunning clutches are mounted.
Then install the frame and running wheels. After that, telescopic traction, steering wheel and plow are fixed on the frame. The frame with the engine suspension element is connected using two arcs from the scooter.
Then the fuel tank is mounted. It must be installed between the pipes. Then the bracket is welded to the frame. After that, a steel axis is installed across the end of the bracket, which has a diameter of 36 mm and a length of 15 cm.
Then an engine with a suspension is attached to the axle. After that, it is fixed to the side arcs of the frame.
Then the secondary shaft is mounted. Mount chains and control cables. After that, the control unit, drive shaft, fasteners are assembled.
Before starting work, it is necessary to carefully study the structure of the walk-behind tractor. To create it, you need an engine from a motorcycle or chainsaw. But it is worth remembering that it must be powerful. If desired, a do-it-yourself harrow for a walk-behind tractor, as well as other attachments, can be made.
General description of walk-behind tractors
Many do not have the opportunity to plow the land with a tractor, and it is quite difficult to manually cultivate even a small garden. But if the owner of the site has a walk-behind tractor, such problems do not arise, since tillage is quick and easy enough.
One of the advantages of the described units is the small amount of fuel consumed. Many owners of such products have enough 5 liters of gasoline for several hours of work. But not everyone has the opportunity to purchase a factory design, since cheap models are not powerful enough to perform all the work, and not all site owners can buy better products.
If you use old equipment as a donor, you can create a reliable walk-behind tractor for the garden with your own hands, which will last for several decades. At the same time, you can create a structure without spending a large number money.
With the help of the described unit, you can perform such work as:
- Transportation of goods. With the power of a walk-behind tractor, you can transfer loads up to 300 kg. To do this, a trailer is attached to the unit.
- Plowing the soil, as well as harrowing. This is done using attachments such as harrows, cutters and a cultivator.
- Planting crops.
- Fertilize the soil on your site.
- Hilling.
- Collection of potatoes.
Also, the walk-behind tractor can be used for such work as drilling, snow removal and sweeping the territory.
What you need to create a walk-behind tractor
Before starting to assemble the unit, you need to determine the power of the future design. If a chainsaw is a donor for a new device, it is better to choose a powerful Ural engine. Also, to create a walk-behind tractor, the engine of an old motorcycle is suitable.
Many have old motorcycles that have ceased to be used, so finding these will not be difficult. The average power of many older motorcycles is 16-22 horsepower.
Before you make a walk-behind tractor with your own hands, you need to find drawings of such devices. Do not forget about the welding machine.
Motoblock device diagram
Before installing the engine from a motorcycle, it is worth increasing the traction. This is necessary for an easier start of the motor. To do this, it is enough to replace the installed valve with a petal one. This will save on fuel while using the walk-behind tractor.
The gearbox can be taken from the scooter. A modified design from a motorcycle can act as a frame for a future product. To do this, it is enough to cut the fork for the front wheel, as well as other parts that interfere with the installation of equipment.
The motor of some motorcycles is too powerful for a walk-behind tractor, so a creeper should be installed. It is worth remembering that a pipe should not be used for the axis of the walk-behind tractor, since such products are unreliable. This part must be complete.

If you wish, you can make a cart for a walk-behind tractor with your own hands.
The main components of the unit
Before starting work on creating a walk-behind tractor, you should learn in detail about the following structural elements:
- creeper;
- reducer.
The first named node is part of the gearbox and is necessary for the normal operation of the device at low speeds. Many works on the site are carried out slowly, so this element is necessary. For example, digging potatoes and cutting furrows occurs at low speeds.

All factory models have a creeper, so it should be fixed to the homemade device. If this element is not installed, a self-made walk-behind tractor can only be used for transporting goods or for plowing large tracts of land.
The gearbox on the unit is installed between the motor and the wheels. When installing certain attachments, the torque is transferred to the attached device. An example would be a snow blower or drill.

In the absence of experience with such equipment, you should not try to assemble the gearbox yourself, as well as fix the creeper. The easiest way to purchase such mechanisms in specialized stores. They are often removed from old technology, which is no longer in use.
Plow
To make a plow for a walk-behind tractor with your own hands, you should find steel, the thickness of which is 3-5 mm. First, a plowshare is created. Usually this part is made from a disk for circular saw. The cutting edge of the plowshare is first beaten off on the anvil, and then sharpened in the same way as the scythe blade.
After the plowshare is made, the blade is created. For it, you can use a pipe with a diameter of 0.58 m. In this case, the wall thickness should not exceed 0.5 cm. Having prepared all the necessary details, assemble the plow for the walk-behind tractor with your own hands.
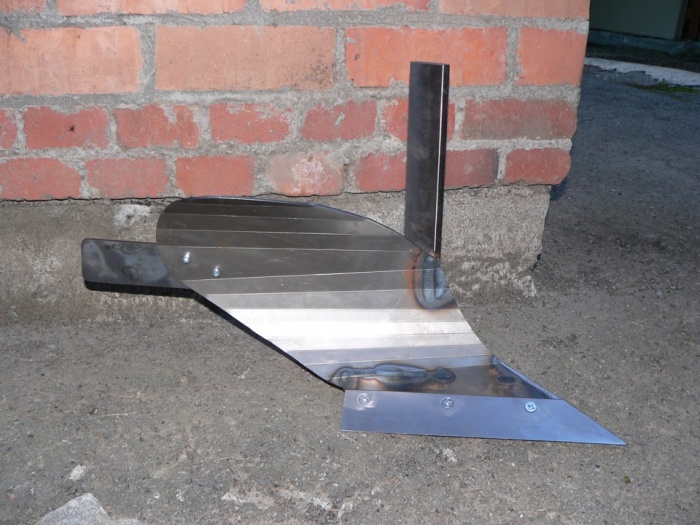
In order not to make a mistake when assembling all the plow elements into a single whole, you should first do this using a layout. After creating the share, blade and additional components, you need to connect them spot welding. The shield and racks are joined to the plowshare and welded as in the drawings. Having done all the elements correctly, you can make a plow for a walk-behind tractor with your own hands, which is no different from factory products.
The presented video shows the process of creating a walk-behind tractor.
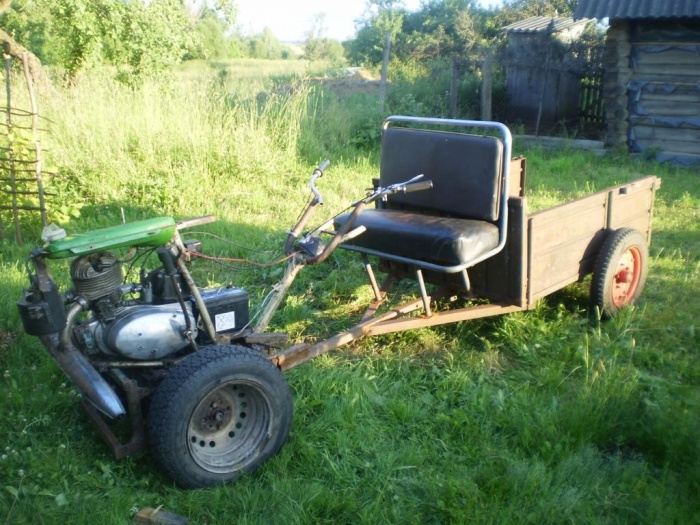
Adapter
Many owners of the described devices use an adapter to make movement more comfortable. This design is impractical, since a trailer can be installed instead. On which the seat will be located. But, nevertheless, many owners of walk-behind tractors create such designs.
You can make them even without experience in creating such structures. First you need to make sure that there is a deal on the walk-behind tractor that is designed to attach an adapter. If it is available, you can proceed to the following work:
- First you need to find a rectangular pipe, which will have the following parameters: length 1.7 m, width and height about 4 cm.
- Then, at one end of this product, it is necessary to weld a pipe about half a meter long, which will become the basis for the wheel racks. During the performance of such work, it is worth remembering that the height of the runoff from the middle of the wheel to the mounting base should be about 35 cm.
- The frame with the seat may have different kind. the choice of a particular option depends on the physique and preferences of the owner.
- In order for the design to be reliable, braces must be attached to the transverse pipes.
- On last step a lever is installed on the frame, with which you can control attachments.
Thus, to create an adapter, you need to have a steel pipe, wheels, a seat and a welding machine.
Grousers
Do-it-yourself lugs for a walk-behind tractor are created to increase the efficiency of the mechanism. Even large wheels do not always allow high-quality tillage. These products adhere well to the soil, which allows you to work more efficiently.
There are three common types of grouser:
- wheel covers;
- lugs made of steel sheet;
- products created on the basis of automobile disks.
Wheel covers are made of steel sheet with a thickness of about 5 mm. Such products are bent sheets of metal on which welded corners are located. Such lugs can be attached to and removed from the wheels, as the edges are tightened with bolts.

If you are a resident of the countryside or an avid summer resident, then sooner or later you will have the idea to mechanize your work. Today the market has a lot to offer ready-made solutions for a wide range of jobs. Their only drawback is their high cost.
The most popular agricultural unit is a walk-behind tractor as an assistant in any work from plowing to harvesting. It can be petrol, diesel or electric. Next, we will talk about how to make a walk-behind tractor with your own hands with a minimum investment.
1 Why design a walk-behind tractor with your own hands?
Almost zero cost is the main advantage over purchased equipment. All the right materials can be found in your barn or bought from neighbors for a penny. It is assembled from a chainsaw, a scooter, a moped, from a Ural motorcycle.
To create such a device, use any gasoline, diesel or electric. Such a do-it-yourself unit will not yield to factory models in quality and reliability.
1.1 What will be required in the work on the walk-behind tractor?
To work quickly and efficiently, you need to have the necessary tools:
- grinder and circles for metal;
- welding machine;
- drill;
- cap keys;
- pliers.
2 What can be upgraded for a walk-behind tractor?
To make a walk-behind tractor at home, you do not need any special investments. Everything you need is easy to find. Consider several options for creating a unit at home.
2.1 Motoblock from ZAZ
Before starting work, it is necessary to develop all the drawings for assembly based on the gearbox from ZAZ. Your assistant will be made on the basis of a single-axle chassis, and is a small-sized tractor.
Self-made motoblocks from the ZAZ checkpoint - great option how to provide yourself with equipment for agricultural work cheaply, quickly and reliably. This unit will be able to:
- cultivate;
- yell;
- dig;
- to mill;
- carry cargo up to 800 kg.
During the construction process, the creator may encounter many nuances, therefore, before starting the assembly, it is necessary to study in detail design features unit.

Homemade products for a walk-behind tractor are important additions. With their help, your tool from ZAZ will become a more functional household helper.
For the construction you will need:
- checkpoint ZAZ;
- final drives;
- wheels;
- front suspension;
- steering rack.
2.2 Assembling a walk-behind tractor from a scooter or moped
2.3 Homemade walk-behind tractor from a Chinese moped (video)
2.4 Motoblock from a chainsaw
A homemade walk-behind tractor from a chainsaw is a popular phenomenon in household plots. Basically, the simplicity of such a product captivates anyone who is familiar with drawing. The drawing is necessary to maintain the highest accuracy during installation.
If you have an unnecessary saw on your farm, you can easily convert it to a motor cultivator with your own hands. Most often, such a unit is made from a Ural chainsaw, due to the low cost and high power of the starting equipment. Such a unit will combine important qualities:
- high power and performance;
- ease;
- very compact unit.
For construction, you will need a standard set of tools. Motoblocks and motor cultivators from chainsaws (Ural, etc.) are the most profitable in economic terms.
The process itself usually begins with the creation of a frame. Such a frame is made in the form of a cube with corners of 3.2 × 3.2 cm. The engine is mounted on the cross members of the frame. Under it, you need to carefully install the fuel tank. It is advisable to use brackets for this. Bearings are welded onto the supports.
The center of gravity is located above the wheel support. If you weld pipes to such a device, you will get manual control. Ignition lock for winding engine fit any, for example, from a Zhiguli or a Cossack.

The main advantages of a walk-behind tractor from a chainsaw with your own hands:
- undemanding to lubricants;
- not picky about fuel;
- works autonomously;
- compact, used for work in hard-to-reach places.
Above are listed good options assembling a walk-behind tractor from improvised materials. It is also possible to make a walk-behind tractor from a motorcycle with your own hands, but this requires additional skills and equipment in the form of lathes and milling machines. However, we note that a home-made walk-behind tractor from a motorcycle has great power and is able to work with any attachments.
The article reveals the principle of creating a do-it-yourself walk-behind tractor for the mechanization of operations related to the processing of agricultural household plots.
In people who process country or personal plots, as well as those living in rural areas, very often the question arises of the mechanization of work on planting, growing and harvesting. Nowadays, the agricultural machinery market offers a variety of units that are capable of performing any agricultural operation.
List of required materials and spare parts
For the manufacture of the frame of the future unit, it is necessary to prepare steel corners 36.0x36.0 mm or pipes 60.0 × 50.0x2.0 mm.
 From the old technique for the manufacture of a walk-behind tractor, you can use:
- engine in complete set;
- fuel tank;
- exhaust system;
- air filter;
- kickstarter;
- steering wheel with throttle and clutch.
Assembly tool
For high-quality and efficient assembly work, it is necessary to prepare the following main tool:
- grinder with a disc for cutting metal;
- welding machine;
- powerful drill;
- a set of open-end (ring) wrenches;
- vise.
The sequence of manufacturing a walk-behind tractor
Consider how to make a walk-behind tractor with your own hands at minimal financial cost.
The first issue is to solve the problem with the transmission, since the walk-behind tractor requires a higher torque and, accordingly, not a high speed. To do this, it is necessary to make an intermediate shaft with two sprockets. For the first gear, a regular gear is suitable. Such a kinematics allows you to reduce the speed of the intermediate shaft by almost 8.5 times. The main gear remains chain.
The ratio of the teeth of the second sprocket should be 1:4.5. 
Video walk-behind tractor with your own hands.
The principle of operation of the walk-behind tractor
The motoblock allows you to perform many agricultural works. Its versatility is ensured by a variety of attachments that can be installed on the machine.
From the engine, torque is transmitted to the intermediate shaft using chain drive through two stars attached to it. Together with the shaft, the wheels fixed on it rotate, setting the unit in motion. With the help of the throttle, you can maintain the desired speed of movement.
Thus, a self-made walk-behind tractor is an excellent assistant in the processing of agricultural plots and greatly simplifies the cultivation of crops. And plus, you can do the repair of the walk-behind tractor yourself.


