Restoration or repair old furniture with your own hands - the process is very complex, but exciting! Give new life your favorite sofa, in which you fell asleep when you were little, to make an ancient chest of drawers sparkle, in which many things memorable to your heart are stored - you can do all this with a little diligence. After restoration, family artifacts can serve and delight the eye for many more years, preserving the stories and traditions of your family.
Old furniture makers worked knowing that a piece would last for generations. Their aesthetics and artistic taste have been improved over the centuries and therefore organically incorporate modern trends. That’s why old furniture is rapidly rising in price. Updating old furniture is not only saving money, but also a very creative and exciting process.
Signs of an antique:
- brand
- fastener dimensions.
Very important: you need to remove the fasteners with a slotted screwdriver, not too narrow or wide, with an even tip, but with slightly licked corners.
First of all, we take out all the boxes and inspect their corners. Roundness without scoring is a sign of antiquity. The mark must be looked for on back wall, under the tabletop or bottom. Dust and cobwebs are carefully removed with a soft brush or vacuum cleaner.
ANTIQUE FURNITURE 18TH - 9TH CENTURIES
We carefully inspect the fasteners - screws, screws, corners. The thread is non-standard, the pitch and profile float - which means it’s old; cut by hand or on a primitive machine with a foot or bow drive.
Wooden furniture
It only makes sense to breathe a second life into something that has served faithfully for many years. Something that was done by masters with a capital letter. Agree, Chinese furniture made from chipboard is unlikely to be repaired. Its destiny is recycling.

First of all, you need to figure out did you get any antiques? Then consider yourself lucky, don’t do anything until the assessment! Museums and collectors entrust restoration only to masters, and any amateur activity reduces the cost of an item tenfold. How to determine if furniture is antique or not?
A complete furniture renovation with updating and new decor includes the following steps:
- Acclimatization;
- Disassembly;
- Cleaning and washing;
- Surface inspection;
- Eliminating varnish defects or removing it, depending on its condition and further intentions;
- Elimination of wood defects;
- Bulkhead and strengthening of fastenings; Veneering;
- Painting and priming of wood;
- Painting and/or painting the surface of wood;
- Surface decoration;
- Giving details an antique effect;
- Protective varnish;
- Polishing;
- Upholstery of seats, pillows, armrests, if upholstered furniture is being repaired;
- Assembly.
All of the above work can be done at home. But before describing the work operations, let’s give a summary of the tools and materials so that in the future we don’t get scattered and get distracted.
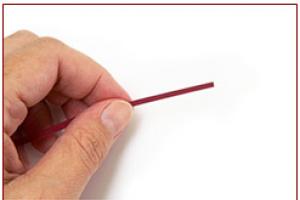
Removing scratches
Grout for cracks in varnish
Recipe 1– paraffin and colored furniture wax 1:1. The composition, selected according to the tone, is rubbed into the cracks using a polisher until it warms up from friction. Residues are removed with lint-free (old and well-washed) rags moistened with kerosene or turpentine. Also suitable for filling small cracks in wood.
Recipe 2, For minor scratches– linseed or burdock oil and ethyl alcohol 1:1. Apply with a swab made of white flannel or flannel; When dry, polish with a clean, dry cloth.

Chips on a wooden surface.
Chip on wooden surface is a serious defect, but nevertheless it can be corrected independently. As we have already said, hard and soft wax are used to seal defects. But to combat chipping more suitable choice There will be putty for wood. Companies produce water-based, nitro- and polyester-based putties. This material is applied with a spatula and, after drying, completely imitates wood. The putty is also selected by color and can be mixed with stain.
Damage to paintwork.
Often, a dent is formed on the varnished surface of furniture or the floor from the fall of a massive object. In this case, it is very difficult to restore the integrity of the coating; the most suitable materials for this are retouching varnish or transparent varnish in a bottle with a brush inside. These materials are selected according to the degree of gloss of the restored surface. However, it is impossible to completely level the surface with varnish; you can only make the defect less noticeable.
Veneering
High-quality veneer is made in two layers: the underside is made of peeled veneer of industrial wood and the face is made of sliced veneer of valuable species. Unfortunately, when the veneer peels off, both layers most often come off together, and they have to be separated, and to do this, you need to remove the veneer from the entire plane and veneer it again.

Old glue can be removed with a surfactant remover, but gluing has some special features:
- Applying a sheet of underwear for final gluing, step 4 in the previous paragraph. list, immediately smooth out the bubbles with a hot embossing hammer: large and elongated with a striker, and small round ones with a butt.
- Smoothed at 45 degrees relative to the veneer fibers in a herringbone pattern, i.e. alternately in different directions.
- As soon as the bubbles subside, iron the entire surface with a hot iron.
- The plane is covered with polyethylene, a sheet of thick flat plywood and dried for at least 3-4 days under heavy oppression.
- If bubbles are found after drying, inject PVA emulsion into them with a syringe and repeat smoothing.
- The front sheet is glued in the same way.
Inlay
Real wooden inlay - intarsia - is not available for independent execution. But it can be successfully replaced by a mosaic made of wood - marquetry. Marquetry is done like this:
- On a sheet of PVA paper from pieces of veneer, possibly tinted with stain, a drawing is assembled IN A MIRROR REFLECTION.
- After the glue dries, the design is turned over with the paper up and glued onto a plane, like veneer.
- The paper with a layer of glue is removed with fine, 220-240 number, sandpaper on a block.
- The entire marquetry is coated with a protective varnish.

Applications
The simplest and most accessible of wood applications is decoupage. There are many ready-made sets for sale, and the technique is simple: fragments of colored paper are glued onto a base with PVA or acrylic and then varnished.

Giving an antique effect.
Many people want to “age” their furniture. There are two main methods: craquelure and patination. Patination of furniture is not at all the creation of an artificial patina on metal; it is used not only for “aging”, but also for surface decoration in provencal style. You need to know that craquelure on patinated furniture is hardly ever appropriate: patination is most often done to look like metal, and who has ever seen bronze or silver in a network of small cracks? But let's move on to technology.

Craquelure
Craquelure on furniture is done with the same craque varnish as on painting or Venetian plaster. Krake is applied to the paint that has set but is still wet and slightly tacky. As the craque hardens, it contracts, pulling the still soft paint with it, and a network of small cracks forms on it. Craquelure can be coated with a protective varnish.

Furniture patina
Patination of furniture is the sequential application of increasingly shrinking layers of ever-lightening paint to it, thus simulating oxidized, worn metal. Each layer is shaded. For bronze patination, first apply acrylic paint golden metallic, and bronze powder is applied over it or bronze powder is rubbed in. Patination to look like silver, as in the illustration with linkrusta, can be done with aluminum and then zinc powder.

The main principle is patination from depressions to convexities, because in reality the relief is erased along the peaks. The technique is:
- Take a drop of paint from the first layer on the corner of a flat brush, insert it into the cavity and shade it roughly with the same brush.
- Once set, use a polish, velvet or cloth to shade it completely towards the convexity, gradually reducing the tone to the background.
- The second and, if necessary, subsequent layers are also applied.
Despite its apparent simplicity, the technique of patination of furniture requires serious skill and a steady hand, so you need to master it gradually, practicing various kinds debris and waste.
Varnishing and polishing
For protective varnishing of furniture, any furniture varnishes are used. For the sake of appearance, it is better to coat aged furniture with oil varnish, but it takes a long time to dry and requires regular care polish with vegetable oil or wax with turpentine. Still, the best furniture varnish should be recognized as transparent or tinted acrylic: it is suitable for any surface, is extremely durable and requires virtually no maintenance.

Polishing of “old” types of varnishes is done with cloth, velvet cloth or felt, but they rub acrylic poorly due to its strength. The acrylic coating is polished with a leather polish (this is faster, but only smooth surfaces) or felt with GOI paste, familiar to every man who served in the army. Kerosene is dripped onto the polish until noticeably moistened, rubbed with GOI and then the furniture is polished. It takes a little bit of paste: if the polishing is difficult, but the green of the GOI is still visible on the polish, just add more kerosene. Traces of GOI on furniture can be easily erased with a rag lightly moistened with the same kerosene.

Cabinet furniture
Sooner or later, a situation occurs when cabinet furniture loses its original appearance. Kitchen set and the same bookshelves need renovation. There are also minor problems: handles break, drawers do not close well. But it is not always possible to buy new furniture. And sometimes it’s just a shame to get rid of old furniture. You need to repair cabinet furniture yourself.
Of course, if you are not sure own strength, it’s better not to undertake repairs. It is better to hire a specialist who will cope with the task in the shortest possible time. Finding it is not at all difficult. It is enough to get to the World Wide Web or open a newspaper with free advertisements, and you will see a huge number of offers on this topic. Just don’t forget that repairs should be carried out by real craftsmen; there is no place for amateurs in your home.
Scratches, cracks, abrasions
Wipe areas that have lost their presentation with linseed oil. It can be purchased at any specialty store or market. Wait until the surface is completely dry. Take a small piece of clean cloth and polish the surface until it shines. In cases where the varnish is severely damaged, it is necessary to cover the damaged area with a layer of wax. Choose the right shade and go!
If you find on varnished surface If there are any stains, it is better to find out their origin first. When this fails, wipe the stains with a cloth soaked in alcohol. As you already understand, repairing cabinet furniture with your own hands does not require any incredible costs. If the spots still do not disappear, then it is better to repeat the operation.
Repairing chips
Chips usually appear at the corners and are small depressions light color(chipboard colors).
The elimination process consists of several stages:
- Preparatory treatment of the chip. In this case, it is necessary to process the chip with a chisel so that its edges become straight.
- Repairing a chip. Hard wax for this suitable color melt it with a wax melter or lighter and apply it to the chip with a small margin.
- Leveling the surface. After the wax has dried, using a chisel, having worked through each plane, carefully cut off the excess wax, forming a clear right angle to the surface, and lightly sand it with a felt cloth.
- Texture restoration. Using a thin retouching felt-tip pen, apply lines along the chip in accordance with the overall texture, wiping each time with a paper napkin to easily blur the clear boundaries of the lines and make them more believable.
- Opening with varnish. To fix the seal and to give the restored surface a characteristic shine, it is treated with a spray varnish.
Door hinges
Often, when using cabinet furniture, it is necessary to adjust or restore door hinges and holes for them.
Unfortunately, chipboard cannot withstand repeated screwing in and out of screws, but simple repairs will save the situation. It is easy to do at home with a minimum of tools.
As a rule, the problem becomes a screw that has been turned or torn out of the body of the furniture and no longer fulfills its function. What to do:
We drill a hole with an 8mm wood drill, being careful not to go right through.
We take a furniture dowel with an 8mm diameter:

And after dipping it in PVA, we hammer it into our hole. After the glue has dried, cut off the protruding part with a sharp chisel.
Now you can re-drill the holes with a thin drill and screw the screws into place. After repair, such a hinge can be adjusted many times without any special consequences - beech hardwood and it is difficult to pull the screw out of it, but the dowel itself is held firmly due to the larger adhesion surface and glue.
Restoration of antique antique furniture
Museums and collectors entrust restoration only to trusted craftsmen, and any amateur activity by amateurs reduces the cost of an item tens, hundreds of times, down to zero.

Bottom line
Restoring furniture with your own hands is a difficult and painstaking task, but rewarding. Old furniture after restoration can last for a very long time. It creates a cozy, cordial, friendly atmosphere in the house and acquires great value. Restoring old furniture can be done at home, but if you are not sure that you can do it, it is better to trust the professionals, especially if you need to restore antique furniture.
Every home has favorite interior items that have lost their appeal over time. Furniture restoration will help extend the life of your favorite furniture, make it attractive and bright. The complexity of the process depends on the damage to the wooden surfaces and how much you want to transform the old furniture. You should not think that restoring furniture is easy, as this process is labor-intensive and will require accuracy and perseverance from you.
Scratches can appear on any household item. But on lacquered furniture they are much more noticeable. If there is information about the varnish with which the surface was coated, then it is enough to treat the scratch with the appropriate product:
- Ethyl alcohol is used for alcohol-based varnish or polish;
- Solvents 646 and 647 are well suited for nitro varnishes. You can also use acetone;
- Sandpaper is used to process surfaces coated with polyester or nitrocellulose varnish. After cleaning, you need to apply a special polishing paste and varnish again.
If the coating is unknown, then it is worth using other methods to eliminate minor scuffs and scratches on furniture. Restoration of Soviet furniture is often carried out using a touch. IN construction stores Furniture touches come in a wide range, they are affordable and easy to use:
- Shake the bottle until a homogeneous mass is formed;
- Apply one coat to the scratch using a brush;
- As soon as the first coat has dried, apply the second. There can be several layers;
- Leave to dry for 10-15 minutes;
- Polish the area with a soft flannel cloth.
This completes the scratch restoration process.

Shake up the stroke

Apply the composition to the scratch with a brush

Polishing the surface
How to use wax pencils for restoration
This material is sold in all construction stores. It is easy to use and not expensive. The pencil is convenient to use when restoring carved objects, as it is easy for them to penetrate into hard-to-reach areas of the decor. Do-it-yourself furniture restoration in the Baroque style is carried out as follows:
- If the wax pencil is soft, it is enough to simply rub out the defect and polish the surface;
- If the pencil is made of hard wax, then before applying it to a scratch, it needs to be heated.
Polish the surface with a soft cloth until it shines.

Applying a pencil

Polishing the coating
How to use furniture wax
There is another very common product - furniture wax. It can be hard or soft. The first version of the material must first be melted and the damaged areas must be filled with it. Restoration soft wax is much easier to use; it is used to rub the area with a lot of scratches. In both cases, after the wax has hardened, the surface is subjected to high-quality polishing. We also carry out restoration of furniture made from chipboard (chipboard), which has many scratches and abrasions.

Heat the wax

Apply wax to furniture

Polish the surface with a rag.
DIY mastic
If you don’t have the above materials at hand, you can make mastic for restoration. furniture wall. To do this take:
- 30 grams of turpentine;
- 20 grams of alcohol;
- 40 grams of wax;
- Petrol;
- Soft wool.
Preparing the mixture is not difficult: melt the wax in a water bath, gradually add turpentine, stirring constantly, then pour alcohol into the container. Take a woolen rag, wet it with gasoline, dip it in the mixture and rub it over the damaged surface until it shines. The job of removing scratches from a wooden surface is not difficult. Now let's look at how to restore furniture with more serious damage.

Preparing materials

Apply gasoline to the coating

Cover the surface with wax
Restoring chips and deep cracks
Chips and deep cracks on the surface of furniture are considered quite serious damage, and they are much more difficult to eliminate. If you are not confident in the quality of this work, contact a professional. Furniture restoration by a private craftsman will not be cheap, but it will be done with high quality and with a guarantee. If you decide to do it yourself, pay attention to what tools and materials will be needed:
- Stain of the desired color;
- White spirit, to dissolve the varnish coating;
- Special primer for wood;
- Putty mixture for wood;
- Sandpaper of different fractions from 100 to 3000;
- Painting tape;
- Brushes and rollers.

The work execution algorithm looks like this:
- In case of incomplete restoration, the surface on which there is no damage is covered with tape;
- The damaged area is treated with white spirit to remove the old varnish;
- Apply primer to wood and leave until completely dry;
- The chip is puttied with a special compound so that a small bump appears on the surface;
- As soon as the putty is completely dry, it is sanded;
- Wipe the area with a damp suede cloth and apply stain of the desired color.
The work must be carried out carefully so that the stain does not get on the undamaged area, otherwise the wood will darken and a complete restoration will have to be carried out. Once the stain has dried, you can varnish the repaired area. Furniture restoration varnish is applied with a brush, if the area is small, or with a roller.
It is necessary to cover the surface in several layers, with each subsequent layer being sanded after drying. sandpaper abrasiveness 800 units. The last layer must be polished with a special polish.
If you don’t know how to carry out restoration correctly, you can purchase special books that describe the entire process in detail. You can also take advantage of master classes from the Internet.

Treat with white alcohol

Apply primer

Apply putty inside the cracks

Sanding

Cover the coating with stain
What to do if the veneer delaminates
Veneered products require a special approach. The means and tools for restoring furniture are the same as for restoration wooden products, and the methods for eliminating defects differ:
- Veneer restoration begins with an inspection of the object. If swelling appears on the surface, then you need to take a syringe with a thick needle into which to draw PVA construction glue. Carefully pierce the swelling with a needle and squeeze the glue inside. Place a piece of clean cloth on the area and place a weight. If the veneer sticks unevenly, this area should be heated with an iron or a bag of hot salt;
- A small peeled piece of veneer should not be cut straight with a knife, it is better to break it off. The uneven edges of the crease are much easier to join. Then the fragment should be cleaned of the old glue, a new layer of adhesive should be applied and the part should be applied to the fracture site. Place a rag and place a weight;
- If repair of scratches is required, it is carried out in the same way as during restoration. wooden furniture: small ones are covered with a furniture pencil, deep ones are filled with wax. After drying, the restoration wax is sanded, polished and varnished.
Restoring luxury furniture yourself requires special care and patience. There is no need to rush - apply the compound, wait until it dries, sand and apply again, and so on several times. The methods vary; in some situations you have to use several methods to achieve the desired effect.

Inspecting the coatings

We tear off the damaged section of veneer

Repairing cracks
Complete paint refurbishment
If using putty and varnish it is not possible to recreate the former beauty of the furniture, you need to restore wooden or complete restoration of Soviet furniture yourself. The work is carried out in stages, the sequence of which must be strictly observed.
Cleaning the surface of old coating
Before you begin removing furniture varnish or paint from the surface of the furniture, you need to purchase a special remover. Restoration Italian furniture made from valuable wood, a very responsible task, so emulsion-based removers are used. This material is non-toxic and harm to wood is minimal. It is worth noting that the fire rate of these washes tends to zero, which is a plus if the work is carried out in an apartment. So the restorers modern furniture It is recommended to use this particular material.
Working with washes:
- As soon as the remover hits the varnish coating, the corrosion process begins. You need to apply the material using a special flute brush and wait. Polyester varnishes will come off after 2-3 hours, alcohol compositions in 30 minutes;
- Before applying the remover, the polyester coating must be sanded with coarse sandpaper so that the composition penetrates as deeply as possible;
- After applying the material, all furniture must be well wrapped in paraffin-soaked paper and secured with string or twine;
- Leftovers old paint or varnish can be removed after the time indicated on the package with the remover. A simple spatula can be used for cleaning;
- Next, the entire surface is degreased with a solvent.
After these steps, the furniture is left to dry for several hours. Then you should walk over it with sandpaper along the fibers and wipe off dust with a damp rag.

Sand the surface

Apply the remover

Covering furniture with paraffin paper

Removing old paint

Degrease the surface
What material to use for varnishing
When choosing a furniture varnishing product, you need to rely on the advice of professionals, for example:
- Lucky on water based used for restoration of furniture at home in children's rooms. They have no unpleasant odor, dry quickly, and do not cause allergic reactions. There is a small minus - after drying they become matte, which some people don’t like;
- Alkyd varnishes are recommended for use by people who have no experience in varnishing surfaces. They are easy to use and apply smoothly the first time. Even if there was a leak during application, it is easy to wash off;
- Polyurethane compounds are the most difficult to apply: firstly, special equipment is needed for their application, and secondly, they have bad smell. But it is worth noting that such a coating will last much longer than all of the above materials;
- Furniture restoration (the master class can be viewed on our resource) is carried out using furniture oils. A tampon is used to apply the composition.
The surface to be varnished must be smooth. Before applying furniture varnish, buy two soft brushes. After applying the first layer of varnish, take a new tool.
Restoration of cabinet furniture at home can be done independently, only if a strict sequence in the process is observed:
- Take off old layer finishing coating;
- Clean the surface;
- Apply primer;
- Repair chips and scratches with putty;
- Sand after drying;
- Apply stain;
- Apply furniture varnish.
This plan will help you avoid making mistakes when working on the restoration of wooden interior items.

Removing old paint

Cleaning up

We prime

We putty the chips

Sanding the coating

Cover with stain

Applying varnish
Technology of working with upholstered furniture
Restoration upholstered furniture is carried out according to the following algorithm:
- Perform complete disassembly;
- Wooden elements should be sanded well along the grain and wiped with a soft damp cloth to remove dust from the product;
- Cover the parts with wood primer and let dry thoroughly;
- For coloring it is better to use aerosol paints, as they lie much smoother. In this case, three layers of paint will be enough. As soon as the paint has dried, a layer of protective furniture varnish is applied to the surface;
- Remove the upholstery and take out the filling. To choose the method by which the restoration of upholstered furniture will be carried out, you need to know the features of the updated product. For example, if we take into account the restoration of chairs, then it is enough to stretch new fabric on the seat. In the photo you can see the product before and after restoration. If a chair or sofa is being restored, then you will have to not only change the upholstery, but also the filling;
- Using the old pattern, cut out the filler. You can use sheet foam rubber, which is available in a large assortment in stores;
- Cut out the fabric elements. To do this, lay out the old upholstery parts on a new canvas and make the corresponding elements;
- Stick the filler onto interior items. To do this, you can use PVA construction glue;
- Lay the sheathing and using construction or furniture stapler, secure it with reverse side products. The fabric should be of medium tension, and the staples should be located every 3-5 cm from each other;
- The last stage of work will be assembling the furniture.
It is worth noting that textile workers use a special restoration kit, which contains everything necessary for high-quality reupholstery of upholstered furniture. As you can see, there is nothing difficult in restoring upholstered furniture with your own hands. If everything is done correctly, the result can be a product in interesting design, which will delight you for many years.
Video
No matter how carefully we handle the furniture, sooner or later abrasions, scratches, and stains appear. They are usually easy to remove. The main rule is that you need to know exactly how and with what help you can get rid of a specific type of defect.
- The wooden surface simply lost its shine.Preparation: We are looking for a care product for the corresponding tree species, the composition should contain orange oil. Take a clean sponge, wet it a little and heat it in the microwave for 20-30 seconds. Be sure to wear rubber gloves coated on the inside. Procedure: Spray the product from a spray bottle onto a dry, clean surface, then wipe with a hot sponge.
- Removing scuffs or stains on wood surfaces. Procedure: just wipe these places with a banana peel. This method helps only with minor defects.
- Significant defects (more severe scuffs or stains).Preparation: we purchase retouching markers of a suitable color (they can be found in stores furniture fittings), denatured alcohol and wax. Procedure: first we clean the surface, for example, using dishwashing detergent and water; After drying, wipe with alcohol - moisten the swab with alcohol and rub the lightened areas well. The color is almost always restored. Of course, alcohol cannot cope with the deepest scratches; we paint them over with a marker of the optimal color. To add shine, the top surface is covered with wax and polished. soft cloth.
- Small irregularities, can be smoothed with a nail file. It is sometimes easier to work with than sandpaper.
- Slight swelling of wood from moisture. This refers to cases where a leaking vessel is placed on the surface and it is necessary to quickly get rid of the defect. Preparation: Mix salt and olive oil into a paste. Procedure: Apply the mixture to the damage and gently rub in in a circular motion. Leave for 30 minutes. Salt draws out water, and olive oil restores elasticity to the fibers.
- Restoration of chips. Preparation: We purchase putty, suitable for both wood and automobile putty. Procedure: We select the desired color; the easiest way to do this is to buy a light putty and add color to it as needed. We cover the chip and spread a little putty on the adjacent surface. After drying, smooth with fine sandpaper.
How to restore varnish and polish?
Restoring the varnish layer is a very labor-intensive task and in each specific case has its own nuances. The only universal task for any restoration is cleaning and removing fat from the surface. The technique described above with detergent for dishes, quite suitable for solving our problem. After wet cleaning, wipe the coating with a clean, dry cloth and wait until it dries completely. Only after this can you proceed to the next steps. Further steps depend on the condition of the furniture, the complexity of its defects, color, etc.- Scratches and abrasions on dark furniture We can paint over it with iodine, achieving the desired shade in the number of layers applied, or by diluting it with water. Or we use furniture markers.
- Deep and whitened scratches cannot be painted over using this method. There are options for this:
- We prepare a special mastic (mix melted wax and turpentine in a ratio of 4:3) and apply it to the polish with a soft cloth.
- You can use shoe polish of a suitable shade.
First you need to paint over the scratches, and only then restore the coating.
- We remove any stains with gasoline. We vigorously wipe off the dirt with a soft cloth soaked in pure gasoline, which will help remove any stains, but you may have to go through it several times. The stain will eventually disappear. After using linseed oil mixed with denatured alcohol, polish to a shine.
- Wipe white circles from hot cups, plates or other objects with alcohol. It is also possible with several attempts. Polish with linseed oil and denatured alcohol. In particularly severe cases, hot stains can be removed using a mixture of drying oil and alcohol.
How can I refresh or renew the polish?
Option 1 Necessary: linseed oil, turpentine and vinegar in a ratio of 2:2:1. What to do: mix all the ingredients, apply with a swab or sponge, wait until it is absorbed and polish. Option 2 Necessary: oil and beer in a 1:1 ratio. What to do with mix and wipe the furniture, polish after absorption. Option 3 Necessary: beer and a piece of wax. What to do: We boil beer together with a piece of wax, wait until the composition cools down and becomes warm, and then apply it to the furniture. When the mixture is absorbed, rub the surface until shiny.Old furniture loses its attractiveness and performance over time, and as a result is simply thrown away. But don't rush to send it to the landfill. You can give worn-out cabinets, chairs and cabinets a “second life” even without being a specialist. To do this, you just need to have a desire to engage in restoration and follow a certain technology. This way you will not only save the family budget, but also decorate the interior of the room.
Removing old coating - how to ensure a surface suitable for restoration
Updating furniture begins with removing old varnish. Don’t even try to paint or apply varnish over paintwork – you’ll just waste time, effort and materials. But, before you start cleaning the surface, first remove all existing fittings - handles, locks, legs, etc.
As for the old paintwork, you can remove it in several ways:
- mechanical;
- chemical;
- thermal.
To remove varnish mechanically You will need sandpaper with a medium abrasive. You should not use something that is too rough, as it will leave deep scratches on the surface of the product. The disadvantage of this method is that it requires a lot of time and effort. Therefore, it makes sense to use sandpaper only for finishing the surface or processing hard-to-reach areas.
You can speed up the work using a grinder with an abrasive attachment. But it is convenient to process large and flat areas. If you need to restore a chair, using a sander is not very convenient. In this case, it is better to use a chemical remover. This is a special paste-like product that is designed to remove any paint and varnish coatings.

The remover should be applied using a brush, preferably with soft bristles. After applying it, it is necessary to cover the treated surface. plastic film and wait until the composition softens the coating. The time it takes for the paste to react with the varnish depends on the manufacturer and the thickness of the paint layer. More details about this are provided in the instructions on the packaging. After the coating has softened, you need to remove the paste along with the old varnish using a spatula or scraper.

You must work with the paste carefully, as it contains acid and is very toxic. It should be applied in a ventilated area, after wearing gloves.
If you are unable to completely clean the surface the first time, reapply the paste. Upon completion of this procedure, lightly “walk” over the surface of the product with a medium-abrasive sandpaper to get rid of chemical residues.

There is another way to remove old paint or varnish - using a hair dryer. This device allows you to heat the coating, as a result of which it softens and is easily removed with a spatula. The main thing is not to overheat the surface so that it does not ignite. Please note that this method is also quite toxic - when heated, the paint releases toxic substances, therefore it is necessary to work in a ventilated area. After cleaning the surface, use sandpaper to get rid of any remaining varnish in the pores of the wood.
Surface restoration – putty, glue and sand
To truly update old polished furniture, rather than just repaint it, you need to get rid of all its defects, such as chips, cracks and crevices. To do this you will need the following materials:
- Putty (starting and finishing).
- Wood glue (you can use epoxy, which provides a more reliable connection).
- Degreaser.
Start by gluing the parts that need it. The surfaces to be glued must be cleaned with sandpaper and degreased. After gluing, the parts should be secured with clamps and left while the glue hardens.

Then you can start puttingty. This procedure is carried out in several steps:
- 1. All narrow cracks and cracks must be widened so that they can be filled with putty.
- 2. For deep defects, such as chips and cracks, apply starting putty and wait until it hardens.
- 3. Then you need to clean the cured coating to remove any serious irregularities and apply a thin, even layer of finishing putty.
- 4. Using the latter, also remove scratches and other minor defects on the surface of the furniture.
- 5. After the putty has hardened, it must be sanded with fine abrasive sandpaper.

After eliminating defects on the surface of the furniture, you need to sand it yourself with sandpaper or a sander to get rid of small scratches and roughness. Therefore, the abrasive grain should be minimal.
If you plan to use a clear coat, choose finishing putty to match the color of the tree. You can paint wood fibers on the surface of the putty with brown paint.
Applying clear varnish - how to achieve a glass effect
Finishing is the most creative stage of work on which the design of your furniture depends. Of course, when choosing the type of coating, you need to focus on the interior of the room in which the furniture will be used. But the field for creativity still remains wide. As an example, let's look at some of the most popular and spectacular options decorative finishing.

If your furniture is made of valuable wood, such as mahogany or oak, think about your choice finishing material You don't even have to. These breeds themselves look beautiful. Therefore, all that is required of you is to coat the product with transparent paint. For this, use a special furniture nitrocellulose varnish, which has increased hardness and smoothness. You can also use polyurethane, alkyd or acrylic varnish. The latter is good because it dries quickly and has no odor.
After applying the first layer of water-based varnish, the surface must be sanded with fine sandpaper. This is done in order to get rid of roughness that appears as a result of swelling of wood fibers.
You can apply the varnish using a regular brush or swab. The surface should be covered with it in several layers, always with interlayer drying. The more layers of varnish you apply, the “deeper” the coating will be, that is, a “glass effect” will appear..
Surface tinting - turning pine into mahogany
The most common wooden furniture is made of pine and spruce. The texture of these rocks is very beautiful, but the color gives off a certain budget. The problem can be solved by tinting. To do this, you need to select a stain of a suitable color and treat the surface with it. It, unlike varnish, is not simply applied, but rubbed into the wood. Therefore, when working with it, you should make multiple circular or reciprocating movements with your brush over the same area.

After applying the stain, the product should be coated with varnish, which is applied according to the scheme described above. If desired, you can use glaze instead of stain and varnish. This paint coating is something between impregnation, varnish and paint. It gives the wood a certain shade, but does not hide the texture and provides gloss.
How to imitate wood - finishing with plywood or chipboard
Materials such as chipboard themselves are unattractive appearance. To without special costs reliably imitate wood; furniture made from such materials can be decorated with wallpaper with a corresponding pattern. This method is good for finishing chests of drawers, tables, cabinets, cabinets and other large items. The finishing process is quite simple:
- 1. Prime the product acrylic varnish in two layers.
- 2. Cut the wallpaper according to the size of the furniture.
- 3. Glue the wallpaper with PVA glue.

After this, the surface must be varnished according to the standard scheme. But first you need to let the wallpaper dry. Note that trellises for finishing furniture can be used not only to resemble wood, but also with any other pattern. The choice depends solely on your wishes.
Painting furniture – we finish it simply and practically
Most simple solution in terms of finishing is painting. For these purposes, you can use alkyd, alkyd-urethane or acrylic water-dispersion paint. To prevent furniture design from seeming too boring, paints of two or three colors are often combined. To ensure smooth transitions, simply apply masking tape. You can even make stencils for drawing.
Apply paint with a brush or roller. But the best effect can be achieved with a spray. If it is not possible to use a spray bottle, use spray paints.

To make the furniture look “branded”, be sure to apply several layers of varnish on top. The only thing is that it is desirable that it have the same base as the paint. The exception is water-dispersion varnish, which adheres well to any type of paint.
Craquelure effect - first we update, and then we age
If the interior is antique, great solution furniture will be decorated with craquelure. This is cracked paint that reveals a layer of another paint that is different in color. To create this effect you will need a special craquelure transparent varnish and an acrylic primer.

The work is carried out in several steps:
- 1. Cover the surface of the wood with several layers of acrylic primer, drying between layers.
- 2. Apply any paint. This will be the base layer, that is, the one that is visible through the cracks. I must say that bronze shades and other “metallics” look especially beautiful.
- 3. After the paint has dried, apply craquelure varnish.
- 4. Wait until the varnish begins to dry (it should not be sticky), and apply a second layer of paint that is different in color from the first. Almost immediately it will begin to crack. If the layer is thick, the cracks will be large. If it is thin, the cracks will be thinner and shorter.
Upon completion of the work, the surface can be varnished. The only thing is that it is advisable to use matte varnish, because gloss and antiquity in this case are incompatible.
Metallic paints cannot be applied as a second coat, as they will not crack.
A few words about polishing - how to achieve a “mirror”
It is not always possible to apply varnish evenly and smoothly, especially for beginners. However, all flaws can be easily eliminated by grinding and polishing. To perform this operation you will need a grinder and two polishing wheels - hard and soft. In addition, you will need a polish with and without abrasive, plus “zero” sandpaper.

Work begins with grouting the surface with a “zero” finish. After removing the imperfections and making the coating matte, you can begin polishing. First, a hard wheel and abrasive paste are applied. After obtaining shine, you should move on to a non-abrasive paste and a soft wheel. The result should be a good gloss. Please note that during the polishing process it is extremely important not to overheat the surface, as this can ruin the varnish.
That's all we wanted to tell you about furniture restoration. Now all that remains is to install new fittings, which must match the design of the product, and you can start using it. As you can see, the work is not difficult, but very interesting, and anyone can cope with it.
If your old Soviet furniture has lost its former shine and is pretty boring, but you don’t want to throw it away, try restoring furniture sets with your own hands using a master class. With high-quality restoration, your friends and acquaintances will not even know that such furniture has served you for a long time.
Of course, reupholstering furniture with your own hands is a huge job, but you shouldn’t worry, as there’s no need to do anything complicated. There are very simple techniques on updating furniture with your own hands, which everyone can master. Let's start with the most common restoration methods.
If you want to paint old lacquered furniture, clean it from dust, wipe it with a damp cloth and wait until it dries. Then level the surface with putty and leave to dry. After the workpiece is ready for further work, clean its surface, then apply another layer of primer and wait for the surface to dry. When the furniture is dry, start painting.
You can paint with a brush or roller. Apply several thin layers, you don't need a lot of paint, otherwise drips will appear. To achieve uniformity, apply paint lengthwise and then crosswise.
First you need to paint the surface inside, the joints and edges, and only then start painting outer surface. This is done in order not to get dirty and not to disturb the structure of already painted surfaces.
If the varnish on your furniture is not damaged, and it is also free of defects, you can start painting without performing any corrective work. To save time, use a spray bottle.
Do-it-yourself restoration of old wooden furniture

No matter how much you take care of your furniture, scratches, various stains and scuffs will still appear on it. They can be eliminated quite easily if you know what to use.
- If you want to restore your wood furniture's shine, try to find a product that contains orange oil. Apply polish to a sponge and heat it in microwave oven, programming it for thirty seconds. Then spray the product onto the surface of the furniture and rub it with a heated sponge. Be sure to use rubber gloves to avoid mechanical damage skin and burns.
- To get rid of stains and abrasions, use a banana peel by rubbing it on the defective areas of the furniture. If the damage is minor, this is the best remedy.
- To remove more serious stains, you will need touch-up markers and wax, which can be purchased at furniture stores accessories. First, clean the surface with detergent diluted in water. When the furniture is dry, it should be degreased with alcohol applied to a sponge or swab. Often these steps will help restore color. However, deep scratches cannot be removed with alcohol; this is why you need a marker of the appropriate color. Polish the surface of the furniture with wax and a soft piece of cloth to give it a shine.

- To remove irregularities, use a manicure file; it is much more convenient to use than sanding paper.
- Places where the furniture has swollen must be treated with a salt solution and olive oil. Apply it to the defects and rub in circles. Leave for half an hour for the solution to take effect. Salt neutralizes water, and olive oil will return the furniture fibers to their former elasticity.
- Chips on the surface can be easily removed using putty. You can use wood putty or regular car putty. To be more confident, buy a light putty and mix it with the color. Cover the chip and a little of the adjacent surface; when dry, carefully smooth it with a nail file or fine-grained sandpaper.
Watch also the video: how to restore old polished furniture with your own hands