But even more important is the first finishing, for example, in a newly built house. Here you can no longer do with simple cosmetics. Sooner or later, you will either have to undertake the installation of electrical wiring yourself or hire professional electricians, because electricity in the house is necessary. And even under the condition one-story house the sum for this will be rather big.
But what if these funds are already planned to be spent on something else? This question can be answered in the following way. With a great desire, utmost care and accuracy, as well as strict adherence to the instructions and rules, you can do the wiring yourself.
Let's try to figure out whether it is possible, without special education, to do the wiring in the house with your own hands, how difficult such work is and what rules must be followed in order to conduct electricity in a private house. How to conduct wiring, wiring and complete electrification of the house - these are the questions that we will now try to sort out. So, step-by-step instruction how to do electrical wiring in a private house.
Preparing for installation
Installation of wiring in the first place implies one thing - it is not to rush and try not to miss a single detail, because this business does not tolerate fuss. Before starting work, it is worth sketching diagrams of future electrical communications (this diagram may come in handy in the future). To do this, first of all, it is necessary to determine the location of the introductory switchboard, all lamps, sockets, and also calculate maximum power for each of them. Further, having made a schematic sketch on a sheet of paper (an example of such a sketch is above), distribute the load along the lines - this will be the electrical wiring device in the house. At the same time, it should be borne in mind that modern lighting devices consume a fairly small amount of electricity, and therefore it would be quite acceptable to plan the number of lighting lines at the rate of 1 group for 2 rooms, and this is done only for the convenience of subsequent maintenance and repair.
But with power groups, that is, lines that will go to sockets, the calculations should be more accurate. Indeed, the size of the machines and the cross-section of cables suitable for the total power consumed by household appliances will depend on the detailed data of consumers.
Usually, when installing electrical wiring, the best option is for each outlet group of the room to have a separate line. In addition to reducing the load on wiring and machines, this gives more convenience in the subsequent repair of sockets and cables, if such a need arises.
Naturally, electrical appliances such as an electric stove or a boiler for heating water should go in separate lines.
Section selection
When doing work such as do-it-yourself wiring in a house, it is very important role plays the calculation of the required cable. So, only after calculating the total load on the rooms, you can proceed to the selection of the section. By the way, the wire diameter can also be calculated not only by power consumption, but also by current consumption. All the necessary data can be found in the technical documentation for household electrical appliances. Such calculations are required before conducting electricity in the house.

Do not forget that the cable cross-section is calculated based on the totality of all data, not excluding the distance from the distribution inlet cabinet to the consumer, as well as the type of installation - when open method Conducting a wire cross section is allowed smaller than with hidden wiring, due to natural cooling.
It is also necessary to take into account the material from which the cable is made. All data on the selection and calculation of the cable section can be seen in the attached table.
An aluminum cable with a cross section of 2.5 square meters will be optimal for lighting. mm, and a copper cross section of 1.5 sq. mm. But this is only under the condition of normal lighting. If high power halogen lamps are used for lighting, the calculation is also made according to the table.
It is important to understand that it will be more reliable if the wire diameter is slightly larger than necessary - this will save you from additional wiring when adding any additional household appliances and electrical equipment in the kitchen or other rooms.
Sockets, switches and lighting fixtures
Having decided on the cross-section and length of the cables, it is necessary to select the necessary lighting fixtures, sockets and switches. This also needs to be done in advance, before going to the store. Sockets are selected depending on the type of household electrical appliance that will be included in it. After all, it's no secret to anyone that the plug of a household appliance can be of an old design, or maybe according to the European standard, that is, with thick pins. This must be taken into account when designing. It is also necessary to determine the degree of protection, that is, IP. To do this, the place of operation of the outlet and the possibility of exposure to aggressive environments, that is, humidity, dust, dirt, and the like, are determined. This also applies to the choice of switches and lighting fixtures.
Another important point. If there are small children in the house, then it makes sense to purchase sockets with protective shutters - they will not allow children to put foreign objects inside, which will protect children from damage electric shock.
You also need to decide where the switches will be installed, and where the dimmers will need to be installed. Depending on this, it will be possible to choose lighting devices. Do not forget that not all LED bulbs are dimmable, and therefore it is better to immediately calculate the number of adjustable and unregulated lamps.

Installation
After purchasing all necessary cables and equipment, you can proceed directly to the installation. First of all, you need to draw the routes along which the cables will pass, after which, using a wall cutter or a puncher, you need to make grooves called grooves, into which the wiring will be laid. Also, with the help of a perforator drill and a special diamond or victorious crown, recesses for sockets, switches and junction boxes.
Do not forget that junction boxes are placed directly above each switch and socket. The lines into which the wiring is laid are located strictly vertically or horizontally - in this case, in the future you will not have to guess where the wire is located if you have to drill something.
After the grooves are made, a cable is laid, which is fixed in the stub so that later the channel can be plastered. At the installation sites of sockets, switches and junction boxes, it is necessary to leave at least 10–15 cm of wire stock, which is necessary for connections.
By the way, if the wire goes from the junction box to a single-gang switch, then the cable must be two-wire, and if it's a two-gang switch, then three-wire. It is probably worth dwelling on the methods of installing junction boxes in a little more detail.
Wiring
Surely everyone noticed that the colors of the insulation of the cores of the cables were of different colors. This is done by the manufacturer not for beauty or aesthetics. First of all, this is the convenience of installation and subsequent maintenance, as well as the electrical safety of the fitter himself.
Wiring by color is carried out as follows:
- yellow green, light green or yellow wire is always grounding. It is these colors that are generally accepted today.
- Blue, blue or white with a blue stripe - always a neutral wire or neutral. It should not be confused with grounding. Of course, when these wires are bridged, the equipment will not fail, but when a residual current device (RCD) is installed in the input shield, it will constantly turn off.
- All other colors are used as phase conductors.

The wiring diagram must match the color marking.
It is important to remember that in order to make the wiring in the junction box to the switches correctly, it is the “phase” that must be interrupted, which means that the neutral wire (and, if available, the ground wire) must be wired in such a way that it goes directly to the lamp, and the phase went down to the enabling device.
Both wires are sent to the sockets from the box, that is, both “phase” and “zero”.
Connections in junction boxes must be tight. For this, it is desirable to use special terminal blocks - Wago. If the twisting method is used, then it makes sense to solder such connections to obtain better contact and prevent heating of the wire.
Installation of the input power cabinet
Maybe, milestone in the installation of electrical wiring in a private house is the connection of the elements of the power shield, through which electricity will be supplied, protection against overloads and short circuits, as well as accounting for electricity supplied to residential premises.
It should be noted that first the entire installation of the electrical cabinet and the switching of the wiring that goes to the premises are carried out, and only after that the main power is supplied.
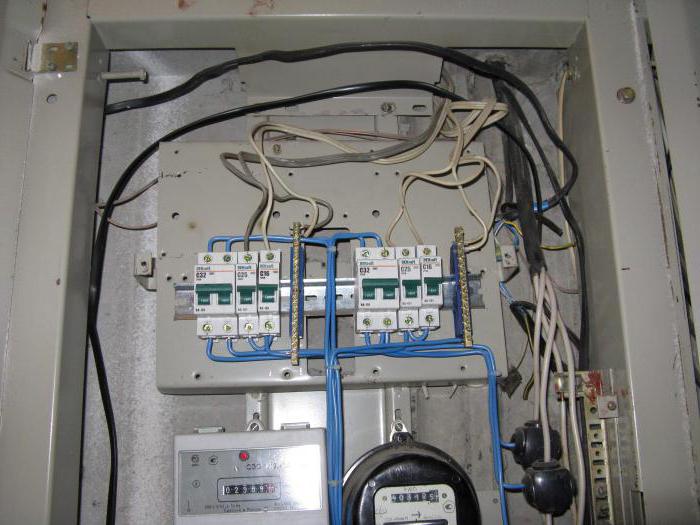
In modern shields, special din rails are provided that facilitate the fastening of equipment such as automatic machines, RCDs and an electric meter.
The switching sequence of the power cabinet is as follows:
First of all, the introductory machine is attached. Its rating must be higher than the total power of distribution machines. Also, the wire going from it to the electricity meter, as well as from the electric meter to distribution machines, must have a larger cross section than the cable cores going to distribution lines in residential premises.
It must also be remembered that the power input voltage line from the pole to the house is made only by the service organization after the necessary approvals. Under no circumstances should you do this work yourself. This means that wiring in a private house is the work that the home master performs, and supplying the power line to the input is the task of a specialist.

Installation of an electricity meter
The electric meter is installed after the introductory two-pole machine as follows.
The phase wire from the breaker comes to the first, and the zero wire to the third contact. The second contact is the phase output to the distribution machines, and the fourth is the zero output, which is connected to the zero bus, which is usually provided in modern electrical panels. All blue or blue (depending on the cable manufacturer's company) lines that go to the premises are also connected to it. This is where the advantage of color-coded cables comes to light.
When connecting an electricity meter, you can also be guided by the connection diagram, which is always present on the back of the protective cover of the contacts.
The wire strands in the contact terminals of the meter, which has two clamping screws, are fixed as follows: first, the upper screw is tightened, then the lower one is pressed. Thus, the core is evenly and tightly located in the contact terminal, which will avoid heating.
Distribution machines
Purchased by the number of socket and lighting groups, as well as their currents, the machines are mounted on a din rail. From above, among themselves, they are all connected by jumpers. Thus, when power is applied to one of them, the voltage is evenly distributed over all.
After that, without confusing the groups, connect the wires outgoing to the premises to the distribution machines. In this case, it makes sense to sign each of the machines, to which of the groups it connects. This will eliminate unnecessary shutdowns when replacing, for example, a lamp or socket. After all, if a problem occurs in one of the outlets, you can turn off the machine, which is responsible for this particular group. Then electrical appliances in other rooms will work normally, and in the room where repair or replacement is needed, the light will even be on. Therefore, it is worth carefully considering the project of electrical wiring at home.
After all the work done, you need to once again stretch all the contacts on the machines, the power consumption meter and, most importantly, on the zero bus, since with poor contact and heating of the wire, it is “zero” that starts to burn first.
In addition, after 2–3 weeks of operation, these contacts will need to be checked again and, if necessary, extended.

Testing and commissioning
If you are not sure that all the wiring in the junction boxes is done correctly, it is better, of course, to contact a specialist. If there is such confidence, you can proceed to the test. Without installing light fixtures, sockets and switches, it is necessary (of course, after making sure that all the conclusions from them do not bridge with each other), turn on the lines of the power (socket) group in turn. In the absence of short circuits (the machines did not turn off), you need to check all the wires of the sockets using an indicator or a multitester. If everything is in order, you can go to the lighting groups.
After turning off the sockets, the room lighting switches on, and then the voltage at the terminals to the switches is checked, where there should be an incoming phase and one or two outgoing wires without voltage. At the norm, the lighting lines are turned off, and the wires of the breakers are bridged. This will allow, after power is applied, to check the voltage at the cable outlets directly to the lighting devices.
If the testing did not reveal any complaints, you can safely cover up the scratches on the walls, close the junction boxes and (of course, turning off the power) start interior decoration of the room. This completes the installation of electrical wiring in a private house.
Do-it-yourself wiring, as already mentioned, is accuracy and precise implementation of instructions and rules - home electrics are complex. But the factor of self-confidence is also important. And therefore, if before you do the wiring, there are doubts about the ability to complete the entire installation, then it is better to immediately entrust this matter to specialists.
Do not think that after completing part of the electrical work, you can pay a smaller amount. It won't happen, and here's why. No self-respecting professional will undertake to conduct electrical wiring in a house where the installation has already been started by others, because in fact everything needs to be redone and rechecked.

The main thing is accuracy and tight contact. Connection using WAGO terminal blocks.
And therefore, the amount for services of this kind can be not only equal to the cost of a full electrical installation, but even exceed it.
If, nevertheless, work is done in a private house with your own hands, you need to carefully monitor the density of connections and compliance color coding, to avoid short circuits, damage to electrical equipment or electric shock.
Of course, making electrical wiring in a house is a very complex and time-consuming process, and besides, it takes a lot of time. But, nevertheless, with the right approach, it is quite doable on your own, which will save money, and most importantly, help you gain a huge and most useful installation experience that will never be superfluous.
The first thing to say is that laying electrical wiring yourself is quite dangerous. According to statistics, more than 70% of fires in private sectors occur due to mistakes made during wiring. In case of doubt and lack of basic knowledge about how to make electrical wiring in a house, it is better to trust the specialists at all, or at least carry out work with an experienced assistant.
The electrical wiring of the premises must initially be carefully designed and rechecked before starting installation work.
You should be aware that the price of a mistake when it comes to electricity is too high. All kinds of installation errors during further operation can lead to serious consequences.
Step by step action plan
 In general, the entire process of electrification of a private house can be divided into the following points:
- Creation of a gasket drawing with all symbols of individual wiring components.
- Laying wires in or on walls.
- Installation of the shield, distribution boxes, as well as sockets and switches.
- Connection of contacts of all elements.
- Careful checking of correct connections, testing, and commissioning of wiring.
By and large, in self-assembly wiring is nothing fancy. It is only important to choose the right wires, taking into account the load placed on them and not to forget about protection devices.
Wiring plan drawing
 First of all, before you start laying wires, you should do detailed drawing wiring diagrams in a private house. This is necessary to understand the scope of further work and facilitate the installation process.
 When creating a drawing, it will be easier to decide what to do when laying wires in problem areas. For example, situations sometimes arise when it is difficult to move conductors to a safe distance from plumbing or heating pipes, and even the potential for water to get on electrical wires cannot be allowed.
You should never place wires diagonally in the recesses of the walls. Perhaps this will save a certain amount of material, but it will greatly complicate the whole work. According to the unspoken rules, wiring is laid only vertically or horizontally.
The plan, with all possible further changes, is best left, not thrown away. Since sooner or later it may be needed during repairs.
Preparatory work
After creating the drawing, for convenience, you can transfer the wire lines to the wall and begin further work. It is important to decide what type of wiring will be - closed or open.
Closed wiring type
 Despite the complexity of installation, closed wiring in a private house is the most popular, since the wires recessed in the thickness of the walls do not require any additional decoration.
The work of creating hidden wiring is very dusty. You will have to work a lot as a grinder and, but after the installation is completed, all the wires will be neatly hidden under a layer of plaster or cement mortar.
 Making open wiring is much easier and faster. The wires are laid in special tubes and. All fixtures for mounting open wiring, are made of fireproof or self-extinguishing plastic.
It is worth remembering that when wiring electrical wiring in a private do-it-yourself, it is chosen exactly open type installation. Trying to lay wires inside wood is prohibited.
Wire selection
 It is important to choose the right wires for installation. To do this, the load placed on them should be taken into account. The calculation of electrical wiring in a private house with your own hands is generally simple. Most often, all energy consumers are divided into groups with approximately equal power, and wires are selected with the same cross section.
The wire can be purchased aluminum or copper. Despite the fact that the cost of aluminum wires is significantly lower than copper wires, such wiring is now rarely used. This is due to the fact that budget counterparts are much tougher and more brittle. Working with copper wires is much easier. They are easy to bend, lay in pipes and channels, without fear of breaking.
You should not try to combine aluminum and copper wires in the same network, since the contact point is likely to overheat. This is permissible only with partial replacement of wiring in old houses, where, as a rule, it was aluminum conductors that were used.
For connecting and distributing electricity in a private house, it is advisable to use two-core and three-core wires of the same type. Through the first, lighting devices are fed, and the second serve to supply voltage to sockets with grounding.
It is best to use VVG or PVG wires in a private house with a core cross section of 2.5, 4 and 6 mm 2, which are wrapped in a double insulating layer.
Ground loop
 When installing electrical wiring in a private house, it is important to take care of the safety of residents. The main element that ensures safety in the operation of electrical equipment is grounding.
In addition to tapping to the ground, the ground loop must have a residual current device (RCD). It is located directly in the shield. Grounding itself is a massive metal object hammered into the ground.
Do not neglect grounding. In some cases, it can save a person's life.
 The wires are connected by soldering, twisting, or using special clamping blocks. To date, the latter method is the most popular, since it greatly simplifies the installation of electrical cables. Twisting is also acceptable, but only when using the same type of cores.
Most reliable method connections, this is soldering, but at the same time, this is the most difficult way.
All switching must be in special distribution boxes. Leave single or multiple connections in open form prohibited even with additional insulation.
 When the turn has come to connecting sockets, switches, and lighting fixtures, the most important thing is to correctly connect all the wires without confusing them. It is desirable to have the phase and zero in all outlets the same. For example, phase is on the right, and zero is on the left.
 The most difficult stage in electrification is the connection of the switchboard. It is given an introductory power cable, from which the wiring branch is distributed to all individual rooms of the building. It is important to understand that the slightest mistake in the wiring diagram in the shield of a private house will certainly provoke a serious problem.
It is best to entrust the work with the shield to a power supply specialist. Here it is extremely important to carefully make all the necessary connections.
security check
In order to check the correctness of all connections and make sure the wiring is safe, it is also better to contact an experienced electrician. For commissioning, it will be necessary to invite the workers of the electrical laboratory to sign a permit to connect to the public network. If employees detect violations, then after their elimination, the check will have to be repeated.
At the end of the topic, it is worth saying that, in general, the installation of electrical wiring in a private house is not difficult. However, it is extremely important to be aware of the danger posed by the process of electrification with multiple violations and ignorance of the basics of electrical safety. All work is best done in a company with a specialist.
Do-it-yourself wiring in the house - video
Some people think that laying electrical wiring in the house with their own hands is too complicated for them. home master. Working with electricity is a serious issue that needs to be approached responsibly. The right device electrical wiring in every home is a guarantee of people's safety, because 70% of fires occur due to malfunctions in electrical networks. But if there is a desire, basic knowledge and a little practice, then you can do necessary work on one's own.
Sequence of work
Electrical wiring in own house carried out prior to the commencement of finishing works. The box of the building is already standing, the walls have been erected and the roof is in place - the time has come to think about electricity.
The sequence of work performed is as follows:
- Determining the required amount of ah - single-phase current (220 V) or you need to connect a three-phase current (380 V)
- Creation of an electrical circuit, calculation of the capacity of future consumers, submission of documentation to regulatory authorities and receipt of an approved project. It should be mentioned that you will not always be allowed the declared power, most often they will allocate up to 5 kW
- Selection of electrical components, purchase of a meter, electrical cables and automatic machines of the required power
- The supply of energy from the pole to the house, this work cannot be done independently, you need to invite specialists from the energy supply organization, place it in suitable place general machine and electric meter
- Fix the switchboard, conduct electricity to the house
- Laying cables inside the house, installing and connecting switches and sockets
- Installation and ground connection
- Checking the network and obtaining an act
But each object has its own characteristics, it is necessary to start with studying specifications and project. First you need to decide what type of input is needed, and determine how much electricity will be consumed.
Preparation and submission of documents will take up to six months, it is better to submit them before the start construction works, 2 years to complete. This period will probably be enough to kick out the walls, and install a counter and an automatic machine.
Number of phases
Own house can be connected to single-phase or three-phase voltage. For private houses, single-phase networks are provided, with an allowable flow rate of up to 15 kW, and three-phase networks of more than 15 kW. You will need three-phase voltage if you need to use powerful equipment that connects to a 380 V network.
Electrical appliances such as productive ovens are connected to a three-phase network, heating boilers or electric stoves. The requirements for a 380 V network are much higher - with a more powerful voltage, the risk of serious injury increases. For this reason, if the house does not exceed 100 m2 in area, and you do not plan to heat it with electricity, then it is better to connect a 220 V network.
Making a plan and receiving a project
Now you can create a plan for wiring and installing electrical outlets in the house. To do this, use the building plan on a scale, mark on it where the equipment should be located, think over the places where switches and sockets will be installed. It is necessary not to forget about the installation sites of massive furniture so that it does not cover switches and sockets.
Wiring diagram in the house
On the plan it is necessary to note all the necessary lighting fixtures. Some will require switches to be installed, others will require their own outlets. After that, you need to think about what else you might have to include in each room.
Eg: there are many in the kitchen different equipment connected permanently, they need their own sockets. But you may need to occasionally use other electrical devices. All these data are indicated on the plan, and the most convenient placement of switching points is calculated.
What power do you need?
After the distribution of electrical equipment throughout the premises, you need to add up its power. You can see how much each device will require in the table, but you need to remember that there are starting currents that exceed the average values. Approximately 20% is added to the amount received to create a small reserve.
Shrink sleeve
The result obtained and indicate in the documents required to obtain permission. If the declared power is provided to you, then it is very good, but most likely, they will give you only 5 kW - the standard limit for private housing construction.
| electrical appliance | Power input kW | electrical appliance | Power input kW |
|---|---|---|---|
| TV | 300 | Air conditioner | 1500 |
| Printer | 500 | water heater | 5000 |
| Computer | 500 | Boiler | 1500 |
| hair dryer | 1200 | Drill | 800 |
| Iron | 1700 | Perforator | 1200 |
| Electric kettle | 1200 | Electroemery | 900 |
| Fan | 1000 | Circular Saw | 1300 |
| Toaster | 800 | electric planer | 900 |
| Coffee maker | 1000 | Electric jigsaw | 700 |
| Vacuum cleaner | 1600 | Sanding machine | 1700 |
| Heater | 1500 | A circular saw | 2000 |
| microwave | 1400 | Compressor | 2000 |
| Oven | 2000 | Compressor | 1500 |
| electric stove | 3000 | Welding machine | 2300 |
| Fridge | 600 | Pump | 1000 |
| Washing machine | 2300 | electric motor | 1500 |
Consumer groups
All consumers - sockets, switches, various electrical appliances are divided into groups. Separately held lighting fixtures, often one is enough for them, but sometimes it is advisable to carry out 2 branches - to each floor or wing of the house. Also, street lighting is transferred to a separate group, utility rooms and basement.
After that, the sockets are allocated into groups, their number on one cable depends on its cross section, but not more than 3-5 pieces. For powerful electrical appliances, it is advisable to provide a separate line, so the wire will last longer and be safer. As a result, you will get from 3 to 7 lines in the kitchen, a lot of equipment is installed here.
For a boiler, a powerful water heater and an electric stove, you definitely need your own lines. Washing machine, electric oven, microwave and refrigerator, it is desirable to connect separately. Weaker devices food processor and a blender, you can also connect separately.
Cable groups
3-4 lines are carried out to the living rooms, in each room there is always something that needs to be connected to the outlet. One wire is used for lighting, another one will have sockets for the TV, router and computer. They have little power and can be combined into one group.
Electric heater and air conditioning - require their own line.
If you don't have big house ik, for example, a summer residence, then 2-3 groups will be enough- one is for all lighting, the second is for powering everything outside the house and another one for all sockets in the house. Simply put, required amount groups in a private house - is calculated individually and directly depends on the size and needs of the people living in the house.
The number of groups is determined by how many machines you need to install in the switchboard, you need to add 2-3 machines for development to the number of groups (if you need to install something else powerful or you forgot about something, then you will need to separate one of the groups). The switchboard is chosen so that it is convenient to place all the necessary machines in it. If you have a large house, then it is more convenient to install one powerful machine on each floor, and connect the machines of the groups of this floor to it.
Where to install an electrical panel?
electrical panel
A specific place for mounting the shield is not indicated in any regulations. Only you can’t install it closer than 1 meter from any pipeline - gas line, downpipes, sewerage, heating system, conduit, you can’t even place gas meters nearby.
According to the purpose of the premises, there are no prohibitions, they often have shields in boiler rooms - it is convenient to collect all communications here, the selection committee will not express complaints. If the shield high class protection, you can place the switchboard near the front door.
How to choose the right cable
When connecting a building to the mains, in our time it is required to place a common machine and an electric meter on the street. This requirement is not specified in the law, but in this case it is easier for the electric service to control energy consumption. If you agree to this, then select the machine and counter with high protection from moisture and dust - not lower than protection class IP-55. When placed indoors, at least IP-44 protection is acceptable, so you will spend less money.
To create an electrical network in a private house, it is advisable to use not a wire, but a cable. They have much better and more reliable insulation, and for this reason, the requirements for laying indoors are softer. Internal wiring must be done with grounding, these are new requirements and there were no electrical appliances with three pin plugs before.
The conductors in electrical cables are made of aluminum or copper. Of course, aluminum is much cheaper, but it is rarely used - this metal often breaks, it is difficult to work with it. Moreover, inside wooden houses it cannot be applied.
Cable core cross section
When you select the material for the cable, you can calculate the required diameter of its cores. This is done taking into account the future load, which is calculated according to a special table.
Calculation of cable cores
The cross section of the conductors is selected according to the power, or the current consumed by all devices connected to one machine. Here again, you need a plan for the electrification of the building, which shows all consumer groups. The sum of the power of the installed devices is calculated, and according to the data indicated in the table, a suitable wire cross-section is selected.
- It is not difficult to use the table if I use copper wires, and a voltage of 220 V is supplied, then the left side of the table and a suitable column are used to lay the wiring indoors.
- It is necessary to compare the total power of all connected devices (it is easier to calculate). Where a copper wire is indicated that is laid in channels, trays or voids, a larger value is selected in the “220 V” column.
- Moving to the right along this line, to the line “Section, sq. mm", find the required diameter of the cores. From cables of this diameter, they create a line from the machine to consumers of electricity.
- In order not to get confused, mark the cores of the same thickness on the plan with your own color (in order not to forget later, separately note what is indicated under which color).
- When the diameter for all cables is found, the total length is calculated for all cables for each diameter, and to this add 20-25% for insurance. After that, it is considered that you have calculated the cables for laying in the building.
Cable sheath
Requirements for the type of cable sheath exist only when creating an electrical network for wooden buildings, they must use double (VVG) or triple (NYM). In buildings made of fire-safe materials, it is possible to lay cables with any insulation.
The main thing in this matter is that there are no damages, sagging, cracks on it. For insurance, you can use a wire with enhanced protection. This may be appropriate in wet areas (bathrooms, bathrooms, swimming pools).
What are the best switches and sockets to use
Under any powerful devices, sockets with the maximum allowable starting current are installed. For low-power devices, you can use standard ones.
They can be:
- (Domestic) To install a socket or switch, it is necessary to prepare a recess in the wall into which the box is mounted. In this box, the electrical filling of the switch or socket is fixed;
- (outdoor) In this case, the body of the socket or switch protrudes from the wall. It is more convenient to mount them - a substrate is installed on the wall surface, on which a switch or socket is mounted.
Most often now use internal switches and sockets. Basically, they are selected according to interior decoration rooms, or simply install white appliances.
Do-it-yourself wiring
Nowadays, hidden wiring is mainly used, for its installation in the walls they make special channels - strobes. When the cable is laid and fixed, the strobes are sealed with putty to the level of the surface of the entire wall. If GVL, drywall, etc. are subsequently attached to the walls, then there is no need to punch strobes. In this case, the cable is simply placed in the void between finishing material and a wall, but they are protected by corrugated sleeves.
Junction box
When laying the wiring, do not forget that the electrical wiring is routed inside the building according to certain rules:
- Cables are laid only horizontally or vertically; oblique laying and any rounding of corners are not allowed.
- Connection points must be placed only in junction boxes
- Transitions above the doors can be made at least 2.5 m, from them the cable is led to switches or sockets
It is necessary to draw up a plan for laying the electrical route, and save it for the future. It will definitely be needed when repairing wiring or during redevelopment of the premises. It will need to be addressed, if necessary, drive a long nail or make a hole.
The main thing during these works is not to break through the cable sheath.
In the article we will talk about how an electrician is made in a house with our own hands, wiring diagrams will also be considered. If a couple of decades ago Electricity of the net In cities and even villages, the loads were insignificant, but today the picture is reversed. Lots of high power household appliances - washing machines, multicookers, split systems and more.
The load on the electrical networks has increased many times over. And if the city has some reserve, then there is no such thing in the wiring of a private house, therefore, an increase in the load leads to the fact that the wires do not withstand and begin to collapse. Therefore, the question is that the electrician in the apartment and the house with their own hands should not only be repaired, but also completely changed.
Previously, they did wiring in houses according to the simplest scheme - a switch and an outlet for each room, and in modern conditions this turns out to be too little - I want to turn on three chargers, and a laptop, and a TV, and so on. To independently make wiring in the house, you need to know certain rules and standards that should be followed during installation. You will also learn how the wiring diagram is made, how to breed it correctly with your own hands and the requirements for it.
Regulations
Building materials and all activities of builders are regulated by certain rules and requirements, they are called GOST and SNiP. The Electrical Installation Rules (hereinafter PUE) also apply to electrical wiring in houses and structures. It is this regulatory document that prescribes all the requirements for electrical equipment, thoroughly indicating what to do with it and how. All electrics in the apartment and house are connected to the voltage with their own hands only after all checks for a short circuit have been carried out.
Requirements for electrical wiring in private houses and apartments

In the event that you decide to independently make electrical wiring in your home, you must carefully study all the requirements for it. But the main attention should be paid to the following points:
- The main components of electrical wiring (distribution boxes, switches, sockets, meters) must be made easily accessible. It is quite simple to install the wiring in the house with your own hands. Electricity, however, is demanding in terms of safety. But all the rules can be easily observed.
- Switches according to the PUE must be performed at a level of 0.6-1.5 meters from the floor surface. And you need to pay attention to the fact that when opening the doors they should not create an obstacle. For example, if the door opens to the right, then the switch must be located on the left. And if the door opens to the left, then the switch is mounted on the right. The cable must be laid to the switch from above.
- Sockets are mounted at a level of 0.5-0.8 meters from the floor surface. The fact is that at this level it is necessary to have it for safety purposes when the house is flooded. Moreover, a distance of at least 0.5 m must be maintained from a gas or electric stove, heating radiators, pipes (and other grounded items). Wires go to all sockets from the bottom up. This is how it is done by hand. Wiring diagrams are given in the article.
- For every 6 sq. m. area of the room should be one outlet. An exception is the kitchen, in which as many sockets are mounted as necessary (based on the number of household appliances located in it). It is forbidden to install sockets in the toilet, but it is allowed in the bathroom, only if there is an isolation through a transformer (220 volts are supplied to the primary winding, the same amount is removed from the secondary). The transformer is installed outside the bathroom.
- Before starting work, you need to make a wiring plan, clearly indicate its location in the walls. Please note that all wires must be either horizontal or vertical - but not diagonally or in a broken line. So the wiring in the house should not be done with your own hands. The wiring diagram of all devices must take this feature into account.
- There must be a certain distance from ceilings, pipes and other obstacles. For example, from the beams you need to maintain a distance of 5-10 cm, from the cornices - the same amount. From the ceiling you need to withstand about 15 cm, from the floor - 15-20 cm. If we are talking about vertical surfaces, then from the door and window openings should be at least 10 cm. But between gas pipe and wiring must maintain a distance of more than 0.4 m.
- External or hidden wiring should not touch the metal parts of any structures.
- If several wires run in parallel, the distance must be maintained between them over three millimeters. Alternative option- hide each wire in a protective box or corrugation. So the electrician is mounted in the house with his own hands. Schemes should be designed with this in mind.
- Connecting and distributing wires should be in special junction boxes. All joints must be carefully insulated, and one feature must be taken into account - it is forbidden to connect copper and aluminum wires. If you make wiring from copper wire, then you make it all out of it, there should not be any sections of aluminum.
- Grounding (including zero wires) must be fixed to all devices using bolted connections.
These are the requirements that all electricians ask for. You can draw up wiring diagrams with your own hands only if you take into account all these rules and regulations.
house wiring project

First of all, you need to create a wiring project, it all starts with it. From it will be repelled in the future during the installation. Of course, it will be much better if it is made for you by experienced technicians who have been doing this for more than one year. But if you have experience, go for it.
But keep in mind that your own safety depends on how the project is made. You need to know which conventions used in drawing up schemes and projects. It is worth noting that Russian standards are quite different from European or American ones, so you should not use foreign schemes in our country. All the electrics in the house are designed with their own hands (the diagrams are given in the article) at the initial stage.

Draw a plan of a house or apartment, mark on it the places where sockets, switches, chandeliers, etc. will be installed. The number of electrical appliances was mentioned a little lower. At this stage, the main goal is to create a diagram on which all the places for mounting devices will be indicated. The second part is to outline the places for laying wires around the apartment. Of course, you need to know where the household appliances will be.
Wiring
Then make the wiring of all wires. And if creating a scheme with the location of consumers is a simple matter, at this stage of work it is worth dwelling in more detail. Three types of connections and wiring can be used:
- Consistent.
- Parallel.
- Mixed.
The third one is considered the most attractive from the point of view of saving materials.

An electrician is made in the house with his own hands (mixed-type circuits) with the highest possible efficiency. To make your work easier, ungroup:
- Lighting corridors, residential premises, kitchens.
- Bathroom and toilet (lighting).
- Sockets in living rooms, corridors.
- Sockets in the kitchen.
- Socket electric stove(if necessary).
Please note that this the simplest option groups of electricity consumers. The fewer groups, the less materials will be used up. The above example is the simplest and most economical. It can be complicated: literally to every outlet, for example, to bring electrical wiring. You begin to realize a little about how to conduct an electrician in a private house with your own hands.

To simplify the laying of electrical wiring, it can be mounted under the floor (for sockets). In the case of overhead lighting, installation in floor slabs can be carried out. Ideal for the "lazy" way - there is no need to ditch the walls and ceiling. Moreover, on the plan diagram, this type of wiring must be marked with dotted lines.
Current consumption calculation
Be sure to take into account the strength of the current that will flow through the network. There is a simple formula for this: current strength is the ratio of the total power of all consumers to voltage (we can say that this is a constant, since the voltage standard in our country is 220 Volts). Let's say you have the following consumers:
- 2000W electric kettle.
- A dozen incandescent lamps, each 60 watts (600 watts in total).
- 1000W microwave oven.
- Refrigerator with a power of 400 W.

The voltage in the network is 220 V, the total power is 2000 + 600 + 1000 + 400, that is, 4000 watts. Dividing this value by the voltage in the network, we get 16.5 A. But if you look at the practical data, then in apartments and houses the maximum current consumption rarely reaches 25 Amperes.
According to this parameter, it is necessary to select all materials for installation. In particular, it depends on the strength of the current Please note that you must always take a margin of 25%. In other words, if you calculated a current consumption of 16 A, you cannot install a fuse with the same tripping current value. It is necessary to choose a standard value greater than the calculated one.
Wire brands for use in homes

Now about how the electrician is mounted in the house. The cable (PUE rules regulate all its parameters) must be selected based on current characteristics. It is desirable that the wiring in the house or apartment be made of the following materials:
- Wire brand VVG-5X6. This wire consists of five cores, each has a cross section of 6 square meters. mm. It is widely used for houses with three-phase network to connect the light box to the main one.
- VVG-2X6 has two cores with a cross section of 6 square meters. mm. It is widely used for single-phase power houses to connect the light box and the main one.
- The wire brand VVG-3X2.5 has three cores, each with a cross section of 2.5 square meters. mm. It is used to connect lighting boards with junction boxes. Also from boxes to sockets.
- Brand VVG-3X1.5 has three cores, each with a cross section of 1.5 square meters. mm. It is used to connect switches and lighting lamps.
- The brand is three-core, the cross section of each core is 4 square meters. mm. It is used to connect electric stoves.
Material counts

Now consider what components (including small ones) the electrical wiring in the house consists of. Do-it-yourself project, wiring, installation, is carried out quickly enough. True, you will have to try pretty hard to count the number of wires as accurately as possible. To do this, according to the plan, go through the apartment with a tape measure. After taking measurements, add four meters on top - the stock will not be superfluous.
At the entrance to the house, all the wires from the house are placed to it. It installs automatic switches. Please note that the machines must have a maximum tripping current of 16 or 20 Amps. must be connected via a separate circuit breaker. With a power of up to 7 kW, a 32 A automatic machine is used, with a larger one - by 63 A.
After counting the number of junction boxes and sockets, there is nothing complicated in this matter, this is done according to the scheme drawn up earlier. In the future, you will need various "little things", for example, insulating tape, lugs, tubes, cable channels, boxes, thermal insulation, and others. Now it’s worth talking about what tools do the wiring in the house with your own hands. The scheme is considered in some detail.
Work tools

When carrying out, always follow the safety rules. In order not to get confused, it is better to do it yourself, but if you have a partner, then help should be minimal - give, bring, do not interfere. You will need the following tool:
- Multimeter.
- Perforator.
- Bulgarian.
- Screwdriver.
- Pliers.
- Wire cutters.
- Curly and flat screwdrivers.
- Level.
If you are doing repairs in old apartment and change the wiring in parallel, you need to pull out all the cables so that they do not interfere. For this work, a special electrical wiring detection sensor is useful.
Marking the location of the wires
On the wall, put marks along which you will lay the wires. Pay attention to whether the position of the wires complies with the rules. After the places for the passage of electrical cables have been outlined, sockets, boxes, shields and switches can be marked. Please note that in new apartments there is a niche for installing a shield. And in old houses, shields are simply attached to the wall.
Wall chasing

First of all, install a special nozzle on the puncher and drill holes for installing junction boxes, switches and sockets. To lay wires, it is necessary to make grooves in the walls - strobes. They are made using a grinder or a perforator. Whichever method you choose, dirt and dust will suffice. The groove should have a depth of 2 cm. As for the width, it should be enough to lay all the wires. As you understand, do-it-yourself wiring is a simple matter, it is more difficult to make installation from a physical point of view.
Separate story with the ceiling. If you plan to make a hinged one, then simply install all the wires on the floor. This is the easiest way. A little more difficult is to make a shallow strobe. And one more - to hide in the ceiling. For example, in panel houses such ceilings are used in which there are internal voids. Therefore, two holes are enough to lay the wires. And the last thing is punching holes in the corners of the rooms to bring the wires to the central shield. After proceeding to closed (you will have to ditch the walls) or open methods.
Conclusion
The most important thing in the installation of electrical wiring in houses and apartments is to adhere to all the rules and regulations in accordance with GOST, SNiP, PUE. So you can not only achieve maximum efficiency from electrical wiring, but also reliability, durability, and most importantly - safety. And try to use only high-quality materials during installation. For example, it is desirable to use copper wires - they have a much longer service life (better conductivity, they heat up less).
Before starting electric installation work First, a wiring diagram is drawn up. With a clear idea and a power supply circuit diagram at hand, wiring becomes much easier.
Why is a wiring diagram needed?
Well, first of all, the scheme is necessary to compile a list of necessary Supplies. That is, having a diagram at hand, the length of the wire, the cross section of the wire in individual sections, the required number of sockets and switches, junction boxes and their marking places, etc. are calculated.
Also, a wiring diagram is necessary to determine the installation location and location of power wiring elements, such as: switchboard, circuit breakers, metering devices (meters), input of power wires and cables.
An example of drawing up a wiring diagram in a private house.
Meals in a private house, as a rule, come overhead line 0.4 kV. From the overhead line support to introductory electrical panel the phase wire L comes and the combined zero protective and working PEN (single-phase power supply).
Fig 1. Input of power supply via an overhead line.
Recently, energy supply organizations have been practicing installing metering devices on the street, in the introductory electrical panel (previously, meters were installed inside the house). Therefore, an electric meter and an introductory circuit breaker are installed in the introductory electrical panel (you can also install an introductory RCD of selective action).
From the introductory shield, the supply wire or cable is laid to the internal electrical panel located directly inside the house.
From this internal electrical panel, the power supply of the house begins. In order to make the power supply more reliable, consumers are divided into groups. Consider the example of the main consumer groups:
- 1. Lighting;
- 2. Rosette group;
- 3. Power group (boiler, washing machine, boiler, etc.);
- 4. Owner. needs (outbuildings, garage, basement, etc.).
Separate protection devices (automatic devices, ouzo) are installed in the internal electrical panel for each consumer group.
Also for compiling wiring diagrams in a private house you need to have a plan of the house itself. Knowing the drawing of the house plan, you can superficially display the wiring diagram.
Fig 3. Layout of the electrical wiring of a private house.
From the above material, a fundamental house wiring diagram.
Re 4. Wiring diagram house wiring.
If the mansion is large, then you can split the consumers separately for each floor, half of the house or each room separately.
If three-phase power is suitable for the house?
If not single-phase, but three-phase power is suitable for the house, then in this case, three phases (L1, L2, L3) and a combined neutral protective and working wire PEN come from the support to the input electrical panel.
Wiring diagram of the apartment
Wiring diagrams in the apartment and the house do not have a significant difference between them. The difference between them is that the power supply of the apartment starts from the floor shield, since the power supply does not come through the overhead line, but through the cable line.
Entering electricity into the apartment begins on stairwell where the switchboard with the meter is located. A common switch is installed here, from which two independent lines usually go.
Each line is protected by an automatic package switch or a fuse (called a plug). Thus, in the event of a short circuit in one line, the apartment will not be completely de-energized.
Apartment wiring can be open or hidden. For open wiring, SHVVP or NYM wires can be used. Hidden wiring subdivided into replaceable and non-replaceable. Replaceable wiring wires are laid inside vinyl-plastic pipes, and non-replaceable wiring directly under the plaster layer.
Previously, in Soviet times, metering and protection devices (meters, automatic machines, traffic jams) were located only in the stairwell. Now, many electricians are redesigning the wiring diagram in the apartment in such a way that an internal electrical panel is also installed in the apartment. From it already comes the distribution of individual wiring lines in the rooms.
Before drawing up a wiring diagram in an apartment, you need to draw up a plan for the layout and location of future electrical appliances. That is, where a TV, refrigerator, computer, etc. will be installed.
This is necessary in order to know where and in what quantity to place sockets and light switches during installation and over time, when the repair is over, there was no need to use devices such as carriers and tees.
Consider the usual two-room apartment. We divide the wiring in it into the following main groups of consumers:
- - lighting (entrance hall, rooms, kitchen);
- - sockets (rooms);
- - bathroom, toilet (lighting);
- - kitchen (sockets);
Wiring diagram in the apartment similar to the scheme of a private house with a single-phase power supply.

Fig 6. Plan-scheme of electrical wiring in the apartment
Also, I would like to note that for bathrooms there are requirements for the location of switches - they are not allowed inside these rooms. In addition, plug sockets are not allowed in the bathroom.
An exception is the socket for connecting an electric shaver, however, its connection to the network must be made through a transformer.


