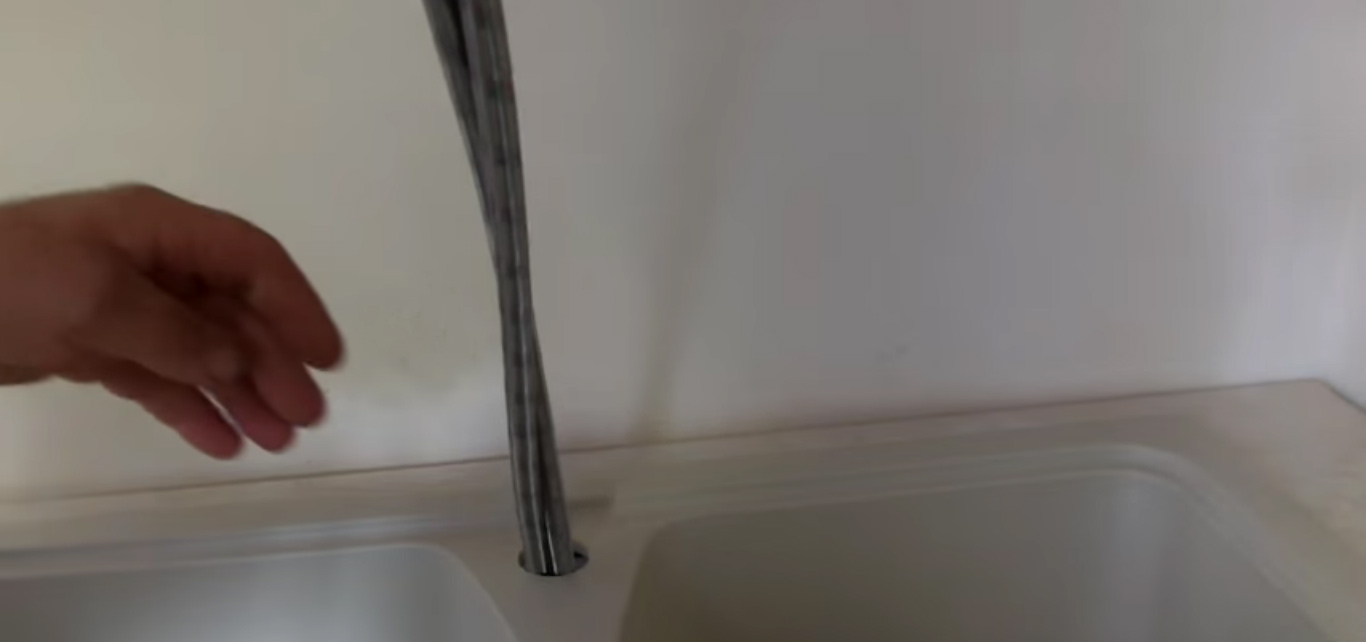
Faucets need to be replaced periodically, as in the kitchen they work in a rather tough mode, being exposed to water and detergents. Installing a new faucet can easily be done without the help of plumbers who charge a lot of money for their services.
Replacement parts - choose the right one
The kitchen faucet is one of the most used plumbing fixtures. For this reason, it often fails. Under the action of water, the body of the described plumbing fixture loses its former attractiveness, corrosion processes begin on its surface, the threads in the places where the cartridge and valve are attached are "eaten away". Often faucets start leaking. In such situations, repair or complete replacement of the faucet in the kitchen is carried out.
Installation of new equipment is carried out according to a simple scheme. The first stage is the acquisition Supplies. To install a new faucet in the kitchen, you need to prepare:
- a set of flexible hoses;
- open-end wrench (for 11 or 10);
- sealing fluoroplastic (FUM) tape;
- mounting kit;
- tubular key;
- two plumbing connections;
- screwdriver, pliers.
In most cases, faucets are sold with metal-braided hoses. The latter have a standard length of 30 cm. This is often not enough. And the quality of complete hoses is usually very low. It is recommended to immediately put them aside and purchase more reliable products, for example, corrugated stainless steel. When choosing flexible hoses, pay attention to the type of threaded connection and its cross section. It is advisable to buy products with different fitting lengths. Such hoses are easy to assemble, as the hex keys do not interfere with each other.
Do not buy too long hoses, as well as those that will be tight after installation. When closing and opening the mixer, they will vibrate, twitch. This will cause early hose wear and leaks.

Fluoroplastic tape is needed to seal threaded connections. It is used when an adapter or coupling is mounted on a water pipe. Instead of FUM tape, it is allowed to use modern sealing pastes sold in plumbing stores, and time-tested linen tow. The mounting kit usually includes three half washers (one horseshoe-shaped and two regular), sealing rubber rings, a nut, two (sometimes one) studs. If an inexpensive Chinese-made mixer is purchased, it is better to immediately buy better, thicker and more reliable linings. Throw out the seals included in the kit without regret. They wear out very quickly.
Dismantling the old crane - operation tricks
Any craftsman can replace the mixer in the kitchen without resorting to the help of specialists. Such an operation consists of the following steps:
- 1. Dismantling the old device.
- 2. Assembly of eyeliners and mixer.
- 3. Installation of a new crane.
- 4. Connecting the equipment to the water supply network.
- 5. Checking the performance of the mixer.
Before removing the old faucet, turn off the water supply (turn the valves on the manifold or at the entrance to the apartment). Then you need to normalize the pressure in the water supply system. Just turn on the kitchen faucet. Place a basin or other container under the sink, lay a rag in an even layer in the sink so that when performing work, the elements of the mixer do not damage it when falling and fall into the drain hole.
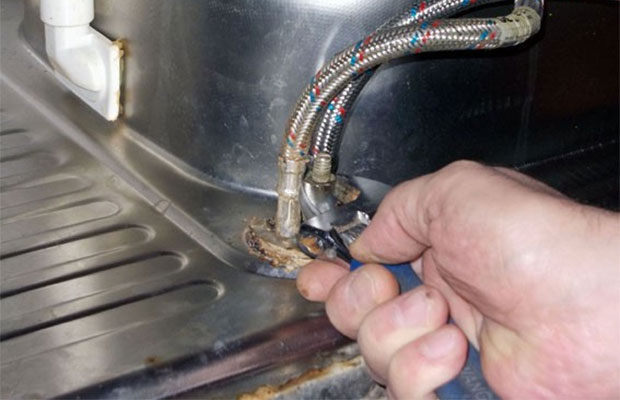
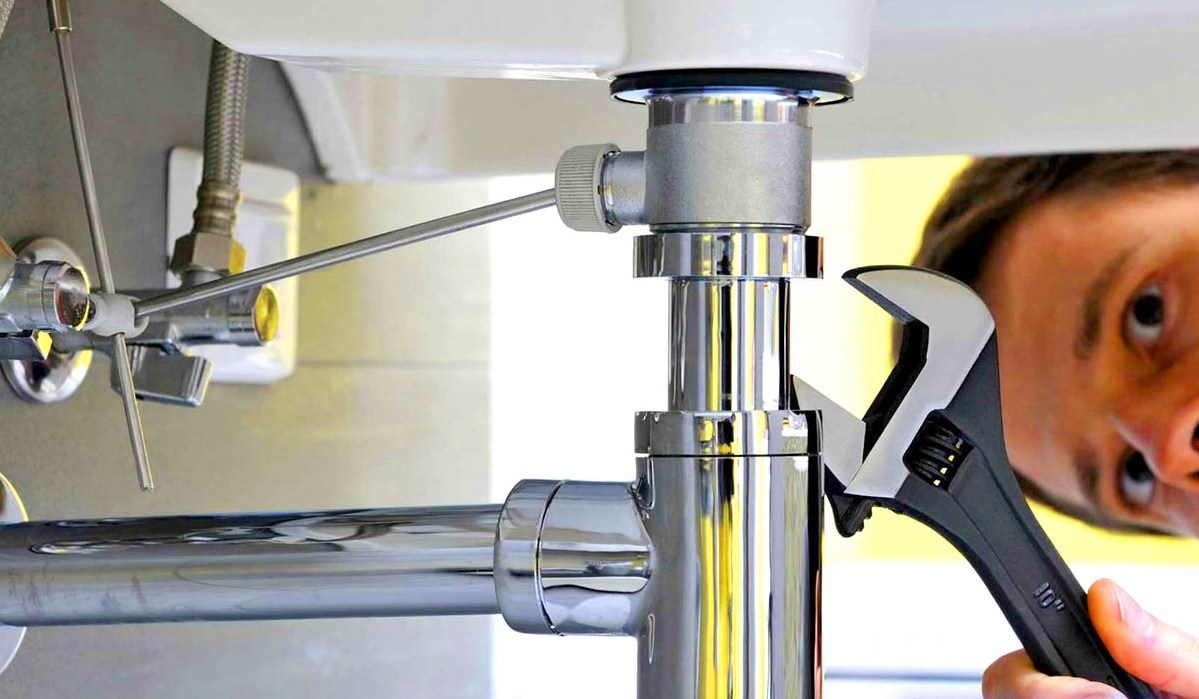
Now you can start dismantling your old faucet in the kitchen. Disconnect the old flexible hoses with an open-end wrench. During this operation, water may pour out (this is why a basin is needed, which we placed under the sink in advance). Take a tubular wrench, unscrew the nuts on the studs with it (there can be only one stud), dismantle the half washer. Pull the old faucet out of the sink hole along with the hoses.
We must say right away that sometimes it is not at all easy to do all the described procedures with your own hands. Often the crane is located in an inconvenient place, which does not allow free use of the tool. Yes, and you have to work in a very uncomfortable position (usually lying on your back). Most of the difficulties arise when the shell is integrated into Kitchen Cabinet. And most importantly, the elements of the mixer during long-term operation stick to each other and to the pipes, rust. Disconnecting them in some cases is almost impossible.
In such situations, the replacement of the faucet should be carried out after the entire sink has been dismantled. The operation is simple and short. It will only be necessary to disconnect the sink from the sewer (remove the siphon by unscrewing the special retaining ring, or remove the corrugated flexible hose from the pipe). After spending a couple of extra minutes, you can safely dismantle the old crane, and then put it back into place.
Assembling a new device - everyone can do it!
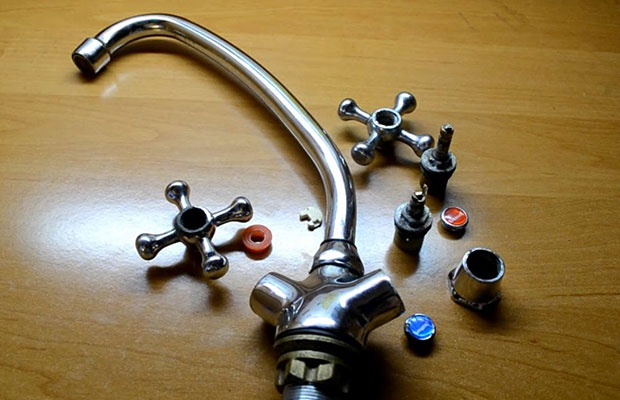
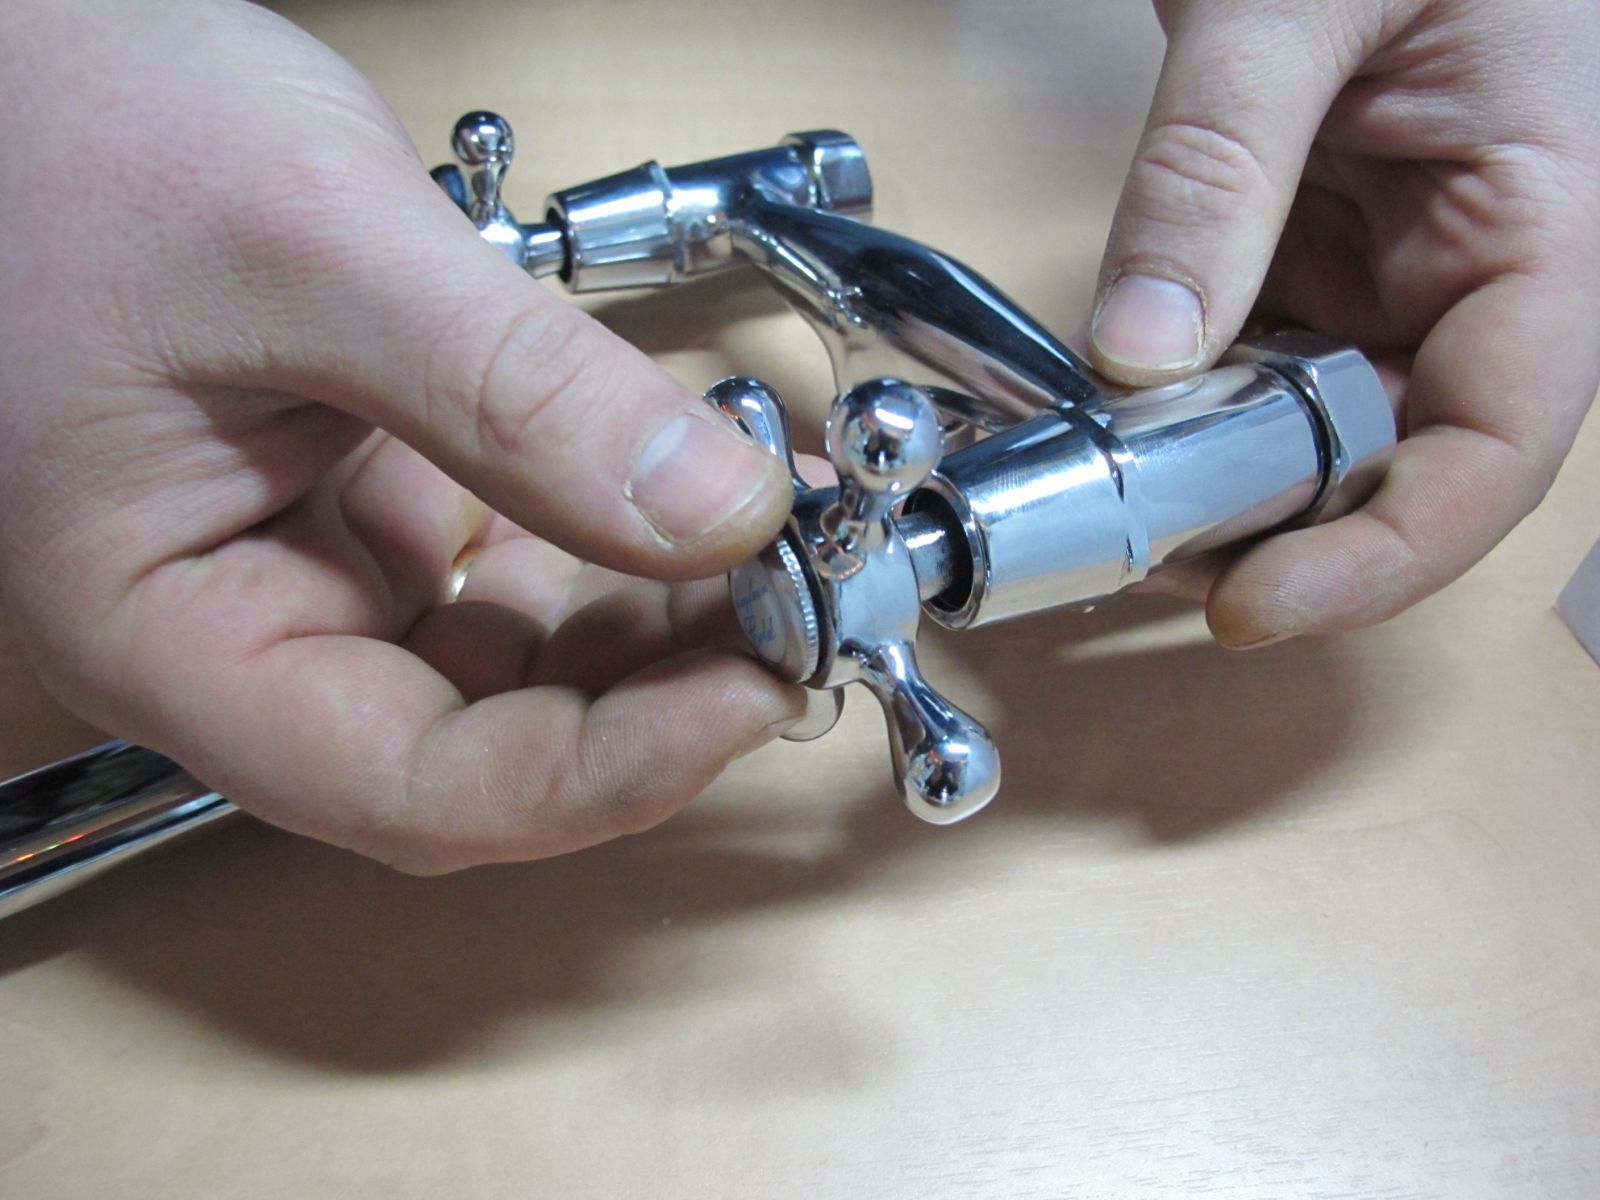
Before changing the crane, you need to assemble it. This applies, in particular, to the two-valve mixers common today. The process is elementary - the spout of the device must be inserted into its body until it comes into contact with the limiter ring, and then these parts are carefully connected to each other. The procedure is carried out without the use of any tools - manually. In this case, it is not necessary to overtighten the spout and the body.
The next step is to connect the mixer to flexible hoses. In some cases, the crane is connected to hard leads. But it is better to entrust such work to professionals. Not every home craftsman can cope with it on their own. After connecting flexible hoses be sure to wrap their ends with FUM tape (a couple of turns are enough). But the tip does not need to be sealed. Gasket on the hose eliminates the possibility of leakage.
Next, insert (alternately) eyeliners into the tap holes. Screw them on by hand. When both eyeliners are installed, additionally tighten the connections with a wrench (open-end) by 11 or 10. Here you need not to overdo it. If you do not reach the connection, the seal will leak water. If overtightened, the pads may crack. Be extremely careful! It remains to install the studs-pins into the holes that are on the mixer, and thread both eyeliners into the sealing ring. They must be stretched to the crane body (to its base), and then fixed in a stationary state.
Installation of the mixer - set, fasten and check
We continue our master class, helping to change the old faucet in the kitchen. Installation of a new device on the sink is carried out according to the following scheme:
- 1. Insert the ends of the flexible hoses into the hole in the sink.
- 2. Install a faucet. At this stage, you should ask someone from the household to hold the mixer.
- 3. Pull from below (under the sink) the pressure rubber lining on the eyeliners. Then fix the metal washer (it is made in the form of a horseshoe), put the nut on the stud.
- 4. The resulting connection is fixed with an open-end or tubular wrench. Important nuance! The nut is tightened firmly enough, but without excessive physical effort.
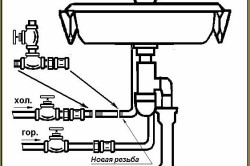
Now connect the water outlet pipes (hot, cold) to the flexible hoses. Don't mix them up. Conclusion for hot water always located above or on the right, cold - below or on the left. Helpful advice. Equip the pipes with bends and install on the last valves. Then, if necessary, you can always turn off the water supply to the sink and make a simple or replace the faucet in the kitchen.
After connecting the tap to the water supply, be sure to check the correctness of the work performed. Open hot water first, then cold. Carefully check all connections for leaks. If there are any, you will have to change the seal. Most likely, you overdid it, tightening the eyeliners.
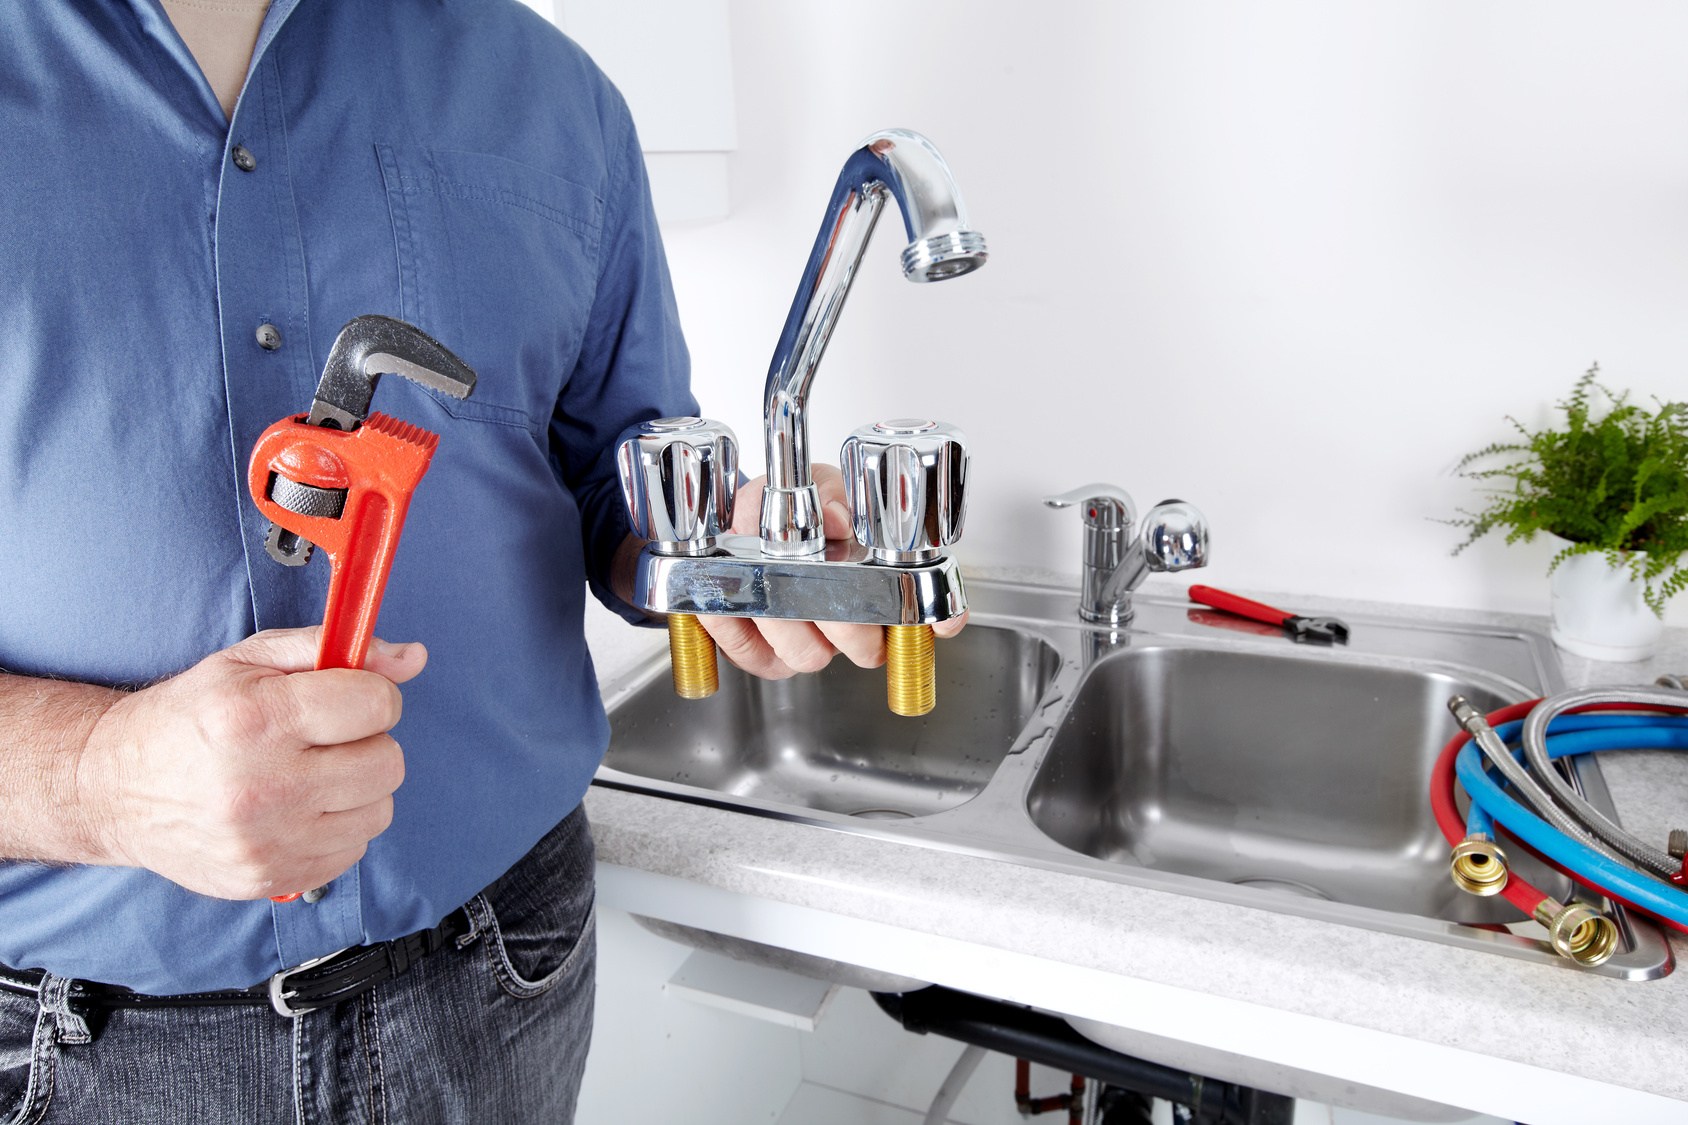
A water supply point along with a mixer is a design that is present in every kitchen. And there is hardly a person who at least once in his life has not encountered the problem of a breakdown of this device. And I would not like to figure out how to change the faucet in the kitchen.
Metal faucet in the interior of the kitchen.
Why is the faucet changing?
There are several situations when you need to replace this design.
- The water supply to the sink is blocked, but the faucet continues to flow. This means that the spout at the mixer is damaged.
- The leak came from under the fluid supply valve. Even if the faucet is turned off, the water continues to flow, just the size of the jet changes.
- Leaks appear at the fixing point of the hoses responsible for the fluid supply. As a rule, these types of communications are hidden from prying eyes. Therefore, the cause of the breakdown is often discovered too late.
- The sink has a problem where the faucet connects to the sink. Rust marks will allow you to instantly see the problem.
- The appearance of a leak at the point of fixation of the spout to the mixer.
- The cause of the problems is a breakdown on the sink mixer.
 Signs of a broken faucet in the kitchen.
 The main thing is to find out and remember in advance which faucet the buyer installed at the sink. Then the replacement process will be easier. And it's easier to figure out how to install a faucet in the kitchen.
General information about the crane device
The taps are designed to supply water at the required temperature to end users. By mixing hot and cold sources, it is easy to achieve the result you want.
 Faucet with two valves that supply water.
 There are several designs that are most widely used.
1. A faucet with two valves that supply water.
2. Models with one adjustment lever.
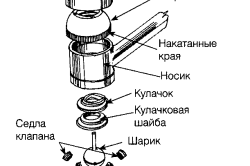
Even models with one valve have the simplest possible design. It has just a few details:
- Two sink valves.
- Spout.
- Crane box.
- Main body.
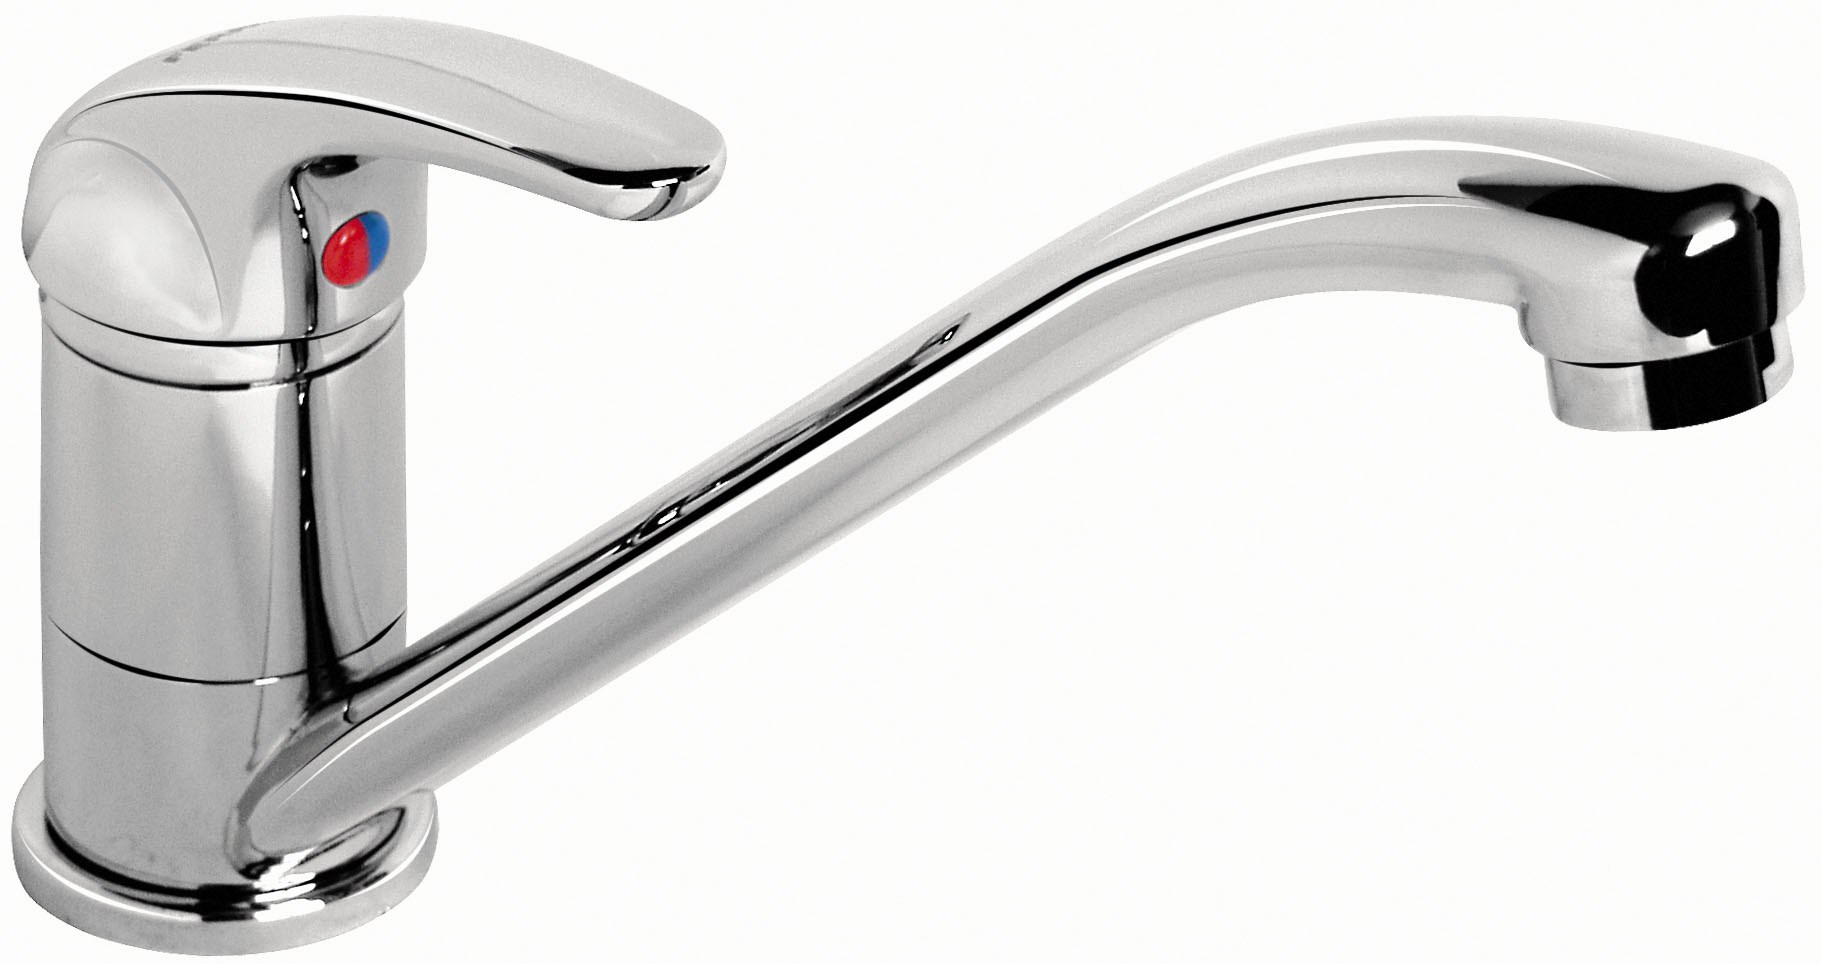 Type of faucet with one lever for supplying water.
 The valves are screwed into special holes, they can be located on both sides. The valves regulate the height at which the crane box is located. She herself opens and closes the water due to the presence of a special rubber lining. Installing the mixer with your own hands is not difficult.
 Interesting design crane with one lever.
 As for taps with one lever and a sink, they also come in several varieties.
- Ball. Consist of a spherical part, three openings. Their location must be changed to regulate the flow of fluid. The movement of the lever in the vertical and horizontal plane helps to control the pressure and temperature.
- Ceramic. They differ in a slightly more complex device. Inside kitchen faucet- plates, polished and tightly ground. They provide maximum tightness. The plates inside the faucet move to different positions, allowing you to adjust the flow of water. This allows you to install the mixer with your own hands faster.
 Repair ceramic mixer in the kitchen.
 How to change valve attachment
The first step in any repair process is to stop the water supply itself. After that, you are allowed to take the following actions:
- Always start by determining the cause of the leak, cold water, including.
- If the cause is in the spout, then the repair procedure is described as follows.
- We remove the valve, unscrew the crane box.
- We change the gaskets, seal the threads with fum-tape.
- We screw the crane box back. Mixer installation is complete.
 Replacing a faucet with two valves.
 How to change crane bushings
- The water is blocked, after which a special button is removed. The removal process depends on specific model. And how the adjustable wrench is used.
- The screw at the sink is unscrewed. It can be lubricated with machine oil if the part is too tight.
- We unscrew the crane box, moving counterclockwise.
- Installing the gasket.
- We install the crane box in its place. This is an integral part of such a process as installing a mixer.
 Replacement faucet in the kitchen.
 What tools are needed for the job
To carry out the work, there are enough devices that everyone has. The list consists of only a few items:
- Fluoroplastic tape.
- Rough wire brush.
- Socket wrench with a deep bed.
- Spanners.
- Wrench.
 Example of tap replacement tools.
 Well, if at hand there is a complete mounting kit. That set has washers and screwdrivers, all the elements for fastening. They are usually sold with the device. Each manufacturer attaches instructions to their devices, where they describe in detail the features. For cold water too.
In addition, you need to purchase household accessories like basins and buckets, rags. Then it will be easier to minimize the water that appears during the repair of the old product. It will not be superfluous to purchase a flashlight, since there is usually not enough light when dismantling. Without it, the installation of the mixer will not be convenient.
Preparing to install a new appliance
First, the crane itself, bought in the store, is removed from the packaging for work. If a visual inspection has not been carried out before, then this should be taken care of now. The main thing is that there are no defects on the surface with damage, even minor ones.
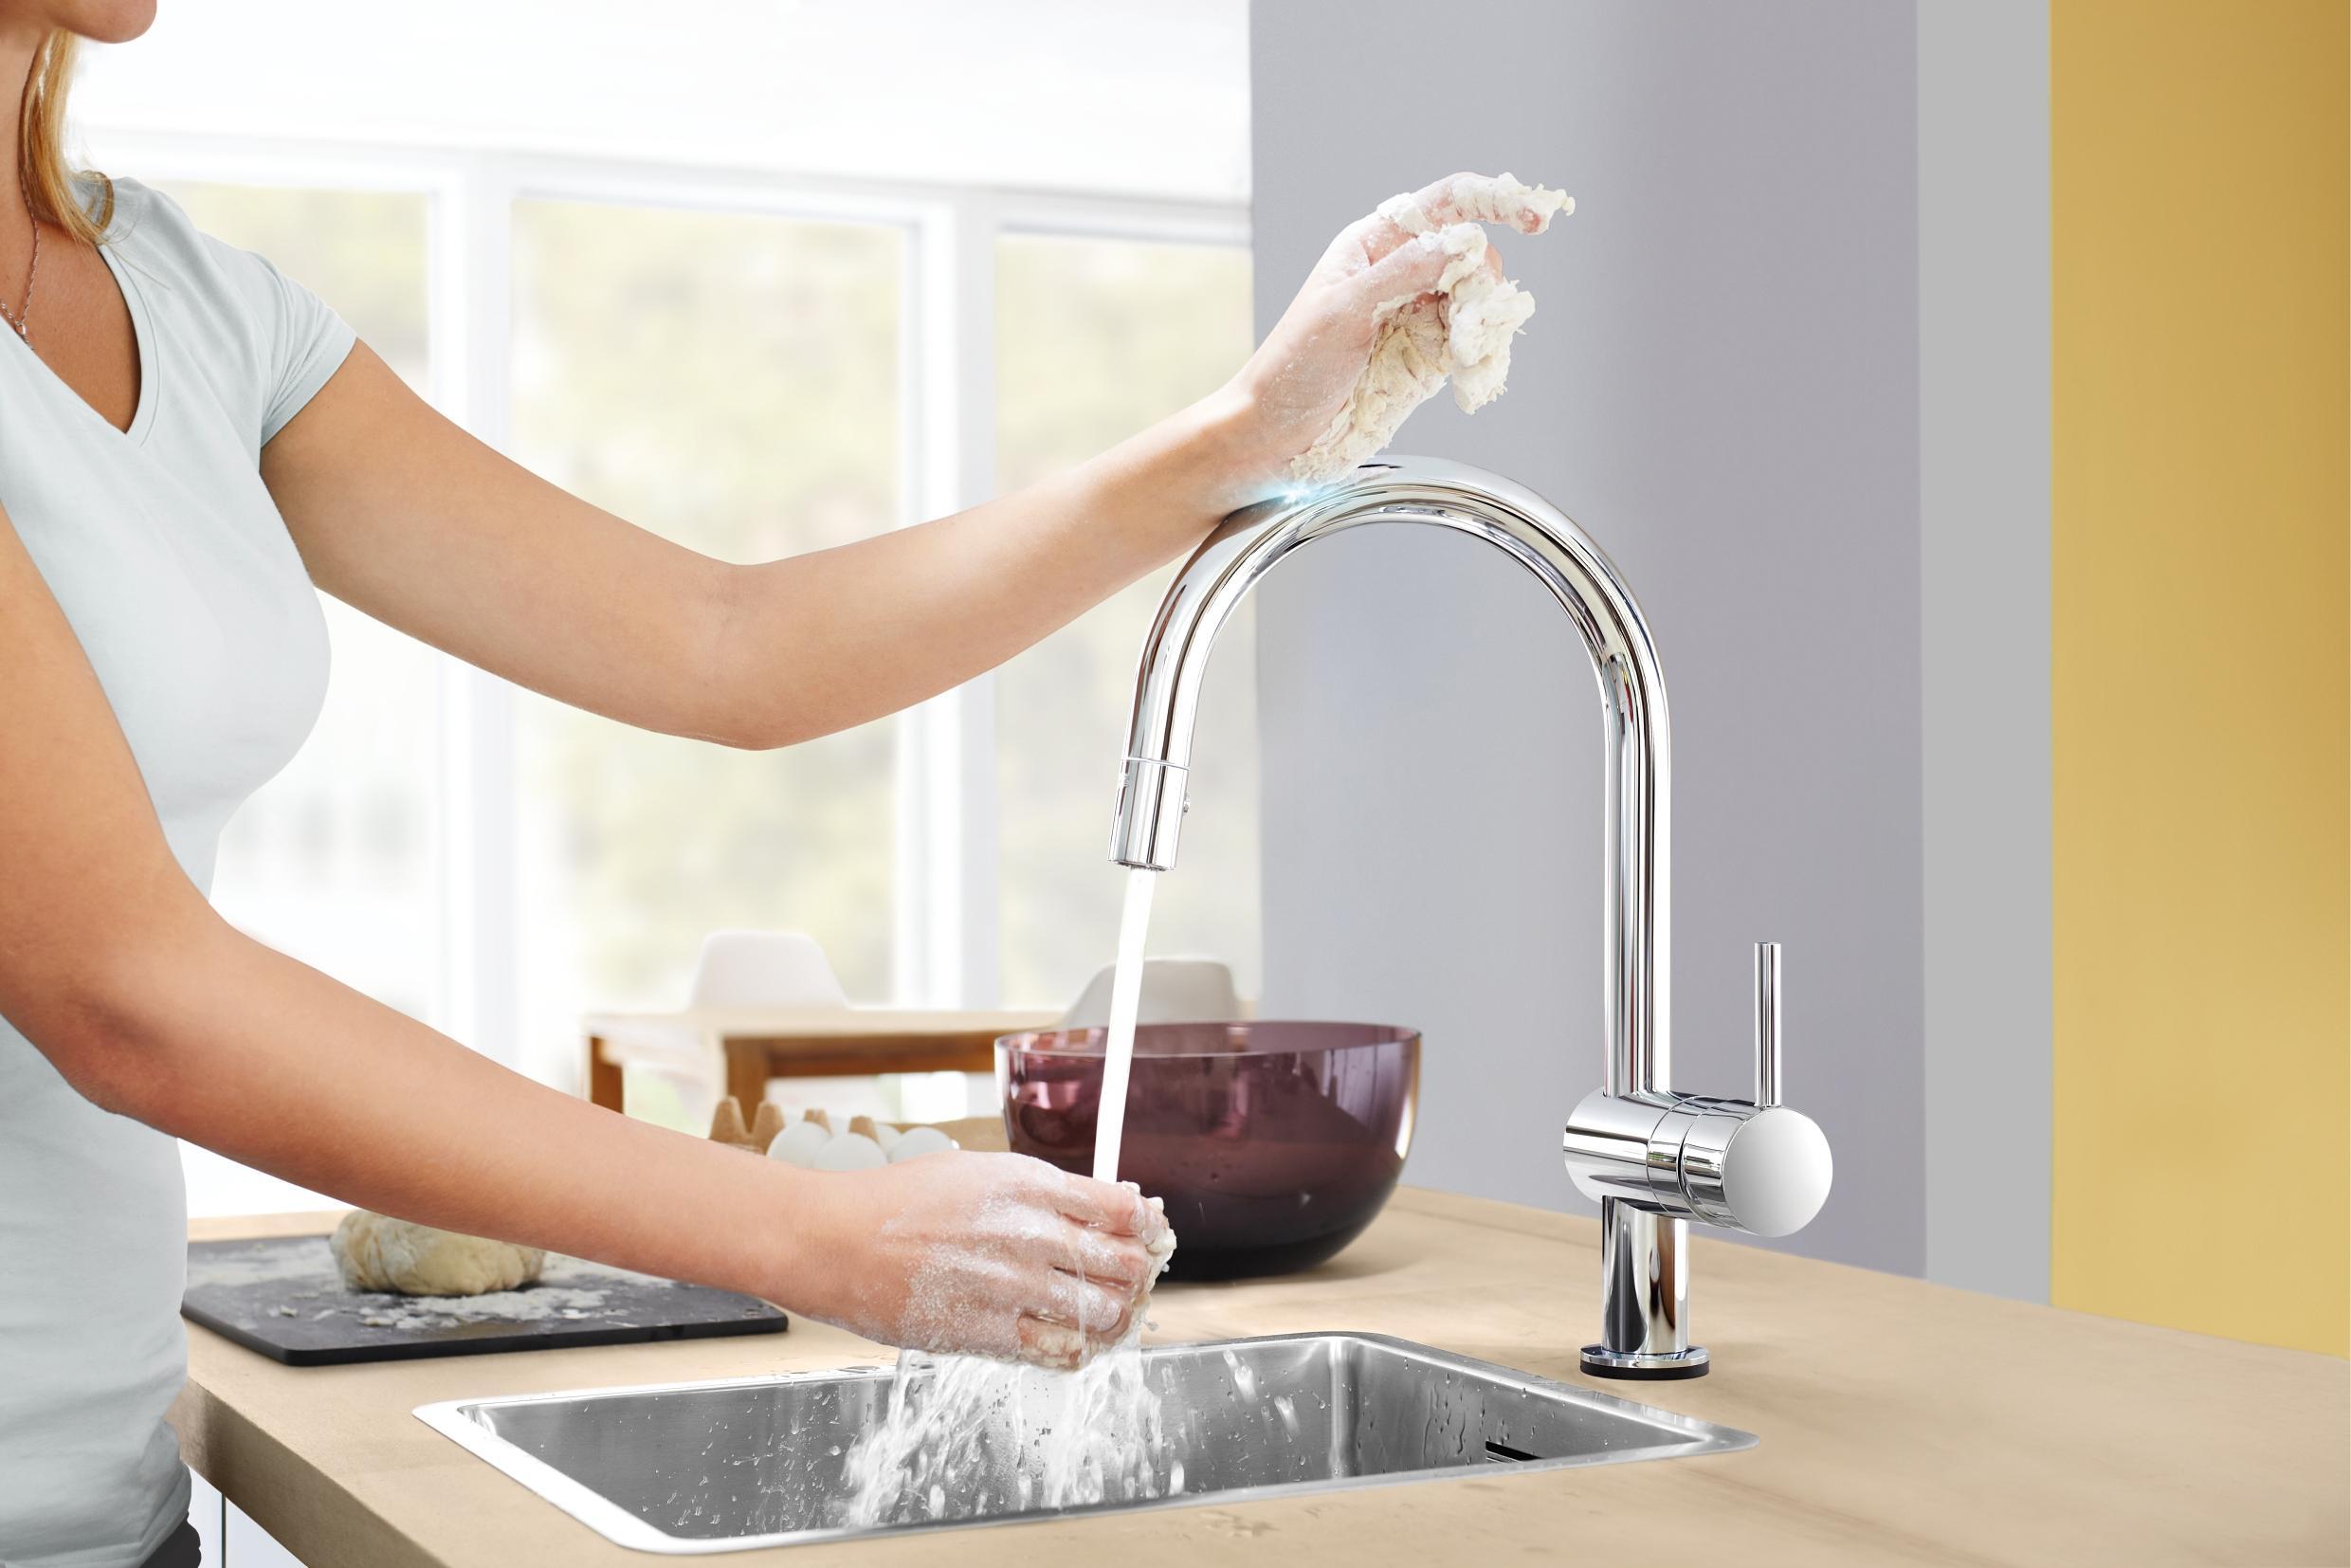
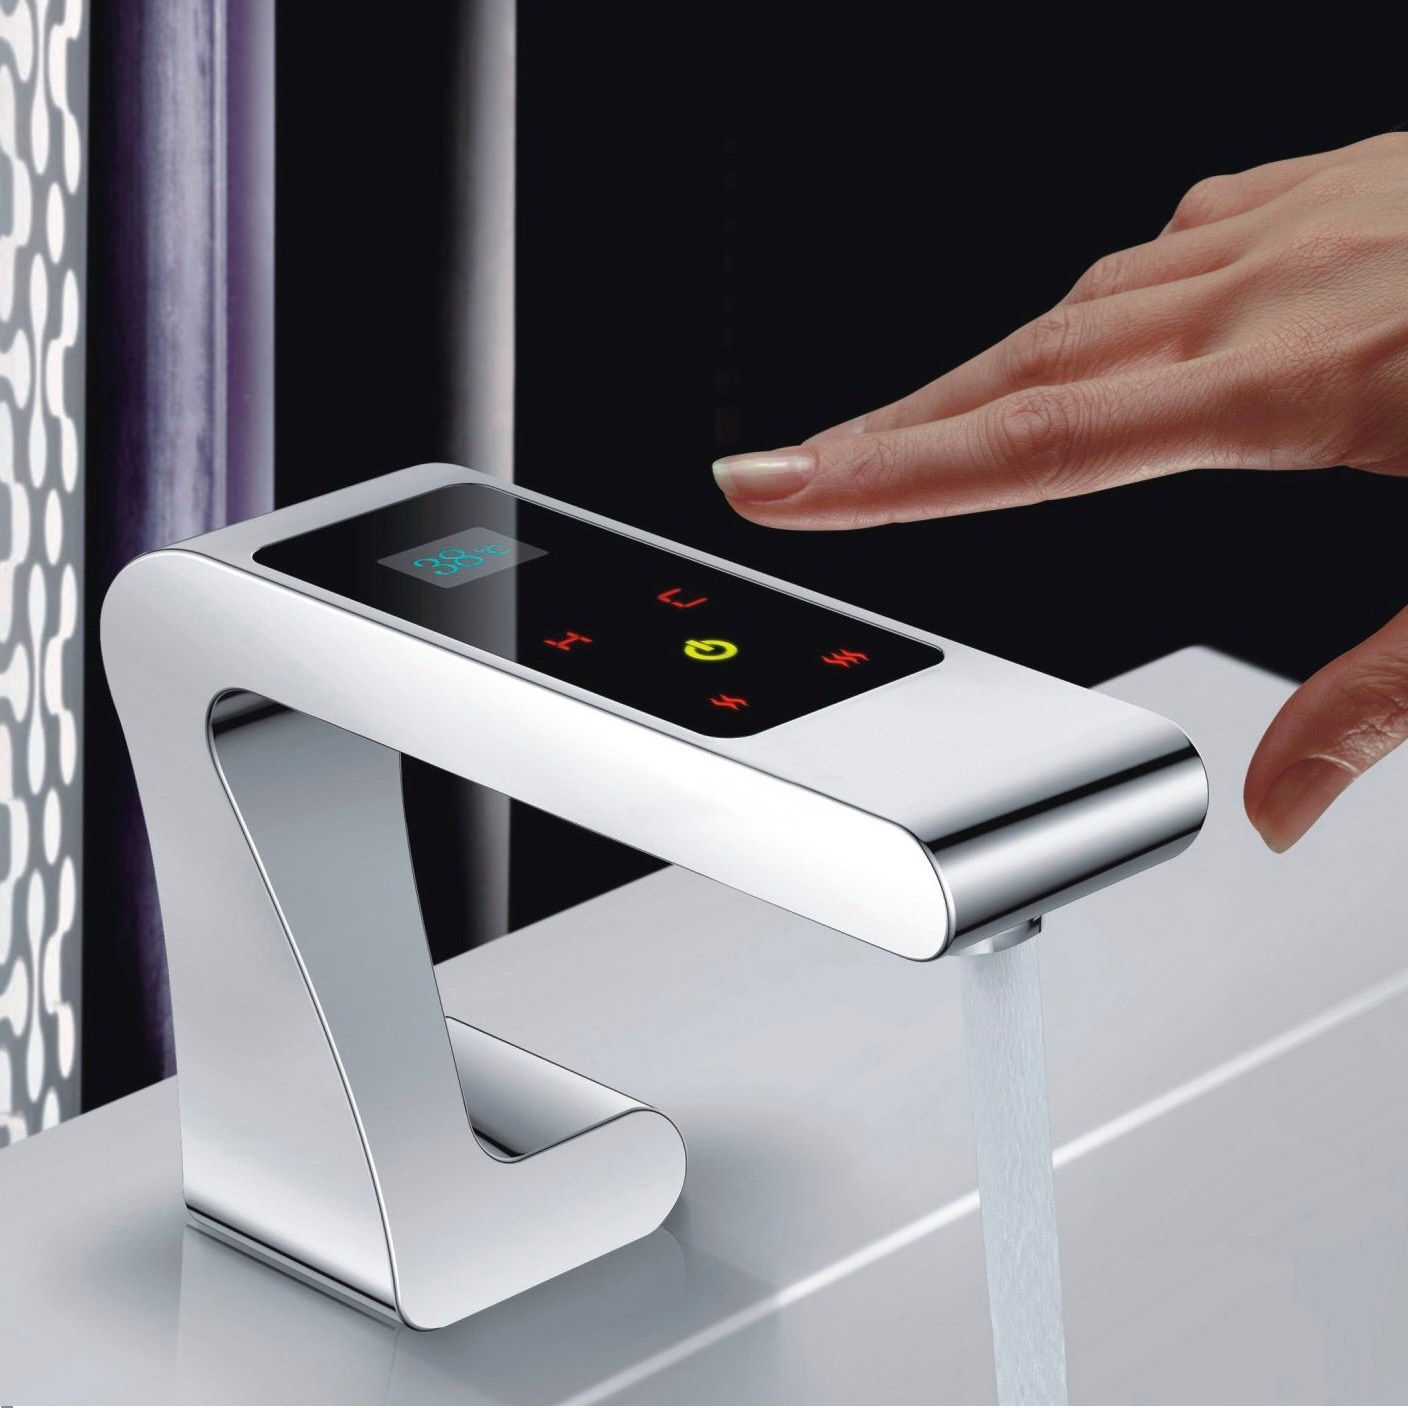
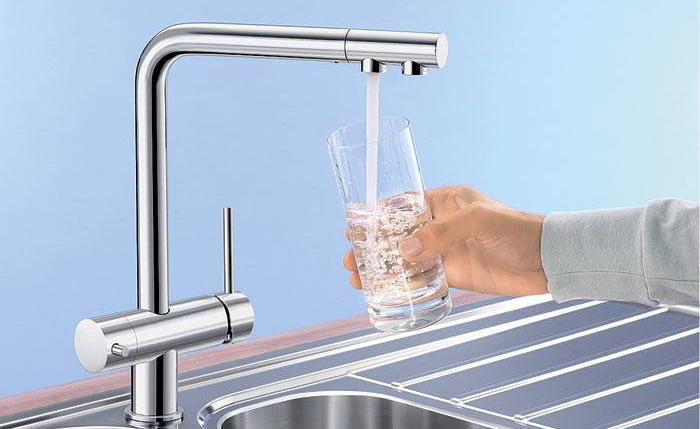
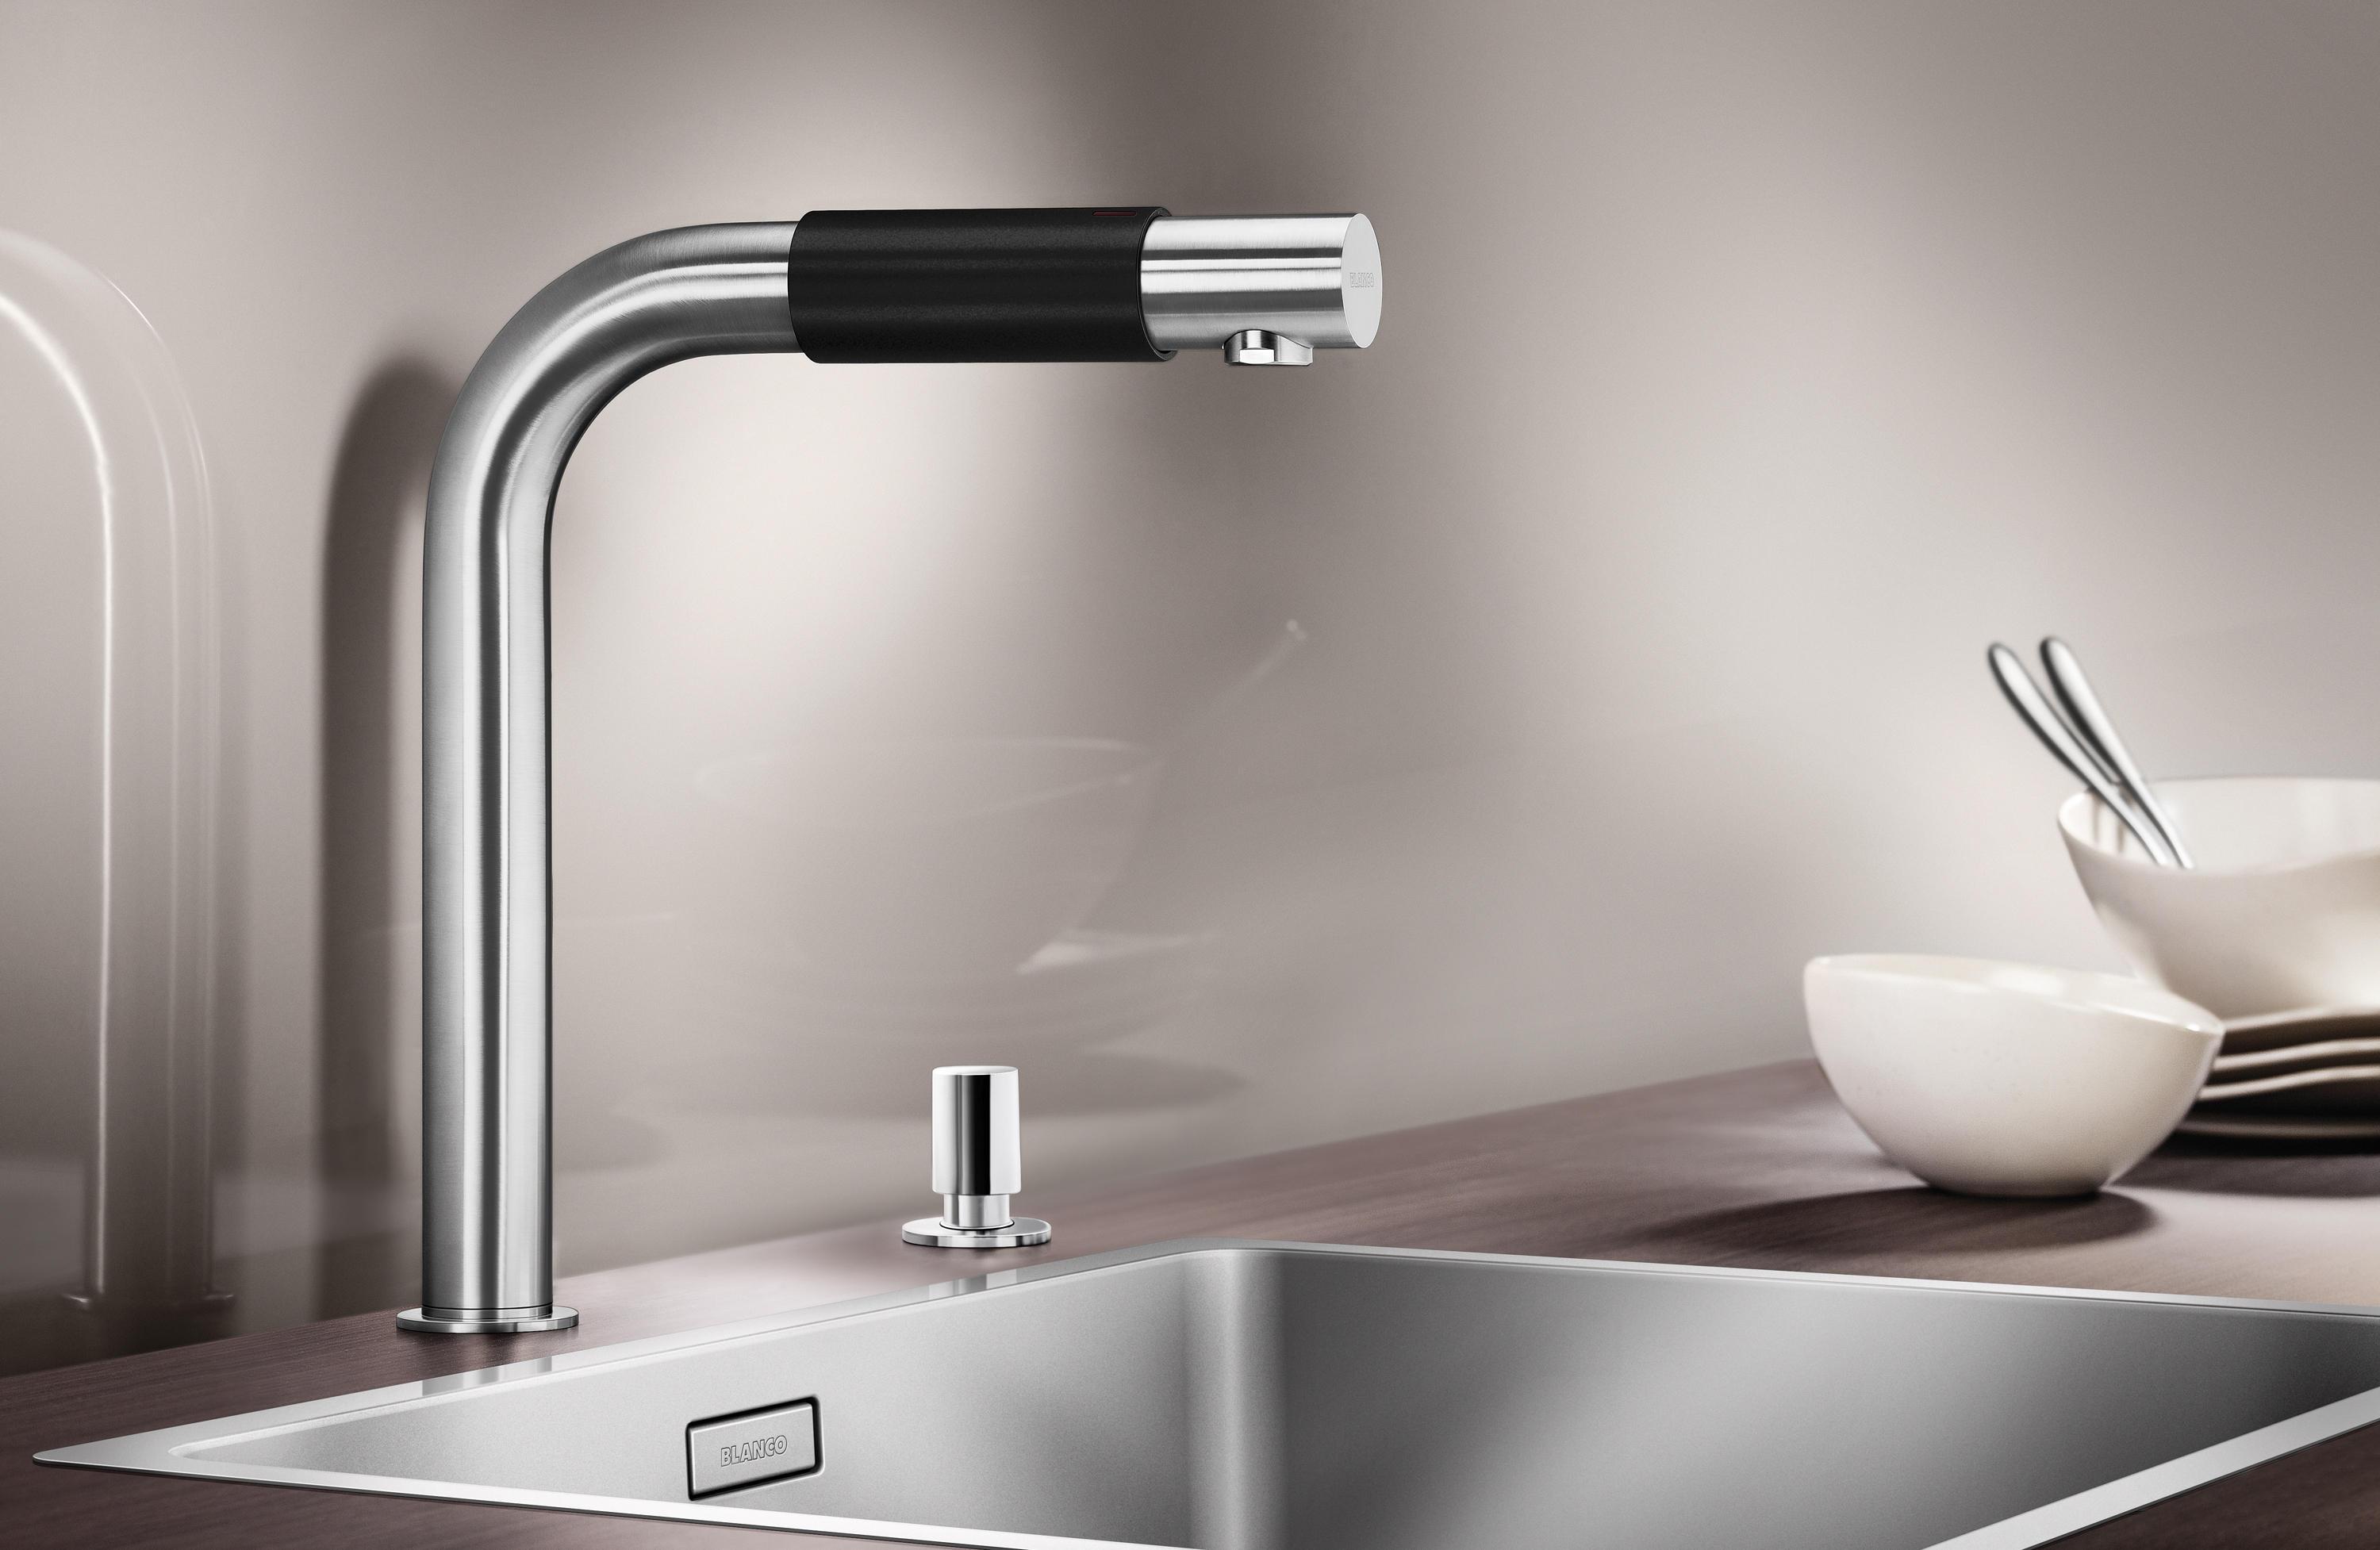 Faucet in the kitchen with hand sensor.
 If the product is defective, then branded stores must accept it and exchange it, at the first request of the buyer. In that case, you only need to take care of saving the sales receipt. There are the following parameters that deserve a separate check for older products.
- The quality of the flexible hoses used for connection and work.
- The integrity of the thread is where one part connects to another.
- Rotation or movement of flow regulators. Otherwise, the installation of the mixer will not work correctly.
The movement of the part should be easy and smooth during operation. The purchased model does not matter. In the places of the connecting thread, the slightest defects must be excluded. Otherwise, the risk that the entire node will be damaged in general increases. And the old ones will have to be replaced with new ones.
The nickel-plated coating of the mixer should remain even and uniform during operation. Scratches and dents are not acceptable on this product. There should be no damage to the protective polished casing.
 When buying a new faucet, carefully inspect it, there should be no cracks.
 The inner outlets of the pipes themselves must be thoroughly cleaned before proceeding with the installation of a new product. Not rough metal brush will be a great help in resolving this issue. Additional cleaning requires the place where the mixer is installed on the sink. Rags in that case helps. And for old parts too.
 Pull-out faucet in a modern kitchen.
 - Two flexible and armored hoses included in the scope of supply must be attached to the mixer. One is used for hot water and the other for cold water.
- Rubber gaskets are put on the fittings before the flexible hoses are screwed into the structure.
- Flexible hoses you need to screw in until they finally enter. After that, they are twisted again, but this time with a wrench, only two or three turns.
The next step is to install the device where it should be. It remains only to push the flexible assembly flexible hoses into the sink hole with a diameter of up to 34 millimeters. After that, the device simply falls on the canvas.
 Installing a faucet in the kitchen.
 From the bottom of the sink cloth, you need to get to the bottom, which is supplied with the mixer itself. Otherwise, it will not be possible to put the sealing washer on the studs. It is tightened with nuts to the very canvas of the sink. But it is not necessary to move to the end in that vein. The mixer body should have a little free play. Then the device will be easier to center the hole intended for mounting. Only after centering and eyeliner nuts on the studs are finally tightened.
 Installation of pipes and hoses from the bottom of the sink.
 The ends of the flexible hoses are connected to main pipes only after the previous work has been completed. IN modern designs the kit usually comes with fitting nuts, which are initially accompanied by rubber gaskets. It remains only to carefully screw them in the appropriate places. At the same time, the instructions for eyeliner are observed as much as possible.
For kitchen faucets, wiring is available that has various characteristics. The main thing is to ensure that the hoses remain sagging. If the distance between the points is 520 millimeters, wiring with a length of up to 600 millimeters is used. Studs are also required for eyeliner.
When buying touch and single-lever appliances for washing, a hairpin mount is usually used. Devices with two levers also have a mounting assembly, but it is somewhat modified. In the latter case, the eyeliner assumes the use of a support washer, which is complemented by a tightening nut. Together they are screwed onto the lower part of the body at the mixer. Thanks to this design, the use of wrenches can be dispensed with. Adjustable or gas wrenches are enough to resolve the issue.
Plumbing fixtures are supplied with a design that can be easily further processed and improved. This is especially true for faucets that are used in the kitchen.
 Exotic semi-professional crane model.
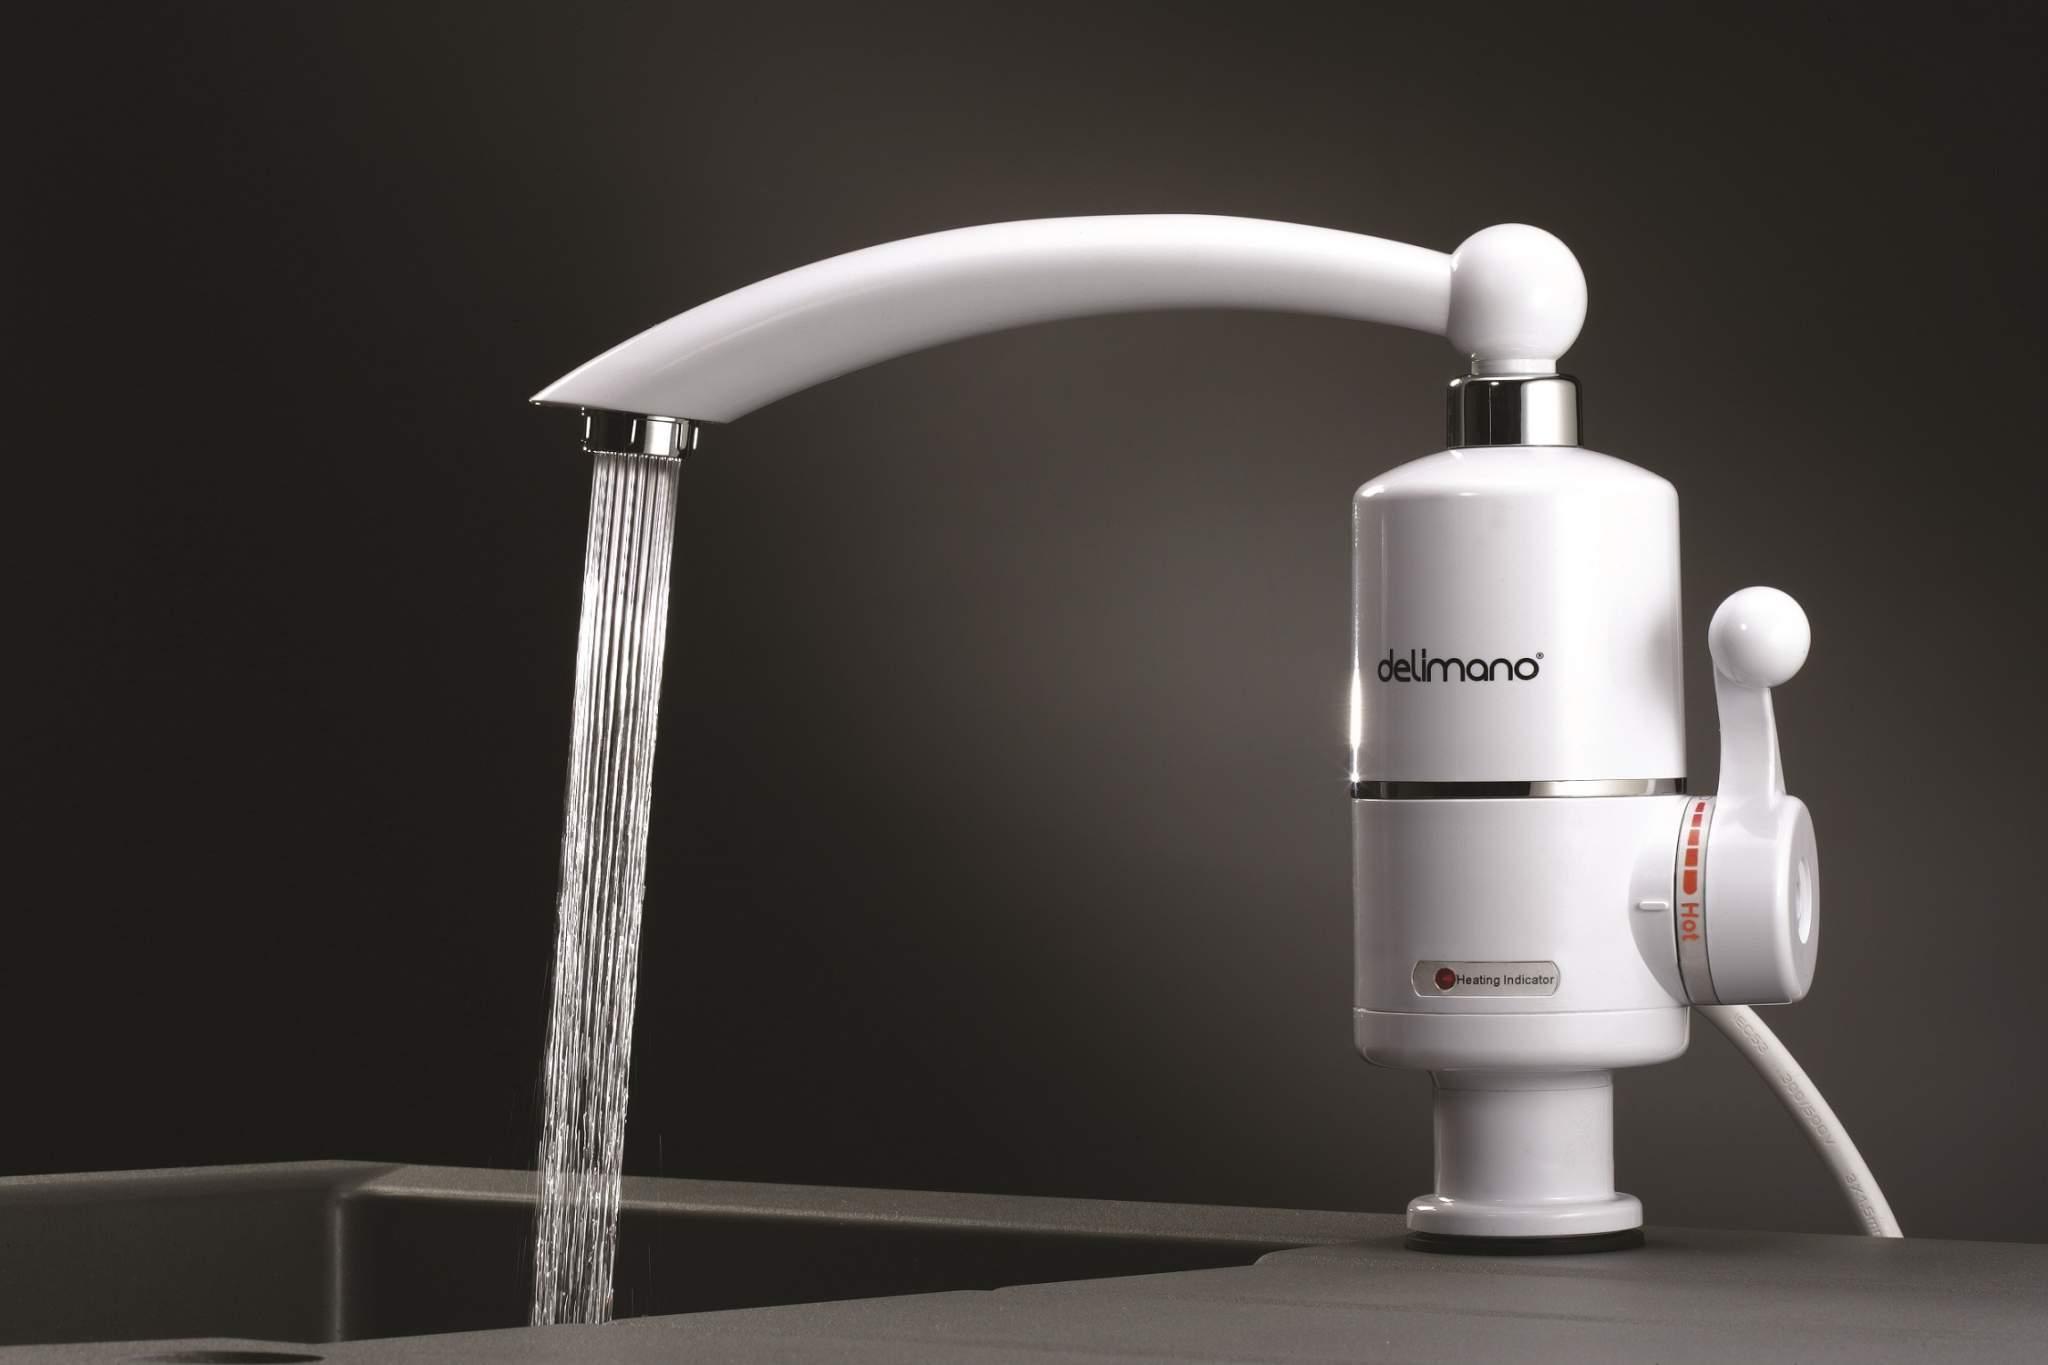
 Often, buyers seek to replace conventional sink fixtures with electronic or sensory varieties. From the point of view of practice, the installation of models is the same as with traditional ones. But certain nuances are attached to the electronic control method.
- The need to install elements with power. What are nuts and bolts used for?
- Setting temperature conditions, the ability to save them in the memory of the device.
- Sensor sensitivity adjustment.
 Sensory professional kitchen faucet.
 If two sinks are used in the kitchen, or one, but with separate sinks, buyers can choose to install semi-professional appliances equipped with a high spout, with a 360-degree turn, as well as a pull-out shower.
Replacement of appliances at the sink is carried out using a standard scheme. Unless there are changes in the layout fasteners. Instead of studs, bolts are sometimes used, different holes.
We carry out pressure testing, competent commissioning
Any assembled structures of this kind it is recommended to pressurize. This means that the product is tested for tightness in all conditions. First, the taps for supplying cold and hot water are opened in turn. After that, a visual inspection of literally all places where a leak may occur is carried out. Nut, studs are also inspected.
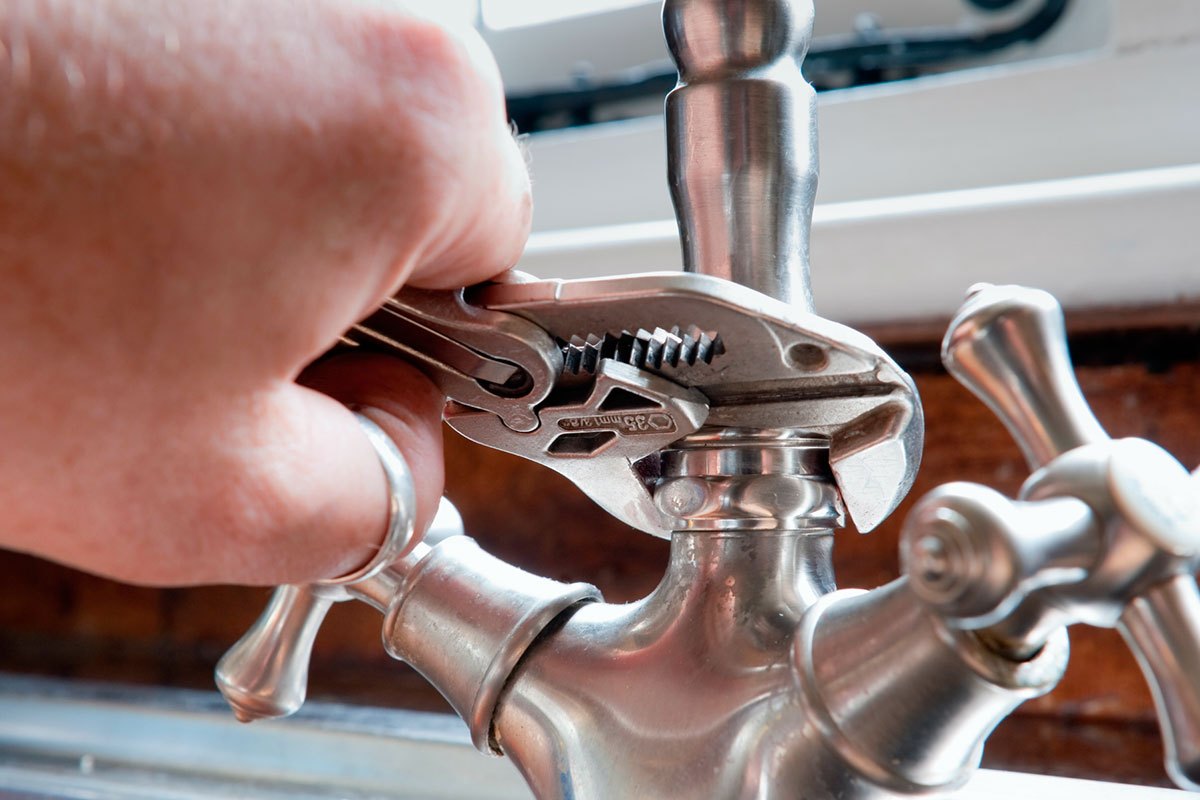
 An example of checking a faucet for leaks.
 If no leaks are found, it means that the installation was carried out in compliance with all requirements, without additional holes.
The aerator must be removed from the gander of the mixer before starting operation. Over time, it is necessary to skip the water to remove the remaining contaminants from the pipes. After the procedure is completed, the filter element is returned back. And then the water supply is tested already in this operating mode.
If the manufacturer is well-known, then he gives a guarantee for the device for at least five years. Nuts and studs are no exception. Taking them off is easy.
How to change wall faucets
Sometimes bundled with kitchen sinks go wall models mixers. The advantage of the option is the convenience of attaching directly to the pipes. You do not need to use additional hoses for connection.
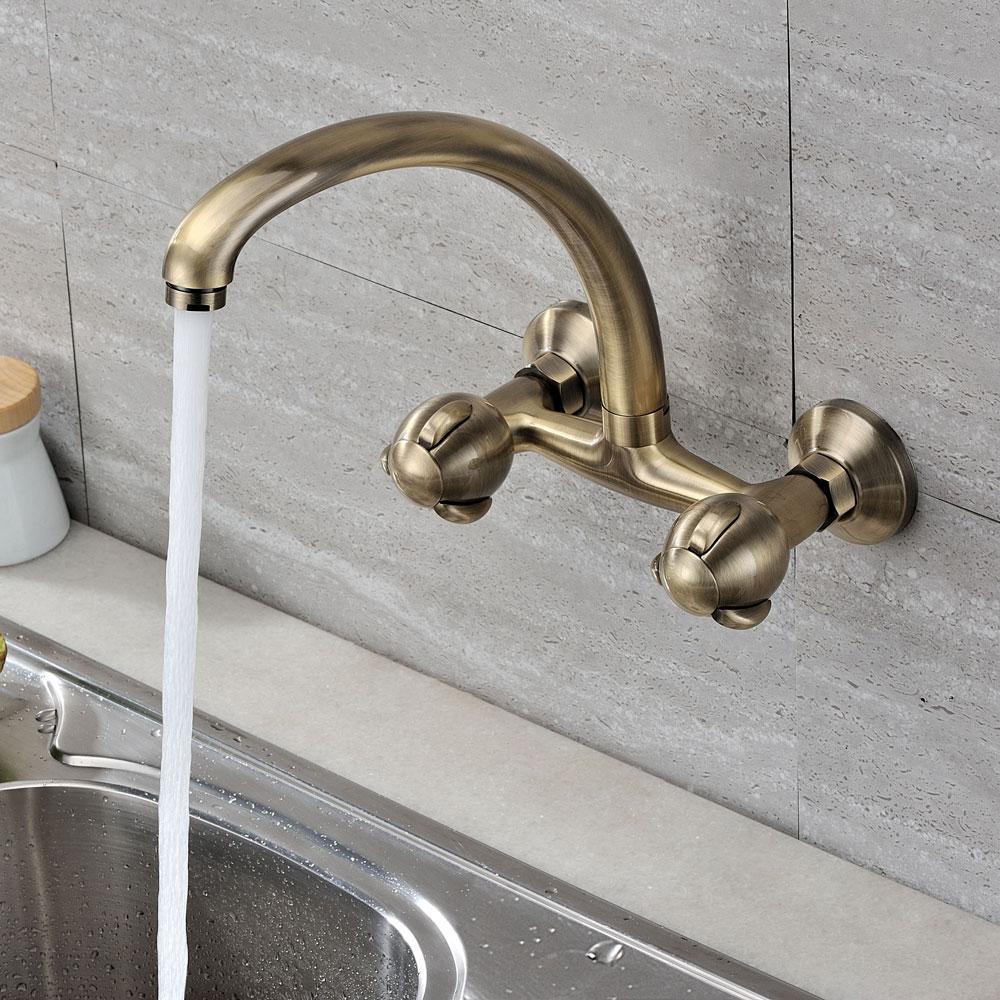 Decorative wall mixer in the kitchen.
 Wall mixers at the sink are attached in two main ways. Either with an outdoor location, or with immured water pipes into the wall. But the replacement in any case will be carried out using one technology. Connection points of pipelines at the same time and places of rigid fixation of the mixer to the pipes. It is due to these connecting parts that the structure becomes especially durable and reliable. It's impossible to take them off.
Technology Description
 Faucet in the kitchen with a nozzle for spraying water.
 - First, the water is turned off in the house.
- Be sure to drain the liquid remaining inside the kitchen faucet after this.
- We unscrew the nuts that are used to fix the mixer. To solve this issue, it is better to use an adjustable wrench and a wrench.
- Adapters with eccentricity are used for fastening. They are needed to align the distance between the axes of the pipes, the axes of the inlet nozzles of the mixer.
- The new mixer must be compared with the outlets or heads of the water pipelines. If the indicators do not match, then it is better to resort to the help of adapters. They are often supplied with the faucets themselves. But if necessary, it will not be difficult to find them in a hardware store.
- After installing the adapters, it is better to fix the mixer on them with nuts. The main thing is not to forget about the use of rubber gaskets inserted into the joints of the connected elements. It is also necessary to use a specialized sealing tape wound around the thread.
- Shut-off valves open only after all elements are firmly fixed. You need to open the mixer to check the design for a leak. You can put a paper napkin or toilet paper under the junction, they will let leaks appear faster. Then removing the excess will not be difficult.
 Double spout kitchen faucet design.
 The user must decide for himself whether to keep some of the flexible hoses for himself in the future. If yes, then their best with the utmost care. Most importantly, before reconnecting, you need to make sure that the connections are sufficiently tight. The landing hole on the sink can be additionally inspected and cleaned.
Mixers with two spouts - the most modern variety this device. This means that there are two working holes in the mixer. From one, water from the pipeline flows into the sink. And the other hole can be used to supply a liquid with a high degree of purity. It is suitable for both cooking and drinking.
Therefore, not two, but as many as three hoses are suitable for such mixers. Replacement of such a mixer is carried out with the method described above. Nuts, studs are used in the same way. The only difference is in those very flexible hoses attached to the main device. You can easily handle the replacement work yourself, without resorting to outside help.
Video: How to replace a faucet in the kitchen
How to change the faucet in the kitchen? This question periodically arises for everyone who is used to doing everything with their own hands. It seems to be a simple action, but in fact, when dismantling the old and then installing a new mixer, unforeseen difficulties may arise. At the same time, do not forget that the work on replacing the crane will have to be performed in an uncomfortable position, bending over.
From frequent use, the faucet in the kitchen can fail. You can replace a damaged faucet yourself.
Need to prepare a kit available tools and materials, get acquainted with the design of the kitchen faucet and additionally take into account the advice of qualified specialists on how to replace the faucet in the kitchen.
The kitchen faucet plays an important role. With its help, a pleasant temperature of water is created for its use for various purposes. This is a necessary accessory. But absolutely everything around is not eternal - the mixer is able to "die". It can break down for a variety of reasons, especially when a cheap model is used.
Tools and materials needed when replacing a kitchen faucet
Do-it-yourself installation of a faucet in the kitchen with your own hands will not require any expensive and specialized devices. This task can be done by yourself with the help of the following tools:
- wrench;
- screwdrivers flat and Phillips;
- flashlight (usually in the place where the installation is made, it is dark);
- sandpaper;
- sealant.
If an adjustable wrench is not available, wrenches of the appropriate size can be used. Working with wrenches, pliers, it is quite easy to spoil the glossy coating of the device body or connecting components. This not only disfigures their appearance, but also contributes to the appearance of corrosion moments. That is why, when mounting the faucet on the sink, it is worth using a “lining” under the sponges of the tool (made of thin rubber, a piece of felt or something similar).
If the purchased mixer is of an inexpensive modification, then when installing it, it is recommended to replace the flexible hoses with which the mixer is connected to water pipes. When buying a more expensive mixer model, flexible hoses are included in the delivery. How to change the faucet in the kitchen, this question is quite simple. If the faucet being replaced was originally good quality, its hoses may not be damaged at the time of replacement, but they should still be changed. After all, a new mixer can last longer. long time than left to "live" the old hoses.
What else you need to pay attention to
In addition to the above tool, you will need a container to remove the water remaining in the siphon. In addition, rags and detergent will be needed in order to clean the accumulated dirt under the sink and faucet at the same time as the replacement work.
Most of the installed kitchen faucets are made from various metal alloys. As a rule, outside this unit to create a beautiful appearance coated with a thin chrome film. In the process of installing such devices, it is worth knowing that the chrome coating is quite delicate and sensitive to scratches. So, it is advisable to wrap nuts for installing certain models in which they are visible with an adjustable wrench using a protective lining.
The sealant is used both for sealing threaded connections and for sealing seams while working with a sink.
During use, the mixer seems to stick to the sink, which is why its dismantling is likely to be complicated by damage kitchen furniture. It is impossible to install a mixer in the kitchen without removing the previous one. It is necessary to pour detergent into the place where the mixer is attached to the sink and wait a while. The mount itself usually does not turn sour, therefore, there are no particular difficulties with unscrewing it. It must be remembered that the previous gaskets between the sink plane and the mixer itself should be replaced.
Well, here is a new mixer selected and purchased, tools and Additional materials prepared. Now about the way how to change the faucet in the kitchen, let's dwell in more detail. The whole replacement process consists of several stages.
The list of works for the dismantling of the old mixer
To carry out dismantling:

- It is necessary to stop the supply of hot and cold water to the mixer.
- Unscrew the knobs on the faucet itself to relieve residual water pressure.
- Find and clean the place where the flexible hoses meet with the plumbing system.
- Find out where and how the faucet is attached to the sink.
- Unscrew the flexible hoses from the plumbing system with an adjustable wrench and drain the rest of the water from the pipes.
- Dismantle the removable part of the siphon.
- Remove sink.
- To facilitate access directly to the place of attachment of the mixer, we unfold the sink, so it will be more convenient for you to work.
- Using a screwdriver, unscrew the threaded rod that fixes the mixer directly. So that the mixer itself does not scroll and then does not fall, it is advisable to hold it with your hand.
- After removing the fixing clip, we take out the old mixer with hoses.
How to install a faucet in the kitchen if it needs to be done quickly? If you previously decided not to change the flexible hoses, then you need to carefully unscrew them from the old tap with an adjustable wrench. Then they are connected to a new mixer. In this case, it is necessary to independently carefully examine the condition of the hoses. Their integrity must not be compromised. It is necessary to ensure that there are no cuts, breaks and squeezing. They should be in their special grooves. Before installing a new product, it must be assembled and flexible hoses connected to the corresponding tap water channels.
It is advisable to carefully inspect the installation hole before installing the faucet in the kitchen and, if necessary, collect all the accumulated dirt from there.
After completing all the preparatory steps, install the product.
The list of works on the installation of a new mixer
Installation includes the following works:

- We take the annular gasket that comes with the mixer and insert it into the annular groove on the lower shoe of the crane, doing this carefully so as not to damage the gasket itself. If everything is done correctly when installing the gasket, then there will be no leakage from under the sink. If there is a leak, then water damage to the kitchen cabinet and other auxiliary parts located under the sink is guaranteed.
- We pass pre-screwed flexible hoses through the existing mounting hole while holding the mixer itself with the other hand. Don't forget about the ring plate.
- WITH reverse side sinks we put a rubber sealant. Its shape must fully correspond to the shape of the retainer plate.
- We insert a fixing plate over the seal. The plate itself and the sealant come with the faucet.
- Having passed a threaded pin from the faucet kit through specially made holes in the seal and plate, without applying strong force with a screwdriver, screw it into the body of the mixer. There may be options though. Some of the expensive faucet modifications are made with two threaded connections and, therefore, two stems must be screwed in. Do not forget to check that there is good access to the screwdriver slots (after all, this mixer will someday have to be changed). On the new tap, the threaded rods are screwed in effortlessly even by hand. Plumbing experts advise not to overtighten these connections to avoid damage to the faucet itself.
- We take an adjustable wrench and tighten the prefabricated nuts. In this case, it is necessary to make some efforts, because a poorly fixed crane will scroll around itself and stagger. On this, the assembly of the mixer in the kitchen is almost completed.
It remains only to install the sink back to its old place, having previously cleaned it and cleaned the places of its connection with the wall, the wall itself and back wall kitchen cabinet. We mount the sink in place, fasten flexible hoses to the water pipes, put the dismantled lower part of the siphon in place. After completing all these steps, the installation of a faucet in the kitchen is completed.
For many owners, installing a faucet in the kitchen with their own hands is a real problem. However, disassembling and assembling a new product is quite accessible to anyone, for this you just need to arm yourself with some knowledge and the necessary tools.
Faucet replacement
How to change the faucet in the kitchen with your own hands? Consider the steps that such a replacement requires in detail.
Before disassembling a white kitchen faucet, you should buy a new faucet, preferably of good quality.
An excellent option would be to choose a faucet that will be in perfect harmony with the kitchen. Take it to the store with you.
For installation work, we also need:
| Name | Photo |
| Tape - FUM |  |
| adjustable wrench |  |
| Set of wrenches |  |
| Screwdrivers of different diameters |  |
| Rag |  |
| Bucket |  |
- At the first stage of replacement need to dismantle the old faucet.
If you have not yet managed to buy a new siphon, and do not know where to find it, you can read ours and leave your opinion or wish.
- First you need to turn off the water in the house, and in the kitchen, respectively, using the shut-off valve handle, which should be placed perpendicular to the body;
- Check if the faucet contains water.

Disconnect the old faucet to replace it with a new one
- Disassemble the siphon. When an overhead sink is used in the house, it should be carefully disassembled.
- Disconnect the white siphon, which is held on by a bolt (it can also be fixed to the drain pipe with a coupling);
- After that, remove the sink itself.
- Further, before installing a new crane, you need find the connection point of the hoses that fit the pipeline.
- Armed with one of the wrenches, disassemble the water hose connection yourself;
- Remove the sink to provide access to the tap fixing point.
We find the connection point of the hoses and disassemble it
- Loosen the faucet fixing nut;
- Remove the white faucet;
- Remove the clamp while holding the faucet gently;
- Remove it from the sink along with the hoses. Next, we will replace it with a new one.

Completely remove the faucet and hoses
Installation of a new crane
Before you change the faucet in the kitchen with your own hands, it should be carefully checked again for completeness. If something is missing, you can use old materials that are still in a usable condition.

- Connect the new white kitchen faucet to the sink installation site.
The rubber gasket is used to protect the sink, especially its wooden structures, from the possible flow of water;
Installing a new faucet
- Place both hoses in the mounting sockets of the sink.
- Then, holding the tap with your hand, insert it into a special hole, and secure it with a sealing gasket;
- Also install a rubber seal on the back of the sink body. Make sure that its configuration matches the faucet mounting plate;
- To replace, put the plate on top and clamp it.
We extend the hoses
- Thread the threaded pin into the socket of the sink. Also on this element there can be a figured overlay, fixing their position.
- Put nuts on the thread of the pin and tighten with a screwdriver;
- Using a wrench, tighten the nut that secures the white faucet to the sink socket;
- If necessary, sealant can be applied to the point where the mixer and old building sinks.

Threading the threaded rod
- Install the sink in the same place in the kitchen and connect the flexible hoses. Before replacing, replace the siphon and connect it to the drain, check how the new white faucet works and make sure that there are no leaks after installation.
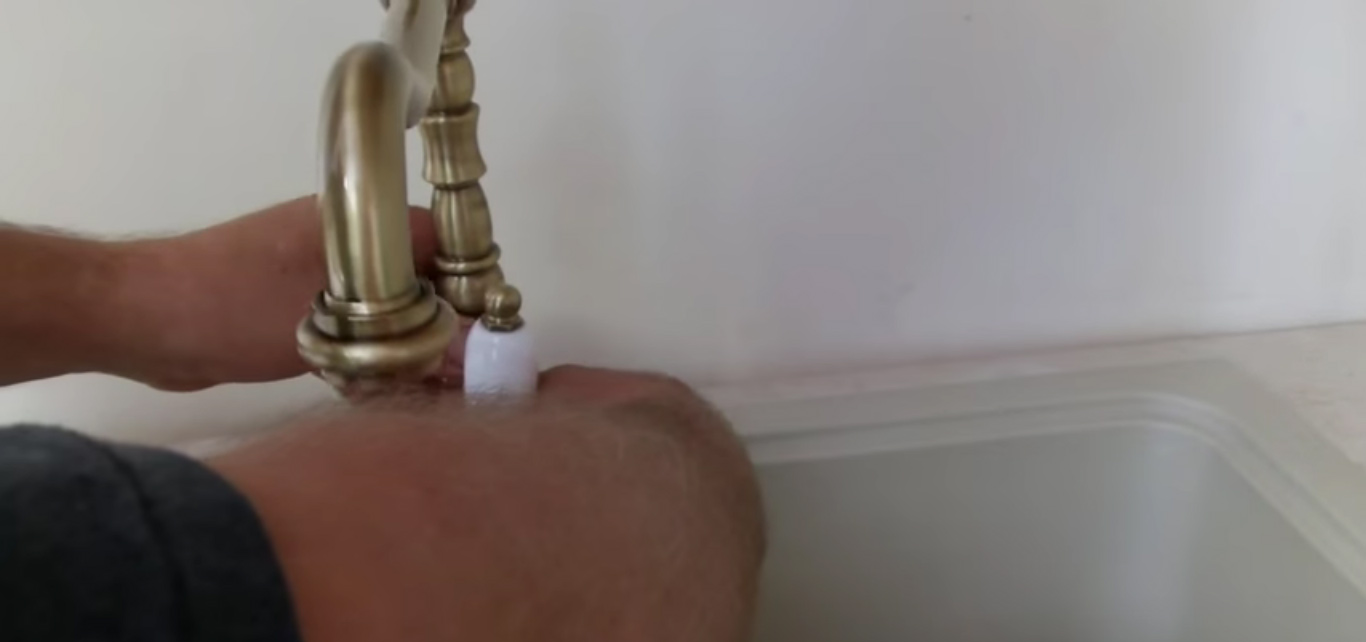
After installing the faucet, you can use a piece of water to check for water leakage. toilet paper or other absorbent material.
That's basically it. Changing a faucet in the kitchen is not so difficult on your own - just a few small steps. New faucet – .
Faucet material
Many modern kitchen faucets are made from different metal alloys. As a rule, the surface of such models is covered with a small layer of chromium for attractiveness, which is very sensitive to mechanical damage.
Clamping nuts must be tightened only with an adjustable wrench, placing a piece of felt or other soft pad under the sponges.
Also important point in the process of replacing and installing a kitchen faucet is the material from which it is made.
| Name | Photo |
| Alloy steel No external damage. |
 |
| Made from silumin Mechanical effects are undesirable - an awkward movement and the product will be damaged, it will need to be replaced. |
 |
| Ceramic It is also fragile, working with it requires accuracy and care. |
 |
Now you know exactly how to replace a kitchen faucet in the kitchen. To disassemble and change any faucet for the kitchen, after reading the above material, it will not be difficult for you now, even without experience.
Forget about the long wait for plumbers - you can perform many of their functions yourself.
How to repair the crane box yourself? The procedure will not seem complicated and tiring if you follow a specific plan and take into account the recommendations of qualified craftsmen.
In this article you will find instructions for disassembling and replacing this part.
Varieties
Crane box deformations occur for many reasons. This part of the mixer is used daily, therefore it is often subject to breakdowns. The design is based on a metal rod and sealed gaskets. The latter are available in rubber or with movable ceramic plates. Based on this, distinguish ceramic faucet box and a model with rubber inserts.
Ceramic options are reliable. Allow to open water for half a turn of a mixer flywheel. Options with rubber inserts (also called worm gears) wear out quickly. To supply water, it is necessary to make several turns of the valve. 
Causes of failure of a ceramic crane box
- Wear of ceramic plates. Occurs rarely and requires replacement of elements. The work is laborious, so it is easier to purchase a new part.
- Foreign objects between plates. For the future, so that such defects do not appear, it is advisable to install a device for purifying water from impurities.
- The appearance of a thread between the stem and the body of the crane box. In this case, it is necessary to change the entire part.
Before repairing any complexity, it is necessary to turn off the water and prepare the tools for work. The minimum set should include a flat and Phillips screwdriver, pliers, a gas wrench and a box wrench. 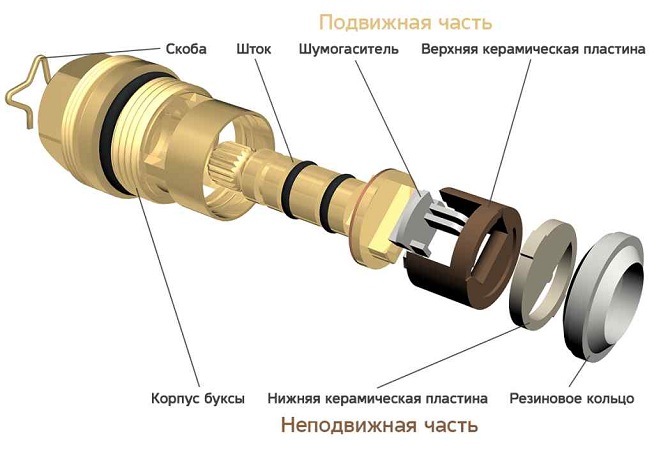
You can choose a team of builders on the website www.stroitel.od.ua
Preparation for repair
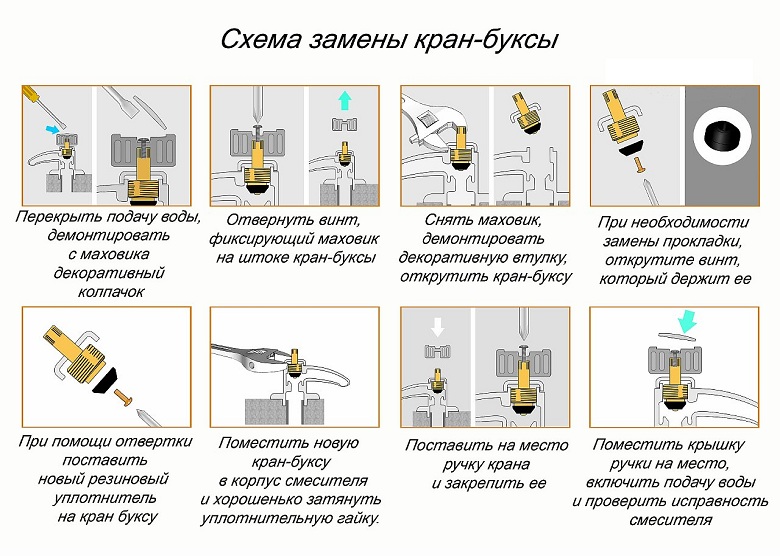
In order to correctly perform operations to restore the mixer's performance, everything must be done in stages. The repair plan is as follows:
- Remove the flywheel from the crane box. To do this, remove the colored decorative cap from the valve. Next, pull the flywheel up. There should be a bolt underneath. Unscrew it, remove the valve.
- Clean threads and flywheel. Under water skip the details a couple of times, use cotton buds or other similar items.
- Unscrew decorative insert crane. At this stage, use a box wrench with a head of 17.
Advice! In order not to scratch the front surface of the tap with a gas wrench, it is necessary to make a kind of gasket from thick fabric. But it is best to use a ring wrench.
How and how to unscrew the faucet box from the mixer? Adjustable wrench counterclockwise. The main thing is to hold the mixer. Then clean the thread with a brush.
Gasket repair
Operating procedure:
- unscrew the crane box;
- put some silicone on the gasket;
- put the part back.
Removal of foreign particles stuck between the plates
Grains of sand contribute to the violation of the tightness of the axle box, its failure. Foreign objects cause leakage. The order of work in this case is as follows:
- unscrew the crane box and disassemble;
- clean the plates, treat them with waterproof grease;
- put the item back in place.
Important! Plates cannot be flipped.
Elimination of chips formed on the surface of the plates
The best way is to replace the plates. 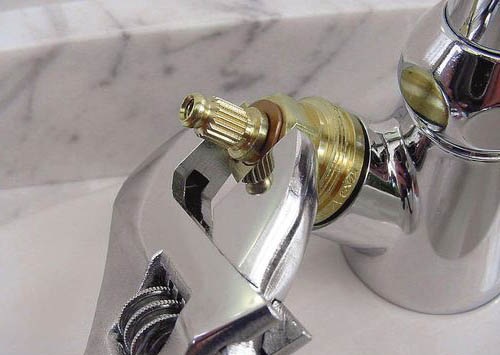
Causes of failure of models with rubber inserts
Leakage is a sign that something is wrong with the part. Water seeping from under the flywheel indicates a breakdown of the crane box.
Gasket wear is the most common cause of failure. The solution to this problem lies in replacing the part. The rubber ring (1 mm) should fit snugly against the metal ring. When making it, this fact must be taken into account.
How to replace the crane box?
It is necessary to change the part in the mixer for an identical one.
To replace, in addition to screwdrivers and keys, it is necessary to arm yourself with pliers - a multifunctional tool that can act both as wire cutters and pliers and tongs.
How to remove and disassemble the part?
- Shut off the faucet with the valve. Pipeline accessories, relating to shut-off and control products, is located in front of the mixer.
- Look for overlapping small size valve in the absence of a valve on the supply pipe. This is a ball valve large diameter in the form of a metal ball with a hole in the upper part.
- In the absence of such an element, turn off the water on the riser.
- Remove decorative caps. Apply a screwdriver.
- Loosen and remove the screw. It is easy to "calculate". The part fixes the flywheel.
- Remove bushings. They are located at the top of the crane box.
- Open the box. Apply the key.
The nuances of work
When unscrewing the old crane box, you may encounter some problems. If it is thoroughly stuck to the body and it is impossible to disconnect it with handy tools, the following must be applied:
- Grasp the bolt edges with a pipe wrench. Try to tear it off by moving it from side to side, as if swinging it. It is important not to overdo it here, namely not to harm the thread and not break the mixer as a result.
- Use chemicals. They will help loosen threaded connection. Take some vinegar detergent type Cillit or other acidic formulations. If they did not help, then try to fashion a small container of plasticine around the jumper. After that, pour in the liquid again.
- Slide the thread through thermal method. Use a building hair dryer to warm up the threaded part. It is necessary to achieve complete loosening of the bolt.
If the tried methods did not help, the crane box should be removed by drilling. To do this, cut off the protruding part of the bolt, and drill the remaining elements. The drill can be replaced with a cutter.
Installing a new
Installation of a newly purchased or repaired part does not require anything complicated. The same steps are performed as when unscrewing, only in reverse order:
- Check if the water is turned off.
- Screw in the faucet box with your hands and only then apply wrench or pliers to be sure that it fits snugly with the rest of the structure. Do not press hard on the product, as the gasket may be deformed. Violation of the integrity of the element leads to the blocking of the water supply channel.
- Take care not to damage the sealing gasket on the valve seat with the tool.
- Tighten the locknut and secure the entire body of the part from turning.
- Open the water. The absence of smudges indicates that everything is done correctly.


