How to change the faucet in the bathroom with your own hands? Faucets fail quite often. This may be different reasons. Usually this is either poor-quality water, from which the metal gradually rusts from the inside, or simply wear and tear due to long service life. Moreover, due to the peculiarities of the purpose of the bathroom, these faucets are more complicated in device than kitchen faucets, and they also experience a greater load, because the bathtub is filled through them from time to time. For these reasons, faucets that were installed not in the kitchen, but in the bathroom, regularly become unusable.
1 How to change the faucet in the bathroom yourself?
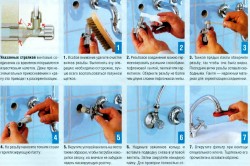
First of all, do not rush to do it. Most often, if some trouble occurs, it will be cheaper to repair, but for this you first need to determine what the problem with the mixer is. In most cases, it looks like this.
Usually people are faced with the fact that when the tap is closed, water still continues to drip. There may be several reasons for this, but most of them can be eliminated with the help of repairs, including those carried out independently. It is often enough to simply replace the gasket to fix this problem. A situation often arises when, when opened, the faucet emits a strong hum. There may be several explanations for this. One of the most common is air getting into the system.
- Causes of breakdowns
- Tools and materials
- Preparatory work
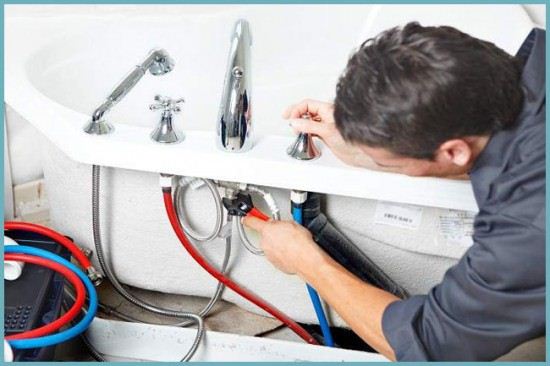
No matter how perfect the appliances and devices in your home are, it is impossible to do without their periodic replacement or repair. You can invite a specialist for these purposes, but often it is quite possible to cope with such work on your own. For example, everyone is quite capable of changing the faucet in the bathroom.
Most often, the faucet in the bathroom becomes unusable due to poor quality tap water. This happens more often if there is no filter at the entrance to the apartment on the water supply. The faucet can be damaged if you forget to replace the cartridge on the filter. If this happens, your task is to replace it without damaging the system.
Causes of breakdowns
First of all, you need to find out what kind of breakdown. The most common types of damage include:
- Corrosion. A lot of manufacturers offer buyers cheap low quality brass alloy faucets. This is mostly done by Chinese manufacturers. European firms produce better and more durable equipment from of stainless steel. With him this problem occurs much less frequently.
- Poor quality brass alloy can cause thread stripping. This is another common cause mixer failure.
- Leaks when the faucet is closed. This can happen as a result of using low-quality water with impurities that just clog and damage the faucet cartridge.
Back to index
Tools and materials
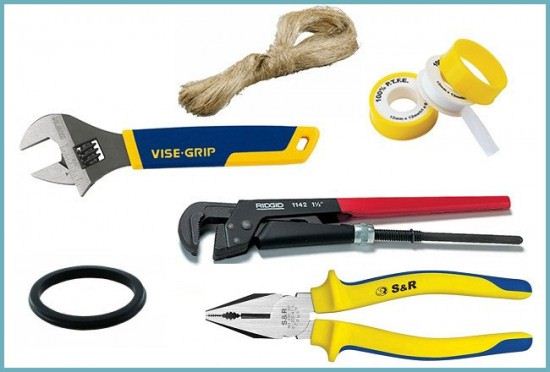
Having decided on the damage, you should find the tools necessary for repair. You may need the following tools and materials:
- adjustable wrenches of several sizes;
- pliers;
- gaskets for water pipes;
- fum tape or tow;
- linen plumbing;
- insulating tape;
- sealant;
- a vessel for draining water;
- graphite gasket molder.
If any tool or material is not available at home, you can easily purchase it at any hardware store.
Back to index
Preparatory work
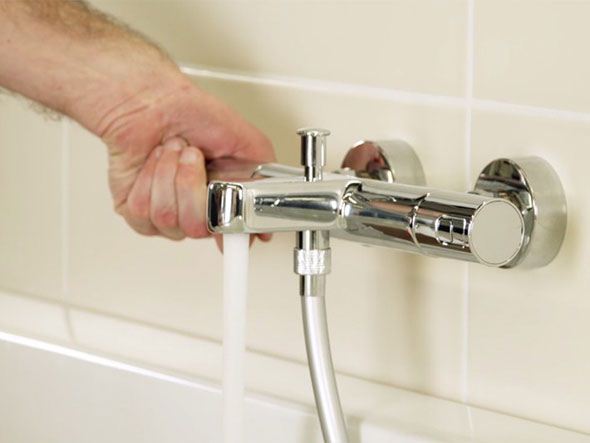
First of all, it is necessary to shut off the hot and cold water In bathroom. Turn off both taps to remove residual water from the pipes. After that, unscrew the two main nuts, with which the old mixer is attached to the eccentric adapters that serve to connect the water supply and the mixer. Disconnect the mixer and remove it. Carefully inspect the eccentric adapters. If they are worn out, you may need to replace them.
The standard distance between the pipes in the mixer is 15 cm. But in reality, this figure is not always observed. You can correct the situation with the help of eccentric adapters. They need to be tightened or, conversely, released in such a way that part of the pipe is displaced and comes into line with the right place on the mixer.
After you have adjusted the desired distance between the nozzles, mount a new mixer. Adjusted eccentrics must be fixed and leaks in this unit must be excluded. Apply the gasket molder and sanitary flax. Wrap a little linen around the outer threads, apply a graphite gasket former on top. You can also use sealant. Another fixation option is the use of a sealant in the form of a fum tape.
When working with eccentrics, there is one trick. Synchronicity is very important here.
Screw the eccentrics into both pipes in a mirror image and if possible at the same time, since any violation will lead to misalignment of the mixer.
The mixer itself should be mounted only after all work on the installation of eccentrics has been correctly performed. Once again, carefully check the distance between the pipes and only then mount the mixer.
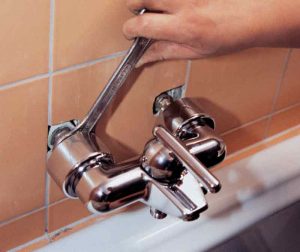
Another critical stage of work is fixing the fixing nuts. The shiny polished finish of the nuts can be scratched very easily, thereby ruining appearance faucet and the entire bathroom. In order to secure the outer coating, the nuts must be carefully wrapped with insulating tape and only then tightened with an adjustable wrench or pliers. When you are done, remove the tape from the nuts.
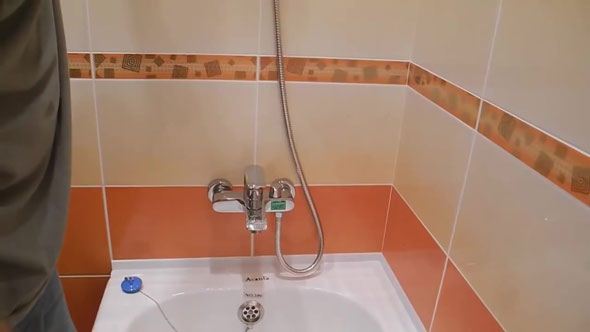
When the replacement is done, run water in the bathroom to check how well the work has been done, if there are any leaks. If you mastered the technology in the bathroom correctly, you can always save money and do without calling a professional.
The reason for the replacement may be to eliminate the leakage of the old faucet or install a new one. Change the faucet in the bathroom with your own hands, simply guided by a proven method. The article describes how to do this and with what.
A set of tools and fixtures
- two adjustable wrenches (32 mm);
- gas key;
- pliers;
- screwdriver with nozzles;
- hexagons;
- open end wrench 12/14;
- vinyl tape.
You should start by dismantling the old faucet, after preparing the place and turning off the main faucet on the water supply. You can change the faucet in the bath, which is leaking without disassembly, unscrew the fixing nuts and remove. If you think that the parts of the old mixer will be useful to you, you can disassemble it. If the nuts cannot be twisted, a rust converter should be used. Try to replace all worn fasteners to eliminate possible leakage and rust. Silicone-based gaskets should be used to seal contacting metal substrates.

It is necessary to connect all the parts that come with the faucet packaging. If it is a shower hose, it can be connected by hand without much effort. The spout must be inserted into mounting hole firmly and tighten the locknut. Be sure to change the gaskets in the faucet in the bathroom with new ones, which are also included. When tightening the fixing nuts, glue the contacting surfaces with electrical tape in several layers so as not to scratch the faucet coating.
Bathroom faucet installation
How to change the faucet in the bathroom so that it does not leak? Installing a new valve or replacing the sealing rings is done in the same way as dismantling. Thread on water pipes should be reinforced with tow or more modern tape, this will increase adhesion and tightness in general. The seal must be wound along the thread so that it is evenly crimped with nuts. Make a few skeins, but do not overdo it, otherwise the nut will not take the thread, the faucet will fly off under pressure.
If the outlet pipes of the water supply are connected to the installation point, but do not match the faucet mount, special adapters are used - eccentrics that allow it. To mount correctly, do not clamp the eccentric tightly until the desired distance is set. This procedure is carried out on both sides. Do not forget to make a seal, wind the tape wherever you see the thread.
The union nuts for hot and cold water can be tightened by hand until they stop, slightly tightening with an open-end wrench. To learn in more detail how to change a faucet in a bathroom, the video is quite common, you can clearly see all the stages of replacing a faucet from our website.

The workplace, especially if there are ceramic and other fragile surfaces, must be protected with dense material or cardboard. During operation, the tool can escape from the hands and break an expensive thing with a blow. Remains of rust or scale, residual water will fall just on this protection, spend less time cleaning.
Also, for a visual fixation of the scheme for replacing the faucet, we suggest watching the video - “installing the mixer on the bath”, enjoy watching:
Similar news:
How to change the faucet in the bathroom with your own hands
Everyone at least once in their life faced with the need to replace plumbing in the bathroom. The most common reason for this is a broken mixer. A failed device can deal a significant blow to your wallet. Drop by drop, several liters of water flow out of the tap per day, which at the end of the month will become a significant increase in the rent. In addition, a broken faucet is not serviceable, and if you use it, then be sure that this is not for long. There is an urgent need to replace the mixer. And here the question arises, how to change a non-working faucet in the bathroom without resorting to the services of specialists. It is quite possible to make a replacement yourself. Any man can do this work with his own hands.
Tools required for assembly and dismantling
Often, owners who want to do plumbing work are faced with conflicting opinions of specialists and locksmiths. utilities, according to which actions taken independently without observing special requirements can lead to disastrous consequences. Of course, such a fact takes place, but in order to avoid trouble, you must strictly follow the instructions, be patient and carefully consider what is happening. To get started, you need to have the following tools on hand that you will need to dismantle the old faucet and install a new faucet.
Tools for dismantling the mixer
- Wrench.
- Tow or fum tape.
- Insulating tape.
- Screwdrivers (cross and flat different sizes).
- Open-end wrenches.
- Wrench.
All tools are at hand, you can start dismantling the old mixer.
Dismantling of the old structure
Before installing new faucet, you need to get rid of the old one. To do this, it must be dismantled. Removal is carried out in a few simple steps.
- You need to turn off the water in the riser.
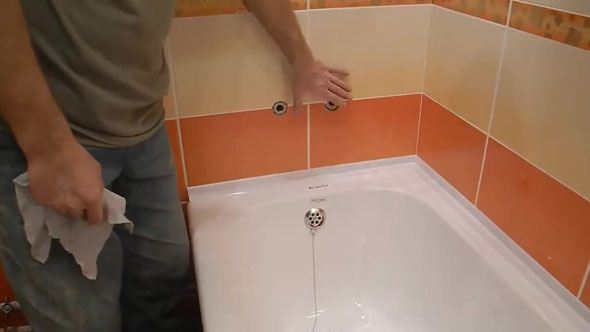
- Lay any unnecessary matter at the bottom of the bath. This is done so that in the process of work not to damage the enamel by an accidentally dropped part or tool. Don't forget to cover the drain hole of the tub. Small details often fly there.
- Unscrew the faucet using the gas wrench. If the replacement of plumbing has not been carried out for a dozen years, then a lot of effort will have to be made. Indeed, during this time, lime and salt deposits firmly settled in the places of fasteners. When dismantling the old mixer, try to remove it carefully. Perhaps some of its components will still be useful to you.

Dismantling the old mixer

Half of the work behind. The next step is to install a new bathroom faucet. which will also be made by hand. Don't forget to buy a new faucet model.
Attention! When buying a crane, you are guided by the quality of the goods, customer reviews and company ratings. Usually, good mixer It's expensive, but it comes with a manufacturer's warranty. Cheap analogues will not last long, and their quality corresponds to the price.
Faucet installation: step by step instructions
The crane can be installed in three most popular ways:
- installation on a vertical wall;
- installation in the body of the bath;
- mounting as a separate stand.
Wall mounting
The convenience of the design lies in the fact that the faucet, installed in the wall, can be used simultaneously over the bathtub and the sink.
Advice. You can position the faucet above the bathtub, sink or between them.
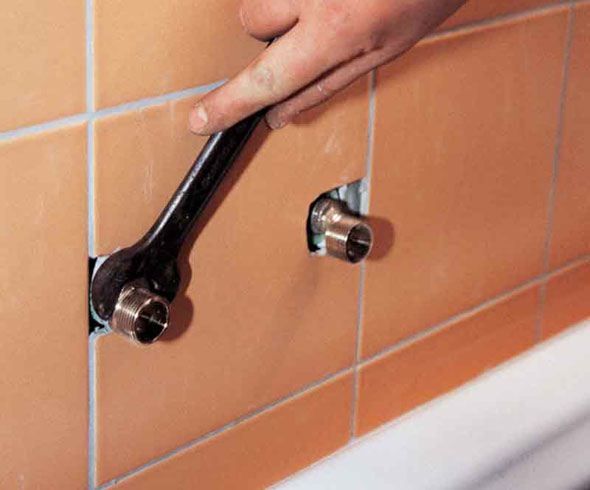
- After dismantling the old crane, pay attention to the eccentrics. For those who are unfamiliar with this concept, eccentrics are a kind of adapters used in plumbing work. If they are in good condition, then they do not need to be replaced.

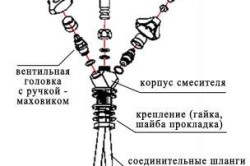
Faucet eccentrics
Winding on an eccentric

Scheme: mixer device
Bath body installation
An interesting option that can be used with a flexible eyeliner. All attributes of the tap will be located directly on the surface of the bath. It is important to choose the right location for the mixer. It must be accessible for plumbing and repair work.
- With a hole cutter mounted on a drill, make a hole in the bath.
- The next step is to install the mixer.
Bath faucet installation
Advice. Use gaskets, they will prevent leakage.
Faucets on a separate stand
Very stylish option mixers. Perfect for large bathrooms. Mixers on a separate rack are also called floor standing.
- The main snag of the installation will be the supply of pipes to the floor. But if the repair is fully completed, then there is only one option left - removing the pipes into a corner and masking with drywall.
- The subsequent installation steps are not much different from installing mixers on the wall.
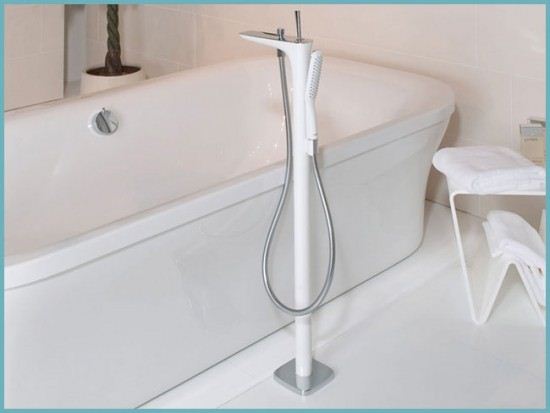
Stand faucet - floor standing
It is worth noting that floor faucets have a very high cost, but it is offset by the originality of the design in the bathroom.
Installing the faucet is a simple job. The main thing in this business is accuracy and attentiveness. The quality of the materials used and the selected crane also play an important role. But if you strictly follow the instructions, then the result will undoubtedly please you. After all, any Homework, made by yourself, looks much better and is valued higher than the help of specialists. And if the question arises, how to change the faucet in the bathroom with your own hands, answer: “Easy and simple!”
Do-it-yourself mixer replacement:
Installing a faucet in the bathroom: photo


http://sandizain.ru
Mixer - important detail bathroom, it’s good when it’s of high quality and lasts a long time, but there always comes a day when the life of the old plumbing comes to an end and the bathroom faucet needs to be replaced. You should not immediately call specialists, you can install the faucet in the bathroom yourself if you follow the instructions below.
If you are wondering how to replace a bathroom faucet, the first step is to choose the right new one so that it lasts as long as possible. The new device can be purchased as in the usual housekeeping departments shopping centers, and in specialized plumbing stores.
Before buying a faucet, look at how it connects to the water supply network. It is also worth remembering that cheap plumbing will not last long, and some parts may break already at the time of installation. Quality materials expensive, but the quality of the purchase will be much higher. It is best to choose plumbing fixtures made of brass or stainless steel, these metals are the most resistant to corrosion.
In addition to the material, be sure to pay attention to the weight of the mixer. The long-term operation of any mixer directly depends on the thickness of the metal, so you should not take a device that is too light. A quality mixer weighs a lot.
When choosing a mixer, study its characteristics better. The device must be suitable in all respects for the place where you install it. Think in advance whether you want a faucet or a lever, and be sure to consider the length of the water supply pipe if you need to use the faucet not only in the bathroom itself, but also in the sink.
How to remove an old faucet
How to change the faucet in the bathroom with your own hands? Before starting the process, it is necessary to dismantle the old one. This is easy to do, but first turn off the water in the riser. If you have a column, boiler or boiler installed, separately shut off the water from them. To remove the old device, you will need pliers and an adjustable wrench.

Drain the water remaining in it from the tap, after this procedure, start unscrewing it. Do this carefully and slowly, otherwise you may accidentally damage the threads on the fitting.
This will be very frustrating, because if the thread becomes unusable, you will have to disassemble the wall to replace the unusable fitting with a new one. As soon as you take off old appliance, clean the fitting of what is left on it - paint or windings.
Replacement process
Before you replace the faucet in the bathroom with your own hands, check the availability of all components. Here are the parts that should be included in the complete set:
- main block;
- shower head;
- shower hose;
- gander;
- eccentrics;
- decorative plafonds;
Each item must be in a separate cellophane or fabric package. Make sure that the threads on the fixing nuts and eccentrics are not damaged. It is best, of course, to do this before buying.
Step-by-step instruction
So, as soon as you turned off the water and removed the old equipment, then it will happen like this:
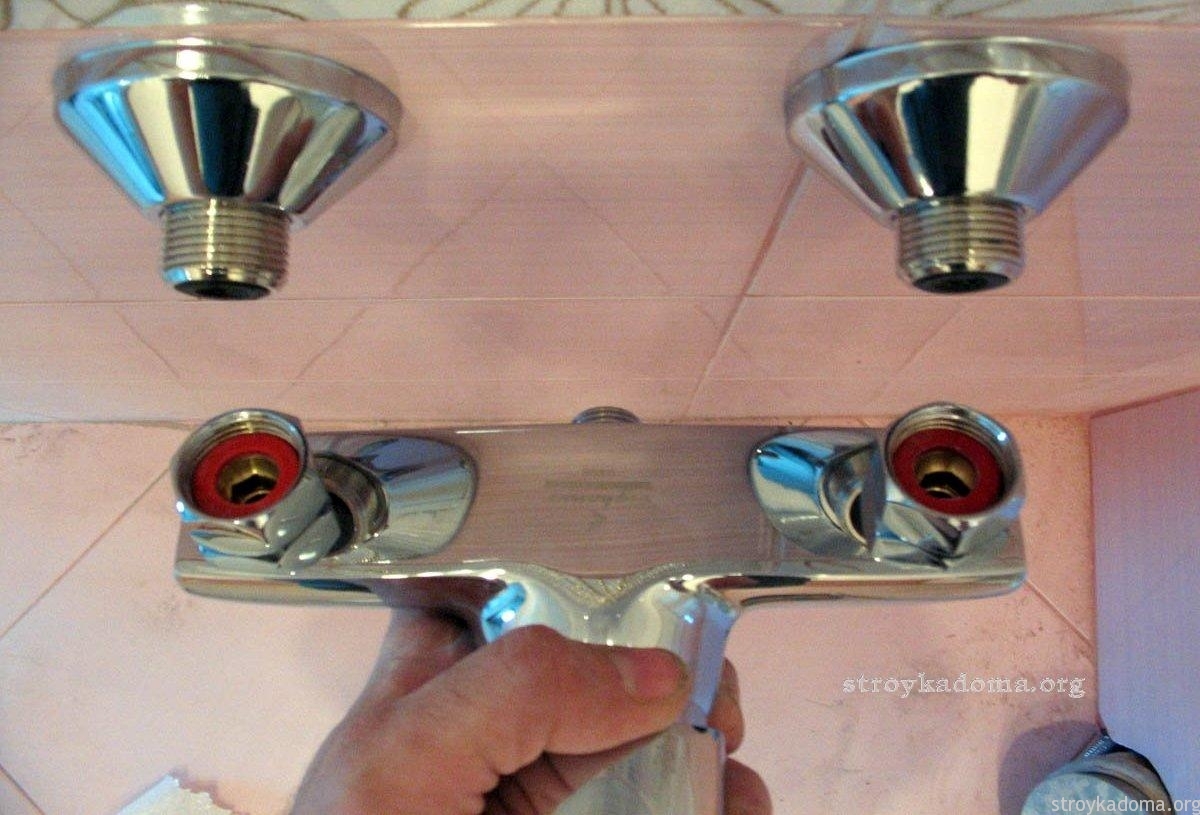
Unscrew the eccentrics remaining from the old device with pliers. You need to turn the pliers strictly counterclockwise.
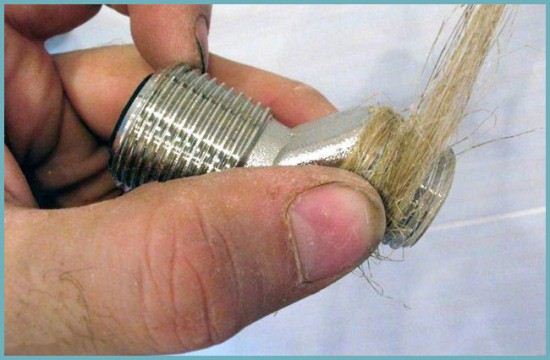
Now it's time to install new eccentrics in the pipe. Before installation, wrap their base with linen (or FUM tape), for this, wind a strip of fabric onto the eccentric to the very end, starting from the base, and back.
Fasten the end of the strip firmly. Once you have coated the flax with grease, the eccentric can be screwed into the pipe with an adjustable wrench. Before tightening the eccentric, clean the pipe with a screwdriver from dirt.
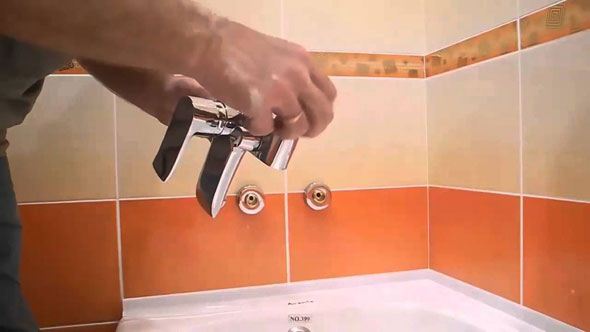
Then screw reflectors to the eccentrics, they will close the pipe.
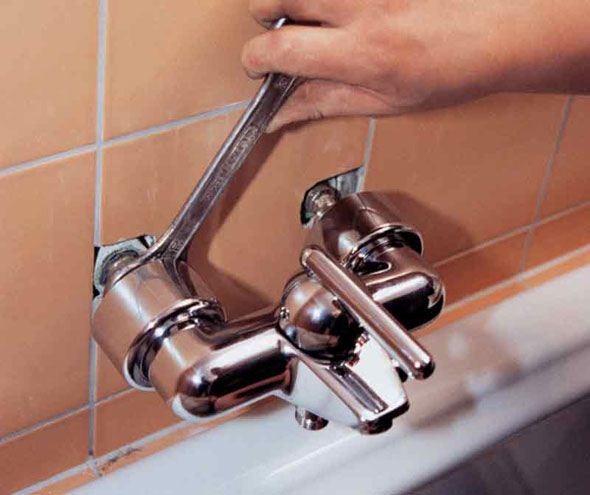
Screw the block to the eccentrics by hand, and then tighten the nuts with an adjustable wrench.
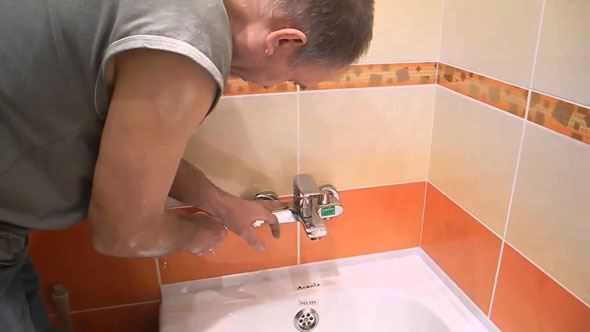
Make sure that all parts fit snugly and do not hang out. At the last stage, it remains to attach the gander or shower hose.
After all necessary work, turn on the water. If there are leaks, just pull them tighter.
Installing the faucet on the sink
Sometimes in the bathroom one faucet is not enough if the sink and bathtub are placed far from each other. In this case, a separate device must be installed. So, how to install a faucet on the bathroom sink?
Tools you will need for installation:
- wrench;
- screwdriver;
- pliers;
- linen or FUM tape.
Installation instructions:
Turn off the water first. After that, disconnect the connection of the old device from the pipes of the cold and hot water, clean the thread.
Using a small wrench or pliers, unscrew the faucet fastening nut, it is located at the bottom of the sink. The faucet on the sink is usually attached with 1 or 2 mounting studs, clamping nuts are screwed onto them. Unscrew these nuts and remove the old device.
Assemble the new faucet before installing it on the sink. Carefully screw the flexible hose into it, try not to damage the cuffs on the fittings, the rubber may not withstand too much clamping. 
Screw new mounting studs into the bottom of the mixer, then install the O-ring.
Thread the hoses through the hole in the sink, the faucet will fall into place by itself.
Install a pressure washer with a rubber pad on each stud. After that, screw the nuts onto the studs and tighten them tight - the mixer should not rotate or stagger.
Connect to hot and cold water pipes flexible eyeliner, it will be final stage assemblies. Screw the nuts onto the pipe threads using linen or FUM tape, but be careful not to overtighten, otherwise the sealing rubber will be damaged.
Once you have connected the wiring, you can start the water. Check for leaks by running cold water first and then hot water.
As you can see, the question of how to make a faucet in the bathroom is solved quickly and without outside help. Choose appliances from high-quality and durable materials, follow all installation instructions, and then the faucets will last you as long as possible.


