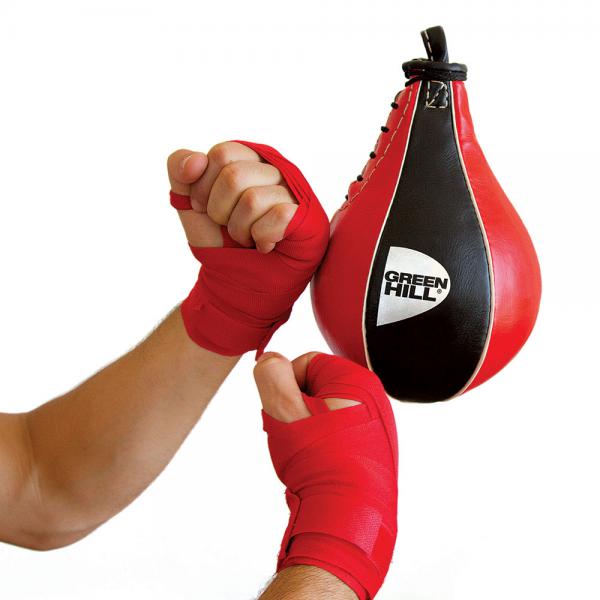
To throw out negative energy and get rid of stress, just beat a punching bag for 15 minutes. It’s inconvenient to go to the gym, and you don’t have free time, but purchasing professional sports equipment will hit your pocket? There is a solution - box at home. A DIY punching bag is very easy and quick to make.
Do-it-yourself professional boxing equipment
It's not just men who like to kick the punching bag. Many representatives of the fairer sex are also not averse to practicing power techniques using such equipment. Self-defense and physical strength are in vogue these days. But there is not always enough time to go to the gym. You can also hang a punching bag in your home. And to save money, quickly learn how to make a punching bag with your own hands.
You can make such sports equipment from almost any available means. First you need to take care of the frame. The easiest way is to make a punching bag with your own hands from a bag. For strength, two or three bags are used, but the outer layer is better made of tarpaulin or thick leather so that your projectile does not crack over time.
Some people make a punching bag out of tires. Only in the practice of martial arts it is called makiwara. On such a bag you can perfect your side punches, and you don’t need an opponent for sparring. This role will be played perfectly by a rubber projectile.

When designing a punching bag, special attention should be paid to the filler. You can take material convenient for yourself:
- sand;
- land;
- dried sawdust;
- textile;
- expanded clay balls.
Depending on the type of filler, the weight of the pear will also change. On average, the weight of such equipment is 80-100 kg. Not every support will withstand such a structure, so take care of the reliability of its fastening. Take a strong metal chain and carabiners. In the apartment, the projectile is attached to the ceiling, installing additional fasteners. In your home you can hone your shots and improve your skills martial art in the fresh air.
The pear is hanging, you can’t eat it
No, this is not a light bulb, as the children's riddle says. Today we are going to figure out how to make a punching bag with our own hands. To create such sports equipment, you need to buy high-quality PVC fabric and durable braid. Choose fasteners depending on where you will mount the structure.
The width of the bag will be 106 cm, and its height will be 120 cm. PVC fabric is very durable, reinforced. It is impossible to tear it apart with your hands, and it is difficult to cut it with scissors. Factory sports equipment is often made from this material, so you can be 100% confident in the reliability and durability of your punching bag.

Necessary materials:
- PVC fabric;
- strong braid;
- 4 things. carbines;
- metal chain;
- scheme;
- lightning;
- filler;
- sewing machine;
- needle;
- threads;
- scissors;
- ruler;
- strong wire;
- pencil or felt-tip pen.
Step-by-step description of the process:
- This is the scheme we will use to construct a punching bag.

- First, we carry out all the calculations, and then purchase the necessary material.
- We lay out PVC fabric or tarpaulin on a horizontal surface.
- We transfer the pattern to the fabric in accordance with the required dimensions.

- At the top and bottom we need to make a round base.
- To do this, determine the diameter of our pear and cut out circles of the appropriate size.

- To fix the pear in a hanging position, we need braid.

- We have prepared all the details for sewing a punching bag.

- We need to cut four 20 cm pieces from the braid. These will be loops that are sewn on the fold.

- For convenience, we will sew a 90 cm long zipper at the top of the punching bag.

- This bag can be unzipped and the filling can be changed if necessary.
- If you noticed, the width of the punching bag is 106 cm, and the zipper is 90 cm.
- We need to cut out the missing part from PVC fabrics. It is enough to make a strip 20 cm long.

- At the top of the punching bag we sew a braid on which the loops will be attached.

- We fold the braid for the loops in half and place it under the main one.
- Place four loops at equal distances around the entire perimeter of the punching bag.
- It is best to sew the loops with a machine stitch, first around the perimeter, and then crosswise.

- Now we trim our tarpaulin around the edge. We turn it literally 10-15 mm and machine stitch it.

- At the top of the pear we sew in a zipper.

- The pear is sewn together, a couple of finishing touches are left, and you can start practicing martial arts.
- We need to insert a strong wire around the circle into the loops and secure it with a clamp.

- We choose a suitable filler and stuff the punching bag.
- Any material must be compacted tightly.
- We thread carabiners through the loops.
- We attach a strong metal chain to the carabiners.
- All that remains is to hang our home exercise machine on a support and you can start exercising.
Modern high-quality boxing bags cost a lot of money, so everyone has at least once thought about how they can make a similar boxing bag with their own hands. Homemade bag Although it may not be of high quality, the size, weight, rigidity and other parameters are adjusted to individual requirements. To make a boxing bag you do not need any special knowledge and all materials can be found at the nearest construction market.
To practice punches, build strength and endurance, you can make two types of bags. Both are suitable for boxing and kickboxing.
Most a budget option homemade kickboxing bag:
1. Take a log or pipe with a diameter of 10-20 cm in the upper part and hammer or weld an eye (ring) for hanging on a hook.
2. For the base, I used a wrestling mat, which was previously used for rings, but it can also be replaced with thick foam rubber (about 10 cm thick). In general, we tightly wrap the log or pipe with foam rubber and secure it with wide tape.
3. Next, using the same principle, we wind the compacting layer. As a sealing layer, you can use any material of your choice, for example, “foam” (foamed polymer).
4. We secure the sealing layer with wide electrical tape (50-80 cm), which is used when laying the pipeline. Take wider electrical tape from the construction market (if there is no suitable size) and cut off the required piece, it will be more convenient to wrap. This insulating tape will provide long life your punching bag.
The bag is ready! If you have all the materials, the work will take about 2 hours, or even less. I advise you to take someone as an assistant, the bag will turn out better and without air bubbles on the tape. This bag is suitable for strengthening the striking surfaces of the legs and will be an excellent option for.
For more rigid stuffing of the shins, we wind a rubber hose onto the same log or pipe and fasten it with wide electrical tape - we get a kind of makiwara bag.
Second option, despite its versatility, I still classify it as a boxing style. The principle of creating this DIY punching bag is simple: a smaller bag is inserted into the bag bigger size, and are filled with fillers of different densities. Now I’ll break down the whole process in more detail point by point:
1. You will need two cases different sizes. You can sew it to order in any studio or try yourself as a tailor. I will not indicate the sizes, I will leave it to your choice. Everyone has their own requirements. The main thing is to choose a material that is stronger and denser; tarpaulin works well. Eat economical option, use old bags instead of covers))
2. Fill the smaller size case with sand and insert it into the larger size case. We fill the space between the small bag and the walls of the large cover with sawdust, rags or pieces of old cloth. Each case should have loops sewn on top for hanging the finished boxing bag.
The rigidity of such a bag can be easily adjusted by the filling density; the weight of the bag itself will depend on this, but in any case it turns out to be heavier than the first option. Therefore, make the fastening loops more reliable. You can attach it to the hook through a chain or by welding to make a circle with a separate hook for each loop.
For want to offer old "grandfather" a method that I tested in childhood. Take a bunch of old magazines or newspapers and thread a rope through them. Hang the free end of the rope on the wall, on a nail (like a painting). You practice hitting this, gradually increasing the force of the strikes. Every day one newspaper or one sheet should tear from your blows. Accordingly, the number of sheets will determine how quickly you reach the wall and how quickly your fists will become “iron.” This method requires patience and endurance so as not to give up halfway through. I hope your neighbors will go through it with you to the end)))
In fact, it doesn't matter what kind of bags you use in your training (expensive or homemade), it's much more important how often they are used.
Let your desire for excellence be embodied in fruitful training!!!
If you want to practice boxing at home: fill your hands, practice punches, then you simply cannot do without a punching bag or punching bag. How to make a pear yourself from scrap materials - this will be discussed in our article.
Materials for making pears
Before you make a punching bag yourself, you need to determine from the very beginning what materials should be used to make not only external cladding, but also the internal filling. It seems that there is nothing complicated about it. All you have to do is do it outer skin made of thick fabric - and that’s the end of the matter. However, it's not that simple. Let's look at all the options for the proposed materials before making a punching bag.
- Thick fabric in several layers. Experts consider this option the most unsuccessful. The fact is that the fabric has a porous structure, and no matter how dense it is, the filler will still spill through it. And its mechanical strength leaves much to be desired. And this can lead to ruptures, after which you will have to collect the internal contents along the floor. It will be possible to work with such a pear only with gloves, since if you hit it with bare hands, then abrasions will immediately form on them and the skin will be torn off.
- Tarpaulin. This material is better than the previous one, since the filling does not spill through it. But still, if you are going to use tarpaulin covering, it is better to do it in several layers. Moreover, each subsequent one should be 1 cm larger in size than the previous one - the matryoshka principle. This is necessary in order to insure yourself in case one of the layers bursts. It is also not recommended to work with it without gloves.
- Leatherettes and leather. The use of this material is most justified, since it does not allow the filling of even the finest consistency to leak out. In addition, its strength is sufficient to withstand blows of any force. Let us also note that training on this apparatus can be carried out both with and without gloves.
Most the best option a combination of skin is considered ( upper layer) and tarpaulin (internal).
How to fill a punching bag
How to make a pear at home, and what filler is best for it? The most commonly used materials are sawdust and sand. The first is used to make the projectile softer and lighter, and the second to make the punching bag denser and heavier. Some amateurs recommend using pebbles in the inner layer, as well as other stones for weighting without sharp edges. There are even boxers that use rice as a filler. But? after all, most professionals and amateurs believe the best filler crumb rubber from old car tires.
Making a projectile
Now let’s move on to the most crucial moment - how to make a pear with your own hands. In fact, there is nothing complicated in this process, you should not be afraid of it.
First stage
Take leather of the required size, fold it in half and sew two parallel lines. To give the shape of a punching bag, corners are folded on one side of the rectangle and stitched in an arc. It was an outer leather pouch. The next bag is similar to the previous one, but it should be 1 cm smaller than the first one. It is better to make it from tarpaulin. How to make a weighted boxing bag? To do this, you need to make a small third bag into which the stones will be poured. All seams must be stitched three times with thick nylon thread. After this, they are coated with rubber glue.
Second phase
Filling a punching bag with filling. The smallest bag is filled with stones and inserted into the middle one. The middle bag is filled with sand at the edges and at the bottom and stuffed into a leather bag, which in turn is filled with sawdust. After several training sessions, when the sand and sawdust pile up, you need to add both fillers. Ultimately, you decide what to stuff the pear with. We can only offer you the most accessible and cheapest materials and options.
The quality of pears that are on sale often leaves much to be desired. Good ones are quite expensive, so for those who are just starting to box, there is little point in buying them, considering that doing it yourself is quite simple.
DIY punching bag: materials and tools
We will need the following materials:
- Thick skin is the best option. They also use a tarpaulin; if it is not strong enough, it can be folded in half or three. Leatherette is also suitable, several layers are required. But just like a cheap home punching bag, it can burst if hit hard.
- Nylon or other strong thread
- Steel wire
- Sawdust and sand
- Reinforced tape. Not necessary
- An ordinary bag.
A homemade punching bag is easy to make. You will need the simplest tools.
- Sewing hook, you can use a large needle
- Pliers
- Scissors.
DIY punching bag: manufacturing technology
We take the material from which the pear will be made and make a pattern according to the drawing. D is the diameter of the future pear, h is its height. We select sizes based on our own preferences. Leave 1-3 cm at the edges for seams. We leave 5-10 cm at the top so that we can go around the steel wire ring, and we make four holes so that we can attach the chain to the steel ring. A DIY punching bag is made using the following pattern:

Sew the pear on the side and sew the bottom on the bottom. We sew by turning the material inside out. Sew the bottom and turn the pear back inside out.

We cut the chain into two pieces of 40-60 cm or four pieces of 20-30 cm.
We fold the steel wire into a ring along the diameter of the pear, inserting pieces of chain into it and evenly distributing them at the four corners.

We insert a ring of steel wire with a chain inside the pear. We bend the edges of the top of the pear around the ring, placing four chains in the cut out holes of the pear.

We sew the top of the pear to hold the steel ring.

We insert a regular bag inside. It is needed to prevent sand from spilling out through the seams when you box. If the pear is sewn from several layers or the seams are well sewn, then you can do without a bag.
Fill the punching bag with a mixture of sawdust and sand. We choose the proportion depending on the required rigidity and weight of the pear. Sand is harder and heavier. After some time, the mixture will settle in the pear, and you will need to add it. You can pour sand alone, but over time it will settle, and the pear will become very hard below, and softer above. A good option- rubber grits (balls) or plastic balls.
We hang the punching bag by the chains.

If your pear material confuses your arms (legs), you can cover it with reinforced tape.

It comes in different colors. They can also be used to repair rips and holes in a punching bag.
Then you can put the bag inside the bag, this way our punching bag will be denser and tougher.
You can fill the bag:
Rags (sewing waste), old clothes and sand, the more sand, the harder the bag will be;
Crumb rubber, it can be taken from any tire shop - this is waste from cutting tires;
Expanded clay chips, this is more difficult to get, but you can ask at building materials stores.
You can also use sawdust. It is better to dry them first

2. Tube from a car tire
This is a pretty good and simple option for a home punching bag. All you need is an old camera from a car, the larger the camera, the better, the main thing is that it is intact. Make a small hole and fill the chamber halfway with water. Then the hole can be sealed. Such a projectile will be quite heavy, and the weight can be adjusted by the amount of water, and you can hit it without worrying about your hands, since the chamber with water is quite soft.

3. Car ramps
This option is suitable for those who can train outside, who have a private house, next to a sports ground or forest, there is a garage in which you can train. I used to train on such equipment myself, and you might have already seen it on sports grounds! It involves taking several tires from cars and putting them on a pipe or tree pole. If you don’t have anything to wear, you can simply stack them one on top of the other in the corner of a garage or building on the street. This way, you will get a hard projectile that will last forever, but you definitely need to work on it with gloves or cue balls with bandages!

4. Car tire on chains
A similar option to the previous one, but here you only need one tire and chains to hang it somewhere in the yard.

5. Old mattress
This is the simplest and home option boxing bag. You take an old mattress, roll it up and tie it with rope. That's all. You will have a soft bag, although it will be quite light; you won’t be able to work on strength, but you can work on accuracy and speed.

6. Partner with paws or makiwaras
This is not exactly a bag, but if you have a friend who can help you with training, and will also work out himself, and, accordingly, paws or makiwaras that he can hold, then this can completely replace a boxing bag and does not require space or fastenings.

How to secure the bag at home?
There are several options for how you can attach the bag at home:
1. If you don’t have the opportunity to hang a bag at home, then you can simply put it in a corner, and if it’s small, then make two of these bags and lay one on top of the other.
2. If you have a horizontal bar at home, you can simply tie the bag to the horizontal bar with ropes.

3. If you can drill walls at home, then it’s better to buy special fasteners for shells, which can easily be found on the Internet for little money, and attached at home.

4. There are also special fasteners that are attached to the ceiling, this makes it possible to hang the bag in the center of the room! Thus, you can move around it, and the projectile itself can move quietly.

5. You can also attach it to the ceiling with just one dowel and for this you only need one hole. And if you remove the bag, the fasteners in the room are not noticeable at all. This is convenient for those who do not want the bag hanging in the room all the time.
6. Stand for a punching bag - this is a more expensive option, but also quite simple. To do this, you need a couple of pipes or angles and a welder who will connect them together. The design can be different, the main thing is that it is stable.

And the shoulder girdle, but also a kind of male antidepressant. We are all subject to stress - but it’s better to kick a bag of sand and calm down than to yell at your neighbors. Or even worse, valiantly overcome, carrying psycho-emotional negativity within yourself... Fifteen minutes of training helps calm your nerves more effectively than an hour of passive relaxation. Therefore, a faithful comrade, the pear, should always be at hand. You can buy it or make it yourself, spending an hour of time and saving a couple of thousand rubles. If there is not enough space for the exercise machine, you can make a wall-mounted punching bag or makiwara.
How to make your own punching bag?
The simplest option is to take eight pieces of polypropylene construction bags, place seven of them one into the other, sew the bottom with a strong thread using a gypsy needle and pull it together like this:
Next, we sew loops of thick fabric on which we will hang the exercise machine - four pieces, or even six. We have one unused bag left: we fill it three-quarters full with sand, tie the neck tightly, and lower it into an improvised multi-layered cover. It is not worth sewing tightly, as the filler will settle out over time, and it will have to be added. Consider this possibility.
Cheap, cheerful, but not very aesthetically pleasing. How to make a neat punching bag with your own hands so that you won’t be ashamed to hang it in your room or workplace? Take a piece of tarpaulin measuring 100x80 cm, and another small piece to cut out a circle with a diameter of about 40 cm for the bottom. Fold the main fabric in half and sew along the edge using sewing machine. Then we attach the bottom. Fold the top edge and sew on the loops. In the resulting case we put a polypropylene bag with sand, and the gap for better shape stuff it with sawdust. As an option, use furniture leather instead of tarpaulin. It is softer: this is important if your hands are not full, and impacts on a rough rough surface leave abrasions on your knuckles even after taking all precautions. You can buy leather in Moscow using the link - one whole piece is definitely enough to sew a completely professional-looking pear, and there will still be left for crafting all sorts of smaller pieces.
 Both the first and second versions of homemade punching bag, it is better to attach it not to the ceiling, but to an L-shaped structure made of a steel angle or channel, tightly screwed to the wall. Or buy a ready-made bracket. The simulator turns out to be quite heavy, and when hung on the ceiling with the help of anchors, it may one day come off. Another important precaution is to remember to protect your hands. Either use gloves or wrap your hands with an elastic bandage.
 How to make a punching bag like this at home? It is lighter and softer because it is made from a rolled-up tourist rug, also known under the party nickname karemat. The main advantage of this type of simulator is its dynamics: during an impact, the pear deflects and then flies towards you. Willy-nilly, you have to practice your evasion skill, which can be very useful to you in a street fight. The structure of the pear itself does not raise any questions, but the flexible leg will have to be worked on. You will need two pieces of pipe: 1 m and 50 cm, as well as a tight steel spring and a round (diameter about 30 cm) or square steel plate (the length of each side is 20-25 cm). We weld a short pipe to one end of the spring, a long pipe to the other, and a plate to the free end of the long pipe, which we then screw to the floor. The metal part is ready - attach the punching bag to it with tape and enjoy dynamic training.
Another very simple one, but exclusively yard or country option punching bag, also suitable for practicing kicks - dig a thick log into the ground, put 4-5 car tires on it... done.
 How to make a boxing bag at home?
If there is not enough space for a punching bag, you can make a wall-mounted punching bag - it is more compact, but this is far from its only advantage. The design of this simulator is probably known to everyone who is in one way or another related to martial arts, and personally, I think it is more successful than the sandbag described above, and even a punching bag on a flexible leg. This option involves practicing punches (fists, heel of the palm, knuckles, edge of the palm...) to the head, body and stomach of a hypothetical opponent. At the same time, the rice filling feels very similar to the human body upon impact.
So, we sew a cover from tarpaulin. We fold a piece of 120x120 cm in half, stitch it on both sides - we get a bag. We pour 3-4 kg of the cheapest rice into it, make a hand stitch, thus separating the lower third. We add another 3-4 kg, sew again, separating the second third. And again. Here we have three bags located one above the other. We sew up the top hole using a machine and attach two loops on which we will hang our homemade exercise machine.
By the way. applies to products long-term storage. After a couple of years, you can open the cover and use the cereal for its intended purpose - cook porridge or pilaf from it, and pour new cereal into the bag. The rice will not spoil at all from the fact that it was beaten daily, and there is a supply of provisions in case various kinds There should be disasters in every home.
 How to make makiwara?
Another idea for those who are closer to martial arts than boxing is how to make makiwara at home. You will need car tire: Cut out the middle, leaving only the outer rim. Insert into the center wooden block about 60 cm long, and at least 2 cm thick. Attach all this beauty with self-tapping screws to wooden shield: behind the block the rubber is pressed against the shield, and in front it will bend in an arc. Almost ready - all that's left is to hang it on the wall. This device is ideal for practicing side impacts. There is another option for making makiwara from a tire. It differs from the first one in that they do not use a whole tire, but cut off half of it (see photo). In this case, it is not necessary to remove the “internals”. You can attach it to the block with a pair of nails.
There are no similar articles.
Sports equipment for practicing punches is necessary not only for boxers. They are used by representatives of all types of martial arts, including karatekas and capoeira practitioners. To save on going to the gym, but still have the opportunity to train every day, you can set up a workout space at home. Let's figure out how to do it at home - it requires a small financial investment, but is no less effective.
Selecting materials for sports equipment
Most novice athletes know only one option for making a homemade punching bag: sand is placed in a bag or bag, and this structure is suspended from the nearest branch or horizontal bar. Unfortunately, such a projectile will last no more than a couple of training sessions. How to make a punching bag at home so that it is durable and effective?
External upholstery and filling
The first option is the most budget-friendly. Will need thick fabric, which needs to be rolled in 4-5 layers. Then you can sew it like a bag or simply tie the ends together. But the only advantage of such a pear is its cost-effectiveness, because every home has an unnecessary but durable rag. Minuses:
- To practice, you need tape or, otherwise, you will rub off all your skin on the rough surface of the fabric.
- Through the pores of the material, sand or sawdust will sooner or later begin to spill out, which will affect the rigidity of the pear and the effectiveness of training.
- Despite the strength of such a projectile, a good fighter with a well-placed blow can pierce the fabric or simply rip the “homemade” weapon from its mount.
A tarpaulin works well; it is a little stronger than an ordinary rag folded in several layers, but still tends to tear. With frequent and intensive use, it wears out. The disadvantages are the same as when using conventional material.
Do homemade pear for boxing you can from. This best material, which is used in the manufacture of projectiles in production. Pros:
- The high strength of the leather guarantees the tightness and durability of the pear.
- There are no pores - there will be less dust in the air, and the lungs will be able to breathe calmly.
- You can train without additional accessories, with bare hands.

Sand or sawdust is used as filler. The first makes the projectile heavier and denser, so it fits better. Some people use pebbles and stones that are compacted inside the filler to add extra weight.
There are also options on how to do it, you will learn from the video below.
How to make a punching bag: step-by-step instructions
- Take a piece of leather of the required size (approximately 75x75 cm, but larger is better), place it on flat surface and fold it in half.
- Next, the material needs to be stitched with durable polypropylene thread: make two transverse seams. You choose the diameter yourself - it will be the same as the distance between the seams.
- You can give the leather a pear shape by bending two corners on one side so that they touch each other, and then stitching them in an arc. The material is joined into a bag using a strong thread or lace.
- We take a piece of tarpaulin and sew a second bag in the same way, but the size is 1-2 cm smaller than the leather one. All seams are treated with silicone construction adhesive; Moment will also work.

- The fabric bag is filled with the available filler. If you want to include stones in the structure, then you should sew another bag, which will be 5-6 cm smaller than the second.
- The fastener is made from leftover leather: the loop is sewn on after the pear is completely assembled. Instead of a loop, you can purchase an iron ring with climbing carabiners.
You can hook the projectile on a piece of plywood or any other surface of suitable height.
Pear from tires and from the store
Another great option for men with really strong fists, make a punching bag out of tires. It is strong and durable, and a moving projectile is much more effective than a bag. It is enough to take 3-4 tires and punch 4 holes in each side. The circumference between the holes must be the same on each tire. A strong rope is pulled through the resulting holes, and the entire structure is attached to branches or crossbars.

The easiest option is to buy the necessary sports equipment. Unlike multifunctional exercise machines, punching bags and punching bags are not very expensive. In addition, projectiles manufactured on a conveyor belt by specialized manufacturers will, of course, be stronger, safer, more durable and convenient for training. The only exceptions are punching bags made from tires - this type of “homemade” is also actively used in gyms.
- Classic leather pear on a pendant - the manufacturer offers models of excellent quality at prices starting from 3,050 rubles. It will serve for many years and does not wake up even when strong blows: There is no filler inside and there is a latex chamber with good recoil.
- A standard simple inflatable bag (for example, a product from a famous one can be purchased for 1,999 rubles). Its advantage is that you will learn to control your distance and dodge enemy strikes, improve coordination of movements and simply remove excess fat deposits.
- For a more advanced level, a heavy bag is suitable - for example, (9,790 rubles) weighing 45 kg. Practicing with such equipment will allow you to learn how to hit hard and knock your enemy to the ground with one blow.
In this blog article, we'll talk about how to make a punching bag. Of course, you can just buy it, but not everyone wants to spend money on it. Someone cannot buy a pear for some other reason, but the reason, in general, is not important.
To create a pear, you will need polypropylene bags - 6-8 pieces, and nylon slings, 5 meters will probably be enough. The bag in question was sewn a long time ago, and when I sewed it, I did not measure the length of the slings. You will also need a nylon thread.
That's all from the materials, and from the tools, you need a gypsy needle, pliers, and you may need a shoe hook, although I didn't use it. For stitching I only needed nylon thread, a needle and pliers.

Small operations need to be done with each bag. If you have 8 bags, then set one aside for now, and the rest need to be pulled together. In order to pull it together, you need to take a bag and thread a needle and thread from the bottom at a distance of about 5 centimeters - maybe a little more. After threading the thread, all that remains is to turn the bag inside out. This is done so that in the end the pear from below is spherical in shape. After all the bags are pulled together, you need to fold them into each other so that the boxing bag itself turns out strong. It is clear that the more bags you use, the stronger the pear will be, but the main thing is not to overdo it. Remember that you will also have to sew them together.
Now you almost know how to make a punching bag, but you still need to sew on the straps. It is desirable that the slings be wide. Before we start sewing them on, we need to sew the bags themselves a little so that it is convenient to sew on the slings. We sew the slings at the top, stepping back a few centimeters from the edge.
First, for convenience, you can attach the outer sling with threads, and the next line will pass through the outer sling, bags and rear sling. We make two or three lines with nylon threads, and move on to the next step. I think that no more is needed, but if you want, you can make additional lines to be sure.
Now we move on to the loops on which our pear will hang. You need to sew on at least five loops, and to do this you need to cut the sling into equal lengths. Also, you need to measure the same distance that will be between the loops. Or at least approximately the same.
We fold the segments of which there will be loops so that the middle is bent into a corner and the ends are parallel to each other. We apply and sew onto the slings so that the stitching forms a square. You can additionally stitch along the diagonals to make it more reliable.
Question, “How to make a punching bag at home?” almost exhausted, and only small things remained. The bag that we set aside must also be pulled together, turned inside out and placed in the other bags. After the filler is poured in, we will tie it up.

How to make a punching bag. A little about the filler
The punching bag itself is made, but, nevertheless, you may have questions about the filler. The filler may be different, but the pear you see is filled exclusively with sand - river and quarry. Previously, in the place of this pear there was another one, and this pear was filled with quarry sand. She hung there for at least 2 years, and during these two years, half of the time she was actively kicked. That pear was smaller, but it also consisted of fewer bags, and it was made differently. It was already starting to break out, so they changed it to a new pear. But it is not important…
The pear is hanging in the fresh air, so whether you like it or not, it will become heavy due to moisture. Rains, as well as condensation, moisten the sand, and the pear becomes heavier. But not much heavier, and the loops with slings can easily support the weight.
If the pear is hanging outside, then it is better to use crumbled rubber with sand as a filler, but just sand is also okay. After you have learned how to make a punching bag, you will make it and hang it, and of course you will hit it right away - or maybe not right away. Overall, it may not seem hard at first, but once the sand settles, it becomes quite hard.
It is better not to hit with bare hands, and for these purposes use elastic bandages. It’s better to first train with gloves, and when your hands harden a little, you can switch to bandages.
If you use sand, you can add two to two and a half buckets of sand. In general, see for yourself so that you can tie a bag that is not sewn.
Now we hang the punching bag, and for this it is better to use a chain so that the punching bag does not spin too much. Also, do not forget to evenly distribute the weight on the loops, which is very important.
Now you know how to make a punching bag at home. What do you think of the recipe for making a punching bag?
Sports equipment for practicing punches is necessary not only for boxers. They are used by representatives of all types of martial arts, including karatekas and capoeira practitioners. To save on going to the gym, but still have the opportunity to train every day, you can set up a workout space at home. Let's figure out how to do it at home - it requires a small financial investment, but is no less effective.
Selecting materials for sports equipment
Most novice athletes know only one option for making a homemade punching bag: sand is placed in a bag or bag, and this structure is suspended from the nearest branch or horizontal bar. Unfortunately, such a projectile will last no more than a couple of training sessions. How to make a punching bag at home so that it is durable and effective?
External upholstery and filling
The first option is the most budget-friendly. You will need thick fabric that needs to be rolled in 4-5 layers. Then you can sew it like a bag or simply tie the ends together. But the only advantage of such a pear is its cost-effectiveness, because every home has an unnecessary but durable rag. Minuses:
- To practice, you need tape or, otherwise you will rub off all your skin on the rough surface of the fabric.
- Through the pores of the material, sand or sawdust will sooner or later begin to spill out, which will affect the rigidity of the pear and the effectiveness of training.
- Despite the strength of such a projectile, a good fighter with a well-placed blow can pierce the fabric or simply rip the “homemade” weapon from its mount.
A tarpaulin works well; it is a little stronger than an ordinary rag folded in several layers, but still tends to tear. With frequent and intensive use, it wears out. The disadvantages are the same as when using conventional material.
You can make a homemade punching bag from. This is the best material used in the manufacture of projectiles in production. Pros:
- The high strength of the leather guarantees the tightness and durability of the pear.
- There are no pores - there will be less dust in the air, and the lungs will be able to breathe calmly.
- You can train without additional equipment, with your bare hands.
Sand or sawdust is used as filler. The first makes the projectile heavier and denser, so it fits better. Some people use pebbles and stones that are compacted inside the filler to add extra weight.
There are also options on how to do it, you will learn from the video below.
How to make a punching bag: step-by-step instructions
- Take a piece of leather of the required size (approximately 75x75 cm, but larger is better), lay it out on a flat surface and fold it in half.
- Next, the material needs to be stitched with durable polypropylene thread: make two transverse seams. You choose the diameter yourself - it will be the same as the distance between the seams.
- You can give the leather a pear shape by bending two corners on one side so that they touch each other, and then stitching them in an arc. The material is joined into a bag using a strong thread or lace.
- We take a piece of tarpaulin and sew a second bag in the same way, but the size is 1-2 cm smaller than the leather one. All seams are treated with silicone construction adhesive; Moment will also work.

- The fabric bag is filled with the available filler. If you want to include stones in the structure, then you should sew another bag, which will be 5-6 cm smaller than the second.
- The fastener is made from leftover leather: the loop is sewn on after the pear is completely assembled. Instead of a loop, you can purchase an iron ring with climbing carabiners.
You can hook the projectile on a piece of plywood or any other surface of suitable height.
Pear from tires and from the store
Another great option for men with really strong fists is to make a punching bag out of tires. It is strong and durable, and a moving projectile is much more effective than a bag. It is enough to take 3-4 tires and punch 4 holes in each side. The circumference between the holes must be the same on each tire. A strong rope is pulled through the resulting holes, and the entire structure is attached to branches or crossbars.

The easiest option is to buy the necessary sports equipment. Unlike multifunctional exercise machines, punching bags and punching bags are not very expensive. In addition, projectiles manufactured on a conveyor belt by specialized manufacturers will, of course, be stronger, safer, more durable and convenient for training. The only exceptions are punching bags made from tires - this type of “homemade” is also actively used in gyms.

- Classic leather pear on a pendant - the manufacturer offers models of excellent quality at prices starting from 3,050 rubles. It will serve for many years and does not wake up even with strong impacts: there is no filler inside and there is a latex chamber with good impact.
- A standard simple inflatable bag (for example, a product from a famous one can be purchased for 1,999 rubles). Its advantage is that you will learn to control your distance and dodge enemy strikes, improve coordination of movements and simply remove excess fat deposits.
- For a more advanced level, a heavy bag is suitable - for example, (9,790 rubles) weighing 45 kg. Practicing with such equipment will allow you to learn how to hit hard and knock your enemy to the ground with one blow.