Don’t rush to throw away your used plastic containers, because you can still find them useful application.
1. Decoration in a marine style
For creating unique decoration V nautical style you will need a small plastic or Glass bottle, which should be filled with plain water and attributes of the seabed: sand, shells, large pearl-like beads, coins, shiny beads and glass fragments. When all the components of the composition are folded, drop a drop of blue food coloring into the bottle, a few drops vegetable oil and some glitter. All that remains is to tighten the cork well and the stunning decoration is ready.
2. Stand for books and magazines

Simple manipulations will allow you to turn an unnecessary milk or juice canister into convenient stand for books, newspapers and magazines.
3. Faucet attachment

You can cut out a convenient faucet attachment from a shampoo bottle, which will allow your child to wash their hands or wash themselves without outside help without flooding the entire floor.
4. Napkin holder

A bottle from detergent can be used to create a bright and practical napkin holder, the design of which is limited only by your imagination.
5. Stationery organizer

Instead of just throwing out regular bottles of shampoo and shower gel, make them into bright and cheerful coasters in the form of funny monsters. To begin, simply cut off the necks of the bottles and mark the locations of future cuts. You can cut out a variety of different things from colored paper or fabric. decorative elements, like eyes, teeth and ears, and attach them to the bottles using superglue. Finished goods It is best to attach it to the wall using double-sided tape.
6. Containers for cosmetic accessories

Containers for brushes, ear sticks and decorative cosmetics.
Cut-down plastic bottles are perfect for creating adorable containers for storing makeup brushes, makeup, ear sticks and other small items.
7. Poof

From large quantity plastic containers you can make a charming pouf, the creation process of which is quite simple and straightforward. First you need to make a circle from plastic bottles the same height and secure it with tape. The resulting structure must be well wrapped with a sheet of foamed polyethylene, securing all joints with tape. The base of the ottoman is ready, all that remains is to sew a suitable cover for it.
8. Bracelets

Plastic bottles are an excellent basis for creating original bracelets. Use fabric, thread, leather and any other materials to decorate the unsightly plastic base.
9. Stand for sweets

The bottoms of plastic bottles of different sizes, painted in the desired shade, can be used to create an impressive multi-level stand for convenient and beautiful storage sweets.
10. Scoop and spatula

Plastic milk and juice canisters can be used to create a practical scoop and handy little spatula.
11. Protective cap

12. Lamp

A wonderful lamp made from plastic containers.
A small plastic canister can be a wonderful base for creating an original lamp.
13. Jewelry organizer

An amazing multi-level organizer that can be made from several bottoms of plastic bottles strung on a metal knitting needle.
14. Pots

Armed with scissors, paints and your own imagination, you can turn nondescript plastic bottles into original flowerpots.
15. Masquerade attribute

Two plastic bottles, painted silver, decorated with fabric and glued to a small piece of cardboard with straps, will allow you to give your child his own jetpack.
16. Containers for spare parts

Capacious containers made from unnecessary plastic canisters, which are perfect for storage, will help you clean up and maintain order in your garage. small parts, nails, screws and other small items.
17. Toy

Armed with scissors, markers and paints, you can turn unnecessary plastic containers into funny toys, the process of creating which, as well as the result itself, will undoubtedly attract the attention of children.
Useful tips
Plastic products are used everywhere because they require less investment to create than products made from other materials.
However, discarded plastic can take hundreds or even thousands of years to decompose, so it is important to recycle it or avoid plastic altogether.
The second option is very difficult to implement today, so recycling comes to the fore. Plastic can be sent to special factories for recycling it, or you can make useful things out of it.
In this collection you will learn how to make various useful things for your home and garden from plastic bottles.
1. DIY ottoman made from plastic bottles step by step

You will need:
Plastic bottles
Foam rubber
Knitting needles
Ruler
Scissors
Sewing machine
1. Wash and dry several plastic bottles covered with caps. Gather all the bottles in a circle and secure them together with tape.
2. Cut two circles from cardboard to cover the top and bottom of all connected bottles. Tape these circles to the connected bottles.

3. Prepare two rectangular pieces of foam rubber and one round piece. Rectangular pieces need to cover the side part collected bottles, and a round piece of the upper part. Secure everything with tape.

4. Make a cover for your seat from any fabric. If you like to knit, you can knit a cover.


2. We make a faucet extension from plastic bottles with our own hands
It will be more convenient for children to wash their hands.


3. DIY products made from plastic bottles: pocket for a rag/sponge

1. Cut the bottle into the desired shape.
2. Finish the edges sandpaper.
3. Hang on the faucet.
4. How to make a bag from plastic bottles

Photo instructions


Video instruction
5. What can be made from plastic bottles: cups for storing cosmetics

6. Feeder made of plastic bottles for a cat or dog
There are many ways to make bird feeders, but this one is designed for cats and dogs.

You will need:
2 large plastic bottles
Scissors
1. In the middle of one bottle you need to make holes slightly larger than the neck of the other bottle.
2. The second bottle needs to be cut in half crosswise.
3. Fill the bottom with food.
4. Connect the parts and open the lid.
7. Vase for sweets: master class on crafts from plastic bottles

You will need:
Plate, round plastic or thick cardboard
6 two-liter plastic bottles
Wooden or plastic rod (you can use a straight branch of suitable diameter and length)
Super glue
Spray paint and glitter (optional)
1. Making the base for the craft. To do this you need a plate, ceramic or glass plate. In the middle of the plate you need to enlarge the hole to 10 mm using a drill.

2. You will also need to use a drill to make holes in the center of the three plastic bottle pieces you will be using. It's easier to drill from the inside out.

3. Cut off the bottom of each of the 6 plastic bottles. Place 3 parts on the rod and secure with glue. Glue the remaining parts to the base (plate) around the rod. If you wish, you can spray paint everything.

It is worth noting that the rod is held on the base thanks to a plastic part that is glued to the plate, as well as to the rod itself.
4. If you wish, you can decorate your vase.


8. DIY wicker baskets from plastic bottles (master class)

And here is a version of a wicker basket made from plastic cocktail tubes:

9. Garden crafts made from plastic bottles (photo): broom

1. Remove the label from the plastic bottle.
2. Using a utility knife, cut off the bottom of the bottle.

3. Start making cuts on the bottle, leaving 1 cm between each.

4. Cut off the neck of the bottle.

5. Repeat steps 1-4 with 3 more bottles. Leave one bottle with a neck.
6. Place all the cut neckless bottles on top of one necked bottle. You will have a blank for a broom.

7. Cut off the top of one bottle and place it over the resulting blank.


8. Make two holes through all the bottles and insert wire into them and wrap the ends.
9. Insert a stick or rod into the neck and secure with a nail. You can also use glue.


Video instruction
10. Modular boxes: description of crafts made from plastic bottles

You will need:
Several large plastic bottles or canisters
Stationery knife
Scissors
Marker or pencil
Strong thread.
1. Cut a suitable hole from a bottle or canister using a utility knife and/or scissors. It should not be too small for everything to fit, or too large for the plastic structure to fall apart.

2. Start connecting the bottles with a strong thread. Start with two, then add two more already connected to them, and so on. Tie strong knots. You can also try using hot glue or superglue (Moment glue).

3. Assemble a design that is convenient for you. You decide how many rows and “floors” to make. However, it is worth knowing that the higher the structure, the less stable it is. You may need to secure the entire structure with rope again.

4. It's time to put scattered things on the shelf.
Waste disposal is one of the most acute problems facing owners summer cottages, especially since most dacha communities are, in principle, not equipped with garbage containers. Undoubtedly, paper and some household waste can be burned, and organic matter can be buried in the beds or sent directly to compost pit. But what to do with the well-known plastic bottles, which are strictly prohibited from being burned in a stove or fireplace, and burying is useless, since it will take hundreds of years for the plastic to decompose? There is only one way out - to use it for good. How to use plastic bottles at home will be discussed in this publication.
The use of PET containers in a summer cottage
 What is a plastic container? These are, first of all, polymeric material and ready-made containers. From this angle, any summer resident with a creative vision and straight hands will be able to make a lot of useful devices for the household from an ordinary PET bottle, create elements garden decor and turn empty containers into necessary things.
The main advantage of plastic containers is the lack of cost. In addition, PET is light, plastic, resistant to atmospheric influences and UV radiation, and can be easily processed. A plastic bottle filled with water can withstand enormous external pressure and can act as a heat accumulator. And most importantly: in any variation, all plastic containers have a threaded section and a lid. And this is a very important thing for any master to do, which will help fasten products if such a need arises. Let's consider several options for using plastic containers in the garden.
Plastic bottles for watering the garden
The first thing you can use ready-made PET containers for is for watering. Irrigation of the site is generally a pressing issue for most summer residents, especially for those who receive water on a schedule or visit suburban area exclusively on weekends. In such a situation, useless plastic bottles will help, which will help create for the entire site without any financial costs. Let's look at three easy-to-implement options for creating a system drip irrigation based on plastic bottles of various capacities.
Simple root irrigation system
 In order to water plants in doses and automatically, you will need:
- PET containers with a volume of 2 liters at the rate of one bottle - one plant.
- foam rubber (any scraps).
Pour water into each container to 4/5 of its volume. Insert a piece of foam rubber into the neck instead of a cork. Place the bottle under the plant so that the neck is in close proximity to the plant's root. As you empty, simply add water to the container. 
Drip irrigation
 For this irrigation system, the size and shape of the containers does not matter. According to reviews from summer residents: the more, the better. Bottles need to have their bottoms cut off. Use a hot awl or thin drill to make 3-5 holes in the cork, 1-2 mm in diameter. Screw the stopper tightly onto the neck.
Dig such a container vertically (neck down) near each plant and fill it with water. Such a stationary root irrigation system requires only timely filling with water.
Hanging irrigation system
 IN this option Whole bottles with a capacity of 2 to 5 liters should be used. depending on the reliability of the fastening system. Just like when creating drip system, make several holes in the cork with a diameter of 1 mm.
Now you need to build a support. By different ends The beds should be dug into the beds, with a jumper (slat, timber) placed on top of them. TO top crossbar hang the filled containers with the neck down.
To prevent water from eroding the ground, the area where water drops fall should be mulched.
 The advantages of a watering system made from plastic bottles are undeniable:
- the soil is moistened directly in the root zone of the plant;
- Irrigation is carried out with water heated by the sun;
- possibility of adding fertilizers directly to water;
- variability of application.
But the most important advantage of such watering is that it does not require human presence.
Agricultural technology using PET bottles
Any container can be used to grow greens. The main thing is to ensure timely watering and avoid stagnation of water in the lower part of the container. This can be done by creating one from plastic bottles, which will not take up much space, but will decorate your fence, balcony railing, or house wall.
Vertical garden with horizontal bottle mount
 For such a structure you will need:
- PET bottles, capacity 2 -5 l;
- soft wire.
1/3 of the side of the bottle is cut out. The plug is screwed onto the neck. On the side opposite to the cutout, a mass of drainage holes is made with an awl (nail, drill).
The bottles are filled with a substrate, inside which seedlings or plant seeds are located. The improvised pot is attached to a vertical surface with soft wire. The remaining containers can be fastened one below the other or in a checkerboard pattern.
Garden made from vertically installed PET containers
 This design is more complex than the previous one, but is much more efficient and is relatively autonomous. So, to create such a design you will need:
- PET bottles, volume 1-3 l.
- rubber or silicone hose ½ inch.
- line segment sewer pipe with plugs, diameter - at the discretion of the owner.
The bottles are cut approximately in half. The upper part will be used to create vertical garden, lower - will be used in creating jewelry, which will be discussed below. The top parts of the bottles are attached to each other with the neck down. A hose with holes for irrigation is laid through each vertical row. The free space is filled with earth or substrate. The upper part of the hoses is secured in the low tide using necks and caps from plastic bottles.
 Water is supplied to the system from the water supply, and a section of the sewer pipe will act as a liquid storage tank. This design allows for rational use of water for drip irrigation. A vertical garden made from plastic bottles will not require any space or large financial expenses from the summer resident. You can always make unnecessary packaging such a design that is best suited directly to your dacha.
 In the section on agricultural crafts, only options for creating a vertical garden were considered. In fact, there are dozens more ways to use TET containers for agricultural purposes. From plastic bottles you can make light, plastic and durable containers, which are widely used as pots, containers for seedlings.
PET bottles for decorating a summer cottage
Due to their properties, plastic containers have long been successfully used by our summer residents to create garden decor. Next, let's look at several examples of the successful use of plastic bottles of various sizes in garden decoration.
Fencing beds and flower beds
 Most simple design fencing made of plastic containers - palisade. In order to make a continuous fence of such a design, you will need a mass of bottles of the same volume and shape, filled with earth (sand, clay)
 Now the small matter is small: we assemble the structure. We dig each container into the ground halfway, creating a “bottle picket fence.” After construction. You can leave it as is, or you can paint the resulting border in any color of the rainbow.
You can take a simpler route: do not dig in the elements of the palisade, but fasten them together with tape. 
The structure is simply placed on the grass, outlining the boundaries of a flower bed or bed.
garden path
 For creating garden path you will need bottoms from PET bottles with a capacity of 2 liters.
- the soil is leveled.
- covered with a layer of wet sand, layer thickness 70-100 mm.
 The bottoms are laid out on the future path and carefully driven into the sand until completely filled. The joints between the bottoms are filled with dry sand, and for better fixation - with sand-cement mortar.
Flowers from PET bottles
 You can simply decorate your summer cottage using “plantings” of plastic flowers.
 Making such a composition is extremely simple: you just need to awaken your imagination, pick up a knife, several plastic bottles and a coil of thick wire.
From the tapering part of the bottle you can create beautiful flowers, which will be used to create bouquets and decorate crafts for the home and garden.
We cut the neck lengthwise, forming six petals. We round each one with scissors. We melt the edges of the petals over an open flame to give them volume. Inner part The flower can be cut out of plastic of a different color. We glue (sew together) the structure using polymer glue or thin wire. 


Animal figurines for garden decoration
 The Internet is replete with photographs of funny animals made from plastic bottles. If you decide to decorate your garden with funny little animals from PET containers, then the easiest option is funny pigs and bunnies.
The bunny is made simply:
- in the tapering part two cuts are made for the “ears”;
- The ears themselves are cut from a plastic bottle.
The structure is assembled using glue.
 Pigs are made similarly, but only horizontally. The main thing is to color your creation correctly and make it recognizable.


Household supplies made from plastic bottles
What can be useful for a domestic gardener? Broom, dustpans, pest traps, washbasins, various containers for storing small items. But a simple rope is recognized by most summer residents as one of the most functional and useful materials in the household.
Rope made from PET bottles
 A rope made from a plastic bottle will help out in an unforeseen situation and will become an indispensable assistant summer resident How to make strong rope from a plastic bottle with your own hands? To create a tape from PET bottles (on an industrial scale), you will need to make the simplest machine, consisting of:
- blades from a stationery knife;
- 4-8 metal washers with an outer diameter of 25-30 mm and a thickness of 2 mm;
- 2 bolts with nuts, diameter 4-6 mm, length 40-50 mm;
- board (piece of plywood, chipboard), 16-25 mm thick.
We assemble the structure. We drill in the board through holes for bolts. The washers will be put on them. The distance between the bolts should be such that there is a distance between the washers equal to half the diameter of the washer. Now install the washers on the bolts. The height of the “pyramid” from the stand will correspond to the width of the tape. Place the blade on the top washer, cover it with the washer, and secure it with nuts.
To obtain the tape, cut off the bottom of the bottle (it is useful for making garden decorations), push the edge of the bottle between the blade and the stand. 
There are many options for using rope made from plastic bottles. Durable and lightweight tape is used by domestic gardeners for tying vegetables, trees, creating supports for climbing plants, furniture weaving, handle braiding garden tools etc. A feature of such tape is shrinkage when exposed to high temperature. When heated, the PET tape assembly self-tightens!
Garden broom
 In terms of its performance characteristics, a broom made from plastic bottles is not inferior to its commercial counterparts. To independently create such a useful household product you will need:
- 7 PET bottles, volume 2 l;
- shovel handle;
- wire;
- two self-tapping screws (nails);
- awl, scissors, knife.
Cut off the necks and bottoms of six bottles. Using scissors, cut strips on each piece, not reaching the top edge of 5-6 cm. The width of the strip is 0.5 cm. Cut the bottom from the untouched container (do not touch the neck!). Next, repeat the operation similar to the previous blanks.
 We assemble the structure. We place the rest of the blanks on the bottle with the neck. We compress the resulting product from the sides and fix the position of the blanks with wire. All that remains is to attach and secure the holder.
A broom made from plastic bottles is ready for use. The whole process is shown in detail in the figure.
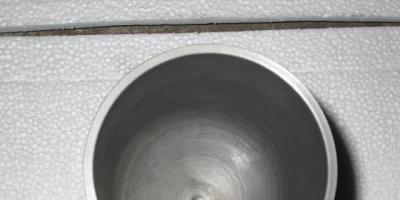
Scoop made from plastic containers
 This product will be an excellent addition to a broom made from PET containers. Everything is simple here: take a plastic container and use a marker to mark the shape of the future scoop.
Cut strictly along the line using a stationery knife. Such a scoop from plastic canister will last long enough. 
The simplest washstand
 To make the simplest one from a plastic bottle, you need to cut off the bottom of the container, turn it upside down, and make holes for attaching to a vertical surface.
You can wash your hands by unscrewing the cap a little so that water flows through the loose connection.
Containers for storing small items
 Any dacha owner has a lot of little things in his household. One problem is that they all need to be sorted and available when needed. To store small items, you can easily make containers from plastic containers. Any one you have on hand will do:
- We make a hole in the upper side part, the size of which should allow you to easily remove objects from the container.
- We drill a hole in the lid and screw in a bolt with a diameter of 2 mm.
- Place a washer under the bolt head.
- WITH reverse side fix it with a nut.
 We assemble the structure. We run the ends of a piece of wire under the washer and form a loop. Screw the lid with a loop onto the container. Now it can be easily placed on a vertical surface. An ordinary nail can serve as an element for hanging a container on a vertical surface.
If you use plastic containers from household chemicals or machine oil, then you can use a similar method to assemble an entire chest of drawers for storing small items.
Insect trap
 Mosquitoes and flies are the eternal “neighbors” of humans, and it is almost impossible to get rid of them. However, their population can be reduced by using the well-known PET container as a trap material.
We cut off the tapering part of the plastic bottle, turn it over and insert it into the remaining part with the neck down. You can use sugar syrup as bait. If you add a little yeast to the composition, you can get rid of not only flies and ants, but also wild wasps.
A simple weather vane made from a PET bottle will help scare birds away from fresh crops and drive moles out of the area.
The design is simple: we cut out and bend the side sections of the container in the shape of blades. We place the resulting product on a thick wire or stick. The wind rotates the weather vane. Vibration is transmitted along the guide, which (according to experts) is very disliked by moles and feared by birds.
Bird feeders
 The simplest feeder on personal plot, will attract birds that will help the owner of a summer cottage fight pests and insects.
They are not difficult to make: just cut out windows in the side of five-liter plastic bottles. The handle is useful for hanging the feeder on a branch. 
Greenhouses made from PET containers
 , discussed above, can be easily done by any summer resident. But if you have experience in carpentry, then with the help of PET containers you can create an excellent greenhouse, without which in our climatic zone It is impossible to grow an early harvest.
Such structures have many advantages, the main one being low cost. PET is much stronger than polyethylene film and much cheaper than traditional polycarbonate. The construction made from plastic bottles is warm and light. It can always be repaired by simply replacing the damaged element.
There are two technologies for constructing greenhouses and gazebos:
- From plates.
- From whole elements.
Frame
Almost any material is suitable for its creation:
- The metal profile is durable and strong, but expensive.
- Wood is available and easy to process, but is short-lived.
- PVC pipes s – great option, if you already have enough pipes and fittings that you don't need to buy.
In any case, if you decide to make a greenhouse from plastic bottles with your own hands, then make the frame from the material that is most accessible to you.
It should be understood: metal carcass will require the creation of a capital foundation, which significantly increases the cost of the project. Support structure made of PVC pipes does not require a foundation, but requires reinforcement to withstand gusts of wind.
Filling
As building material for enclosing structures, it is better to use identical PET bottles with a capacity of 2 liters, from which the label must be removed.
For a greenhouse measuring 1.5 by 2.5, you may need from 400 to 600 PET elements.
Construction technology
The greenhouse is assembled from elements that are collected from PET bottles. The bottom of each building element (bottle) is cut off. The elements are then placed on top of each other, creating an improvised “plastic log”. To secure this element, a cord or rail is pulled through the middle. Ready block vertically fixed to the frame. The construction process continues until the frame is completely filled: in this way the walls are built and the roof is covered.
Buildings made from plastic bottles
 More serious buildings than gazebos and greenhouses can be erected from PET containers. Next, we will consider a method for constructing an outbuilding from plastic bottles, using the experience of Bolivian builders in practice:
- A pit is dug and a foundation is erected.
- We are creating a replacement for bricks, instead of which PET bottles of the same volume will be used. They are filled with sand, clay or earth, which is often left after digging a pit.
- The elements are connected to each other and laid in rows. A sand-cement mortar is used to connect the rows.
- A reinforcing mesh is laid between the rows.
After installation, only the necks of the building elements remain without mortar. For additional fastening, builders recommend tying the necks together, creating a kind of plaster mesh. Now all that remains is to carefully plaster the walls, hiding the material that was used for construction.
 This technology can be used for the construction of capital buildings: fences, garages and one-story residential buildings, which, (according to the craftsmen), are quite warm and strong.
This publication provided answers to the question of how plastic bottles can be used on the farm. Actually a new application this material is found every day, which cannot but please any normal person, because plastic is practically not recycled due to low profitability. By giving a “second life” to PET containers, we cleanse the planet of garbage that is simply buried in landfills or disposed of in incinerators, poisoning the environment.
Useful tips


7. Lift the fabric and thread the string through it.


Master class from plastic bottles. Mobile phone holder.

You can also make a good and very useful holder from a plastic bottle. mobile phone. You need it when you urgently need to charge your phone, you find an outlet, but there is nowhere to put the phone.
Prepare a 0.5 liter plastic bottle and pierce a hole with a knife to further cut off the unnecessary part of the bottle.
Using scissors or a utility knife, cut out a circle for the fork.

All that remains is to insert the cord from the charger into the “neck” and plug it into the outlet.
Master class from a plastic bottle. Chandelier.

You will need:
50 plastic bottles (volume 0.5 l)
Flower wire
Regular wire
Bulb
Spray paint
Glue (preferably a glue gun)
Scissors
Stationery knife
1. Prepare plastic bottles and remove labels from them.

2. Cut each bottle into the shape of a flower (see picture). To do this, use a stationery knife.

3. Spread the "petals" of the flowers.

4. Once you've completed steps 1-3 with all 50 bottles, it's time to paint them. Use spray paint or you can take a little more time and paint each flower acrylic paints. You can choose any color. You can also vary the colors by making some flowers one color and others another.

5. Make a circle out of regular wire. Wind the jute and use glue gun glue it to the wire. You will have the base of the chandelier to which the flowers will be attached.

6. Using floral wire, attach each flower to the circle you made from the wire.

There are two ways to attach floral wire to a flower: wrap it around the neck, or glue it.

This is what the first layer looks like.

7. Repeat all steps to make several layers. In this example, 3 layers were made.
8. Use jute to attach the chandelier to the ceiling (see picture).

What you can do from plastic bottles. Waterer.
Simply make holes in the cap of a plastic bottle with an awl or nail.

Products made from plastic bottles. Funnel.


Plastic products from bottles. Money box.

1. Prepare a plastic bottle. Rinse it off hot water with soap and leave to dry.
2. From colored cardboard, cut out details such as ears, eyes, snout and nostrils.
3. Use glue or double tape to attach all the parts.
4. Wrap the bottle with patterned paper.
5. For the legs, you can use empty spools that need to be glued to the bottle.
6. Make a cut at the top for coins.
We make a dispenser for plastic bags from a plastic bottle

You will only need one 3-liter plastic bottle in which to store your plastic bags.
Simply cut off the bottom of the bottle so you can slide the bags in, and the neck so you can carefully remove one bag at a time.

You can use sandpaper to make the edges of the bottle more even and smooth.

Making bracelets from plastic bottles

You will need:
Plastic bottle
Adhesive tape (the width of the bracelet depends on the width of the tape)
Double-sided tape
Felt (or other material)
Scissors
Stationery knife
Decorations
1. First, wrap some adhesive tape around the bottle. Make several "rings" as shown in the picture. Everything needs to be done carefully and evenly, since it is the tape that will determine how smoothly you can cut the bracelet out of the bottle.
2. Using a utility knife, carefully cut off each ring.


3. Carefully remove the adhesive tape.


4. Glue double-sided tape to the resulting plastic bracelet.
Well, who among us doesn’t like to drink? Well, at least if he doesn’t love you, then from time to time you have to. Sometimes after fun get-togethers with friends or family celebrations, there are a lot of bottles of wine or other “fun” drinks left behind. The first thing that comes to mind is to throw it in the trash. But don't rush! You will be surprised, but empty bottles of the same wine can be much more useful than you think. Take a look at these ideas for using empty bottles around the house - you might discover a ton useful little things and you can create one of these practical works of art with your own hands.
(Total 22 photos)

Place one of these special terracotta things on the neck of the bottle and voila! Your plants will water themselves.

2. Bookshelf.
Durable boards+ bottles = DIY bookhouse.

3. Candlesticks.
The long neck of the bottle will prevent the candle from going out, and the glass will protect from the wind.

4. Torches.
Fill these unique torches with citronella oil and stop mosquitoes from invading your property.

5. Hanging flowerbed.
It feels like the bottles grew from plants, and not the other way around.

6. Terrarium.
Clear or colored glass bottles are ideal for growing your own tiny garden.

Add some color and flair to your garden while still maintaining your personal space. This idea will work at home too.

8. Hummingbird feeder.
Tiny pollinators will love this awesome and eco-friendly feeder.

9. Chaise longue.
Looks cool, but is it comfortable?

10. Wind chimes.
This distinctive cork wine bottle is ready to take on the wind.

11. Chandelier.
A luxurious detail that would suit even a ballroom interior.

12. Hat rack.
The idea was presented by Lucirmás in Milan. Partly art, but at the same time useful thing.

13. Necklace.
Handmade in the USA. A similar necklace can be made to suit your own color taste.

14. Glassware.
Wine bottles are most durable due to annealing, which means they are ideal for making glassware.
15. LED lamp.
Are you looking for a unique lamp? affordable price? Simply insert the LED stopper into the wine bottle and voila!

16. Serving dish.
Affordable way serve appetizers at your next party.

17. Bottle tree.