The concept itself summer shower is known to almost all summer residents and does not raise questions, but when it comes to building country shower with your own hands, you have to figure it out.
Make a country shower with your own hands or purchase a ready-made structure?
Of course, nowadays you can buy a ready-made design for a country shower, install it on your site and enjoy it all season long. Such pleasure will cost from 10 thousand rubles. Ready solutions, as a rule, are equipped, either included or optionally, with all necessary details, including water tank and external fences. Construction is so simple, but very useful design You can organize it with your own hands within two to three thousand rubles, and with a little ingenuity and imagination, even less, because all sorts of things from old stocks can be used.
To begin with, it is worth deciding what the required degree of capital of the future structure is. A country shower can be either a mobile, collapsible structure that can be easily rolled up for the winter, or a serious structure with heating. Some craftsmen erect entire utility blocks, designed for summer use and including, in addition to a shower, a toilet and a kitchen.
Diagram of the multifunctional complex
As with any other building, first of all, you need to decide on the location. This will determine how to arrange the base of the shower and organize the cesspool.
Drain installation: what to pay attention to
The mobile structure does not require a special foundation; most often it is stuck directly into the ground in any location. convenient location plot. The collapsible frame implies lightness, which means a water tank of obviously modest volumes. In this case, separate cesspool not organized. The amount of used water that will flow to the ground will not particularly harm either plants or nearby buildings. The only requirement is that such a shower will have to be moved regularly so as not to waterlog the area directly under the shower stall.
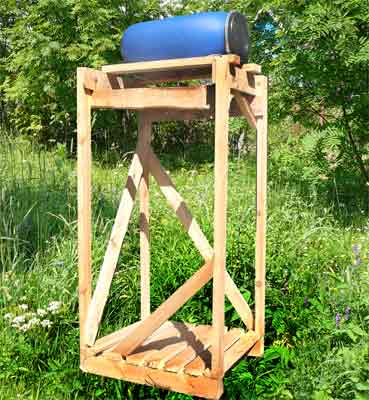
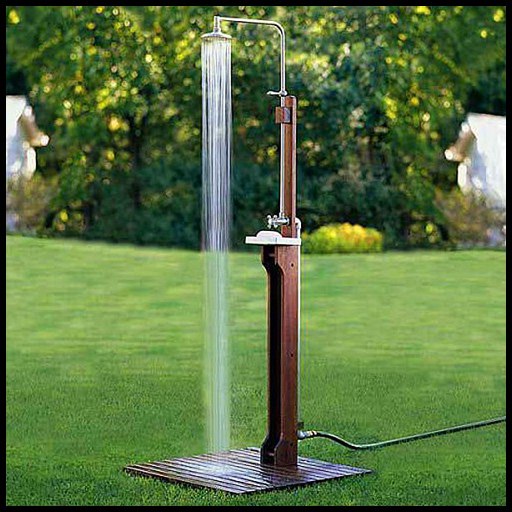
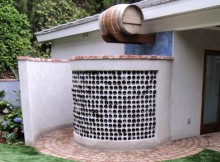 Option for a country shower
 In the case of a stationary shower, drainage should be considered at the stage of organizing the base. By the way, you should not combine the main cesspool on the site with the shower drain for sanitary and economic reasons. The problem is that the drain from the shower is too liquid for the main cesspool. This means that you will have to make sure that the cesspool does not overflow and clean it more often. In addition, waste water contains a lot of alkalis and surfactants from soaps and shampoos, and they are destructive to beneficial bacteria that naturally process waste in the pit. At most, the sump from the shower can be combined with the sump from the kitchen.
But it sounds much worse than it actually is. You just need to take into account a few logical points. Firstly, waste water must drain slowly (so as not to wash away anything, but also not to become swampy, and so that alkalis and surfactants have time to be neutralized). Secondly, in order not to harm plants and living creatures, including bacteria living in the ground, the seepage mark Wastewater into the ground should be below the fertile layer.
According to the standards, the cesspool is located at a distance of 15 meters from the house, septic tanks and dry closets are allowed to be installed 4-5 meters away. There are no clear rules for installing a summer shower.
Most often, a barrel is used as a reservoir for wastewater from a summer shower. If the barrel is metal, it should be treated with special compounds to prevent corrosion and rotting. It's a little easier with plastic. The volume of the barrel must be no less than a one-time water discharge. On average, it is equal to the volume of a water tank. The bottom and lid of the barrel are cut off. The resulting cylinder is dug into a pre-dug pit, at the bottom of which a filter, 30 cm thick, made of crushed stone and sand is installed. Crushed stone can be shed with clay diluted in water until it becomes milky. When the water goes away, the clay dries, the filter layer should be turned. This can be done in pieces metal fittings. You will need a segment from the lid that will cover the outer part of the barrel and act as an inspection hatch.
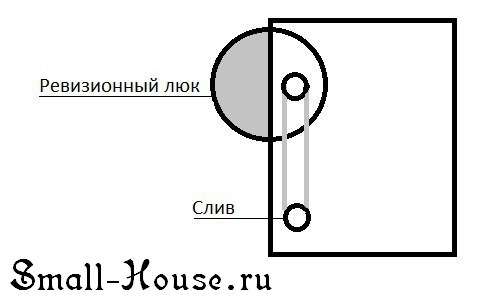 The role of the inspection hatch is difficult to overestimate
 The location of the shower cesspool directly depends on the foundation on which the structure will stand. In any case, you should not place it strictly under the structure for greater reliability and access. The monolithic base will force you to make a cesspool at some distance from the cabin, the pile structure will allow you to place the barrel, as shown in the diagram, overlapping. The choice of base depends on the severity of the proposed structure. For a shower it will be enough to build pile foundation, and it is not at all necessary to buy expensive screw piles. Simple ones are fine metal pipes, dug into the ground. The calculation is simple, one per corner and for every full 1.5 meters of length. A grillage made of welded metal parts is used as the bottom trim. If the foundation is monolithic or strip, the grillage can also be made of reinforced concrete. The main thing is not to forget to provide a hole for drain pipe so that you don’t have to drill a hole in the finished structure.
Frame installation: basic information
The frame of the shower cabin can be made of wood or metal, at the discretion of the owners. The most important thing is its load-bearing capacity. If the water tank is installed on the roof, the frame must support its weight along with the water. To ensure frame strength vertical racks fasten the top and bottom trim and reinforced with jibs, regardless of whether they are made of wood or metal. Wooden racks fastened with nails or self-tapping screws; metal ones can be welded or bolted.
 A shower in the country is a necessary thing
 Having chosen this or that material for constructing the frame, we must not forget that the shower is a place high humidity, which means a favorable environment for the spread of fungi and all sorts of pathogenic bacteria. A shower stall can last for many years, but the quality of use directly depends on the careful processing of the materials from which it is built. All wooden parts impregnated with bitumen mastic, water-polymer emulsion, and antiseptics. The outside of the frame is sheathed with any typesetting or sheet finishing material. This could be polycarbonate, siding, wooden lining or simple curtains for the bathroom. It all depends on your imagination.
Floor arrangement: an important detail
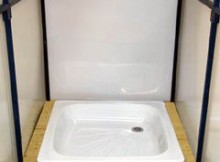 You can use a ready-made shower tray
 A country shower does not require a permanent floor. It is enough to make do with wooden ones. The boards are sawn to fit the width of the building, impregnated in two layers with a water-polymer emulsion, after drying which any biocide is applied, then varnished twice.
If the shower includes a changing room, you should take care that your shoes do not get wet while swimming. To do this, a wooden or metal grate is placed on the floor in the locker room. Instead of varnish, it is better to coat a wooden lattice with a compound. By the way, the grate can be made from PP pipes. It makes sense to install a tray in the washing compartment. Pallets are available in acrylic or enameled steel. The important thing is that, despite the price attractiveness of an acrylic pallet, it is significantly less durable. Acrylic is afraid of any abrasive influences, and at the dacha it will be difficult to protect it from soil and sand.
The pallet is installed in a hole in the floor, along the perimeter of which polyurethane foam. If the floor is covered with an acrylic compound, then the need for foam disappears, all joints will be tightened. For safety, place an anti-slip mat on the bottom of the tray or a grid similar to the one in the locker room.
Installation of water supply for a country shower
If the site is equipped with at least summer water supply, then the shower can be connected directly to it by making the wiring. But it can be used as a water supply, and most often a water tank is used. Water can be collected into it either from rain or manually (pipe water, well water, pump from a well, etc.). You can buy the tank ready-made. They come in different sizes and prices. Modern tanks are made of durable plastic, dark in color, with a flat bottom. You can choose a tank with a bottom area corresponding to the perimeter of the shower stall. This best option in terms of the rate of heating of water from the sun and the stability of the structure.
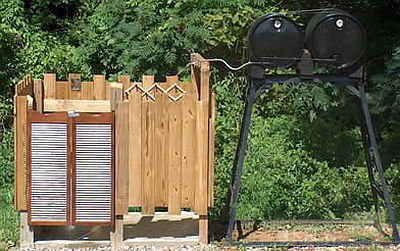
 A simple shower in the country
 You can build a tank yourself from metal or plastic barrel. Sometimes even old tanks are used washing machines. It is important that the volume of the tank is sufficient for the needs of the owners, that the water is heated quickly and that all necessary communications are easily installed. Pay attention to the presence of a drainage hole with a shut-off valve. It is installed at the lowest point of the vessel. This is necessary so that you can regularly drain the settled water with sediment and preserve the shower for the winter. The outlet hose must be higher than the drain so that only clean water flows from the watering can.
The watering can itself is not particularly difficult. A locking mechanism and a diffuser are attached to the spout hose.
The joints are sealed.
If desired, you can arrange heating of the water in the tank. There are a lot of options for heating water. These can be ready-made water heating elements, solar panels, which you can make yourself, a camping solar stove, and even the properties of the water supply hose itself.
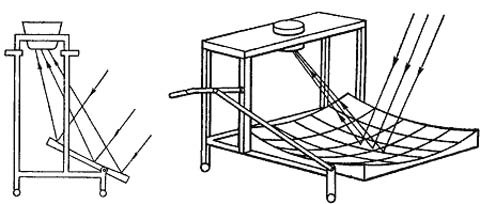 Heating water is important in the Russian climate
 If you use gas at your dacha, either mains or from a cylinder, you can heat the water due to elementary heat loss. To do this, a copper hose is drawn around gas-burners. In this case, it is important to remember that it is useless to burn gas in vain; the water will heat up faster when something is being cooked on the stove, due to kitchen utensils standing on the burner.
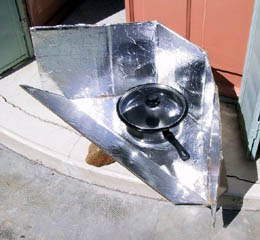 You can heat water with gas
 Insulation of a shower structure in a country house
Considering that in our latitudes summer heat- the concept is short-term, and it is necessary to take a shower, even if it is +12 outside, some insulation of the structure may be required. For a summer shower, two methods come to mind. The first is to skip the return line, the second is to use the properties of the casing.
 We insulate the structure
 If we are not talking about a permanent brick building with full finishing and insulation, then covering the frame with polycarbonate will completely provide the interior space with the necessary warmth even in cool weather. The fact is that the properties of polycarbonate allow it to accumulate and retain heat inside the perimeter, even if the shower is built without a roof and has a wide ventilation gap inside.
Outdoor shower: how to arrange it?
You can arrange a shower in your dacha with your own hands utility room, directly to country house, a separate building, right next to the wall of the house or even in an open space.
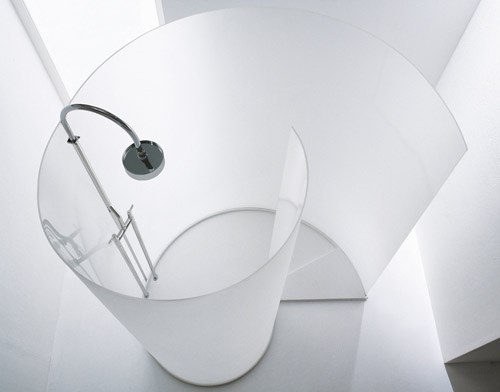
 The shower can be completely open
 Everything depends on climatic conditions.
If the shower is adjacent to the walls of permanent buildings, it is important to remember about high-quality drainage and waterproofing. Before you start building an outdoor shower, you should consider the consequences of its use. An outdoor shower should be easily ventilated so as not to create an environment for the spread of fungi. Water should not stagnate either in the tank or in the waste pit.
From an aesthetic point of view, everything is limited only by the owner’s imagination. Like any building, an outdoor shower should not contradict the general concept of the site. Modern choice finishing materials will help to harmoniously fit it into the environment.
IN Lately shower stalls have gained unprecedented popularity, which is why they began to be installed not only in small Khrushchev's baths, but also in large bathrooms of private houses. The cabins have gained fame due to their compact size, beauty and functionality. You can use the booth every day! This device very comfortable to use and also saves water well. Installing a shower stall is not a difficult task at all, however, professional workers charge a lot of money, especially if the work has to be carried out in a private home. Of course, you can pay the installation workers and not fool yourself. But don’t discount the option that you can do the installation yourself! This is not difficult to do, the work will not take much time, and, of course, you will not have to pay anyone.
Preparatory stage
On preparatory stage you need to purchase a good and high-quality shower stall from the store. Prepare the tools you will need during installation. Read in detail and carefully all the installation rules and nuances that are written in the instructions. And of course, cherishing the desire within yourself will help you cope with all upcoming tasks.
Sometimes, when purchasing a shower stall, owners of private houses encounter some difficulties. This mainly happens due to the fact that few people now buy original Italian souls. Citizens of our country always try to save money, and because of this, they very often give their preference to cheaper Chinese models. Be extremely careful when purchasing this product! There are often cases when the shower package does not match the instructions, and therefore sometimes you have to purchase the necessary parts.
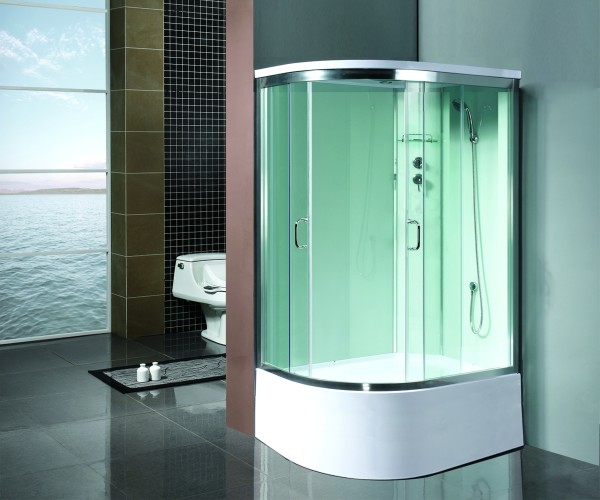
Stylish shower cabin
Should be given Special attention the fact that the rules for installing a shower stall can differ significantly depending on the configuration of the type of cabin, as well as the material from which it is made.
What to look for
If you already have a shower stall, you can skip this point of the article. But if you have not yet decided which model you need, then you should carefully read the selection rules. So, when choosing a shower stall, you must consider:
- Size. This point is the most important, because you must know for sure whether the model you choose will fit into your bathroom country house. You should also pay attention to the internal dimensions of the shower. You should feel comfortable and comfortable in it. At the same time, do not forget that in the shower you will have to raise your arms or bend over, so the stall must be free. If you choose a model with hinged doors, be sure to make sure that after installation you will be able to swing the doors open and nothing will interfere with this.
- Form. The shape of the shower stall is also very important! Today, the most common types are round, semicircular, corner, as well as square and rectangular models. It should be noted that square and corner booths take up much less space rather than round and rectangular. But in the latter you can take not only a shower, but even a full bath. Therefore, once again calculate all the space available to you and determine how it can be used as comfortably as possible.
- Functions. Different models of shower stalls have different functions. For example: Finnish, or Turkish bath, tropical shower, hydromassage, etc. Here the choice depends solely on your preferences. However, we would like to immediately draw your attention to the fact that simpler showers are much cheaper.
- Water pressure. It is very good if the water pressure and the pressure in the shower stall coincide with each other. IN own home this indicator must be at least 3 bar.
Paying attention to these simple rules, you can choose a stall that fits perfectly into your bathroom. Try to give your preference to original, high-quality models, especially if you choose a shower room for a wooden house. The service life of each cabin directly depends on the quality of the manufacturer. Therefore, the more reliable the manufacturer, the longer the cabin will serve you without breakdowns or leaks.
In order to wooden house able to serve you for as long as possible, it is necessary:
- Provide sewerage, water, electricity to the bathroom, and, of course, ensure excellent ventilation of the room.
- Read the instructions carefully, and if necessary, find videos on the Internet that explain how to act at one or another stage of the work.
- Prepare the optimal installation location for installing the shower cabin with your own hands.
If, according to your plans, the shower stall is located in a small bathroom, it is better to assemble it where there is more free space. Also, before starting installation, specialist developers recommend assembling the shower with your own hands without sealant. This will ensure that you have all the parts and fastening elements. Only after you have carefully studied the instructions, confirmed the presence of all parts, and completed the preliminary assembly, can you proceed directly to installation yourself.
The main difference in a private house is precisely that there are absolutely no conditions for good plumbing work. All this will have to be organized with your own hands, and that’s all.
So, if you install a cabin in a wooden house, you definitely need to waterproof the floor. You may even have to pour a cement screed.
For finishing the floor in the bathroom of a private house, it is best to use tiles. True, painting the floor is much cheaper, but tiles can provide additional. As for the thermal insulation of the floor, to solve this problem you will need roofing material, waterproofing mastic, as well as extruded polystyrene foam.
Waterproofing will protect surfaces from mold and dampness
Don't forget about the walls and ceiling. They will need it too additional protection from moisture and steam. For this purpose the walls and ceiling wooden house It is recommended to treat with waterproofing mastic. The best coverage for walls, as well as for floors, it is considered ceramic tile. As for the ceiling, it is best to turn your attention to plastic, mounted models. They will help you hide uneven ceilings and unnoticed electrical wiring, and will also protect wooden ceiling from moisture, steam and condensation.
Cabin assembly
The most important and most difficult part of the work begins, namely assembling the shower stall with your own hands. First of all, you need to carefully remove the apron from the pallet. It will only be needed at the very end of the work, so you can put it aside for now. At this stage of installation, you will connect communications, because if the screen is fixed in its rightful place right away, you simply will not be able to install pipes for communications.
You need to mount drain hose, and attach it to the sewer drain, securing it well with sealant (read more about shower drain). It is necessary to install a sealing gasket into the drain hole on the pallet, having previously treated it with the same silicone sealant. Now you need to attach the drain assembly using screws.
After connecting all communications and treating with sealant, you need to check everything for leaks. To do this, the sealant must be allowed to dry, and then pour water into the pan. If within half an hour not a single puddle has formed on the floor, then you did everything right. All you have to do is adjust the pallet legs. For this you will need a simple level. Make sure that the pallet is in a level, horizontal position, and you can proceed to the next part of the installation yourself.
The next step will be the installation of side panels and doors. For correct installation you will need sealing glue, as well as hardware. The side panels must be placed on the edge of the pallet, in special recesses, and fixed in the correct vertical position. This can also be done using a level. The side panels must be placed side by side and make sure that everything mounting holes coincide with each other. There are much more holes at the top of the panels than at the bottom, so it is almost impossible to mix them up.
The glass is very easy to install. You need to define correct position(there are fewer holes at the bottom) and then insert the glass into the corresponding guides, which are attached to the rack with self-tapping screws. The glass around the edges must be treated with sealant, and then put in place and tighten the screws. Installing the doors is also very easy. This is done only after the sealant has completely dried. You need to install the guides one by one (first from above, then from below) and then put on the doors and insert them into the grooves. That's all. The final step will be installation top cover. Several are attached to it functional features soul (fan, light, etc.). Special wiring is carried out for electrical devices.
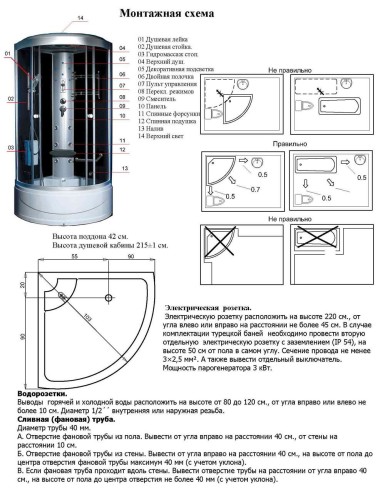
Cabin wiring diagram
Once your shower is completely installed, you need to check both the electrical and plumbing fixtures. Make sure everything works and you can safely take a shower in your new DIY shower stall.
Now you know how to install a shower. Moreover, it should be noted that the shower cabin in a small bathroom and in a large one are installed in exactly the same way. We really hope that you will be able to install all communications yourself! Good luck to you in this difficult matter.
How to make a shower in your home with your own hands using available building materials and relatively inexpensive plumbing? This question arises before many compatriots planning major renovation bathroom.
Considering that the price of the services of professional plumbers is high, the topic of doing a bathroom renovation yourself is of particular interest. Therefore, let’s consider the technology of carrying out construction work that everyone can handle.
Bath or shower
When choosing how to arrange a bathroom, you need to decide whether a shower or a bath is more suitable.
For owners of apartments with a small or combined bathroom, this issue has long been resolved, since a shower takes up much less space than a bathtub, and in addition, not much water is wasted when bathing, which has a positive effect on utility bills.
Again, the bath costs more shower tray, which is mounted before installing the cabin. And finally, a home shower can be made with your own hands from a small amount of building materials, while a bathtub can only be purchased.
So, we decided that a shower tray with a cabin is more accessible and more profitable to use; all that remains is to decide how to make a shower at home.
Selection of plumbing fixtures
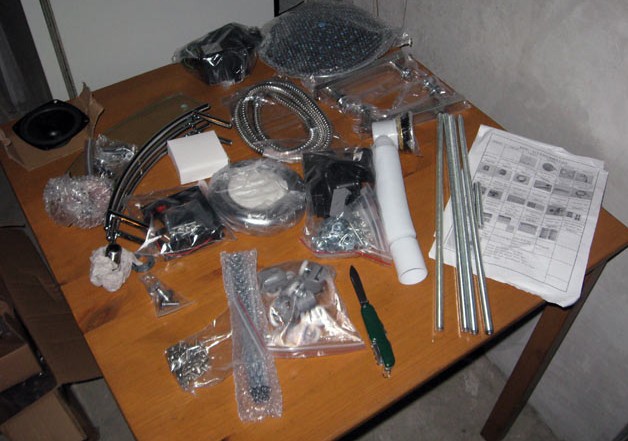
It doesn’t matter what you decide to build, a shower house for a summer house or a full-fledged washing cabin in an apartment, you cannot do without purchasing a number of plumbing fixtures.
To build a shower in a country house we will need the following:
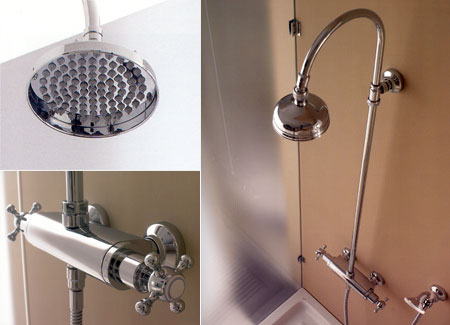
- or a stand with an integrated mixer and watering can included. All these devices can be purchased separately, but in this case their price will be slightly higher.
- Siphon for drainage (trap).
- Pipes for supplying water and for discharging wastewater into the sewer system.
- Flow-through or storage heater, if a centralized hot water supply is not provided.
Important: If you can save money when choosing building materials, then you should not save money when choosing plumbing fixtures. Faucets and other expensive components purchased at suspiciously low prices are most likely of poor quality, and therefore will not last long and will require replacement after a short period of time.
Selection of building materials
Despite the fact that a shower house for a country house can be made from improvised materials and boards left over from the construction of a fence, equipping a bathroom in a residential building requires a slightly different approach.
The easiest way is to purchase a ready-made cabin with an acrylic pallet, but since we decided to do everything with the least material costs, we’ll try to assemble a pallet from brick, concrete and ceramic tiles.
It is better to prepare solid ceramic bricks. As a masonry mortar, you can use tile adhesive or a less expensive mixture of cement and sand at the rate of 1 part cement to 3 parts sand.
In addition, concrete will be required to fill the internal volume of the pallet. You can prepare concrete with your own hands, since the production instructions are simple: mix 1 part of cement with 2.5 parts of sand, after which 3 parts of small crushed stone are added to the mixture.
The mixture prepared in this way is mixed with water and mixed thoroughly until a homogeneous consistency is formed.
So, after we have decided on the selection of the main building materials Let's look at how to make a shower at home. As an example, consider the construction of a simple corner shower.
Construction works
Instructions for carrying out construction work are multi-stage:
- On initial stage We plan how the shower room for a country house will be arranged, namely, where the plumbing equipment will be located, where the shower tray will be, what its configuration will be, etc.
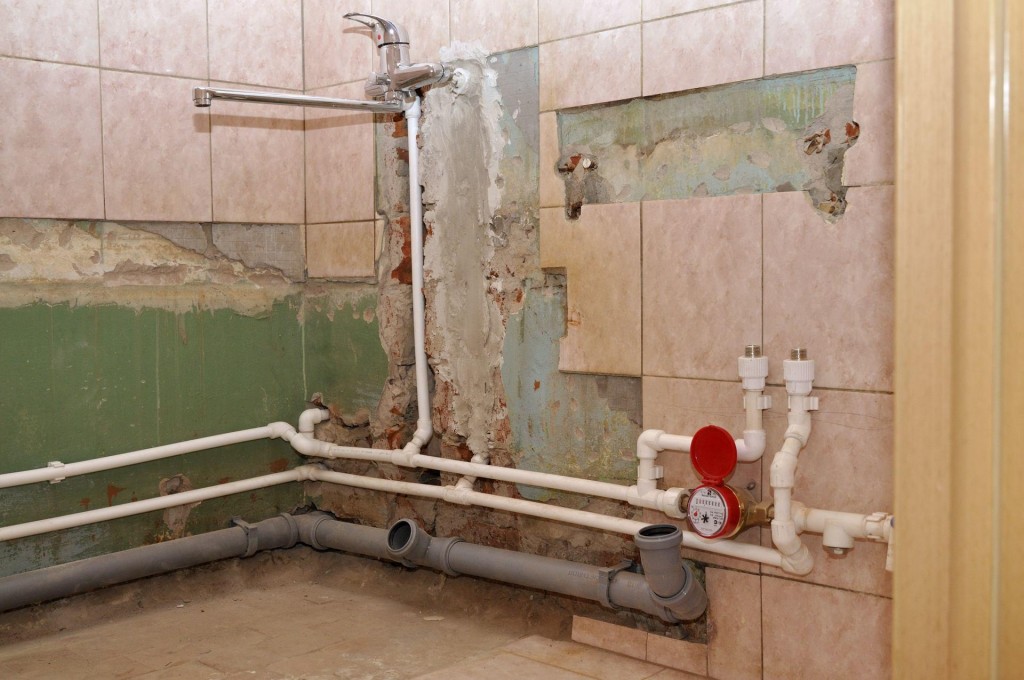
- After we have decided on the size and configuration, we supply all the necessary communications, namely pipes for water supply and pipes for drainage.
Important: More detailed information You can find information about methods of installing polypropylene or metal-plastic pipes in the relevant articles on our portal.
- Preparing the base of the floor and the adjacent wall. We remove old ones from the floor and wall Decoration Materials, assess the condition of the surfaces and, if necessary, strengthen them.
Surfaces are strengthened by applying deep penetration impregnations, such as concrete contact. After the impregnation has dried, you can begin leveling the surface with a cement-sand mixture or tile adhesive.
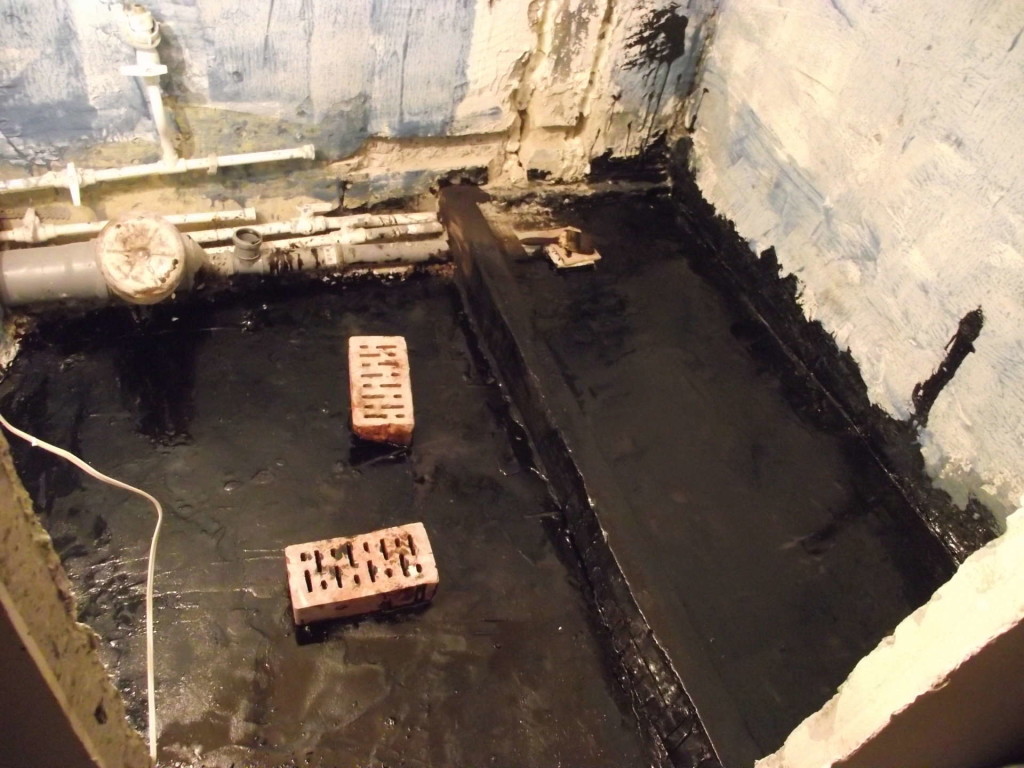
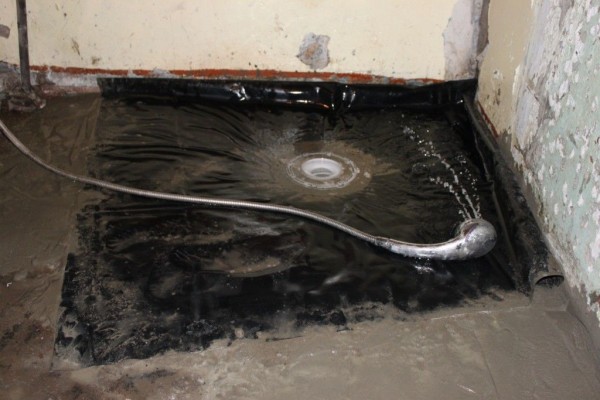
The photo shows an example of waterproofing
- After the surfaces have been strengthened, they must be waterproofed. For this we use bitumen mastic, which is applied in a thin layer using a brush.
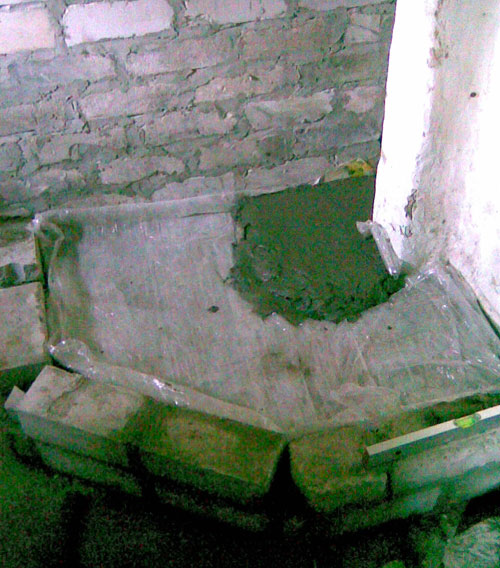
- Next, along the perimeter of the future pallet, we lay out the side in two bricks.

- After the masonry has dried, we put on the serviced siphon (ladder).
- We reinforce the internal volume of the pallet between the sides with wire mesh and fill it with concrete. We do this so that there is a slight slope and so that the water flows away by gravity.
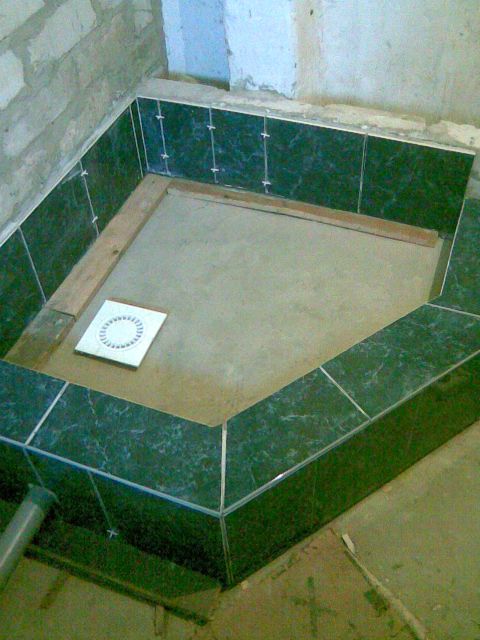
- We cover the wall and the adjacent pallet with tiles.
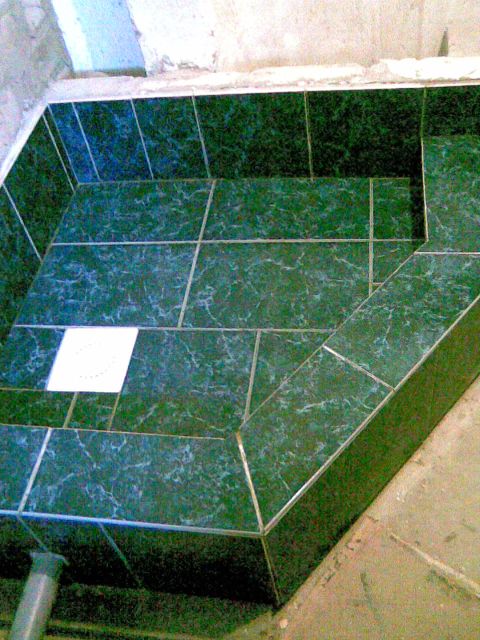
Important: We use thin wall tiles for the walls, and thicker rough (non-slip) floor tiles for lining the pallet.
- We connect a pre-prepared shower panel or stand to the water supply. We check for leaks at the connection; if there are no leaks, move on to the next step.
- We attach the plumbing fixtures connected to the water supply to the wall.
- After the pallet is built and shower equipment installed, it's time to take care of the fence.
Factory cabins are equipped with glass or polycarbonate doors. But, since we do everything with our own hands, we’ll stop at purchasing a special curtain.
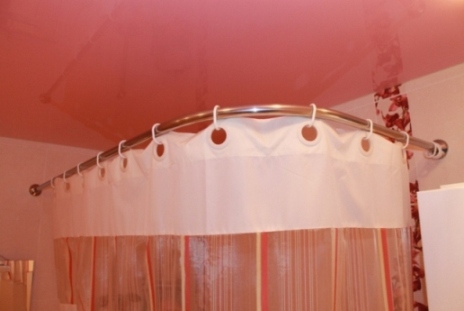
Special bracket made of of stainless steel can be purchased both on the market and in specialized bathroom furniture stores.
The bracket is fixed on adjacent walls and perfectly supports light polyethylene curtains.
Conclusion
Now that we know how to make a shower in country house or in an apartment, it's time to buy necessary materials and get to work.
Still have any questions? More useful information can be found by watching the video in this article.