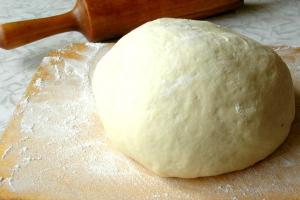
An organza lampshade looks simply amazing, and there is no need to water such a flower.
Materials and tools:
. Organza golden swamp and turquoise color
. Golden green beads
. golden wire
. Aerosol acrylic paint golden color
. Lamp
. Glue
. Pliers
. Wire cutters
1. Cut out 40 petals along an oblique line from organza in two colors.
2. We fold the petals of two colors in pairs and, stepping back from the edge 0.5 cm, sew a zigzag seam with stitches 2 cm wide. Cut off the excess fabric. Lightly pull each petal along the seam so that the edges are wavy.
3. We cut the wire into 20 pieces 10 cm long and attach a bead to their ends. We collect the blanks into a bundle. We twist the ends of the wire so that we get a flat leg. These will be fixes.
4. Cut a wire 35 cm long and string 50 beads onto it. We bend it so that there are 30 beads on one end and 20 beads on the other.
5. Using glue, attach the petals to the lampshade so that you get a flower.
6. Attach the stamens and long wire, imitating brushes.
7. Paint the leg of the lampshade with gold paint.
"Handmade"
making a lampshade like this

An ordinary lampshade under an elegant cover looks completely new. The most suitable fabrics are light, stiff and transparent. Choose colors so that the lamp emits a warm, caressing light; white, cream and pink shades create a good mood. You can successfully use an old lampshade. For an ugly frame, take an opaque fabric - taffeta, light silk or thin cotton. If you like the color of the lampshade, let the design be visible through the transparent cover.
Curly lampshades
Using this method, the lower cover and the gathered upper cover are sewn separately, which are held on by an elastic band. The lining is placed over the lamp and the top edge of the lampshade, and the outer cover is attached just below, with the junction hidden under a wide ribbon. Finish the case with a silk ribbon, light braid, highlight its narrowed part with a bow, rosette or silk flower - this is a convenient reason to practice with decorations. You will need: A concave frame or lampshade. Centimeter, ruler, pencil and scissors. Paper. Textile. Threads. Elastic band 6 mm wide. 2 safety pins. Tape 50 mm wide.
Measurements. Measure the bottom circumference (A) with a centimeter, add 4 cm to the seam. Measure the length of side (B), add 8 cm for the elastic drawstring. Determine the height of the outer cover (C) and add 1.5 cm for the hem. Write down your measurements. 
Calculation of fabric consumption. Using the measurements taken and taking into account seam allowances, draw a rectangle AxB on paper. Draw a second rectangle taking into account the gathering allowance Cx2A. Determine the fabric consumption from the pattern - you need to cut one rectangle of each size.


Open it up. Pin the pattern onto the fabric lengthwise and cut out the outer cover and lining.
Stitching the lining and cover. Sew short sections of the lining using a French seam. On open sections, sew drawstrings, turning them first by 3 mm, then by 12 mm. Leave some unstitched areas on each drawstring so you can thread the elastic through. Sew the short sections of the outer cover with a French seam. Fold one long edge 3mm and stitch. Turn it over again by 3mm and stitch again.

Lining adjustment. Thread the elastic bands into the drawstrings and secure the ends with pins. Place the cover on the lampshade, tighten the elastic bands so that the cover fits the lampshade. Trim the ends of the elastic bands and sew them together. Sew the drawstrings with a hidden seam.

How to measure elastic for an outer cover. Wrap the elastic band around the lampshade at the level of the top edge of the cover. Pull the elastic slightly so that the cover fits snugly. Cut the elastic and sew the ends together.
Attaching the elastic band. Fold the elastic band into quarters and mark the folds with pins. Fold the cover in the same way and mark the folds. Pin the elastic to the top edge of the cover with wrong side, combining the marks. While stretching the elastic and gathering the cover into folds, sew the elastic in a zigzag pattern.

Finishing. Place the outer cover over the lining that is already on the lampshade. Tie a ribbon around the narrowing point to close the line of connection of the covers, attach it with a few stitches. Decorate the lampshade with a bow, rosette or flower.


Lampshade - “coolie”
You can also sew a cover for a conical lampshade. Here are instructions for sewing a lampshade cover from transparent fabric in the flower mentioned above. This cover is simply glued to a small white conical lampshade. If you don't have an old lamp that can be refurbished, pick up an inexpensive, color-matching lampshade at the store. You will need: Conical lampshade. Centimeter, ruler, pencil, scissors. Newspaper. Threads. Ribbon 35 mm wide for tying the top and for the bow. Universal glue.
Measurements. Measure the bottom edge of the lampshade (A), add 4 cm for the seam. Measure side (B), add 6 mm. Draw a 2AxB rectangle on paper, taking into account seam allowances, and calculate the fabric consumption. 
Open it up. Using the pattern, cut out a rectangle of fabric lengthwise. Sew short edges with a French seam. 
Hem. Turn one edge under 3mm and stitch. Fold the edge in again by 3mm and stitch again.
Gathering the top edge. Fold the cover in four and mark the folds with pins. Sew along the top edge twice, starting and ending at the pins. Mark four equal sections on the top edge of the lampshade with a pencil. Place the cover on the lampshade and, aligning the marks, gather it to fit the size. Distribute the gathers evenly, fasten the threads and remove the cover. 
Tying the top. Cut the ribbon so that there is enough for the top edge, adding 1.5 cm to overlap the ends. Fold the ribbon over the gathered edge, fold one edge, and attach the ribbon. Stitch the tape to the edge, catching both sides and gathers in the seam. 
Finishing. Place the cover on the lampshade and glue it with universal glue in several places. Tie the remaining ribbon over the glued area into a bow to disguise it.
Advice. Tulle lampshade. So that the case is made of thin and soft fabric stayed better on the lampshade, it can be reinforced with a lining of hard tulle. Measure the distance from the edge of the lampshade on one side to the edge on the opposite side across the top. Cut a circle of this diameter from tulle. Drape it symmetrically over the lampshade and cut out a circle to cover the top. Sew the cover as above, but baste the lining before you tape the top edge.

The color of the lampshade under the clear cover with a small frill at the top matches perfectly with the decor of the room. Sew a cover as for a conical lampshade. Cover the gathered seam with a ribbon with a bow or a garland of roses.
Types of lampshades
Making a lampshade with your own hands is not at all difficult - this good way save.
Table lamps and pendant lamps play a prominent role in the interior. These are not just light sources in the house, but also important decorative elements. You can reduce expenses on furnishings and choose the ideal lamp if you make a lampshade with my own hands.


What is needed to make a lampshade
Kits for most of our models are available for sale. But if you don't have a lampshade unusual shape, you can find an original one at a thrift store old model, which you can design to your liking.
Frames. The frame consists of upper and lower rings connected by posts, and a base for the lampshade. The rings and shape of the posts determine the type of lampshade. For example, for a cylinder-shaped lampshade, the diameters of the upper and lower rings are the same. The rings are connected by straight lines vertical posts. The elegant “concave empire” lampshade has an upper ring that is smaller than the lower one and the posts are smoothly curved inward.
Materials. To make and cover the frame, you will need: Durable cotton paper tape dense weave, which is wrapped around the frame so that the lampshade can be sewn on. Self-adhesive paper tape if the lampshade is not sewn on. Enamel for painting a metal frame.
Textile. When choosing fabric for a lampshade, follow these rules: Look through the fabric at the lamp and check how it transmits light. For a lampshade without lining you need thick fabric, which will hide the contours of the lamp and stands. If the outline is visible through the lampshade, add a lining. The fabric shades the light of the lamp. For example, blue and green lampshades give cold light, red and yellow - warm glow.
Fittings. Each frame comes with mounts for the lamp fittings. Usually lampshaded table lamp attached to its stand using a suspension ring with spacers or to special frame, which rests directly on the fixture, small “candle” lamps have clips that hold the lampshade. Lampshades pendant lamps suspended on fittings.
Parchment paper for a smooth lampshade. Self-adhesive PVC sheet is a rigid PVC sheet to which fabric or other material can be glued. Decorative finishing, which is glued or sewn to disguise the joints and finish the lampshade.
A lampshade made of dark, heavy fabric allows light to pass through from above and below and creates a directional flow of light.
Thick fabric is not suitable for a pleated lampshade. On a flared lampshade, the design is more distinct at the bottom. Check how a folded piece of fabric looks.
For a shaped lampshade, you need soft, easily draped fabrics. The fabric pattern should lie nicely diagonally.
Frame making
Before covering the lampshade frame with fabric, it must be prepared depending on the type of frame and the covering material. For example, if you are making a cardboard cap on a frame with plastic coated, no preparatory operations are required. The metal frame should first be painted with white enamel to prevent it from rusting. The old frame needs to be cleaned sandpaper. If you are sewing a lampshade to a frame, you must first paint the frame and wrap it with tape, after which you can sew on the cover.
Painting the frame. If metal carcass is not covered with PVC, it should be painted. Remove traces of rust with sandpaper. Sand the frame so that bumps and protrusions do not damage the fabric. Paint the posts and rings with white enamel, but leave the center ring alone. 
Wrapping the frame. If the frame is covered only with fabric, then you need to wrap it with cotton braid. Do not wrap the suspension and fittings ceiling lamp. To calculate the tape usage, measure the length of each post and the circumference of each ring and multiply by 3. This will be the total length of the tape. If the white ribbon shows through the dark fabric, paint the ribbon to match the color of the lampshade.
Wrapping the stand. Cut strips of tape 3 times longer than the post. Start work from the top end of the rack. Wrap the end of the ribbon around the ring, then around the post to secure the end. Using slight tension on the tape, wrap the post from top to bottom in a spiral so that each turn covers and holds the previous one. The finished winding should not move. 
Fastening the winding. When you reach the bottom of the post, wrap the braid around the ring, threading the end through the last turn to create a knot. Pull the ribbon tightly and leave a loose end. Wrap all the posts in this way except one. 
Wrapping the top ring. Measure the circumference of the top and bottom rings and the height of the last, unwrapped post. Cut the braid to this length. Roll up the tape and secure with a rubber ring, leaving a free end of 20 cm. Hold the end of the tape in front of the top ring at the unwrapped post. Throw the ribbon through the ring over the free end and secure the end. 
Shutdown. Wrap the top ring, wrap the braid in a figure eight around each post. Having reached the unwrapped post, secure it with a figure eight and wrap it from top to bottom. Make a figure eight at the bottom and wrap the bottom ring. On each stand, trim the ends of the braid to 1 cm and hide them under the braid wound in a figure eight. After finishing the winding, trim all ends of the braid to 6 mm, tuck and sew by hand. 
How to choose a base stand
The lampshade and the lamp stand must form a single unit. There are a few principles to keep in mind when choosing a base stand and lampshade. The lampshade should completely cover the fittings, but not the base of the lamp. The lower diameter of the lampshade should be twice as wide as the widest point of the base stand. The height of the lampshade should be 1-2 times the height of the round or vase-shaped base stand. The height of the lampshade for the base stand and candle should be 1/3 of the height of the stand. 
In the interior of each apartment, even the smallest and most insignificant element plays an important role. Just one wrong detail and the interior is ruined. That is why the choice must be approached carefully and very responsibly. In this article we will talk about such interior decoration as lamps. It’s not enough to just hang a light bulb, you also need to decorate it somehow. This can be done using a lampshade. Store-bought variations of lampshades may not always please you, and it is rare that among them you can choose the model that will harmoniously fit into our interior. We don't always choose new lamp With beautiful design, sometimes the old one no longer attracts us, has gone out of fashion or absolutely does not fit into new interior. All these factors push us to create DIY lampshade (photo).
It would seem that decorating a lampshade yourself is a rather complicated procedure, but in fact everything is very simple. Set aside some free time, and we will tell you several options for creating a beautiful lampshade. Do DIY lampshade can be made from any materials that you find at hand. It can be any fabric you like, ribbons, beads and many other materials that, in your opinion, are suitable for decorating an original lampshade.
DIY lampshade for floor lamp everyone can do it. The main thing is not to set yourself too serious tasks. If you have never encountered homemade products and have a hard time imagining how to cope with the task, then it is better not to take risks, but to choose a simpler option for designing a lampshade.

A beautifully selected material, color and shape for the future lampshade will create a truly spectacular interior element. A neat and original floor lamp or other lamp can perfectly complement the design of a hall or other space.

It is not always convenient to make a lampshade from scratch; it is much easier to transform an existing one. In particular, this solution is much simpler for those who for the first time decided to decorate their apartment with their own hands and add a fresh touch. To create a new design for central lighting or a floor lamp, you need to take an existing lampshade or purchase the simplest inexpensive option in the store. Each of the proposed options is good in its own way. In the first case, the former lampshade is not always in perfect condition, which accordingly can add problems when decorating it. In the second case, you will receive a whole new material to express your imagination, but at the same time you will incur small losses.

But in any case, making a new one from a ready-made lampshade will not be as difficult as decorating a new one. What can be made from an old floor lamp? Having cut out, for example, parts from cardboard or plywood, they can be attached to an existing lampshade, painted in one color or covered with fabric. We will get a lampshade with new shapes. This solution is often used when parents want to create a fabulous design. Just imagine how great a boy’s room will look, decorated in a cosmic style with elements of unearthly planets, and a lamp made in the form of a cosmic creature or a small satellite. But making such a lampshade for a lamp using the above method is not difficult. Imagine a little, involve your child in the process, who is always full brilliant ideas that you wouldn't even think about. A little time and effort and you will succeed original solution for central lighting of a children's room. All guests who come to visit you will be delighted with the solution they see.

If you have a plain lampshade, you won’t have any problems with its design. Plain colors are an ideal material for homemade decoration, because here you can realize any wishes and ideas. For example, get original lampshade You can use appliqués, embroideries and even ordinary stickers, which can be found in many stores.
DIY lampshade - master class
We offer you an interesting DIY lampshade (master class), in which we will tell you how to create a work of art from an ordinary light lampshade. During the day, our floor lamp will represent an ordinary element of the interior, and at night it will turn into a wonderful decoration.

Our master class will be devoted to creating a lampshade in the form of a night city. To do this, we need the lampshade itself in light colors, yellow, orange or light pink shades are desirable. They will most closely resemble night lighting when the lamp is on. We take black fabric and cut out our model of a night city from it. These can be trees, buildings and even cars. Using PVA glue or any other glue, we glue our applications onto the inside of our lampshade so that no folds form. You can sew a black ribbon on the bottom. Please note that it is better to stitch with white thread or thin ribbon. This will create the effect of a city road.
In daylight, our application will not be visible. And when the light is on, landscapes of a night city with houses and trees bathed in moonlight will open before us.

When choosing a colored floor lamp with bright ornaments and patterns for decoration, it is enough to slightly decorate it by adding pendants with beads of bright colors. It is possible to decorate with thin satin ribbons to create a brighter effect. This lamp will fit perfectly into. Thanks to such a small additional interior, she will be able to feel like a real princess living in a fairy-tale room with a cute interior.
How to make a lampshade with your own hands from scratch?
If you are interested in a question, how to make a lampshade with your own hands from scratch? Then you can just buy a few plastic folders and wire. From the folders, cut out the necessary parts for the frame, and use wire to connect them together. This solution will allow you to create a completely new, original and unique lampshade.
Before you begin any design of the lampshade, you need to take into account all the colors that are found in the room for which it will be intended. As you understand, the lamp must fit harmoniously into the interior of the room, match the texture and color scheme of the space. In addition, follow safety precautions. That is, if you have a baby who is still too small and strives to grab onto everything that comes his way, then try to design a more discreet version of a floor lamp or lamp that the baby will not reach out to. The fact is that we have more than once encountered situations where children pulled the pendants on the floor lamps and tipped it over on themselves, receiving various injuries. Let's not talk about the bad. Just try to take into account all factors other than beauty.

What materials are most often used to create a lampshade? The most common option is textiles. It is good not only for its flexibility and ease of use. Its popularity is also deserved thanks to the chic variation of colors, which allows you to decorate absolutely any floor lamp that is perfect for any interior, be it minimalism or ethno style. Among all the variety of fabrics, it is best to choose thick cotton or felt, which very quickly gain popularity among needlewomen. Felt is an excellent material for creating a lampshade. It allows you to create a variety of multi-layer compositions, for example, DIY lampshade with butterflies.
If you don’t want to tidy up your old lampshade for central lighting, we suggest you very interesting option doing it from scratch. This option will not take much effort and time; it is good for any interior, especially for.

To create a new lampshade for a ceiling lamp, we will need a ball, glue and thick threads. Performed DIY thread lampshade very simple. Inflate the ball. Dip the threads in glue and wrap the ball in a random order. Just don't overdo it. There should not be too many threads; there should be enough space between them to allow light to pass through. In addition, it is worth leaving a small space without threads on one side, this will be the bottom of our lamp, through which the light will flow. The creation process is almost ready, just wait a little until the glue dries, after which you can blow off the ball.
Our threads will remain in the form and form in which they were at the time of drying. If desired, our lampshade can be painted with paints in order to give it brightness and originality, while simultaneously combining several colors. Now all we have to do is hang our lamp on the lamp. As you have seen, there is nothing complicated about this. But the interior will receive a new note of originality.

To decorate an old lampshade, you can use satin ribbons and even scraps of fabric. They can be sewn along the diameter of the fabric, thereby creating horizontal stripes. For example, you can make a combination of several colors. For example, let our lamp be bright Pink colour, and we will insert stripes in burgundy tones with bright small flowers. A combination of turquoise and brown. This lampshade is suitable for decorating the interior of a hallway or one of the rooms. A cute floor lamp can be placed in the nursery, and a brighter solution can be left for guests to see in the living room.

IN Lately people strive to create new and original elements for interior decoration with their own hands. Therefore, in their works they use absolutely unpredictable elements, among which are kitchen utensils, artificial leaves, bamboo and others, no less. interesting materials. Lampshades look unusual, the frame for which is made of transparent plastic, and the inside is covered with old slides, photographs or decorative stones.

As you noticed, making a new floor lamp or chandelier is not as difficult as it might seem at first glance. Everything is quite simple if your imagination works and you have a lot of brilliant ideas. You can make an original interior element from any available means by adding a little new perspective to their design. Imagine, experiment and you will be able to create bright interior, full of unusual and unique details of the overall composition.
A DIY table lamp is one of the most available ways decorate the interior and give it individuality. As long as professional and amateur designers don’t mock them! The reason is simple: in terms of the ratio of functionality and opportunities for creative expression to the required costs of materials, labor and skill, the table lamp is firmly among the top leaders among household items. In this article, we’ll see what you can do with it without particularly straining your hands or wallet. Just a fiction.

Which one should I do?
Rack-mounted table lamps (item 1 in the next figure) illuminate a work area that does not require rapid movement of the light spot across the table surface: dressing table, desk. Possibilities decorative design in this case the largest. Technically, the design of a table lamp on a stand is the simplest. There are practically no possibilities for quickly adjusting the size of the illuminated area. Light adjustment working area is possible if there is a thyristor voltage regulator in the lamp, but the spectrum of emitted light changes significantly.

The great advantage of rack-mounted table lamps is the ability to obtain relatively by simple means so-called cosecant-square radiation pattern (DP) of the illuminator, see also at the end. A cosecant square pattern provides almost uniform illumination of the working area within a certain angle φ (see figure on the right), which sharply reduces fatigue from intense intellectual work.

Lamps on a breakable hinged bracket (item 2) are more suitable for technical creativity. Lamps on a pantograph bracket at home are impractical and technologically complex, and making a lamp on a flexible bracket at home will cost more than buying a ready-made one.
The design of a table lamp on a breakable bracket is limited to laconic and utilitarian forms. The design is more complex than that of a lamp on a stand, primarily due to the requirement for electrical safety, see below. The possibilities for quickly adjusting the light in the work area are wide both in terms of the size of the illuminated area and its illumination with a constant spectrum.
Console table lamps (item 3) are less common in everyday life, because for stability they require a heavy base and, most often, a counterweight, which complicates and increases the cost of the design. There are fewer possibilities for quickly adjusting the light in the work area for console lamps than for lamps on brackets, but it is possible to obtain a cosecant square pattern.
Table lamps without raising the light source above the supporting surface are no longer table lamps, but night lights (item 4). The fundamental difference between both is that the night light does not have a working area with certain light requirements. Accordingly, the light from a night light can be whatever you want, as long as it doesn’t harm your health.
Design
In any type of table lamp you can highlight the trace. design elements:
- Electromechanical – ensures the stability of the lamp and the safe supply of power to the lamp socket.
- Support – supports the illuminator or reflector and, possibly, allows you to change its position.
- Illuminator - an electric light bulb in a lampshade or reflector.
Electromechanics play a role in the design of a table lamp only insofar as it can be hidden in the lamp support. The design touches come in the form of support and illuminator. In stand-mount lamps, as a rule, the main aesthetic load is carried by the lampshade, and the stand complements it; in hinged ones it’s the other way around. But there are plenty of exceptions to this rule.
Electromechanics
The electrical circuit of a table lamp is simple: power plug, cable, switch, light bulb socket. Sometimes a voltage regulator is added. An E27 pendant lamp socket (for a lamp base of a regular width, item 1 in the figure) can only be mounted on an M10 or M12 threaded shank. The cartridge for a narrow E14 minion base is also attached to a thread or to a lamella in the form of a steel strip; the socket for it is shown by a green arrow in pos. 2. For a table lamp, chandelier sockets (item 3) with screw-on threaded flanges are best suited: between them you can clamp a steel faceplate with a lampshade frame or a clamp for mounting on a hinge. Drawings of the E27 electric chandelier socket of various modifications are given in pos. 4.

It is necessary to make a table lamp in such a way as to ensure its electrical safety. This is especially true for hinged and console lamps. Making your desk lamp safe is quite simple:
- The cable must be round and double insulated.
- The conductive cores of the cable are flexible, made of many wires. Core cross-section from 0.35 sq. mm.
- Places where cables are routed through conductive or damp-prone structural parts must be protected with sufficiently strong flexible dielectric bushings, cuffs or elbows.
- The cable inside the lamp structure should not be strained.
The diagram of the mechanical part of the support with a weight of a homemade rack-mount table lamp is shown in the figure:

Before insertion, the cable from the inside (highlighted in color) is tied in a knot or pulled through the holes of the dielectric fixing washer so that by pulling it from the outside, the cable cannot be torn inside. Decorative finishing made of polymer clay (plastic, cold porcelain) on a block made of trimmed plastic bottle- the best option at home, but, of course, only one of many. If you want, for example, to carve the decorative shell of a stand out of wood, please, as long as it fits properly on the mechanics. However polymer clay how the material for a table lamp stand allows you to realize the most original ideas its decor and fully satisfies safety requirements: dried polymer clay is a mechanically strong, non-wetting, non-flammable dielectric.
Original supports

It is not necessary to fence the support of a rack table lamp, which is quite complex and requires turning work, if its lampshade is light, for example. made of thread (see below) or thin hard plastic, and it is not intended to place a light controller or other electronics in the support. In this case, a fairly stable lamp support is obtained from a “pot-bellied” glass bottle with wide bottom, pos. 1 in Fig. A narrow bottle can be made heavier by throwing pebbles (item 2), steel balls, etc. into it. The lampshade holder is secured to the neck with a standard threaded plug or a piece of hard EPS polystyrene foam, ground into the neck thread.
The hole for the cable in the bottle is drilled with a tubular thin-walled diamond drill. But glass is not at all the same as tile, so you need to drill it like this:
- The bottle is placed on its side and secured securely.
- A plasticine side 2-3 cm high is molded around the future hole.
- Water is poured into the resulting hole.
- They drill under a layer of water at no less than 2500 rpm with the most gentle and smooth feed.
How to make a table lamp from a Jack Daniels whiskey bottle, see the video below:
Video: DIY bottle table lamp
Such a lamp will organically fit into steampunk and other technogenic-utilitarian styles. Just don't make the mistake of trying to make it a lampshade out of flower pot or any other utensils. Technogenic-utilitarian styles are not a meaningless pile of rubbish; their concepts are clearly thought out. Interior elements for them should be related to industrial, not agricultural or food production. A lampshade, for example, is needed from a tin reflector from an old production pendant lamp on a pantograph, a car headlight, a small spotlight, etc.
In Fig. shown on the right is still very original version the supports of a “real big” table lamp are made of... rope! It is done this way:

- The rope is taken from natural organic braid 6+1, i.e. 1 strand along the axis and 6 around the circumference;
- A section of rope is stretched by hand and loosened, simultaneously turning in different directions against the direction of twisting of the strands;
- The axial strand is carefully pulled out and a thin-walled one is inserted instead. copper tube with a fishing line threaded into it for tightening the cable;
- The rope with the tube inside is tightened by turning it with your hands in the direction of twisting the strands;
- The ends of the rope are firmly secured to the tube by winding with a cord;
- Tighten the cable into the tube;
- The workpiece is bent and knitted in a knot. You need to bend it little by little, carefully, so that the tube does not break;
- The rope is tightened once again, picking up the wrinkled strands, and soaked acrylic varnish.
Note: the tube should be taken for air conditioning systems, made of oxygen-free copper. The red copper gas or electrical pipe in the assembly will probably break.
Hinge Features
The mechanical part of a table lamp with an articulated arm is more complex. The lamp shown on the left in the figure does not meet the electrical and fire safety: The cable is caught in flammable parts and may become strained when handling the light. Its hanging loop can be caught in the semi-darkness by a hand or a sharp object.

The cable to the light bulb socket in a table lamp on a hinged bracket should be routed along dielectric fireproof elbows either between the sidewalls of its links, or, if the hinge link is solid, along its top, in the center and on the right in Fig. In this case, the cable must be secured to the hinge link. If the hinge links are tubular, the cable is routed inside them. In any case, Ω-shaped cable loops with a diameter of 60 mm or more, but not less than 12 cable diameters, are made over the kinks of the hinge links. At the cable transition from the bracket to the illuminator, an Ω-loop is made from 90 mm, but not less than 20 cable diameters.

The balance of a table lamp on a hinge varies widely and it is quite difficult to ensure its stability with a weight. Because of this, manufacturers sometimes come up with such systems that it is easier to shine a flashlight than to adjust the light from such a miracle, see fig. left. Therefore, table lamps on hinges are often equipped with screw terminals.

A small carpenter's clamp is excellent as a screw clamp for attaching a homemade table lamp to a tabletop, see fig. on right. Better lamp clip from furniture store: costs less, holds more reliably. The grip of the clamp is wider, and the lamp can be attached to a tabletop of any conceivable and inconceivable thickness. You need to ask the carpentry shop, because... jaws of metalwork clamps without a soft coating.
A clamp is converted into a lamp holder using a socket made of a steel tube with an internal diameter of 10 mm and a length of 120-150 mm. The tube contains approx. A longitudinal cut is made halfway along the length, with a width equal to the thickness of the clamp holder. The socket is attached to the clamp with through bolts. A steel pin with an eye, which is the fixed link of the lower hinge of the lamp bracket, is inserted into the socket tightly, but not tightly. Hooks for hanging chandeliers with the end bent into a ring are well suited here; the thread does not prevent them from turning smoothly in the socket.
When adapting a clamp to a lamp holder, you need to remember that its holder is made of highly carbonized steel; This is so that the jaws of the clamp do not give way under the back pressure of the compressed parts. High-carbon steel is very hard and quite brittle, so you need to drill it with a carbide drill at 800-900 rpm with a gentle, smooth feed. Do not hit with hard objects or try to bend the clamp clamp!
Illuminator
This table lamp assembly should give the right light into the work area and is often the main decorative element. Here you should first of all note that compact, lightweight and economical LED illuminators (see figure) only shine well in 3D models. In reality, their light is still far from satisfying the medical and sanitary requirements for local work lighting.

Reflectors
The illuminators of table lamps on a hinge are made to be reflective; the lampshade for them is too bulky and heavy. The reflector needs to be selected parabolic; it gives a fairly concentrated and even light. You can make a single conical reflector yourself, but the light from it is uneven, tiring for the eyes, and a lot of it is wasted “scattered” to the sides. Reflectors of good articulated table lamps are made with a reflective surface of the 4th order of curvature (for example, “Hobby”, which has not lost popularity for more than 20 years), but it is unrealistic to build one yourself.
The solution, if a suitable reflector is not available, is to use a krypton incandescent lamp with an internal reflector; conscientious manufacturers also have it of the 4th order of curvature. In this case, the manufacture of the illuminator comes down to installing a shell of any shape around the light bulb from any sufficiently strong and light material, protecting the lamp from accidental impacts.
The reflector of a table lamp illuminator on an articulated bracket must have an opening or holes at the top for the exit of heated air. Fluorescent energy-saving lamps and LED lamps seem to heat up weakly, but from being in a heated air cushion their resource is sharply reduced, and they are not cheap.
Shade
The illuminators of rack table lamps are made in the form of a light bulb. Its purpose is not only to be a fertile field for decoration, but also to be a partially translucent reflector, providing the required illumination of the working area of a given size. The lampshade for a table lamp can be made hard frameless or soft with a frame. The frame of the lampshade is most often made of wire in the form of a truncated straight cone, on the left in the figure, with simple (in the center) and complex (on the right) curvilinear elements.

The simplest way to cover a straight conical lampshade is with pieces of tape. It is labor-intensive, but the good thing is that the outer surface turns out smoothly curved, without breaks. The seams on the rims of the lampshade are masked with ruffles (item 1 in the next figure), braid, fringe, etc.

There is no point in cutting the fabric in the form of a truncated cone to cover a conical lampshade, because... As a result of tightening the material, the lampshade will not be conical, but faceted, pyramidal. It will be easier to sew a lampshade cover from wedges, the patterns of which are built step by step without using any geometry:
- A sheet of thin cardboard or thick, rigid paper is placed on the frame section;
- Cardboard/paper is attached to the frame with an elastic band or tape;
- The outline of the pattern is drawn from the inside, this will give the lack of fabric necessary for tightly covering the lampshade;
- The fabric is taken from satin, twill or staple weave;
- Cut so that the warp threads of the fabric are oriented along the longitudinal axis of the pattern.
The finished lampshade is often decorated with rosettes, bows, etc. For such a case, there is an interesting design technique: the main fabric is thin, highly translucent, colorful, and the rosettes are sewn in pale pastel colors or very light ones, pos. 2. In the light, the lamp stands modestly in the interior, but when turned on in the dark, everything lights up.
How to cover a lampshade
An embroidered cover can simply be thrown over the frame of a lampshade with complex curved ribs (with a “waist”) and tightened with ribbons (item 3), thread, and an elastic band. But according to the rules, covering a lampshade with fabric is done like this:

How about in a different way?
There are other ways to make a table lamp shade, allowing you to embody a variety of original design ideas in the material. For example, a dummy mandrel is glued from ordinary writing paper (item 1 in the figure) and impregnated twice with acrylic varnish. After the varnish has dried, lanolin is rubbed into the block several times until it stops being absorbed. The lanolin-coated blank is wrapped with a thread pulled through PVA glue, as when making Christmas tree decorations with your own hands. A device for pulling thread through PVA is shown in Fig. lower right. The finished hard lampshade cover is fixed with drops of glue onto the frame, which in this case can only consist of the lower rim, fastening ties and a faceplate for the luster socket.

A rigid seamless lampshade made of thin synthetic fabric is made on the same block. A cut cut like the development of a truncated cone (with an allowance) is used to wrap the block. The fabric is fixed at the edges with paper clips and impregnated with acrylic varnish with a wide stripe in the middle. When the varnish is dry, remove the staples and saturate the edges from the outside. The paper is torn out from the dried lampshade. The inside of the cuffs is trimmed, a thick fishing line is inserted into the bends and secured with drops of glue.

A frame with curved ribs can be braided horizontally with strips of fabric (item 3) or narrow tape, newspaper tubes, straws, etc. For lighting technology, ordinary propylene twine is excellent, but its aesthetics are... not that great... Finally, a soft textile cover for the lampshade can be sewn with a simple straight sleeve along the diameter of the lower rim, and gathered at the top, pos. 4.
Quite original
The following 3 table lamp shade options are outwardly extravagant, but provide very good lighting performance. Which, by the way, cannot be said about many homemade textile lampshades. For example, we buy (stealing is a sin, as Captain Barbosa from Pirates of the Caribbean would say) a milky plastic lampshade for street lamp. Not that expensive, ideal light transmission with light diffusion, and does not break. And below there is a wide opening through which enough light will come out for local working lighting. We decorate the outer surface of the lampshade with decoupage on a transparent basis or paint it by hand. What happens in the end - see in fig. But this, of course, is an option for an amateur who is resistant to psychedelic influences.

A plywood or board lampshade with glue (see next figure) due to internal reflections has good light transmission and greatly softens the light. You can even put an LED light bulb with a frosted bulb into a table lamp with it. The rims are embroidery hoops of different diameters. In the same way, you can make a table lamp integrated with a lampshade (on the right in the figure). It will take up a lot of space on the table, but it looks original, “ecologically”, and the light produces a very soft, non-tiring light.

A table lamp integrated with a lampshade can also be made from the same wonderful material -; in a thin layer it is translucent. The jellyfish lamp (see picture on the right) is made from this very material. The manufacturing procedure is as follows:

Green lamp
Look through old photos of Lenin, Stalin, Churchill, Roosevelt, Theodore or Franklin Delano, Mahatma Gandhi. Or, if you like, with Hitler, Mussolini, General Tojiyo, Chiang Kai-shek. And check out their table lamps. Really, they look like the one on the left in the picture? Which in the USSR was not sold to “the general population”? And which gave birth to the catchphrase “green lamp”?

"Green" luxury table lamps antique and modern
“Green Lamps” are still produced and sell out well. True, judging by the prices (on the right in the figure), they have not become more accessible to ordinary citizens. The secret of the “green lamp” is in the lampshade made of green glass painted in the mixture, coated on the inside with a translucent (more precisely, 3/4 transparent) layer. The shape of the lampshade corresponds to a very specific mathematical law. Within a wide range, approx. 3 lampshade diameters, the working area of the “green lamp” pattern is almost cosecant-square, and then its illumination very smoothly turns into a greenish twilight. He slightly raised his gaze from the papers - his eyes and mind were resting.

Every housewife wants to make her home extraordinarily beautiful. Some arrange it in some way unusual style, for example, Provence, country or minimalism. Someone is trying to decorate with decorative elements. Others focus on one element, for example, a lampshade or lampshade.
Let's consider options on how to make a lampshade for a chandelier with your own hands. To do this, you will need not some rare, but ordinary improvised means.

Option #1: paper
The easiest way is to make an original lampshade from paper. This decorative element can have any shape. It will harmoniously fit into almost any interior - the kitchen, living room, children's room. It is worth remembering that the service life of a paper lampshade depends on the quality of the paper. It should not be too thin, but at the same time light transmitting.
The easiest way is to consider how to make a lampshade with your own hands from the wallpaper left over from the renovation. Let's look at how to make a product in the form of an accordion. The work process does not take much time and does not require any special skills, abilities or schemes. From wallpaper you can make a lampshade for a floor lamp with your own hands, for a table lamp or sconce:
- First you need to prepare the material - a piece of wallpaper 1.5 m long and approximately 30 cm wide.
- Mark the ribs with a pencil or pen.
- Carefully form an accordion. The width of each rib should not exceed 3 cm.
- Using a hole punch, make holes in the accordion.
- Thread a decorative cord through the holes and glue the lampshade along the side seam.

Even a child can make such a product on his own.
While working, you can use rice paper instead of wallpaper. With its help you can update an old lampshade. Drawn with this paper, it will look stylish and modern. You can decorate the product using decorative elements such as special stamps, stickers, etc.
DIY paper lampshades will decorate any interior style. The main thing is to choose the right one color scheme and shape.
Option #2: rope
A DIY rope lampshade will look original. It can be used to decorate any lamp: sconce, floor lamp and others.
First you need to prepare necessary tools and materials:
- 20 meters of rope;
- 1 inflatable ball for the base;
- PVA glue;
- white paint (preferably in a can);
- duct tape;
- gloves (regular household or medical);
- device for weaving (special board or perfume box).

It’s quite easy to make such a lampshade with your own hands:
- Using a weaving board, make a decorative ribbon out of rope. Its lines can be smooth or curved - as your imagination tells you.
- Now you need to cover the air-filled ball with tape.
- Taking the top of the ball as a starting point, lay the rope in smooth turns. At the same time, lubricate it with glue.
- Remove the shade from the lamp. Paint it in White color. Place the finished lampshade on top.
- Cover the ball completely and coat it with glue again.
- Use a needle to pierce the ball and remove it out. This will leave a shape woven from rope.
A lampshade made from twine, twine or rope is suitable for a table lamp, sconce or floor lamp. It is recommended to use an LED lamp under it, which will not heat up such a lamp too much.
Option No. 3: threads
Another option is a DIY thread lampshade. Self-made chandeliers made from threads look very original. They attract attention and fit perfectly into any interior.
You will need:
- balloon;
- cotton threads of one or more colors;
- 250 ml PVA glue;
- suspension cord;
- Powersave lamp;
- scissors;
- large needle;
- oilcloth or plastic the size of an A3 sheet;
- petrolatum;
- brush;
- cotton pad and stick.

The process of making a lampshade for a table lamp, sconce, chandelier or floor lamp from threads with your own hands consists of several stages:
- Inflate the balloon. It is desirable that its size be from 25 cm.
- Lubricate its surface with Vaseline.
- Cover the working surface with paper or oilcloth.
- Punch a hole closer to the bottom of the glue tube.
- Wrap the ball with threads in any order.
- Lubricate the threads with glue. Leave to dry completely overnight.
- Using a cotton swab, separate the ball, deflate and remove it.
- Make a hole in the top of the finished product for the lamp and socket.
- Insert the lamp inside. Attach the cartridge holder to the hole.
Now just hang the finished lampshade in the place intended for it.
Option number 4: lace
You can try making your own lace lampshade. From this material you can make a lampshade for an old table lamp with your own hands, for a sconce or a floor lamp.
Work begins with preparing the things necessary for work. This is the lace itself, PVA glue with a brush, a balloon and electrical elements for a lamp.

Stages of work:
- The first stage is preparing the lace. You need to cut out several circles of different sizes.
- Inflate the balloon. Lubricate its surface with glue.
- Attach lace circles to the ball. This needs to be done overlapping.
- Leave the product until completely dry. This will take about a day.
- Burst the ball and pull it out.
- Secure the socket, lamp and wires. It is recommended to use low-power lamps that will not heat the lace.
Option number 5: macrame
Fans of original decorative elements will undoubtedly pay attention to the macrame lampshade.
To make macrame lampshades with your own hands, you need to prepare:
- 172 m of 3 mm thick cord;
- metal tubes and rings for the frame;
- 8 rings with a diameter of 7.5 cm;
- 1 ring with a diameter of 17 cm;
- 1 ring with a diameter of 36 cm.
How to make a frame for a lampshade with your own hands? We connect two rings (17 and 36 cm in diameter) and 8 metal tubes 27 cm long.

The workflow for making the lampshade itself looks something like this:
- You need to cut 40 threads of 3.5 m each from the cord. Secure them to the top ring.
- Using macrame patterns, weave an openwork mesh.
- Insert 8 rings along the bottom edge, braiding them with thread.
- Also braid all the vertical tubes of the frame.
- Decorate the bottom edge with decorative elements.
Before making lampshades with your own hands, you can watch master classes. They will help you master the basic elements of macrame weaving and avoid mistakes in the work process.
Option number 6: fabric
A fabric lampshade will also look great. Using fabric you can update or restore an old product. It is enough just to cover it with prepared material and decorate it with any suitable decorative elements. A fabric lampshade with a cardboard base is suitable for a table lamp, sconce, infrared lamp, night light and even chandelier.
In order for the product to turn out neat, it must be sheathed on the sewing machine. In addition to this, you need to prepare:
- iron;
- pencil;
- ruler;
- textile;
- pins;
- threads matching the color;
- thick paper (thin cardboard or Whatman paper);
- universal glue.
The workflow consists of several stages:
- Make a paper template the desired shape. It is important that it fits the frame.
- Connect the template to the fabric using pins. Trace it with a pencil. Draw another line 2 cm from the template line.
- Fold the seam allowances inward, gradually removing the pins. Mark the fold line with them.
- Remove the template.
- Sew the fabric on a machine.
- Iron the fabric well.
- Place the workpiece in a well-ventilated area and coat it with glue. Let it dry a little.
- Glue the fabric to the frame. All seams and cuts must be hidden.
- Let the lampshade dry. After a day it can be used.
A fabric lampshade decorated, for example, with flowers, buttons, and bows will look good. Instead of regular fabric, you can use organza.
Option number 7: wood
Separately, it is worth mentioning the lampshade for the steam room, sauna or bathhouse with your own hands, because here high humidity, and the glue may no longer hold the shape of the product. For making your own from scrap materials, wooden materials are the most popular.
To make a wooden lampshade for a steam room with your own hands, you need to take:
- paper;
- pencil;
- wood;
- sandpaper for sanding;
- self-tapping screws

Using this set of tools and materials you can make a corner lampshade:
- Draw a template for the bottom of the frame on paper. It should be shaped like a trapezoid. It is important that its sides match the walls of the bathhouse.
- Using a pencil, transfer the design onto the prepared wood. Cut out.
- Sand with sandpaper.
- Cut 3 strips with a width of 1 cm and a thickness of 0.5 cm. The height should be equal to the height of the lamp.
- These strips will connect the top and bottom of the frame. They need to be nailed on the sides and in the center.
- After measuring the distance from the center to the edges, cut out several more planks of the same size.
- Screw the strips with self-tapping screws inside lamp They can be fixed in any position.
As you can see, there are many options for making lampshades with your own hands. In addition to those listed, there are also wire products, knitted products, beaded lampshades and many others. In the process of work, almost any material that is at hand is used. If necessary, you can make a new product, or you can update the old one (do restoration). The work almost always requires a diagram or template. It is important that the workpiece matches them exactly. Only in this case ready product will become a real decoration of your home or apartment.