Storage space is a must. And this is where chests of drawers come to the rescue. If your old chest of drawers seems boring to you, or you find that the one you just bought is too simple, the ideas that we have carefully selected for you come to the rescue. Lots of patterns with stickers, wallpaper, paint; gradient effect; new, bright colors - your updated chest of drawers will become the most memorable interior detail.
Before decorating the chest of drawers, choose a new color for it. Sunny yellow, bold red or fresh green work wonders. Then think about how you want to decorate the drawer fronts. It can be a pattern, a picture or a solid color. Interesting idea- paint the boxes with a gradient. To do this, you need to choose the main color and paint each box a few shades lighter than the previous one. Get inspired by our photo selection!
Update an old chest of drawers with a gradient effect


Bright accent on the drawer front


Dresser decor wallpaper


idea for a big family

Antique pattern in modern interpretation
Restoration of antique furniture is an interesting and creative process, but who needs it and why. In this article we will deal with this issue, visually restore an old chest of drawers.
In fact, there is no shortage of furniture in stores now, but on the contrary, there is a lot. The furniture market in the modern world is replete with a large assortment and variety, and the prices are very affordable. Almost any family can afford to buy a new chest of drawers.
The main point of the restoration is that on an old grandmother's chest of drawers, for example, you can reflect your individuality, reveal your creative abilities and harmoniously complement the interior of the room with decorative elements or paintings. After all, exactly the same painted product that you want to see and which fits perfectly into the interior of your home cannot be found in the store. But it is quite possible to do it yourself, even without special skills or any creative talent, you can repair old furniture by following simple instructions.
There are two other benefits of restoring antique furniture. Previously, it was all wooden and of high quality, but now we mainly buy from chipboard panels. Therefore, sometimes old wooden furniture will last longer than a recently purchased new one. And the last advantage of repairing such products is still cost-effectiveness. Sometimes it is enough to repaint or drag with a new fabric and it is already like new at no extra cost.
So, let's figure out how to restore an old wooden chest of drawers with the lowest cash costs and with a painted tabletop. 
Materials and tools used in the work:
1. Knife, spatula medium and small;
2. Fine-grained and coarse-grained sandpaper;
3. Grinder;
4. Putty on wood;
5. Thinner No. 646;
6. Brushes different sizes and a pencil;
7. Varnish on water based clear and solvent lacquer.
The first stage - cleaning the chest of drawers
To begin with, before work, you need to remove all accessories from it, these can be handles on drawers and decorative elements. They can be damaged during the restoration process and they themselves will constantly interfere with your work.
Next, you should clean the chest of drawers from the old varnish. To do this, we need a grinder with coarse and fine-grained sandpaper. If the countertop was covered with a thick layer of varnish, then one sandpaper is not enough. In our case, we cleaned the countertop with a knife and spatula. 
Old varnish can be removed in several ways:
1. Scrape with a knife or spatula.
2. Soak with solvent and clean with a rag in several stages.
3. Use a building hair dryer with a special nozzle.
The third option, of course, is the most effective and fastest, but not everyone has such a device. Therefore, we successfully scraped off the varnish with a knife and spatula. And the second option is the longest and most painstaking, but wooden table top most likely to remain intact and not scratched.
After removing the old varnish, the entire surface should be well sanded. If there was a thin layer of varnish on the boxes and almost not damaged, then you can simply sand the coarse-grained sanding paper. But still, ideally, for a uniform color after applying varnish, especially light, it is better to remove all old varnish.
After we are convinced of the smoothness of the sanded surface, we can proceed to the next step.
The second stage - preparation for painting and leveling the surface
We brush off the dust from the entire surface with a wide brush and wipe it with a cloth soaked in solvent No. 646. On a degreased surface, varnish or putty will last longer and stronger.
It must be remembered that the newly applied varnish very noticeably reveals all surface imperfections, even the most insignificant ones, one speck of dust will be visible under the varnish as an ugly bump.
After degreasing the surface, we take wood putty and a small spatula. The main thing when choosing a putty is to match its color to the color of the sanded surface. And we begin to smoothly cover up the cracks, scratches, recesses and chips. We are waiting for the puttied places to dry completely.
In deep places, the putty after drying may “fail”, so you may have to putty again. After finishing drying, sand and degrease again. The surface should be perfectly even and smooth. 
Now that we have achieved a uniform and even, smooth surface, you can start decorating and painting the chest of drawers, go to the third stage.
The third stage - applying varnish and pattern
So, the surface of the countertop is varnished in one layer with a brush. 
After the first layer dries, the pile will rise on the tree, it needs to be sanded so that it is easy to apply the pattern. On a non-sanded lacquer surface, the pattern will not be displayed. Using a pencil, we apply the necessary drawing, we had a flower. 
The pencil, in which case, is easily erased from the lacquer surface with an ordinary eraser. After drawing the picture, you can start painting with paints. In the technique of drawing with shading, it is imperative to use water-based paint.
We buy a regular color for water-based paint Brown. First, draw the contour of the petals, then the middle and shade them with a napkin. Drawing such a flower is not at all difficult, even without drawing skills. 
Very important point
- Coating the pattern with varnish. The main thing is to choose the right varnish. It should be clear and water based. Varnish on solvents or acetone cannot be used, such a varnish will immediately dissolve the entire pattern. It is better to cover with a roller, not with a brush, in the direction of growth of the petals and only in one direction. That is, do not carry the roller back and forth, otherwise the whole drawing will be smeared and lose its appearance.
It is desirable to cover the drawing with transparent varnish in two or better in three layers. For the last time, you can safely apply varnish as you like, the pattern will no longer blur. 
It remains to varnish the boxes and side walls. If you do not plan to make a drawing on them, then you can apply varnish with a roller or brush, but be sure to apply the second layer after the first has completely dried. And also do not forget that after the first layer, a pile will rise on the tree, which must be sanded with fine-grained sandpaper.
The handles of the chest of drawers can be painted with the same solvent-based varnish and screwed back to the drawers. That's all, it remains to weather the nasty smell and let the varnish dry completely. 
The chest of drawers has been given a new life, it will perfectly fit into the interior of any room and will serve for more than one year. The technique of drawing and decorating can be used completely different, there are many interesting options, the only thing you need to adhere to the rules that you read earlier, otherwise you can just ruin the drawing.
To make a dresser decor with your own hands means to create a unique piece of furniture from an ordinary piece of furniture. designer thing. It will dilute the familiar atmosphere with its brightness, transform the overall interior of the room. Consider several ways to decorate with your own hands.
Cabinet restoration and painting

dresser decoration

Dresser dressing
Sometimes it's a pity to throw away a shabby old one, but quality furniture. In this case, it can always be transformed.
Restoration
Restoration is a time-consuming process that goes beyond the simple transformation of an interior item. But more often you can’t do without it when working with old things. Before you start restoring a chest of drawers, you should carefully examine it for value. It is possible that it may turn out to be an item made tens or hundreds of years ago. self made. To do this, first of all, you should pay attention to the fittings: handles, legs, screws. If they are not the same, there are differences in the notches, then most likely they are made by hand, and not by an industrial method.

Cabinet design

Beautiful dresser decor in the form of a constructor
If the decision to restore is made, then the following things will be required:
- special glue for wooden surfaces;
- putty;
- several types of sandpaper;
- screwdrivers;
- gloves;
- respirator;
- toothpicks;
- old toothbrush, paste;
- brushes;
- wood varnish.
Updating the chest of drawers includes several stages
Cleaning and product preparation
Surface cleaning must be done carefully so as not to damage any decorative details. First wipe the surface soapy water, for the cleaning small parts you will need a toothbrush. furniture fittings can be removed if necessary.
To combat plaque or ingrained dirt, it is better to use fine sandpaper, but the main thing here is not to overdo it and not ruin the furniture. If a complete color change is planned, then the entire surface will have to be easily sanded.

Cabinet restoration and painting

Dresser decoration with rulers

Dresser dressing
After the chest of drawers has become clean and dried, it needs to be repaired. You will need to inspect the product for scratches, damaged screws, and so on. The cracks are covered with putty, the fittings are changed to a new one.
Painting
Most likely, you will have to paint, since it is unlikely that the old chest of drawers will match the modern one. color solution interior. You can repaint it in a solid color. You need to paint carefully, especially in the corners. You need to use a special paint for working with wood. If desired, you can varnish the chest of drawers.

Cabinet design

Beautiful dresser decor
Design solutions
There are many ways to decorate an updated chest of drawers. You will certainly be able to choose the most suitable method.
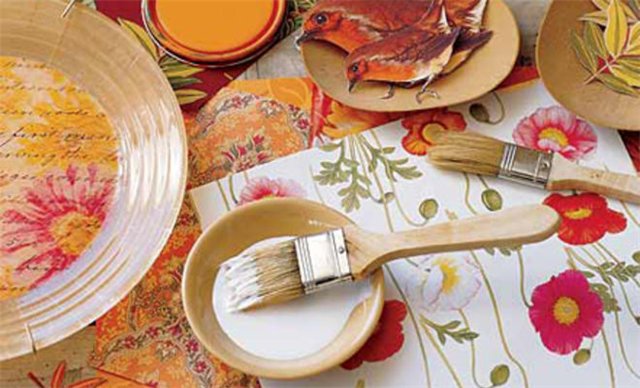
Decoupage
The easiest way to do this decoration is on a white surface. Decoupage is a modification of the product with the help of special napkins. They can be purchased at craft stores. In the bedroom, you can use a floral print, and for the children's room - images of your favorite cartoon characters. The work includes several main stages:
- Dresser cover white acrylic paint and good drying.
- Preparation and cutting of decor items. On this stage You need to pull out all the boxes, determine exactly where which image will be placed.
- Sticker cut patterns with PVA glue. It is better to smooth the drawing on the chest of drawers with a special roller so as not to damage the thin paper.
- Coating the surface of the chest of drawers with varnish.

Cabinet restoration and painting

dresser decoration

Dresser dressing
Decoupage can be done not only with paper, but also with fabric. This option will be much more economical if you glue improvised trimmings. More often, the facades of boxes are decorated in this way, choosing colors to match the curtains or upholstered furniture. Handles must be removed from them before starting work. Next, you need to perform the following steps.
- Cutting out fabric. The flaps are made wider by a few centimeters than the facade. This is a must for folds.
- The box is covered with PVA glue, cut out fabrics are applied, all wrinkles and bubbles are carefully smoothed out from the center to the edges.
- Glue the ends of the facade with glue, make bends. You can attach it with inside facade with a stapler.
- Screw handles and other fittings.
Dresser decor in the English style
Stylish in any modern interior the decor of the dresser will look in English style. For this design, an old piece of furniture from Ikea is well suited. Two evenings will be enough for you to work. For decoration you will need:
- scarlet and blue acrylic paint;
- putty;
- brown oil paint;
- topazure (wax-based coating);
- decorative nails for furniture;
- putty knife;
- masking tape;
- paint brushes and rollers;
- sandpaper.

Cabinet design

Beautiful dresser decor
The work consists of the following steps:
- Removing all fittings from the chest of drawers and cleaning it from dirt and dust.
- Covering the surface with a thin layer of putty. It should not be smooth, but textured. You can make a few spots on top and smear them a little.
- After drying, the product is coated with white acrylic paint.
- Marking areas for painting with masking tape.
- Preparation and breeding of blue and scarlet paint. The more pigment you add, the richer the color will be. When staining, do not be afraid of spotting. That's the way it should be. You can paint in two layers.
- Sanding the sides and top of the chest of drawers with sandpaper.
- With the help of a sponge, the entire surface is covered with topazure (it is better to choose the “walnut” tone).
- Driving in at the same distance along the facade of carnations.
- Installation of handles. Covering them oil paint(for dimming).

Cabinet restoration and painting

dresser decoration

Dresser dressing
Antique decor
The design of the old chest of drawers will look quite stylish. Usually this method is chosen by lovers of creativity, Provence or country music. To work, you need to prepare:
- dresser;
- sandpaper of different hardness;
- acrylic paint (2 colors);
- lacquer craquelure;
- soft sponge;
- wax candle;
- paint brushes;
- screwdrivers.
Before starting the decor, they pull out all the drawers, remove the chest of drawers, handles. Then all surfaces are sanded with sandpaper to a smooth state and wiped with a sponge moistened with water. After drying, apply the main layer of paint and allow the product to dry again. Now you need to make scuffs with sandpaper and rub them with a candle, as well as some parts of the main surface.

Cabinet design

Beautiful dresser decor
After that, paint of a different shade is applied (darker or lighter - everyone chooses for himself) and the areas covered with wax are wiped with a sponge. The paint will come off easily. You can paint or decorate a chest of drawers using decoupage technique, and then cover with craquelure. This type of varnish will add to wooden surface small natural cracks.
Once the varnish is dry, the chest of drawers can be assembled and used for its intended purpose.
Volumetric decor
The voluminous decor of the chest of drawers does not require large cash costs, and the work will only bring pleasure. Moreover, in this technique, you can transform cabinets, sideboards and other pieces of furniture. Stencils may be required for the design, they are easy to make from thick cardboard.

Cabinet restoration and painting

Dresser decoration with pictures

Dresser dressing
For decoration you will need:
- putty knife;
- stencils;
- acrylic-based putty or bulk paste;
- acrylic white and brown paints;
- brushes and sponges;
- masking tape.
The work is simple, the main thing is to do everything carefully, after removing the handles and taking out the drawers. Stencils are attached to the surface, and putty is applied on them with a dense layer. Most likely, the applied layer will have to be slightly trimmed with a spatula before removing the cardboard. The volumetric pattern is left to dry.

Cabinet design

Beautiful dresser decor
You can cover everything with one color. Or select a bulk element. To do this, follow these steps:
- Paint a chest of drawers, for example, with a white tint.
- Rub the convex parts with wax.
- Cover everything with a brown tone, and wipe the wax areas with a sponge. They will remain white.
This method is suitable for both the old chest of drawers and the new one.
Video: Restoration and decor of a chest of drawers
Dresser decoupage is an easy way to breathe new life into your furniture.
If your chest of drawers is cracked, old or just tired of you - do not rush to throw it away, because it is quite possible to turn it into a new one without spending a lot of money.
This can be done with the help of decoupage - an unusual furniture design technique that came to us from France and quickly fell in love in Russia.
In the article, you will learn how to restore furniture in a similar way, and also get a master class on decoupage chest of drawers.
Photos, videos and instructions will help you cope with this work and give new life to your old things.
The decoupage technique consists in covering furniture and other household items with colored paper, pictures, as well as additional effects such as coloring, gold plating, etc.
The decoupage technique became most famous in the 17-18 centuries: with its help, merchants faked Chinese furniture that was fashionable in those days, by covering ordinary furniture additional elements and decorations.
Such a product was to the taste of the poor segments of the population who could not afford real furniture.
Initially, this technique spread throughout Europe under the name "art of the poor", but soon more affluent segments of the population became interested in it, and soon it reached the court of King Louis XV.
In addition to pasting furniture, decoupage is also common on other items. Everyday life: often with the help of decoupage they decorated clothes, for example, ladies' hats, plates, caskets, mirrors, etc.
Over the years, decoupage has not lost its relevance, but, on the contrary, has entered the same row with other professional occupations - for example, such great artists of the 20th century as Henri Matisse, Pablo Picasso used this technique in their works.
Today, decoupage is available to everyone who loves creativity.
The big plus of this technique is that you do not need any expensive tools - just imagination and improvised blanks, such as old magazines, stickers or pictures, which can be purchased inexpensively in specialized stores.
In the photo you can see what the decoupage technique looks like - in fact, it is just furniture and household items pasted over with pictures and varnished.
Naturally, in order for the result to look attractive, and not hit and miss, you need a concept for the future creation.
Can be used already ready-made ideas- for example, decorate your chosen item in the popular Provence style.
To do decoupage, you will need pictures that you can find in magazines, newspapers, books, sticker albums, wrapping paper, postcards, photographs, etc.
To cut them, you will need scissors or a razor, and to stick them, you need PVA glue or special decoupage glue.
To remove the glue, you will need a rag or sponge, and to finish the job, the glued pictures need to be varnished or acrylic and polyurethane spray.
As you can see, this technique does not require large expenses.
Decoupage can be used to decorate literally any item, and it will be of interest to both adults and children who can use it to decorate their notebooks, diaries, shelves or tables in the room.
However, when it comes to furniture, decoupage should be approached with great responsibility, because this item will be in your house for more than one year.
Decoupage of furniture is not such an easy task, and below you will receive instructions on how to deal with it so that the chest of drawers is really pleasing to the eye.
How to restore a chest of drawers using decoupage?
Before you start decoupage of a chest of drawers, you need to decide how you want to see it in the end, as well as choose a coating technique. One of the most simple techniques- decorating with paper.
Such a restoration of a chest of drawers with your own hands is suitable for those who do not have much experience in furniture finishing, because. it is quite simple, but at the same time it looks attractive and original.
The design of a chest of drawers depends on its location and the general interior, for example, with a strict monophonic design of the cabinet, a chest of drawers can be decorated using ordinary newspapers, but for a children's room it is better to choose something more interesting and bright.
If the room is decorated in a certain style, for example, Provence, then it makes sense to make a chest of drawers in a similar way so that it does not stand out from the general style.
Before you get started, watch the mini-master class. Decoupage takes place in several stages.
The first step is to wash and dry the surface of the furniture and remove the drawers and shelves that are inside. If the chest of drawers is uneven, then you can process it with sandpaper.
Now you can start painting. You can paint the chest of drawers completely or partially, depending on your idea.
Then, after drying, the painted parts are treated with sandpaper and the next layer of paint.
Now comes the decoupage itself. Take the mini blanks you made (newspapers, magazines, etc.) and cut out the images, and then place them on a surface pre-lubricated with glue.
The paper can be smoothed out with a roller or just by hand. Then you can apply paint along the outline of the picture, if you want, you can varnish the chest of drawers.
Wait a while and you can collect the chest of drawers.
Decoupage with cloth
As you can see, the first mini-master class is quite simple. It will be a little more difficult to arrange a chest of drawers with a cloth. In terms of material costs, it will not be more expensive - most likely, there is an abundance of old fabric in your home.
Usually, not the entire chest of drawers is decorated with this technique, but only drawers, but you can try another way by looking at the design options in the photo.
This mini-master class begins similarly to the previous one - first you need to wash and disassemble the chest of drawers.
Before gluing the fabric, you need to make mini-blanks - that is, patterns with a suitable pattern, while they should be a few centimeters wider than the front of the box.
you can buy ready-made patterns, or choose an example from the photo, or come up with a drawing yourself.
When the fabric is ready, coat the outside of the drawer with glue and attach the fabric, and then smooth it from the middle so that it is even.
It is better to attach the fabric folded inside the box with a stapler so that it holds better. After the glue has set, you can assemble the chest of drawers.
The most difficult thing in this method is to make patterns. A mini-master class on video will help you with this.
It is best to choose a fabric that matches the tone of the interior, or in some interesting and popular style, such as Provence.
Luxurious decoupage option
The following mini-master class will help you make a dresser in a truly luxurious style and turn it into the main addition to the interior.
To do this, you will need some blanks: pasting paper - it is better to buy ready-made, as well as additional decorative elements - for example, paints and gold leaf.
After preparing the chest of drawers, you need to paint all the details, and then apply the ornament of your choice to the doors.
The pattern can be applied according to the finished pattern, or see a master class on decorating a chest of drawers in a bohemian style.

Cover the finished ornament with gold leaf or other material of your choice, and close the facades of the boxes with baguette frames.
Then the entire surface must be varnished, and you can assemble the chest of drawers.
If you don’t want to decorate a chest of drawers in a too pompous style, then you can choose something lighter and more modern, for example, Provence, hi-tech, etc.
Dresser aging
The last mini-master class is devoted to how to artificially age a chest of drawers. You can do this in addition to the selected style, or choose this design option as the original and only one.
As in other cases, you need to completely disassemble the chest of drawers and process all its parts with sandpaper. Then wipe the surface with a sponge or cloth.
Paint the furniture and wait until it dries a little, and then you can start "aging".
To do this, you will need some ideas and blanks of tools - candles, a scraper or a skin will do.
With a scraper, you can create artificial damage on the surface, and rub some fragments of the surface with a candle.
You can apply other options for "aging" by looking at a master class or a photo with decoupage. Then you need to fix the blanks with an additional layer of paint.
Re-treat the chest of drawers with a sponge - where the paraffin has been applied, the paint will come off easily, and you will get the effect of aging.
If you want, you can also add decoupage to the resulting design using paper or ornament. After everything is ready, varnish the surface and you can assemble the chest of drawers.
This style is considered “rustic”, but it will also fit perfectly into a city dwelling if your apartment is decorated in country or Provence style.
Thus, with the help of decoupage, any restoration of the chest of drawers can be carried out.
To do this, you only need to make inexpensive blanks that will make up the drawing, choose a design style (Provence, Art Deco, hi-tech, etc.) and put a little imagination and effort - then you can restore an old chest of drawers so that it will turn out no worse than a new one.
Not a single house, like a single bedroom, is complete without a good, beloved chest of drawers for storing things, bed linen, towels and other useful and necessary things. For example, we often store small things in it, such as corkscrews for wine, champagne, can openers or hair clips, etc.
It can be a good wedding gift, and the jointly acquired property of a married couple, or just an individual choice. Therefore, its purchase should be approached thoughtfully, taking into account a whole range of factors and characteristics, the interior of the room, price / quality ratio, and other criteria.
To avoid problems with convenience, ergonomics, the right choice materials for manufacturing and appearance, we recommend buying a chest of drawers from the manufacturer https://usadba-mebel.ru/products/category/komody-iz-dereva. Buying goods in a trusted store, you automatically receive high quality control criteria for products, competitive prices on the market, and good quality service and delivery of goods.
How to restore a wooden chest of drawers at home
Many in our time can be found antique wooden furniture, which was either inherited from grandparents, or earlier generations. And some people buy such furniture at antique auctions. It is worth considering that we are talking not only about antiques, it can be from Soviet times, but made from natural wood different breeds such as oak, ash, beech, pine, etc.
Consider several recovery methods:
1. Sanding and varnishing
2. Pasting with veneer
3. Pasting with a finish film with a wood grain texture
The initial state could be, for example:
Sanding and varnishing
For sanding the chest of drawers, it is better to use sandpaper on fabric basis. For example, in Kharkov, I often used Zaporozhye sandpaper for similar purposes with P60-P80 grit to remove the old paintwork, and then P180-P320 for finishing surface grinding. Sandpaper on paper basis wears out faster and is ineffective.
First you need to wash and dry the wood with some kind of cleaning agent with a soft washcloth to remove dirt. Then remove the varnish layer with P60-P80 grit sanding paper, it is also worth going through the places where the coating has worn off to restore the color of the wood. You can use the manual method - attach sandpaper to a wooden plank 10 cm by 15 cm or use grinder. It can be both tape and vibration.
Next, you need to sand the entire surface with sandpaper with grit P180-P320. If there are small dents on the surface that could not be removed by sanding, you can use wood putty, or you can do otherwise - mix the remnants of small sawdust with varnish and cover them with an ordinary spatula. So you manage to keep a fairly accurate shade. original wood, and with small amyatinkas - preserve the texture.

Next, a layer of primer is applied on wood, and after it dries, 2-3 layers of paintwork. There are many options here, but it is worth considering that alkyd or epoxy varnishes will be the most resistant. Also, the first layer of varnish can be used as a primer, but after that it is necessary to sand the surface with fine emery, lightly, to knock down the raised pile of wood. And then apply already 1-2 finishing coats of varnish. An example of a lacquered chest of drawers can be seen below:
You can also use wood paints, they are also better to buy on an alkyd or epoxy basis. The fact is that during the restoration old furniture it is better to take care of the durability of the coating. And then your furniture will serve you faithfully for more than a dozen years, and the abrasion of the coating is possible in 5-7 years after its application.
Veneer gluing
To restore a wooden chest of drawers with your own hands, you can use a method such as pasting with veneer. To do this, it is better to buy natural (planed) material, and stick it on a surface sanded with coarse (P60-P80) emery with contact adhesive, such as Bindan-S, Moment, etc. For thin, building PVA glue is also suitable.
Also, do not forget that before coating the surface must be cleaned, and hidden with one layer of primer on wood, waiting for it to dry completely. Also, the material should be chosen with a moderate thickness, about 1.5-2 mm. The texture can be chosen at your discretion, taking into account the interior of the room and the cost.
It is better to stick the veneer with small tolerances along the edges, and then cut it off in fact with an electric jigsaw, or a plunge-cut saw. Because the edges of old furniture are not always smooth. Of course, you can also use a clerical knife and a plywood bar as a cutting guide. There are many options.
However, I note that more or less amenable to processing at home is veneer made from softer wood species (pine, maple, spruce, etc.), or mahogany, and of small thickness - 1.5-2 mm. If you take thicker wood, it will be stronger, but this strength is not due to anything. Enough 1.5 - 2 mm. It can be cut with an ordinary clerical knife in several passes.
Veneering - more difficult option restoration than refinishing and sanding. It should be used when the surface of the old wood is dotted with pits and other furrows from inaccurate use of furniture. Or if you are not satisfied appearance wood. Because for good result it is necessary to accurately mark and cut the strips and clean the base well, and use high-quality glue. An example of a chest of drawers restored by veneering can be seen below:

Pasting with a finish film with a texture under the tree
This is a cheaper and easier method than the previous two, but it should be used if there is an understanding that such a film is not natural wood. And if in previous cases were used natural materials, then this film is an artificial material, and not as durable as the wood itself. However, in appearance, you can find a film with a texture very close to the real one. It looks something like this:

First, as in previous cases, it is worth completely washing and cleaning the chest of drawers with coarse sandpaper. And then primed the tree and stick the film. Such a film is self-adhesive, it only needs to be well smoothed. However, the film will not hide surface irregularities. Therefore, irregularities must be puttied with putty on wood, or mix sawdust from sanding and PVA glue.
After pasting, it is better to hide the film with alkyd or epoxy varnish. Because by itself it is not very resistant to abrasion.
That's all, we looked at several ways to restore an old wooden chest of drawers with your own hands. Of course, these are not all methods, but they allow you to achieve excellent results, with a relatively small financial investment.


