Many private homeowners pay insufficient attention to protecting their properties from lightning strikes until the “rooster bites.” One of the reasons that encourages you to install a lightning rod in a private house with your own hands is when lightning strikes your yard. And it’s good if it’s not a house, but some less important object.
Lightning rod: to do or not?
Physical deterioration of the electrical networks of the old residential sector, electrical installations in need of repair, operated in rural houses, growing exponentially country houses make the problem of lightning protection quite relevant. At the same time, the owner of any form of ownership must clearly understand that from a timely decision taken and its practical implementation depends on the lives of those close to him and those around him.
Lightning protection is considered to be the prevention of damage to people, communications, buildings by a direct lightning strike, as well as the manifestation of its secondary symptoms. It is worth taking care of the long-term and safe operation of the house even at the design stage. Using established standards (GOST R IEC 62305-1-2010 “Lightning Protection” Part 1 and Part 2), you can decide on the choice of protection and its economic benefits. One thing is indisputable: a lightning rod for country house, cottage, country building will be more reliable the more expensive it is.
Attention! A non-serious attitude towards the issue of manufacturing and installing a lightning rod, lack of knowledge and experience can only aggravate the situation. Therefore, it is better not to make any lightning rod than to make it incorrectly.
Types of lightning protection
Preventing direct lightning strikes from entering a structure (building) is considered external lightning protection. Preservation of communications and equipment from inductive interference and lightning strikes electrical networks, penetration through the grounding system into buildings requires internal lightning protection. Depending on how the lightning rod works, its effectiveness can be assessed in four categories:
- 1 – 98% (highest degree of security);
- 2 – 95%;
- 3 – 90%,
- 4 – 80%.
Lightning rod: fundamental factors
The lightning rod device is nothing more than a structure rising above the house’s protection zone, through which the lightning discharge, bypassing the house (dacha, cottage, etc.), is diverted into the ground.

It consists:
- from the lightning rod receiving the force of the discharge,
- the down conductor transporting it (descent),
- ground electrode – “quenching” the discharge in the soil.
In this case, the house must be lower in height than the lightning rod (the difference is about 200 cm), located in close proximity to it or even under the outlet. Too much high protection is also not desirable, otherwise it will attract lightning from all over the area.
Before making a lightning rod, you need not only to think through its design features, but also to achieve maximum efficiency while working. This can only be ensured by following certain rules. Carrying out preliminary calculation lightning rod with determination of the level of protection will allow you to collect the necessary set of tools and consumables.
How does he work?
The principle of operation of a lightning rod is based on searching for a charge in the air, attracting it, receiving it and redirecting it to grounding. After all, lightning primarily strikes metal objects, structures that are significant in height and in direct contact with the ground.

Another important stage, which involves a lightning rod in a private house with your own hands: a diagram of its implementation. This can be a hand-drawn drawing or a serious drawing with a visual image of the conductors, pin, grounding conductor, fastenings, etc. It should contain a description of each element, indicate the method of fastening and the route along which the wire for the lightning rod is laid to the grounding point, the grounding itself.
Execution options
The lightning rod takes the blow and therefore must meet increased reliability requirements during operation.
- If it is a rod, then the best material Multi-profile rolled steel is used: water pipes, gas pipes, metal rods. With a diameter of at least 100 sq. mm length should be about 200 cm from the place of fixation on the house. Hollow pipes are welded at the upper end or hermetically sealed with a stopper. The most complete coverage area for the protection of cottages, country houses and private houses is observed when the height of the core structure does not exceed 30 m.
- You can use a cable (galvanized steel rope). Several of its threads are suspended horizontally above the house on free-standing supports. The ends of the ropes must be grounded. You just need to choose the right place to hang the tensioned structure.
- The use of mesh protection made of wire rod with a cross-section of 8 mm, laid on the roof, or flat steel strips (with a cross-section of up to 20 mm) is also relevant. Moreover, an air terminal in the form of a mesh, connected to the ground loop by several separately located conductors, is considered the most effective, allowing for the maximum protection factor.
- The wire for the lightning rod as a current dissipation element must have a diameter of at least 6 mm (above-ground part). The same wire rod is used for these purposes. The piece of wire going to ground should not be thinner than 10 mm. In this underground section, a connection (welding, bolting) with the ground electrode is made.
- As a reliable grounding, use a sheet of metal (1 m x 1 m) sprinkled with soil or a metal pipe, a rod driven into the ground at least 1.5-2.0 m. The grounding site must always have moist soil - an effective conductor . Grounding made of copper and stainless steel will be durable.
How to protect your cottage from being damaged by a lightning strike?
Summer residents with their “light” buildings located in sparsely developed areas are especially at risk of fire from lightning strikes. There is nothing else left to do but make a lightning rod at the dacha. The most vulnerable places for lightning to strike are: the edges of gables, skylights, and the ridge, especially if the roof is wooden or covered with slate.

You can make a simple lightning rod like this:
- two opposite distant points on parallel roof gables are selected;
- the bars are vertically fixed in them so that their ends rise above the top point of the roof ridge by at least 25 cm;
- A steel wire (5-6 mm cross-section) is stretched between the beams along the roof.
- The main metal part 1.0-1.5 m high of the lightning rod is attached to the upper parts of the beam with a screw connection. It may consist of a steel angle, a pipe (ᴓ 50 sq. mm.);
- the pipe for discharging combustion products into the atmosphere is closed with a stainless steel lampshade or a twisted wire connected to a conductor.
- according to the scheme, the most in the best possible way The down conductor is laid along the outer wall of the house, where it is connected to the grounding, which is buried 100-200 cm into the ground.
Attention! The lightning rod device involves the installation of a separate structure with its own grounding. It is prohibited to adapt existing household grounding to it.
Organization of lightning protection: how to do everything right
An economical option for protection against lightning strikes is an ordinary vertically installed rod. It must be placed separately from the building on a pole or tall tree. The height of the installation directly affects the probability of a discharge entering the house: the higher the rod, the lower the probability.
Before making a lightning rod in a wooden house, you need to familiarize yourself with the implementation of comprehensive protection. It is this that will be able to protect the building and equipment not only from the direct threat of a discharge, but from the destructive effects of lightning, which sometimes occurs even at a distance of several kilometers from your home.
Table Materials and minimum cross-sectional values of elements of the external inter-branch structure
| Protection | Material | Section, mm | Note |
|---|---|---|---|
| Natural lightning rod | iron 4 mm thick | * | galvanized/stainless steel |
| (tank casing, pipe) | copper 5 mm thick | * | |
| aluminum 7 mm thick | * | ||
| Special lightning rod | steel | 50 | galvanized/stainless steel |
| copper | 35 | ||
| aluminum | 70 | ||
| Current lead | steel | 50 | galvanized/stainless steel |
| copper | 16 | ||
| aluminum | 25 | ||
| Ground electrode | steel | 100 | galvanized/stainless steel |
| copper | 50 | cable | |
| aluminum | * | not applicable | |
| Equalizing conductor | iron | 50 | galvanized/stainless steel |
| copper | 16 | ||
| aluminum | 25 |
The operating principle of a complex type lightning rod is based on the close interaction of external and internal leads converging in grounding. Selection of material for external structure depends on the angle of inclination of the roof slopes, their size, decorative roofing covering and its properties, the absence or presence of additional elements on the roof, antenna, etc.
For the internal branch, the fundamental element is the potential equalization bus. Its purpose is to counteract a strong powerful pulse charge that causes overvoltage entering the building from power lines or through various communications. Down conductors are installed as close as possible to the outer corners of the house.

With the traditional method of organizing a lightning rod, you need to ensure that all conductive (metal) parts of the roof of the house are connected to the lightning protection. A roof covering made of metal decking, if it is not thinner than 0.5 mm, can serve as a kind of conductor.
In the case of an active set of measures to protect against electric shock, the mating of all protruding metal parts of the roof frame is not required: the discharge passes along the path of the shortest length.
As statistics show, in last years Natural disasters are becoming more and more frequent. And if a tsunami or earthquake cannot be avoided, then reducing the mortality and destruction from lightning is within the reach of any of us. Anyone can carry out simple activities that do not require significant capital investments with appropriate training. You just need to follow a strict algorithm for performing the work, use reliable materials, and not neglect the requirements of the standards.
Country houses are usually built from flammable materials, and the fire station is located far away. Yes, and you can’t drive up to every building, and you shouldn’t expect anything good from the strong wind that accompanies any thunderstorm.
Sometimes entire holiday villages burn out from a lightning strike.
We’ll tell you how to make an effective lightning rod on your own and eliminate the risk of a direct hit from a “heavenly discharge” into your house.
Where do lightning come from?
In a simplified way, the physics of the process can be described as follows: the source of lightning is cumulonimbus clouds.
During a thunderstorm, they turn into a kind of giant capacitors. On the upper plus part, a huge positively charged ion potential accumulates in the form of ice crystals, and in the lower minus area, negative electrons accumulate in the form of water drops.
During the discharge (breakdown) of this natural battery, lightning appears between the ground and the thundercloud - a huge electric spark discharge:
This discharge will always flow along the circuit of least local resistance electric current. The fact is well known and verified. Such resistance usually occurs in high-rise buildings and trees. Most often, lightning strikes them.
DIY lightning rod
The idea of a lightning rod is to arrange an area of minimal resistance near the house so that the lightning discharge passes through it and not through the building.
If you don’t have a lightning rod at your dacha, it’s time to think about building one. The cheapest and easiest way to make it is to do it yourself. What do you need to know for this?
So, a lightning rod (lightning rod) is a lightning protection (lightning protection) device that ensures the safety of a building and the lives of people in it from the destructive effects that can occur during a thunderstorm when directly struck by lightning.
This is a corrosion-resistant, bare conductor - that is, a material that conducts electricity well and has the largest possible area and cross-section (minimum 50 mm²).
A lightning rod (lightning rod) is assembled from thick copper wire or steel wire rod, pipes of the required section, or from steel, aluminum, duralumin rods of various profiles, angles, strips, and so on.
It is better to use galvanized steel materials. Since they are less susceptible to air oxidation.
What does lightning protection consist of: device
Lightning rod (lightning rod) simplest design consists of 3 parts:
Lightning rod.
Down conductor (descent).
Ground electrode.
Let's talk about each element in more detail.
Lightning rod
Lightning rod - a metal conductor fixed to the roof of a building or to separate support(tower). Structurally, it is divided into three types: pin, cable and mesh.
When choosing a lightning rod design, be guided by the material with which the roof of the house is covered.
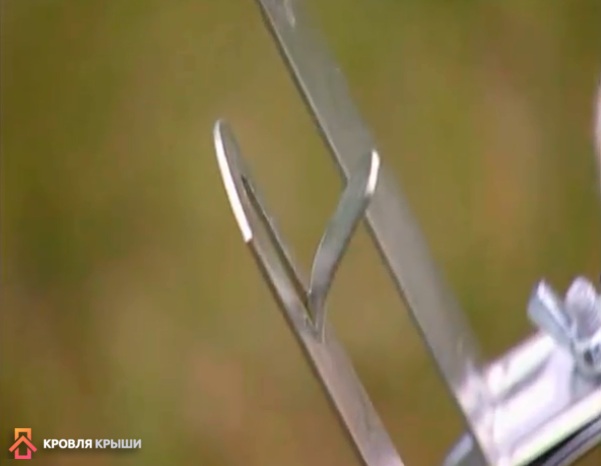
1. A pin (or rod) lightning rod device is a metal vertical rod rising above the house (see figure below).
Suitable for roofs made of any material, but it is still preferable for metal roofing. The height of the lightning rod should not exceed 2 meters. And it is attached either to a separate load-bearing support, or directly to the house itself.
Materials for production:
Steel pipe (20-25 mm in diameter, with a wall 2.5 mm thick). Its upper end is either flattened or welded into a cone. You can also make and weld a special needle-shaped plug to the upper edge of the pipe.
Steel wire (8-14 mm). Moreover, the down conductor must be exactly the same diameter.
Any steel profile(for example, angle or strip steel at least 4 mm thick and 25 mm wide).
The main condition for all these steel materials- cross-section minimum 50 mm².
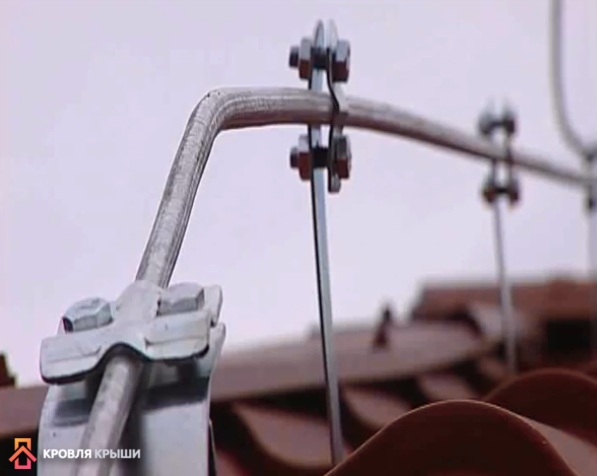
2. The cable lightning rod device is a cable or wire stretched along the ridge at a height of up to 0.5 m from the roof with a minimum cross-section of 35 mm².
Galvanized steel rope is usually used. This type of lightning rod is suitable for wooden or slate roofs.
It is fixed on two (1-2 meters) supports made of wood or metal, but insulators must be installed on the metal supports. The cable is connected to the down conductor using die clamps.
3. The mesh device of the lightning rod system is a 6-8 mm thick mesh laid over the roof. This design is the most difficult to implement. Suitable for tiled roofs.
4. Well, a lightning protection cover device is very rarely used - this is when the metal structural elements of the house itself (roof, trusses, roof fencing, drainpipe) act as lightning rods.
All considered designs of lightning rods are reliably connected by welding to a down conductor and through a down conductor to a grounding conductor with a single- or double-sided weld of at least 100 mm in length.
Down conductor
Down conductor (descent) - the middle part of the lightning rod, which is a metal conductor with a minimum cross-section for steel 50, for copper 16 and for aluminum 25 mm square.
The main purpose of the down conductor is to ensure the passage of discharge current from the lightning rod to the ground electrode.
The ideal path for the passage of electric current is the shortest straight line, directed straight down. When installing a lightning rod, avoid turning under acute angle. This is fraught with the occurrence of a spark discharge between nearby sections of the down conductor, which will lead to inevitable ignition.
The most popular material for a current conductor is uninsulated steel wire rod or strip. It is carried out only on fireproof surfaces. Metal brackets should be installed on flammable walls, which themselves, being in contact with the flammable surface, will protect the down conductor.
The minimum distance from the wall to the down conductor is 15-20 cm.
It is necessary to lay it so that there are no points of contact with such elements of the house as the porch, front door, window, metal garage doors.
We know that it is better to connect parts of a lightning rod by welding, but if this is not possible, it is permissible to couple the down conductor with the grounding conductor and the lightning rod using three rivets or two bolts. The length of application of the current conductor to other parts of the system with a rivet connection is 150, and with a bolt connection - 120 mm.
The end of the non-galvanized wire rod and the place where the wire conductor is attached to the steel parts must be cleaned to ensure reliable contact, and the galvanized wire must be washed from dust and dirt. Then a loop or hook is made at the end of the wire, washers are placed on both sides and the whole thing is tightened as tightly as possible with a bolt.
The joints (if it is not welding) also need to be wrapped in several layers of electrical tape, then with a coarse cloth, twisted on top with a thick thread and covered with paint.
To improve contact, you can treat the ends of the wire with tin and solder them.
Ground electrode
Grounding conductor (grounding electrodes) - the lower part of the lightning rod located in the ground, ensuring reliable contact of the down conductor with the ground.
How to properly arrange grounding is described in GOSTs and SNIPs, but for the most simple option It is enough to bury a U-shaped structure made of metal conductors at least one meter from the edge of the foundation and no closer than 5 meters from the entrance to the building.
A conventional grounding loop (it is made for household electrical appliances) can cope with the task.
These are 3 electrodes driven and buried in the ground, connected to each other at the same distance by horizontal grounding conductors. The grounding structure should be buried below the maximum soil freezing level. From 0.5 to 0.8 meters deep.
For the ground electrode, rolled steel with a cross-section of 80 mm is used, less often copper with a cross-section of 50 mm square. Vertical grounding electrodes are 2-3 meters long, but the closer the groundwater level, the shorter they are.
If the soil at your dacha is constantly wet, then a meter or half meter pin will be enough.
To what depth to drive and how many electrodes will be needed can be found out at the energy service at your place of residence.
It must be remembered that the quality of grounding depends on the size of the contact area of the ground electrode with the soil and the resistivity of the soil itself.
A separate grounding conductor is needed for the lightning rod; you should not ground the lightning rod to a household circuit. We strongly advise against experimenting. It's fraught with consequences.
We invite you to watch a video with a visual diagram of lightning protection installation:
According to regulatory documents, the installation of lightning protection systems is optional for private residential buildings. And only you can decide the feasibility of installing a lightning rod (lightning rod) at your dacha. We hope that the article will help you make the right decision.
bydom.ru
Protecting a private home from lightning - review of a good lightning rod
Reliable lightning rod for summer cottage will not only protect a person from lightning, but also a house from fire, especially if it is wooden. Consists of good system lightning protection consisting of a grounding conductor, down conductor and lightning rod. Next, we will tell Sam Elektrika readers about what all the elements of the system should be and how to make a lightning rod in a private house with your own hands!How the system works
First, let's figure out how lightning protection for a private home works and what is needed to create it. You can clearly see all the components of the system in this diagram:
As you already understood, the metal rods on the roof are lightning rods that discharge a dangerous discharge to the ground through a down conductor and special grounding.
There is an opinion that if a telephone tower is installed near the house, there is no need to install a lightning rod in a private house. This is wrong, because... It’s better to spend a little time and ensure yourself complete protection from lightning strikes. So that you know what a lightning rod should be like and how to make it correctly with your own hands, below we will separately consider the features of choosing each of the system elements.
Brief overview of lightning protection installation
Components of protection
Lightning rod
The main task is to choose the right lightning rod, which should provide complete protection country house in its coverage area. Today, a pin, mesh, cable, or the roof itself can act as a lightning receiver. Let's take a closer look at the features of using each option in a private home.
As for the pin, there already exist finished goods from manufacturers that have a suitable shape and convenient fastening. As a rule, the metal used to make the lightning rod is copper, aluminum or steel. The most suitable and effective is the first option. In order for the receiver to cope well with its task, its cross-section must be at least 35 mm2 (if copper) or 70 mm2 (steel rod). As for the length of the rod, in domestic conditions it is recommended to use receivers with a length of 0.5 to 2 meters. The pins are convenient to use to make a lightning rod on garden house, bathhouse or other small building. 
Metal mesh can also be sold in already finished form. As a rule, a mesh lightning rod is a cellular frame made of reinforcement, 6 mm thick. The cell size can range from 3 to 12 meters. Most often, this type of lightning protection is used in apartment buildings and large buildings, for example, shopping centers.
The cable is more practical at home and does the job better than the mesh. To make a lightning rod in a private house using a cable, you need to stretch it along the roof (along the ridge) by wooden blocks, as shown in the photo below. The minimum diameter of the cable for lightning protection of a building must be 5 mm. As a rule, this option is used if you want to make a lightning rod on a house with your own hands. slate roof.
Well, the last option - the roof as a receiver, can be used if the roof of a residential building is covered with corrugated sheets, metal tiles or other metal roofing material. With this type of lightning rod, two important requirements are imposed on the roof. Firstly, the thickness of the metal must be at least 0.4 mm. Secondly, there should be no flammable materials under the roof. You can make a lightning rod in a private house with a metal roof much faster and at the same time save on the purchase of special lightning rods.
Please note that if you use a mesh, it must be installed at a height of at least 15 cm above the roof itself!
Down conductor
A 6-mm wire made of copper, steel or aluminum is used as a down conductor for a private home. The wire must be connected to the lightning rod and the grounding system with bolts or welding.  The only, but very important requirement for the down conductor is that it must be insulated from environment and go to the ground along the shortest path. As for insulation, in dachas and country houses the use of conventional cable channels is popular, which are also used if it is necessary to make open wiring in the house with your own hands
Ground electrode
Well, the last element of the lightning rod is the grounding circuit. In order not to make the material too voluminous, we have dedicated a separate article to this issue - how to make grounding in a private house. We recommend that you read the information so that you know all the intricacies of this stage.
In short, we can say that the grounding loop should be located next to the house, but not in the walking part of the site, but, on the contrary, closer to the fence. The charge is discharged to the ground by metal rods buried in the soil to a depth of 0.8 meters. It is better to place all the rods according to the triangle pattern, which is exactly what is shown in the photo: 
So, we have become familiar with the constituent elements of lightning protection on the roof, now we will look at how to properly make a lightning rod with your own hands.
Reliable lightning rod in the country - video tutorial on how to create
Manufacturing instructions
To make it clearer to you how to assemble the lightning rod system of a private house into a single whole, we provide step by step instructions with photo examples:
 Video instructions for assembling lightning protection by professionals
That's the whole technology for creating a lightning protection system. As you can see, making a lightning rod in a private house with your own hands is not at all difficult, the main thing is to carry out the calculation work correctly. We recommend that you watch the video instructions, in which all stages of lightning rod installation are discussed in more detail.
Related materials:
samelectrik.ru
Lightning rod at the dacha. We make lightning protection with our own hands.

There is a widespread belief that wooden house does not require lightning protection. They say that wood is not a conductor, on the contrary, it is a dielectric, and the height of the roof is small, so a lightning rod is not needed at the dacha. This kind of misconception is literally deadly, since lightning in dry weather is as rare a phenomenon as ball lightning. But in a thunderstorm, when it pours like buckets, the conductor of electricity is not wood at all, but water, which is dangerous to life if classified as a dielectric.
These photos show the consequences of a rare phenomenon - a name for which we do not know. There was just a strong thunderstorm, and, despite the fact that the house is equipped with lightning protection, it was not it that acted as the discharge receiving circuit, but the perimeter of the roof drain (it is metal). All the machines turned off, but while this was happening, the author managed to take several photos. This is a TV with a satellite dish, which is at a height of 2.3 m from the ground on the wall, and seems to be completely unaffected by lightning.
First the lightning introduced itself and showed itself,  after which it played with the TV picture.
  After that, the picture disappeared, but the receiver was still alive, having switched to factory settings mode.
  After which the house was completely de-energized, and how the matter would have ended remains a mystery. The photos were taken on a mobile phone, so as you understand, the process was not instantaneous. Take it out, turn it on, take a picture, etc.
The receiver had to be repaired - it burned out, at the same time the regular antenna (meter range) was damaged, and the spillway was burned in two places. Three burned out LED bulbs. All incandescent lamps survived. There was no fire, no damage to electrical wiring, thanks to correct connection grounding and lightning rod. So a lightning rod is needed at the dacha, since we still know too little about lightning.
This was the preamble, and now about what and how you can do with your own hands to avoid such cataclysms.
A little theory about the practice of lightning protection
We pride ourselves on our practical knowledge of electricity, but we do not believe that scientists have yet understood what lightning is - that is, the spontaneous discharge of atmospheric electricity. We also don’t believe in the idea that electricity is generated by clouds that “rub against each other.” But we know that there are practical methods of protection, and they have long proven their effectiveness. We will focus on this aspect, taking a couple of laws of thermodynamics as a theoretical model, and also reading about discharge in a saturated gas environment.
In this model, the discharge will occur between the point of maximum potential (somewhere in the clouds) and the nearest point of minimum potential. Note that this is exactly what happens in the vast majority of practical cases. Therefore, we accept as the correct model of a lightning rod in a dacha a conditional point above the roof, which, being the top of a speculative hemisphere, will cover the entire house.

The radius of this hemisphere is determined not by the height of the dacha lightning rod, but by the amount of potential that it is capable of receiving and releasing into the Earth (the potential of which is relatively infinite). In fact, the radius of such a hemisphere is the depth of the grounding, and we just need to understand how to choose materials in order to move on to the task of making lightning protection with our own hands at the dacha.

Preparatory work for the installation of a lightning rod
The preamble talks about what can happen in a private house that is equipped with a lightning rod if two mistakes are made. The first is that the lightning rod receiver is next to the antenna, perhaps this had its effect. The second, more serious mistake was the constant cross-section of the lightning rod channel along its entire length. Simply put, from the metal strip of the receiver to the ground itself there is exactly the same strip. Throughout the entire height.
The lightning receiver can be thin, its task is to cast a fishing rod and wait for a bite. But the lower and closer to the ground the discharge line, the “thicker” it should become. A very thick conductor must be buried in the Earth. That is, we go from the roof to the ground, increasing the cross-section of the lightning rod.

So, we do lightning protection with our own hands at the dacha, without resorting to the help of specialists.
- We determine the height and configuration of the roof, mentally covering it with a hemisphere from the top point of the lightning rod, which we make at our dacha.
- The radius of the hemisphere is defined as a section of 5 sq. mm. per 1 meter height. That is, a lightning rod in a country house 12 meters high (for a square house) should have a cross-section of 12 x 5 = 60 square meters. mm. This is a 1 cm strip of 6 mm thickness. Let us clarify that this is the minimum permissible value for the point at which the receiver pipe will be welded to the discharge outlet channel. That is, the lower this tape goes, the thicker it should be.
- We determine the attachment point of the lightning receiver pipe. The chimney is not the best option– it is better to fix the pole on the wall, slightly increasing the height, than to allow a powerful discharge to hit the center of the roof. We dig a hole for grounding, most often triangular in shape, as for grounding.
- We evaluate the height of the pole, the depth of the pit and the cross-section of the metal in the pit according to the principle - the larger the better, but without fanaticism. If you make a very high pole and a very good hole with grounding, then your dacha will collect all the lightning in the area with its lightning rod. Add 10 percent on top - that will be enough.
Don't drive several reinforcement bars into the ground! We dig a hole, weld several metal rods together, make sure the weld is strong, cover the welding areas with protective compounds and then bury the hole.
Having finished preparatory work, we make lightning protection with our own hands:
- We attach a metal rod to the pole. It is advisable to install a fan at the end (an old metal brush will do);
- Using screw connections, after thoroughly cleaning the contact points, we connect the tape and the lightning rod;
- We will make sure that both the lightning rod and the tape do not have contact with the roof - if necessary, we install insulators (they cost pennies and are screwed with ordinary self-tapping screws);
- We lower the tape along the wall to ground level and weld it to the ground loop. We cover the welding area with protective compounds;
- We check that the outlet tape is not connected to the wall, check the insulators, connections and dig a hole with grounding;
- In no case are we trying to save money by hanging the electrical wiring ground on the same grounding!
Our lightning rod at the dacha is ready. It remains to wait for the cataclysm to test it in action.
Some nuances of arranging a lightning rod at the dacha
For some reason, iron rusts, especially in the ground. Cover ground protective composition It’s possible, but it’s better to take a thicker piece of iron. A 120x120 corner with a thickness of 12 will rust in the ground for 40 years without losing conductivity relative to the entire lightning protection circuit.
Additional impregnation with fire retardant compound wooden walls along the entire lightning rod line will be a very useful and useful means of fire protection.
Before choosing a specific location for a lightning rod pole in your dacha, walk around and look at the tall trees and buildings around. The correct location will be where it is furthest from the nearest highest points. Exactly the farthest!
The whole complex of work can be done in a day, maximum two. This is not the most difficult task, it does not even require special knowledge. But it requires scrupulousness and thoroughness, so do it yourself without involving mercenaries. You want to protect yourself, and not receive assurances that you are protected.
obelektrike.ru
Do-it-yourself lightning protection of a private house: materials, diagram, instructions
House and cottage Gardener's calendar June House and buildings Do it yourselfLightning strikes on unprotected private houses and trees, unfortunately, are not uncommon. Having lightning protection at your dacha is necessary - it will divert the discharge into the ground and help save your property, and sometimes even your life. We will tell you how you can make a lightning rod with your own hands, using improvised means and tools.
 How to protect against lightning a private house
 The lightning rod can be:
- Rod - a metal pin fixed to a frame (on the roof, near the house, on a tall tree growing near the house). The pin is connected to the grounding system using a metal wire. This lightning rod looks aesthetically pleasing, but its coverage area is not large. It is easy for them to calculate the protection area: from the highest point of the pin, you need to mentally draw a line to the ground at an angle of 45º. Everything that ends up in the perimeter triangle area is protected from lightning strikes.
 Installation of rod lightning protection
 - Cable - its peculiarity consists of several masts (two or four), connected to each other by steel or aluminum wire. This lightning rod is more effective and covers a larger area with protection.
 Cable lightning rod on the roof of a private house
 These two types of lightning rods are the most common and are used in private homes and dachas, since their design is simple and installation is not difficult to do with your own hands.
Lightning protection elements
Any type of lightning rod system consists of three mandatory elements:
- Lightning rod. In a rod lightning rod, this is a pin fixed above the chimney at least 1 m; in a cable lightning rod, it is a wire connecting the masts on the roof. A metal roof can also act as a lightning rod if the coating thickness is 4-7 mm.
- Down conductor is one of the main elements of lightning protection. It consists of copper (d 16 mm²), aluminum (d 25 mm²) or steel (d 50 mm²) wire.
- Grounding is a system of metal rods connected to each other by conductive material. It is located underground at a depth of at least 80 cm.
Materials and tools
For the construction of lightning protection with my own hands you will need:
- The lightning rod is a pointed pin. A television mast or radio antenna can be used, you can also buy an air termination rod from one of the leading manufacturers: SCHIRTEC, OBO Bettermann, J Propste, GALMAR;
- Copper, aluminum or steel wire of the recommended cross-section;
- Pins, pipes or metal strips for grounding;
- Mast (frame);
- Plastic fastenings;
- Tools (hammer, drill, shovel).
Installation of cable lightning rod
At the first stage of lightning protection installation, it is necessary to stretch a wire along the roof ridges, which will serve as a lightning rod.
 Installation diagram of cable lightning rod
 If the roof is covered with flammable materials (wood, plastic tiles), the wire should be located at a distance of 10-15 cm from the surface on special plastic fasteners. The ends of the wire are attached to metal masts (horizontal lightning rods), or bent vertically.
 Installation and fastening of lightning rod
 The down conductor is attached to the lightning rod by welding, bolts or rivets. The connection points are isolated. On the roof the down conductor is fixed with brackets, on the walls of the house - plastic fasteners. The wire can be placed in the cable channel to avoid negative influence atmospheric phenomena on it.
 Down conductor from the roof of a private house
 The grounding system is installed at a distance of at least 5 m from the house, paths, benches. There should be no areas for children to play or for animals to walk nearby. Grounding only works in moist soil, which must also be taken into account when choosing a location.
The procedure for installing lightning protection grounding is:
- Dig a trench to a depth where the soil is always damp (at least 80 cm)
- Drive metal pins into the bottom of the trench.
 Ground loop for lightning protection
 - Connect the pins together steel tape or pipe by welding.
- Extend the grounding with a steel tape to the point where it connects to the down conductor.
- Connect the down conductor to ground.
 Attaching the down conductor to grounding
 Installation of rod lightning rod
A rod lightning rod requires installation of a high frame. Its role can be played by a television antenna mast. The lightning rod is attached to the mast by welding or bolts.
 Scheme of a lightning rod in a private house
 The installation of the down conductor and grounding of such lightning protection does not differ from that described above. After completing the work, it is necessary to check the resistance of the entire system. It should not exceed 10 ohms.
Service
Preventative maintenance of a lightning rod includes periodic cleaning of the rod pin from dirt, dust and oxide, as well as checking the integrity of all connections.
It is not difficult to install a lightning rod at your dacha yourself. If you follow all the recommendations and standards of the instructions for the installation of lightning protection RD 34.21.122-87, then at the right time it will work flawlessly.
Despite the fact that it is easy to make a lightning rod with your own hands, it is recommended to contact specialists to perform such work. Only professionals will be able to suggest which materials are best to use specifically in your situation, provide qualified assistance in choosing the right location for installation, and take into account the negative factors from which the protection may not work.

How to decorate a stump in the country with your own hands
Before considering the process of calculating and installing a lightning rod in a private house, you need to find out the physical causes of the phenomenon. This will allow you to better understand all the actions and possible consequences if the developed instructions are violated.
Thunder is air waves that appear as a result of a sharp increase in air pressure after the contact of a lightning discharge. The current strength in lightning can reach 500 thousand amperes, and the voltage can reach several million volts. Such a powerful eclectic discharge causes the air to heat up to high temperatures, and its volume sharply increases. As a result, sound waves from lightning arise, which are called thunder. Thunder is a consequence of lightning and does not pose any danger to the house; buildings must be protected not from it, but from lightning.

Accordingly, build not a lightning rod, but a lightning rod.

Why do you need a lightning rod
Some not very literate developers think that a metal pin attached to the ridge of a house will attract all the lightning along a cylindrical circle above it and lead them to the ground along a wire. For this purpose, a piece of wire rod is specially buried near the house. Such ideas are very far from science; a metal pin stuck into the ground near the house and tied to a rod on a ridge will not bring any benefit. Why?
- Where can I find a wire that can withstand a current of 500,000 A and a voltage of 1000000000 V? This is exactly the type of discharge that lightning has when it hits the ground.
- Why, in principle, attract lightning and direct it along the wire, risking setting the building on fire due to overheating of the down conductor?
- What to do if there are several buildings of different heights on a summer cottage? Will we have to make a lightning rod system for everyone?
Conclusion. It is necessary to install not a lightning rod, but a lightning rod. All actions should not be aimed at attracting lightning, but, on the contrary, at creating conditions that minimize the likelihood of it hitting a structure.

These are very complex calculations; simplified formulas give a big error. Sometimes it is not possible to fulfill the original technical conditions; there may be several reasons, some of them are objective and beyond human influence.
Prices for lightning protection and grounding
Lightning protection and grounding
When to install a lightning rod in a private house
Again we need to remember a little theory about lightning - they will become clearer actions during installation of a lightning rod. There can be several types of lightning, but we are only interested in the cloud-to-ground direction. At the initial stage, streamers appear, which later connect and form stepped leaders. They are the ones who glow brightly and quickly head towards the ground.

As it approaches, the voltage of the eclectic field on the earth increases, all the electrons in it rush upward and, at the highest point, throw out a response streamer towards them. It connects to the leader, the circuit is closed, and the electrical discharge goes into the ground. The channel heats up to 20,000–30,000°C, the air expands and creates strong sound waves (thunder).
Now it will be clearer when it is necessary to install lightning rods on a house.
- If the earth in a given area has a large number of ions. Such zones are located in waterlogged areas; they are the ones that can accumulate a large amount of charge. Pay attention to how often lightning occurs in your area, talk to old-timers. If they cannot remember cases of lightning hitting any objects, then there is no need to install a lightning rod.
- The house is located on lands capable of accumulating charge; lightning strikes are not uncommon in this area. Installation of a lightning rod is mandatory, but you must strictly follow the installation rules and perform preliminary calculations.

How does a lightning rod work?
An effective lightning protection system is aimed at minimizing the direction of stepped lightning leaders into the building area. And for this there is only one condition - the electrical potential of the earth in a given area must be minimal and necessarily much less than in neighboring ones. Lightning rods should perform this task. They constantly, and not just during a thunderstorm, send into the atmosphere electric charges and thereby significantly reduce the voltage potential. The conditions for the appearance of oncoming streamers disappear, lightning finds other energy outlet points.
Important. If a lightning rod is struck by lightning, it means that it is not installed correctly and is causing harm instead of benefit.

The size of the protected area depends on the number and quality of grounding pins; they collect electrons and send them through wires to the vertical pin of the lightning rod. From there, the electrons gradually move into the atmosphere. Due to this continuous process, the potential under the house is reduced and the likelihood of lightning striking it is automatically minimized.
Now that the principle of operation of a lightning rod is clear, the tasks of each element of the system are clear, you can begin installing home protection.
Step-by-step installation instructions
As is already clear from the above, lightning protection should be installed only in conjunction with effective grounding, otherwise the system will not function.
It is recommended to begin work only after calculating the number, size and location of grounding conductors. Only qualified specialists can perform such calculations. By the way, after installation they must check the effectiveness of grounding with special devices (meggers); if the indicators turn out to be unsatisfactory, then it will have to be corrected or completely redone.

Step 1. Bend the wire fastening tendril and assemble the two halves of the ridge holders.

They are made in such a way that with the help of adjusting holes and screws it is possible to change the main parameters. The elements can be firmly fixed to skates of various sizes, while the reliability of fastening is maintained throughout the entire period of operation, spontaneous unscrewing is completely excluded.

Step 2. Attach the down conductor holders to the ridge. If you buy an industrial lightning rod system, great, it has all the elements necessary to install the equipment. You can make them yourself, but this will require additional time. In addition, handmade holders significantly lose out in design and do not decorate the building in any way.
The distance between them is approximately one meter; care must be taken that the wire does not touch the roof covering. Try to fasten with the same spacing, this way the system looks much better and does not have a negative impact on the appearance of the house.
Practical advice. Always use a safety rope when working on roofs, especially metal coatings. If it is not possible to purchase industrial equipment for climbers, then make some basic equipment yourself.
Tighten the wing nuts firmly, use open-end wrenches or pliers. Remember that it is difficult to correct the mistake you made later; you will have to climb onto the roof again. Please note that everyone vertical racks for installation, the wires were positioned strictly on the same line.

Step 3. Proceed with laying the wire on the ridge holders. It must be even, the diameter is calculated by a specialist, but in most cases it cannot be less than 6 mm. It is desirable that the surface of the wire be coated with a layer of zinc, due to this the performance characteristics are significantly improved.

- The wire does not rust, and brown streaks do not appear on the roof. Traces of rust greatly worsen the appearance of the building.
- Due to the fact that the wire does not rust, the resistance indicators remain unchanged for a long time. And this is a very important parameter of any lightning rod.
- Resistance is reduced at the connection points; during operation it does not deteriorate the physical and electrical characteristics.
You should not skimp on the quality of all lightning protection elements, otherwise the effectiveness will be insufficient, and money for purchase and installation can be considered wasted. Clamp the wire with special tongues and pliers.
Step 4. Bend the end of the wire protruding beyond the slope at a right angle, leave a piece approximately 50 cm high, cut off the excess with special wire cutters.

Step 5. Spread threaded connections special mastic, if it is not available, then you can use ordinary grease. Mastic provides additional protection metal surfaces from oxidation. The fact is that when tightening the nuts, the zinc on the thread breaks off due to strong friction, and the exposed metal requires protection.

Step 6. Proceed to attach the wire to the slopes in the longitudinal direction. Here, the installation technology depends on the type of roofing material.
- Single-wave metal tiles. You need to loosen the screws a little, lift the sheet and insert the mounting bracket into the resulting gap. It has a curved leg shape that fits into the recesses of the metal tile and is firmly fixed in it. Tighten the roof fastening screw. Install the wire and clamp it with the tabs.


- Piece tiles. There are special brackets for such a roof; they have an increased leg length and several notches with tongues. Before installing the bracket, the tongue must be bent at a distance equal to the length of the piece tile, thereby increasing the strength of the fastening. Then you should lift the tiles and slide a bracket under it; when the roof is lowered, it is fixed in a stationary position. The wire is attached to it in the usual way.


- Sheet metal tiles. To attach the wire, special brackets are sold that need to be fixed on top of the roof with self-tapping screws. It is necessary to ensure that the screws always fit into the sheathing boards. Two rubber gaskets are used to seal the hole. One is installed between the bracket and the roof surface, and the second is installed between the bracket and the self-tapping washer.


- Flexible bitumen shingles. This roofing covering has a solid base, which greatly simplifies the technology for fixing the brackets. They are screwed to the surface with ordinary wood screws, and rubber pads are used to seal the holes.


Practical advice. There are situations when the design of a lightning rod requires moving one wire from the front slope to the rear. It is recommended to connect them at the intersection with the ridge wire; for this, use elements with bolted ties. This way you will achieve reliable contact between the down conductors.
Prices for down conductor holders
Holders for down conductor
Step 7 Screw the brackets to the edge of the gutter of the drainage system, the wire is fixed to them with bolts. Tighten connections with great force.


The down conductors installed on the house are connected to grounding.


Making grounding
This is the most important element of a lightning rod; as already reported above, only a specialist with special education should calculate the parameters. He must know the soil resistance, its composition, the proximity of groundwater and other initial data. Based on calculations, the material, metal pins, distance and quantity, and burial depth for each grounding are selected. Depending on the size of the house, the specific location of the grounding conductors is selected.

Prices for voltage stabilizers
Surge Protectors
- For steel pins, the cross-sectional area must be at least 80mm2, for copper pins - 50mm2. It must be remembered that both steel and copper oxidize at different rates, and the oxides negatively affect current conductivity. The cross-section and surface area of the rods must be selected with reserve, and resistance measurements must be taken annually. When critical values are reached, it is recommended to dig out the rods and clean them of rust.
- The depth of the trenches is at least 5.0 m, the length is at least three meters. These indicators largely depend on physical characteristics soils, decisions are made by a specialist at the work site.
- It is better to make all underground connections by welding; the clamps quickly lose their initial resistance values. Welding must be done on both sides, the length of the seam is at least five centimeters.
- Professionals advise using a metal strip with a thickness of at least 1 mm and a width of approximately three to four centimeters instead of round pins. Such metal is not only cheaper, but also significantly increases the operating time of the lightning rod due to the large contact area with the ground.
To make or not to make a lightning rod is up to each developer. Strict requirements are established only for government buildings and premises with a large number of people. There are no exact statistics on the performance of the system; no one knows how many lightning strikes were managed to be diverted from the building and how efficient the device is.
Now you know how to properly install a lightning rod in a private house. But we remind you once again that before starting work, you must carefully analyze all the factors that influence the likelihood of a lightning strike on a structure, and only then make a final decision. In order for the installation of a lightning rod to have the expected effect, the roof of the house must meet existing building codes.
Video - Installation of a lightning rod
Today we will talk about how to protect a private home from lightning strikes.
What is lightning?
Many owners of private houses try to make their home as comfortable and safe as possible, but at the same time they forget about the possibility of their home being struck by lightning.
Lightning is one of the most unpleasant phenomena that can cause enormous damage to a home.
As you know, it is an electrical discharge high power, therefore, even if it enters the house indirectly, it can damage electrical equipment in the premises.
It is good if there is a tall building near the house, equipped with lightning protection.
In this case, you don’t have to worry about the possibility of lightning striking your house, since such houses often have lightning rods with a large protection zone, which will cover the area with adjacent buildings.
A special feature of lightning is the discharge to the highest point. Therefore, if a house is located on the outskirts, it is the highest point, unless, of course, a tree grows next to it that is taller than the house.
But wood is also not a guarantee of protection. The risk of a home being struck by lightning increases many times over if there are ponds, strong streams, or swampy areas near the house.
So, if a private house is not surrounded by high-rise buildings, it is better to protect yourself by providing your home with lightning protection.

Damaging factors of lightning
But before you figure out how to protect your home from possible lightning damage, you should consider the damaging factors of this phenomenon.
There are two of these factors.
Primary.
This is a direct lightning strike on a house, as a result of which it may suffer structural damage and there is the possibility of a fire. This factor is the most dangerous.

Secondary.
Less dangerous for the home and residents. This factor comes down to the appearance of electromagnetic induction in the wiring of the house during a lightning discharge near the house.
Due to induction, a significant voltage surge occurs in the wiring, which can damage all electrical appliances in the house connected to the network.

And if you can protect yourself from the secondary factor without additional equipment by disconnecting all devices from the network during a thunderstorm, then it is impossible to protect yourself from the primary factor in this way; you need to equip your house with lightning protection.
Ohio, a house struck by lightning.

Since lightning is just an electrical discharge, although great strength, but it acts like any other discharge, that is, it moves along the path of least resistance.
Providing this path is the task of lightning protection.
If lightning strikes a house equipped with this type of protection, the electrical discharge will go into the ground without causing damage to the building.
Popularly, such protection is called lightning rods or lightning rods.
As for the latter, the definition is not entirely correct, because thunder is just the sound that occurs during a lightning discharge.
Criteria and types of lightning protection
Now let's look at the types of lightning protection.
Here, this equipment has several criteria that divide it into types.
The first criterion is the method of protection.
According to it, lightning rods are divided into:
- Active;
- Passive.
The active ones appeared relatively recently. They contain a lightning rod, discussed below, equipped with a special ionizer, which “provokes” lightning with its impulses.


In fact, this device specifically attracts lightning towards itself, which completely eliminates the possibility of a secondary factor of lightning damage.

Passive ones are not equipped with anything like that; lightning may or may not discharge onto it. This type of protection is used everywhere.
The second criterion is the types of protection.
According to it, lightning rods are also divided into two types - external and internal.
Everything is simple here - the external one protects the house from the primary factor of lightning, and the internal one – from the secondary one.
And the third criterion is design features.
But here the division into types relates more to lightning rods. According to them, the lightning rod is divided into pin, cable and mesh.
Lightning protection design
Now regarding the design of lightning protection, let’s talk only about the external one for now.
It consists of only three elements - an lightning rod, down conductors and a grounding conductor.
Lightning rod.
It receives a lightning strike, so it is fixed on the roof of the house so that the receiver itself is the highest point.
The simplest is the rod type of receiver.
A metal rod with a diameter of 10-18 mm and a length of 250 mm is considered standard.

You can also use a pipe, but only its ends must be welded.
The number of receivers is calculated based on the size of the building. On small houses One is enough if the area of the house exceeds 200 square meters. two rods are installed with a distance between them of 10 m.

To prevent the discharge from the receiver from reaching the house, it is secured to the roof using wooden blocks or special fasteners.
Some, in order not to spoil the appearance of the house, install the lightning rod on a separate support near the house.
Some, if possible, attach an additional lightning rod directly to the tree.

There is not much difference, since even with a lightning rod installed nearby, the protection zone will cover the house.
The main condition for installing the receiver is that it must be located above the house, as well as other buildings near it.
Another type of lightning rod is a cable one.
A cable is used that is stretched along the entire length of the roof ridge and secured to wooden supports. An important condition is the tension of the cable - it should not touch the roof.

The third type of receiver is the mesh.
It is made from any wire (steel, aluminum, etc.) with a cross-section of at least 6 mm.
It is stretched over the entire roof area; the cells of this mesh should form a square of approximately 6x6 m.
In this case, the mesh should also not touch the roof; it is fixed on wooden or special non-conducting supports at a height of 6-8 cm from the roof.

There are no strict regulations for the use of this or that type of lightning rod; you can use any, they are all quite effective, so they are chosen at will.
Their main task is to transfer the discharge from the receiver to the ground electrode.
Most often, steel wire with a diameter of 6 mm or more is used as down conductors.
If the walls of the house are made of brick or foam block, in general, of any non-flammable material, then the down conductor can be secured along the wall in any inconspicuous place, most importantly, not near windows and entrance doors.

You can also use metal tape as a down conductor, but it must be at least 2 mm thick and 30 mm wide.
The down conductor is attached to the receiver using a welded, bolted or soldered joint.


The number of down conductors depends on the number of ends of lightning rods.
If only one rod receiver is used, then one bend is attached to it. When using a cable receiver, two taps are already needed.
Also, two down conductors are used for a grid receiver.

Ground electrode.
 The last element is the ground electrode. The simplest grounding device is two metal rods buried 2-3 m into the ground.
The distance between them must be at least 3 m. These rods must be connected to each other with a jumper at a level of 0.5-0.8 m in the ground. The down conductor is connected to this jumper.

On soils with high level groundwater, it is better to use a horizontal position of the ground electrode at a depth of 0.8 m. In this case, the ground electrode should be a metal corner or strip with a width of 50 mm and a thickness of 4 mm.
The ground electrode is connected to the down conductor only by welding.
Features of lightning protection installation
Based on what has been described, you can understand that it is quite possible to make lightning protection yourself, having only necessary materials.
To protect your home from lightning, you must first take measurements.
It is necessary to find out the height at which the receiver should be located, and also determine the method of its mounting.
Then you need to calculate the length of the down conductor. It is important to consider here that the lightning charge path to the ground electrode should be as short as possible. Therefore, you should not make any contours, bends, etc. And even more so, it is impossible to form rings from the tap.
As for the ground electrode, it must be located at least 1 m from the nearest wall of the house. After all the calculations, you can begin installation.
You need to start with the ground electrode.
If it is made of rods, it is enough to dig a trench 0.5 m deep and 3 m long.
Drive rods at least 2 m long into the ground along the edges of this trench.

Then, using a welding machine, weld a jumper to these rods.
If the ground electrode is horizontal, then you will have to dig a trench much deeper.
Here you need to comply important condition– it should not be in contact with the roof of the house, so use only wooden supports to secure it.
Country houses are usually built from flammable materials, and the fire station is located far away. Yes, and you can’t drive up to every building, and you shouldn’t expect anything good from the strong wind that accompanies any thunderstorm.
Sometimes from a lightning strike Entire holiday villages are burning down.
We’ll tell you how to make an effective lightning rod on your own and eliminate the risk of a direct hit from a “heavenly discharge” into your house.

In simplified terms, the physics of the process can be described as follows: source lightning are cumulonimbus clouds.
During a thunderstorm, they turn into peculiar giant capacitors. On the upper plus part, a huge positively charged ion potential accumulates in the form of ice crystals, and in the lower minus area, negative electrons accumulate in the form of water drops.
During the discharge (breakdown) of this natural battery, lightning appears between the ground and the thundercloud - huge electrical spark discharge:

This discharge will always flow through the circuit least local resistance electric current. The fact is well known and verified. Such resistance usually occurs in high-rise buildings and trees. Most often, lightning strikes them.

The idea of a lightning rod is to install it near the house area of minimum resistance so that the lightning discharge passes through it and not through the structure.
If you don’t have a lightning rod at your dacha, it’s time to think about building one. The cheapest and easiest way to make it is to do it yourself. What do you need to know for this?
So, a lightning rod (lightning rod) is a lightning protection (lightning protection) device, ensuring the safety of the building and people's lives, located in it, from the destructive effects that can occur during a thunderstorm with a direct lightning strike.
This corrosion protected, bare conductor - that is, a well-conducting material with as large an area and a larger cross-section as possible (minimum 50 mm²).

A lightning rod (lightning rod) is assembled from thick copper wire or steel rod, pipes of the required section or from steel, aluminum, duralumin rods of various profiles, angles, strips, and so on.
It is better to use galvanized steel materials. Since they are less susceptible to air oxidation.
What does lightning protection consist of: device

A lightning rod (lightning rod) of the simplest design consists of 3 parts:
(descent).
Let's talk about each element in more detail.

A metal conductor mounted on the roof of a building or on a separate support (tower). Structurally divided into three type: pin, cable And mesh.
When choosing a lightning rod design focus on the material, which covers the roof of the house.
1. Shtyrevoe(or rod) lightning rod device is a metal vertical rod rising above the house (see figure below).
Suitable for roofs made of any material, but it is still preferable for metal roofing. The height of the lightning rod should not exceed 2 meters. And it is attached either to a separate load-bearing support, or directly to the house itself.

Materials for production:
Steel pipe (20 -25 mm diameter, with wall 2,5 mm thick). Its upper end is either flattened or welded into a cone. You can also make and weld a special needle-shaped plug to the upper edge of the pipe.
Steel wire (8 -14 mm). Moreover, the down conductor must be exactly the same diameter.
Any steel profile(for example, angle or strip steel of at least 4 mm in thickness and 25 mm in width).
The main condition for all these steel materials is the cross-section minimum 50 mm².
2. Trosovoye the lightning rod device is stretched along the ridge at a height of up to 0,5 m from the roof cable with a minimum cross-section 35 mm² or wire.
Galvanized steel rope is usually used. This type of lightning rod is suitable for wooden or slate roofs.
It is fixed on two ( 1-2 meter) supports made of wood or metal, but insulators must be installed on metal supports. The cable is connected to the down conductor using die clamps.

3. Mesh the device of the lightning rod system is a mesh laid over the roof with a thickness 6 -8 mm. This design is the most difficult to implement. Used for roofs covered with tiles.

4. Well, it’s very rarely used covering device lightning protection is when the metal structural elements of the house itself (roofing, trusses, roof fencing, drainpipe) act as lightning rods.
All considered designs of lightning rods securely connected by welding with a down conductor and through a down conductor with a single- or double-sided grounding conductor welded seam minimum 100 mm in length.

(descent) - the middle part of the lightning rod, which is a metal conductor with a minimum cross-section for steel 50 , for copper 16 and for aluminum 25 mm squared.
Main purpose down conductor is to ensure the passage of discharge current from the lightning rod to the ground electrode.
Ideal path for electric current to pass- the shortest straight line directed straight down. Avoid turning at sharp angles when installing the lightning rod. This is fraught with the occurrence of a spark discharge between nearby sections of the down conductor, which will lead to inevitable ignition.
The most popular material for current conductor- bare steel wire rod or strip. It is carried out only on fireproof surfaces. Metal brackets should be installed on flammable walls, which themselves, being in contact with the flammable surface, will protect the down conductor.
Minimum distance from the wall to the down conductor 15-20 cm.
It must be laid out so that there were no points of contact with home elements such as a porch, front door, window, metal garage door.
We know that It is better to connect parts of a lightning rod by welding, but if this is not possible, it is allowed to interface the down conductor with the grounding conductor and lightning rod using three rivets or two bolts. The length of application of the current conductor to other parts of the system with a rivet connection is equal to 150 , and with a bolted one - 120 mm.

The end of the non-galvanized wire rod and the point where the down conductor wire is attached to the steel parts to ensure reliable contact needs to be cleaned, and it is enough to wash the galvanized one from dust and dirt. Then a loop or hook is made at the end of the wire, washers are placed on both sides and the whole thing is tightened as tightly as possible with a bolt.
The joints (if it is not welding) also need to be wrapped in several layers of electrical tape, then with a coarse cloth, twisted on top with a thick thread and covered with paint.
To improve contact you can treat the ends of the wire with tin and solder.

(grounding electrodes) - the lower part of the lightning rod located in the ground, ensuring reliable contact of the down conductor with the ground.
How to properly arrange grounding is described in GOST oh and SNIP ah, but for the simplest option, at least one meter from the edge of the foundation is enough and no closer 5 meters from the entrance to the building to bury P-shaped structure made of metal conductors.
Able to cope with the task conventional ground loop(it is made for household electrical appliances).

This 3 electrodes driven and buried in the ground, connected to each other at the same distance by horizontal ground electrodes. The grounding structure should be buried below the maximum soil freezing level. From 0,5 before 0,8 meters deep.
For a grounding conductor take rolled steel cross section 80 mm, less often copper cross-section 5o mm squared. Vertical grounding electrodes are 2-3 meters in length, but the closer the groundwater level, the shorter they are.
If the soil at your dacha is constantly wet, then a meter or half meter pin will be enough.
On what depth to drive and how many electrodes will be necessary can be found in energy service at your place of residence.
It must be remembered that the quality of grounding depends on the size of the contact area of the ground electrode with the soil and the resistivity of the soil itself.
Grounding conductor for lightning rod need a separate one, you should not ground the lightning rod to the household circuit. Categorically We do not recommend experimenting. It's fraught with consequences.
We invite you to watch a video with a visual diagram of lightning protection installation:
According to regulatory documents, installation of lightning protection systems for private residential buildings optional. And only you can decide the feasibility of installing a lightning rod (lightning rod) at your dacha. We hope that the article will help you make the right decision.


