

As a blank, I again used a plastic bottle, which I foamed on all sides, and to give it stability, I inserted this foamed blank into a plastic container (you can use an old pan). I fixed this propennennaya blank, - mounting foam. Then the most interesting begins, it is necessary to give an approximate figure with foam. As a sample, I buy a small toy in the store, or a figurine, additionally download pictures from the Internet.

Be sure to allow some drying after each layer. So gradually, layer by layer, a figure is created. If you missed somewhere, you can always cut it off, cut off the excess with a sharp clerical knife. If somewhere it still doesn’t work out, this applies to both large and small parts... we spray the place (from a sprayer, for example) where we want to apply foam, then we foam a small layer (about 4-5 cm), after a minute, spray fresh foam again with water. Now the moment - the main thing is not to miss the moment so that the foam does not have time to dry, and we form the intended bend, shape, etc. with wet hands (I do this without gloves). So you can act layer by layer, achieving desired shape. When the figure takes on its shape, we cut off all unnecessary bumps with a knife, the pits (airs) can be foamed again. Small air vents, there is no need to foam, then everything will be puttied with tile adhesive.

How to make paws, tail .... I take the wire, give it a bend, and also foam it layer by layer, giving it time to dry. The ears of a hare, I made from an aluminum tape 7 cm wide, which I cut across (like a Christmas tree), set a bend, and gradually foamed.


It is not at all necessary to spend money on the purchase of ready-made garden figures to decorate the site. original crafts from polyurethane foam will become a worthy element of landscape design. The main thing is to show imagination and a little perseverance.
Polyurethane foam properties
The scope of application of polyurethane foam is quite extensive. Now it has spread to the landscape design of the site. Do-it-yourself garden figures made from polyurethane foam are no worse than specimens made on an industrial scale, and often surpass crafts made from tires or plastic containers in terms of decorativeness.
The special properties of mounting foam allow you to create crafts of complex shape. Ease of processing makes creative occupation accessible to weak female or children's hands. In the process of formation garden figure Do-it-yourself removal of an extra fragment or adding a missing detail is not difficult. With proper decoration, the craft looks very presentable and does not show signs of recycled raw materials, as is the case with plastic containers.
Attention! Garden figurines made of polyurethane foam are resistant to precipitation, but require UV protection.

An obstacle to creating crafts with a complex configuration may be a lack of experience with three-dimensional figures. Creating something new from scratch, focusing only on a flat image, is a problem for some. Therefore, it is initially recommended to practice on simple garden figures. Mushroom, turtle or ladybug will be an excellent start for the manifestation of the abilities of the sculptor.
Depending on the amount of mounting foam involved in the manufacture of crafts, it may take a long time for it to dry completely. The process usually takes a week. You should be prepared that the mounting foam in the process of forming a garden figure can pollute the surrounding area, so it is recommended to organize work in an open area.
Colorful examples of do-it-yourself polyurethane foam figures are shown in the photo:


improvised materials
The list of improvised materials varies depending on the garden figure chosen for the manufacture, but the unchanged set consists of the following items:
- Mounting foam. It is better to replace an ordinary spray can with a tube with a gun, which is much more convenient to work with.
- Stationery knife for trimming excess elements.
- Latex gloves to protect hands. Fabric products will quickly become unusable.
- Sandpaper for sanding the surface.
- Brush with paints intended for outdoor use.
To create a frame, crafts usually use plastic containers and cans, hard wire, boards, hoses and double-sided tape. If the foam gets on the skin during operation, a special cleaner or kerosene will help get rid of contaminants.
Advice! The garden figure, made using polyurethane foam, has a low weight, therefore, at the formation stage, measures are taken to make it heavier. plastic container can be partially filled with sand or small pebbles. A wire protruding from the paws of animals will help fix the craft on the ground.

General algorithm
Preliminary acquaintance with the instructions for the use of mounting foam will reduce the likelihood of undesirable situations. Engage in the manufacture of crafts should be on outdoors at plus temperature. If work is carried out indoors, it is worth taking care of high-quality ventilation. Polyethylene film prevents surface contamination, mounting foam does not stick to it.
Shake the can before use, keep the cap down during use. Otherwise, the gas will come out, and the material will not be completely used up. The initial strength of the mounting foam is gaining within an hour, and finally dries out in 10 hours. It all depends on the applied layer.
Apply in one go a large number of material is not recommended, the liquid substance can fall off. It is optimal to build work on the formation of a garden figure as follows:
- arrange the frame of the craft horizontally;
- apply a small layer of mounting foam;
- give the material time to dry;
- turn the craft over and repeat the steps.
When the foam dries up again, the voids and missing fragments are filled in accordance with the selected outlines of the garden figure. Excess fragments are removed with a sharp clerical knife. To achieve a smooth surface of the craft, it is sanded sandpaper fixed on a bar.

Advice! Protect the garden figure from rapid destruction under the influence sun rays putty is capable. This technique will provide additional leveling of the surface.
After the composition has completely solidified, they proceed to the stage of decoration. Usually it consists in painting the figure from polyurethane foam. Acrylic-based paints are best suited for work, which are applied in 2 layers. Buttons, cords, wire for a mustache, pieces of glass to create a mosaic act as an additional decor tool.

Characteristic crafts from polyurethane foam for the garden
Studying a wide range of garden objects made using polyurethane foam, we can conditionally distinguish two groups of crafts. In one case, the surface of the figures is even, in the other, it is bumpy and often imitates the skin of an animal.

Leveled areas are often additionally covered with putty. This creates a protective layer against UV rays. With rough garden figures, this technique is not practiced.
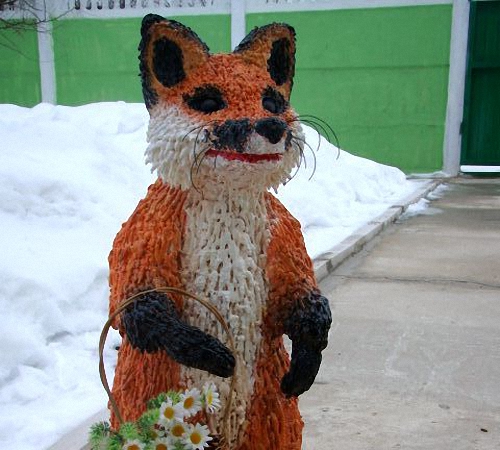
It is unlikely that it will be possible to achieve the identity of the animal skin immediately after applying the mounting foam; this will require additional manipulations. But the result of hard work is always impressive. The only exception may be a lamb, whose curls are so similar to a bumpy surface obtained from a liquid building substance. Vivid examples of do-it-yourself polyurethane foam crafts show photos:


Representatives of the animal world are the most popular solution in the formation of garden figures. Less commonly, objects of inanimate origin are created - all kinds of flowerpots, shoes and other items, mainly intended as decorative coasters under flowers.

simple crafts
If there is no experience in creating crafts at all or it is not enough, it is better to start the experiment with a light garden figure, for example, a mushroom, which is based on a plastic bottle. To the materials at hand listed earlier, you will need to add a primer and you can begin to be creative.
Main stages:
- A plastic bottle, which acts as a leg, is filled with sand or pebbles to give the mushroom stability.
- Mounting foam is distributed in a thin layer, the process takes place in several stages. A thickening is formed in the lower part.
- The hat of garden crafts is cut out of foam. It is not worth striving for a perfect circle, slight asymmetry is quite acceptable.
- From the mounting foam applied to the foam, you should try to form a cone-shaped figure or a hemisphere.
- A strong wire is used to connect the two parts of the garden figure. Gluing the parts will help to strengthen the fixation.
- Trimming unnecessary protruding parts is carried out carefully so as not to damage the assembled craft.
Comment! The porosity of the mounting foam is the reason for the absorption of moisture, so it is recommended to treat the garden figure with a primer.

The absence of a primer layer will lead to the absorption of moisture from the mounting foam by the putty, this process will cause cracking of the surface of the craft. After priming, the garden figure is covered with a layer of putty and left to dry. To make the mushroom smooth, the surface of the garden figure is treated with sandpaper, first with medium grain, then fine. To reduce paint consumption, the puttied surface also needs to be coated with a primer. The color of the craft is chosen at your discretion, whether it will be cute White mushroom or a bright fly agaric, depends on the wishes of the master. Lacquer is able to give the figure additional shine.

Large figures
When simple do-it-yourself polyurethane foam figures turn out well enough, the task of creating garden crafts you can complicate and move to larger objects.

Donkey
To form a popular landscape design element, you will need:
- Water tank with a volume of 10 liters, it will serve as the body of a garden figure.
- A tin can or eggplant for 5 liters will play the role of a muzzle.
- Wooden planks for legs.
- Bead or wire will become the basis of the tail of the garden figure.
- The usual set of tools used in the design of crafts from polyurethane foam.

When everything is prepared, start the creative process:
- First, two containers are connected to each other; wire or adhesive tape will cope with the task.
- A glue gun will help to fix the legs on the body of the garden figure.
- A tail is inserted into a pre-prepared hole.
- The eggplant is filled with sand to give the craft weight and stability.
- When the frame of the garden figure is fully prepared, it is gradually covered with mounting foam. Between applying the next layer, take a break of 15-20 minutes.
- The ears of a garden figure will turn out perfectly from a flexible wire, which, after fixing, is also covered with mounting foam.
- After drying, unnecessary protruding fragments are cut off with a sharp knife.
- The application of further layers is identical to the mushroom creation algorithm. First, the craft is primed, then the surface is treated with putty, then cleaned with sandpaper, again primed and painted. The final layer will be a waterproof varnish.
Naturally, between each action, the polyurethane foam crafts are given time to dry the next applied layer.


Symbol of family happiness - stork
The stork looks incredibly cute on the site, the manufacture of which will also require polyurethane foam. The algorithm of actions includes the following steps:
- A plastic 5-liter container serves as the body of a garden figure.
- The head of the stork will be on the side of the bottom, the tail will be in place of the neck.
- The thick wire will serve as the base of the neck, on which the foam head is fixed.
- At the discretion of the master, the long nose of a garden figure can be made from a small piece of wire or wood chips.
- Long legs for crafts can be made from electrodes or plastic pipes. Both the material is subsequently buried in the ground, due to which the garden figure made of polyurethane foam becomes stable. Therefore, it is not necessary to fill the eggplant with sand for weighting.
- You can decorate the wings from pieces of foam. They are screwed to the sides of the craft with wire.
- To give additional strength to the connection of the head with the body, wrapping with tape will help.
- When the frame of the garden figure is fully assembled, they begin to cover it with mounting foam.
- After complete solidification, excess fragments are removed with a clerical knife with a sharp blade.

When the mounting foam is completely dry, proceed to decorating. As a primer for a garden figure, you can take an aqueous solution of PVA glue, diluted in a ratio of 1: 2. The body and head of the craft are covered with white paint, the tail and edging of the wings are made black, the legs of the stork are painted red. As a tail of a stork, you can use real feathers of a poultry, whether it be a goose or a rooster. When the garden figure is completely ready, the stork's legs are buried from the electrodes into the ground.

Overview of original ideas
The choice of garden figures that you can create with your own hands using polyurethane foam is not limited. Here is a modest list of original ideas:
- A small artificial pond or waterfall will be perfectly decorated with a funny frog or turtle. Someone wants to become the owner of a crocodile or monitor lizard - it all depends on preferences.
- If children are resting on the site, they will like the presence of crafts in the form of a cheerful Sponge Bob.
- Bright ladybugs always attract attention.
- Mounting foam will not require grinding if a lamb is chosen as a garden figure.
- Sometimes a wire helps to create a frame with a complex configuration, which is braided around plastic containers, and then gradually filled with foam.
- The craft does not have to be covered with paint. Some masters of working with polyurethane foam offer to create a real mosaic on a garden figure from small pieces of mirrors or tiles.
In the process of creating any craft, it is important to allow each applied layer to dry well. This applies not only to mounting foam, but also to primers, putties and paints. If the technology is violated, the garden figure can quickly become unusable.

Polyurethane foam has firmly won its place in the construction industry. This handy sealant is able to alleviate assembly work and the range of its application is unusually high. But now, more and more often, polyurethane foam has begun to receive unusual use as a material for creating crafts. To figure out how to do this, you first need to know what polyurethane foam is and what features it has.
What is foam and what is it used for?
First of all, mounting foam is effective remedy, capable of providing reliable sealing of seams in a matter of minutes and correct position installed parts. In fact, it is a combination of two components: isocyanate and polyol, which are produced from oil. Foam is sold in cylinders, which, in addition to the polymer compound, also include a propellant gas that displaces the mixture from the nozzle. Upon contact with air, the mixture begins to significantly increase in volume and polymerization of the substance occurs.
Initially, foam found its use in providing a secure fixation of installed window frames and door formwork, as well as filling voids. It is characterized by the following properties:
- Significant amount of covered area. When leaving the cylinder, the foam expands its volume, the difference of which in relation to the initial one is 40 times.
- Good adhesion. The foam adheres strongly to most materials, except for oily and polymeric coatings.
- The ability to fill all hard-to-reach places.
- Ensuring a good degree of sound and heat insulation.
You need to know that foam, despite its simplicity, requires special attention when working with it:
- foam should be handled at temperatures above +5°C,
- any work must be carried out with gloves to exclude the possibility of foam getting on unprotected areas of the body,
- before starting work, shake the container thoroughly for a minute so that the contents acquire a homogeneous structure,
- the cylinder during the entire operation should be kept upside down, that is, with the cap down, so that the gas that displaces the mixture from the cylinder can freely exit, since it is lighter than other components,
- any products should be covered with a protective layer of paint, since the mounting foam is afraid of direct exposure to ultraviolet rays.
- complete hardening of the surface occurs after 8 hours; before the specified period, the material should not be subjected to loads.
Due to the unique properties of the foam, many crafts made from this versatile sealant began to appear.
What tools will you need to create crafts from polyurethane foam
To get started, you need a simple set: the mounting foam itself in cylinders and a special gun for it, the cost of which starts from $ 5. In addition, the work will require the following tools in order to create garden crafts:
- stationery knife,
- artistic brushes different sizes: 4.8, 10 and 25 mm wide brush for decorative work,
- foam cleaner,
- Oil paint,
- weighting agents. Since the foam has a low weight, only 20 kg per m³, products should be equipped with simple loads, the role of which is played by a container with sand - a plastic bottle or a small can,
- colorless protective varnish. Simple varnishes not always suitable due to the fact that the resulting products will become yellow,
- several pairs of household gloves: cotton or rubber. The latter are preferable, since household gloves sometimes provide insufficient protection for hands. It is important to remember that the foam is difficult to remove if it comes into contact with the skin, so the use of gloves is mandatory.
When these tools are prepared and the necessary stock of foam is available, work should begin.
Where does the work on the manufacture of crafts from polyurethane foam begin?
Since it’s hard to keep an artistic image of a craft in your head, you should first have photographs or pictures that reflect the essence of the future product and its prototype. Next, you need to build a frame with a weighting agent, on which mounting foam will be applied in layers. For the construction of the frame, plastic containers are most often used, which are filled with sand to provide weight. In addition, there is another method that is structurally more efficient, when the frame for the future product is either welded from thin reinforcement with a diameter of 5 mm, or twisted from thick wire. To ensure the stability of the craft, if it is located on the ground, you should leave the steel parts protruding 20 cm outside. For example, if a deer figurine is created in a standing position, the rods should be passed from the hooves.
In this way, better stability of the figurine against the wind will be achieved, as well as a more evenly distributed load on all parts of the product.
In the event that work on creating garden foam crafts is carried out indoors, a respirator should be used. The mounting foam itself is not toxic, but has an unpleasant odor.
The process of creating crafts for the garden, according to novice sculptors, is not difficult. It is only necessary to act carefully and allow the foam layer to harden in time before proceeding with the application of the next layer.
Creating figures for the garden from polyurethane foam
The process of creating a figurine is technically simple. You need to follow the steps:
- Creation of the frame of the figurine. If the craft is squat, then it is enough to use a plastic container with sand as a base, which, using improvised materials, should be adjusted to the required dimensions of the form.
- Next, using mounting gun foam is applied. The use of this tool will allow you to accurately dose the amount of material.
- Allow 20 minutes for each layer to dry.
- With the help of a brush and a clerical knife, when the foam layer is hardened, the craft should be given the necessary size and shape.
- After all the layers of foam were applied and the figurine acquired finished look- it is worth puttingty the entire base so that there are no cracks.
- After that, the product is painted with acrylic paints, applying at least two layers to the figure.
- At the end of the work, the figurine is varnished to ensure better preservation and resistance to weather conditions.
The finished craft should be left for several days so that all materials acquire the final degree of hardening.
Foam lamps and lanterns
A real master class can be shown by those specialists who create not only beautiful, but also functional things from polyurethane foam. Working lights on the site will be a beautiful and eye-catching addition to the overall picture. And what is nice, making them is not much more difficult than a simple figure.
To create a lamp, a base is made in the form of a stool made of chipboard or OSB, since the latter is more durable. Then the following actions are performed:
- the base is carefully foamed with a mounting gun,
- further complemented by others wooden elements, which are also treated with foam,
- in the upper part of the wooden structure, it is necessary to make a cover for inserting a lantern,
- after that, the upper part is covered with a layer of foam and additional decorative elements(wooden lintels, forged fittings),
- the final stage is painting the finished structure, after which the lantern is placed through the cover on the body.
If the flashlight is powered by solar battery, then you should fix it on the side. But this will break the aesthetic appearance, so you should consider installing a flashlight that runs on batteries.
Ready workers lighting covered with several layers of foam, followed by decoration. In this case, if the lamp has a supply power cable- an aesthetically pleasing design. Even if the lamp is old-style and does not differ in sophistication of style, such a procedure will breathe new life into an old thing.
Decorating dishes with polyurethane foam
In the event that the initial skills are not enough to carry out such work, it makes sense to practice on the dishes. Decorating is not difficult, just a few steps:
- clean the surface of the selected object from contamination,
- apply a layer of foam using a mounting gun,
- at the time of its polymerization, use a brush and a knife to correct the resulting mass to give it a more regular shape,
- after hardening, cover the surface with a layer of paint.

As you can see, the process of decorating dishes does not have significant differences compared to the creation of a figurine. The presence of the selected dishes as an element of the base will allow you to conduct experiments without being distracted by the construction of the frame. A similar method is used for any vases, cabinets or baskets.
Creation of panels and ornaments from polyurethane foam
Mounting foam is also suitable for creating entire decorative panels. For example, a simple steel grating will gain the new kind thanks to the application of foam on each of the rods, followed by the creation of artistic elements that imitate forging. With the help of the form it is quite possible to create simple decorative panels cladding, the purpose of which will be to give the building or its individual elements greater external appeal. In general, the possibility of using polyurethane foam is limited only by imagination.
It is not difficult to create crafts for the garden with your own hands. The foam itself is light and easy to use material, which, in addition to many advantages, also attracts with the price. The cost of a balloon of polyurethane foam with a volume of 850 ml starts from $ 3, which allows you to special costs create whole artistic compositions. In order for the finished product to please with its appearance, you should use a few practical tips in your work:
- after the layers of foam harden, you should let it “lie down” for 3-4 days finished product for maximum strength,
- for the safety and integrity of the coating, after applying several layers of paint, it is advisable to apply varnish to the coating. It is recommended to use a colorless protective lacquer, because, unlike the usual one, it will not impart a yellowish tint to the painted products,
- before painting, make sure that the selected paint does not contain a nitrocellulose base. Otherwise, the foam structure will be softened,
- the clerical knife used should have a good blade sharpness in order to effortlessly cut the foam. Otherwise, the blade will tear the viscous base, which will violate appearance crafts,
- cheap polyurethane foam does not hold its shape well, so when working, you should refrain from buying inexpensive bottles up to $ 3, the optimal choice would be foam from the manufacturer Tytan, at a price of $ 5.5 for a bottle of 850 ml,
- simple crafts of small sizes do not require the creation of a frame.
As can be seen from what has been written, learning to create beautiful compositions if you have an understanding of the final image, it is not difficult, although it will take time. If you want to use only professional polyurethane foam to create high-quality crafts, then you should trust the choice of specialists.

According to bench tests, Tytan Professional 65 O2 polyurethane foam is the leader among the proposed mixtures:
- film formation time takes 4 minutes,
- initial hardening of the material occurs after 25 minutes,
- the volume of material during the initial expansion was 51 liters, which is twice as high as most of the tested competitors,
- mixture output mass - 900 g.
- retail price from $5.5 per cylinder, which, together with a large amount of foam at the outlet, can significantly reduce the cost of buying new cylinders.
This foam is well suited not only for masters, but also for beginners. Blowing occurs slowly, which gives time for processing the layer to give the desired shape. Budget foam M70 from the manufacturer Hercul will also become good choice, since it has average performance and a low price of $ 3, at the same time, it significantly outperforms the leader in terms of hygroscopic properties.
Mounting foam, crafts for the garden from which you do not need to make - is:
- Makroflex
- Houser
- Expert
- storehouse
- Ultima
- Bau Master
- Baumax
- Cyclone
All of these manufacturers sell low quality foam, which begins to lose its shape after 5-6 months.
Crafts from polyurethane foam can be made with your own hands in just a few hours.
If you have a disposable tank that hasn't run out yet, why not put it to good use. landscape design.
In this case, it is still better to resort to professional foam, and not household foam, since a small gun with a diameter of 2 mm is added to it.
Unusually simple and beautiful figurines made of polyurethane foam will become the property of your site. They will not leave indifferent either neighbors or just people passing by.
Materials for fakes from polyurethane foam
You will need:
- gloves;
- sprayer with pre-prepared water;
- polyethylene;
- aviation kerosene.
Kerosene is needed so that, upon completion of work with mounting foam, hands can be easily washed from building material.
Something will also come in handy for creating the basis for crafts from polyurethane foam with your own hands.
You can take an ordinary plastic bottle, an old pan or something else, which is not a pity.
With foam covering the auxiliary material, the creation of crafts will begin ...
You need to paint them carefully, and before carrying out this procedure
dry thoroughly in the shade. Drying takes at least a week, but if the foam layer is large, it is better to wait longer.
The paint is applied to the craft from mounting foam with your own hands every spring again. If this is not done, the foam may crack and the craft will deteriorate.

Foam craft ideas
If your site has a small pond, you can make a large green toad. This is especially true where many plants grow, especially large-leaved ones. In some cases, it is easier to make a lizard or a crocodile - who can do what.

In order not to miscalculate with the sizes and “fill your hand”, you can practice on plasticine. No matter how strange it may sound, but it was after trials on this simple material, it turns out to make chic crafts from polyurethane foam.
The same goes for the dough - if you like to bake delicious buns, pat animals - this will help you figure out what you can do better.
Perfect solution- make turtles from polyurethane foam. And it is not at all necessary to have a reservoir on the site. In addition, almost everyone has white paint, and it is now cheaper than colored ones.

Turtles are easier to dye, their shells can be alternated with natural ones. If, during the creation of the craft, bumps appeared that should not be, they can be cut off with a sharp knife.
Similarly, the situation will be with rounded details - if they need to be sharpened, the excess is simply cut off.
Crafts from polyurethane foam not only street views decorate, they can be made for the home. Funny frogs will bring smiles to people passing by!


Yes, as original New Year's decor you can make a snowman out of foam, but you need to start creating in advance so that the material has time to dry properly.
If you paint over the foam ahead of time, it will quickly crack.
For most owners, the dacha is a place to relax. However, in order to arrange the site properly, you need to spend quite a lot of money. In this regard, some summer residents are looking for opportunities to save money, which is why they are trying to create crafts from polyurethane foam that look no less aesthetically pleasing than figures made of plastic, metal and wood. And today, this option continues to compete with another equally common method - creating crafts from plastic bottles.
Every person who does not have special skills and knowledge is able to make his own household plot more attractive. The main thing is to have abstract thinking, be patient and prepare minimum set of tools. All this will be enough for cheerful gnomes, frogs, lambs and Christmas trees to appear on the backyard territory, the creation of which will require quite available materials.
Manufacturing technology
The first issue that must be resolved by the summer resident is the preparation of materials and tools, without which it will be impossible to make crafts from polyurethane foam. Moreover, you should not neglect any element of the list, since this will subsequently affect the quality of the work and the time that they will require.
To make a product frame, you can use plastic bottles , which are pre-filled with sand, boards, metal objects and thick wire. In some cases, you can use ordinary brick to create the basis for the future mushroom on your site.
- mounting foam;
- foam gun;
- gun cleaner.
It's a good idea to use sculpture for growing flowers. But for this, in its center you will have to install a certain container, like a bucket, tin can or the aforementioned plastic bottle.
- varnish, paint and brushes for them;
- clerical or other knife;
- several pairs of gloves. They must be present with you, as this will help protect your hands from mounting foam, which quickly and firmly sticks to your hands.
If we consider in more detail the process of manufacturing garden figures from polyurethane foam, then two stages can be distinguished in it, which are carried out in a certain sequence.
- work begins with covering the base with a layer of foam, after which they wait for a pause, which is necessary for the material to harden;
- then we apply the next layer of foam and so on until we achieve the desired shape of the product.
When the desired result is achieved, we take an ordinary clerical knife and use it to cut off the extra protrusions. In the process of such work, we give the sculpture the desired contour, after which you can proceed to its coloring. To complete all the work, you will have to spend from 1 hour to several days. The specific period is determined by the size of the product and the thickness of the applied layer.
It is recommended to engage in the manufacture of garden figures from polyurethane foam in a separate dry room which must be clean and have limited access for children. Otherwise, you will have to spend a lot of time and effort to remove the mounting foam from the surfaces, and for this you will need gasoline or acetone.
Manufacturing examples with instructions
Next, examples of various foam garden figures that can be made without even having experience in this matter will be considered. But in order to achieve the desired result, it is necessary to perform all operations in the exact sequence. It will take a couple of hours, and you will feel like a real creator, in whose hands an ordinary polyurethane foam turns into real masterpieces of art.
Christmas tree
The master class on making a Christmas tree from polyurethane foam is quite simple and understandable. Pre-required prepare twigs to be attached to iron pipe. As a fixer, you can use tape or wire.
Then, using a spray gun, the preform is moistened, which will improve the adhesive properties of the foam when it is applied to the base.
After that, we proceed to the processing of the structure with mounting foam, in this matter you can completely rely on your imagination.
Having at hand such affordable things as cutting sticks, twigs, mounting foam and fishing line, it will not be difficult for you to do it yourself Christmas tree. And to give a natural look, the Christmas tree can be painted. acrylic paint Green colour.
Ball
If you are afraid to take complex garden figures from polyurethane foam, then you can choose the simplest product, which is a ball. For those who do not have experience in making figures from polyurethane foam with their own hands for decorating a garden, it is recommended to take the first steps in creating this particular figure. And, having stuffed your hand, you can try to create more complex decorations and sculptures.
The master class itself includes the following actions:
- first we need a paint can in which we need to pour sand;
- then we take mounting foam and cover our blank in layers;
- when the product acquires the required dimensions, and the initial shape changes to a spherical one, we take a knife and cut off the excess parts;
- we process our ball with varnish;
- we complete the work on making the ball by coloring, for which you can use the colorful material that you like best.
Ram and sheep
 A master class on the manufacture of this garden figure from polyurethane foam with our own hands begins with the creation of a frame. To do this, we need several plastic bottles that need to be connected to each other. with tape. As a result, the craft should resemble something like the “skeleton” of an animal. To give our figure more stability lower limbs can be filled with sand.
After that, you can begin to process the craft with foam. To avoid waste of material, it is recommended to wrap the frame with isolon or other polymeric material. After covering the figure with the first layer of mounting foam, it should already be clear to you what should happen upon completion of this work.
To create the ears, we use pieces of skin. You can also use plastic bottles for their manufacture, which will first have to be heated and bent.
To make a muzzle, you will have to use a knife, forming the necessary features with it.
To make our animals look beautiful, they need to varnish.
Goat
To make the frame, you will need a thick wire, which you need to wrap several plastic bottles around.
To make a frame for legs, it is recommended to use metal pipes. They are attached to the pedestal by welding, after which they are fixed to the ground, or they can simply be bolted. Make sure that the base of the figure is firmly fixed, otherwise it will fall to the ground from wind or rain.
Then the craft is necessary cover with 1-2 layers of polyurethane foam.
To make horns and a tail, we take wooden shelves or we use plastic cuts and fasten them to the base.
Having finished applying the last layer, it is necessary to remove the excess parts, after which we wrap the product with a sickle or fishing line.
We finish the work with staining, but first you need to apply a layer of primer. When choosing a color, you can completely rely on your own preferences, because this is your creation and you can show all your imagination here.
We use buttons to make eyes.
Now our goat is ready and can be installed where you see fit - next to a pond, in a clearing, surrounded by other design elements.
Keep in mind that the process of making this craft will take you 1-2 weeks, since you will have to wait for a pause so that each layer of foam can harden. Thus, using orphan pipes, plastic bottles, pieces of wire and other debris and a couple of cans of mounting foam, you can easily create beautiful decorative elements for your suburban area.
New Year crafts
 If you only have wire and a balloon of mounting foam at your disposal, then only with their help are you able to make beautiful New Year's decorations for the garden. These materials will be enough to make a variety of ornaments, Christmas decorations, as well as crafts of varying degrees of complexity.
A good idea is to create a snowflake. For her, you need to take the wire certain thickness so you can bend it easily. It will serve as material for creating the frame of the future snowflake. We begin to cover it with 1-2 layers of foam. Immediately needed correct the shape, giving it a flat and smooth surface, and this must be done before the foam hardens. If any part of the figure turned out wrong, then at any time you can add a small amount of price and remove unnecessary parts with a clerical knife.
You will have even less difficulties when making a Christmas ball. The master class on the implementation of this idea will boil down to the following. For him, you need to take a tennis ball and apply a layer of foam. When the material hardens, we paint the craft, adding bright and positive colors to create a New Year's mood.
You can offer a simpler version of making a Christmas tree. It will require cardboard or isolon, which is wound on a rigid base, giving it the shape of a cone. You can easily apply a couple of layers of mounting foam. Next, it remains to give the craft flat surface, color and find a suitable place for the Christmas tree.
Conclusion
 In order to make your backyard more attractive, it is not necessary to go to the store and buy special decorative ornaments. It is within the power of any site owner to make their own beautiful crafts for garden. Moreover, for this you can use the most affordable materials, one of which can be polyurethane foam.
It's easy enough to work with her., so even the owner, who has never had to deal with such a thing, can easily cope with this task. It is enough to study the master class on creating figures for the garden, and you will succeed.


