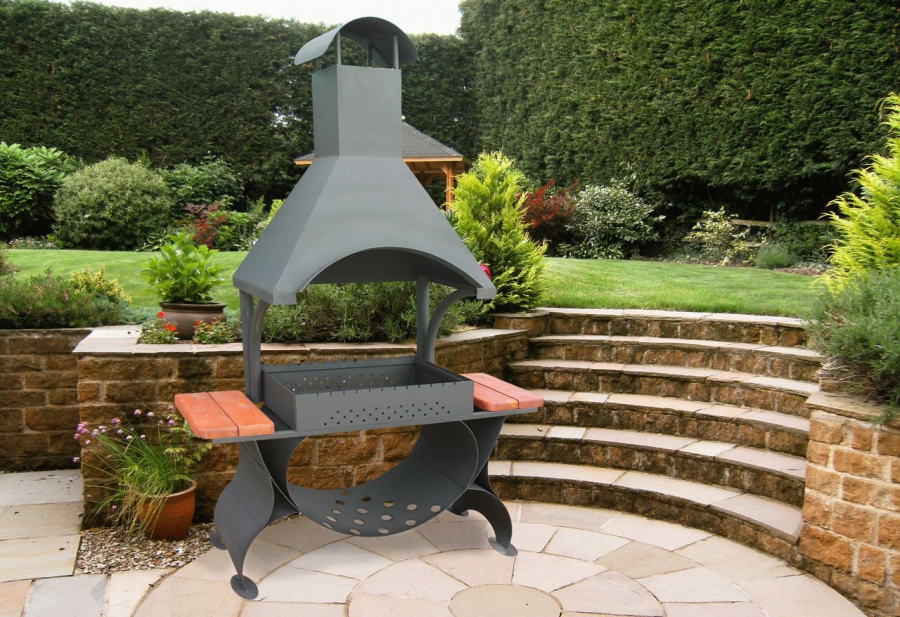
With the onset of warmer weather, the thought comes to us more and more often: shouldn’t we go to the dacha to fry some meat in the wild? It’s good if you already have a stationary kebab maker or you are able to purchase a portable version. But what about those who don’t have this opportunity? Make a barbecue with your own hands from a gas cylinder according to our instructions.
Types of barbecues
Braziers, depending on their size, are divided into 2 types:
- portable - compact structures that can be easily disassembled, folded and transported. To reduce their weight, such kebabs are made of thin metal. This is their advantage, since they are mobile, but there is also a disadvantage here - thin metal burns out quickly;
- stationary - solid structures that are impossible or difficult to transport. They are made of stone, brick, thick metal and other heat-resistant materials.
We will tell you how to make a stationary DIY barbecue from a gas cylinder. With proper skill, you will only need a few hours.
Instructions for making a barbecue from a gas cylinder
To make a barbecue with your own hands, you will need:
- empty gas cylinder(don’t have yours - buy online);
- Bulgarian;
- welding machine;
- 4 hinges (we suggest using window hinges);
- metal handle (suitable for an old iron or a saucepan);
- metal sheet 1 mm thick;
- 2 corners 40 mm;
- fittings or corner from which we will make legs (7 m);
- hose and water;
- chalk (apply markings).
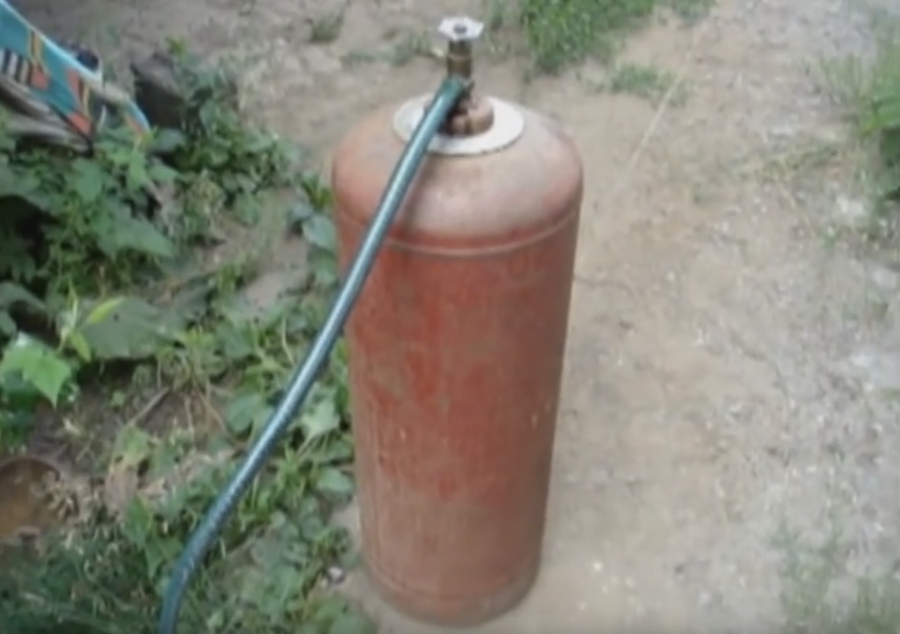
1. Prepare the cylinder for cutting. Open the tap slightly and release any remaining gas. To avoid poisoning, do this outdoors, away from the fire and try to stay away yourself. Pour water into the container through a hose - it will squeeze out the remaining gas from inside, which can explode from a spark when cutting metal.
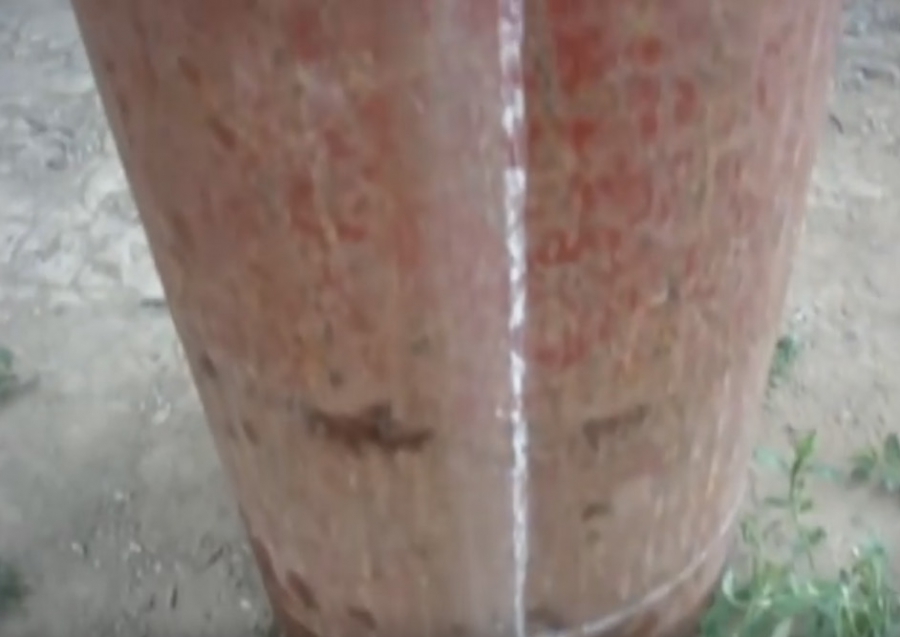
2. Apply markings. We take the connecting weld as the center (reference point). The balloon itself reaches 96 cm in circumference. We divide it into 4 equal parts, each 24 cm.

Measuring 24 cm to the right from the seam, draw a longitudinal straight line with chalk - this is the future boundary of the cut.
We also measure 24 cm from the connecting seam to the left and draw a parallel longitudinal segment. Having counted 3 cm from the upper and lower circular welding seams, we make notches with chalk. Measuring 8 cm from the top notch, we mark with chalk the locations of the holes for the skewers. If you did everything correctly, there should be 6 of them.
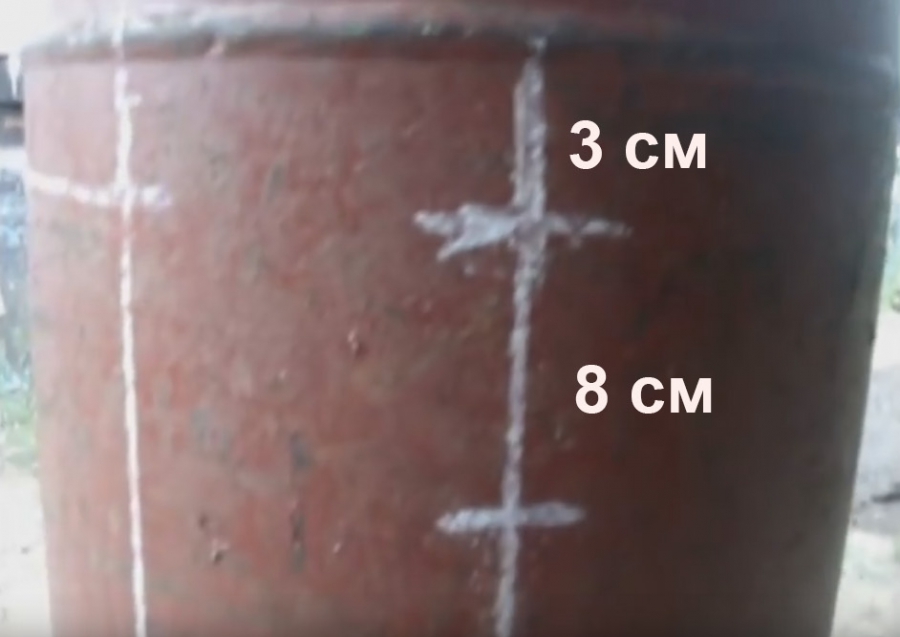
From the line with notches to the left, measure 10 cm and draw a parallel line - this will be the lid.

3. Cut out the lid. Using a grinder, we cut a balloon filled with water. First, we make a cut along a line located 10 cm from the notched segment. Having completed this operation, we weld the hinges, as shown in the photo.
Only after this do we complete cutting out the cover around the perimeter.

We open it and drain the water, the barbecue with your own hands from a gas cylinder is half ready.

4. We make limiters for the lid. We take two 40-mm corners and cut out holders 3 cm wide. We apply it to the grill body (see photo) and weld it.
Now, when the lid opens, it will not fall back and overwhelm the structure. You can increase the size of the angle of the limiters, then the lid will not tilt back much, and you will not have to reach far for it.
5. We weld the handle. You can choose the lid as its location, but then try to choose a handle with thermal insulation material, otherwise, when cooking barbecue, it will heat up and you may get burned.
The second version of the handle will avoid accidental burns. It is enough to weld a metal rod 10 mm thick to the side of the lid.

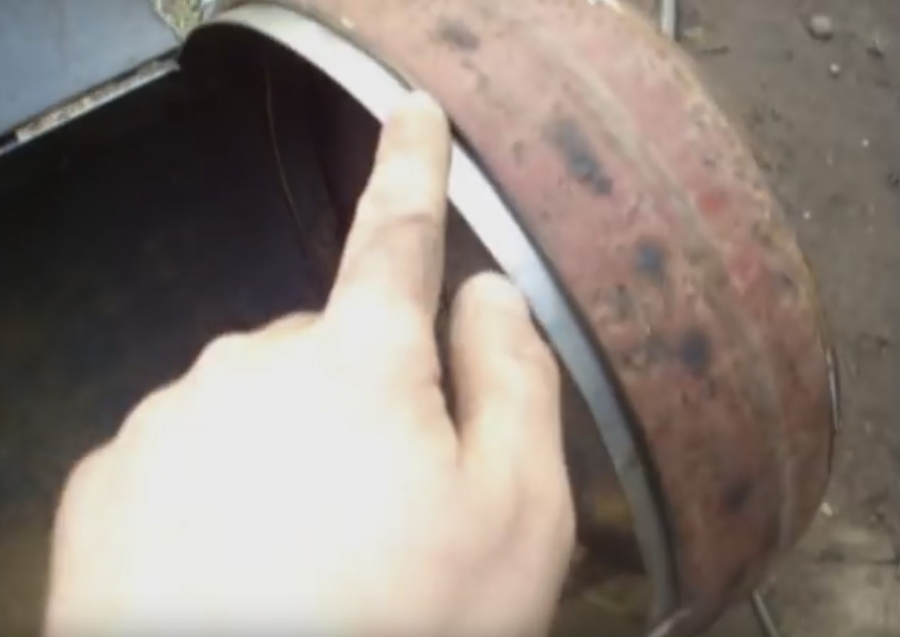
6. Cut off the rim of the cylinder. To make it easier, you can make a cross-section.

7. We process the edges of the opening so that the lid does not fall inside. From a sheet of metal 1 mm thick, cut out long strips (3 cm wide), the length of which should correspond to the size of the sides of the rectangular hole for the cover,
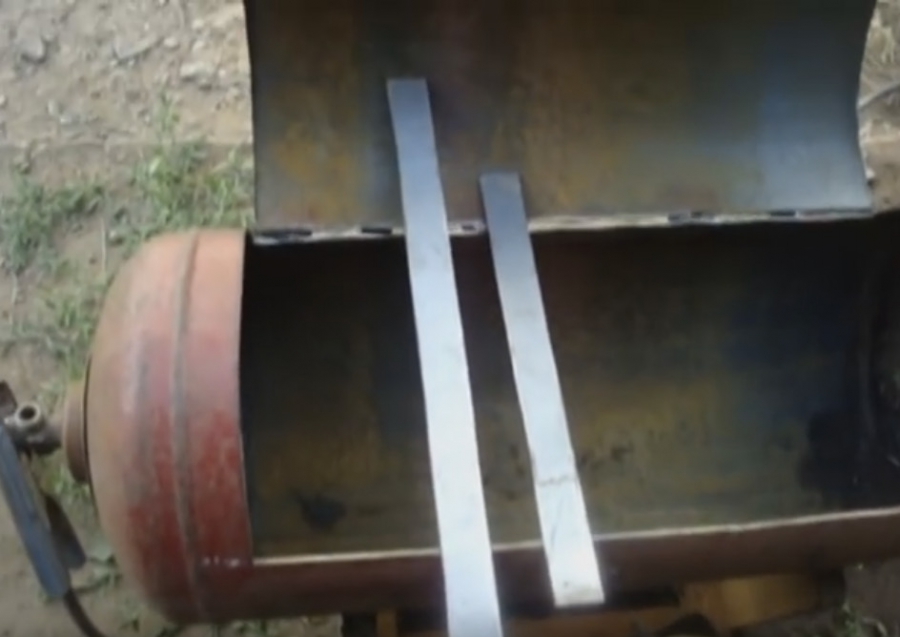
and weld them around the perimeter.
It should look like this:

You can stop for a few minutes and watch this video on how to make a portable homemade barbecue using a beer can and four screws:
8. Since we have barbecue grill, make holes into which the skewers will be inserted. Using the marks made earlier (notches placed at an 8-centimeter distance), we drill holes.
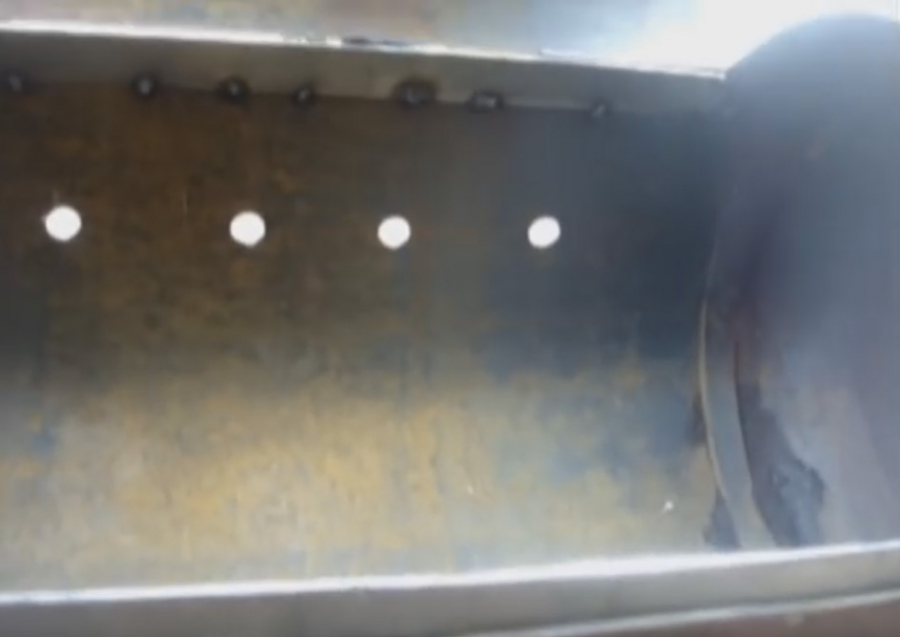
Having marked the plate located on the opposite side of the holes in exactly the same way, we make slits in it where the skewers will be inserted.
9. Cut off and weld the top hole where the faucet stood.
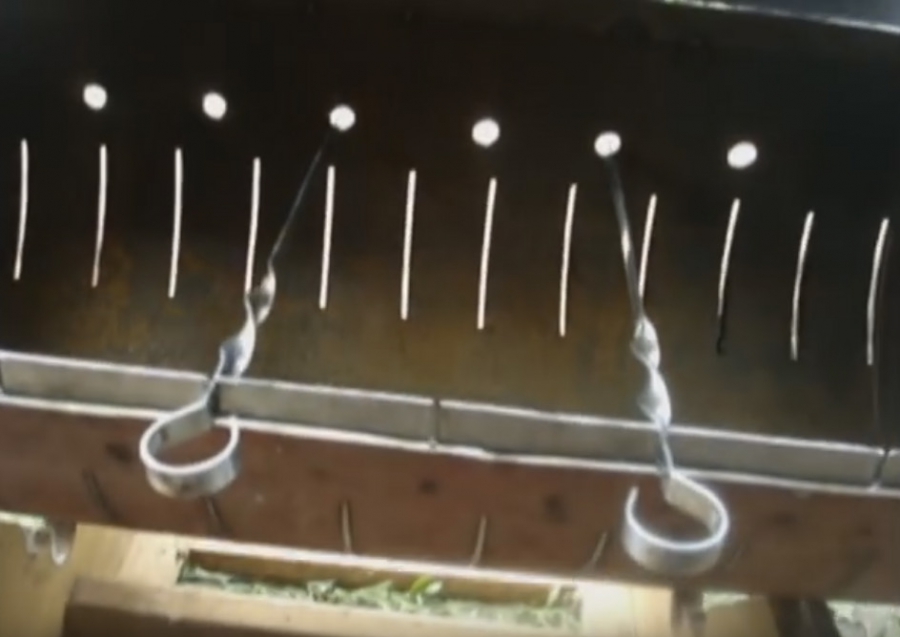
10. We make slits to provide oxygen access. We turn the cylinder over with the weld seam facing up, step back 10 cm from the seam towards the round holes for the skewers and draw a longitudinal line.

We measure another 10 cm from it and draw a second one. We connect the resulting two lines with segments, placing them at a distance of 5 cm from each other. These will be the slits.

We apply the same pattern on the other side, there will also be slots there.

We cut the slots.
11. Having finished making the grill with your own hands, we weld its legs. They can be made from a corner
or fittings.

Choose the height according to your height. The barbecue with your own hands from a gas cylinder is ready. All that remains is to paint it, giving it a final presentation and providing protection against corrosion.
How to paint a homemade grill?
The barbecue grill can be covered with:
- heat-resistant silicone enamel, which can withstand temperatures up to 600 ° C;
- thermal powder paint. True, this method of corrosion protection is not applicable at home, since it requires firing in a high-temperature oven.
Another method of anti-corrosion treatment of barbecues is oxidation. It is also not easy to implement, but it is quite feasible.

First, you need to treat the grill body with 5% sulfuric acid, then boil it in a highly concentrated solution laundry soap, and then boil for one and a half hours in a sodium hydroxide solution. Such homemade grill will not rust for a long time.
No matter how high-quality the anti-corrosion coating is, we do not recommend testing its reliability by leaving the grill in the snow and rain. The best place its installation is a canopy. With the onset of cold weather, it is better to move the structure to some room, for example, a garage or barn.
And in conclusion, some tips for proper grilling:
- lighting a fire in it, conditionally divide inner part barbecue for two zones. In one, where there is more heat, cook meat, in the second, where the temperature is lower, cook vegetables and fish;
- Don't turn the skewers frequently. Normal cooking can be achieved by turning the meat only 2-3 times. The coals should be red with a gray coating of ash;
- do not allow the meat to char: black coating is a direct path to cancer. The other extreme - weak roasting - poses a risk of helminth infection;
- add flavor to your food by throwing a few branches of fruit trees onto the coals;
- preparing shish kebab in rainy weather, don’t even think about moving your homemade grill indoors. Poor draft will lead to increased concentrations of carbon monoxide.
To avoid fire, place the barbecue grill away from flammable objects. There should be no grass, branches or boards near the legs. Do not rush to throw away the ash: it can smolder within a day, which means it can cause a fire.
If you prefer traditional rectangular barbecues, you can watch a video tutorial on how to make them:
Take it for yourself and tell your friends!
Read also on our website.
Few people imagine outdoor recreation without well-fried shish kebab or grilled vegetables. The key to successful preparation of products is convenient device, for example, a barbecue made from a gas cylinder with your own hands. At correct operation it can last for more than one year.
The design can be easily made to suit your needs using high-quality auxiliary materials and tools. For different situations, either a folding version of the barbecue made from a gas cylinder, the photo of which is presented on this page, or stationary design, where a grill-smokehouse made from a gas cylinder is securely fixed in the courtyard of a country house.
Varieties
A brazier is usually called a brazier, with the help of which dishes are cooked over hot coals from wooden logs. It is customary to classify into the following groups:
- portable design, due to its small dimensions and maximum disassembly, it is easily transported to the place of operation;
- portable devices do not have a clear structural connection to a specific location, can be moved nearby, and can be disassembled into several component elements;
- stationary installations, structurally built into a foundation or other base and cannot be moved.
Stationary structures are manufactured using brickwork, and for the rest, sheet iron or remnants of metal containers are used. Owners of old unnecessary cylinders are luckier, because a barbecue made from a gas cylinder, made with your own hands as in the video, already has shapes that are as close as possible to the required dimensions.
The cost of a completed cylinder is about $10-15, which is significantly cheaper than buying a ready-made industrial product for barbecue or shish kebab. At the same time, the walls in the gas cylinder are much thicker, which will ensure long-term operation.
Necessary materials
To make a barbecue you will need a gas cylinder with a capacity of about 50 liters. A larger one will be difficult to move, and those with a smaller volume are not so convenient operational properties, but also look much more aesthetically pleasing and attractive.

The walls of the container are approximately 3 mm thick, which allows for easy processing using an angular grinder(Bulgarians).
You will need to stock up on the following kit:
- drill and set of drills;
- grinder with several discs for working on metal;
- hand saw for metal;
- portable welding machine and electrodes with a diameter of 2-3 mm;
- corner 40x40 mm or close to this profile with a length of about 6-7 m;
- door canopies 2-3 pcs.;
- straps 10 mm in diameter if it is intended to form a barbecue grill.
Preparatory work
It is advisable to take the cylinder without through rusty areas, so that corrosion processes do not destroy the product. Before cutting down the faucet, you will need to release the pressure by opening the faucet and turning the container over. Checking the complete gas output is done using soap solution, which can be applied to the outgoing hole. If there are no signs of bubbles, then the gas has completely escaped.
It is necessary to cut down the crane hand tools to prevent overheating and sparking. You can additionally secure the process by watering the cut with water.
After cutting off the tap, water is poured into the opened hole to wash out the residues. gas condensate. If you don't wash the container properly, then a grill-smoker from a gas cylinder will have a long lifespan. bad smell inside.
Residues of water should be disposed of as far as possible from the residential area, as they are poisonous and emit a characteristic odor for a long time. Only after the hapah has been completely eliminated can you start making a barbecue from a gas cylinder with your own hands - drawings, photos, videos later in the article.

Using chalk, markings are made on the outside to cut out a segment that will serve as a lid. Stepping back from the bottom and top by 3-5 cm, make marks on both sides perpendicular to the axis along the circumference of the container. We connect these two chalk rings with two axial lines located at the maximum distance from each other. A rectangle has formed inside, which needs to be carefully cut out with a grinder.

It is necessary to leave intact a couple of inner rings on which the future lid will rest.
Making legs
After measuring the height, we saw off the legs. They can be welded into a single frame, which is the future basis for the structure, or made into separate detachable elements. In the first case, you will need a construction angle of 40x40 mm, and for the second option you will need four equal pieces of pipe 40-45 mm. Another option is to weld the frame with your own hands to the underside of the barbecue grill from a gas cylinder, and bolt the removable legs to the frame.
.jpg)
The design includes a lid secured with door hinges. For them, holes are pre-drilled through which steel rivets are placed.
.jpg)
Aluminum rivets may not withstand the load when exposed to high temperatures.
The handle is secured with bolts, and its working part must have wooden insulation to prevent burns during use. It is advisable to choose its material with maximum heat-resistant characteristics.
The side hole can be welded with a patch or installed on it exhaust pipe to increase draft through such a chimney.
The lid can swing back greatly and overhang the structure. To prevent this from happening, you will need to weld a limiter in the form of a small corner or pipe.
Assembly of all elements
Frequent high temperatures capable of deforming the structure of the cylinder container. This can be avoided by tightening the grill around the perimeter by welding a metal corner. To this structural element An auxiliary shelf for skewers, racks, containers with meat or other household needs can be easily installed.

To connect the remaining parts, clamps are used, which will secure the structure in the required position. After assembly, you can drill holes in the bottom to ensure better ventilation and removal of moisture, ash and small debris.
Painting the barbecue with heat-resistant paint will help ensure durability. This coating prevents corrosion processes on the outside.
Before use, it is necessary to heat the container several times with wood for 1-2 hours to get rid of the harmful odor.
Decoration
The barbecue can also be used as a smokehouse; to do this, only install a container for sawdust on the side opposite the pipe. However, in this case it is necessary to ensure maximum tightness of the structure.
The difference between a barbecue grill and a barbecue grill is that the first design requires an installed mesh for meat, and in the second case, slots are made on the edges of the cylinder for skewers.

To make a barbecue grill, a spit is installed, on which meat preparations will subsequently be placed. It is mounted along the cylinder axis.
Stationary barbecues are designed in the form of stylized funny designs, for example, an old steam locomotive. In this case, the pipe acts not only as decoration, but also performs the functional duties of the hood.
Reading time ≈ 10 minutes
Many people like to relax in nature with family or friends, have picnics and get-togethers in the fresh air. And, of course, traveling out of town is often accompanied by cooking kebabs or grilled vegetables. To make your vacation pleasant and memorable, you need a good ambience. You can make it yourself using available materials, for example, an unnecessary gas cylinder.
Types of barbecues
Today in stores you can find a huge assortment of country barbecues and smokehouses for every taste. But it is not at all necessary to buy such a product, because you can make it from a gas cylinder, barrel and other materials with your own hands. Before you understand which design is right for you, you need to know what kind of barbecues there are:

Material for homemade barbecue it should be:
- Durable and reliable.
- Fire resistant.
- Keep warm.
An excellent option is a standard barbecue from an old gas cylinder; it can be easily made using drawings and necessary tools. Designs of what configuration can be made:

You can use metal knitting needles, curly handles, rods or other details as decoration. The design of the building depends on your imagination, the main thing is that the barbecue fits into the landscape of the dacha area. The video master class shows how to make a barbecue container with step-by-step instructions and drawings.
Features and Benefits
You can purchase a ready-made barbecue in the store, or you can make a structure of any configuration and size from a gas cylinder with your own hands. Is it worth using just such a container, and is it safe? According to advice experienced craftsmen suitable for making old cylinder volume 50 liters. In this case, the optimal length is considered to be about 85 centimeters, and the diameter is from 30 centimeters.
Let's consider the advantages of models of such homemade barbecues:

A do-it-yourself barbecue made from a gas cylinder has several disadvantages:

How to safely disassemble a cylinder
The preparatory stage for creating a homemade barbecue is to disassemble the old metal cylinder and purchase all the necessary tools. Before you start cutting the body of the future barbecue, you need to make sure that there is no gas or gasoline left inside. Gasoline is a special mixture of hydrocarbons in liquid form that remains in a container. How to carry out this work safely:

What tools and materials do we need:
- Door hinges for securing the lid.
- Adjustable open-end wrench.
- Metal pipe for chimney.
- Hammer with screwdriver.
- Clamps.
- Electric drill.
- Apparatus for welding work.
- Bulgarian.
Secrets of mastery
The entire process of building a homemade barbecue can be divided into several stages, in each of which the following instructions should be followed:

Dutch oven with lid
You can make a barbecue grill yourself from a propane cylinder without spending a lot of time and resources. old gas burner Instead of throwing it away, you can make a homemade brazier using the drawings. 
 Following the advice of the masters and clear instructions, we begin production:

Brazier on low legs
To bring to life your idea of creating your own mini roaster for your garden, you can use an old metal container, for example, a gas cylinder. First, pay attention to the markings indicating the volume and dimensions.

Let's get started:
- We cut out the lid from the body, leaving the sides intact, as in the photo. This way the coals will not fly away in the wind.

- Make sure that the rings are exactly along the seams.

- Now we have the body and lid of the future mini-smokehouse ready, two separate parts.

- We connect the cover to the body with two metal loops. They must then be well welded so that they do not fly off during operation.

- We first fasten it using aluminum rivets, as in the photo.

- We apply markings on the lid for the location of the handles. They must not be made of flammable material.

- To avoid deformation of the cylinder, we attach a corner inside the body. It should also be well welded and serve as a support for the skewers and grate for placing grilled products.

- We shorten the legs so that the grill can be transported in the trunk of a car.

- It's time to weld the lid to the hinges.

- The handles are welded to the outer surface of the lid, which we place on the hinges.


- We install limiters on the cover to fix it in the open state.

- Several holes need to be drilled in the bottom to allow the passage of burnt coal and for better traction. On the opposite side of the holes we cut out slots to fix the skewers inside.

- The design is ready for use!

The entire creation process can be seen in the video master class.
There are many options for making barbecues, smokehouses and barbecue ovens of various configurations. However, the most universal way is to use an old propane tank. Instructions and advice from experienced craftsmen will tell you how best to make such a design and help you avoid common mistakes.
In this article I will talk about the most useful homemade product summer season, without which almost no event is complete. We will talk about making a homemade barbecue from a gas cylinder. The costs for this assembly will be minimal, and many people probably have an unnecessary gas cylinder.
In order to make a barbecue from a gas cylinder with your own hands, you will need:
* Gas cylinder
* Angle grinder
* Cutting disc for angle grinder
* Safety glasses, gloves
* Welding machine, electrodes
* Welding mask, gaiter
* Electric drill, metal drills with a diameter of 6 and 12 mm
* Pipe bender
* Tape measure, pencil
* Metal corner with shelf width 40 mm
* Metal rod with a diameter of 14 mm
* Profile pipe dimensions 20*20 mm
* Thick wall pipe with outer diameter 22 mm
* Hand vice
* A couple of cans of black thermal paint
* Semi-automatic core
* Metal tire
* Bed from the old one sewing machine
* A piece of reinforcement with a diameter of 10 mm
* Shovel handle
* Metal grinding wheel for angle grinders
* Metal lathe
Step one.
The first step is to start with a gas cylinder. In this case, the gas cylinder is taken from a car and does not have a lower skirt and valve, unlike a stationary one, and due to the fairly wide filler neck, it is safer to disassemble it.
To prevent the cylinder from rolling on the floor during operation, we install car rolls under it.

Then, using a string, we measure the circumference of the cylinder, applying it to a tape measure, after which we divide the resulting figure by two and subtract about 50 mm, the resulting value will be the size of our door.


Next, using masking tape, we paste the balloon along the contour and get such markings that are visible in any lighting.

We take an angle grinder with a cutting disc in our hands and make cuts according to the markings, we don’t cut out the door completely, we leave just a couple of millimeters in the corners to make it easier to weld the hinges. When working with an angle grinder, be careful and wear personal protective equipment such as gloves and safety glasses.

Step two.
Now let's make the hinges that will hold the door on. If you don’t have a metal lathe, you can simply buy hinges from hardware store, they are inexpensive. In this case lathe available, so we’ll make the loops ourselves. First, we grind the outer diameter of a thick-walled pipe, initially its diameter is 22 mm, then we fit a rod with a diameter of 14 mm under the hole in the pipe.


The pipe should rotate on the rod without jamming, but without large backlashes. So, from two pieces of pipe and a rod, one powerful hinge is obtained; a pair of these is needed for the door, so we make the second one in the same way.
Using a metal grinding wheel and an angle grinder, we clean the places where the hinges will be attached. After this, we place two thin plates under the hinge to ensure the required gap and begin welding the hinges to the door and cylinder welding machine. First we make tacks, and then, making sure that the loops are located coaxially, we finally weld them. When working with a welding machine, follow safety precautions, use gloves and a welding mask.

Remove slag from the weld seam using a hammer and clean it wire brush.

After the hinges are welded, cut off the 2 mm left earlier and the door is ready.

The door opens well, there are no distortions or jams.

Step three.
To install the skewer in the grill, you need to make special holes and cuts. With the door open, we apply markings to the cylinder, the distance between each slot is 70 mm, we make them using an angle grinder. We try to make the width of the slots the same, about 4 mm.

In the process of making the slots, their depth was increased by another 5 mm, since there will be an overlap of a metal bus that overlaps part of the slot.

WITH reverse side balloon, we make markings for installing the ends of the skewer, the distance between them is also 70 mm, while the distance from the edge should be 25 mm.
Next, using a semi-automatic core, we make indentations according to the marks and drill holes with an electric drill with a metal drill installed at 6 mm, and then at 12 mm. During the drilling process, add technical oil to the cutting edge, so cutting tool will last longer and will not jam. When working with an electric drill, be careful and wear safety glasses and gloves.


Step four.
From the bottom of the cylinder we measure 100 mm upward and make markings for the blowing holes.

Next, we also make cores and drill holes with a diameter of 12 mm. As a result, we get 17 holes on each side, the height between the rows is 50 mm, and the distance between the holes of one row is 65 mm.

Since the grill will sometimes be used as a barbecue, it is necessary to make supports for the grid. Take a metal one profile pipe measuring 20*20 mm and pressed against the wall of the grill with a hand vice in the place where the slots end.

Next, we weld the pipe with a welding machine, and then similarly weld the second one on the other side.

The grill is almost ready, all that remains is to make a shredder and a handle, but first we install the cylinder on the base.

Step five.
The base for the barbecue will be the bed from an old sewing machine, which I think many people have.

From a metal corner with a shelf width of 40 mm, we saw off four 40 mm sections using an angle grinder with a cutting disc. These corners will be used to attach the cylinder to the base.

We screw the corners to the bed of the sewing machine, having previously drilled holes the size of the bolt and rounded the edges of the corners so as not to accidentally get hurt. The distance between the corners was 220 mm.

Next, we install the cylinder on the corners and make several tacks with a welding machine, after which we put on the grill and finally scald the fasteners. Use a hammer to remove the slag formed during the welding process.

Since the temperature in the barbecue is quite high, it was decided to strengthen the door by welding two fittings with a diameter of 10 mm at the edges.

We bend the metal bar using a homemade pipe bender from a vice.

After this, we press it to the barbecue door with a hand vice and weld it to the points with inside so that everything looks beautiful from the outside.
Everyone needs a barbecue. Some people organize monthly picnics, others cook aromatic meat on their plot. Such a vacation is always pleasant and useful, because there are beautiful landscapes and fresh air give a boost of energy and have a relaxing effect. But you don’t always have the funds to purchase a barbecue, because this design cannot be called cheap. But if you have free time, then an old gas cylinder can turn into a good-quality barbecue. IN this material collected drawings, diagrams, video materials and step-by-step instruction on making a barbecue from a gas cylinder - all this will help you understand the simple work.
We will study three types of barbecue based on a gas cylinder:
- standard grill;
- barbecue steam locomotive;
- grill-smokehouse.
Preparation of tools and materials
In order for the work to go quickly, you need to ensure that you have the necessary tools and materials. To make a barbecue we will need:
- Welding machine.
- Bulgarian.
- Several clamps.
- Metal pipe.
- Electric drill.
- Dense metal sheets to add structural strength.
- Aluminum rivets.
- Hinges for the lid.
- The basis of the barbecue is a cylinder with a volume of at least 50 liters (if the cylinder is smaller, it will be inconvenient to turn over the coals).

The photo shows the main units for making a barbecue.
IMPORTANT! Safety must come first, so sawing the cylinder can only take place when all the gas has left it.
Removing gas is simple: turn the cylinder upside down and twist the valve. Gas is heavier than air, so in this position it will come out intensively. To see whether the process is going on or not, you need to lather the valve hole. If bubbles appear, it means the gas is escaping - wait for completion. To be sure at the end, the cylinder can be completely filled with water so that it washes away the last remaining gas.
Manufacturing process: instructions
When the cylinder is empty and all the necessary tools are at hand, you can get to work:

After drilling the holes, the manufacture of the barbecue can be considered complete. Clean it thoroughly and heat it several times until the smell of gas disappears completely. As for paint, this is an optional step. Some owners paint with a heat-resistant coating, others skip this step. All the same, after a few dinners with good barbecue, the grill will become smoky and black. To increase draft, it is recommended to install a chimney: a chimney is cut out at the end of the barbecue structure round hole, where you can weld a regular drain pipe of a suitable diameter.
You can place a couple of cast iron grates at the bottom of the grill. They are used in potbelly stoves and various boilers. By installing these elements, there will be additional ventilation inside the barbecue. Hot grates help save coal, since they also participate in the process of cooking meat. You can place the grill in a brick gazebo or in an open place.
For convenience, the internal barbecue area is divided into two sectors. In one, protrusions are made for the grates, and in the second, slots are cut for skewers.
As tests show, the thickness of the car cylinder is quite enough for normal functioning - the shape of the barbecue is maintained under the influence of high temperatures.
Features of barbecue legs
Legs are the basis of a homemade barbecue. Before you make them, think about whether you will take the grill with you or whether it is created only for use on the site. If you plan to go on a picnic, then you should take care of folding legs. First, you can weld four short bases, which can later be placed on a higher structure.
The legs are usually made from durable pipe. You can fix it either by welding or using bolts: we drill holes and place the bolts there. After installing the legs, the bolts can be tightened with nuts or welding can be used.
Barbecue smokehouse
Using the instructions for creating a regular barbecue from a gas cylinder with your own hands, you can also make a smokehouse. The main difference in the design is the presence of a firebox. Also, the smokehouse must be airtight. A strip is cut off at the bottom of the cylinder, then it is necessary to cut off half of the bottom of the cylinder. As a result, we will have space for the firebox. It is made from dense iron sheets - 2-3 millimeters.

The element is welded to the bottom, after which we get a solid structure. Also, a barbecue smokehouse requires a pipe through which the smoke will escape. This part can be purchased on the construction market or made from a cylinder with a smaller diameter. Some craftsmen even install a motor, whose task is to rotate the spit with meat.
The structure must be coated with safe, but heat-resistant paint. You can start cooking after calcination. Sometimes it’s not possible to get rid of the smell of gasoline the first time.
Brazier steam locomotive
If making an ordinary barbecue with your own hands takes several hours of work, then creating a barbecue-steam locomotive can take more than one week. This is a decorative product that includes a grill, barbecue, grill and even a smokehouse. The brazier was called a steam locomotive because in appearance it really looks like one, especially if the design uses pipes of different diameters. Masters make real masterpieces using several cylinders.

If you can take a standard gas cylinder for the base, then barrels and main pipes. The wheels can be made from cut cylinders, but to add originality, you can use forged elements. The barbecue locomotive must be completely covered with heat-resistant paint. For these purposes, take a coating with a temperature limit of 700C°. The paint needs to be renewed, the intervals depend on the frequency of use of the grill.
Forged parts allow you to breathe life into a design made from cylinders. Craftsmen install retractable grilles, comfortable tables, functional and decorative elements to them.

A steam locomotive is not only a curiosity that attracts attention to your site, but also an excellent design that allows you to set the table in the shortest possible time.
If you decide to start making a barbecue from a gas cylinder, then you should think about whether you are good at welding and a grinder. This is a rather complex process, so if you handle the tool ineptly, the result can only be disappointing.
U homemade design there are several features. Please take note of these before starting work:
- if you do not apply a heat-resistant coating, you can get seriously burned on such a grill;
- after several “sessions” with kebabs, the cylinder will become smoked, so for transportation you need to take reliable bags or plastic film;
- the structure must be stable, but not heavy, so you need to calculate in advance what supports to make for the barbecue;
- Only coal can be used as a raw material, since there is too little space for firewood.
Drawings and videos
The drawing shows a barbecue firebox made from a gas cylinder:

This drawing diagram should help you understand what a gas cylinder grill is:

Scheme of operation of the grill-steam locomotive:

In this video in simple language explains how to build a barbecue from a gas cylinder at home with your own hands:
The video instructions below will help you make a barbecue smokehouse:


