Traditional bouquets are certainly good, but a basket of luxurious flowers looks more original - such a gift will pleasantly surprise the recipient and bring a lot of pleasant emotions. Buy beautiful bouquet in a basket you can in any floristry salon or you can create it yourself, the main thing is to know a few secrets that real professionals use.
How to properly prepare your cart
One of the most important points when creating such a bouquet is choosing a suitable basket and preparing it for placing flowers. Nowadays you can easily find special products intended directly for floral arrangements. Distinctive feature Such baskets are that they already have a special waterproof layer, without which the water in which the flowers are located will simply flow out.
If you use a regular basket, then you can make a waterproof layer yourself. To do this you will need a piece of polyethylene or polypropylene film, from which you need to cut the lining. According to its parameters, the site film must exactly repeat the bottom of the basket, plus it must completely cover the walls. If you measure out a little more film than you need, it’s okay, you can always trim off the excess.
Why do you need a floral sponge?
The next step is preparing a floral sponge, which experts also call an “oasis.” This is special porous material, used as a basis for the composition: “oasis” perfectly absorbs moisture and retains it for a long time. Moreover, the sponge is initially soaked in a special disinfectant solution, thanks to which the flowers in the basket can last for a very long time. You won’t be able to make a sponge with your own hands; you will have to purchase it at the store. For compositions with fresh flowers, choose green sponges of round or rectangular shape - the material can be easily cut with a knife, so its configuration can be changed without any problems.
Working with a floral “oasis” is simple:
- Cut the sponge into pieces of the desired size.
- Place it in the water and wait until the water is absorbed (usually this takes no more than a minute).
- Place the sponge on a napkin (towel) and wait until the excess water drains.
- Place an “oasis” at the bottom of the basket - for greater reliability, it can be secured with pins or the site with a special floral wire.
Don’t worry if, after placing the sponge, it sticks out a little from the basket - everything is in the process of making a bouquet. unnecessary details can be hidden using decorative elements.
How to place flowers correctly
After preparatory stage finished, it’s time to place the plants in the basket. Please note that creating a bouquet is not as simple as it might seem at first glance; there are some nuances that cannot be ignored.
All flower stems must be properly processed, and the ideal option is an oblique cut. This will make it easier to fix the flowers in the sponge, and there will be no problems with them absorbing moisture. In this case, the stems must be placed so that they do not reach the bottom of the basket by about 1 cm. The very first flower is installed in the center: note that it will be the main element of the composition, so it should be located slightly higher than the rest of the plants. The remaining flowers are placed around the central one at a slight angle, which will make it possible to cover the edges of the basket.
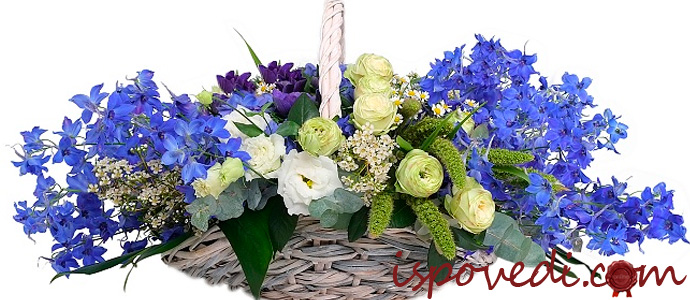
To mask a floral sponge and the edge of a basket, you can and should use ornamental grass, site leaves, coniferous twigs and so on. In addition, this way the bouquet will look more elegant and festive. You can use any flowers, but remember that bright and light buds should be placed in the center - and dark ones on the sides of the composition.
As you can see, you can make a bouquet in a basket with your own hands, but if you are not sure own strength or you simply don’t have time, you can order beautiful flower arrangements from a specialized company, for example, from the Megatsvet online store.
As you know, a bouquet in a basket will last longer than any other flowers, but in order for this statement to actually turn out to be true, you need to follow certain rules. Among them:
- Comfortable temperature - do not place the bouquet near heat sources or in direct sunlight.
- Do not pull flowers out of the floral sponge, because it is thanks to the special impregnation that the plants remain fresh longer and receive the necessary nutrients.
- At night, put the composition in a cool place, you can even put it on the balcony.
- Periodically wipe the leaves with a damp sponge or simply spray with water to wash off the dust.
By observing these simple rules, you can maximize the life of the flower arrangement and admire it for many days.
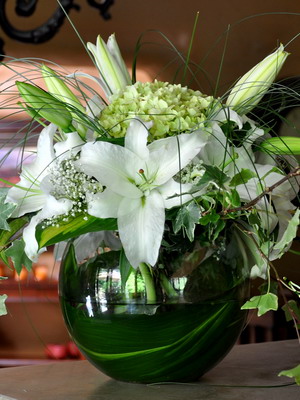
Having bought a gorgeous bouquet in a store or collected flowers in a field, it’s not enough to just put them in a vase. In order for your bouquet to look harmonious indoors, you need to learn how to make compositions from fresh flowers.
For these purposes, you can use various vessels: vases, jugs, containers, baskets, bowls, stands and other items. In this article we will tell you about the elements of flower arrangements and the rules for arranging flowers. You can also learn how to make flower arrangements at home for various holidays and simply for interior decoration.
How to make a composition of flowers in a container
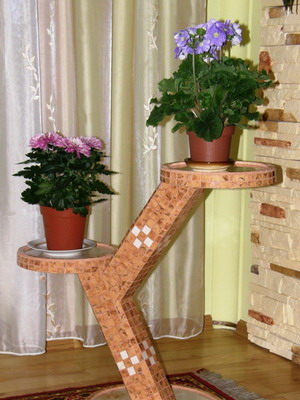
Before making a flower arrangement, collect suitable containers, stands and accessories for the arrangement. indoor plants The range of containers is huge. They come in all shapes, sizes and materials - glass, ceramic, metal, wood, plastic, wicker, terracotta and so on.
Arranging flowers in a composition requires one rule: the container, plants and surroundings must match each other. For example, a muted colored vase on a pastel background, a tall top hat for a stylized modern arrangement, and so on. You'll need a large selection - thrift stores, yard sales, etc. are great sources.
A plastic container that has internal ridges designed to hold a block or cylinder of floral sponge. This type of container is cheap, but it is purely functional. This means it should either be hidden with plant material or placed in a more attractive outer container.
Composition of flowers in a vase and jug
There is no exact definition of a vase, but it is usually a container that is at least as tall as it is wide and often has a very narrow neck. Vases continue to be the favorite vessels for cut flowers, and there are many to choose from. Glass vases still popular for flower arrangements, although the stems may look unattractive underwater. There are tall and narrow vases designed for a single rose, tulip or orchid flower. Metal vases were once popular.


The composition of flowers in a vase should match the decoration of the room. Tall, spike-shaped inflorescences generally require vases with nearly vertical sides. Very bright surfaces or spectacular paintings are rarely successful. Jugs are vessels with a spout and one handle that are suitable for arrangements in period interiors.
Making flower arrangements in hanging vessels, bowls and mugs
Hanging at the end of a bench or on a wall, the vessels consist of a wire or plastic frame into which a block of wet or dry sponge is inserted, used to make arrangements of fresh or dried flowers.


Compositions of flowers are also possible in ordinary mugs. They are sometimes covered with felt or elastic nylon to make them more suitable as a coaster. The panel is either cut out and pasted onto the board, or put on it as an elastic cover.


Wreaths decorated with flowers, berries and leaves are favorite decorations for the Christmas table. Vessels filled with moss are sometimes used, but a ring of floral sponge is more convenient these days. A candle stand is a shallow bowl made of plastic or metal on which a block or cylinder of floral sponge is attached. It has a short stem at the base. Attach this stem to a candlestick or bottle using floral plasticine.


Rose bowl (bowl with lattice). Once a popular vessel for table decoration, they are now rare. A low cylindrical base made of ceramic or glass holds water, and the lid holds the plants either by criss-crossing thick silver-plated wires or by a series of round holes for stems.

Bowl and tray are small containers. Bowls and dishes are widely used for tabletop compositions. An urn is a bowl made of ceramic, stone or plastic with a short, thick stem and often with handles and a square base. The smallest is the tray, a flat container with raised sides used for linear arrangements.
Compositions of flowers in a basket and other items
For fresh flower arrangements, you will need to place a waterproof container inside - this can be either a plastic bowl or a sheet of plastic stapled to the inner rim.
The list of suitable household items is almost endless - jelly molds, wine glasses, decanters, teapots, saucepans, old lids aerosol cans, coffee pots, etc. Shells and driftwood can serve as containers. Hollowed out pumpkins and melons look attractive, but the gas released from them shortens the life of the cut flowers.
Gather the appropriate coasters and accessories. A stand is an object placed between the container and the support on which it stands. It is used to protect the polished surface from splashing water and condensation. A stand can be used to improve both visual appeal and the sense of balance. However, there is a danger in using a stand that distracts the eye from the flower arrangement.
An accessory is an element of non-plant material that is part of or placed near an arrangement. Its purposes are usually purely decorative, although lit candles can also serve a practical function. Some arrangers never use accessories, except at Christmas, when it is bells, ribbons, candles, etc. are features of tabletop compositions. Accessories can add interest, but it requires restraint. Fruits, moss and driftwood are sometimes added to compositions, but these are objects made of plant material and are not true accessories.

Wooden coasters can be rectangles or circles made from plywood, blockboard, chipboard or fiberboard, but the most popular by far is the cork coaster.


Stand in oriental style will strengthen the “eastern” appearance painted Chinese vase with exotic arrangement.


Pieces of marble, slate, gypsum, limestone, etc. When placed correctly, they make excellent decorative stands. The stone gives a feeling of solidity. Particularly useful are stones that have a cavity that can accommodate a small container.


A rug made of straw, bamboo, or covered in plastic that is placed on a table is the most popular base for arrangements that are displayed in the home. When making arrangements of fresh flowers on a rug, avoid shiny or ornate surfaces. In most cases, a table mat does not add decorative value, so use the smallest size that fits.


A cross cut of a tree trunk with or without bark is an excellent decorative stand for some arrangements. An oval-shaped saw cut is well suited for installing a container with landscape compositions or linear arrangements. The container is usually placed closer to one side rather than in the middle of the stand. The wood cut can be left untreated or painted with wood dye; they are often covered furniture wax or varnish.

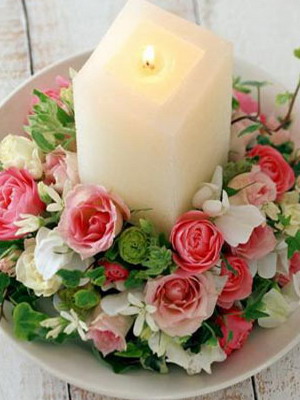
Candles are an important accessory for compositions on dinner table. Unlit candles can be decorated with vines, such as ivy, wrapped around each candle, and flowers can cover the stand. When lit they represent fire danger, if you handle them carelessly. Make sure each candle is securely attached to the arrangement. One way is to attach four toothpicks to the base of the candle with adhesive tape, and then stick them firmly into the sponge; make sure that the plant material does not touch the surface of the wax.


The idea of using wood, metal, ceramic, glass, etc. figurines as part of a floral arrangement is either loved or hated. For some, having such an accessory provides additional interest and a way to emphasize the theme of the arrangement - biblical figurines next to a nativity arrangement, a Chinese fisherman next to an ikebana arrangement, etc. Others find such distractions unnecessary or downright tasteless.


Bows and curly ribbons are usually used in floristry, not floral arrangement, but there are times when this accessory can add attractiveness to the composition. Use polypropylene floral tape rather than satin. Always cut the ends with a slant cut. Curl these ends by running the blunt side of the knife over them firmly and quickly. When decorating with ribbons, as with other accessories, it is important not to overdo it. In most cases it is a useful addition to Christmas arrangements and some church decorations, but it tends to be out of place in regular living room arrangements.
No celebration is complete without flowers. But compositions made from them allow you not only to decorate the room, but also to fill it with a pleasant aroma. In addition, small baskets with flowers can complement any gift and create
When making such compositions, a sense of style as well as artistic taste is required. After all, you can use flowers to make different varieties and shades. So, how to make baskets with
What types of baskets are there?
In this regard, everything depends on the number and size of flowers, as well as fruits. They can also be added to the composition. After all, fruits are a symbol of prosperity and abundance. Flower baskets are completely different not only in shape. They differ in material. For example, wickerwork can be made from willow twigs, tree bark, reeds, bamboo or straw.
The classic version is a round basket. Of course, it all depends on the design and initial idea. A flower basket can be not only oval or square, but also polygonal. As for the handle, it should be strong and reliable. After all, the whole composition weighs decently. In addition, the handle should be comfortable for carrying flowers.
Is it possible to make the basket more original?
When composing flower arrangements it is worth Special attention pay attention to the container in which the flowers will be located. The basket can, for example, be painted. To do this, spray the background paint using a spray bottle. After the product has dried, you can apply an original pattern using brushes of different sizes.
In addition, you can use it to decorate baskets. natural materials, for example, moss, dry grass, spruce or birch twigs, as well as pine cones. If sphagnum moss is used for decoration, it must be periodically sprayed with water. This will keep the moss bright and fresh longer. Can be used in combination with sphagnum small flowers, for example, sand mines or cat paws.

If the flower arrangement should be Christmas, then you should use fir branches and cones to decorate the basket. For rustic style You can use branches, bast and hay.
It is not necessary to glue everything onto the basket. You can fix everything on the fabric and then cover the product with it.
Such decoration will allow you to make a more original basket with fresh flowers. However, there are certain rules here too. Which ones? Firstly, the basket must match the composition not only in terms of style, but also in terms of shades. The main thing is to remember that the product will contain fresh flowers.
Secondly, do not forget that plain baskets are ideal for compositions with a rich range of colors. And for very simple bouquets it is better to use a product made in several colors.
How to keep flowers fresh
Handmade baskets with flowers look original and very beautiful. However, not everyone knows how to preserve the beauty of fresh flowers. The secret is very simple. A sponge base is placed at the bottom of the basket. It is usually called an oasis. It serves not only as a basis, but also as a means for attaching flowers. An oasis, moistened with water, perfectly supports and nourishes the entire composition. If the base has dried out, then it can be refreshed. To do this, just add a little water.

Beauty in a basket
A flower arrangement is an original addition to any gift. You can make it yourself. Of course, weaving takes the most time, as well as selecting required material. The process itself is very exciting. On at this stage certain rules must be followed. Otherwise the composition will not work. So, let's start the master class.
A basket of flowers is made quickly. Especially if the main element is not woven, but is bought ready-made. The bottom must be covered with a thick film and a base must be installed: a thick sponge or an oasis. In this case, it is worth choosing a sufficiently dense material that can hold the flowers in place. Before installation, the base should be moistened well in water, to which you can add a little special fertilizer. The sponge or oasis should be placed in a container with the solution and left for a while. This way it will absorb more moisture.

Assembling the composition
The moistened base should be placed in a basket and secured with tape. In this case, you should make sure that the sponge is securely fastened and can survive any shock during transportation.
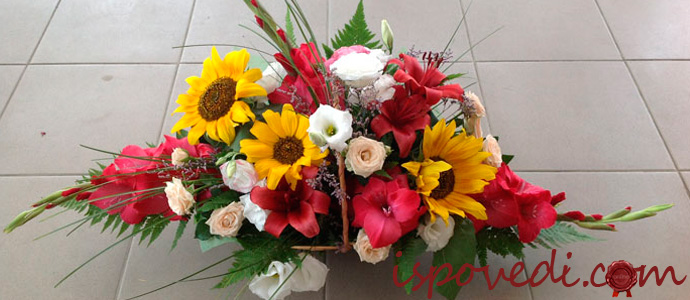
Now you can begin the main stage of creating a basket of flowers with your own hands. The first step is to select material of certain grades and colors. Now you can insert flowers. You should start exclusively from the center of the composition, gradually moving towards the edges. However, there are exceptions. If the highest point of the bouquet is shifted slightly to the side, then it is worth starting with it. Compositions made from flowers of different colors and varieties look best. You can complement the bouquet with a variety of leaves and branches. At the same time, do not forget about the harmony of shades.
Flower arrangement “Spring day”
To create such a masterpiece you will need:
- Deep bowl.
- A dish that matches the size of an oasis.
- Cold water.
- Scissors.
- Toothpicks.
- Mandarin. You can use any fruit or berries.
- Fresh flowers and green leaves. In this case, carnations and chrysanthemums are ideal.

How to do
Fill the dish with water and place a sponge in it. You need to leave it for several hours until it is absorbed most of moisture. After this, the oasis can be placed in the bowl. If necessary, protruding edges must be trimmed.
Now it’s time to prepare the flowers for work. First you need to cut off the buds, leaving a short stem. In this case, you need to take into account the depth of the container. The prepared buds should be inserted into the sponge along the edge of the bowl.
You need to insert a toothpick into the tangerine and fix it in the sponge. After this, we fill the remaining space with flowers so that the oasis is not visible. That's all - the composition is ready.
You can use not only a bowl, but also a basket as a base. small sizes, milk jug, sugar bowl. Floral arrangements of fresh flowers of this type - perfect solution for interior decoration.
Flower arrangement “Tenderness”
To make it you will need:
- A basket for flowers, preferably wicker.
- The basis. In this case, you should use a floral sponge - oasis.
- Flowers.
- Scissors, knife, wire cutters.
- Glue gun and stick.

How to compose
The bottom should be covered with film and a sponge soaked in water should be placed on it. In order for the oasis to hold better, it can be fixed using glue gun. After this, you need to place fern leaves along the contour of the basket. They can also be secured with silicone.
Now you should stick five roses into the base. This will be the main accent. They need to be placed in a checkerboard pattern. After this, you can evenly distribute the rest of the material. As additional elements pink lily of the valley branches are ideal.
Finally, the composition can be decorated with white gypsophila. In this case, the color can be changed as desired. A basket with fresh flowers can be decorated original butterflies, which should be suitable not only in shade, but also in size.

Finally
Professional florists making flower arrangements from fresh flowers, always take into account the peculiarities of the celebration. The room should be decorated with such baskets in compliance with all the shades in the design. Only a specialist can take into account every nuance. Therefore, to decorate the premises, it is better to seek help from professionals.
But no one forbids making baskets with flowers (with your own hands, of course) as a gift. In this case, you can use the favorite shades and plants of the person for whom the bouquet is intended.
DIY flowers. Master class with step-by-step photos
A bouquet of flowers for mom. – class with step-by-step photos
Master class Bouquet of flowers “Spring mood”
Author: Mantsigina Oksana Sergeevna – teacher at MBDOU kindergarten No. 1 village Staroye Melkovo, Tver region, Konakovsky district.
Description of material: This material designed for middle and older children, teachers and parents.
Purpose: making panels, participating in competitions, interior decoration.
Target: Creating a bouquet of flowers using various techniques.
Tasks:
- develop children's creative abilities, attention, imagination and creativity;
- develop fine motor skills hands;
- learn to make flowers using various techniques.
Bouquet of flowers
The gift is generally simple.
But there is nothing better or more pleasant
Well, what can argue with beauty?
Flower bouquet.
Fantasy is small -
Give flowers.
But let's not forget
What's the best gift people
We haven't been able to figure it out yet.
And humanity in the world
Lives for quite a few years...
And yet what, please note,
I give you a beautiful bouquet!

To complete the work we will need:
A3 sheet, colored paper, colored metallized crepe paper, rainbow foil, white and pink napkins, felt-tip pens, stapler, ruler, scissors, pencil, cotton swab, cotton pad, gouache yellow color, PVA glue.
PHOTO No. 2what you will need
Work order:
1. First, draw the shape of a basket with a pencil.

2. Next we take yellow corrugated paper and blue colors and cut out templates for gluing the bottom of the basket (for convenience, you can circle the bottom of the basket on thin paper and cut out templates) and paste it over, alternating colors, you can make it monochromatic, as you like.

3.


It turns out like this basket

4. Next we will make leaves. Take colored foil and cut it into three equal parts. Then cut each part in half, you should get a square. And cut the square diagonally.

5. Take half of the square and fold it like an accordion.

6.


Fold the resulting accordion in half.

7. Glue the fold line together to create a leaf.

8. You can make large leaves using the same technology, it all depends on your imagination. One leaf produces 12 leaves.


9. Look, look,
What is this red light?
This is a wild carnation
Hot day is celebrating.
And when evening comes,
The flower will fold its petals,
"See you in the morning! See you again!" -
And the light will go out.
10.Next we proceed to making carnations. Take a napkin, unfold it and fold it three times.


11. You get a strip like this.

12. We fold the resulting strip three more times, as shown in the photo.
13. It turns out to be a square like this.

14. Take a stapler and staple it in the center. Let's draw a circle.

15. Cut with scissors, you get something like this

16. Next, use a felt-tip pen of any color to outline the edges of the future carnation.

17. We begin to collect cloves, lift each layer of the napkin to the top and crush it.

18. These are the carnations you get, you can take colored napkins and also outline the edges.

19. Now we begin to make an aster
Asters spread their wings
Like angels, a little shaggy,
Thin multi-colored mantilla
They stripped the garden and its paths...
Angel stars are a baby miracle.
We take paper of two colors, I took yellow - this will be the middle and red - these will be the petals of the aster. Using a ruler, measure 0.5 cm and 4.5 cm on red paper (the size depends on what kind of flower it is, large or small) - this is for the petal. On the yellow one we measure 0.5 cm and 1.5 cm - this is the core.

20. Cut the strips into fringes.

These are the blanks you get:

21. Take a skewer or toothpick and first wind a yellow strip cut into fringe onto it, then a red one and glue the tip with glue.

22. Remove the red fringe from the toothpick and bend it, but you don’t have to bend the middle, or you can bend it too. Astra is ready.

23. Let's start working on the calla lilies. Take a cotton swab and paint the cotton swab with yellow gouache. This will be the middle; from one cotton swab you will get two centers.


24. Next, take a cotton pad. We place our dried center in the center of the disk.

25. Screw it into the middle and glue it with PVA glue.


26. Cut off the excess part of the cotton swab.

27. When the flowers are ready, we begin to glue them in any shape onto our basket.
A beautiful basket of flowers with your own hands will be an excellent gift for the holidays or interior decoration. The filling of the baskets is selected individually - these are not necessarily fresh flowers. Bouquets of sweets and toys, paper flowers and themed seasonal compositions look no less interesting and original. These interesting master classes They will tell you how to make flower baskets for bouquets of any complexity yourself from start to finish.
What to make a flower basket from?
Baskets are used for floral arrangements different sizes and material. At the same time, they can be divided into:
- Decorative bases from artificial materials(foam plastic, penoplex, floral oasis). Flowers are stuck into a basket-shaped blank, so this option is more suitable for bouquets of sweets and artificial flowers.
- Actually baskets and baskets. There is also classic shapes, and original vases in the form of an umbrella, shoes, and household items.
These options are quite within the capabilities of home craftsmen. And it’s not at all necessary to look for wicker in stores the desired shape. You can make durable and lightweight baskets yourself from:
- paper;
- cardboard boxes;
- plastic containers;
- natural materials (cones, branches).
The container should complement the flowers, depending on the size of the bouquet and its style.
Why do fresh flowers not fade and remain fresh in such compositions?
All thanks to the floral sponge, which transfers moisture to the flower stems:
- Place a plastic bag-substrate at the bottom of the container.
- After wetting the sponge, place it in the basket.
- We will trim the flower stems and stick them into the oasis.
Selecting plants
Depending on the size of the basket, different flowers are taken:
- For large ones - roses, chrysanthemums, gladioli, carnations.
- Medium - miniroses, daisies, forget-me-nots.
Important! The flowers in the bouquet are complemented by large leaves, cereals and climbing plants.
Let's take a closer look at the options self-made baskets with flowers from different materials.
Mini basket with paper flowers
This miniature DIY paper flower basket is made from a tape reel and colored paper. Children will like the simplicity of making the composition, and adults will be able to create more complex options based on this master class:
- Cut a circle from a piece of cardboard and glue it to the reel, trimming off the excess edges.
- Cut a piece of brown paper into strips.
- Having arranged them lengthwise and crosswise, braid the spool of tape.
- Place crumpled green paper inside.
- Make flowers from colored paper. We twist strips 5-7 mm wide into tight spirals. We paste them over paper tapes, cut into fringe.
- Glue the flowers inside the basket.
- Cut a 1 cm strip from cardboard, glue it or wrap it in brown paper.
A large gift bouquet will not fit in such a basket, but for small gift arrangements for March 8, Teacher's Day, and New Year, they will be just right. For large bouquets, make a basket from a wide round box covered with fabric or appliqué.
Important! Based on this idea, make a small bouquet basket with small flowers - lilies of the valley, tulips, forget-me-nots, tea roses.
Kraft paper basket
This option is suitable for those who do not know how to elegantly decorate a basket with flowers in eco-style. Pay attention to craft wrapping paper. It is dense enough to retain its shape and support the weight of the flowers.
Operating procedure:
- Cut the paper into wide and long strips.
- Fold them in half and stitch along the edges.
- Lay out 8 strips in front of you (4 horizontally, 4 vertically).
- Pass the top vertical ribbon through the horizontal ones, through one.
- Repeat for all other strips.
Important! To ensure an even weave, pin the ribbons to the table and secure the edges with paper clips.
- When the bottom is woven, move on to the walls. Fold the strips along the edge of the weave and braid the corners.
- Then continue weaving the walls to the desired height.
- Decorate the edges of the paper basket with a strip of paper.
Important! This basket is suitable for large flowers. Place an oasis inside, decorate it with peonies and roses. The combination of delicate petals and rough paper will create an interesting composition.
New Year's basket of pine cones
This basket is suitable for New Year's compositions on festive table. For a small basket you will need about 50 cones, for a large one - 200-300 pieces.
This is the order of your creative work:
- Make rings of different sizes from pine cones wrapped with wire at the base.
- Stack the rings from smallest to largest. Pass the wire between the rows and pull it together.
- Inside, make a bottom of 3-4 large cones, fastened with wire. But it’s better to glue the bottom out of cardboard.
- Make a handle from pine cones. This time leave a tail at each end of the pine cone chain and wrap it 2-3 times. Coat with additional glue.
- Attach the handle to the bowl, and the basket is ready!
What to put in such a basket? Pine needles, juniper, Christmas plants - poinsettia, mistletoe sprigs, hippeastrum, plus decorate with small Christmas tree decorations and garlands.
Important! To make the cones open and become fluffy, place them in a colander and hold over steam. Then fix the scales in the opened state with varnish or wood glue.
Round newspaper basket
A round basket made of newspaper tubes is very similar to a wicker basket, but weighs less and is not so difficult to make with your own hands. The material is easy to find - these are newspapers and magazines, which are cut into pieces, rolled on a knitting needle and glued. The basket is woven from these tubes.
Important! Before weaving the tubes, paint them with wood stain or acrylic paints ocher flowers so that the basket looks like it is wicker from a real vine.
Let's figure out step by step how to make a small flower basket using this technique:
- Stack 3 tubes horizontally and 4 vertically on top of each other.
- Bend the outermost one vertical stand and intertwine adjacent horizontal ones with it, passing through one.
- Continue wrapping the center vines in a circle. If the tube ends, glue the next one to it, inserting one into the other.
- Align the central pillars to create rays.
- Weave the base and put the mold inside.
- Lift up the posts and secure them with a rubber band. We continue weaving, making sure that it is not too tight and that the shape comes out of the basket freely.
- Having weaved the desired height, tuck and hide some of the weavings inside the basket, gluing them to the walls.
- Leave 2 posts opposite each other for the handle. Connect them with glue. If the handle is too tall, cut off one side.
- Glue 2 tubes near the base of the handle - one on each side. Interlace the handle posts crosswise. Having finished the braid, cut and glue the vine.
Important! Using bowls, saucepans, jars of different sizes to shape, you can make small and large baskets using this method. If you need a shaped basket or vase with a transition from a wide part to a narrow part, then by changing the base shape, you can get the desired outline. A bouquet in such a basket, made with your own hands, looks especially elegant, because wicker basket and flowers are a classic composition in floristry.
Basket made of plastic container
You can make cute interior baskets from different containers and food substrates:
- We take burlap and wrap it around a plastic container, securing the edge of the fabric with a glue gun.
- Glue white lace on the outside.
- We wrap the wire with twine, bend it and secure the handles to the body.
- From the remains of wire, lace and rope, rolled into a spiral, we make flowers.
Important! Flat baskets made from low containers are suitable for romantic bouquets. The beauty of such baskets is in the high handles, so they are the ones you should pay attention to and avoid additional decor.
Penoplex basket-bag
A light and shiny basket in the shape of a women's handbag can be used as a gift, for weddings and birthdays.
Important! This basket is designed for artificial decor, but in the middle you can make a recess for a floral sponge. The dimensions of the finished basket with flowers are 40*40 cm.
The order of the creative process:
- Cut 2 trapezoids from foam. Figure dimensions: 16*16*22 cm.
- WITH wrong side At the base of the basket, cut a recess where the weight will be placed to stabilize the composition.
- Glue both parts and sandpaper sand the edges
- Wrap the entire piece in gray crepe paper. Use a hot glue gun to secure the paper and foam.
- Make a handle from a soft plastic tube decorated with a silver ribbon. Attach wire pins to the ends of the tube.
- Wrap the basket with lace, and glue a twisted cord along the edge of the bottom.
- Stick the handles into the top and decorate with flowers.
Important! From polystyrene foam and its varieties, you can make a variety of shapes for topiaries, Christmas wreaths and interior compositions.
Master class: a bouquet of fresh flowers for a basket
The main difficulty in making a bouquet basket is that you need to be able to show the beauty of the flowers and correctly use the shape of the basket in which they are located.
Depending on the size of the buds and the length of the stem, the composition can be:
- symmetrical - with an exact center in which the most noticeable flowers are located,
- asymmetrical, arranged in a wave from large flowers to smaller ones.
This master class will tell you how to make a basket with fresh flowers with your own hands:
- We cut the oasis with a knife to the size of the basket.
- Place it in a bowl of water, allowing it to become completely saturated with moisture.
- We take flowers with hard stems (roses, matthiolas) and cut off the stem.
- Protect the inside of the basket from water with film and place a sponge on it.
- To ensure that the floral oasis lies flat in the basket, we secure it with tape (green paper tape).
- We decorate the edges of the basket with leaves, then stick roses in a circle. We place large buds in the center.
Important! Before making a bouquet, you need to cut the petiole of flowers at an angle. Weak stems are strengthened with wire inserted inside and tape.
Master class: bouquet of paper roses
Let's learn how to make a basket of flowers with your own hands from crumpled paper. This is a very popular trend in needlework. Having learned how to make paper roses and peonies, you will be able to make gift candy bouquets, as well as decorate holiday decorations. Therefore, let’s focus on making flowers, and take a ready-made basket or make it according to previous lessons:
- Cut the red paper into 5 cm strips.
- We cut each ribbon into 6 parts - 120 petal blanks come out.
- Round the top of the pink petals.
- Cut 27 strips 1 cm wide and 20 cm long to wrap the stems.
- For sepals, cut 8 strips 6 cm wide. Make a jagged edge on the strip.
- Take the candy and glue it to the kebab stick with double-sided tape.
- Apply hot glue to the bottom edge of the first petal.
- We wrap the candy, forming the inner bud.
Important! To ensure that the edge is curled, like a real flower, we twist the edges onto a stick. One candy rose will need 8-10 petals. For a bud - no more than 3.
- Glue the sepals to the bottom of the flower.
- Wrap the skewer in narrow green paper and secure it. You will get 9 buds and 18 lush roses with candy in the middle.
- We cut squares from organza or tulle and fold them.
- Glue the fabric by the corner to the skewer - this will be greenery to fill the voids in the bouquet.
- We place a piece of polystyrene foam in the basket and mask it with green paper or sisal filling.
- We stick tulle greens in a circle, filling the entire space.
- We stick open roses into the center, and buds along the edge.
Important! Complete the composition with golden fern leaves, decorate the handle with ribbon and thread with beads, and add a bow to the basket for a complete festive composition.