The question of how to clean cement from windows can become quite relevant if the repair work was not carried out very carefully, and cement, for example, got on plastic or glass when plastering walls. Washing it after the material has hardened is not so easy, especially without damaging the window, but it can be done if you follow the instructions and do not overdo it.
What tools will you need?
When choosing between cement, you need to take into account that glass is a fairly delicate material that can be scratched. Strong physical impacts are also terrible for him, which can lead to serious damage. Therefore, you need to use not only gentle detergents, but also special tools that will not harm glass and plastic surface. You will need to have the following on hand:
- Cotton or fleece rags.
- Scrapers and spatulas with a plastic or rubber surface. You should not use metal ones, as they leave scratches on the surface.
- Sponges and mops.
- Detergents.
- Rubber gloves and a bucket.
There is one inexpensive trick - you can use ordinary newspapers rather than expensive factory-made glass cleaners. Paper can remove dirt without harming the surface, as it is soft enough. You can use old stockings. The peculiarity of such materials is that they will not leave streaks on the glass.
Do not wipe with newspapers plastic elements, the paint can eat into it and it will be even more difficult to wash it off than cement. Can not use toilet paper: this material is quite thin and gets wet quickly, which will leave dried fibers on the glass that will be difficult to remove. Detergents will be more effective than those containing alcohol.
How to remove traces of cement from windows?
If this substance gets on the glass or plastic of the window and has time to dry, you will have to think about cement with plastic windows. In principle, any alcohol-containing detergent will do. It is important to take into account that you should not scrape off the cement with sharp objects.
While the material is hard, it will not be easy to remove, so you will need to soften it first. To do this, you need to follow the instructions:
- Apply any acid to cement stains using a brush. If the stain is large, you can do this with a sponge, but it is better to work with gloves.
- You will have to wait about a minute until the stain becomes soft.
- Now it can be carefully removed.
- In order to remove stains, you can wipe the surface with a baking soda solution.
- If the stain was on the glass, you can polish it with an alcohol-containing detergent and wipe it with paper so that there are no streaks left.
If it was not possible to wash the cement off the window the first time, the procedure should be repeated until the thick stain of mortar is destroyed and completely removed.

How to remove construction dust?
From cement mortar, we have already figured it out. However, as a result repair work windows can be stained not only by it. Quite often they suffer from construction dust, which, unlike ordinary household dust, is not washed off so easily and requires a more serious approach. The peculiarity of construction dust is that it hardens when it dries, so it is not easy to remove it from plastic, just like cement.
If the windows are new and have been coated, everything is simple: you need to remove the film and the dust will go with them, but if there is no protective coating, you will have to try. You need to proceed as follows:
- Wipe surfaces with liquid detergent. You can use the same thing you would use to wash cement mortar from glass.
- Wait at least 10 minutes: this will cause the dust to become soft and can be removed with a cloth.
- If you can’t remove dirt with a rag, you can use a plastic scraper, but you need to do this carefully so as not to leave marks on the surface of the glass or plastic.
It is best to use foaming agents for glass. The foam penetrates the structure of cement dust, softens and destroys it, helping to clean the surface without extra effort. After the cleaning procedure, you can polish the surface with a rag, and at the same time remove small stains that you did not notice right away. After complete removal of dust, polish the glass and plastic with any suitable means, with a soft, dry cloth.

What should you not do when trying to clean windows?
Before you try to clean windows from cement mortar or cement dust, you will need to study in detail the typical mistakes that many owners make when trying to clean the structure. Otherwise, you can seriously damage the window and ruin its appearance.
- Do not use aggressive detergents. They may help get rid of dirt quickly, but there is a high risk that they will harm the plastic surface.
- Never apply detergents to rubber seals or other elements made of rubber. Its structure may be destroyed, as a result of which the window will no longer be airtight, and you will have to change all these elements.
- Before you wash cement from plastic windows using chemicals, carefully study their composition to make sure that it is not harmful to plastic structures. Many detergents indicate in what proportions they should be diluted. If such information exists, you should listen to it and not use the substance in its pure form.
- When choosing how to remove cement from plastic windows, always study the composition of the detergent. Some indicate that the products should not be used on plastic. Such substances should be discarded immediately: they may not take the cement, but they will damage the window, after which it will no longer be subject to restoration.
- Do not use sharp or metal objects, they may leave deep scratches, which will be noticeable.
If you are patient, follow the instructions and choose the right detergent that will be safe primarily for plastic and rubber structural elements, removing cement from plastic windows will not be so difficult, and you can do it on your own.
Do-it-yourself cleaning after renovation is an important event that must be carried out. After all, it is not enough to exclude only construction dust; it is worth spending a little more effort and time to ensure that the cleaning in the apartment after renovation is of high quality. Most simple solution This issue involves calling professionals to the contaminated premises, but this costs significant costs, which not every person can decide to undertake. Therefore, it is much easier to do the cleaning after renovation yourself; you just need to follow the recommendations of professionals.
The main stages of general cleaning after renovation
How to clean an apartment after renovation? This should be done step by step, following the instructions. This way you can finish the cleaning quickly and efficiently.
The full stage of doing such work consists of:- Remove debris after construction.
- Wash off dust particles from all existing surfaces in the room.
- Clean windows and glass.
- You will begin to prepare furniture and other wardrobe items for moving into the apartment.
- Finishing touches.
How to properly clean a room? You will need many special devices, without which your ideas will not come true.
Attention! Start the process with helpers. They can be friends or relatives - the main thing is that joint efforts will save time.
It could be:Before washing off construction dust, you should remove construction debris (garbage, tools, large objects) from the room, and then proceed to the main process. The initial stage is removing large-sized garbage.

- Not removed trimmings of wall or flooring, drywall. It is better to put them near front door to one place or outside the apartment. This way, it will take less time to collect and remove them.
- Items made of wood, metal or plastic (plinth, carpet, ceiling tiles), but the remaining foam and screws are placed in a large bag or bag.
Construction waste is stored in a certain place until it becomes necessary to dispose of it. First of all, it is worth removing from the apartment objects that may pose a danger to humans: glass, toxic chemicals, knives, nails. You need to get rid of them immediately after the repair is completed. If this cannot be done for some reason, the garbage is placed in a large bag and then removed from the premises along with the rest of the waste.
Attention! It is necessary to remove garbage after renovation in an apartment in a special place intended for this purpose. Failure to comply with these rules may result in penalties.
Cleaning the floor after renovation
Where to begin? When carrying out a thorough cleaning of the room, you need to pay attention Special attention floor covering. The entire surface must be washed to remove dust particles with plain water, and then wiped with a dry cloth and vacuumed. How to do this correctly? First, you should find out what kind of coating is available in a particular room, then, following the instructions, begin cleaning. Not all detergents are suitable for a particular flooring, and therefore you need to choose the right ones.
So, basically, in apartments there is:
- linoleum and laminate are the easiest to clean - just touch the area of contamination with a damp sponge on which there is soap solution;
- Porcelain tiles and tiles are not easy to get rid of stains of any complexity. This will require special products that have a cleansing effect;
- parquet or wood flooring is cleaned with products that contain oily liquid or wax;
- tiles made from tiles are rubbed with a hard-bristled brush; you can also use aggressive chemicals.
Made on new way the apartment may contain stains of dye or varnish. If this happens, you can remove them using ammonia. This product also removes fresh dirt.
Cleaning walls and ceilings after renovation
The renovated premises leave many traces that require human intervention. Dust settles on the entire surface of the apartment. However, the most difficult thing is with hard to reach places. You can reach them with a washing vacuum cleaner, which is equipped with a telescopic tube.
Experiences of people who cleaned after renovation:- Wash the painted walls with a damp cloth, first dipping it in detergent. However, you should choose such that after their exposure there is no formation unpleasant consequences.
- Wash away any remaining tape, glue, or paint on the walls with an alcohol solution.
- The foam was washed with a stiff brush.
Before washing any surface with products household chemicals, read the instructions for use.
Apartment renovation is worse than a nuclear war. This expression occurs in the conversations of people who have started a major renovation of their apartment, deciding to change the wallpaper, update the ceilings, fix the plumbing and other things. Indeed, even at the final stage of the renovation, when everything has already been pasted over/painted/whitewashed, there are still a lot of little things that will require you to spend both time and effort. This type of work also includes cleaning the house. How to clean floors after renovation from white deposits? This question is asked by those who have decided to resort to one of the old but reliable methods of finishing the ceiling - whitewashing.

Cleaning up after renovation is not an easy task. Fine and nasty dust resulting from construction work, you will have to rake large quantities from everywhere. She gets stuck in upholstered furniture, settles on cabinets, sometimes getting into the most inaccessible places.
Important! Fine construction dust negatively affects people's health. It settles in the respiratory system and often causes the development of respiratory diseases. Coughing and pain in the lungs are common companions for those who do repairs and do not follow safety precautions, that is, do not use personal protective equipment.


That is why it is important to remove as much debris and dust as possible after completing the repair. And also, before starting this large-scale operation, it is recommended to make some preparations that will protect the interior from dust and whitewash.
It is advisable not to leave anything in the room where the work will be carried out - all the furniture is taken out, it is best to pack things in boxes or bags so that dust does not penetrate to them even through small cracks. It is recommended to wrap the furniture itself plastic film, because even standing in another room, it will be “attacked” by the smallest particles of building mixtures. It is recommended to wrap anything that cannot be taken out with cling film, as it will not allow dust to get to the interior item.

If a procedure such as whitewashing a ceiling is being carried out, and there is already a new floor covering on the floor or it is not being replaced at all, since it will be used further, then the floors need to be protected as much as possible. To do this, the base is covered with a thick film, which is then fixed along the baseboards using masking tape.
Important! If you neglect fixation, the film will become crumpled and will be of no use. It is also important to seal all joints of individual panels with tape.
Some people use regular old newspapers instead of film, but this method is not the most reliable. When wet, paper loses its strength and tears easily. To maximize the safety of the base, it is recommended to lay newspapers in at least two layers. It is not recommended to use a cloth to cover the surface, as it will still allow all the fine dust to pass through.

It is worth remembering that it is easier to prevent contamination, and especially whitewash, than to later wash off all the consequences of your negligence. Sometimes some coatings become hopelessly damaged when exposed to white dust.
Features of whitewashing as a finishing material
Whitewashing is one of the cheapest and available options ceiling finishing, moreover, time-tested. Despite the fact that this technology has now been partially replaced by more in modern ways design, it is still in demand, and all thanks to its special advantages:
- accessibility and low cost of the method;
- the ability to do the work with your own hands without the involvement of craftsmen;
- environmental friendliness and purity of the materials used;
- strength, reliability, stability of the applied decorative layer;
- a classic design option for a regular white ceiling.
Whitewashing can be done either with chalk or lime - these materials are available and always on sale, and are inexpensive.

Advice! If the ceiling has previously been whitewashed, it is recommended to use the same material that was used previously to update the layer. That is, if the upper part of the room was covered with lime, then it is important to use a lime composition.
Whitewash is exactly the material that most often leaves white coating on the floor surface after repair. It is sometimes very difficult to wash off, especially if it ends up in the wrong place, for example, on the floor. And during repairs, it is unlikely that it will be possible to completely avoid contamination of the base, even if you cover the entire room with film. The fact is that the protective coating can be easily damaged and all the dirt will fall onto the floor through the resulting hole. It is unlikely that anyone will pay attention to a small hole in polyethylene and immediately repair it during the work process. That is why, when deciding to whitewash the ceiling, it is worth finding out how the process of washing the floors takes place.

In general, cleaning the floor after finishing renovation work is not much different from regular cleaning. But it is often necessary to use special solutions or components to deal with white spots on the base. Before we talk about floor cleaning products, we will share a few useful tips for cleaning the base:
- You can't use baking soda to clean linoleum.– its impact will have a bad effect on the appearance of the coating;
- It is best to remove paint and other similar liquids from the coating immediately– then it will be more difficult to wash them. The same goes for whitewash stains;
- laminate and other similar coatings should not be rubbed with abrasive materials– the top protective layer can be damaged;

- Potassium permanganate cannot be used to treat varnished surfaces– stains will appear on the floor;
- It is best to wash all stains after the initial treatment of the floor– sweeping and wet cleaning;
- It is better to start washing the floors from the wall farthest from the door, moving towards the exit so as not to trample on the newly washed surface;
- It is recommended to change the water as often as possible when washing floors after repairs– this way you will be able to quickly deal with corrosive stains and avoid stains, which especially often appear during whitewashing.

How to clean the floor after whitewashing?
To remove white deposits from the floor, you will have to be patient and purchase several products that make the job easier. You will also need plain water, a couple of rags, and a mop.

Methods for removing white deposits and stains from the floor differ depending on the type of floor covering. Let's take a closer look at each option.
How to clean parquet after renovation?
– the coating, although reliable, is very delicate. It does not like to come into contact with water - due to its exposure, the coating loses its beautiful and noble appearance and may swell. That is why it is not recommended to wet it abundantly. Let's look at the easiest way to remove whitewash and white deposits from parquet.

Table. Means for combating whitewash on parquet.
| Means | a brief description of |
|---|---|
| After dissolving a little of this product in water, the parquet is carefully treated with a rag soaked in the solution. The composition easily copes with water-soluble types of stains - putty, construction dirt, including whitewash. |
| Before using these products, it is recommended to wipe the parquet with a clean damp cloth. After this oil is dissolved in cool water in a ratio of 1:100. The parquet is washed with the resulting composition - the whitewash will be removed very easily. After this, the floors are wiped with a weak vinegar solution. |
| Suitable for severe dirt. Dissolves in a bucket of water (5 l) in an amount of 100-150 g. The resulting solution is used to treat contaminated floors. The method removes stains well. It is important to ventilate the room well after finishing work, and wipe the floors with a weak vinegar solution - it will help cope with the smell of kerosene. |


Important! Parquet does not like the effects of aggressive chemicals, so you can only work on it with soft compounds. This can be methyl alcohol, white spirit, kerosene. But still, before using them, it is better to check on an inconspicuous area of the parquet how the material will react to contact with the chosen product.
Parquet should not be rubbed with coarse abrasive materials. Neither metal brushes nor rough scrapers are suitable for processing it. They will simply ruin the coating by scratching the protective top layer.
How to remove whitewash from laminate flooring?
Laminate is a coating that, like parquet, really does not like water. Excessive moisture will negatively affect this type of coating, so use water only large quantities not for washing. Although in general, this type of finishing material for finishing the floor is quite durable and reliable. But you still need to clean it carefully, otherwise you can damage the outer protective layer. And without it, the material will become susceptible to all types of mechanical and physical stress, as a result of which its service life will be dramatically reduced.

A vinegar solution of 1 - tbsp will help with whitewash stains on laminate flooring. l. dissolves in a 5 liter bucket of water. After this, a soft cloth (preferably microfiber) is moistened with the resulting solution and wrung out thoroughly - no liquid should flow from it. The floors are then treated with a damp cloth. The final stage is washing the laminate with plain water.
Important! The rag should be rinsed in a vinegar solution as often as possible. The cleaner it is, the easier it will be to remove dirt.
Just like parquet, laminate can be treated vegetable oil. It is diluted in warm water in a ratio of 1:100. After treating the laminate with this composition, it is wiped with vinegar diluted in water (2 tablespoons per 5-liter bucket).
On a note! Vinegar can be replaced with citric acid.

Another remedy for removing white plaque from laminate flooring is a solution of ordinary table salt. The main thing is not to dilute it in water in large quantities, otherwise stains may remain on the floor. The optimal consumption is 0.5 cups of salt per bucket of water. After treating with this composition, the floor is wiped with a clean hoe moistened with plain water.
Linoleum is a less capricious material than parquet or laminate, but it also deserves careful care and handling. For example, you should never rub it with a hard brush - it can be damaged. But whitewash stains from such a coating are easiest to remove.

Linoleum is not afraid of water, so any white stains and deposits can be washed off with a well-moistened cloth. The main thing is that the water is clean and warm. It is always better to rinse the cloth thoroughly with water to avoid streaks. It’s even better to change the water in the bucket with fresh water as often as possible.
If stains from linoleum cannot be wiped off with water and a rag, then you can use a little turpentine or add laundry soap to a bucket of water. Perhaps the last option is the best.

Removes whitewash stains from linoleum and salt well. It is used in exactly the same way as with laminate.
It is worth remembering that you should not try to clean linoleum with gasoline, ammonia and similar compounds. Because of this improper processing the coating will fade quickly.
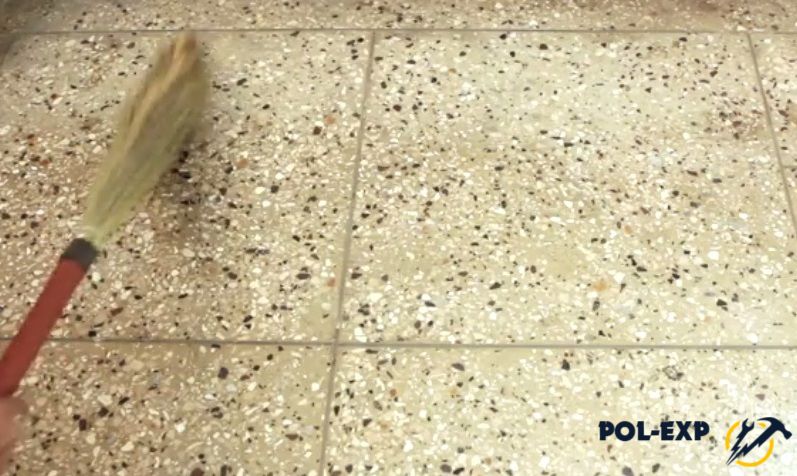
Ceramic tiles are a material that has, one might say, been proven over the centuries. It has been used in construction and decoration for many years and has won the love of craftsmen for good reason. It is durable, reliable, not afraid of moisture and practically does not react to chemical substances, remaining inert. That is why it is so often used for finishing floors, especially in the bathroom, kitchen, toilet - that is, where the humidity is always high and the floors are treated using various chemical compounds.

It will not be difficult to wash off the white coating from such a coating - you can use absolutely any of the above methods, since they will not cause harm to the tiles. The tiles can also be washed with any amount of water.
How to clean the floor after renovation
Step 1. It is recommended to clear the floor surface of foreign objects before starting cleaning. Interior items are removed (it is recommended to completely remove them from the room), film and newspapers that protected it from dirt but were damaged, as well as all construction waste. Before cleaning, it is recommended to clean the things in the room before washing the floor. Otherwise, the surface of the floor covering will have to be washed again.

Step 2. Large debris is removed from the floor surface - the floors can be swept with a broom or brush. If you don't sweep the floors first, cleaning will be quite a difficult task.
Step 3. 5 liters of water are poured into the bucket. It should be warm or cool, depending on the type of flooring. However hot water You should not use it - it will be uncomfortable to rinse a rag or mop in it. Next, the agent selected from the above is added to the water.

Step 4. The mop is well wetted in the prepared solution. Excess water is squeezed out.

Step 5. The floor is mopped. Visually, it can be divided into several sectors and each section can be washed separately. Corners, joints near walls and heavily soiled areas are washed especially thoroughly.

Step 6. It is important to rinse the rag as often as possible and change the water to fresh water. This will reduce the risk of divorce. Also, after treating the floor with a detergent, it is recommended to rinse its surface with clean water.

Video - Cleaning the floor after renovation
Video - How to remove grout from tiles
Cleaning after renovation is a rather complicated and time-consuming procedure. But using various compositions And folk remedies things will go faster. And if you choose the right method, then the white plaque can be removed without difficulty.
After completion of construction work, it is not always possible to clean tools and equipment in a timely manner. As a result, areas covered with hardened cement mortar remain on their surface. You can get rid of this not only mechanically: concrete solvents will effectively clean the surface.
It is necessary to put spatulas and trowels in order: otherwise their appearance and functionality will suffer. Special chemicals will help you clean the tool from concrete in a gentle way.
How does concrete solvent work?
Concrete has good adhesion to most materials, which is not always a good thing. Accidental contamination of the finish spoils the appearance of the interior, and it is often impossible to use a dirty tool without cleaning.
The composition of concrete solvents includes three main components:
- high concentration acid (necessary to destroy concrete);
- inhibitors;
- remedy for chemical protection metal
After application to the surface to be cleaned, the acid destroys the concrete, gradually penetrating into its inner layers. A foamy, porridge-like mass is formed, which can be easily washed off with water or removed with a rag. This way you can clean any surface from concrete mortar, put tools or equipment in order.
General characteristics of solvents for concrete
Solvents for concrete do not emit toxic volatile compounds. They are fireproof: they do not burn and do not support combustion. You can use a concrete remover to clean a painted or varnished surface without fear of damaging it. The odor emitted by solvents does not irritate the mucous membranes of the human respiratory organs. In case of accidental contact with soil, it decomposes over time without causing harm. environment.

Solvents are packaged in spray bottles or canisters. They can be ready for use or in the form of a concentrate, which is diluted with water.
Attention! When working with solvents, you should take precautions, since you are using organic acids: the room should be ventilated, your hands should be protected with rubber gloves. In case of contact with skin, the solvent is washed off with water.
Guide for safe use solvent:
- The surface contaminated with concrete is cleaned of large fragments, as well as dust and debris mechanically.
- Concrete solvent is applied with a large brush or sprayed.
- After a few minutes (the exact time depends on the product and is indicated by the manufacturer on its packaging), it is necessary to rinse off the resulting foam with a stream of water. If necessary, you can use a metal brush to clean the surface.
- If all the concrete has not been removed, the procedure should be repeated.

- old stains are removed with undiluted product;
- to clean fresh cement deposits, prepare a solution in a ratio of 1:3;
- to remove traces lime mortar — 1:5;
- for cleaning construction equipment - 1:10 (it is recommended to add chemical detergents).
Attention! Some surfaces may change color after treatment with a solvent (this is especially true for low-quality finishing materials), so check the effect of the product on inconspicuous areas.
Description of chemicals for concrete removal
Among the numerous range of concrete dissolving products, it is worth highlighting the most popular ones on the Russian market.
"Lugato"
Acid based cleaner not suitable for acid sensitive surfaces. They are not recommended to treat terrazzo and marble. Lugato is used to remove lime and cement from the surface of plumbing fixtures and unglazed ceramics. No harm appearance chrome parts. The efficiency is comparable to the dissolving power of hydrochloric acid.
"Khimfrez" ("Lepta Khimfrez")
The product can be used for cleaning decorative coatings: due to the absence of acetic, phosphoric and hydrochloric acid in the composition, the solvent does not spoil the design. Has no smell. Promotes the opening of microcracks in brickwork and concrete, which is important for the subsequent treatment of surfaces with waterproofing compounds. Eliminates efflorescence.
"Himfrez" can be combined with manual cleaning, sandblasting. Work can be performed at air temperatures of +5 °C and above.
BIO DECAP'BETON GUARD
A product that acts as a surface cleaner. Can be used both for daily treatment of equipment and for removing old stains cement mortar. It is gentle on the environment, as it does not contain dangerous acids. Decomposes by 90%.
BIO DECAP’BETON GUARD cleans metal, plastic, glass, painted surfaces. Some application features should be taken into account: it does not mix with other substances (except water) and is applied only with a spray bottle.
Barracuda (Barracuda 10K)
Does not contain acid and is safe to use. In addition to cement, it removes water stone, efflorescence, limescale, tile adhesive. Allowed for processing any materials.

Does not irritate skin and respiratory organs. After application it can remain on the surface to be cleaned long time. Does not cause corrosion and does not damage paintwork. Environmentally friendly product: completely biodegradable. Can be used repeatedly.
Table. Comparative characteristics cleaners for removing concrete mortars
| Cleaner brand | Consumption | Compound | Packing | Shelf life | pH level | Price |
| Lugato Zementschleier Entferner ("Lugato") | 30-100 g/m2 (depending on the degree of contamination) | Amidosulfonic acid | Canisters of 1 and 5 kg | No restrictions | 1-2 | 170-180 rub./l |
| "Khimfrez" ("Lepta Khimfrez") | 1 l per 3-4 m 2 surfaces | Complex acids with surfactants | Canisters 5, 10 l | 12 months (warranty) | 1-2 | 150 rub./l |
| BIO DECAP'BE-TON GUARD | 5-8 m 2 /l | Synthesized from a particularly thin organic molecule based on water based | Canisters 5, 25 l | 12 months (warranty) | - | 28.8 USD e./kg |
| Barracuda (Barracuda 10K) | About 10 m 2 /l | Synthetic product | Canisters of 1, 10 l or barrels of 200 l | No more than 12 months. | - | 633-740 rub./l |
“Home” methods for cleaning dried concrete mortar from surfaces
But besides chemical method cleaning surfaces from concrete, there are also “home” secrets and tricks for cleaning dried cement mortars.
Mechanical method
You can get rid of cement using a hammer, chisel, spatula and sandpaper. These tools and equipment can be used to clean ceramic tiles for reuse.
In this case, it is important to securely fasten the tile (for example, by pressing it between two wooden blocks) horizontally, placing it on a flat surface. Blows of moderate force should be applied to a chisel installed at a slight angle to the surface. Remains of cement can be cleaned off with sandpaper.
Cement can also be removed from the surface of durable material using a grinder, using the minimum speed of rotation of the disk. A nozzle in the form of metal brush for electric drill. Once large pieces of cement have been knocked down, you can finish cleaning with sandpaper.
Chemical method
In the absence of special solvents, cement stains on red brick can be removed using sulfuric acid diluted with water in a ratio of 1:10. The resulting mixture should be poured into the old cast iron bath, heated over a fire. After boiling, the remaining cement will be destroyed.
For the cleaning brickwork You can also use alkaline solutions from old car batteries. You need to wipe the wall with a rag soaked in the solution, and after some time, wash off the destroyed cement with water. Hydrochloric acid acts similarly.
Removing dried grout from carpets and fabrics
You can clean cement from clothes or carpet using a stain remover: moisten a sponge with the product and apply it to the contaminated area for a while. When removing large stains, the sponge is moved from the center to the edges of the material. If the cement has already hardened, you should carefully use tweezers and a knife, after which the item is washed.
Table vinegar can also be effective means: a sponge soaked in it is applied to the cement stain, and then covered with plastic wrap for a while. This will reduce the evaporation of the vinegar. They act in the same way using acetone or alcohol.
At home, you can make a solution by mixing 1/4 part dishwashing liquid with two cups of water. It is recommended to mix the substances in a bottle to obtain a homogeneous mass. The resulting product is applied with a rough brush or a stiff toothbrush, and then rinsed off thoroughly.
Concrete solvents save the time and effort required to clean contaminated surfaces. Using the means indicated in the article, you can get rid of efflorescence on the external surfaces of the walls of buildings and prepare them for waterproofing.
Seasonal washing of windows, including plastic ones, is a habitual action that can be done at least once every 6 months. However, after construction work in the house, double-glazed windows require urgent cleaning. How to clean plastic windows after renovation, what products to use, and what to avoid?
Before you search various options In order to clean windows after repairs, you need to take into account some useful tips. They can facilitate the process of cleaning double-glazed windows, saving time and effort.Some rules and tips for bringing windows to their original form
- Before starting any repair work, it is important to properly protect the glass, frames, and window fittings from possible contact with paint, plaster, primer and other materials. And also protect plastic windows from mechanical damage. To do this, you should at least cover them with a protective film.
- After completing all the manipulations in the room, so as not to wonder too much about how to clean windows after repairs that have traces of glue or tape on them, it is important to remove everything within a couple of days. protective coatings. If this process drags on for several months, there is a risk that the film or construction tape will stick too much, it will be problematic to peel them off, and a sticky base will remain on the surface of the frames and glass.
- If, during the period of repair work, protective measures and safety measures in relation to double-glazed windows were violated, traces of dirt appeared on the surface of the profiles, you should not use sharp metal objects to scrape off dirt. This will damage the plastic. You can only use special devices sold in hardware stores and construction stores, often having either a plastic or rubber base.
- As is the case with other windows, solutions based on soap shavings should not be used on double-glazed windows. laundry soap. Such solutions are very alkaline, and also leave noticeable white stains on a transparent surface, which are extremely difficult to get rid of.
- If, when deciding how to clean plastic windows after repair, the choice is given to professional chemicals, it is important to follow all safety measures to protect skin covering, mucous and without inhaling toxic fumes. After cleaning the windows, the room should be well ventilated. The preparation of solutions and the washing process itself must be carried out strictly according to the instructions indicated on the chemical product.
- When choosing devices for cleaning any window surfaces, preference should be given to soft tissues, containing polyester, as well as white cotton materials, flannel. Rags should not fall off during washing. Also suitable paper towels, napkins, including microfiber ones, regular newspaper, which helps polish the transparent surface to a shine. It is not recommended to use toilet or other thin paper.
- It is important to remember: cleaning windows should initially be done from the outside, and only then from the inside. First, the glass is cleaned, then the frames, fittings, and window sill. In this case, you should first vacuum the entire profile well in order to pull out small particles dust, soil, plaster.
- When using any strong product based on chemicals or alcohol, you need to make sure that it does not get on the rubberized areas of the double-glazed windows, and also does not remain for a long time on the surface of the frames and plastic, so that cracks do not occur.
- When deciding how to clean windows after repairs, you need to remember that acetone products should not be used on plastic, especially when applied in large quantities or left on long term. Gels with abrasive particles and dry powders that can scratch the glossy surface are also not suitable for plastic windows. Using hot water and heated solutions of any type is also not recommended.
- Window cleaning should be done at a time when direct Sun rays don't get into the room. If possible, this manipulation should be carried out in cloudy weather, in the evening or in autumn or spring.
- plaster, primer and other similar options should first be moistened with warm, almost hot water; you will have to repeat the procedure several times, simultaneously cleaning the glass surface with a rag or napkin;
- The polyurethane foam must first be scraped off with a scraper, then try to soak it either with warm water, or using a special product (solvent), rub it with a hard (but non-metallic) sponge;
- paint stains come off easily if they are heated even with an ordinary but powerful hairdryer; under the influence of hot air, the paint “melts” and is easy to wipe off from the surface of frames or glass;
- If the tape does not come off, it should be moistened with water using a soft sponge, then carefully trying; It is also permissible to soften the glue with steam using an iron or steam generator;
- Various means can help against traces of adhesive tape or film, including special solvents and laundry soap.
Brief instructions for washing plastic windows and options for special cleaning products
- Wipe the surface of the profiles with a soft, non-shedding cloth, collecting the first dirt. Then vacuum, including between the frames.
- Carefully remove any serious dirt using a scraper or special knives suitable for plastic. Remove any dirt with a dry brush or cloth.
- Apply the selected cleaning agent to the transparent surface. cleaning solution. It is better to use a spray bottle for this, spraying the substance diagonally across the glass.
- Wipe off the cleaning mixture using napkins or selected rags. Or use mops and double-sided scrapers to greater efficiency cleaning. Don't forget about spinning. Important: washing is carried out from top to bottom and gradually, with smooth movements.
- Wipe the window dry with paper and newspapers. If necessary, cover it with special protective mixtures that do not need to be washed off; it is only important to apply and distribute evenly over the glass.
- Then clean the frames, fittings and window sill.
How to clean windows after renovation? Several proven chemicals
- « Mister Muscle", helps fight dirt, but does not leave unsightly streaks when used correctly.
- Solvent « 646 ", which removes paint, primer and other construction contaminants without damaging the surface of double-glazed windows.
- « Phenozol", a specially developed product for plastic profiles, with which you can also get rid of polyurethane foam.
- « Bref", is an affordable and effective tool.
- « Cosmofen 20", which does not contain strong chemical components, is therefore not suitable as a solvent, but fights against various contaminants. " Cosmofen 10" And " Cosmofen 5", acting as solvents.
- « Penosil", fights various contaminants, and is available in a convenient bottle in the form of a spray.
- « Mister proper", similar to the first remedy listed in the list.
- Windshield wipers from the manufacturer « San Klin».

You should use products such as Comet with caution, choosing only gel-based options. When choosing an additional means for cleaning glass units, it is worth considering that it should also not contain wax particles and chlorine.
Traditional methods of cleaning plastic windows
Sometimes there is no way to use strong and aggressive chemicals. And how to clean plastic windows after indoor renovation work in this case? You can turn to folk methods.
Fight against pollution plastic profiles The following tools will help in the apartment:
- Nail polish remover, which should not contain acetone. You can use it to wipe off various stains, including glue or paint.
- Vinegar, diluted in warm water in a ratio of 5:2, will make plastic windows look perfect.
- Foaming gel cleanser, suitable for washing dishes, will remove surface dirt without damaging the plastic or leaving streaks. It is enough to dissolve a couple of spoons of the gel in a bucket of warm water, foam well and wash the windows with the mixture.
- Ammonia, diluted in warm water, eliminates the effects of repairs visible on plastic profiles. It will take a couple of teaspoons of the substance to add a little to a liter warm water.
- Strong acetic acid , dissolved in water, acts like ordinary vinegar and is also suitable for cleaning double-glazed windows. It will help get rid of yellowed areas on the surface of the profiles that could have arisen under the influence of smoke or sun. We also recommend reading the article.
- In emergency cases it can save kerosene, which should be applied exclusively to the site of contamination. Helps with paint stains. Additionally you can use petrol.
- Another popular trick: moisten a piece of natural, undyed leather in medical alcohol. Then wipe the windows with it, removing dirt.
Sometimes you can find advice that it is permissible to wipe the surface of double-glazed windows with solutions of soda or table salt. However, this method can lead to unnoticed trauma to the plastic and will soon damage the windows.
Two additional tips on how to clean and protect plastic windows
Tip one: dissolving a few tablespoons of dry potato starch in a mild detergent, you can achieve shine on the plastic surface. In this case, you won’t have to rub the profiles with newsprint for a long time.
Tip two: To prevent double-glazed windows from getting dirty too quickly, after cleaning they should be wiped with a solution of glycerin and ammonia. For a liter of warm water you will need two large spoons of glycerin and a couple of spoons of ammonia. There is no need to wash off this mixture; it will protect the windows from dust, fine dirt, and prevent fogging of surfaces.
Washing windows is a tedious task. However, by following all the valuable recommendations, relying on advice and selecting the most relevant remedy for a specific problem, you can put plastic windows in order after repair in 20-40 minutes, without damaging their surfaces and keeping them clean for a long time.