Children's mini playgrounds are usually located in even small yards country houses. Their mandatory attributes include a slide. Of course you can buy ready-made option similar designs in the store. But it’s much more interesting to make them yourself, right in your garden. And it will take much less money to equip the site. In this article we will talk about how to make a children's slide with your own hands.
Requirements for a children's slide
Of course, making a wooden slide with your own hands should be safe. To achieve this, the following requirements must be met when drawing up a project:
- The finished structure should not have sharp corners and protrusions that could injure a child.
- The upper platform, stairs and descent are necessarily fenced with railings.
- Do not use flammable materials in the manufacture of the slide.
- When choosing the angle of descent and the height of the slide, you need to take into account the age of the child. Most often, such structures are assembled for children 5-9 years old. In this case optimal height will be 1.5 meters (to the top platform). The slope angle of such slides is usually 55 degrees.
- And, of course, the structure must be assembled from environmentally friendly materials. Most often, do-it-yourself slides are made from wood. To assemble a metal slide you need welding machine. But not every household has it.
Drawings and diagrams
In one of the drawings above - children's playhouse with a slide.
What materials are needed for a children's garden slide?
To install the slide you will need a 100x100 mm timber, a 200x30 mm edged board, a long piece of galvanized sheet, bitumen and crushed stone. All lumber must first be sanded with a grinder and impregnated with anti-rotting and fire-resistant compounds. From the tools you will need to prepare a grinder with a grinding attachment, garden auger, screwdriver or hammer. The elements can be fastened with nails or self-tapping screws. You will also need galvanized corners. A do-it-yourself children's slide should, first of all, be safe, so you need to choose only high-quality materials. Below you can see step by step photo with instructions.
First, markings are made on the ground downhill. Assembly begins with the installation of supports. They are made from thick timber. Holes with a depth of at least 70 cm are drilled in the ground with a garden drill. A little crushed stone is poured onto their bottom and compacted. The ends of the beams are coated bitumen mastic, drying oil or and installed strictly vertically. Backfilling is done with crushed stone.
Jpg" alt="Installing supports" width="300" height="225" srcset="" data-srcset="https://remontcap.ru/wp-content/uploads/2015/04/09304755-300x225..jpg 1024w, https://remontcap.ru/wp-content/uploads/2015/04/09304755.jpg 1500w" sizes="(max-width: 300px) 100vw, 300px">!} 
Attached to racks bottom trim(at a height of approximately 40-50 cm from the ground). Next, support beams are placed under the platform. If you plan to make a canopy over the slide, attach the top frame. The platform handrail is fixed to the corners.
The descent is assembled like this:
- Using bars (across, from the bottom side) connect 3 boards.
- Smooth tin is stuffed on top. It must be secured in such a way that the edges do not come off later and children cannot get hurt. It is best to place them on the ends of the boards.
- Sides are attached to both sides of the finished descent. It is better to fix them not with nails, but with self-tapping screws. The ends are at the required angle.
Assembling the stairs
The slide steps must be safe. Their optimal height is 12-15 cm. The angle of inclination of the stairs may be slightly less than that of the descent. The easiest way is to secure the steps on strings. To do this, two boards are first fixed to the racks at the level of the upper platform. Next, support bars for the steps are placed on them from the inside. Then the treads themselves are attached. It is not necessary to install risers.
The final stage
The last step should be to secure the descent to the support pillars at site level. In this case, it is also better to use self-tapping screws. Next, the floor of the site is sheathed and the canopy is installed. The latter is most often made gable. In this case, two posts are attached to the top trim. The skate is fixed on them. Four rafters are fixed (two on each side) and plywood is sewn on. The platform railings are covered with a board. Next, the entire structure needs
A homemade metal slide for a summer house or the yard of a private house will be an ideal addition to a children's playground. The child has a new additional entertainment that he can indulge in at any age. That is why slides are made, as they say, “to grow.” This means that the most durable material is selected for it.
Metal is one of the top three (wood and plastic are in first place) in terms of prevalence as a material for making slides.
Those who know how to work with a welding machine, when deciding what to make a ramp for a children's slide, prefer iron.
Pros and cons of a metal slide
Advantages:
- reliability;
- durability;
- wear resistance;
- sustainability.
These are the parameters that an ideal outdoor slide for children should have.
Flaws:
- strong heating of the slope in summer and cooling in winter;
- corrosion of metal;
- difficulty in manufacturing.
It should be noted that a children's slide made of metal for a summer residence is not much different in design from its counterpart -.
Material for metal slide
- square pipe 3*50*50 or round pipe with a diameter of 50 mm. for slide supports;
- square pipe 2*50*50 - for the construction of the upper platform, as well as the frame for the stairs, ramp and fences;
- metal sheet, 2-3 mm. for stingray;
- anti-corrosion primer;
- dye.
Note. The length of the blanks is determined by the parameters (dimensions) of the future slide, taking into account the fact that the support posts must be dug in followed by concreting.
Tools: grinder, welding machine or drill, level, grinder.
How to make a metal slide with your own hands - step-by-step instructions
Construction technology:
1. Development of a project, drawing or diagram of a slide
The presence of drawings will significantly simplify the calculation of material and determination of the location of fastening parts.

2. Making the top platform of the slide
For this purpose from thick square pipe They make a frame that is covered with sheet metal. To make the platform more durable, you can weld/attach corners crosswise at the bottom.
Note. To avoid slipping, it is better to give preference to ribbed metal or choose another anti-slip coating.
3. Construction of the frame for the slide
Support posts are welded to the upper platform. Users recommend welding so-called “heels” (square or round pieces of metal) to the lower edges of the posts for a more stable position of the support. Without “heels”, the metal support may sag under its own weight, and the structure of the metal slide may sag.
4. Installation of the slide frame
To install the frame you need to drill holes in the ground. To do this, soil is removed with a garden drill to a depth of over 600 mm. A crushed stone-sand cushion is poured onto the bottom of the recess, onto which the “heels” of the racks are installed. Next, the installation site is cemented (concreted).
Note. The order of work may vary. Considering the fact that metal structure has considerable weight, many advise starting the construction of an iron slide by installing supports and then welding the upper platform to them. Moreover, for a high slide it is recommended not to dig in the supports, but to pour a full foundation, but this is an unnecessary measure. Supports installed at a depth of up to a meter are quite capable of withstanding the weight and intensity of use of the slide.
5. Construction of stairs for the slide
On one side of the frame, two inclined pipes are welded to the top platform of the slide - they will serve as the basis of the staircase, to which the steps will be attached. The frame of the steps can be made from a corner, and the steps themselves from wooden beams/boards. This will avoid injury from sharp metal corners.
Care should be taken to ensure safe movement on the stairs and consider a guardrail. At the same time, for a slide intended for small children, it is recommended not to make metal balusters, but to replace them with a wire mesh. For older adults, railings are sufficient. General requirement– the distance between the elements of the enclosing structure should be such that the child does not get stuck if he wants to squeeze between them.

6. Making a metal slope for a slide
When determining the curvature of the descent chute, it should be taken into account that the angle of inclination of the slope should be steeper at the beginning of the slide and flatter at its end. This way, at the end of the descent, natural braking will be ensured, which means a safe landing.
A children's slide made of metal has the advantage of being able to give it any shape: straight or helical (spiral). To give the pipe the desired configuration a pipe bender or heating by welding is used. After this, two identical pipes are attached parallel to the top platform of the slide. The lower ends are dug into the ground at the base of the descent.
Then the frame of the descent is covered with a sheet of metal. Most often, galvanized steel, stainless steel or aluminum are used for these purposes. In a situation where the duration of the slope is greater than the standard length of the metal sheet, the sheets must be installed overlapping, in the direction of travel. In this case, the child will not experience inconvenience when descending.
Parallel to the base of the slope, at a height of 50-100 mm. additional elements made of thin pipe are installed. They will create sides that enclose the slope and make the descent safer. To eliminate the possibility of hands and feet getting into the distances between the slope and the sides, it is recommended to sew it up with the remainder of the galvanization.


It should be remembered that the metal gutter has one significant drawback: it gets very hot in the summer - going down the heated surface can lead to a burn, and it also gets very cold in the winter, which also does not bring joy to kids.
To do this, you can cover the descent with linoleum.
Note. The slope of a children's slide made of metal has significant weight, so in order to avoid deformation of the structure under its own weight, it is recommended to strengthen it by welding several additional supports under the slide chute.
7. Processing of metal elements of the slide
The main requirement that a slide for children must meet is safety. Therefore, after manufacturing, the structure must be processed grinder, smooth out all corners and protrusions.
8. Coating with anti-corrosion solution and painting
The last stage of manufacturing is processing to prevent rust. The frame is coated with primer and metal paint. In this case, the bottom is usually not painted, so as not to slow down the sliding.
Conclusion
Knowing how to make a children's slide with your own hands and having the skills to work with a welding machine, you can make not just a slide, but a real one. game complex for your child and his friends.
Summer residents who have kids need a children's slide, and the easiest way is to make it yourself. You can buy a ready-made version, which you only need to install in the right place, but various reasons people may not want to purchase a factory product. And in this case, the wooden slide is the best option to create, since it can be done independently and without high costs.
From the place where it will be installed new item entertainment depends on it appearance, dimensions and material required for manufacturing. There are only two location options:
- In the sports room or in the children's room, if you have them.
- On the street.
Slide in the nursery

Outdoor slide
A small children's wooden slide located indoors can be made of plywood, chipboard, laminate or other materials. Wide choose components for manufacturing is determined by stable weather conditions in the room: there are no temperature changes or wind, humidity is normal.
Outdoor models will require significantly more space; the materials used are thick wood that can withstand various weather conditions. The manufacturing process is the same in both versions, the only difference is in the size of the elements.
Outdoor slides can be found at many children's centers in the middle of cities. As a rule, they are made of metal or plastic, since these are the most durable and strong materials that are unpretentious to adverse weather conditions.

Wooden slide in the city

Slide in the yard of the dacha

Wooden slide

Wooden complex with a slide
A slide made of wood will not harm a young body, since wood is an environmentally friendly product and does not contain harmful chemicals, unlike plastic. This product is lightweight compared to metal counterparts and can be assembled quickly. It does not require a welding machine or special connecting elements.
Among the disadvantages, one can take into account the low durability due to the process of decay of wood fiber. With such a ratio of positive and negative properties, many people prefer to do wooden slides for children. Absolutely anyone can make such a product without the help of professional carpenters.
The process of creating a slide will be discussed using a small model as an example. All creation and installation steps are the same for most options.
Three-dimensional visualization with exact dimensions and shapes always helps the designer to create the highest quality slide and roughly imagine what the end result should be.
On initial stage To create a figurative idea of the project, the designer must pay special attention to the following points:
- Independence of the person playing.
If the child is under 3-4 years old, then the slide should provide a convenient descent so that parents can help the children slide down and climb back up.
- Growth parameters.
These indicators will help create a product with the most comfortable dimensions of the elements (steps, railings, slopes, handrails, etc.) of a new piece of entertainment.
- Planned location.
It is necessary to take into account the peculiarities of finding a new structure. There must be free space at the construction site to ensure comfortable movement while using the slide.
- Steepness of slopes and turns.
To keep an older child interested, you can create various dips and twists on the slope, but you need to take into account the angle of inclination of the sliding surface so that the baby does not damage the spine and other organs while having fun.
- Individual ideas from junior assistants.
Since the slide is created for children, the wishes of the customers – children – must be taken into account.
After taking into account all additional factors, you can draw up a drawing, or download previously invented options, making individual adjustments to them.
 Since the slide is for children, we need to take into account the wishes of the customers – children.
For example, for a supporting structure it is advisable to use beams with dimensions of 10x10x150 cm. In most cases, 4 support pillars are sufficient. Self-tapping screws or nails are used to fasten the elements.
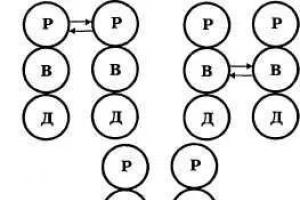
The table shows examples of material sizes for a small slide.
B – timber, D – board
As an option, you can additionally equip the bottom of the upper platform with a drawer or handbag. You can store various toys, pillows, etc. in additional compartments.
All wooden elements need to be processed with a plane and saw to the desired size, then sanded sandpaper or electric grinder. The support beams must be additionally treated with resin or waterproofing mastic. This is required to prevent the rotting process.

Wooden elements need to be processed with a plane

Waterproofing mastic
Preparing the installation site
Any do-it-yourself slide for children in the country requires a certain area for placement. Before installing a new entertainment item:
- The territory on which it will be located must be leveled:
- mark a square for the base supports of at least 50*50 cm;
- dig 4 holes (60 cm or more) at the corners of the square.
 Compact the area for placing the slide with crushed stone
 Mounting of supporting structures
Pre-prepared pillars are installed with the bottom side (must be treated with resin) in the pits. Next, the remaining space in the recess is filled with concrete. After it hardens, further work is carried out.
For guard supporting structures to prevent loosening, all pillars are additionally connected by stiffening ribs. For this:
- make a groove 2 cm deep and 10 cm wide in the supporting pillars;
- insert boards measuring 2*10*50 cm into the grooves if you have chosen a 50*50 square as your base.
If the size is different, the length of the ribs must correspond to it
The parts are connected using self-tapping screws and self-tapping screws, this allows you to achieve the highest quality coupling. Instead of installing supports in the pits, you can use ties. As a rule, only small slides for children under 3 years old are designed to be transported from place to place.
 The parts are connected using self-tapping screws
 Remember! Portable and indoor models are not equipped with a fixed support.
Creating a floor covering on the upper platform
On load-bearing pillars 2 to 4 beams are mounted; they will perform two functions on the upper platform: load-bearing and stiffening ribs. Boards are placed on top of these elements, be sure to leave a gap of 0.5 mm between them. This is required for free flow of water to the ground during rain.
For aesthetics, you can fasten (screw, glue) strips or pieces of laminate left after repairs onto the boards. It will be beautiful and modern. Plywood should not be used for these purposes. It will absorb water very quickly, swell and warp.
Descent equipment
The main element of the slide is the ramp. It should be slippery and equipped with additional sides so that the child does not fall out while descending from a hill. If you have a purchased descent, you just need to place it on the upper platform and secure it.
Assembly steps:
- To begin with, the boards are installed from the top platform to the ground. The upper part of the pitched boards is sawn off at 30-45 degrees to ensure slope.
- For fixation, it is recommended to make recesses in the descent boards to the size of the lower bar and place them so that it fits into the grooves.
- Then you need to secure boards across the slope that will hold the sliding surface.
- The next step is to install the protective edges. The bottom corner of the board is sawed off so that it becomes parallel to the ground.
- Next, a small continuation of the slope parallel to the soil is made (bend). This is necessary so that the playing children do not hit the hard ground and smoothly roll to the end of the sliding surface.
Creating a Descent Cover
After the installation of the pitched boards is completed, they need to be sanded again to remove nicks and irregularities. Next, the boards are painted and covered with a protective hard varnish.
Many other materials can also provide a slippery descent surface:
- any floor coverings, for example, linoleum;
- sheet metals (thin steel, tin);
- plastics.

Linoleum


Plastic
The last option is the most slippery, but has a high cost compared to previous analogues.
You can use a laminated coating. But it is not recommended to use it if your base is poorly made, since the laminate will quickly become unusable due to deformation under the weight of children.
Mounting must be done carefully. At the end of the work, the sliding surface should be free of irregularities, jags and protruding elements, as this can lead to a splinter or injury to the child’s spine during descent.
To avoid such troubles, the places of all fastenings and sharp protrusions are ground off, and the wooden elements are covered with a protective layer of varnish.
At the end, the sides (10-20 cm high) from treated and varnished boards are nailed.
 Don't forget to nail the sides
 Creation of a staircase and its installation
To easily climb the hill you need to make a good ladder. It is most convenient to use boards as steps, but, as an option, beams or trimmings of logs are suitable
For marking and assembly:
- place one of the boards (stringers) intended for the stairs in its place on the hill with its edge to the ground and cut it from the bottom so that it rests firmly on the ground;
- mark the places for the steps, leaving 20 - 30 cm between the marks;
- draw lines so that they are parallel to the ground;
- then place two boards parallel to each other and make marks on the second stringer;
- then create grooves and insert steps into them;
- fasten it all with self-tapping screws
- After assembly, install the ladder onto the slide.
For reliable support so that the product does not go into the ground, nail a board treated with resin from below. You can concrete this place or install stringers on the bricks.
Installation of additional fencing and decoration of the structure
The main structure of the slide is ready, it can already be used, but to ensure the safety of small children, it is recommended to additionally make railings on the upper platform and stairs.
All that remains is to give the new building a beautiful appearance. You can decorate the wooden elements. If you wish, you can equip the upper platform with carved elements (stars, bears, etc.).
The construction of such a structure may not require less than two days if all materials are prepared in advance.
Every child's favorite place is a playground where they can actively play. The most favorite is the slide, which even some adults don’t mind riding. Today, in specialized stores you can find a huge assortment of playgrounds of different configurations, made of different materials. Naturally, such a purchase will be expensive, and it cannot be said that the quality of the product will be adequate. Therefore, more and more often, parents decide to arrange the play area themselves. So, with minimal financial and time costs, you can get a full-fledged children's slide at the dacha with your own hands.
Before you start developing a layout, you should consider an important issue - security, which comes first among all requirements. Since the slide is intended for children, it is necessary to think through and calculate everything in advance in order to eliminate the slightest possibility of injury to the child. Safety is determined by many characteristics:
- sustainability;
- strength;
- attractive appearance;
- functionality;
- ability to withstand heavy loads.
The optimal solution is to secure the structure to concrete base or supports that are driven deep into the ground. Finishing material must be firmly secured, and the descent from the slide must be as safe as possible. To achieve this, experts recommend:
- pay attention to the evenness of the gutter;
- eliminate the presence of sharp corners, burrs and bolts;
- ensure a soft landing, for example on sand or thick grass.
An equally important issue is climbing the hill. The stairs must be equipped with handrails on both sides. Additional means of protection are also welcome: stability and reliability. So, when choosing wood as the main material, it is necessary to choose the right fasteners - nuts, washers and bolts. The trigger guides are fixed with special glue - this will ensure good glide.
Even a simple foundation will ensure the stability of the slide, and reliability depends on the choice quality materials for assembling a children's slide and playground.
Choosing a place to install the structure

Before making a children's slide on a summer cottage, you need to decide not only on the design, but also on the location. So, ideal option will become a zone with good review from all sides, this will allow parents to monitor their child at all times.
In most cases, the slide is installed on the playground, but it can also be placed outside the complex. The chosen location should be both sunny and close to trees or a building. Great option There will be a playground next to the garden; at certain times shade will come from it, which means the children will not overheat.

Despite the huge range building materials, only wood or metal is suitable for arranging a children's slide. Despite the fact that the design will be the same type for both the first and second options, the manufacturing process will be completely different. This is explained by the fact that each material has its own characteristics, which should be taken into account before making the final choice and starting to study the construction technology of the structure.
Metal children's slide
At the very beginning, it is worth paying attention to the fact that it will be quite difficult to make a slide without a welding machine. Therefore, it is necessary to have minimal operating skills and the welding machine itself. In addition, do not forget that metal is a fastidious material, which when heated (in the process welding work) can be deformed and bent. Any idea without special knowledge of working with metal may not end up as originally intended.
Despite this, it must be said that a children's slide made of metal has many advantages compared to wood:
- long service life;
- strength;
- reliability;
- does not pose a danger to the life of a child if the installation technology is followed.
Wooden children's slide
The main advantage of wood is its ease of processing, which requires a standard set of power tools:
- electric jigsaw;
- grinder with special attachments (for polishing wood).
Even a beginner in the construction business can easily cope with the task. Unlike metal, a slide made from any lumber has virtually no flaws, and if there are any, they are insignificant and can be easily eliminated. For example, if it is necessary to protect the structure from moisture, it is enough to treat it by special means protection, as well as paint with any paint and varnish material. This will create a protective layer.
It is also worth noting that when considering the option of purchasing a ready-made children's play complex or slide, you can consider another option - plastic. In most cases, manufacturers combine it with wood or metal, so you can get the most various shapes and slide designs.
Everyone decides for themselves what material to use to make a children's slide. But, if you are faced with a similar problem for the first time and do not have welding skills, then the choice is obvious - wood.
There is one more “but” when choosing a metal. Scrap metal collectors can take advantage of the homeowners' absence and recycle the structure.
Manufacturing principle

As already mentioned, the terrain is selected first. The best option there will be elevation. After taking measurements, you can begin developing the layout. All drawings must have accurate calculations, which will allow you to prepare parts in advance the right size V required quantity. When everything is ready, you can begin the actual assembly:
- First you need to make a platform that will be installed at the very top. This is where the children will begin their descent. This stage is quite simple: a rectangle is assembled from timber and covered with boards on one side. It is better to give preference to a tongue-and-groove board, since there will be practically no cracks or joints in it, which means that the risk of injury to the product will be minimized.
- When the platform is ready, you need to attach the legs to it, resulting in a fairly high stool. That is why the fastening process is no different: 4 legs are attached in the corners. For greater stability, they are connected to each other by horizontal jumpers in several places (depending on the height of the children's slide). So, for a slide 1.5 m high, jumpers are required in the middle and at the bottom.
- When the “stool” is completely ready, you can begin to create a ladder along which children will climb up. There is nothing complicated about this either: 2 parallel poles are installed, which are attached to the upper edge of the structure. Horizontal crossbars are used for connection; they will also serve as steps. If you wish and have free time, you can design a standard staircase with steps and risers. Handrails will ensure lifting safety. To make them, several vertical supports are installed on which the railings are attached.
- The main stage is the descent. It is worth noting that for it you can use the same technology as when creating a staircase, with only one difference: a sheet of plywood is installed on parallel poles. It is also necessary to create a low restriction on the sides so that the child does not fly out of the slide when descending. To do this, thick and wide boards, the height of which should be more than 10 cm above the level of the plywood sheet.
- The final stage will be sanding and painting the structure. All wooden elements must be cleaned of burrs and sharp corners that could scratch the child's skin. For these purposes, you can use a grinder with a special disk attachment, which will quickly clean all the uneven areas. Both varnish and paint can be used as a protective layer. After the structure has dried, you need to install a sheet of tin on the trigger, ensuring perfect sliding.
At the final stage, you can show your imagination. So, you can use several colors of paint to give the children's slide some bright accents. On the descent, you can draw any picture using carbon paper.

When creating a children's slide with your own hands, you must remember the main rule: all stages must be performed efficiently, since the safety of your children will depend on this. In addition, you should follow several recommendations from experts:
- When choosing lumber, you need to check its quality. Also, all elements are screwed in, painted, and the nails are hammered in well so that the heads do not stick out.
- There should be a soft covering around the slide, which is chosen depending on your own preferences or situations. For this you can use: sand, thick grass (lawn) or artificial materials.
- The legs of the ladder, as well as the lower parts of the ladder and descent, must be sunk into the foundation. This will ensure maximum fastening and structural strength.
- The entire space around the slide must be cleared of unnecessary objects so that children do not trip during games. Sticks, stones and glass must be removed.
Only a high-quality children's slide will contribute to the proper development of the child, keep him fit and allow him to play healthy image life. The playground is a kind of stimulant for the full development of the growing organism. In addition, every child will enjoy fun and active games every day.
As you can see, constructing a children's slide with your own hands is quite simple - you just need to follow the instructions step by step instructions. In addition, climbing the hill can be done not only in the form of stairs. You can use the remaining 2 sides to arrange other lifting options. They will also influence the proper development of the child’s body. If you have free time and desire, you can develop a whole play complex, which, in addition to a slide, will have a sandbox and a swing.
Video
You can learn how to make a children's slide with your own hands from the video, which shows all the processes step by step:
The entire structure is made of chipboard, the upper platform is reinforced for rigidity wooden slats and an additional stand made of metal pipe. As usually happens during the process of construction and operation, many nuances are revealed that were not taken into account in the project, but which are worth describing so that readers can avoid the author’s mistakes. I am writing this article a couple of weeks after the start of operation and therefore I already know all my mistakes and shortcomings, which of course will also be mentioned.
This Homemade product was made at home, using improvised tools that most home craftsmen have. Ideally, it would be to use an electric jigsaw, but in the absence of one, I made do with a hacksaw, and made the circles using a screwdriver attachment and coarse sandpaper (P40). The list of tools and materials below can be both shortened and expanded. But still, the more you have different instruments, the easier it will be for you in the process of making any Homemade Crafts.
So let's break it:
Materials and tools:
1. Wood saw
2. Ruler
3. Pencil
4. Knife
5. File
6. Shilo
7. Screwdriver or drill with sanding attachment
8. Drill set
9. Forstner drill 30mm
10. Roulette
11. Square (I didn’t have one, but I really wanted one)
12. Hacksaw for metal
13. Pliers
14. Hexagon set
15. Chipboard
16. Wooden slats
17. Shovel handle
18. Metal tube
19. Steel corners
20. Wood screws
21. PVA glue
22. Euroscrews
23. Bolts with cage nuts
24. Decorative plastic tape for the ends of chipboard
Detailed manufacturing description:
Step 1: As a material for the DIY, I used a former chipboard door (2 pcs). A fasteners were purchased. Since I don’t know how to make drawings and normal design, the entire structure was built by eye. I made individual marks and measurements that needed to be taken directly on the floor on the tiles. I also estimated the width of the slide and the height of the sides by eye, guided by the size of the target child, who is three years old)))
So, we take the door, remove everything unnecessary from it, saw off the edges where there are holes from the handle and hinges. We make two sides 25x160 cm and the main plane of the slide 37x160 cm. During operation, there were no complaints about the dimensions of the structure.


I initially “fit” the slide into a shelf that already existed in the apartment, so I only needed to make the slide’s chute and the ladder, as well as strengthen the shelf itself and its fastenings so that it could support the weight of the child. But first things first.
Step 2: Having marked the height of the shelf (74 cm) on the floor, I made a template according to which I sawed off the corners on the sides, where the sides would rest on the floor. It’s better, of course, to calculate such things or at least measure them using a protractor, but due to inability and lack of knowledge, you can do it this way.


Step 3: At this stage, I selected the diameters of the holes for the Euroscrews and bolts with cage nuts. They are different in the two surfaces being connected. I also tried the attachment on a screwdriver, which is used to recess the heads of screws and euroscrews. Well, I experimented with a Forstner drill, which I used to make holes for the steps of the stairs. Working with this drill turned out to be not so easy... the first thing I did was drill through holes with a small drill, and then made a hole of the required diameter with a Forstner drill, but not all the way through, but about halfway chipboard thickness, and then turned the chipboard over and reverse side made a second, counter hole. If you drill straight through, then inside Chipboard produces an extremely unsightly exit hole.


In general, the holes for the steps should not be drilled through, and the steps should not be inserted into the hole, but into a recess in the chipboard. It would have turned out even cuter. And then it turned out that the Forstner drill was not intended for through holes at all)))
Step 4: We drill holes for the Euroscrews and assemble the slide gutter. In the front plane the diameter of the hole is 6.5 mm, and in the inner plane it is 4.5 mm.
In the lower part, for reliability, I reinforced the structure with steel corners every 35 cm. Perhaps the corners here are even superfluous, but I decided to play it safe, after all, in children's structures, as in aviation - reliability should be two to three times higher than calculated, and safety systems should duplicate. It is better, as they say, to be overcautious than to be underdressed.


Step 5: Now we round all the corners, sand the bumps and glue plastic tape to the ends. At first I used a rubber band with treads on the plane, but this turned out to be inconvenient, since the child’s hands must slide along the sides when he rolls down, and the rubber has too good a grip.
The easiest way to round corners is with an electric jigsaw, but in the absence of one, a screwdriver helped me again. First, I measured 7 cm from the corners in each direction and drew a smooth curve with a pencil. Then I sawed off the corners with a hacksaw, and finished off the rest with a screwdriver and a sanding attachment. I used coarse sandpaper P40.


You also need to make a cutout so that the slide fits tightly with the upper platform. We do this with the same tool: a hacksaw and a grinding attachment on a screwdriver.


After the failure of experiments with a specially purchased rubber tape for the ends, I decided to use the tape that I cut from the doors from which I am making a slide. It should first be cleaned of old glue and then glued. I glued it to some unknown PVC glue, the result seemed normal, but I would advise using Titan glue - it is both more reliable and easier to work with.


Step 6: Let's start making the ladder.
Since I only had two doors, I had to use a piece of chipboard with holes from the handle and lock for one of the staircase posts. I left these holes in the most inconspicuous and hard to reach place, additionally taping it on both sides so that the child does not have the opportunity to stick his finger there.
Let me note once again that the holes for the steps in my Homemade product are not designed in the best way. It is better if they are not end-to-end!!!


Step 7: I made the steps for the ladder from a birch cutting from a shovel. The width of the steps turned out to be 30 cm, during operation it turned out that this was not enough, it would be better to make it 35 cm and three steps would be enough for such a height. Four steps of 30 cm are also, in principle, normal, but I would still recommend three of 35.
For beauty, you can cover them with stain or paint them. I coated it with clear varnish to preserve the wood texture.


Step 8: The main fasteners for the slide gutter and ladder are wood screws screwed into the walls of the gypsum plasterboard structure and steel strips for fastening to the upper platform. As a backup safety system, I made hooks from chipboard, which are fixed with steel corners to the upper platform and bolts with cage nuts to the sides of the stairs and slide. I will not describe for a long time the order and process of their production, since everything is quite clear in the photographs.


When installing it directly in the room, it turned out that the bolts were sticking out a little, which under no circumstances should be allowed to happen. I had to saw off 3 mm from each of the six bolts. And this turned out to be the most difficult part of the whole Homemade project. The problem was that I didn’t have a vice, a hacksaw, or a grinder. I only found a disc from an angle grinder, which I installed on the attachment of a screwdriver. And as a vice I used a bedside table in which I had to drill a hole. Now it’s funny to remember, but next time I’ll still prepare the instrument in advance so as not to repeat such experiments.


Step 9: Final.
I reinforced the top shelf with 30 mm thick blocks. I smeared the bars with PVA glue and screwed them with self-tapping screws every 10 cm. Also, to the existing five plastic corners To attach the shelf to the walls, I added six steel angles and a metal pipe stand in the center. Some will say that this is too much, but I think it’s just right. For children, you need to make sure it doesn’t break, and then strengthen it twice more.