The muffle furnace is a chamber device with a horizontal unloading system, which is an integral criterion for the owner’s safety during use. In certain cases, a shaft version may be required, in which the muffle is made blank and positioned vertically - this will not only significantly reduce the production time, but will also allow objects to be heated without direct contact with air. In any case, the key elements of heating the furnace remain the heating system, chamber and thermocouple, which controls the maintenance of the required temperature.
History of origin
At the end of the 17th - beginning of the 18th centuries. French carriage maker Jeantot began to invent the steering trapezoid, which received his name, but he was unable to begin practical tests, because the axles of the prototypes constantly broke. Jeantot, who was sure that the invention would bring him huge profits, completely despaired, because the carriages placed on his axle constantly overturned during the trip. However, things progressed significantly when a Russian nobleman visited Jeanto’s workshop and wanted to order, by order of Peter the Great, a luxurious carriage from the best European master as a gift to the Khan of Bukhara.
Having tested the product for strength, the nobleman advised Jeanto to first carry out cementation in a muffle with cattle horns crushed into powder, and only then proceed with hardening. Thanks to this method, the inside of the steel should remain viscous, and on the outside it would be covered with a hard, hardened crust that would last for many years before being worn off.
Despite the fact that the muffle furnace for firing ceramics has changed significantly over time, it continues to retain its basic characteristics. The muffle is a container that is resistant to high temperatures and has an impenetrable structure. In it, the part undergoes the necessary heat treatment due to the fact that it completely isolates it from external influences, while ensuring uniform heating on all sides.
Over time, the requirements for the quality of heat treatment increased significantly, which made it possible to begin the mass use of furnaces on an industrial scale already at the beginning of the 19th century. Today, even a low-temperature muffle furnace has appeared, in which the elements undergo a hot curing procedure.
Application today
- Safe melting of valuable metals to avoid impurities in their structure and prevent direct interaction with the flame.
- Artificial aging of metals.
- Firing ceramics.
- Receipt flat surface.
- Drying materials with a high degree of thermal conductivity.
- Burning objects to the state of mineral components, for example, when cremating a body.

The muffle furnace is also used for growing single crystals and high-temperature processing medical equipment. Thanks to this, it is possible to destroy all harmful bacteria without damaging the instruments themselves.
What is better - make or buy?
If you want to create a device such as a muffle furnace with your own hands, be prepared for the fact that the volume of the muffle will not exceed 7 liters, and the work itself will be lengthy and labor-intensive. Before you start work, decide on the choice of a suitable model that you will focus on. They differ:
- Heating temperature - from 100 to 2000 °C.
- By design.
- Processing mode.
- Type of heating.
The undisputed leader in sales is the muffle furnace model PM-8 and PM-10 - the muffle chamber does not exceed 6.5 liters. It is her prototype that most people choose for handmade, because the main material used in the work is only heat-resistant ceramics.

Available in several versions, K and M, differing only in that the latter has digital control. The cost starts from 1 thousand dollars, while you can buy a much cheaper option, the design of which will function just as well as if you bought it in a store.
Despite the fact that this muffle furnace has excellent characteristics, there is still one significant drawback - the door. It becomes very hot during operation, which is why the owner often gets burns.
How to start creating?
When starting to make a structure such as a muffle furnace for the first time with your own hands, it is best to give preference to a design that will be used for minor work. You can significantly reduce the cost of the product by creating a small hole in back wall muffle. It will be quite sufficient if you are not going to use a design such as a muffle furnace on an industrial scale.
First of all, decide what fuel - gas or electricity - the muffle furnace will operate on. The price for a gas-powered device will start from 1 thousand dollars, however electrical system much easier to manage. In addition, you will need to purchase a high-quality temperature sensor (thermocouple) that monitors heating degrees up to 1300 degrees. Attaching the sensor to the furnace can be made from soft steel wire, carefully twisting it with pliers so that the ends do not touch each other.
For safety reasons, it is better not to try to make a muffle yourself, because if the design is incorrect, the product will simply lose its value after processing. It is best to purchase ceramic chemical glassware for the required type of unloading from a laboratory equipment store.

Secondary purpose
The muffle furnace allows you to quickly remove moisture from the material. In this case, it does not matter at all whether it is ordinary water or a liquid element. chemical composition in the material. In addition, small structures are very convenient to use when carrying out cupellation (laboratory experiments), easily melting lead with gold or silver by oxidizing the structure with oxygen contained in the air to release precious metals in their pure form.
Starting to choose muffle furnace, it is better to give preference to well-known manufacturers who guarantee the quality of the product, which also ensures high firing rates.
Based on the type of fuel used, the muffle furnace can be of two types:
- gas;
- electric.
Important! It is not possible to make a gas stove yourself, since this is prohibited by current legislation.
Regarding the design, the following types of furnaces are distinguished:
- Horizontal, which are the simplest;
- Potted type or vertical;
- Tubular;
- Bell bells.
Heating of such furnaces can be carried out in a vacuum, air or gas environment. The muffle furnace that you will build with your own hands may only provide an air environment for processing products.
Important! In addition to saving money, self-production The advantage of such a stove is that the master can create a design of the volume and shape that is most convenient for himself.
What does a muffle furnace consist of?
The operation diagram of a muffle furnace becomes clear when considering the main details of this design.

Let's look at what parts a muffle furnace includes:
- Furnace body. In this case, it will be most convenient to use an old gas stove equipped with an oven, which will be used as the basis for the structure.
Advice! If used as a housing gas stove, then it is necessary to first dismantle all plastic parts. In the absence of a finished structure, the body is welded from sheet metal, more than two millimeters thick.
- Inner layer, which is in direct contact with the surface of the firebox. It is very important, since the efficiency of the furnace structure depends on it. Fire-resistant fireclay bricks should be used as the inner layer.
- Outer layer. It is designed to reduce heat loss from the oven. You can use basalt wool or perlite.
Advice! It is undesirable to use asbestos as an external furnace layer, since when heated, this material releases carcinogenic substances into the atmosphere.
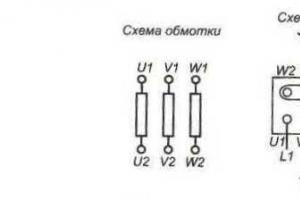
- Elements involved in direct heating of the workspace. In muffle furnaces, such elements most often are spirals, which are twisted from fechral or nichrome wire, about 1 mm thick. By the way, nichrome wire is a more desirable option due to its corrosion resistance and high ductility. At the same time, fechral wire has a lower cost.

Drawing of a furnace with a rectangular muffle: 1 - regulating millivoltmeter; 2 — signal lamp; 3-fuse; 4 - switch; 5-control unit; 6- heating chamber; 7-body; 8-ceramic muffle; 9-heat. element; 10-thermal insulation; 11 — counterweight; 12-door; 13 — hole for control thermocouple; 14-hole for regulating thermometer.
You can take examples of dimensions, power and volume based on SNOL brand furnaces in the table below.
| Furnace model | Volume, l | Temperature, °C | power, kWt | Number of phases | Width x Length x Height, mm. | Weight, kg | |
| Working chamber | Dimensions | ||||||
| SNOL 3/10 | 3 | 1050 | 1,8 | 1 | 150×200×100 | 425×530×520 | 30 |
| SNOL 3/11 | 1150 | ||||||
| SKV (SNOL) 6/10 | 6 | 1050 | 2,2 | 180×270×130 | 450×600×545 | 40 | |
| SKV (SNOL) 6/11 | 1150 | ||||||
| SNOL 10/10 | 10 | 1050 | 4 | 200×300×180 | 470×620×595 | 50 | |
| SKV (SNOL) 10/11 | 1150 | ||||||
| SNOL 3/10-V | 3 | 1050 | 1,8 | 1 | 150×200×100 | 425×610×650 | 32 |
| SNOL 3/11-B | 1150 | ||||||
| SKV (SNOL) 6/10-V | 6 | 1050 | 2,2 | 180×270×130 | 450×680×675 | 42 | |
| SNOL 6/11-B | 1150 | ||||||
| SKV (SNOL) 10/10-V | 10 | 1050 | 4 | 200×300×180 | 470×700×725 | 52 | |
| SNOL 10/11-B | 1150 | ||||||
Abbreviation of the form SNOL used to designate the type electric ovens. C - resistance, refers to the type of heating elements (resistive type). N - chamber type, with a rectangular section of the furnace chamber. O - for processing parts/materials in air at normal pressure. L - laboratory, i.e. allowing temperature adjustment over a wide range.
How to make your own muffle furnace

A muffle furnace for ceramics has a similar manufacturing procedure, regardless of the horizontal or vertical layout. The only difference is the arrangement of the elements. Let us consider the process of manufacturing a muffle furnace for firing ceramics in more detail:
- As mentioned above, the best option for the body is ready gas oven or a structure made from sheet metal. To do this, using a grinder, you need to cut a rectangular strip of the size suggested by the drawing. Next, it is bent into a radius, after which the seam is hermetically sealed. Thus, a cylinder is obtained.
Video about making muffle furnaces yourself from a professional craftsman
Advice! To prevent corrosion, the metal can be exposed with several layers of fire-resistant paint.
- We weld the bottom to the resulting structure, for which you need to cut a circle of the required diameter from a sheet of steel.
- To strengthen the bottom and walls of the housing, it is necessary to use reinforcement. The housing must be of such a size that it can easily accommodate thermal insulation and a fireclay brick structure.

Important! Can also be used as a structure body old refrigerator. In this case, it also needs to be strengthened with metal tubes and corners.
- The inside of the body is lined with a thick layer of basalt wool.
- Now we make a heat accumulator. To do this, you need to join 6-7 bricks, as in the photo below. This will be the working chamber of the future design. To make it, you need to cut the bricks at an angle so that they can be used to assemble a structure in the form of a pipe. Trimming should be done using a grinder.

Advice! For ease of use, the bricks can be numbered. After cutting, we assemble the structure. When cutting bricks, it is very important to ensure reliable protection for eyes and respiratory tract. Work must be carried out indoors with good ventilation, or even better - outdoors.
- We make a spiral from a coil of wire, the diameter of which should be about 6 mm. For these purposes, nichrome or fechral wire is excellent, which can be wound on a thin metal rod or pencil.
- The bricks used to make the working chamber are laid out on a flat surface. It is necessary to make special grooves in them to accommodate the spiral. A grinder is used for this.

Important! The wire should be laid in a spiral in a brick structure. It is very important that the turns do not touch each other. Otherwise, a short circuit may occur.
- To extend the ends of the wire outside the chamber, it is necessary to prepare three long and thin pieces ceramic tiles. Thin channels for the wire are first sawed into them, after which these sections are inserted between adjacent bricks. Such ceramic leads will be able to significantly facilitate the operation of equipment in the future, allowing simple and quick production of renovation work.

Three pieces of tile allow you to use the oven at three power levels. To do this, you will need to include different spiral contours:
- To turn on the first power stage, it is necessary to turn on two spiral circuits in series.
- To operate the device in the second mode, you need to separately connect the lower spiral.
- The third stage involves parallel connection two circuits.
Advice! The inclusion of spirals must necessarily provide for grounding!
- Now that the design of the working chamber is completely ready, it must be wrapped in a layer of thermal insulation and placed in the furnace body. The camera is installed on a brick, which will act as its bottom. It is pre-coated with fireproof glue or clay.
- To remove the ceramic channels outside the body, it is necessary to drill holes in it in the appropriate places.

- Sheet steel is also used to make the lid. It is necessary to cut a circle to fit the size of the oven. A latch, canopies and handles are welded onto the lid. To seal the structure, it is necessary to apply a layer of silicone along the edges of the lid and on the adjacent walls of the structure. To do this, the surfaces are pre-degreased.
After the structure is completely dry, you can connect the wire to electricity through a stabilizer. On at this stage the furnace undergoes tests, during which the power of the muffle furnace is adjusted to obtain the required operating temperature at each of the steps.

Advice! To make sure that the stove structure is completely dry, turn it on maximum power and check for the presence of fumes. If there is no steam coming from the surface of the oven, this means that it is completely dry.
Conclusion
An analogue of the PM 8 stove can be easily made at home. Wherein homemade design has excellent technical characteristics and is able to compete with factory-made analogues.
The muffle furnace is special device for heat treatment various materials. Its main feature is the presence of a special compartment called a muffle, which protects the object being processed from direct contact with fuel and combustion products. Such furnaces have a wide range of applications.
Purpose of muffle furnaces
Muffle furnaces for firing ceramics are used at the final stage of production. They serve for hardening finished products, as well as for baking special paint into the surface ceramic products. The processing technology is quite simple. The product prepared for processing is placed in a muffle made of special fire-resistant materials. Next, the air inside the muffle is heated to the required temperature and maintained at this level until firing is completed. Thermal energy supplied to the muffle using heating elements. Muffle furnaces for ceramics often operate from electrical network, since they do not need to be heated to the high temperatures required for metal processing. After the firing procedure, any ceramic product acquires additional hardness and strength, and the hardened color pattern will last for several years without wearing off or fading.
Laboratory muffle furnaces are used in jewelry production, as well as in food, chemical and medical laboratories. Basic distinctive feature This type of furnace is characterized by high technical equipment, the ability to quickly replace the muffle and almost perfect accuracy of setting operating parameters. Laboratory equipment is mainly intended for conducting experiments in order to identify ways to improve the quality of a particular product. Therefore, maximum accuracy of all indicators is a prerequisite. Laboratory furnaces quickly warm up to the desired temperature, are equipped with a timer and ensure uniform heating of the air space inside the muffle. The muffle chambers in them are subject to frequent replacement, since they have to work with a variety of raw materials, which require the use of muffles made of different materials.
Design and operation of equipment
Muffle furnaces for metal processing often run on fossil fuels. Their operating temperature is much higher than in electric muffle furnaces. Metal processing involves hardening, burning, normalizing or melting. The processing process is quite expensive, so only products intended to work in aggressive environments, parts for high-precision engineering, jewelry, and spare parts for medical prostheses are subjected to it. Treated metal resists negative influences much better environment, has improved specifications. And most importantly, during the processing process it is not exposed to gases released during fuel combustion.

The muffle furnace diagram looks quite simple. If desired, a simplified version of the device can be assembled at home. The most important part of the design is the working chamber - the muffle. To make it, you need to use fireproof clay or other heat-resistant material. First you need to assemble the camera the desired shape from cardboard or plywood. Then the outer layer of the resulting structure is covered with clay, and the thickness of the walls should be at least one centimeter. After the clay hardens, it must be fired at a temperature of 900 degrees Celsius. A standard home stove heated with coal is suitable for this procedure.
After completing the procedure and cooling the workpiece, it is necessary to wrap the resulting chamber with fechral or nichrome wire, which will subsequently serve as a heating element. It is necessary to apply another layer of clay on top of the wire, not forgetting to leave the ends for connecting them to the electrical circuit. The firing procedure is repeated again. Frame future furnace made from sheet steel 1.5-2 centimeters thick. A hole is made in the finished case for contact output. Then the resulting muffle is placed inside the housing and the contacts are connected to the heating element. It is important to work very carefully and carefully when connecting the electrical circuit, as incorrect connection can cause a short circuit. If you have no experience in such matters, it is better to seek help from specialists.

The empty space between the walls of the housing and the inner chamber must be filled with asbestos chips. The calculation of the muffle furnace should be done in advance so that during the manufacturing process you do not encounter the problem of a shortage of materials. The device can also be equipped additional accessories, for example a timer or electronic thermometer for ease of use. That's all, the resulting device can be tested and put into operation. Of course, it is not suitable for operations with metal, but firing ceramics will work without problems.
How to choose a suitable oven?
Manufacturers of muffle furnaces are constantly improving their products, as high competition in the market stimulates constant satisfaction of customer requests. In order not to lose your customers and conquer new markets, you need to keep up with the times. At the same time, the pricing policy must be adequate, otherwise the level of sales will be low, regardless of the quality of the products. EKPS muffle furnaces are equipped with multi-stage systems for adjusting and setting operating modes.
In their production, only modern environmentally friendly materials are used. The furnaces have a two-stage operating cycle, when heating occurs in the first stage, and stabilization of the resulting temperature occurs in the second. The control unit allows you to remember the settings during a power outage. The competitive model, the MIMP muffle furnace, also has all of the above advantages. The main struggle is between these two manufacturers for domestic market. And not a single opponent manages to achieve a decisive advantage. According to user reviews, the products of both companies are at top level, which is why they are the leading suppliers in the industry.
Very often, users purchase a thermocouple for a muffle furnace. This device is used to measure precise temperature. It is mainly necessary when the oven itself does not have a built-in thermometer and does not show the current temperature value. For safe work staff will find a fume hood for the muffle furnace useful. This is a special element of technical furniture, inside which a working device is placed. It is necessary to prevent a person from accidentally getting burned on a device that gets very hot during operation.

The internal temperature of a muffle furnace can range from 400 to 2500 degrees Celsius, so even touching the outside surface can be quite unpleasant. Among other additional equipment, muffles made of different materials are in great demand. They are used depending on the working conditions with a particular material.
The price of a muffle furnace depends on its size, operating parameters and functional equipment. The most simple models can be purchased for 20-25 thousand rubles. And devices with high-tech control units, a large working chamber and various operating modes will cost over 1 million rubles. As for purchasing a device on the secondary market, here you can choose good model with good functionality for 100-120 thousand rubles. But you should understand that when buying a product secondhand, no one will give a guarantee on it and in the event of a breakdown, repairs will have to be carried out at your own expense.
For most people, muffle furnaces are completely useless. At the same time, stoves are necessary for those whose profession or hobby is related to manufacturing jewelry, firing ceramics or smelting metals. Moreover, muffle furnaces are used in the creation of single crystals, cupellation, and also in medicine for high-temperature sterilization.
The cheapest factory models cost about 30,000 rubles, which significantly hits the pockets of home craftsmen. But if you remember school physics courses, in particular thermodynamics, then it is quite possible to build such a structure with your own hands.

Depending on the design features of the furnace, there can be:
- tubular;
- cylindrical shape;
- vertical arrangement;
- horizontal arrangement (the simplest option).
Heat treatment can be carried out in air, vacuum or inert gas, but at home only the first option is possible.
Depending on the type of heating element, muffle devices are:
- gas;
- electric.
Operating gas appliances is cheaper, but making them yourself is prohibited by law. Electric ones are more expensive, but have a significant advantage - the ability to accurately regulate the temperature.
Important! A homemade muffle furnace can be given any shape and dimensions, and made in a style that would suit the overall interior of the house.

What will be required at work
The most convenient to use is the vertical design. To make it you will need:
- grinder, metal circles;
- wire cutters;
- welding machine;
- nichrome wire, ø1 mm;
- steel sheet 2.5 mm thick;
- basalt wool;
- corners;
- fireclay brick;
- silicone sealant;
- fire-resistant mixture;
- respirator, plastic glasses.
Main design elements

Important! A muffle furnace consumes quite a lot of electricity. For example, a device capable of heating up to 1000ᵒC requires about 4 kW. The electrical wiring with which the stove will be connected to the network must withstand heavy loads. You will also need a machine with a 25 A stabilizer.

Important! Asbestos should not be used for this, since when heated it can release carcinogens.
Case manufacturing
A rectangle of appropriate dimensions is cut out of a steel sheet, bent to a radius, and the seam is welded using welding machine. The resulting cylinder is coated with fire-resistant paint and as soon as it dries, the bottom (a circle cut from the same sheet) is welded to it. The bottom and walls are additionally reinforced with reinforcement. The volume of the cylinder must be calculated in such a way that thermal insulation can be placed in it.

Important! When using, for example, an oven, the bottom also needs to be reinforced with corners.
Do-it-yourself muffle furnace: manufacturing instructions
Stage one. The inside of the cylinder is lined with basalt wool.


Stage two. Thermal insulation is being constructed, for which, as mentioned earlier, you only need to take fireclay bricks. The procedure is as follows: seven bricks must be joined in the body so that they form a pipe. In the future it will serve as a working chamber.

The bricks are laid out in a row, and marks are made on each of them at which they will be cut. Next comes the actual cutting, after which the bricks must be of such a shape that they can be connected into one hollow pipe. To simplify the procedure, the bricks can be numbered. At the end of cutting, the pipe is assembled, tied with wire, and the symmetry of the shape is checked. If necessary, adjustments are made.

Important! Cutting should be carried out in the fresh air, preferably in a ventilated place, not forgetting about personal protective equipment (respirator, overalls, goggles).
Stage three. Nichrome wire twisted into a ø6 mm spiral by winding it onto a base (used electrode, pencil, etc.). The brick is then removed from the body and placed back in a row.

Stage four. A spiral is applied to the bricks and future grooves are marked. The correctness of the lines is measured building level. As a result, the laid spiral should lead from the bottom to the top of the pipe. Contact of the turns is not allowed, as this may cause a short circuit.
Stage five. To bring out the ends of the spiral and connect them to the machine with a stabilizer, three strips cut from ceramic tiles with polypropylene and channels for wire are inserted between a pair of bricks. These channels will greatly simplify future repair work.
Stage six. The finished structure is placed in a steel case. In this case, one brick is placed on the bottom of the body, pre-coated with fire-resistant glue. To remove the ceramic channels, holes are made in the housing in appropriate places.

Important! The spiral can only be turned on after the structure has dried, otherwise the wire will be damaged.
Stage seven. The same sheet steel is used to make the lid. A circle is cut to the size of the structure, and for more reliable fixation, fireclay bricks (1 pc.) are attached to it on top. Then the handles, canopy and metal latch are welded. The edges of the lid in contact with the walls of the oven are covered with a layer of fire-resistant silicone. Silicone is applied only to a previously degreased surface.


Stage seven. Test run. To allow the structure to dry completely, place it in a warm, well-ventilated place. The use of any heating devices is prohibited as this may lead to cracking of the masonry. After drying, the coils are connected to a machine with a stabilizer, and the heating power and operating temperature are adjusted.
Important! To check the dryness of the masonry, you need to turn on the device at full power and see if it evaporates. work surface steam.
When operating the oven, the lid must be tightly closed.
Muffle furnace for ceramics
The image shows a primitive muffle kiln that could be used to fire small pottery pieces.
To make it you only need a clay flower pot and electric stove. Half a fireclay brick is placed on the tile (so that the spiral does not come into contact with the ceramics), the product is placed on it and covered with a pot. A thyristor regulator is used to regulate power.
Even in daylight, you will notice that soon after turning on the sides of the pot will glow dark red. From this moment the firing countdown begins, from five to twelve hours, depending on what is being fired. If overheating is observed, the power is slightly reduced.
Stove made of earthenware barrel
You can also make a larger stove from a faience barrel.
Stage one. First, a small hole is made at the bottom of the barrel with a diamond drill to release the expanded air.
Stage two. Next you need to do under. To do this, a “foundation” of fireclay bricks is assembled on a small sheet of steel and connected with metal corners. Then, in the upper part of the barrel, grooves are made for the spiral (no more than three or four) - the heating element of the required power will be placed in them.
Stage three. All that remains is to make the outer shell of galvanized steel. It is made removable, since it will be put on only after covering the product with a muffle (barrel). The space between the muffle and the outer shell is filled with asbestos.
The firing procedure is no different from the previous version, but the temperature is adjusted using a thermocouple. The walls of the barrel are thick; by the time they light up (even without the outer shell), the ceramic product will already be burnt out.
Safety precautions
- Only persons who are familiar with the safety precautions for operating electrical appliances should operate the muffle furnace.
- You cannot start work without personal protective equipment - gloves, goggles, special clothing.
- The structure can only be switched on with grounding.
- Do not start work if there are chips, cracks or other structural defects.
- The oven must always be supervised.
- After switching on, do not touch the heating element (coil).
Despite numerous advantages, muffle furnaces, especially small sizes, are still not very common among home craftsmen.
For a more detailed look at the design, watch the video below.
Video - Muffle furnace
For almost all of us, a muffle furnace is an unnecessary device. And such furnaces are needed exclusively for people in professions that are associated with smelting, firing ceramics, or making jewelry. In addition, with the help of muffle furnaces it is possible to create single crystals, and in medicine they can be used for sterilization during high temperature. The cheapest “store” version of the device costs about 30 thousand rubles, which, of course, is not affordable for everyone. But if you remember something from a physics course at school (we are talking mainly about thermodynamics), then you can make a muffle furnace with your own hands.
Classifications of such furnaces
There are several classifications of the described devices. Yes, according to design features There are such ovens:
- cylindrical;
- tubular;
- horizontal (this is the simplest option);
- vertical.

Moreover, heat treatment of products can be carried out not only in air, but also in a special gas or vacuum. But, characteristically, only air can be used at home.
There is one more classification. Based on the type of heating element, the devices described can be:
- electrical;
- gas.
Application gas ovens They are significantly cheaper, but you cannot do them yourself - this is prohibited by law. As for electrical appliances, they will cost more, but they have one important advantage - the user will be able to independently regulate temperature regime.

Note! A muffle furnace made by yourself can have any size and shape; it can be made in a style that would be ideal for a specific home design.
Now - directly to the manufacturing process!
Option #1. Manufacturing of vertical muffle furnace
This option is the most convenient to use, so let's start with it. The manufacturing procedure itself (subject to the availability of high-quality instructions, of course) is nothing complicated. Traditionally, work begins with preparing everything necessary.
Stage 1. Equipment and consumables
To create a furnace vertical type The following list of equipment/materials will be required.
- Grinder, “metal” circles for her.
- Plastic glasses.
- Wire cutters.
- Respirator.
- Welding machine.
- Fireproof mixture.
- Nichrome wire (0.1 centimeter in diameter).
- Silicone based sealant.
- Steel sheet (its thickness should be 0.25 centimeters).
- Fire brick.
- Stone mineral wool.
- Metal corners.
The preparation stage also includes familiarization with the basic structural elements device. There are several of these, let’s take a look at them.


Note! Asbestos cannot be used for thermal insulation, since it can release carcinogenic substances when heated.
Now a little about making the body for the future stove. To do this, you will need a sheet of metal from which a rectangular piece of the required size is cut. This rectangle is rolled into a “pipe”, and the seams are welded using a welding machine. The finished cylinder is painted using fire-resistant paint, then, when it dries, a circle pre-cut from metal is welded on one side (this will be the bottom). After this, the body is strengthened using reinforcing rods. It is important to calculate the volume of the case in advance - after all, you still need to place layers of thermal insulation into it.

Note! If an electric oven is used as the body, then the bottom will be reinforced with corners.
Stage 2. Direct manufacturing of the furnace
Now let's begin the manufacturing itself. Algorithm necessary actions is given below.
Step 1. Internal surfaces the housings are laid out using stone mineral wool.


Step 2. After this, thermal insulation is installed - it, as noted above, is made of refractory bricks. The procedure is as follows: seven bricks are joined inside the cylinder so that a pipe is formed. Subsequently, this pipe will serve as a working chamber.

All bricks must be placed in a row and marks must be made on them according to which the cutting will be done. After this, the bricks are cut so that their shape allows them to be folded into a hollow pipe. To simplify the work, it is advisable to number each of the bricks. When the cutting is completed, the pipe should be assembled and tied together with wire. Then it is checked for symmetry, and if necessary, the position of the bricks is adjusted.

Note! You need to cut the brick outdoors or, alternatively, in a well-ventilated area. Moreover, do not forget about personal protective equipment - glasses, respirator, etc.
Step 3. Nichrome wire is twisted into a spiral, the diameter of which is 0.6 centimeters, by winding it onto any base (this could be, for example, a pencil). Next, the bricks are removed from the cylinder and re-laid in a row.

Step 4. The spiral should be applied to the bricks in order to mark future grooves. Using the mounting level, the correctness of each of the lines is checked. It should turn out so that the spiral runs from the bottom to the very top of the structure. The turns should not touch, otherwise there may be a risk of a short circuit, and the do-it-yourself muffle furnace may fail!

Step 5. Between the two bricks you need to insert 3 strips made of ceramic tiles (with their help the ends of the spiral will be brought out), in which polypropylene channels are made for the wire. Thanks to these channels, repair work will subsequently be significantly simplified.
Step 6. The entire structure is installed in a steel cylinder. It is important that before this, another brick is laid on the bottom, covered with a special fire-resistant glue. Also, a pair of holes are drilled in the body in the required places in order to remove the ceramic channels.

Note! Turning on the spiral is allowed only after the entire structure has completely dried, otherwise it - the spiral - will be damaged.
Step 7 The cover will be made of the same steel sheet. A circle is cut out according to the dimensions of the body; for greater reliability, another unit of refractory brick is placed on top of the lid. After this, it is necessary to weld the handle, the iron latch, and the canopy. The edges of the circle that come into contact with the body are treated with fire-resistant silicone. Typically, silicone can only be applied to degreased surfaces.


Step 8 The design is almost ready, all that remains is to carry out a test run. But before this, it is necessary to install the device in a ventilated and warm place so that it is completely dry. The use of any heating devices is prohibited, as this may cause the masonry to crack. When the structure is dry, the spiral must be connected to the machine. After this, the power and desired temperature conditions are adjusted.
Note! To check how dry the masonry is, the device is turned on at full power. In this case, you need to observe whether steam is emanating from the surface.

During further operation, the lid must be tightly closed. Now let’s take a look at another manufacturing option – this time horizontal.
Video - Muffle furnace

Learn how to make a stove with your own hands
Previously, we talked about how to make a waste oil stove on your own; in addition to this article, we advise you to read this information
Option #2. Creating a horizontal structure
The manufacturing procedure is in many ways similar to that described above, but significant differences still occur. The body can be made from old oven, washing machine or, alternatively, steel sheets (the thickness of the latter should be at least 0.2 centimeters). The procedure consists of two stages, let's get acquainted with them.

Stage 1. Preparing everything you need
In addition to the body, to make a muffle furnace with your own hands you will need the following equipment.
- Welding machine.
- Individual protection means.
- Bulgarian with circles.
- 1mm wire made of nichrome.
- Iron corners.
- Stone wool.
- Fire brick.
- Scissors for cutting metal.
- Abrasive saw.
- Fire retardant adhesive.
If there is nothing to use as a body, you will again have to make it from scratch. To do this, you need to cut out the walls from steel sheets required sizes and weld them into a single structure. After this, the top and bottom are welded. From the outside, the bottom is reinforced with metal elements, and legs made from corners are welded in the corners. Now you can proceed to further actions.

How to make a camp stove with your own hands
Previously, we talked about how to make a camp stove on your own and what materials are best used for this; in addition to this article, we advise you to read this information
Stage 2. Manufacturing instructions
Step 1. The base of the body is laid with a 10-centimeter thermal insulation layer. To avoid deformation processes, pieces of metal corners are laid on top of the insulation. A sheet of metal of the required size is laid on top of the corners. A similar procedure is performed with the walls of the housing.

Step 2. Now let's proceed directly to laying and connecting our device.
Note! Before starting work, the refractory brick should be immersed in water for half a minute so that it does not absorb liquid from the working solution.
Brick laying begins from the bottom, a fire-resistant adhesive mortar is used (it is mixed as required by the manufacturer's instructions). It is important that the width of the seams between the bricks does not exceed 5 millimeters.
Step 3. When forming brick walls, a new mortar is used - this time it is necessary to add cement. The proportions should be as follows: for each kilogram of the finished mixture there should be about 300 grams of cement. Masonry can only be completed after installation has been completed. stone wool And metal sheets. Although you can do without a thermal insulation layer, but only on the condition that the bricks are laid flat.
Step 4. The bricks are laid from top to bottom, while bandaging the seams is observed. If necessary, they are trimmed using a grinder.
Step 5. After laying the walls, you can proceed to the upper part of the body. Here the outer bricks must be laid on the edges of the side walls, and a slight rise must be maintained. To make the central part, the bricks are cut to a trapezoidal shape and fixed with mortar.
Step 6. One brick is attached to the door. Upon completion of installation, he should create a protrusion that will fit inside the body when the muffle furnace is closed with his own hands. Next, the hinges are welded, and the door itself is ground in. It is important that the gaps between the body and the door are minimal.

Step 7 Next, a heat-resistant seal is placed around the perimeter of the door, which will prevent leakage of thermal energy during operation. The end bricks are covered with grease, and the door protrusion around the perimeter is processed silicone sealant. Next, the door should be closed so that the silicone takes on the required shape. Excess grease is removed with alcohol. This will be a kind of seal that will need to be periodically updated in the future.
Step 8 We begin making the spiral. To do this, the wire is wound onto some kind of base (the same as in the previous method), after which grooves are made for the heating element under the resulting diameter of the spiral. The spiral fits into these grooves.
Step 9 Two circuits are created, which will allow further regulation of the temperature regime. After this, the wire is brought out and bolted to a plate made of ceramic.

Step 10 All that remains is to take care of the switch. On one side it is equipped with two contacts - zero and phase - and on the other three. The switch is attached in such a way that the toggle switch is located outside, and the wires are supplied. As a result, in the first mode the circuits will function sequentially, in the second only one circuit will work (the one located below). Finally, in the third operating mode, both circuits will operate simultaneously.
Video - Homemade muffle stove
Option #3. Making a simple muffle furnace
The most primitive kiln for firing small ceramic products is the one shown in the image below. As you can see, to make such a design you only need a clay pot and an electric stove.

A refractory brick is placed under the stove; a thyristor regulator or, alternatively, an LATR is used to regulate the power. Typically, the thermocouple does not necessarily need to be placed inside the pot - with such a small size, the procedure can be controlled visually: at dusk, the sides of such a pot will give off a red glow. When such a glow appears, it is necessary to begin the countdown - this can take from four to twelve hours, depending on the specific product. If overheating is observed, the power should be reduced.
If the design has big sizes, then the muffle should also be large (see the next picture), ideally a barrel made of earthenware. You need to make a small hole in the bottom (use a diamond drill for this) for the thermocouple and release excess air.
The base is assembled “dry” from the same refractory brick; fixation is carried out using a frame made of metal corners. Several annular grooves are made from the inside (necessarily with transitions), into which the heating element is placed.

The final stage is the outer shell using galvanization. The shell will be removable; it is put on only after installing the device and covering it with a muffle. The gap between the muffle and the shell should be filled with asbestos. The procedure for firing products is no different from that described above, the only difference is that the temperature will be regulated by a thermocouple. The dimensions of the barrel are significant, and the walls are thick. Therefore, even without a shell, at the moment when the muffle furnace lights up with your own hands, the ceramics will simply be burned out.

Option number 4. Making a miniature muffle
If you plan to execute minor works, then a wire resistor (either PEV or PE) with a power of 50 to 150 watts can be used as a muffle. As for the internal diameter, it can vary between 20 and 38 millimeters. It is difficult to say a specific figure, since electroporcelain tubes are different, there are different sizes (much depends on the manufacturer).

Note! For 220 volts the resistance should be approximately 900 ohms, for 100 volts - about 450 ohms, and for 150 volts - about 340-360 ohms. You should not try to speed up heating by reducing the resistance, since such a device will still not be able to produce more than nine hundred degrees, but the resistor may burn out because of this.
Brass clamps will require a heat sink. It is made from strips of copper 0.2 centimeters thick (this is shown in the image below). An enameled copper busbar is also suitable - the enamel will additionally insulate.

After installing the heat sinks, the power cables are connected to the resistor. The heat sinks themselves are insulated with special glass tape, and the turns in this case should overlap by 1/2. The insulating layer is treated with heat-resistant varnish.
The final stage of work is putting on the shell and filling it with thermal insulation. The edges are pre-bent at an angle of 90 degrees so as not to damage the insulation of the heat sinks. That’s it, the do-it-yourself resistor muffle furnace is ready for use!
Video - Large and powerful oven