In this article, we will learn how and what to sand walls, what tools and materials need to be used, and get acquainted with interesting nuances that we may encounter while working. The same operation is also called sanding the wall.
Why do you need to sand walls?
All the procedures that we did before: plaster, putty - these are all procedures for leveling the wall. Plastering is rough, puttying is fine. And now the process of sanding or polishing the walls begins.
Even after applying a thin layer of putty, in any case, small irregularities and tubercles remain on the wall, formed mainly by the sharp ends of the spatula, which remain when we disperse the putty and connect one part of the putty wall to another.
That is why when putting putty it is better to use a large spatula so that the area of leveling the wall is maximized. But the joints, no matter how hard we try, can still be traced. Therefore, after you have puttyed the wall, you need to let it dry (at least a day) and you can start sanding the walls.
IMPORTANT!
Don’t try to accidentally prime the wall after puttying! Sanding begins immediately after puttying!
What tools and materials are needed to sand walls?
So, let's look at what we need to have to start sanding the walls.
A sanding block is usually used for sanding walls:
In addition to the block, for grinding you need to have sandpaper or a sanding mesh, which is fixed into the block before starting work:

Sandpaper is on the left in the picture, sanding mesh is on the right.
What to consider when choosing a whetstone and grinding material (sandpaper, mesh)
Sanding mesh
The advantage of the sanding mesh is that it does not become clogged with putty dust during operation. The mesh itself is perforated and all sanded off putty will pass through the mesh. It must be replaced during normal wear and tear, which is determined by appearance used mesh. If the mesh is torn in places or you already feel that sanding is not as effective, replace the mesh with a new one.
Usually the mesh is sold in ready-made pieces directly to the size of the block and all you have to do is install it on the block and work. But, you need to remember that the size of the bars is also different, as shown in the picture. Therefore, when taking a mesh, immediately select a block to match its size. Mesh is more expensive than sandpaper.
Sandpaper
During operation, the sandpaper will become clogged with sanded off dust and the sandpaper will have to be changed more often than the mesh. You need to be aware that sandpaper, although cheaper than mesh, is also not a cheap material. It is sold completely various options: large rolls, small rollers, rectangular pieces.
If you decide to sand with sandpaper, then you need to figure out how you will cut it, taking into account the size of the block, so that there is as little waste as possible. You, of course, can refuse to cut the sandpaper and buy pre-cut pieces ready for bars, but this will be more expensive! There is a concept of graininess sandpaper(paper with different grains).
In order not to blow your mind on this topic, buy paper with grain 60, 80 and 100 in small quantities at the store and try to work with it. There is no exact recommendation on what grain to take. But it’s better not to take less than 60 for sure, because it will be very rough sandpaper. More than 100 is also not very good, because it will become very clogged with dust during processing and will have to be changed very often.
IMPORTANT!
The walls that you will sand usually go on to either wallpapering or painting. In case of painting, the wall should be absolutely smooth, I would even say polished. In this case, the craftsmen sand the wall 2 times. The first time, for example, with 60-grit sandpaper, to remove obvious large frozen pieces of putty, and the second time, take even finer sandpaper, for example, with 120-grit sandpaper and polish the wall with it. But in the case of wallpaper, this is clearly a redundant operation. For wallpaper, just go over the wall once.
Catalog of grinding stones
Grinding process
The sanding process is much simpler than, for example, the process of puttying or plastering. All you need to do is take a block, attach a piece of sandpaper or sanding mesh to it using special clamps and start working. This is what the sanding blocks look like ready for use. On the left is a block with sandpaper installed, on the right - with a sanding mesh installed.

It can be seen from the figure that the size of a piece of sandpaper or mesh should be longer than the plane of the bar itself by exactly enough to be able to secure the sandpaper or mesh using the clamps of the bar on both sides.
IMPORTANT!
Remember, sanding walls is a very dusty job! Be sure to read the recommendations in the article before you start working.
When you have installed the sanding material on the block and have taken all protective measures against construction dust, you can begin to work. It is best to start sanding the wall from the corner and move towards the other corner. I always sand the walls from top to bottom in small strips (about a meter wide). We sanded a meter wide strip from top to bottom and moved on to the next one.
How to sand walls? Take the block in your hand and begin to move it along the putty wall with slight pressure. Movements: up-down, left-right. The main thing is to make sure that in the place where the wall is already smooth, you do not need to continue rubbing for a long time. You must remember that if you rub for a long time, you can thus wipe off all the putty, which, of course, is not included in the plans. We made sure that the section of the wall was smooth, almost polished, and moved on.
It happens that you come to a section of the wall where for some reason a deep hole has formed. In this case, you do not need to rub a lot and for a long time around the hole in order to wear off the putty around the hole to its bottom. Leave this small area alone. Then, when you have sanded everything and primed the wall again, you simply take rubber spatula, which I mentioned in the article and once again fill this hole with a thin layer of putty flush with the wall.
IMPORTANT!
Of course, I must tell you that sanding walls can be done faster if you use.
When you've done everything, pick it up building level and attach it to the wall. In any position of the level, its plane should fit snugly against the wall along its entire length. There should be no gaps. If gaps do appear, it means you have put too much putty in some places. Identify these places and try to grind them down with the same block.
That's all. In this article, we learned how and with what to sand walls. However, do not rush to paint the wall or glue wallpaper. After sanding they remained. Have you had problems with sanding? How often did you change the sandpaper on the block?
How to sand the walls after puttying? Without sanding the wall after applying putty to it, the finishing process is considered to be performed poorly. This work is necessary to give the surface a perfectly smooth coating, for further decorating it with other finishing materials.
The article suggests learning how and with what to sand putty when renovating a house.
Anyone who begins to make repairs in a room must understand that painting the surface of the walls (see) is carried out only after stripping the putty. This process is one of the main stages of finishing a room - the translation of design ideas into reality will depend on its quality. But it is quite difficult to determine what kind of sandpaper is needed to grout the putty so that after painting the surface is free of flaws.
Abrasive sandpaper for putty should have the following features:
- When leveling surfaces with putty material, paper abrasive is the main tool for final cleaning of walls and ceilings before painting them or gluing wallpaper. To perform such work, certain knowledge and skills are required.

Moving the tool when sanding walls
The instructions for leveling walls suggest carrying out the process in several stages:
- It is applied to the surface, which allows you to eliminate large flaws in the plaster layer.
- After it has dried, a finishing ball of putty mixture is placed to obtain a perfectly flat plane.
Advice: Even the most the best masters they won’t be able to get it perfect after puttying flat surface, without streaks from the spatula. To remove these imperfections, the last ball should be completely sanded until the surface is as smooth as possible.
Sanding is carried out with a special trowel mesh or paper abrasive. This can be done with your own hands or using special electric sanders, which will be needed for finishing large areas, but at the end of the operation you cannot do without manual sanding.
Advantages of the machine method:
- speed of work;
- convenience.
But in the end, you cannot achieve quality with a machine, as with the manual method.
Advantages of abrasive mesh:
- Presence of perforations on the surface. In this case, construction dust passes freely through the holes, which prevents the mesh from becoming clogged, like sandpaper.
- Pieces of material can be easily replaced as they wear out. The degree of wear is determined by such characteristics as:
- the mesh breaks;
- work efficiency decreases.
- Material is purchased the right size , this eliminates additional modification of the product. The main thing is to choose the right piece in size.
The disadvantage of abrasive mesh is its high price.

When using sandpaper:
- The disadvantage is the constant clogging of the material when sanding the surface with construction debris, which increases the consumption of paper compared to mesh.
- Advantages – wide range of products. It can be purchased:
- in pieces;
- in rolls;
- small rollers.
Tip: When purchasing ready-cut pieces, you should keep in mind that the cost of sandpaper will be higher.
What tool will you need to grout the putty?
Before sanding the putty, you need to purchase the necessary tools:
- A reliable stepladder.
- Carrying for surface illumination.
- Sandpaper or abrasive that is installed on the skinner.
- Manual type skinner.
- Sanding sponge, with pre-cut corners.
- Small spatula.

- Items to protect the master when performing finishing work:
- gloves;
- respirator;
- headdress.

When choosing an abrasive mesh or sandpaper, you need to consider some nuances:
- Initial sanding should always be done with coarse sandpaper.
- For finishing, fine-grained devices are used.
Sandpaper by grain size is divided into several types, which have a special number according to FERA standards:
- Macro sizes are assigned numbers from No. 20 to No. 240.
- Micro sizes correspond to numbers from No. 240 to No. 2500.
Wherein:
- To grout the first layer, sandpaper with numbers from 120 to 180 is most often used., which depends on the condition of the surface being finished.
- When sanding finishing putty, finer sandpapers with numbers from 240 to 280 are usually used.
- The process of leveling walls for painting can be done with materials of higher grain size.
Tip: Keep in mind that the higher the grit number, the finer the sandpaper.
Abrasive meshes are also divided into numbered models.
For example:
- Large unevenness can be eliminated by a format whose index is 60. It is used when sanding walls after applying the first layer of putty.
- For a finer treatment of the wall, such as for wallpaper, a sandpaper with a number from 100 to 120 is selected for grouting putty.
- For painting, the skin number can be taken from 120 to 150.
How to sand wall surfaces

The surface grinding process consists of several stages:
- The putty surface is inspected for the presence of voids.
- The presence of wet areas is determined.
- Before starting work, protective attributes are put on.
- The walls or ceilings must be sufficiently illuminated: a portable lamp is connected and installed.
- Large bumps are removed using a spatula.
- Primary grinding is carried out. The process starts at the top and gradually the tool moves down to the bottom.
Tip: When fumigating, areas must be treated small area, approximately 1-1.5 meters.
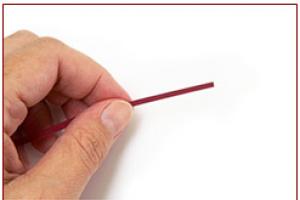
- Sanding should be carried out using two types of tool movement, with uniform round movements of the hand performed as in the photo:
- "up down";
- "left-right".
You cannot sand the same place for too long, as this can cause unevenness on the surface. If a depression forms on the wall, you can skip it and putty it later.

- After sanding the main area of the wall, attention is paid to the corners and other hard-to-reach areas. To process them, special sandpapers with beveled corners or bent sandpaper are used.
- All rubbish in the room is removed and wet cleaning is done.
- The surface is checked for flaws, deep depressions are filled with putty if necessary.
- Finish sanding of the walls is carried out using finer abrasive grains. Hand movements are softer than before. At this stage it is necessary Special attention focus on illumination of the surface; after finishing grinding, the quality of the surface finish is determined.
- Garbage is removed.
- The walls are primed (see).
- The final decorative coating is applied.
Sanding putty is not a very complicated or expensive process. Using simple tools, you can perform all operations no worse than mechanical devices. What to use for skinning finishing putty The video in this article will show you how the process is performed correctly.
Sanding wood by hand, although it requires a lot of labor, in return provides a number of important advantages: less aggressive processing, better process control and high surface quality in hard to reach places ah - in corners, on smooth bends and other reliefs of any complexity.
Manual technique is indispensable for interlayer sanding finishing coatings, since it ensures the most delicate work and eliminates the risk of rubbing the applied finish. When using the same abrasive, hand sanding guarantees a better quality surface than sanding with a sander, grinder or drill.
About grinding pads and making them yourself
Sanding pads (grinding pads) – indispensable assistant in the carpenter's arsenal. These simple devices ensure uniform contact of sandpaper with the surface being treated, increasing the speed and quality of the work performed. Using such pads, you will significantly improve the quality of grinding, extend the life of the abrasive, and avoid irreparable defects in the form of depressions and rounded ends.
To acquire such a grinding tool there is no need to spend extra money. It will not be difficult to make it yourself from dense foam or wooden scraps. Check out some easy sanding block projects in our gallery.
With this sanding block, which you can easily make from scraps of wood you have lying around, you won't have to waste time changing sandpaper. Wedge clamps are a simple and functional alternative to traditional clamps. A simple corner block will prevent accidental rounding of edges when sanding the ends. To sand smooth curves, use curved blocks made from scrap wood or foam. For grinding grooves or wooden products with a round cross-section, for example, balusters, use an additional soft backing. Don’t rush to throw away the profile scraps; they will still serve you as a block. Everything ingenious is simple!
How to choose sandpaper for working with wood?
There are quite a few characteristics by which sandpaper is classified. But the main and most significant parameter that you should focus on when choosing a sandpaper is the size of its abrasive grains - the so-called. graininess index. For specific tasks When working with wood, a certain type of grain size is chosen.
TABLE: SELECTION OF ABRASIVE FOR WORKING WITH WOOD

Practice shows that to perform basic tasks, a master needs a set of five types of abrasives:
- P150; P180; P240(wood processing before applying finishing);
- P280; P400(interlayer and final sanding finishing coatings).
You can read all about the intricacies of choosing sandpaper in.
Dry or wet sanding?
For intermediate sanding of finishing coatings - stain, varnish, polyurethane, etc. Traditionally, two techniques are used - dry or wet.
Dry grinding increases the efficiency of the abrasive and makes it possible to better control the work process, which is especially important at the stages of intermediate grinding of delicate coatings. The disadvantage of this technique is the rapid clogging of the skin. Sandpaper with an anti-clogging stearate coating partially compensates for this problem.

At wet grinding For wooden products, mineral oil, white spirit or ordinary soapy water are used as a moisturizer. With this technology, the abrasive becomes clogged much slower and, accordingly, lasts longer. But the mess formed from foam and shavings significantly complicates the grinding process. There is a need to constantly wipe the surface and carefully monitor the result of grinding.
How to sand wood correctly?
Grinding technique . The wood is sanded with active movements along the grain or at a slight angle, but without excessive pressure on the block. Movements should be as light as possible, on the second or third pass using fine-grained sandpaper with virtually no pressure.

Preparing the surface for finishing . When preparing wood for applying a finishing coating (varnish, oil, stain, polyurethane, etc.), start working with P120 or P150 abrasive (depending on the nature of the irregularities). After that, move on to P180 grit and finish with P240 abrasive.
Intermediate grinding of coatings . When applying the finishing coating layer by layer, intermediate sanding of each layer is carried out with fine-grained sandpaper P280. For final polishing use P400 sandpaper. Use P600 grit abrasive to remove even the slightest imperfections in a glossy finish.
Requirements for finishing coatings to be sanded . Matte types of coatings are not as demanding on the quality of sanding as glossy ones. At the same time, a dark stain will expose all the flaws of unfairly performed sanding.
No matter how hard you try, it is impossible to get perfectly smooth walls after puttingtying them. In any case, traces of the spatula, uneven transitions of the treated areas, bumps, depressions and other defects will remain on the surface. This is why you need to sand the walls. Let's figure out how to sand the walls after puttying.
How to sand the walls after puttying?
The first thing you should do is get the right tools and consumables. You will need:
- Several types of abrasive mesh or sandpaper.
- Sanding block.
- Sanding sponge (used for hard-to-reach places).
- Ladder.
- Good lighting: spotlight or pendant lamp.
- Small construction spatula.
- Personal protective equipment: respirator, safety glasses, hat.
Experts recommend sanding the walls after they have been puttied, before painting the surface or before wallpapering. Grinding is often carried out for other types of construction work. The grinding process is relatively simple, but quite labor-intensive and dusty. How to sand walls after puttying? At manual grinding You can use sandpaper or a special abrasive mesh. The choice of material depends on the personal preferences of the master.
- Abrasive (grinding) mesh for putty– its advantage lies in the perforated structure. All construction dust will pass through the holes, so during work it will not clog as much as regular sandpaper. The mesh needs to be changed when it wears out, which can be determined by its appearance: if it starts to tear or you feel that the grinding process is no longer as effective, then it should be replaced. As a rule, the mesh for grouting putty is sold on the market in pieces, the sizes of which correspond to the size of the bars, so all you have to do is install it and get to work. But remember that the bars are also different, so when purchasing a mesh, take this factor into account. The disadvantage of the sanding mesh is its higher price than sandpaper.
- Sandpaper for putty– its main drawback is that during operation it will constantly clog construction dust, so it will have to be changed much more often than the mesh. You can buy sandpaper in the most different options: ready-made pieces, small rolls or large rolls. If you decide to go with rolls of sandpaper, you need to decide how you will cut it based on the size of the bar to ensure minimal waste. Of course, you can buy already cut pieces, but such a purchase will cost much more.
In addition, sandpaper has such a concept as grain size, which is indicated by a number marking. The choice of grain causes some difficulties for inexperienced craftsmen. The larger the serial number sanding belt, the higher its grain size (the number of grains per square centimeter), and vice versa. For example, coarse-grained tapes include tapes in the following range: from P20 to P220, and fine-grained sandpaper labeled from P240 to P2500.
Sanding the walls after puttying is carried out in two stages. Here you need to remember that the first grinding is done using coarse-grained sandpaper, and the final grinding is done with fine-grained sandpaper. For execution repair work In the apartment, sandpaper with a grain size of P80–P280 is mainly used. Not so often (for “jewelry” processing) smaller abrasives can be used – P320–P360. After treating the surface of the wall with starting putty, it is recommended to polish it with a rough grinding stone P100–P180. Sometimes, for initial processing, sandpaper marked P80 is used, but this is too coarse material and, for example, it is not suitable for painting. After treating the walls with finishing putty, the surface is sanded with fine-grained sandpaper P220–P280.
How to sand walls after puttying?
Before sanding the walls after puttying, you should make sure that the finishing layer is completely dry and ready for processing. Take care in advance good lighting– it is necessary that the light falls on the treated area at an angle and only from one side. Remember to take care of your personal safety, always wear goggles, a hat and a respirator. There will be a lot of dust!
Large overhangs can be removed or trimmed using a small, clean putty knife. After this, secure the rough sandpaper to the sanding block. You always need to sand the wall in the direction from top to bottom and from left to right; in this case, not the entire surface is processed at once, but is divided into small sections.
If you have never sanded walls before and are not sure whether you have chosen the right abrasive grit, then be sure to practice on small area somewhere in the corner. After a short grinding, check the result - if you find scratches on the surface, it is better to replace it with an abrasive with a finer grain.
It is still permissible to use coarse-grained emery for wallpapering, but it will no longer be suitable for painting walls, since even minor defects cannot be allowed to appear - they will show themselves very clearly after painting.
When grouting, you should not press too hard on the sanding block, although, of course, you will still have to put in some effort. It is not recommended to grind in one place for too long, so as not to overdo it: sand it, inspect the surface for irregularities, and move on to the next area. If large depressions are found during the initial polishing process, it is better to skip them and treat them with putty later.
After sanding the main surface of the wall, you need to start processing corners and other hard-to-reach places. In this case, use grinding bar can only harm the putty layer. Therefore, it is best to use sanding sponges that have beveled corners. If this material is not available, the corners can be sanded with a sheet of fine sandpaper folded in half.
How to sand a ceiling after puttying?
The ceiling attracts no less attention than the walls, and every flaw on its surface will be evident. The technology for sanding this surface is no different from sanding walls, except that working on the ceiling is much more difficult. Therefore, it is better to understand the question of how to sand the ceiling after puttying, having in your arsenal.
No matter how much effort you put in, you will not be able to achieve perfectly flat and smooth surfaces after applying putty. In any case, marks from the spatula, uneven transitions, bumps or pits and other errors will be visible on the walls.
To avoid such a situation, the walls are sanded, which we will discuss in more detail in the article.
What can you use to sand walls?

It is important to use a mask while sanding walls to protect your respiratory system.
First of all, you will need to acquire the necessary equipment.
For sanding you will need:
- different types of abrasive mesh or sandpaper of different grain sizes;
- grinding bar;
- sanding sponge;
- ladder;
- additional lighting;
- spatula with a small working blade;
- individual protection means.
- after applying putty;
- before applying paint;
- before wallpapering.
But there are other cases when it is impossible to do without sanding.
Sanding surfaces is not a very complicated, but very lengthy process, which results in a lot of dust.
For sanding, sandpaper or a special abrasive mesh is used. What you choose depends on your preferences and wishes.
The advantage of the abrasive mesh is its perforated structure, due to which all dust will easily pass through the holes and the cloth will not quickly become clogged. Replacement of the mesh is carried out after its wear, which immediately becomes noticeable external signs. As a result of wear and tear, the mesh may tear and not perform its intended purpose properly.
Most often, such mesh is sold in pieces, the size of which can be adjusted to the size of the bar. To work, you only need to install the canvas on the timber and begin transforming the walls.

We sand the walls of the house ourselves
Please note that the beams can vary greatly in size, so when buying a mesh, accurately measure the dimensions of the beam.
The abrasive mesh has one drawback - its high cost, relative to sandpaper. But the downside of sandpaper is rapid wear, which is why the blade requires constant replacement.
Sandpaper is sold in completely different variations:
- finished canvas;
- small roller;
- wound into a large roll.
If you want to buy canvas in a roll, immediately decide how you will cut it so that there is not too much waste left. Of course, you can make your task easier and buy ready-made pieces, but their cost is much higher than that of uncut fabric.
Another one distinctive feature sandpaper consists in the grain size, which is indicated by the number marking. This is what causes many difficulties and questions for beginners who cannot choose the right grain size correctly.
Please note that the higher the tape number, the larger the grain, and, accordingly, vice versa. Sandpaper with coarse grains is presented in the category from 20R to 220R, and with fine grain – from 240R to 2500.
The sandpaper features are shown in the table below.
You need to sand the walls after puttying in two steps:
- the first sanding is carried out with a tape with a coarse texture;
- the second - fine-grained paper.
Most often, sandpaper from P80 to P280 is used for renovation work in apartments, and especially for fine workmanship– from 320 to 360R.
When the wall is sanded with starting putty, it requires subsequent polishing with coarse sandpaper, the range of which varies from 80 to 180R.
But please note that this is a very coarse-grained material, and if you plan to paint the walls in the future, such sandpaper cannot be used.
What technology is used for sanding?

Self-sanding of walls after puttying
Before you start sanding the walls, you need to check the finish for readiness (make sure it has dried properly). To make the work comfortable and the result positive, get sufficient lighting. The rays should not be distorted and cast a shadow; the area of the wall being treated should be illuminated from all sides.
Don’t forget about personal protection that will protect your eyes and respiratory organs from dust; believe me, there will be a lot of it.
If there are large protrusions on the walls, remove them with a small putty knife, but make sure it is clean. Then place some coarse paper on the block and start sanding the walls from the top, working towards the right side. Such actions will help you not to get lost and treat the surface in small areas, without missing a single centimeter of the wall.
If you have never sanded walls and are afraid of making a mistake with the grain size of the sandpaper, test the selected abrasive on a small section of the wall in a secluded place. If scratches appear on the wall during testing, your choice is wrong, so immediately replace the sandpaper with a finer grain.
Once again I would like to mention that coarse sandpaper is suitable for preparing walls before wallpapering, but subsequent painting of the walls does not allow the presence of even the smallest flaws, which will become more pronounced after applying the paint.
When sanding, try not to apply too much force when pressing on the block and do not sand the surface in one place for too long. After performing a few circular actions, check the result and move on to the next fragment of the wall.
If during sanding after initial polishing you find significant holes on the surface, skip these areas and later treat them with putty.
When the main surface of the walls has been sanded, you can move on to the more inaccessible parts - the corners. To sand corners, do not use a sanding block, as this will only damage the putty layer. For such painstaking and delicate work, sanding sponges with a beveled angle are best suited. If you don’t have such a device, use the same fine-grained sandpaper, folding it in half.
How to sand a ceiling?

We sand the ceiling with our own hands
When renovating a room, the ceiling requires no less attention than the surfaces of the walls, because all the defects on it will attract the attention of not only the owner, but also the guests of the house.
Sanding the ceiling is no different from sanding the walls. The only caveat is that working on the ceiling is much more difficult. That is why, before you start sanding this area, get a sanding machine.
If such a miracle machine is used, a mesh numbering from No. 60 to No. 80 is put on it for rough cleaning, or a mesh numbering 100 is put on it for finishing work.
To easily reach the required area of the surface, use a ladder or scaffolding, but if you have a machine with a special rod, you can sand the ceiling directly from the floor.
The surface is sanded in a circular motion until the surface has a perfectly smooth texture. Initially, sanding rids the surface of major damage, after which the remaining debris and dust are removed and the surface is examined for the presence of minor defects.
When the work has come to an end, you can cover the walls with finishing putty. After the mass has completely dried, finishing sanding is carried out with fine-grained sandpaper. The technique for performing the work is identical to that described above, the only caveat is that the movements should not be so sweeping, but neat.
When all surfaces have been sanded, it is necessary to remove any remaining dust and then prime the walls. It is the application of primer that will increase the level of adhesion of the base with subsequent finishing materials.
When deciding what materials to sand the surface and what technology to use, it is necessary not only to take into account the advice of more experienced finishers, but also to try your hand at a small section of the wall. Although today you can watch many video tutorials on the Internet, they cannot replace experience working with a grinder or other abrasive materials that you need to feel with your own hands.