Arches are an architectural element that has existed since time immemorial. But despite all their archaic nature, arches are able to add zest to a modern one.
Now you can mount sheets of drywall - on both sides.
Construction of the arch vault
When starting to build an interior arch with your own hands, Special attention should be given to the vault. Firstly, this is the most difficult part of the arch to manufacture, and secondly, its shape affects the entire structure. 
In addition to the above-mentioned arch-portal, there are several more types: 
- Classical arch or Romanesque(arch in the form of a semicircle);
- Arch in Art Nouveau style(half a circle cut by a chord. It is similar to the classical one, but with a flatter arch);
- Pointed arches(the vault seems to be made up of two circles that are leaned against each other);
- "Romance" arc(similar arches are made in very wide openings. The vault is in the form of two arches connected by a straight gap);
- Prism(the arch is made without any roundness, consists of straight lines, between which there are obtuse angles).
The sides of the vaults are also made of plasterboard. We cut out a recess of the required shape from the bottom of the sheets.
 Since a prismatic interior arch consists exclusively of straight lines, it is easiest to make it yourself. To make a rounded vault, you will have to sheathe it at the bottom bent sheets drywall.
If you want to build interior arch with your own hands, but there is doubt about own strength, then you can use standard ones or make them to order. Arches can be chosen in various designs, textures and materials.
Wooden arches will look expensive and presentable, but they won’t be cheap either. In addition, the material is heavy in every sense. For DIY work, fiberboard or MDF is better suited.
Assembling the arch must begin from the top.
 First we use the wooden dowels supplied in the kit. We assemble a vault from two pairs of panels. We connect with PVA wood glue. After gluing, we wait for it to dry, and then the vault cornices from below.
Then we file the flexible plate of the inner part of the arch- with a margin of at least 10 millimeters.
We assemble the vault from the two halves, the halves are glued to the inner panel.
We install the arch in place and fix it with self-tapping screws or liquid nails. It is necessary to finish the side panels according to the dimensions of the openings with a small margin in length and width.
We also file the trims, from to to, so that the cut is inside the arch. Then we install platbands into the cornice of the vault using dowels. To do this, coat the groove with glue and insert the side panel into it so that the top edge is immersed in the groove.
We do the same with the second half of the arch.
One way to increase your living space is to remove the doors. But there is not always the opportunity or desire to break down the walls. Then the former doorway is designed in the form of an arch. Another option for using arched openings is to divide a long corridor into zones, breaking up an overly simple geometry. When making repairs on your own, arches are most often made from plasterboard: it’s easiest to make them yourself.
Types of arches
Interior or corridor arches can have different shapes. They differ mainly in the shape of the upper part and sometimes in the way they are connected to the vertical parts. Their main types are presented in the photo.
This group is missing one of the most popular Lately- semi-arch. They have a rounded corner only on one side, on the other it remains straight. This is where the name came from - semi-arch. It looks good in modern interiors: minimalism, hi-tech, maybe art deco.

Classic is different correct form top. This is strictly a semicircle, the radius of which is equal to half the width of the doorway. This type looks good with an opening height of at least 2.5 m. It fits well into any interior, but looks best in a long corridor, or instead front door to the kitchen.

An arched opening in the Modern style is distinguished by a small radius of curvature and a sharp transition at the junction with the vertical components of the opening. It looks good if the walls and ceiling have more or less simple design. Looks great in place of the former one balcony door, good when entering the office.

The “Romantic” style arch is more likely to be simply rounded corners (mostly masters call it that). Looks good with a large width and not the greatest height.

The “romantic” shape is good with large width and small height
The “ellipse” shape is very close to “romance”. It differs only in greater curvature in the middle part. Also suitable for low and wide openings. It just looks a little softer.

Trapezoid is a non-standard design consisting of broken lines. It is difficult to play out in the interior, therefore it is used infrequently: for some non-standard designs.

One of the design options is trapezoid
It’s very similar to a regular opening, and that’s essentially what it is, only without door leaf. For greater originality, it is often accompanied by wooden carved elements in the form of columns on the sides. In this form it is good for classic interiors, as well as ethno-style - Greek or Roman, depending on the type of columns.

For decoration in modern styles They use another example - next to the main arch, they place smaller portals. This technique allows you to “beat” a simple form.

Another version of the “portal” arch
Before you start making an arch, you need to decide on its parameters. select the type, and then the parameters: where it will start, and what the radius of curvature will be. It could be a really sharp bend, or it could just be some rounding of the corners.

To understand how your chosen shape will look, you can cut out a template from cardboard and attach it to the doorway. Evaluate the effect. If everything suits you, you can make a blank using this template. But only one - for one of the sides of the opening. The second one needs to be done in place, otherwise it will turn out crooked.
Step-by-step instructions with photos: the fastest way
Do-it-yourself plasterboard arches different ways. This one takes a minimal amount of time. Having decided on the shape, we proceed to installation. We attach a frame to the prepared opening, cleared of peeling plaster and relatively leveled, according to the dimensions of the future arch. It is made from a profile for drywall or dry wooden block suitable size. Sometimes, if the wall is narrow, you can only choose wood.

To begin, we cut out a rectangle from drywall to the size of the future arch, find its middle, mark it, and then temporarily screw it into place. We retreat from the edge 12.5 mm - the thickness of the plasterboard sheet. If the adjacent walls are already plastered, add a couple more millimeters of putty so that the surface can be leveled.

Now we take a piece of profile or hard corner and set aside half the width of the opening from one edge. At this point we make a hole in the corner and insert a nail into it. We stick this nail into the middle of the doorway we marked earlier on the sheet. It turns out to be a kind of compass, with the help of which it is easy to draw an ideal line.

Device for outlining an arc
By changing the mounting height, you can get a more or less high arch. If you need a flatter curve, increase the length of the “compass”.

Having removed the sheet, we cut out an arc along the outlined contour. This can be done with a special saw for drywall, a saw for metal - with small tooth for a smoother edge, use a jigsaw (there will be a lot of dust). If the cut is not very even, smooth it out using sandpaper attached to a grater. With this device we achieve a perfectly even curve of the shape we need. Carved fragment of an arch - side wall- we fasten it in place again.

If everything is smooth, there are no distortions or irregularities, on the other side of the opening we attach the same sheet of drywall as a few steps earlier - a rectangle or square, depending on the shape. It must be fixed strictly vertically. Now we transfer the shape of the arch onto it. We take a square, at a right angle and press one side against the drywall, onto which we transfer the arch, and the other side against the arch. Having aligned the square perpendicularly, mark a point with a pencil. We make such points along the entire arc. The more often they are done, the easier it will be to draw the line and the more accurate the match will be - the less you will have to grind down.

Why is it so difficult and not just to make a copy of the first sheet? Because few openings are symmetrical. As a result, installing the second sheet so that the lines of the arch coincide is very problematic.
Having marked all the points, remove the sheet, draw a line, and cut along it. We install it in its original place. Now we take the ironing board again with sandpaper and now we align both edges until they completely match. One point - the trowel should be wider than the opening so that both walls of the arch are captured in one pass.

We measure the length of the arc, cut out a piece of the profile of the same length, make notches on the walls every 3-4 cm. This tape will need to be secured along the arch arch on one side and the other.

We fasten it with self-tapping screws, carefully, pressing the profile and holding it with a block, not with your fingers: it’s easy to get the screw into your fingers. By the way, you need to wear gloves when working with the cut profile. If you don’t, you’ll definitely cut your hands.

By the way, the back of the profile can be aligned along the edge - it’s easier to work this way, but the joint will still have to be sealed later. Screw the strip to the other side in the same way.

This is a bottom view - profiles are attached to the sides
There is a second way to attach the profile - attach it to a quick-setting universal glue, such as liquid nails. This method is acceptable if the opening width is small. If the arch is thick, the glue may not be able to withstand the mass of drywall that will be attached from below.
The next step is to attach the jumpers. First, the depth of the arch is lost, 1-1.5 cm is subtracted from it. This will be the length of the lintels. Cut profile pieces of this length.

Jumpers are cut from the same profile
At the places where the jumpers are attached, the “petals” are cut off, and the prepared fragment is installed and secured. It should not rest against the walls, it should be located approximately 5 mm from the back. Jumpers are needed to make the structure more rigid, otherwise it “walks” when pressed.

Next, you need to cut out a rectangle from drywall that will cover the structure from below. Its width is determined simply - from the outer edge of one sheet of plasterboard to the outer edge of the second sheet. The length is measured with a flexible tape (can be a tailor's tape) or a tape measure with an assistant. We attach this sheet with self-tapping screws to the arch frame. The sheet has to be bent, but read how to do this a little lower - closer to the end of the article.

Arched opening made of plasterboard: second method (photo report)
This method is good if the thickness of the partition is small: try attaching the profiles if the gap between them is several centimeters, and then attach the jumpers. It all starts the same way: the first wall of the arch is cut out, attached and transferred to the second sheet.

Afterwards, wooden crossbars are cut along the width of the gap between the two sheets, which are attached along the edge of the arch with self-tapping screws.

The cut strip of drywall is fastened starting from one of the sides. To make it more convenient, you can fix it with clamps, since the thickness of the wall is small. When attaching the strip, you can use the self-tapping screws that were used to fasten the bars. This way you will definitely hit the crossbar.

Then all that remains is to secure a special perforated corner in the corner and smooth out the unevenness.

A corner is attached to the arch arch, everything is puttied

It is also more convenient to smooth the dried putty along the arch arch with the entire plane of sandpaper attached to a grater. It’s unpleasant that dust falls into your eyes, making it almost impossible to work without glasses.

How to make an arch instead of a door: method three - typesetting technique
Another way to make arches from plasterboard with your own hands is by typesetting. The arch is divided into segments and assembled from pieces that create a curvature close to the required one.

They are attached to putty diluted with a mixture of PVA and water. This batch dries quickly, so first we cut the plates and try them on. You can fold it on a table, but the vault will turn out upside down, but it will allow you to evaluate how correctly the plates are assembled.

Then the plates begin to be attached to the opening, periodically strengthening them with self-tapping screws for reliability. Place washers under the heads so as not to push through the cardboard. Remove excess putty immediately. If it gets stuck, it’s impossible to tear it off. The finished surface is treated with a primer to improve adhesion (adhesion), and then puttied, leveling the arch. To make it easier to display, you can use a template attached on both sides.

Making sharp bends using this technology is not easy, but for rounded corners and semi-arches it is a great way to do without profiles.
How to bend drywall
One important detail: standard wall plasterboard bends poorly. For curved surfaces, they specially came up with thin ones - 6 and 6 mm thick. This bent part is easier to make from it. With a slight curvature such thin sheet can bend easily and without tricks. If you don’t want to buy thin GVL, there are two ways to bend the standard one.
First- take a needle roller and roll the cut section well on one side. You need to roll with force so that the plaster breaks. Then the leaf is soaked in water and left for two to three hours. After such procedures, it should bend quite well. You take it, fix it on one side, and gradually press it against the arch frame, bend it, gradually screwing it along the edges with self-tapping screws. The method is not bad, but if there is a lack of experience and insufficient processing of the gypsum, the sheet may burst. You will either have to mask the gap later, or start over.

Second way to bend drywall: on one side, make notches with a knife approximately every 4-5 cm. The notches should cut the paper. This strip is also gradually fixed, breaking the plaster as necessary. It bursts along the cut lines with light pressure.

Video on the topic
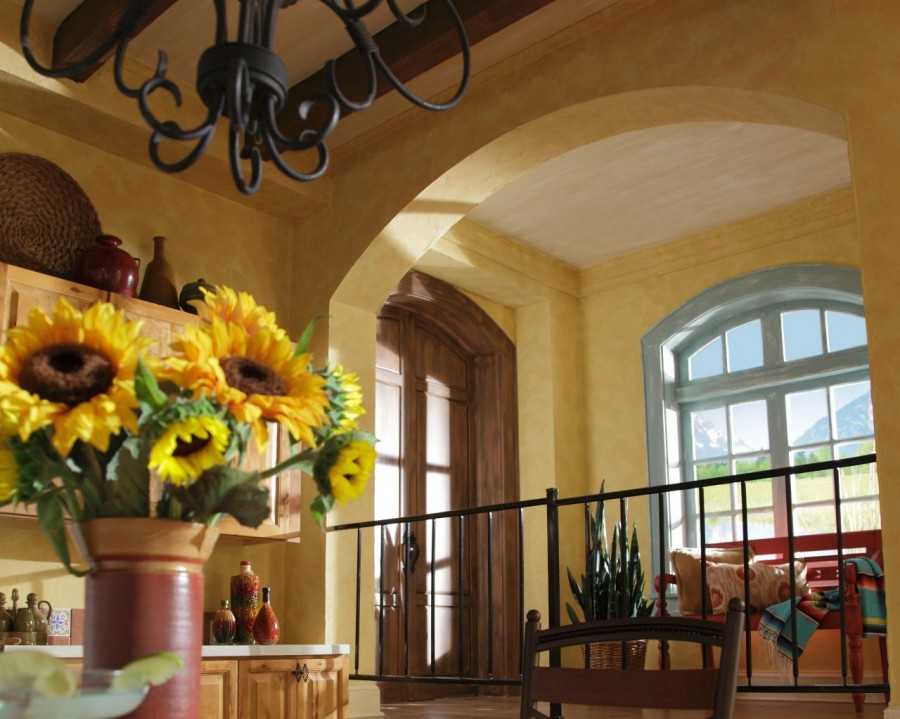
Any owner of a residential building with an arched passage has somehow wondered: how to design the arch so that it takes on a stylish beautiful view. In addition, it is necessary to maintain complete harmony general style premises.
As a rule, an arch is used to delimit space in the kitchen, living room, balcony, corridor and hallway. The design can take any shape, configuration and size, take different variants decor.

How to paint an arched passage?
The photo of the arch in the interior shows the most popular way of designing the structure - this is initial plastering, then painting. This method is equally suitable for use in both classic luxurious and super fashionable modern style.

Please note that first it is important to correctly select the base for the paint (the plaster itself), which is divided into several types:
- to create a relief effect;
- traditional putty;
- textured version of the composition;
- a special pigmented solution is applied.


First, before starting work, it is necessary to align the contours of the arch in the apartment as much as possible. For these purposes they use plasterboard sheets, corners and putty. Joints and possible cracks should be filled with serpyanka. To obtain the smoothest and clearest contours of the structure, it is necessary to fix the corners with a profile.

Then you should ideally clean the work area evenly, applying paint using a roller. If you intend to further decorate the element with relief accessories, it is wise to immediately use a pigmented solution. After finishing the main work, you can introduce linings or decorative curtains into the opening.

Decoration with stone and tiles
No less in a relevant way beautiful design arch is decoration facing materials, which include: tiles, natural or fake diamond, imitation brick. Less often the opening is decorated tiles, or mosaic.

An important advantage of this method is the introduction of arch decor into absolutely any style. The combination of stone can be completely different: with paper, textiles (wallpaper), plaster, paint.
When finishing an opening using this method, gypsum materials are usually used, but clinker and porcelain stoneware raw materials are not excluded. Due to their high strength and durability, they are usually located at the entrance to the house, or on the balcony area.


In order to decorate an arch with stone, that is, its original cladding is of high quality and reliably serves its household, you need to make the surface perfectly flat, and then select a good, appropriate glue composition.

The cladding can be made with an individual non-standard pattern, so it is first recommended to apply markings for further precise orientation of the masonry.

You can also line the opening with natural durable stone, but this will be a very expensive repair. Moreover, it is worth considering that the arch only needs to be in the opening load-bearing wall, or a solid partition.

The use of panels and stucco in the interior
Popular way of decoration door arch is the framing special decorative panels and overlays. The most relevant and relatively inexpensive material serves MDF, which harmonizes perfectly with classic style premises.

The surface is treated using artificial veneer or film. Please note that imitation of natural wood always remains at the peak of fashion.

To properly fix the panels in the passage, you should use special nails without heads and an adhesive solution. There are situations when you have to remove the level, you should use a spacer and foam for installation. This process is practically no different from installing a door frame.


As in other methods, you first need to level the surface and eliminate all possible cracks and joints. Markets and specialty shops building materials offer ready-made options pads that lock into place with a simple click.

An interesting way to decorate an arch in an apartment is stucco, which is not at all difficult to do yourself using glue or liquid nails. Most often, polyurethane is used, which gives the interior a special gracefulness, chic and luxurious rich look.


Can be done relatively simple shapes, or to produce complex bulky cast parts. The main disadvantage of stucco is the rapid mechanical damage and failure.

Curtains and curtains
Since ancient times, an arched doorway has been decorated with ordinary curtains, but even now this design option, although less common, is acceptable. The entrance is masked with light tulle, a curtain or a thick curtain, which will serve as the door itself.

Usually, doorway disguised with bamboo curtains, beautiful threads, and decorative beads. This method is very easy to do with your own hands, using a cornice above the opening to fasten the curtains. There are cornices of a curved configuration that coincide with the very shape of the opening.

It is no secret that the arch serves as a continuation of the wall, which is why, when designing it, it is necessary to take into account the decoration of the walls.


As you know, wood is the most noble and wear-resistant raw material, which is successfully used to decorate classical household items. It is better if the design is simpler, but very elegant in shape. It is also possible to hang a wooden arch with an elegant curtain with gilding, which will successfully highlight the classics.


Lighting solution
The beautiful design of the arch is complemented by built-in lighting devices, which can be point, side or contour types. The easiest way is to integrate lamps into a plasterboard element at the end.

The decorative opening is equipped with recesses where light bulbs are subsequently installed. To slightly hide the backlight, you need to mask the recesses with glass. It is important to use colored or translucent glass, which in itself will serve as an additional detail of the interior and the structure itself.

The arch that divides the space of the kitchen and living room looks very beautiful, and its lower part smoothly turns into a bar counter.

Photo of arch design options


Do you want to functionally and visually zone the space of your apartment, but do not want to install standard interior doors? Then your choice is plasterboard arches. They not only separate rooms, but also effectively decorate doorways, making them more original. Besides these beautiful designs do not require large expenditures - you can even do them yourself. How? First, find out the features different types arches and rate the photo finished products in the interior to determine the design of the model. Then read the step-by-step instructions and watch a video explaining all stages of installation. And then you can confidently begin installing the arch. More about all this below.
Choosing the type of arch
The main distinguishing feature of each arch is the shape of the vault. It is this that serves as the criterion for classifying products. So, the following types of arches are distinguished:
- classic - a traditional version with a semicircular arch, the cross-sectional center of which lies exactly in the middle of the doorway;
- portal – laconic arches with a rectangular vault;

- segmental - an asymmetrical arch, the arch of which consists of two elements: one repeats the shape of the portal, and the second - the classical model;
- modern - semicircular arches with a non-standard arch radius - more or less than the classic radius of half the width of the doorway;
- romantic - a type of portal arch with neatly rounded corners.
Advice. When choosing the shape of the arch, you should take into account the size of the rooms. If the ceilings in your apartment or house are low, it is better to avoid classic variations - they somewhat hide the space. And for very low rooms it is better to select arches without pronounced curves at all - segmental or portals.
Getting ready for installation
Before you begin the actual construction of the arch, you need to complete several preparatory work. The first one is the blank necessary tools and materials. In particular, you will need:
- plasterboard sheets: two sheets 12 mm thick and one for the vault - 6.5 mm thick;
- metal profiles - at least 6 pieces;
- two arched corners;
- dowels and screws;
- hacksaw for metal;
- drywall knife;
- hammer drill, screwdriver and drill;

Tool for installing a plasterboard arch
- building level;
- pliers;
- roller;
- gypsum putty and spatula;
- primer;
- sanding paper;
- pencil and tape measure.
Next you need to prepare the opening for installation new design. First of all, you need to eliminate the door frame - this will help to significantly increase the opening area. After dismantling, it is necessary to thoroughly clean the surface from various flaking materials, dirt and dust.
After finishing preparatory stage start installing the arch. Start by assembling and installing the structure frame.
We construct the arch frame
The construction of an arched frame consists of the following steps:

We install drywall on an arched frame
After the arch frame is installed, it needs to be sheathed with plasterboard. Start with the side parts: screw the prepared sheets to the metal guides with self-tapping screws in increments of 15-20 cm.

Advice. Screw in the self-tapping screws so that their heads “sink” into the drywall - this way they will not interfere with the work. finishing works and in the future they will not spoil appearance arches.
Next, you need to secure the drywall to the curved top profile. This is the most difficult procedure, since the material, on the one hand, bends poorly, and on the other, can quickly deform under force. The best way out of the situation is to slightly wet the drywall and, carefully bending it, adjust it to the frame. When the required arch radius has been reached, attach the plasterboard elements to the curved profile using self-tapping screws. Then the finished upper part of the arch must be connected with the same screws to the side walls of the structure.

We process and decorate the arch
The last stage of creating a plasterboard arch is finishing and design of the structure. The first procedure is performed in several stages:
- Walk along the surface of the arch with sandpaper to remove all roughness and unevenness.
- Attach the arched corners to the putty - they will hold the shape of the upper part of the structure.
- Apply putty to all installation seams.
- After the putty has completely dried, smooth out any uneven areas again.
- Cover the surface of the arch with primer, and after it dries, apply on top finishing putty and sand the structure again.

- finishing with wallpaper is a simple option with great possibilities: thanks to the variety of textures, colors and patterns, you can choose a cladding for absolutely any style. It is best to use non-woven ones - they are not only aesthetic, but also durable.
- painting – this decoration option is good for its practicality: the painted structure can be washed an unlimited number of times. Choose water-based paint– its colors are more saturated.

- covering with fabrics – non-standard finishing, which will give your arch a more noble look. The choice of fabrics is unlimited - from laconic cotton to exquisite jacquard.
- decorative patterns are a very easy to implement decorating idea: you only need template stencils, cans of paint, protective film and your own imagination.
A plasterboard arch is an effective and relatively simple way to transform the interior of your home with my own hands. All you need is to follow the instructions and carry out all the work step by step. And the result will not keep you waiting long - you will get a distinctive and original doorway instead of the usual interior door.
How to make an arch with your own hands: video
Drywall arch: photo


An arch as an element of building architecture is intended to divide a room into zones without using a door. Last years are marked by the active use of these structural elements. Such an elegant device can enhance and decorate any home and save living space, which is especially important for small spaces. They can often be seen in hallways, kitchens and between other rooms. How to make an arch at home? To do this, it is necessary to study the features of installation work.
This covering can be purchased at finished form or do it yourself. The shape of such vaults is also different: starting from classic options and ending with modernist designs. In the process of their production, various building materials are taken: brick, stone, metal, wood, PVC, fiberboard, chipboard, gypsum board, plywood. The most popular are plasterboard sheets. They are flexible and easy to install.
Preparatory work
To understand how to make an arch, it is important to carry out installation one by one. First, the designated space is measured: its width and height are determined.
When starting to build an arc, it is worth considering the fact that the door plane will decrease by 10-15 cm. These indicators relate to height. Later, this space can be lined with decorative inserts made of ordinary foam plastic.
Its width is measured and divided by two. These numbers will be necessary to ensure that the traditional semicircle turns out smooth and symmetrical.
These data are equal to the internal distance corresponding to the opposite sides of space. At the beginning of the work, you should decide on the shape of the structure.

Traditionally, semicircular samples or gypsum board sheets are installed, which will be discussed below. Find out how to make an arch correctly below. To begin with, you should focus on the verticality of the surface, otherwise the design will look ugly and one-sided.
If the need arises, the internal plane should be leveled using plaster or putty, focusing on the installed beacons.
Return to contents
Necessary attributes for work
The following list of accessories will allow you to carry out installation on your own:
- Guide view profile.
- Rack profile.
- Dowel with a screw for fastening a profile frame for concrete and brick walls.
- Self-tapping screws for wooden surfaces and fastening of gypsum board sheets.
- GKL sheets.
- Self-tapping screws with press washer.
- Roller with needles.
- Special corner with perforations.
- Latex putty for gypsum boards.
- Jigsaw.
- Stationery knife.
Return to contents
Installing Arch Facial Components

You can get an answer to the question of how to make an arch, starting with cutting out the façade structural elements. The main problem during this period is that you need to get two identical elements, regardless of the material from which the vault is made. Marking and cutting for each of them is carried out according to the same pattern.
An even semicircle can be made in different ways. For example, by using any devices. As such samples, you can take strong and elastic twine and a simple pencil.
- The rope is tied to a rod.
- The center of the circle is marked. To correctly determine the radius, you need to remember the number that was obtained during previous measurements.
- So, if the width is 1 m, then the required figure will correspond to 50 cm.
- 60 cm is laid off from one of the edges of the sheet and a line is drawn. The distance from the top of the opening to the top of the future arch corresponds to 10-15 cm.
- The gypsum board is cut based on the width of the door plane. So, in this version it is equal to 100 cm.
- Then, on the designated straight line, a border corresponding to 50 cm is marked on each side. These indicators indicate the boundaries of the hemisphere.
- Using a pencil and string, 0.5 m of the length of the rope is marked and the last marks of the hemisphere are drawn. The result is an analogue homemade compass. As a result of using such a device, a circle with smooth edges is formed.
- According to the markings, a semicircle is cut using a jigsaw or a stationery knife. Its width is 1 m and its height is 60 cm.

The profile for the arch opening is cut to obtain the required bend.
The arch is made in a different way using a long and flexible element. To do this you can take plastic panel, flexible plinth.
- A rectangular base measuring 100 × 60 (65) cm is cut out. Next, 50 cm is measured from each side and 2 lines are drawn. The place of their intersection is indicated by a dot.
- The drywall sheet is bent on both sides according to the width of the future opening. It turns out to be a semicircle. The volumetric part corresponds to the previously designated points, the ends should be in contact with the ends of the rectangular base in the lower part.
- The finished vault is drawn and cut out.
The second method of making arches requires the involvement of an additional person. Taking accurate measurements alone will not be easy.
Return to contents
Erection of the frame on the arch
You can make this important element in the house by preparing metallic profile. Marking guides oriented to the width of the opening. Here these indicators correspond to 1000 mm. They are fixed on any side. They are secured to concrete and brick with dowel screws; for wooden surfaces, special self-tapping screws are used.
In order for the structure to be in the same plane as the wall, the frame should be fixed 12 mm inside the opening.

As soon as the gypsum board sheets are fixed and putty is applied, the base will become even.
Fastening is carried out on either side of both side parts of the frame. The length of such elements corresponds to 600 mm.
The bottom of the profile is cut at an angle. Fixing arch parts to the frame with self-tapping screws for metal bases.