There are fewer and fewer people who like to lie in the bath: the majority of people use the shower.
For this reason, there is no need for a container that occupies the main part of the bathroom.
Before washing machines became available to every family, they rinsed clothes in the bathroom, but now this need has disappeared.
Dismantling it and installing a compact shower stall is not a problem now. However, it is not always possible to select a product in a store that fully meets the needs of the apartment owner. In such cases, a homemade shower cabin can help out.
The production of any design begins with paper work - design. At this stage you will need to do the following:
- Acquainted with existing types shower cabins: real designers do not reinvent the wheel - they use the experience accumulated by mankind, making the necessary adjustments to the design.
- It is advisable to read about the principles of ergonomics: this will help you avoid mistakes that could turn your future cabin into a structure unsuitable for use.
- Draw a sketch of the structure on paper indicating dimensions and specifications - a list of parts and their quantity. This will make it more convenient for you to make economic calculations in the future.
- Decide on the materials from which you are going to make these parts.
- Based on the list from point 3, calculate required amount each of the materials and their cost.
To choose the best option in terms of financial costs, you can develop a couple of sketches. For example, figure out what it would cost to build a corner and rectangular cabin.
For clarity, mark the installation location in the bathroom and evaluate which design will fit better into its space.
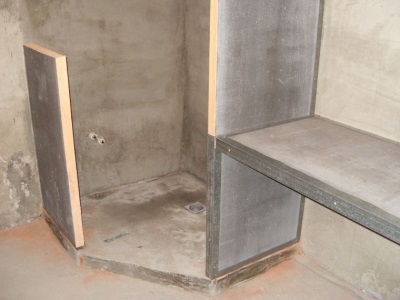
![]() Creation shower tray Doing it yourself has many advantages - the design will be cheaper, and you can choose any sizes, deeper and wider than the factory ones. — advice, current trends, materials.
Creation shower tray Doing it yourself has many advantages - the design will be cheaper, and you can choose any sizes, deeper and wider than the factory ones. — advice, current trends, materials.
If you decide to make a shower in a private house yourself, you need to study this issue thoroughly, because the wrong approach to installation can lead to destruction of the foundation and building structures as a result of constant exposure to moisture. There are many useful tips for construction and plumbing work.
How to make a shower cabin with your own hands
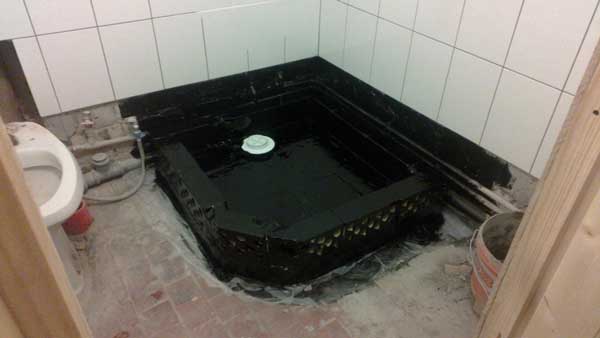
The success of the event for the manufacture of a homemade shower stall depends on strict adherence to the order of work. In this case, any operation will be easy and convenient. You need to start working with waterproofing the floor in the bathroom. It is important to carry out this work with special care, otherwise friction with neighbors below will be inevitable.
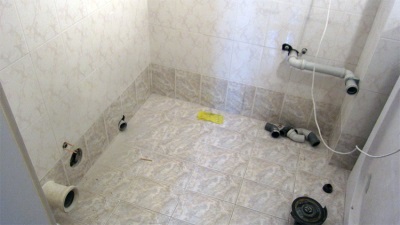
- Pipes are brought to the locations of the mixer and drain.
- They equip the cabin floor (if you plan to use a drain ladder) or install a tray.
- The walls are finished with waterproof materials.
- Mount the cabin frame and cover it with polycarbonate or other material of your choice.
- Doors are installed.
DIY shower cabin
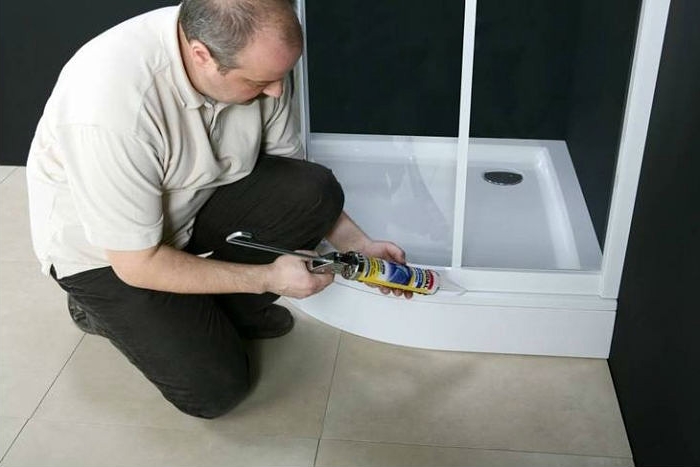
All joints of the structure must be sealed with sealant to prevent the possibility of water leaking beyond its boundaries.
Installation of an inclined floor
Work on installing a sloping floor should begin with arranging a drain. This operation is performed after completing the waterproofing of the floor.
Procedure:
- A drain is installed and connected to the sewer pipe.
- The floor along with the ladder is poured cement mortar in such a way that the hole of the ladder protrudes above the pouring surface to a height equal to the thickness of the tile.
- You can build a side around the perimeter of the cabin - this will help prevent water from escaping beyond its boundaries.
- We lay the tiles, ensuring a slope from the boundaries of the cabin to the drain hole.
The entire process of constructing a sloping floor will take at least ten days (including drying of the solution).
Shower floor
Installation of a floor with a pallet
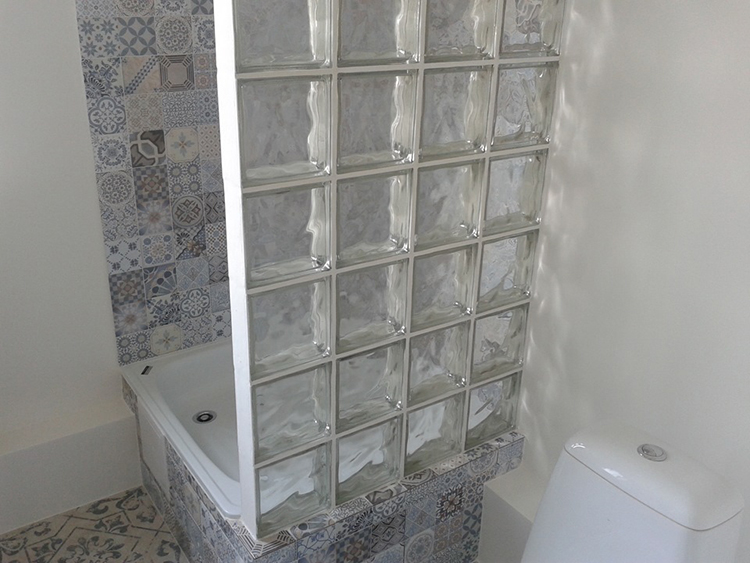
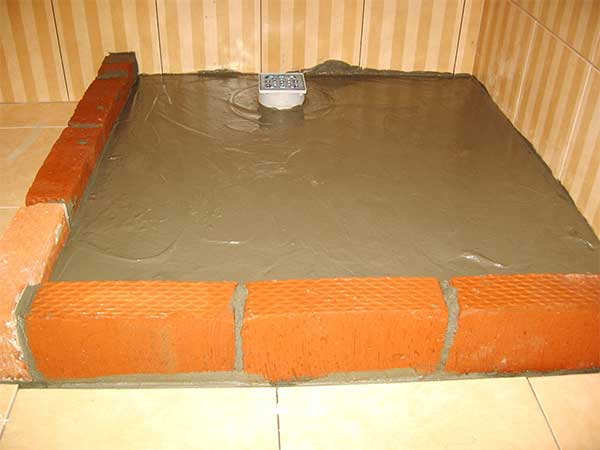
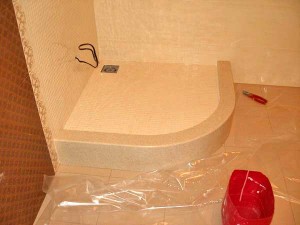
Now let's look at how to make a homemade shower tray. You can buy a ready-made shower tray - it can be easily installed in place, following the manufacturer's instructions. But a cabin equipped with a brick or concrete tray made by yourself can be called truly homemade. It can be given the most fantastic shape, and custom sizes may differ greatly from standard ones.
To build a brick pallet you will need:
- brick, sand and cement;
- waterproofing mixture and metal mesh;
- pan drain;
- self-leveling mixture;
- set of tools: trowel, plaster beacons, building level, paint brushes;
Be sure to purchase a tape measure, a drill and a mixer attachment.
It is more convenient to make the pallet before finishing the floor and walls. The waterproofing compound is applied three times: under the screed, on top of it and before facing.
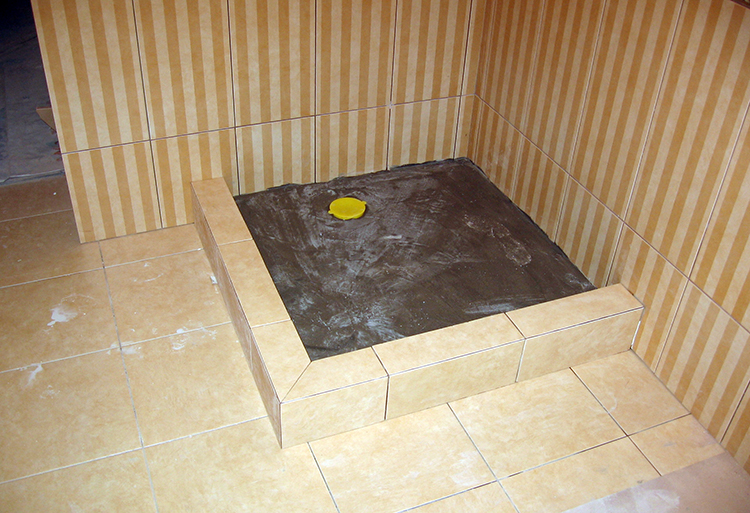
Shower tray manufacturing process
To keep the shower floor warm, install a “Warm Floor” electrical system under the finishing screed. It can be placed not only under the pallet itself, but also around it.
Once the waterproofing has dried, you can begin to form the pallet. You can use any brick for this – silicate or red. In order not to bother with preparing masonry mortar, you can buy a ready-made mixture.
To give the structure strength, a metal mesh is laid on the base.
Now we need to determine the location of the drain and install a drainage system to it.
Your next step will be a rough fill. But first, install construction beacons. IN cement-sand mortar At this stage you can add crushed stone.
Since the pouring area is small, you can level its surface using a spatula or trowel. The dried screed is treated with a waterproofing mixture - it will not allow moisture to get into the deep layers of the mortar and the floor slab.
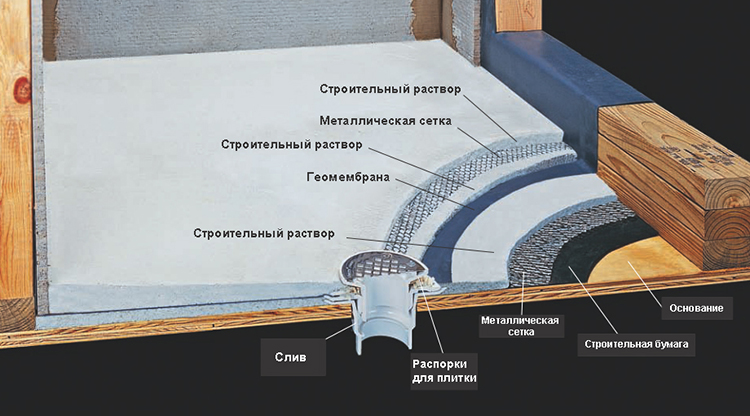
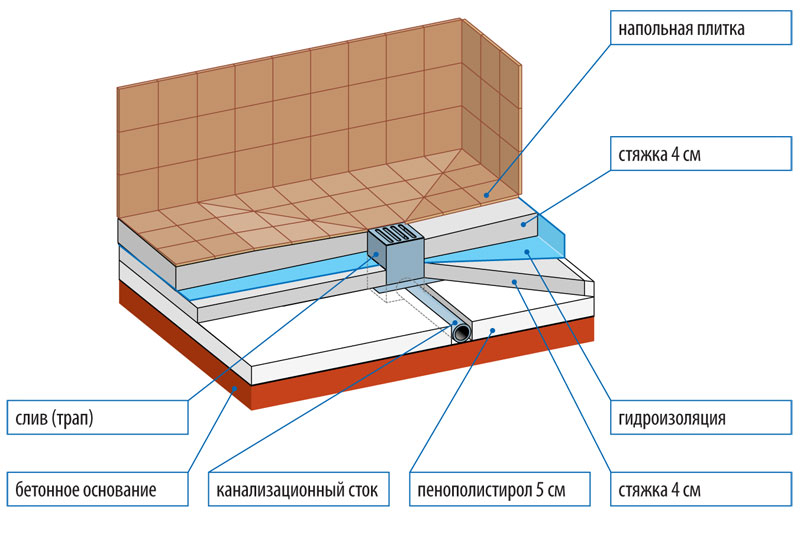
Installation diagram for shower tray and floor
- A self-leveling mixture is applied to the dried surface;
- a smooth depression is formed around the drain hole to remove obstacles in the path of drained water;
- After the mixture has dried, the final waterproofing layer is applied. Special attention in this case, it is given to the junctions of the pallet with the walls and around the drain.
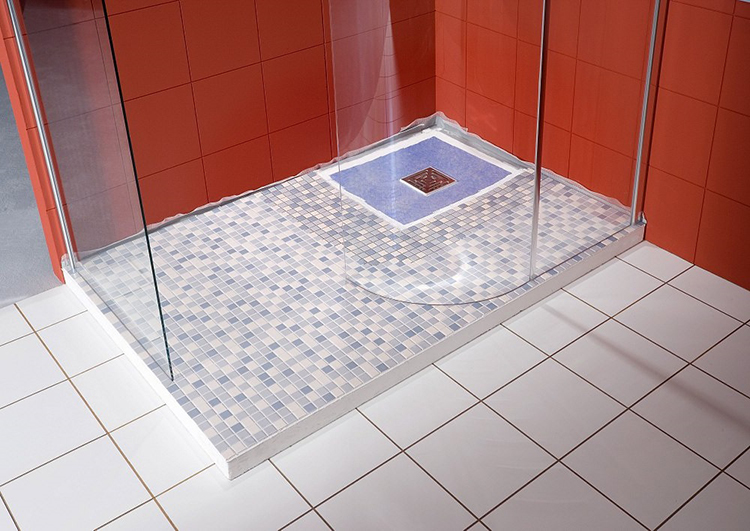
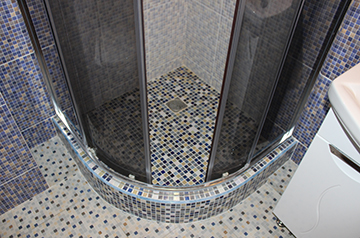
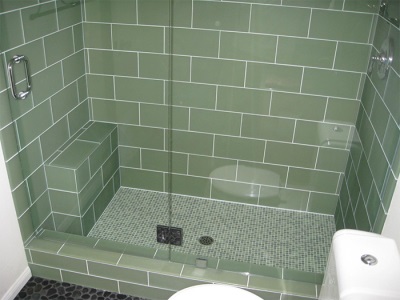
The finished structure is tiled with ceramic floor tiles. A mosaic finish can add special chic to the pallet.
Once the pan is completed, you will not have the opportunity to replace the drain. Therefore, initially choose a high quality product.
Connection to utilities
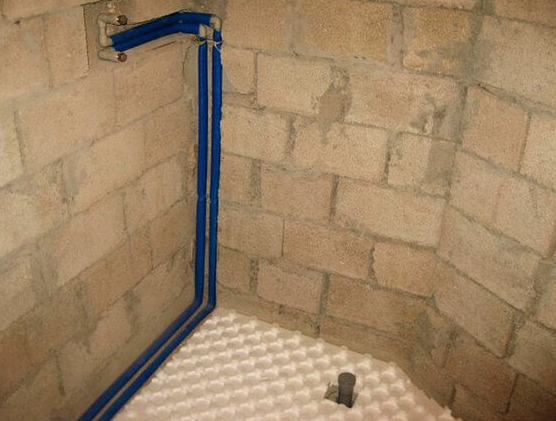
 Pipes for supplying water to the shower faucet are usually laid below - along the baseboard. But sometimes they are placed along the wall in grooves.
It is advisable to install a water purification filter in front of the mixer.
There are increased requirements for electrical connections to the shower stall. Therefore, it is better to place the wiring on the outside of the cabin.
If you plan to install an outlet in the immediate vicinity of the cabin, it must have an appropriate protection class against moisture and dust.
It is advisable to entrust the installation of the electrical part of the cabin to a professional electrician.
A warning for particularly self-confident home craftsmen: your lack of experience can negatively affect the health of your household, even leading to death.
Making shower cabin walls
The manufacture of shower cabin walls begins after final finishing capital walls. The easiest way to make it is from plastic or fiberglass.
Polycarbonate is easy to process. With the help of simple devices it can be given any shape in the home workshop.
The profile for roller guides can be attached to permanent structures through finishing. The frame is filled with wall elements after installing the door frame.
If the walls are made of transparent material, you can save on local electric lighting of the cabin.
 Installing a shower cabin requires certain knowledge. You will find basic information in the following article. — stages of installation and configuration of equipment.
Installation options hygienic shower for the toilet we will consider .
Video on the topic
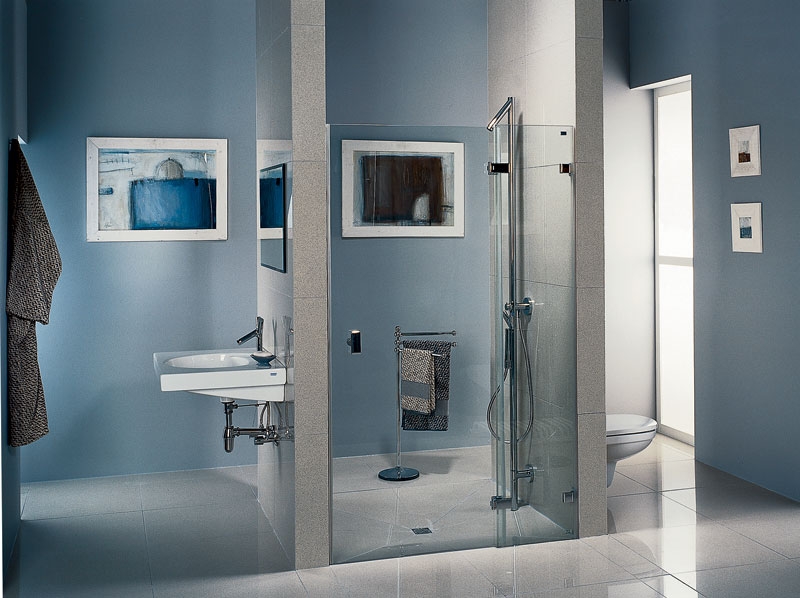
Modern interior design of a shower room dictates its own rules and today suggests using an interesting design in bathroom design instead of the notorious bathtub or shower with a tray - shower without tray.
This solution has several main advantages:
- Significantly improves the perimeter of the bathroom;
- Forms unusual design premises;
- Provides exceptional ease of adoption water procedures(this especially applies to people with disabilities, children and elderly residents of the house);
- Simplifies the procedure for arranging a bathroom;
- Facilitates the process of cleaning the bathroom;
- Saves money from the family budget.
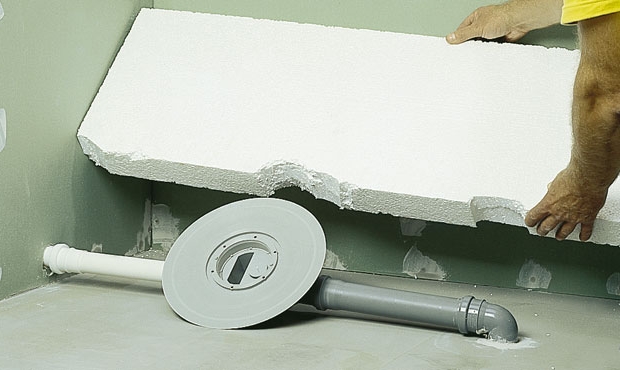
A distinctive feature of this shower is the complete absence of a high tray. In this case, the outflow of water coming from the watering can is carried out through a drain installed in advance in the floor (hereinafter referred to as a drain).
Important: Installation of a shower cabin without a tray should only be carried out after careful design. Since installing a ladder requires at least 15 cm floor height, starting from concrete screed to decorative flooring. This makes it much more difficult to install a shower without a tray in an ordinary apartment. Or it requires raising the floor level along the entire perimeter of the housing.
Disadvantages of a shower cabin without a tray
Before deciding to install a shower stall in your home, you need to carefully weigh the pros and cons. So, in addition to quite significant advantages, a shower stall without a tray also has several disadvantages.
The main ones:
- Improper installation of the drain and, as a result, accumulation of water on the shower floor;
- The release of collected water outside the shower stall when the shower doors are opened;
- Possibility of flooding of neighbors below;
- Failure of the underfloor heating system (possible injury to household members as a result).
- Unpleasant odor in the shower due to improper installation of the siphon.
Important: taking into account all the listed disadvantages, it is recommended to entrust the installation of a shower without a tray, a photo of which you can view below, to a competent specialist. Or take a very careful approach to performing all calculations.
Shower drain (drain) of a shower cabin: types, options
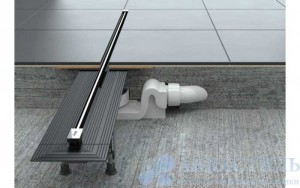
The first will be optimal for a private building, since it requires space for its competent and reliable installation. The second (horizontal) is most in demand in small apartments, where the connection to the sewer is carried out along horizontal lines, taking into account a slight slope towards the drain due to lack of space in the floor.
The wall drain is the easiest to install, with enough wide choice options for its height installation. In addition, the throughput of such a ladder is 41 l/min, which makes it much more expensive in contrast to its fellow ladders (about 400 USD).
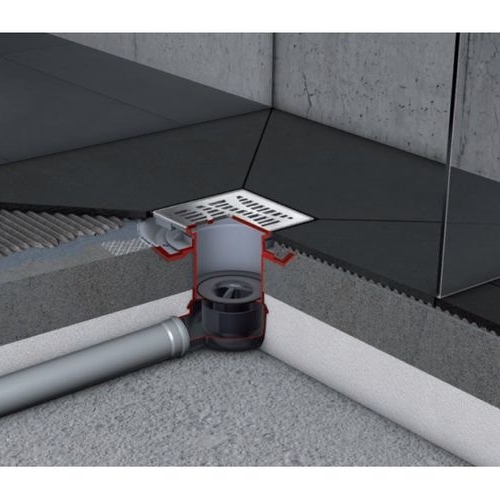
A standard shower drain kit consists of the following elements:
- The ladder body itself;
- A steel flange that reliably connects the drain body with the waterproofing layer in the floor;
- Drainage ring (designed to safely drain water into the sewer in case of damage to the waterproofing layer);
- A siphon, the kit of which includes a mechanical and dry seal, as well as a water seal (the latter prevents unpleasant odors from the sewer into the shower room);
- Decorative grating of the ladder.
In addition, shower drains are distinguished by shape:
- A regular shower drain, round or square in shape;
- Tray ladder (elongated structure).
When choosing a drain for a shower without a tray, base it on the amount of water that the water supply system will produce while taking a shower. Thus, a regular shower drain is capable of draining a much smaller amount of water, unlike a tray drain.
The throughput of the drains varies from 8 to 16 l/min depending on its shape. The wall drain is capable of draining up to 41 l/min of water.
In addition, you should give preference to a high siphon. This will allow for a much greater slope of the pipes to the side sewer drain and, accordingly, high gangway capacity.
It would be ideal to have a mechanical valve water seal in the siphon. This will prevent leakage unpleasant odors from the sewer to the shower room.
Important: regardless of the type of ladder and the method of its installation, such a mechanism provides a normal reaction to sufficient high temperature water (up to 85 degrees Celsius). This will not damage the ladder in any way, but will significantly reduce the possible load on it to 150 kg. Therefore, pouring down the drain is too much hot water Not recommended.
Arranging the floor in a shower stall without a tray with your own hands
You can set up an area for taking water procedures in your home with your own hands without the help of a specialist. The main thing is to take into account one main feature and strictly adhere to it: the floor in shower corner without a tray, it must necessarily have a slight slope towards the drain
Otherwise, the water simply will not flow from the shower into the sewer.
So, if you decide to install a standard drain in the center of the shower stall, then you need to slope the floor on all four sides towards the drain. It is enough to form a slope at a slight degree.
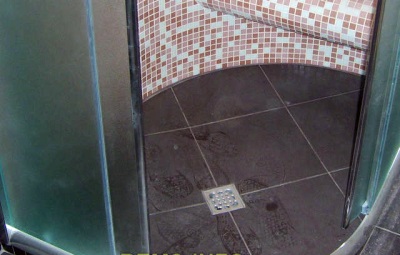
Laying tiles on such an uneven floor, subsequently it should be done by cutting the material diagonally. And the tile itself is mounted from the drain to the stall doors and its walls at an angle. Ideal option For such a floor there will be a tiled mosaic.
If you decide to use a ladder tray, in this case it is enough to make a slight slope towards the tray. This floor can be easily covered with tiles.
Important: when finishing a shower stall without a tray, you must first tile the floor, and only then the walls. This is done so that the vertical wall tiles cover the horizontal tiles below. The resulting wall seam (as well as the joints between the floor and the drain) must be treated with a waterproof material.
The procedure for installing a shower without a tray with your own hands
If you don't know how to make a shower stall without a tray yourself, the instructions below will help you.
Stage one
In order to make a shower stall with your own hands without a tray, you need to take into account the floor itself to the sewer by at least 1 degree. To cleaned and prepared concrete base it is necessary to apply a layer of waterproofing mastic. In this case, it is necessary to raise the level of application of the product from the floor along the walls to a height of at least 25 cm. This will provide additional insulation of the screed from moisture.
Now we install t in the intended placerap or tray. To do this, you must first install the ladder and its supports strictly according to the instructions. Connect all communications (siphon, drain, pipes) together into one structure and test water drainage by pouring liquid into the drain. After the water drainage system is installed, it is better to seal the drain grate self-adhesive film to prevent construction dirt and debris from getting into it.
On open spaces it is advisable to lay a layer of floor foam plastic(expanded polystyrene) plates, at least 4 cm thick. Such material will act as an insulating and shock-absorbing pad.
The level of inclination of the foam plastic to the drainage point is constantly controlled using building level. We fill the remaining gaps between the communications and the foam with a sand-water mixture. We carefully tamp, leveling the level of foam and sand. We leave this design until it hardens for 3-4 days.
Important: when installing the drain, constantly monitor the slope of the pipe towards the sewer drain.
Stage two: waterproofing a shower without a tray
 Before making a shower without a tray completely attractive, it is necessary to ensure its absolute sealing. This will ensure possible flooding of neighbors below.
To carry out sealing in the shower, you need to treat the previously laid polystyrene slabs again with sealing mastic. And again grab a section of the walls from the floor up.
Place a continuous sheet on top of the applied layer of product. waterproofing material(fiberglass or roofing felt). Its edges should extend onto the walls from the floor to a height of at least 25 cm.
Important: when installing waterproofing material in the corners, do not cut the film under any circumstances. It’s better to just bend the waterproofing at the corners and press it well. Can be placed on glue. Otherwise, the cuts will begin to let water through over time, which will lead to subsequent destruction of the entire structure.
Stage three: concrete screed and fine finishing shower
 We once again cover the half-assembled floor with a concrete screed about 4 cm thick. Do not forget to take into account the slope of the floor towards the ladder. It is recommended to lay strips intended for tile seams on the concrete screed. This will allow concrete floor respond well to temperature changes without cracking.
All that remains is to finish the floor and walls of the shower with ceramic tiles or mosaics. All seams are carefully covered with a waterproofing agent (film or silicone).
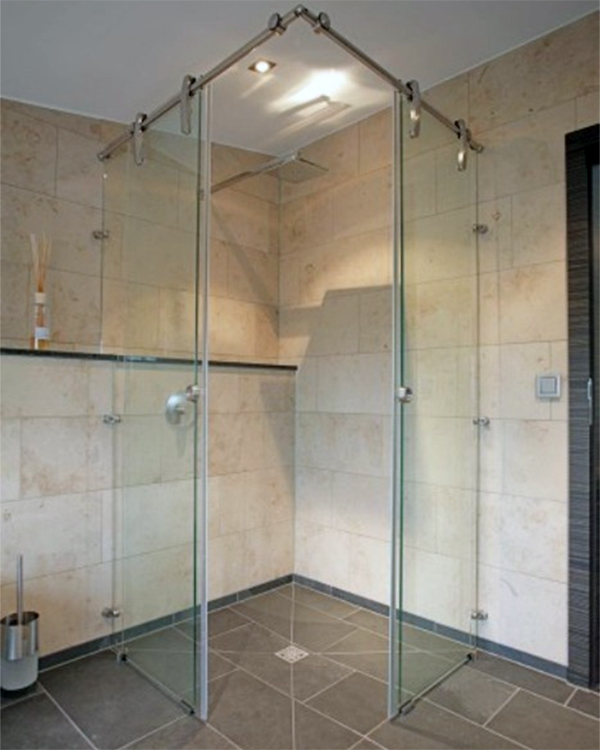
Now all that remains is to install shower enclosure without tray. What it will be is up to you to decide. Options you can use:
Brick or cinder block a partition decorated with tiles or mosaics;
Glass doors, installed at right angles or having a rounded shape.
At the same time, it is worth knowing that today there is enough a large number of The company produces a wide variety of shower wall options without a tray. As a rule, this is reinforced glass with a thickness of 6 to 12 mm, which does not leave streaks, drips or stains. In addition, such walls can be made in transparent, light, dark or matte versions.
Any watering can be used as a watering can. modern design of your choice.
Good luck with your work and enjoy your water treatments!
This will require skills in plumbing installation and tiling. But even a novice builder can cope with a simple shower on a finished pallet. The main thing is to correctly assess your capabilities.
Of course, it is much easier to plan a future shower room in a house under construction. In this case, imagination is almost unlimited:
- construction of a shower room with a sloping floor;
- device for a tray “recessed” into the floor;
- installation of a monolithic pallet with a side;
- installation of a finished pallet;
- connection of a modern shower cabin.
So, to organize a sloping floor, even at the construction stage, its level must be made lower than the floors in the remaining rooms by at least 10-15 cm. The same applies to a shower with a tray, the edges of which are located at floor level - so that you do not have to make a threshold into the bathroom.
If you need to re-equip a shower room in a finished house, but it is not possible to dismantle the floors, you will have to limit yourself to only the last three “floor” options. Their advantage is undoubtedly - such a shower can be made with your own hands, even without professional skills.
Features of piping in the shower
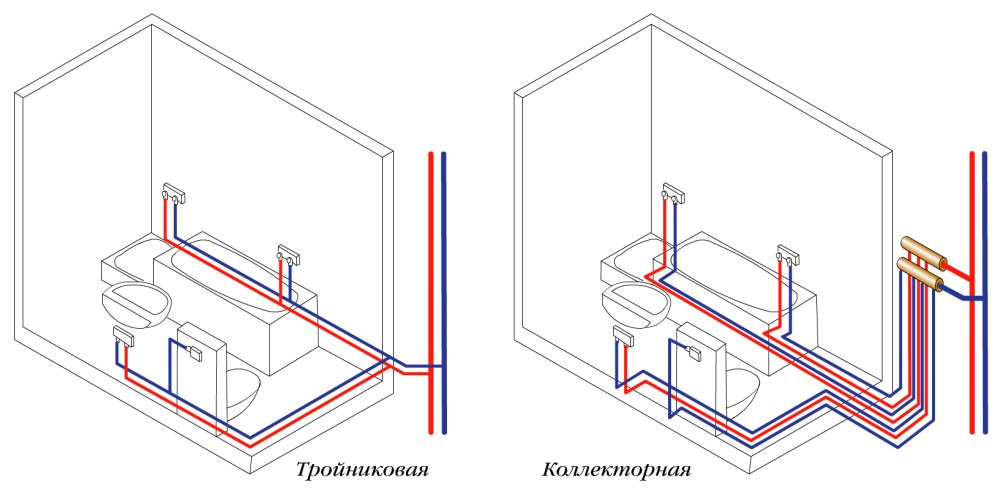
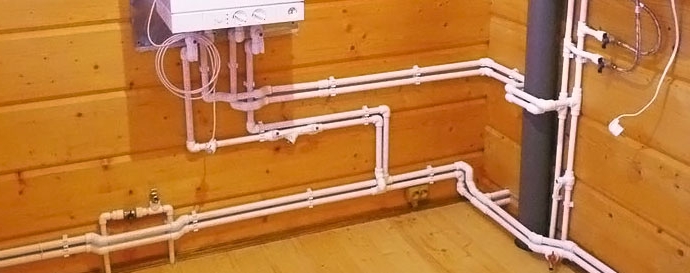
The second method is much more complicated - first the water enters the collector, and from it separate pipes go to each object - sink, shower, toilet and other appliances. This solves the problem of pressure drop when several water intake points are turned on simultaneously.
Do it right without special skills collector system it won’t work, that’s why in self-built houses they use a serial connection. And to prevent boiling water from pouring out of the shower when filling the washing machine, it is enough to use pipes of different diameters - 3/4" for the common pipe and 1/2" for connecting appliances.
Another important point– organization of drainage from the shower. When choosing a siphon, you need to decide in advance:
When choosing a place for a shower, the distance of the sewer connection is important - if it is more than 3 m, you will have to do deaeration to remove the air coming with the water.
Waterproofing and ventilation of the shower - what to pay attention to
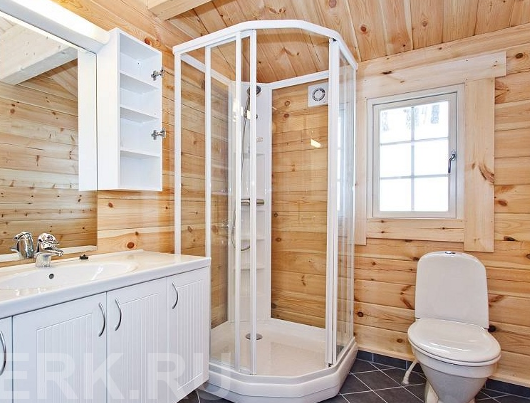
Organizing a shower even in wooden house– no problem thanks modern materials and solutions. So, you can level and protect the walls with moisture-resistant plasterboard with mandatory gluing and puttying of the joints. The sheets should not reach 0.5-1 cm from the floor. If the walls are concrete or brick, you can immediately begin finishing them.
The waterproofing is applied to the screed and should cover the entire floor, extending onto the walls at least 15 cm. The walls in contact with the shower are also covered with waterproofing.
It can be either mastic or built-up roofing material. Special attention should be paid to the outlets of pipes and electrical appliances. At the junction of the walls and floor, as well as at the corners, an additional sealing tape is glued, the edges of which are also rubbed with mastic.
But proper organization waterproofing the shower is only half the battle. Constant high humidity, even if it has no effect on facing material, can ruin the most modern bathroom. Therefore, forced ventilation should be provided at the planning stage.
The direction of air in the ventilation shaft, if it affects and living rooms, should be from “dry” rooms to “wet” ones - the bathroom and kitchen. Otherwise, constant dampness in the bedroom will be ensured. At the same time, it is advisable to do the hood even if there is a window - in the cold season it is hardly rational to constantly ventilate the shower room.
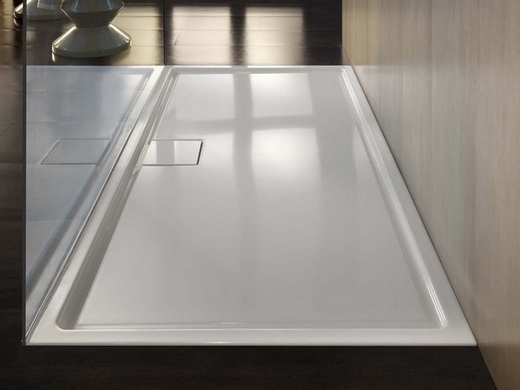
Shower with a ready-made tray - a simple and aesthetic solution
Installing the tray is extremely simple - just follow the instructions. Steel and acrylic pallets, in most cases, are equipped with special legs. But even in this case, it is better to place the pallet on a monolithic base with a support in the center - so that it does not sag or move.
The installation process includes five steps:
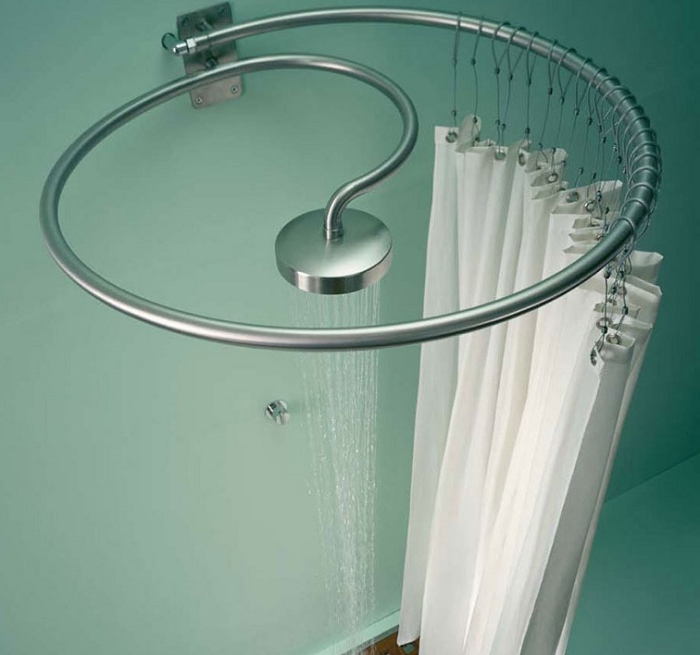
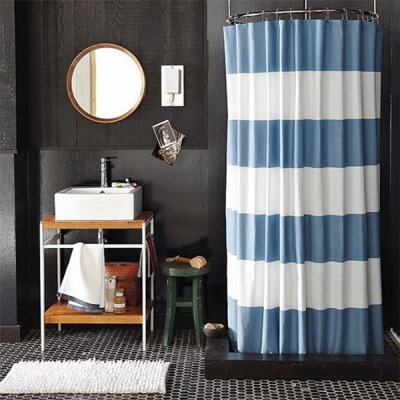
To simplify installation, instead of installing glass screens, you can attach a curtain bracket. To add originality to your shower, you can use non-standard brackets - oval, semicircular or even spiral.
How to make a shower without a tray
A shower without a tray looks very stylish. Such a shower in the house is convenient for children and the elderly, as well as for bathing pets. The absence of a curb is compensated by the correct slope for draining water, so you don’t have to worry about complete flooding of the bathroom.
The process of organizing such a shower is also quite simple, although it takes a lot of time:
To avoid screeding the entire floor twice, you can make a shower with a border. To do this, bricks are laid along the desired contour, and the whole process is repeated, but only in the space limited by the curb.
How to make a shower with such a tray with your own hands is very clearly shown in the video:
Many of us dream of a shower cabin, but not everyone can make their dream come true, because a shower cabin or hydrobox is not a cheap pleasure. Prices for models of more or less acceptable quality start from several tens of thousands of rubles. In addition, not every bathroom has room to place a shower in addition to the bathtub.
There is one great solution to this problem - you can build a shower stall yourself. Even using expensive ones Construction Materials, you will spend less money than for a ready-made shower cabin from leading manufacturers, and there is no point in buying another one, since cheap models quickly fail. As a result, you will receive a shower cabin that meets all your requirements: shape, size and equipment. You will be confident in its quality characteristics, and it will serve you for many years.
Shower cabin: all the pros and cons
If your bathroom size allows, you won't have to choose between a bathtub and a shower, so you can enjoy the benefits of both fixtures. If square meters dictate their conditions, then, in order not to make a mistake with the choice, we suggest considering all the advantages and disadvantages of shower cabins. This will help you decide whether you are ready to trade your traditional bathtub for a modern shower stall.
Proponents of shower stalls usually make the following arguments:
- For people leading an active lifestyle, a shower cabin seems to be the most the best option. It allows you to perform hygiene procedures literally on the run, without being distracted by restricting movements, high sides and curtains that constantly strive to stick to a wet body.
- If there are elderly people in the house, then it will be much more convenient for them to wash in the shower, especially if you install a bench there. Entering and exiting the shower stall will not be difficult for them. But grandparents often need help to overcome the high sides of the bathtub.
- The shower stall is usually a more or less enclosed space and therefore warms up faster than the entire bathroom. You can warm up the cabin simply by running warm water for a few minutes, and then, already at comfortable temperature You can begin hygiene and cosmetic procedures.
- The shower cabin occupies less space than a bath. On saved square meter you can install a bidet, washing machine or closet. In addition, a beautiful shower cabin, no matter whether purchased or made by yourself, can become a real highlight of your bathroom.
Opponents of shower cabins point to the following disadvantages:
- For many people, taking a bath is a real ritual, which is accompanied by fragrant foam, oil, candles, pleasant music and even champagne. Not everyone is ready to give up this pleasure, which helps fight stress and fatigue.
- Little children love to splash in the water. Rubber toys and special bath paints can keep them occupied for a long time. Unfortunately, such entertainment is not available in the shower stall.
- The bathtub is convenient for washing large items that do not fit in washing machine or clothes that require delicate hand washing. Of course, there are showers with deep trays that partially solve this problem.
- Installation of a finished closed cabin does not require preparatory work, but if you decide to make a shower stall with your own hands, you will have to take proper care of the waterproofing.

Selecting the installation location and shape
In principle, a shower cabin can be installed anywhere in the bathroom, but only if you have started planning the decoration of the room final stage construction when sewer pipes have not yet been installed. In this case, you can install the sewer system at your own discretion, based on the location of the plumbing fixtures. If you just decide to replace old bath on the shower stall, then you need to install it as close as possible to the sewer riser, that is, in place of the bathtub. Of course, you can extend sewer pipes yourself, but this is not always possible and, moreover, unsafe.
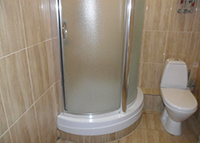
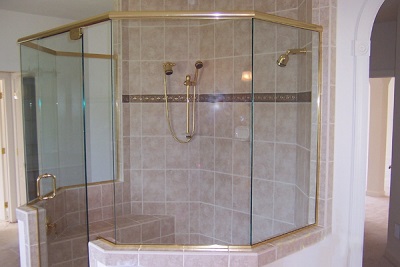
As for the shape of the shower stall, it will entirely depend on your skills in construction and repair. It is better for novice craftsmen to choose a rectangular or square cabin. This cabin can easily fit into a corner, so you will need less construction work and materials. For more advanced renovators, we can recommend a round-shaped or even shell-shaped shower stall.
Deciding on a pallet
There are two options for the base of a homemade shower stall.
This is the simplest and most obvious solution. You won't spend a lot of time and effort installing it and, moreover, you won't have to bother with waterproofing the floor.
One “but”: a high-quality shower tray will cost you much more than a home-made floor, and there is no point in buying a cheap, low-quality option. The most popular are acrylic and earthenware shower trays. They look great and retain heat well, but they are quite fragile products.
Cast iron pallets are stronger and more durable, but due to their weight they are gradually falling out of use.
The best option– these are shower trays made of quarry or artificial marble. They combine wonderful appearance and the thermal conductivity of acrylic and earthenware with the strength and wear resistance of cast iron. But for such an acquisition you will have to pay a fairly large amount of money.
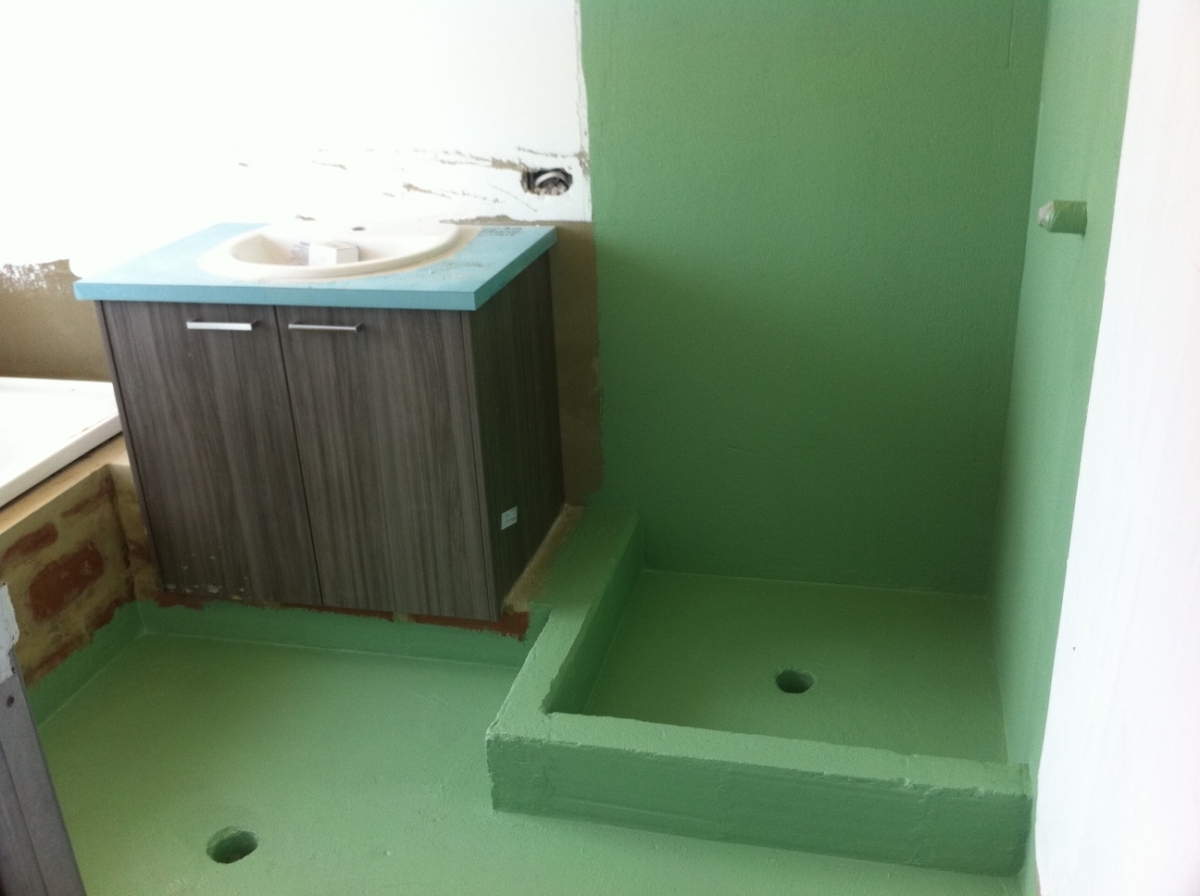
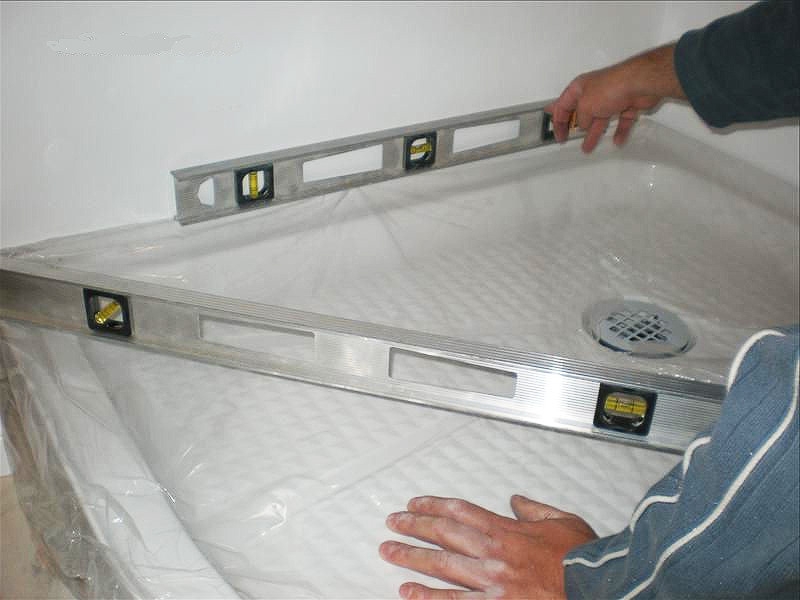
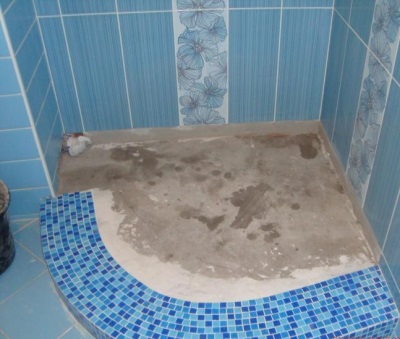
Sloping floor
This is a more reliable, but also more labor-intensive solution. It involves creating an uneven floor in the shower stall with an angle of inclination along which the water will flow into the drain. You can make such a floor yourself by knocking a few centimeters of the floor from the walls of the shower stall towards its center. Then the floor is laid with non-slip tiles, maintaining a slope. It is important to add a special composition to the tile adhesive against the formation of fungus and mold. Treat joints with walls with bathroom sealant.
![]()
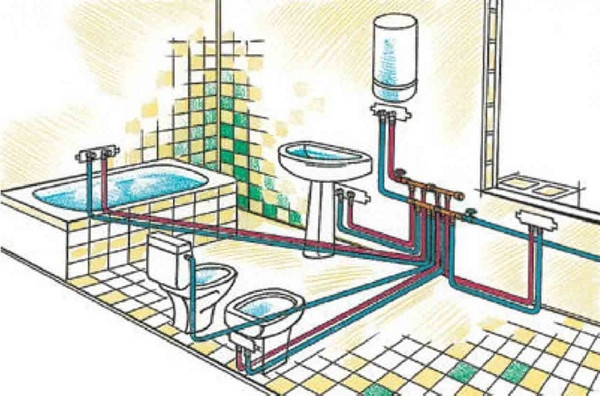
Connection to water supply and sewerage
An important part of creating and installing a shower cabin yourself is connecting it to the sewerage and water supply systems. In order to do this correctly, be sure to consider the following points:
- To connect the shower cabin to water pipes you need to use special flexible hoses. Choose hoses that are slightly longer than necessary.
- The pipe that connects the drain to the sewer should run at a slight angle. In the future, this will protect the drain from clogging.
- A sump pump is necessary if the shower stall is located far from the sewer riser.
- To prevent the shower stall from flooding, install pumps with magnetic valves.
- To prevent water from accumulating in the pan, select the position of the siphon so that it is above the drain.
- Sewer pipes must pass below the level at which the drain siphon is located.
- When connecting the shower stall to the water supply, be sure to use sealing gaskets and, if necessary, silicone sealant.
For information on how to install a drain into the floor, watch the following video.
Electrics
If you are not going to equip your shower stall additional functions, such as hydromassage, steam bath or sauna effect, then you will only need electricity to organize lighting and forced ventilation(using a fan that is powered by electricity). Close contact with water implies increased safety for electrical appliances. It is better to conduct electrical wiring along the outside of the shower stall. Don't forget to install a residual current device that will protect electrical network from overloads. If there is a socket next to the shower stall, make sure that it has the appropriate class of protection against moisture and dust.

If possible, it is better to entrust the electrical wiring to a professional electrician in order to be confident in your own safety and the safety of all family members.
Finishing materials for walls and floors
The best option for finishing the walls and floor of a shower stall is tiles. You can install it on the walls plastic panels, but this is only a temporary and not very reliable solution. For walls you can choose any ceramic tiles– with or without a pattern, glossy or matte, flat or embossed. It all depends on your preferences and the rest of the bathroom interior. Looks great in the decoration of shower cabins - mosaic covering.
With choice facing tiles For the floor, you should be careful: it is easy to slip and fall on smooth tiles, and tiles with an overly embossed pattern can cause calluses and microtraumas on the feet. To protect yourself, place a special rubber mat on the floor of the shower stall.
Equipment
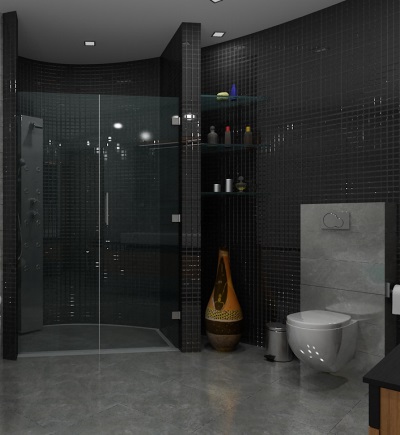
Having finished with the main components of a homemade shower stall, you can begin to resolve minor issues. First of all, it is necessary to resolve the issue with additional walls of the shower stall. Someone can do without them, but in our opinion this is not entirely convenient, especially if the apartment has a combined bathroom. a budget option- this is to close the shower stall with ordinary bath curtains made of waterproof material. However, in order to give the shower stall a truly beautiful and finished look, we recommend installing transparent doors.
Shower doors are usually made of glass, fiberglass or acrylic. Glass sashes are, of course, beautiful, but extremely impractical, because they can crack or even break even after a slight blow. Of course you can buy strained glass, but it is expensive. It’s the same story with fiberglass – for our purposes it is not strong enough.
Plumbing equipment: faucets, shower heads, etc. are installed at the stage of connecting the shower cabin to the water supply. There are several options for shower heads - with a hose, static, which is attached to the wall and ceiling. For greater convenience, we recommend combining two types of shower heads, for example, a regular one with a hose and a ceiling one for a tropical shower procedure.
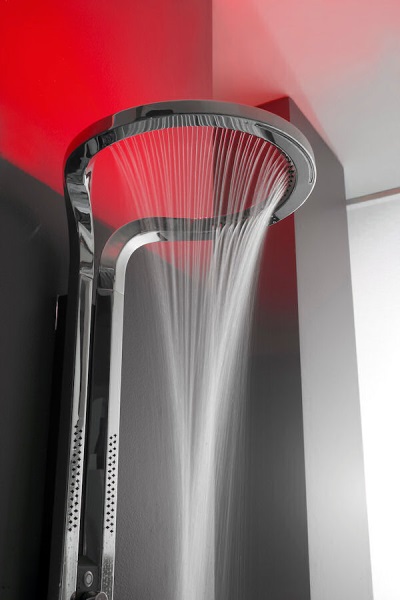
A shower cabin is needed not only to keep the body clean; it can also be used to carry out procedures that maintain health and beauty. In a large plumbing store, look in the department that sells equipment for shower stalls. There you will find hydromassage panels, devices that create the effect tropical shower or Charcot shower, steam generators, equipment for sauna and infrared heating.
If you do everything correctly, the shower cabin you created with your own hands will become a source of pride for you, as well as an object of admiration and envy for your guests.
How to install a shower cabin in a private house? The task is not as difficult as it seems at first glance.
Moreover, they usually ask for good money for installing a shower cabin, and by doing this, you will not waste your family budget.
However, even here there are tricks, subtleties and secrets, adhering to which you will get a good result.
Before you install a shower cabin in a private house with your own hands or make right choice When purchasing in a store, you need to familiarize yourself with their structure. This way you can do everything without making mistakes that you may regret in the future.
The shower cabin consists of four main parts:
- Pallet
- Fencing
- Back surface with equipment
- Ceiling with equipment
It is also common to see a folding seat. However, more often the seat is non-removable and is an element of the pallet.
The shower ceiling can also be used for laying communications. Often on ceiling panel lighting and electrical equipment are located. In most cases, a cascade shower is located at the top of the cabin.
Plumbing and electrical requirements
The plumbing for the shower must meet the requirements for sewerage and water supply.
The sewer system must have a diameter no less than that required in the instructions for the cabin, and must have a slope from the drain hole in the cabin of at least 10 degrees.
If this requirement cannot be met, before installing the cabin it is necessary to make a platform on which it will be placed to ensure a slope to the drain hole into the main collector.
This is important for those who want to install a shower stall on a wooden floor.
The water supply, as already mentioned, must meet pressure requirements. In addition, the cabin may have temperature restrictions for hot water.
For example, some models are designed for operation at water temperatures no higher than 50 degrees, and water in hot pipe some apartments and private houses can reach 80. Try to take this into account - you may have to install a separate heater or choose another cabin.
The water supply must be equipped with a shut-off ball valve before entering the cabin - if a problem occurs and water leaks, so that it can be quickly shut off without leaving far from the cabin.
The power supply to the shower cabin is usually done from a 220 volt household power supply. All wiring must be made with increased requirements, wire that allows installation in wet conditions.
The transfer case must be located outside the bathroom or outside the room in which the cab is located. Protective grounding is required.
It is also prohibited to equip sockets in the bathroom to which the cabin is connected using a plug - the connection point must be located outside the bathroom. The cabin must have a separate RCD circuit breaker.
Preparatory work
Before installing the cabin in, you should think through all the small details.
It is highly advisable to do the installation before laying tile– it is possible that separate communications will have to be laid inside the wall.
If the calculated slope to the cabin plumbing pipe it turns out less than 10 degrees - they make a platform for the cabin.
It can be laid out entirely on a reinforced concrete floor, or a special elevation can be made on a wooden one from a sheet of plywood laid on beams.
Install electrical wiring and lay pipes approximately up to the cabin, install water sockets. The water connection to the shower cabin is carried out through water sockets using flexible hoses. The length of the eyeliner can be quite large - up to one and a half meters.
The cabin should fit snugly and stand clearly on the floor horizontally. Therefore, if the walls and floor are not level, they must be leveled before installation.
If the cabin is placed in a corner, this angle must be exactly 90 degrees; it is checked using a square and leveled, if necessary.
It is not necessary to level the entire length of the wall - you can level only the place where the cabin will stand, and make a step flush with the cabin in place after its installation. This will make it easier to hide the difference with finishing.
Installation of a shower cabin
To directly install the shower cabin you will need a minimum of tools:
- Set of screwdrivers with different heads
- Wrenches – box and internal hexagon
- Level, tape measure, ruler, marker and square
- Caulking gun and
- Plastic cutting knife
- Drill and drill bits
You may need some other tool - it depends on the design of the cabin itself.
Installation begins by assembling the pallet. To do this, the pallet is turned over and the lower casing is attached to it. Then the lower part of the frame and legs are secured to the pallet using complete units and parts.
The design and fastening scheme may vary - just follow the assembly instructions. The frame bolts are tightened gradually - according to the snail rule or against each other one by one.
The pallet is then turned over and placed in place. At this stage, you can think about how your drain will go. Most often, you have to cut holes for water and sewer pipes on the side of the bottom casing of the pan.
This is possible if the pallet has a large depth - if it is almost flat, you will have to spread communications throughout the thickness of the wall. Usually, for a flat pallet, you have to place the cabin on a pedestal; communications can be brought from below through the pedestal directly under the cabin itself.
The pallet is pre-aligned in height. If there is a vertical frame in the cabin structure, secure it. Then begin fastening back wall.
All functional elements are pre-attached - watering cans, water sockets, control panel terminals and speakers. They are connected using standard connections, then, after installing the casing, they are connected to the main water unit of the shower cabin.
At this stage, you can connect the water and check performance at low pressure. It is advisable to seal all holes, especially around the edges, with plumbing sealant - this is necessary to prevent water from leaking.
After installing the back wall, install the shower doors and glass. Installation is carried out in accordance with the instructions; fixed elements are coated at the seams with transparent plumbing sealant before installation. In accordance with the instructions, guides, rollers, latches and seals are installed.
Lastly, the cabin ceiling is installed. Perhaps the ceiling will have a casing that can be cut flush to the ceiling itself. Typically, such a casing comes with a plinth that covers the gap between the casing and the casing. Connect the electricity and check the functionality of all electrical systems.
You can watch the video on how to install a shower stall yourself: