Today, not only exotic souvenirs are relevant, but also ingenious crafts created at home from scrap materials. Original decoration for any room - a floating cup with money. This beautiful accessory can be made with your own hands quite quickly and without difficulty. Moreover, a minimum of costs will be required. The main thing is to know the technology and principle of fastening parts. It’s worth taking up this task right now, and after a while you’re guaranteed to get a magical composition that looks like a container hanging in the air, from which a stream of coins flows endlessly.
Materials for a flying cup with a coin waterfall
To make your own miracle cup with coins, you will need the following items:
- a suitable saucer that will be located at the bottom of the structure, acting as a stand for the coin waterfall;
- a mug from which, in fact, the cash flow will pour out;
- when creating a frame for money, an ordinary table fork is indispensable;
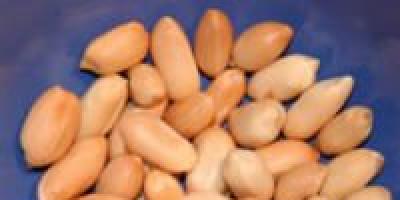
- you also need a scattering of coins, it is better if they have a single denomination and a smooth shiny surface, the money can be glued chaotically, or all turned over on one side;
- You will need a small piece of polystyrene foam and a spool of absolutely any thread - using these accessories you will need to process the fork-frame, giving it volume and a surface suitable for gluing money;
- for the best fastening of all components, it is advisable to use Moment brand glue marked “universal”, it securely fastens different materials between themselves and shows the maximum long-term durability of connections;
- You must have a glue gun; it can be purchased cheaply in a store with the appropriate assortment;
- among other things you will need final processing quick-drying gold-colored enamel is ideal for this; this material is sold in convenient small cans;
- two banknotes of any denomination, they will act as a harmonious decorative element, you can fold them arbitrarily and glue them anywhere, for example, make a money butterfly;
- strong pliers and a small piece of thin-gauge wire.


Instructions for making a floating cup with money
Now, before our eyes, an amazing exhibit is being created - a floating cup with money. Making this souvenir with your own hands is not only easy, but also indescribably pleasant. Below we will describe step by step the actions that a needleworker must take if he decides to take on the creation of a wonderful waterfall.
Stage No. 1 - bending the fork
Armed with pliers, you need to try to bend the fork as shown in the photo instructions attached to this article. The secret is to have a pair of medium teeth cutlery were moved back slightly, and the outer teeth were directed slightly forward. The opposite end, that is, the fork handle, must be bent in such a way as to achieve a tight fit of this part to the stand, that is, to the saucer.

Stage No. 2 - attaching the fork to the plate with glue
So that the monolithic structure can be freely mixed and held in your hands, you need to tightly glue the prepared fork to the saucer using the universal “Moment”. After connecting the two surfaces, you must wait 2 hours.

Stage No. 3 - adding the first batch of coins
The base of the fork needs to be strengthened by gluing some money. They also need to be glued on.

Stage No. 4 - fixing the mug and adding a second batch of coins
Having placed the edge of the mug on the fork in the same way as in the attached photo, you should fix the objects and, of course, stick a certain amount of money. The glue is applied in the required quantities without skimping and is applied strictly in accordance with the instructions attached to it.
Stage No. 5 - creating a foam base with threads
By applying the foam to the fork, we create a base where the money waterfall will flow. The foam base must be tightly tied with threads to the fork, making several turns and tying a knot at the end.
Stage No. 6 - gluing the bulk of the coins
The previous two steps are optional. Using a glue gun, you need to carefully decorate the foam base with money. In the simplest version of decoration, this step can be considered the final one; all that remains is to wait for the glue to dry completely. For those who wish to create a super-attractive masterpiece, it is recommended to go through one additional step, described below.

Stage No. 7 - applying gilding to money
All coins are coated with gold paint by spraying it from a spray can. According to the advice of folk craftsmen, you should first glue unpainted coins, and only then give them a golden color, thus, the result looks as aesthetically pleasing as possible and the design is practical. To protect individual parts that you do not plan to spray with gold paint, you can temporarily apply tape. Final stage Coloring will require some effort, but the resulting creation will be pleasing to the eye.


The appearance of this handmade jewelry, without exaggeration, can be called fascinating. Having such a beautiful thing in the house, the owners notice how this item attracts attention, sets the mood for positivity and creates a feeling of celebration. An excellent use for this simple craft would be a gift to a loved one, but you can build such a structure for yourself. To each to modern man You will love the unusual floating cup with money. Anyone can make such a souvenir with their own hands. Beautiful craft, represented by a frozen money waterfall, will be a harmonious addition to the interior of your home or work.
A beginner will make a stylish topiary in a few hours. Unusual composition– a wonderful decoration for residential or office space and an unusual gift. To make it you will need patience and some materials: coffee beans, twine, glue and a number of tools that can be found in hardware store. You need to start the creative process by choosing a composition design.
Topiary"Lfeeding cups» : searching for inspiration
Coins, seashells, buttons, beads, pearls and coffee beans - the above are used to create creative crafts. When choosing a material, you need to build on your own preferences and available resources. Another reference point will be the upcoming occasion: Easter, birthday or February 14th.
Regardless of the occasion and materials chosen, topiary is initially created on paper. Unlike real materials, you can design a composition on a sheet as many times as you like. If thoughts don’t come to mind, then a master class will come to the rescue. Watching video fragments will not take much time.

As an additional means of finding inspiration, it is recommended to use:
- View thematic catalogs.
- Visiting handicraft shops.
- Watch programs about design.
- Poll of friends and so on.
After analysis various options, you can choose the one that best fits into the interior. It must be remembered that flying compositions are selected taking into account the prevailing color in the interior. Once the project is approved, work can begin. Before going to the store to buy a list necessary materials, it is better to think in advance what you will need. Regardless of the size of the composition, it is imperative to purchase a cup and saucer. It is desirable that they combine harmoniously.
How to make a beautiful topiary magnet is described in this material:
Easter topiary"Lrunning cup» with your own hands
It is more fun to celebrate a holiday when it is decorated with stylish compositions. One of the most common is the “cup of abundance.” It is performed in light colors, using shards or pebbles. Designers urge not to limit the flight of imagination. The main thing is to adhere to a sense of proportion, otherwise the composition will not stand still.
An Easter floating mug is created in a few hours.

To do this you will need the following materials:
- Painting tape.
- Shards from an old pot.
- Sisal green.
- 20-25 pieces of plastic eggs.
- Artificial roses or a set of flowers.
- 3-5 branches.
- Thermal glue.
- 3-4 small chicken figures.
- A fork that needs to be bent using pliers.
To avoid accidental damage to the dishes, the place of contact between the bent fork and the cup and saucer must be covered with tape. Carefully stick the fork with its tines to the bottom of the saucer. Glue drying time is 35 minutes. After making sure that it is really dry, you should fix the fork handle on the bottom of the cup.
When creating a composition with your own hands, you need to remember safety precautions. Immediately after securing the cup at the top, it should be supported with a thick, high box. A simple technique will not allow the composition to fall apart until the glue dries. Attention and accuracy will be needed when decorating the lower part of the composition.
It is necessary to choose it wisely - the stability of the base ensures the durability of the composition. For these purposes, decorative pebbles are used, on top of which they are laid out. Masking tape will help to disguise the fork, onto which the sisal is attached with a glue gun. Using a similar tool, the upper part of the inner surface of the mug is decorated with decorative branches.
Topiary made from money and coins will perfectly complement the interior of your home:
The design of the saucer includes decorative Easter eggs, which are fixed with a glue gun closer to the rim of the base. The eggs are laid out in such a way that the roses fit into the gaps. If desired, the composition is complemented with lace or sequins.
Coffee topiary"Lyushchand IXia mug»
Fans of the strong drink will please themselves or loved ones with a stylish interior detail. To make it you will need materials, as in the previous case. The only exceptions will be a few moments related to the main decorative element - coffee beans. You should choose them not in the market, but in the store. In this case, the special aroma will remain for a long time.

Designers do not recommend taking goods that have been lying on the counter for a long time. Such grains are heavily saturated with atmospheric moisture and odors. In order for a flying coffee composition to be truly spectacular, you will need 500 - 700 grams of beans to make it.
The further procedure is as follows:
- Choose a geometric shape for the composition: ball, heart, etc.
- Find a stick or pencil that will act as a base.
- The craft can be installed in any container the size of which matches the design.
- Mix the fixing solution in a pot and quickly insert the base of the composition into it.
- Make a hole in a pre-selected geometric shape that is used for fastening to the trunk.
- Cover the base with masking tape.
- The first layer of coffee beans is applied with the strip down, and the second - up.
For beginners, it would be useful to know that after each stage of pasting, at least 30 minutes pass before the next one begins. The specified time is enough for the glue to dry. The creative process is completed by fixing a wire that is strong in its structure on the cup and saucer. To do this, you need to bend both ends of the wire by 4-5 cm, moistening them with thermal glue.
Children's topiary"Pscreeching cup»
The flowing compositions, unusual in form and content, will delight both children and adults. Light and calm tones are chosen for it, for example, blue, orange or burgundy. As a basis, topics related to the child’s favorite animated characters, literary heroes or hobbies are chosen. Photos of finished options will give you some ideas.

- If we are talking about a girl, then samples of princesses or a fairy house are chosen as a blank.
- Boys will be easily impressed by a hovering alien flying saucer, a super hero or an airplane.
- Baby wants a pet? Then a figurine of a psi, cat or bird is taken as the basis.
How to make topiary correctly (video)
A mug floating in space is a spectacular addition to the interior and a chic gift. A beginner can do it in a few hours without any problems. Before starting work, you should decide on the design option, size and color style. After this, materials and reliable glue are selected. After finishing work and before you start using it, at least a day should pass.
Topiary for beginners (photo)


A floating cup always looks unusual and attracts attention. This topiary will perfectly decorate the interior and will be an excellent invigorating gift. In this article we will look at: how to make a floating cup from coffee beans with your own hands.
You will need: saucer, cup, newspapers, water, PVA glue, glue gun or titanium glue, umbrella needle, wire, twine, coffee beans, knitting threads.
Master Class
- Cover the saucer with pieces of wet newspaper in two layers, then glue on another 8 layers. This technique is called papier-mâché, detailed Master Class and the features of this technique can be viewed in Image 1.
- Cover the cup in the same way, leaving the handle uncovered. Image 2.
- Leave the cup and saucer to dry completely.
- After drying, remove the paper blanks from the dishes and trim the edges. Image 3 and 4.
- Cover the hole in the pen cup with newspaper.
- Insert the knitting needle into the saucer, bend it and secure it with titanium glue. Image 5.

- Glue the saucer and cup on both sides with twine in a circular motion tightly to each other, fixing with titanium glue.
- Bend the knitting needle to secure the cup. Image 6 and 7.
- Attach the cup. Image 8 and 9.
- Wrap the knitting needle with knitting threads and secure with glue. Image 10.

- Tape the knitting needle coffee beans using titanium glue, also glue them to the inner wall of the cup and the surface of the saucer. Make a handle for the cup from wire, wrap it with twine, and then glue it. Image 11.
- Lay out a twine flower, glue it to the surface of the cup, and attach a coffee bean to the center.
A steaming cup of coffee beans is ready! I recommend watching the video master class!
Floating cups are created according to the same principle. Their main difference lies in the decor. Use the most original decoration elements - flowers, beads, ribbons, sparkles, figurines and whatever your soul desires. Also view detailed master class how to create a floating cup from kanzashi flowers
An exquisite hand-made souvenir can enliven a simple office interior and decorate living room– topiary is rightfully included among such products. Previously, this was the name given to decorative trimming of tree and shrub crowns. Later this direction was embodied in making miniature “trees of happiness”, decorated mainly with natural decor - dried flowers, feathers, stones, shells.
Nowadays, topiary in the form of a bowl of abundance with a stream of coins, flowers, coffee beans and even jewelry. A floating cup as a symbol of abundance is not just original craft in Feng Shui style, but also a great gift for a friend.
Topiary “flying cup”: what can you make it from with your own hands?
The set of necessary materials always includes a pair of tea or coffee - a cup and saucer. They are connected into a single composition using thick wire or a regular fork.
To make topiary with your own hands, you will need a heat gun with silicone rods, pliers, and scissors. To give the flow of abundance a more natural form, use polyurethane foam. Paste decorative elements Foam pads on the saucer help.
Experienced craftswomen advise using glue instead of a heat gun " Cold welding"- the structure will be much stronger.

What the flying cup will “pour out” depends on the author’s idea. These can be artificial flowers and leaves, New Year's beads, moss or sisal (fiber from agave leaves) and other interesting little things.
You can imitate pouring coffee using coffee beans, cinnamon powder, or regular acrylic paint. If the floating cup is covered with lace or wrapped with rope twine, this will add zest to the product and give it a special style flavor.
Topiary “Easter Cup of Plenty”
To make a beautiful souvenir for Easter with your own hands, you will need:
- coffee cup and saucer, fork (pre-bent using pliers and a vice)
- masking tape
- shards from the old flower pot or pebbles
- for decoration, prepare green sisal, plastic eggs (about 30 pcs.), small artificial roses, green twigs with small flowers, a couple of small fluffy chickens
Manufacturing stages:

The result is a very positive, sunny floating cup. If desired, one more touch is added: the sippy cup is covered with lace - using hot glue or double-sided tape.
Topiary “Floating Cup of Coffee”
In addition to the glue gun and pliers, prepare:
- small ball of twine
- thick copper wire
- glue Moment (crystal)
- lace
- brown tape for floristry
- decoupage varnish
- Arabica coffee beans
- Pre-beat the handle off the cup
Making your own begins by covering the cup with twine, starting from the center inside bottom.
- First, roll it into a tight circle as much as possible. larger diameter, drop a little Moment into the center of the bottom and glue the folded element
- Add glue little by little and gradually wrap it with twine. inner surface, go to the outside and end with the center of the bottom. Decorate the saucer in the same sequence
- Now you need to make the handle of the cup with your own hands. From two pieces of wire, bend two identical pieces, fold them together, wrap them with tape and wrap them with twine. Glue the handle with a heat gun and let it dry well
- To make the floating cup have a unique decor, cover it in the middle part with lace or braid. First, put a wide strip of a darker color, then place a thinner light strip on top of it. Place coffee beans evenly around the circumference of the lace. Also decorate the outline of the saucer with a lace rim
- Bend the wire into a tongue shape, place the ends on the saucer, and place the bent part closer to the bottom of the cup. Adjust the bend so that the composition looks most natural. Fill in a sufficient amount of hot glue and fix the wire in the cup, after hardening, glue the wire ends to the saucer
- Wrap the wire “coffee stream” with tape and stick the coffee beans using a gun, starting from the cup and ending with the saucer.
When the topiary has completely hardened, use a brush to varnish the grains. A cup of coffee floating in the air with ever-flowing coffee is ready! In order for the aroma of your favorite drink to spread in the air, coffee should not be varnished.

The floating cup can be complemented with a mini cake made of colored foam acrylic paint. In this case, it is better not to decorate with twine, leaving the earthenware surface in its original form.
Symbol of abundance. Do it yourself in half an hour
This topiary is really built very quickly and looks beautiful. The flow of abundance is decorated artificial flowers to match the cup, with golden New Year's beads. In addition, prepare:
- thick wire in white insulation
- golden nylon tape
- aquarium pebbles to prevent the floating cup from tipping over
Manufacturing process:

This topiary can be complemented with an artificial butterfly, a beautiful rose, a delicate lily, a doll or a ladybug made of foamiran.: all this splendor will look organic among flowers and an abundance of sparkling decorations.
A floating cup with flowers is a topiary that will decorate any interior in an original way. Everyone who sees this craft for the first time immediately thinks: how does the cup stay in the air? This flying feature makes them popular. In this article we will look at how to make a soaring flying cup with flowers using the kanzashi technique with your own hands.
You will need: thin floral felt, cup, saucer, fork, foam sponges, glue gun, titanium glue, soldering iron, ruler, satin ribbons of different colors 5 cm wide, tweezers, weight (metal square or something else), decorative ornaments– stamens, microbeads, beads, butterfly...
Master Class
- Cut out felt leaves in the required quantity. There are 30 of them in this master class. Image 4.
- Cut the ribbons into squares; for one flower you will need 5 squares of the same color. Image 5.
- Form a petal by folding the square twice diagonally, then pinch with tweezers. Image 6.

- Guide the soldering iron along the marked line. Image 7 and 8. You should get a petal like in image 9.
- Turn out the petal. Image 10 and 11.

- Make 50-70 petals this way. Image 12.
- Fold 5 stamens and thread them through a bead. Image 13 and 14.
- Give the fork a curved shape and glue the fork handle to the inside wall of the cup glue gun. Then glue the fork to the center of the saucer, leave it for 10 minutes, and then apply hot glue on top. Image 15 and 16.

- Place a metal square on the fork and saucer as a weight. Image 17.
- Cut the sponge into pieces and glue them on, masking the fork, weight and making a platform for the flowers. Image 19.

- Cover the foam rubber with felt. Image 20.
- Take a bead with stamens and glue 5 petals. Make all the flowers this way. Image 21,22 and 23.

- Apply titanium glue to the core of each flower and sprinkle with microbeads. Image 24.

- Cover the saucer and the inner wall of the cup with petals. Image 25 and 26.
- Glue the flowers as shown in images 27 and 28.
The soaring flying cup with kanzashi flowers is ready! I recommend watching this video!