It is quite easy to weld two parts well if, in addition to a good electrical apparatus and a mask with an LCD regulator, good electrodes are purchased, and all work is performed on a convenient welding table. A steel workbench for welding can be purchased at a supermarket or specialized salon, but it is more convenient and rational option will make a welding table with your own hands according to individual preferences, height and arm length.
Types of welding tables
Most do-it-yourselfers are absolutely sure that you can work with a welding machine on a regular workbench or even on concrete floor. Experienced craftsmen are able to work with a welding inverter, as they say, “on their knees,” but even they prefer to work on a special table, especially if it is necessary to produce a complex spatial structure.
For work involving welding at home, four main table models are mainly used:

All tables for electric welding, regardless of the design, are made of structural steel, most often by welding or using bolted connections. On the side surface of the tabletop or on one of the legs of the table, a contact pad is cut or welded into which the zero clamp will be connected welding machine.
All that remains is to place the workpiece on the table, connect the welding machine to the network, and you can weld metal. This is much more convenient than if you try to weld a part on a concrete floor or on bricks, when the lion's share of the time has to be spent looking for a place to connect the zero clamp.
Requirement for welding table
You cannot make a welding table according to an arbitrary pattern; when choosing a pattern and design of the base, you should take into account that you will have to work with molten and spattering metal and electric arc one and a half hundred amperes. Therefore, the design must meet clearly defined requirements:
- The base and tabletop are made only from a tubular profile; the tabletop and the entire structure must be massive enough so that blows with a hammer or an accidental push or the fall of a part onto the work surface do not lead to the structure tipping over;
- Steel legs or supports must be tied with a lower horizontal strapping made of a profile pipe or angle. Thus, it is possible to avoid loosening or deformation of the structure when installed on workplace very heavy or large parts;
- The working surface is equipped with a lattice deck, through which hot slag and drops of metal freely, without ricochet, fall into a tray with sand or onto a concrete floor;
- Venue welding work must be equipped with a hood. If welding work is carried out irregularly, then metal structure made mobile or portable, for example, installed on steel wheels with rubber braiding or on rubber-coated coins.
For your information! If the welding table is planned to be used for welding work on outdoors, the supports must be insulated with getinax, rubber or any other dielectric.

If the working or welding plane is covered with a solid metal sheet, then the lower tier of the workbench can be equipped with a mesh or shelf for storing tools. In professional models of welding fixtures, cradle in the lower tier there are footrests or mounting hooks for storing electrodes, hammers, brushes and marking tools.

Welding table design
The design and layout of the workbench must be selected depending on the height of the person, the nature of the parts being welded, dimensions and weight. Most significant conditions, providing comfortable work and handling of the welding machine, the following factors are considered:
- Table height for welding work. When working while standing, the tabletop or work surface should be at the level of the welder’s belt;
- Tabletop dimensions. As a rule, for professional work selectable width and length work surface 70-75 cm. Maximum welding accuracy is achieved if the welding zone is removed no more than ¾ of the length of the welder’s arms;
- Welding table dimensions for working in a sitting position, it can be copied from a regular home stool or chair, but in this case the device must be equipped with a protective screen at a height of 70-80 cm to avoid sparks and hot slag getting on the worker’s legs and clothes.
Welding and assembly tables
Workbenches and tables used for simultaneous installation, assembly and welding work are conditionally excluded from the general range of welding equipment. Conventional tables, stands and workpiece holders are made, as they say, in the format of a bedside table; a small square tabletop provides convenient access to parts from any side.

In terms of dimensions and table top structure, welding and assembly tables are closer to metalwork benches.
The working surface is made of thick sheet metal With drilled holes for installation of clamps, mounting clamps or measuring tools.
On the tabletop can be located additional accessories to fix workpieces, for example, when carrying out welding work on voluminous parts made of thin rolled products, it is necessary to install holders on the table, base plates, tripods that provide reliable retention of welded edges until the end of assembly work.
Rotary welding table
The rotary workbench looks more like part of an industrial welding equipment. The working surface is made in the form of a solid metal disk with a fireproof heat-resistant coating, raised above the table frame. The free outer edge of the disk allows you to fix the parts to be joined anywhere on the welding fixture.

As a rule, special beacons or markings are applied to the tabletop, allowing the axes of rotation to be aligned as accurately as possible and to avoid beating of the weld during the rotation of the part. This is the most difficult option welding fixture, but sometimes you simply can’t do without such a table. For example, if you need to weld a circumferential seam on a cylinder, the round body of a potbelly stove, connect the workpieces of two steel pipes wires In this case, the welding table must be equipped with a rotary belt drive. By rotating the tabletop, the welder can weld a heavy seam without changing his position relative to the fixture, which is very important for ensuring high quality welding.
Simple table for welding work
The simplest version of the table can be made according to the diagram shown in the photo. The base of the frame is welded from two sections of I-beam No. 70. Legs 60-65 cm high can be made from a square profile pipe. To make a tabletop, you will need ten meters of I-beam No. 50 or five profile pipes 40x60 mm.
The pipe is cut into two halves with a grinder along a short edge, ground and welded onto the finished frame.

The result is a very reliable and convenient welding table on which you can perform most welding works.
Semi-professional welding table
To perform welds in products over high level you will need a welding table of a more complex device. One of the models of modern devices is shown in the photo. Structurally, the table differs from any other only in the presence of height-adjustable supports and a special table top.

The working surface is made of perforated lamellas. A set of steel angles will ensure reliable fixation of even the most complex product configuration on the welding table.

Required tools and materials
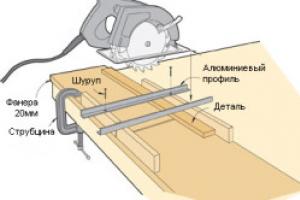
To make a full-fledged welding table, you will need a 70x70x3.5 mm profile pipe, a set of roller supports and a sheet of thick metal. Tools required welding inverter, table saw for cutting metal and marking tool.
You can also cut metal using a manual grinder, but you won’t be able to get the much-needed perfectly right angle of cut, so you will have to cut the profile pipe and tabletop strips using a table saw or stationary saw.
Welding table drawings
The design of the welding table consists of two main parts - the support frame and the table top. The frame can be made from a channel or pipe; if the welding table is supposed to be made mobile, then it is best to use a profile pipe or a steel angle.
The frame of the welding table is reinforced in the lower part with an H-shaped frame made of a profile pipe.
For stationary welding tables, it is best to install the tabletop and protective box on a brick frame. Most unusual options a welding table in the form of a folding structure or a folding table mounted on the wall of a garage or workshop.
Most often, for a regular garage or workshop, a welding table is made with a sheet metal top. In this case, it can be used both for welding and plumbing or repair. Therefore, the corner zones of the working plane are used for installing metalwork yews, devices for cutting and drilling metal. In fact, the best option welding table for home work is a combination of a workbench for metalwork with small additions for connecting a welding machine.

Making a welding table
The process of making a table begins with cutting the purchased square pipe. The frame and frame of the table are made of a square pipe 70x70 mm. Whether the entire structure will be sufficiently stable depends on how accurately the cutting and assembly of all frame parts is carried out.

Table legs
The first four pieces of 80 cm square pipe cut will be used to make support stands or legs for the welding table. Pre-pipe blanks are assembled on a steel plate into one package, trimmed and trimmed so that the length of all legs is maintained to the nearest millimeter.

The supporting part of each leg must be equipped with a thick metal plate on which the swivel wheels or rollers. We immediately drill five plates cut out of steel for fastening the wheels and weld them onto the legs.


According to the selected dimensions, we cut out the parts of the supporting part of the frame of the welded table.

We align the workpieces laid out on the concrete along the corners - gauges and fix them with clamps. We weld the frame using semi-automatic or conventional electric welding.

After the metal parts have been secured with small welds, it is necessary to allow the structure to cool and check the geometry of the legs again. It is necessary that the racks are in a strictly vertical position, and the distances between them on opposite sides differ by no more than 1-2 mm.
The next step is to make the lower tier of the table. Its design is somewhat different from the traditional angle binding, as is done in the case of assembly for carpentry and metalwork benches.

The frame of the welding table is reinforced in the lower part with an H-shaped frame made of a profile pipe. This design of the lower tier provides comfortable foot placement when working with parts placed on the welding table. Nothing prevents the center of gravity from moving far forward, as a result it becomes possible to weld the most complex and thin products.
Making a countertop
After cleaning the parts from scale and installing the support rollers, the frame of the welding table is painted with heat-resistant paint. It is best to make the tabletop from a steel sheet with a thickness of at least 5 mm. The large thickness of the metal ensures that the working surface does not deform and will not produce a bubble when overheated.

The tabletop slab is cut out according to the drawing and laid on the finished frame. Before welding, you need to check for gaps and adjust the support areas so that the tabletop rests on all four points of the base. Metal plate fixed with a clamp and welded to the frame using a carbon dioxide semi-automatic machine.
Protective box
The main enemies of an experienced welder are dust, slag and scale that inevitably accumulate on the workbench. Sometimes remnants of emulsion and large drops of molten slag must be removed from the countertop before finishing work.
For these purposes, a protective box is added to the tabletop; it can be made of galvanized steel or ordinary roofing metal. The location for installing the protective box on the table is selected depending on the preferences of the welder.
Safety when performing welding work
When carrying out welding work, first of all, you need to be extremely careful to avoid injury electric shock and poisoning when welding parts with zinc or cadmium coating. For safe work A sheet of asbestos or getinax is usually placed on the table, on which a welding wrench can be placed without turning off the inverter.
Conclusion
The manufactured table meets all the requirements for industrial equipment and equipment when carrying out work using welding of any type. To work safely, you will need to add a rubber mat, a toolbox, a properly functioning ventilation system and autonomous lighting to the table.
Profile pipes are a universal material for use in private households. The variety of products and price in retail chains determines the popularity of corrugated pipes among builders of dachas and individual buildings.
Profile pipes have amazingly high strength indicators.
The strength and quality of the materials used in the manufacture of pipes, the possibility of using anti-corrosion protection and other attractive factors determine the breadth of their use.

Finished structures will be able to withstand enormous loads, while avoiding even the slightest deformation.
Profile pipes are widely used in the manufacture of household items, the construction of small forms in areas adjacent to houses, installation of the base of barriers, house frames, staircase, balcony and window grilles,for indoors and outdoors, tables, chairs, beds.

If corrosion does not affect the steel, it will serve you for tens or even hundreds of years.
There are a lot of retail chains various products from profile pipe , but not all the wishes of buyers are taken into account by manufacturers of street and home furniture, stairs, flower bed fences and other things.

The created structure will not fall apart even for an impressive period of time.
Therefore, if possible custom made It is always preferred to create objects from profile pipes according to own project, a do-it-yourself product that will bring in subsequent years not only joy to use, but also a sense of pride and self-satisfaction.

Making a variety of products from profile pipes with your own hands in Lately is becoming increasingly popular.
From a practical standpoint, the advantage of products made from DIY pipes , lies in an absolute understanding of all the advantages, disadvantages and maintainability of the product, in contrast to a purchased one, which always stores mysterious application parameters.

Profile pipes are a universal material from which you can create not only outdoor structures, but also stylish interior items.
Product made from DIY pipes , always meets the requirements of the manufacturer, who knows how the product can be improved.
Design, construction and required materials
To create a product, you need imagination and knowledge of examples. similar products, have some skills as a mechanic and carpenter, stock the necessary tool and the desire to achieve results.

Forged elements are found everywhere and are distinguished by their individuality. They can be used for benches, gates, display cases, tables.
During construction frame house needs to be addressed Special attention on the quality of the material, understanding that the supporting structure must be strong and reliable. Therefore, it is advisable to calculate the design or purchase finished project, which details the parameters of profiles and pipes, methods of their connection and processing, including anti-corrosion.

You can create a lot of useful things for your home from square or rectangular steel pipes.
If a fence is being installed, it is convenient to use profiled pipes as posts, reinforced into the foundation of the fence or driven into the ground with a sledgehammer.
Attaching the crossbars to the posts is possible both by welding and bolts.

It is necessary to select bolts by diameter for optimal fastening of the structure.
It is preferable to attach gate hinges to poles with bolts; welding on pipes will be less reliable.
The frames of small structures that play the role of utility buildings on the estate, such as sheds, greenhouses, garages, poultry houses and others, are optimally made from profile pipes.

At the same time, greenhouses can be made without a foundation and portable from year to year from place to place.
Sports equipment such as racks for basketball hoops and badminton, gaming tables and exercise benches are easily made from profile pipe.

It is reliable, easy to install, and the cost of the material is affordable.
The use of pipes for stairs, balcony railings, protective grilles for windows requires the use of professional welding, but is achievable with your own hands if you have the skills.

Do-it-yourself metal structures made from profile pipes have many advantages.
The greatest possibilities for using profile pipes arise when it is necessary to produce DIY metal furniture , it doesn’t matter garden or home furniture, racks and shelves in basements, attics, garages, tables, chairs and benches in gazebos near barbecues and many others.

If you correctly calculate the building, it will be durable and reliable.
Bent frames of chairs, sofas, tables, beds, wardrobes and mezzanines, lamps and other objects, which is enough for your imagination.

The profile pipe allows you to ensure the fulfillment of any fantasies in the house and on the estate.
The greatest interest among the possible products is furniture made from profile pipes because some kind of furniture is always required at a dacha or estate, be it a bench or shelf, chair or table, etc.

Therefore, you should always have pipes and simple tools for creating furniture in stock.
Required Tools
The manufacture of various products requires special equipment and tools. To create the frame of a house or garage, and to make a chair, you need to have different equipment and tools.

If desired, the furniture can be given aesthetics by complicating the frame design and applying decorative finishing.
To make furniture, it is necessary to consider the basic operations that will have to be performed during the work process.

Pipes with a square cross-section are easily assembled into the desired structure.
The workpieces must be cut circular saw popularly called a “grinder” or a hand hacksaw. When precise work is required, it is better to prefer hand saw or an electric jigsaw.
To connect parts you need a welding machine, but if you don’t have one or don’t have the skills to use it, then you need an electric drill with a set of drills for metal and wood.

The main thing is to get a drawing, a grinder and a drill with bolts or a welding machine, and the rest, as they say, is a matter of technique.
To clean parts you need a flat file, for large parts a metal disc for a grinder and an emery disc for wood. Both discs are inexpensive and are always available at hardware stores. Need emery cloth For minor works, mhammer, tape measure, chisel, screwdriver, preferably an electric screwdriver with a set of attachments.

Tools for working with profile pipes.
For making furniture from profile pipe Equipment is required to bend pipes. Making such equipment is not difficult, but it requires time and careful execution.

The equipment is manufactured for the production of intended pipe bends.
Equipment may be changed and supplemented during the work process. Therefore, the main requirements for equipment are simplicity, ease of manufacture, modification and addition.
Recommendations for the manufacture of equipment for the production of bent profile pipes
There are many ways to bend pipes. One of the simplest is to use two tooling pipes with a larger internal diameter and a longer length than the workpiece. The first pipe of the equipment is rigidly fixed on a workbench or on any plane; an option is driven vertically into the ground. The workpiece is bent by fixing the bending point with a wooden wedge. profile pipe in the first pipe of the equipment. Using the second pipe of the equipment, put on the remaining part of the profile, using it as a shoulder, we bend the profile to the desired degree. This bending occurs at one point.

A rocking chair with forged elements looks quite aesthetically pleasing.
In the case where the bend has a complex configuration, the equipment becomes more complicated. The easiest option is to take a 200x50 mm board, the length will be determined by the workpiece, and mark the reference points of the profile bend on it. Secure the board to a workbench, floor or other hard surface. Then, in the designated places, bolt the semicircular wooden stops around which the pipe bends.

The shape of the stops determines the desired bend of the workpiece.
The pipe is fixed in three stops, and then the pipe larger diameter We bend the workpiece at the stops that define the bends.
So in a simple way bend the parts of a metal chair or headboard from profile pipe.
Manufacturing furniture from profile pipes
Furniture includes chairs, benches, tables, beds, shelves, cabinets, beds.

All these items can be made easily from profile pipes.
The instructions for making furniture from metal are uniform and are determined by the sequence of execution of the following points.
- In accordance with the design drawing of the product, cut blanks of its parts from pipes.
- Clean the cut burrs and drill the necessary holes.
- Using the equipment, bend the parts of the product frame structure.
- Conduct necessary welding structural elements.
- Make a tie to the product structure using bolts.
- Prepare and install fittings on a piece of furniture.
- Install wooden and plastic structural elements.
- Paint the elements of all furniture products.

This is how furniture is created from a profile pipe for each specific product.
The instructions provided may be clarified in detail; some points may be omitted. For the chair and for wall shelf The instructions will be different, but it is advisable to create such instructions before starting work.

All these designs will have something in common, namely incredibly high strength and resistance to any aggressive mechanical influences.
VIDEO: Loft-style table made of wood and profile pipes.
For a home workshop, if welding work is often carried out there, a small welding scaffold is simply necessary, thanks to which you can organize a comfortable workplace and at the same time save some space.
A table made of metal, in addition to being convenient for welding work, will also act as a grounding loop; in addition, a welding machine, electrodes and other auxiliary tools can be placed on its lower shelves.
Requirement for welding table
Any table designed for welding work, in addition to convenience, must also have complete safety for the welder, since the work uses a high current with a fairly high voltage. To do this, its design must meet the following requirements:

And the most basic requirement is in its design should not used and stored, flammable and emitting when heated toxic substances materials.
Welding table design
There are two types of tables for welding work for home workshops - these are the usual, most simple tables for periodic welding of medium complexity and semi-professional assembly and welding tables on which more complex tasks are performed.
In terms of ease of use, the following requirements are imposed on the table:
- The height of the table must be no lower or higher than the limits of 700 - 850 mm.
- The minimum recommended dimensions of the working surface should be 800×1000 mm.
- The height of the table with a protective screen from welding rays must be at least 1400 mm.
Simple table for welding work
 It is durable, easy to assemble and has a fairly convenient design for the welder to work with. Its design consists of a rigid frame, which is welded from metal and consists of four steel racks from angles or profile pipes welded together. Along the lower part, at a height of approximately 200 mm from the floor, the racks are welded with corners, and on top they are welded to a strong frame on which the metal tabletop is located.
The metal tabletop may have special grooves for fastening the workpieces to be welded.
On a steel frame, on which the tabletop is located, it is advisable to weld brackets for the welding wire, and it is recommended to place a shallow tray under the tabletop to collect dust and scale.
On the left or right side there may be a cabinet with several storage compartments various instruments. The remaining space is suitable for temporary storage of larger equipment.
It is advisable to weld a stand next to the water container.
Semi-professional welding table
 It's already quite complex design assembly and welding table with additional equipment. Ergonomic properties Such tables are practically no different from ordinary ones, but they provide for the installation of additional equipment for milling, drilling and other metalworking operations. Tables can also be equipped with built-in ventilation systems.
For the rigidity of the entire structure, table legs are often firmly attached to the floor with anchor bolts or a concrete screed.
An important feature of these tables is the ability to rotate the work platform, allowing the welder to apply welds on parts to be welded from one operating point.
Assembly and welding tables are often equipped with a quick-release bench vice, a set of different sizes of clamps and rotary attachments for installing a welding machine.
Table selection criteria
 Protective screens from welding rays, ventilation ducts and others facing materials working area must be made of non-combustible materials. If earlier asbestos fabric was used for this, now they use modern materials Supersil or basalt cardboard.
For the rigidity of the entire structure, its mass must be at least 180 - 200 kg.
The lighting of the working area should be adjusted so that it does not create glare that interferes with the work of the welder (the glass of welding helmets practically does not absorb it).
The design must have a rotating working platform mechanism and built-in ventilation.
Materials and components
To make the table, a variety of materials are used in the form of steel angles, profile pipes, small channels and I-beams with rolled sheets. The main condition for it is stability and ability bear a lot of weight workpieces processed on it.
 For high strength, table stands are best made from a profile pipe with a minimum cross-section of 60×60×2 mm or a corner 63×63×4 mm.
It is advisable to make the working surface (tabletop) from a channel or corner mounted on one of the edges with the plane facing up. There should be a gap between the tabletop parts for clamps and other fastening tools that will, if necessary, secure the workpieces to be welded.
Auxiliary structures, with which you can increase the working surface area, it is better to make them from profile pipes, since they are lighter in weight than steel angles.
Set of additional tools
To create the most comfortable working conditions, it is recommended to purchase an additional set of tools with functions for securely fixing the parts to be welded on the workbench with the ability to quickly change their spatial position. They must have strength and resistance to sudden temperature changes.
Such tools include clamps, with the help of which workpieces can be attached to each other or to the work table.
Clamps. Their function is almost the same as that of clamps, but they are more widely used. Thanks to them, you can set a certain angle and fix more complex connections between workpieces.
DIY welding table drawings
 The problem with making your own welding table is that this moment there is very little information about such designs. If we take models made for industrial purposes as a basis, then their drawings are quite complex for use in home workshops, and many functions cannot be used at all. An alternative could be the simplest drawing, which you can simply modify and improve yourself.
The simplest and affordable option table, which you can quickly and easily make with your own hands, modifying it yourself.
Making a welding table
As an example of manufacturing, you can take a structure for welding work, made of metal profiled pipes and a steel angle. Naturally, during manufacturing you can use other sizes, materials and change the geometric shapes of the table itself.
Making a countertop
 It is not recommended to make the tabletop from solid fabric. Its surface is welded from a profile pipe 60x40x2 mm (along the perimeter). The internal grille is made of a profile with a cross-section of 30×30×1.2 mm (8 or 10 channels can be used instead).
Pipe blanks are cut using a grinder, and the ends are cleaned of burrs. First of all, the outer frame is welded, which should have clearly identical diagonals.
Internal profiles are cut along the opening of the manufactured frame and inserted into its middle (the channels are laid on the frame) at a distance of 30-50 mm from each other, after which all welds are cleaned with a grinder.
Handles for the design of the welding table may be needed for ease of moving it to a new location. They are made from round reinforcement with a diameter of 12−14 mm, have U-shape and are welded on both sides to the bottom of the tabletop.
 Four legs for the table are cut from a round pipe with a diameter of 50 mm (or from a square pipe 50x50 mm). Their length should be approximately 760 mm. The cut out posts are welded to the corners of the previously made table top.
After the legs are welded to the tabletop, additional strapping is made along the bottom of the racks to enhance the rigidity of the entire structure. To do this, stepping back from the lower end of the racks by approximately 200-300 mm, the legs are welded together with an angle section of 30×30 or 40×40 mm. The corner is welded with its flat side towards the bottom of the racks. A shelf made of chipboard or thick plywood will be placed in the middle of the corner to store various welding tools and the machine itself.
When welding the legs to the table top, it is important to prevent them from skewing. They must connect to the frame at a precise 90 degrees. To ensure such an even angle, you must use a metal square and a tape measure.
It is advisable to weld wheels to the racks for ease of moving the table, but this is only the case when it has to be rolled frequently. If it will be stationary, it is better not to use them, since the table will be unstable during operation, and it will be necessary to make additional brake mounts for the wheels.
Several hooks are welded to the table posts for storing the welding cable and holder for other devices. They are made from smooth wire with a diameter of 6-8 mm or ordinary nails 100-150 mm long. The nails are simply bent and welded to the outside of the posts.
Protective box
 The box is welded under the tabletop to the racks at a slight slope. Made from metal sheet and has small sides. Its function is to collect small debris, scale and slag knocked off the welds. At the same time, it protects against the same waste getting on the tools and devices that are located on the lower shelf, laid on the frame of the racks.
It is best to store tools in a special box made of chipboard or sheet metal. It would be best if instead there was a bedside table with several shelves on which you can sort the tools.
Safety when performing welding work

When welding small parts, problems arise with their fixation. Subsequently, they will affect the quality of the seam and the reliability of the connection. To solve this, special tables are made, the design of which is designed to improve the convenience of the welder. It is important to choose the right drawing and draw up an assembly diagram.
Table drawings
Problem self-made table for welding work lies in the minimum information about such structures. Factory models cannot serve as a basis for drawing up a drawing, as they are complex and many functions are not applicable in a home workshop. An alternative is to take as a basis simple drawing and improve it.
- do not install wheels, as they will affect stability;
- on the working welding surface, make longitudinal slots (30 mm) with your own hands for fixing the clamps;
- install an inclined plate under them to protect the tool from sparks and scale;
- installation of lifting sides to increase the working surface of the table.
The result should be a similar device for welding work:

Materials and components
For manufacturing, you can use any available rolled metal - corners, profiled pipes, sheet material. It is important that the welder’s table is stable and can withstand not only the weight of the workpiece, but also a possible increase in pressure on the surface during work.

Tips for choosing materials:
- Support stands (legs). They are made from a profile pipe or angle; the first option is preferable, as it increases mechanical strength. Thickness - from 1.5 mm or more;
- Working welding surface. Steel plate with slots for clamps, thickness - from 2 mm. The edges are rounded to create a smooth surface.
- Additional designs to increase the working area of the table from square or round pipes.
- The protective screen is made of sheet iron, preferably with sides.
- The bottom shelf is made of fiberboard or chipboard. For better protection you can put a thin steel sheet.
- Stiffeners - corners or pipes.
Additionally, primer and paint will be required. It is better to treat the desktop - this will increase its service life.
Assembly order
To carry out the work you will need a welding machine, electrodes, a grinder with metal discs, a measuring tool, and bolts for fastening. A design drawing is first drawn up and the dimensions of the workpieces are calculated. In the latter case, the thickness of the weld seam must be taken into account.

Assembly instructions:
- Forming blanks, checking their dimensions according to the drawing.
- Assembling the frame, welding the support posts, attaching the stiffeners.
- A worktop is made according to the dimensions of the finished frame. After measurements it is not attached.
- Installation protective screen. The tilt angle is up to 45°; an additional chute is made for dumping welding waste.
- Installation of the main work surface.
- Manufacturing of sidewalls, they are attached to the structure on hinges. Movable stops made of small diameter pipes.
- Primer and painting.
- Installation fiberboard sheet or chipboard.
Additionally, hooks, drawers or boxes can be installed on the welder’s table for storing and securing tools. The choice depends on the requirements for functionality and ease of use.
What else is needed for the kit?
To create the most comfortable conditions work will require purchasing additional tools for the welder. Their function is reliable fixation of the workpiece and the ability to quickly change its position. Requirements: resistance to temperature changes, mechanical strength.


A set of additional tools:
- Clamps. Necessary for fixing the workpiece on the surface for precise welding;
- Clamps. They perform the same function, but in a more specialized manner - installation requires an angle between the parts being welded, a complex connection.
- Magnetic base. Recommended for processing small-sized parts, the fixation of which mechanically difficult.
In the latter case, it is necessary to take into account the mass of the auxiliary magnetic tool and the maximum permissible weight details.
The video shows detailed review optimal table model for a welder:
Reading time ≈ 4 minutes
A compact, DIY welding table will allow you to organize your workspace and save space. The small design allows you to conveniently place the inverter and supply cables without any risk mechanical damage. Additionally, a ready-made table can be used for welding work. Due to the built-in wheels, the table assembly can be moved to any location. comfortable spot.
Required tools and materials
You can make a welding table from a profile pipe, as in the photo, with your own hands without the use of special equipment. It's enough to have everything necessary materials and a minimum set of garage tools, in particular an angle grinder, welding, measuring angle, jigsaw, drill and vice.

The design dimensions of the table according to the drawings in the article are: 370x580x780 mm, however, depending on the need, you can use your own dimensional parameters.
Step-by-step instructions for making a welding trolley table
1. Manufacturing top cover table. The metal table for welding work is equipped with a lattice cover, which is made of a profiled pipe with a cross-section of 50x50 mm (for the outer frame) and 30x30 mm for the inner lattice. The pipe is cut to size using a grinder. The prepared elements are connected by welding. The outer belt of the cover consists of a 50x50 mm profile, which is welded into a rectangle taking into account the design dimensions. The internal space is filled with a 30x30 mm profile. The pipes are welded at intervals of 30-50 mm, forming a grid. Welding seams must be cleaned with a grinder.


2. Making table legs. The legs for the welding cart can be made from a round pipe with a cross-section of 25x25 mm or 30x30 mm. If these dimensions are not available, 20x20 mm can be used. Materials are cut to size (780 mm). A total of 4 metal legs are required. The cut elements are welded to the finished lid at four corners.


Important! When welding the legs to the lid, it is important to control the distortion. To obtain the most stable table, it is necessary to ensure even installation angles and the location of the racks. It is recommended to use a square and a tape measure.
3. Additional stiffening belt for the table. The metal cart for the welding machine should be as rigid and durable as possible. To do this, it is necessary to make an additional stiffening belt, which will be located at a height of 200-300 mm from the floor level along the racks. The amplifiers are made from a 30x30 mm corner that unfolds acute angle out. The elements are welded in a circle to connect all 4 posts. If necessary, you can additionally clean all welding seams.


4. Making a handle for lifting and transportation. The handle is necessary to conveniently transport the table to any specified place. For the handle, you can use a metal rod or reinforcement with a cross section of 8-10 mm. It is important to initially give the required form for the element. Subsequently, as can be seen in the video, the finished handle is welded to the supporting frame of the top cover. The handle must be welded from below to avoid inconvenience in the future during operation of the table.


5. Hooks for welding equipment or cables. Side hooks are essential for conveniently securing thick cables, holders or storing any other welding tool. Hooks can be made from an ordinary nail 100-150 mm. To do this, it is enough to give the desired shape to the nails and weld them to the supporting legs from the outside.


6. Wheels for moving. Wheels are necessary for more convenient movement of the table to a convenient place. In total, you will need 2 wheels assembled with mounting mechanisms. It is most preferable to use small parts from a shopping cart or similar equipment. Before installation, the upper part of the locking mechanism with the nut should be attached to the posts by welding. Next, the wheels are screwed onto the welded nut.


Important! Wheel nuts should be welded taking into account the horizontal position. The parts must be on the same level.
7. Niche for tools. The niche should be made of plywood, chipboard or OSB board. If necessary, you can use a solid sheet of metal. The material is cut to size using a jigsaw and installed on the corners at the bottom of the table.


8. Protective cover from debris and scale. For manufacturing, you can use an ordinary sheet of metal of any thickness with a bend along the edge. A metal rod of 8-10 mm is first welded to the load-bearing legs, and one side must be higher than the other in order to create the required slope. The cut sheet of metal is installed on the rods.