Acrylic bathtubs are in high demand among homeowners today. It has many advantages, the main among which is simplicity and ease of use. But like any other plumbing, it is subject to mechanical and chemical attack, so many owners are faced with the problem of cracks in the acrylic bath. What to do in this case? Some advise just buying new plumbing, others offer to solve the problem on their own. If you are not afraid of physical labor and want to save the family budget, we offer you to learn how to repair a crack in an acrylic bathtub.
 Before starting repair work, you need to find out what nature the defects that have appeared are. It depends on the specifics and the result of your actions. Experts distinguish 2 types of damage: chemical and mechanical.
Chemical burns are called "burns" on the body, provoked by the wrong choice of cleaning agent for the care of the bathroom. Another reason is laundry soaking: the components of the powder react with the surface, which causes dark spots to form.
Mechanical damage includes scratches, punctures and through holes. The reason for their occurrence may be long-term operation, the fall of a heavy or sharp object on the surface. Eliminating this is not very easy, but it is quite possible.
When the nature of the defect is established, it is necessary to determine its size. This moment is very important, because the choice depends on it. necessary materials and your next steps for repairing a crack in an acrylic bath.
A small crack in the acrylic bath: what to do?
 If you are not careful when using plumbing, small defects will appear on its surface over time. Some owners do not attach importance to them, but they must be removed immediately, because they are in in large numbers germs and dirt accumulate.
A small crack in an acrylic bathtub is easy to repair. First, sand the damaged area with the coarse side of the sandpaper. After a thorough cleaning, treat the problem area with fine-grained sandpaper. On finishing stage apply a special polish.
Since the material has a homogeneous structure, after processing it sandpaper the color will not change. Therefore, you do not have to worry about the fact that the treated area will stand out against the general background of the surface.
What to do with a large crack in an acrylic bathtub?
If the damage is serious and large in size, a serious approach is required from you. You must have a set of special tools. The problem must be removed immediately after its discovery, since ignoring it will entail considerable physical and financial costs.
Before repairing a crack in an acrylic bath, carefully sand the damage with coarse sandpaper. Capture not only the problem area, but also the areas around it. It will be enough to process an additional 1.5-2 cm around the defect. This is necessary so that the epoxy putty that you will use later adheres better to the surface of the plumbing.
Then using electric drill, drill one 1 mm hole on both sides of the damage. This is necessary so that it does not increase in size.
 Clean the damaged area with laundry soap And clean water. Then let the liquid dry completely or remove it with a regular hair dryer.
Let's figure out how to seal a crack in an acrylic bath. As a rule, special two-component mixtures are used for this. You need to mix the hardener with the base material right before applying it to the plumbing surface. It is important to remember that these mixtures contain toxic materials, so you must ensure good ventilation in the room and wear a respirator when handling the material.
The prepared putty mixture is applied to the problem area and drilled holes using the applicator, which is sold in the repair kit.
Important! The putty dries out within 12-16 hours, so the next step in the restoration of cracks acrylic bath should only be started after this time has elapsed.
When everything is dry, take a fine-grained sandpaper and work on the area until it is perfectly smooth.
How to fix a crack in an acrylic bathtub with repair tape?
To repair damage with repair tape, you must do the following:
- clean the damage with coarse-grained sandpaper;
- drill small holes with a drill at the bottom and top of the crack;
- thoroughly degrease everything and allow the surface to dry;
- cut the tape along the length exceeding the damage by 2-3 cm;
- remove the protective film from the tape immediately before use;
- stick the tape on the damaged area;
- carefully remove all bubbles from it with a plastic spatula and a dry cloth.
The restored area must dry. Typically, this takes 4-6 hours. Be careful not to get liquid on it. Experts recommend using plumbing for its intended purpose at least 8 hours after repair work. Now you know how else you can repair a crack in an acrylic bath.
What to do if a crack on an acrylic bath has turned into a chip or a hole?
 With such problems, the restoration of the surface consists of several stages:
- thorough cleaning and degreasing of the damaged area;
- applying coarse putty, which forms a durable uniform layer;
- sanding the dried layer of putty;
- application of a finely dispersed repair mixture;
- processing with fine-grained sandpaper;
- acrylic polishing.
Now you know what to do with a crack in an acrylic bathtub.
To make the restoration process as easy as possible, adhere to the following:
- buy the right one repair kit and read the instructions carefully;
- provide a comfortable workplace;
- do not rush in your actions.
If necessary, you can always repeat the restoration.
Finally, expert advice on how to fix a crack in an acrylic bath:
Affordable prices, good consumer properties, low weight and ease of installation explain the growing popularity acrylic bathtubs in recent years.
Plastic products can be used actively and for a long time, subject to the precautions that you need to familiarize yourself with before purchasing.
If the trouble still happened, you should be aware of the possibility of restoring an acrylic bathtub, which is really doable at home.
Rules for the operation of an acrylic bath
There are several types of models made of polyacrylic materials, which differ in the characteristics of the top layer, its mechanical and chemical resistance.
A coating with a thickness of more than 5 mm is intended for use over a quarter of a century. Bathtubs with a thinner inner layer can last 10 to 15 years without repair if they are handled with care.
The main thing is not to damage the polymers by mechanical action, treatment with chemically active reagents. Hygienic care can be carried out with mild detergents, without using strong oxidizing agents.
Wipe the surface gently with brushes or sponges that do not have hard fibers. Heavy objects should not be placed near the bath, metal containers should not be placed in it.
Compliance with simple rules increases the chances of a long-term successful use of the bath without repair. However, troubles occur, as a result of which damage of varying degrees may appear:
- rough areas and small scratches;
- chips and easily noticeable scratches;
- cracks;
- through holes;
- plastic delamination.
At home, you can repair acrylic bathtubs, using the recommendations experienced craftsmen, a set of unpretentious devices and means.
Removing minor scratches
With prolonged use, the washing surface sometimes loses its original luster, due to the appearance of multiple small scratches. In this case, the restoration of acrylic baths is done by hand in a certain sequence using polishing agents.
First, the area with small scratches should be rubbed with an emery flap with the smallest grains. The procedure must be done carefully, not too zealous, so as not to aggravate the damage to the surface.
After leveling the scratches, a polish containing fine grains of abrasive action should be applied to the prepared area.
Rubbing the product with felt will allow you to get absolutely smooth surface, which needs to be brought to full brilliance wax composition polishing character. On sale, both types of polishes are often present in one set, which allows you to qualitatively repair a scratched acrylic bathtub.
After applying the wax, the surface is rubbed with a soft cloth, which is included with the treatment. At the end of the repair, the bathtub is washed, rinsed and allowed to dry.
It is possible to independently restore the gloss of a surface that does not have noticeable scratches only with a wax polish, without using products with small abrasive particles.
Repair with liquid acrylic
Chips and large scratches are somewhat more difficult to repair, for this you will need liquid acrylic preparations. It makes sense to buy a repair kit right away, which includes:
- composition for restoring the layer;
- an applicator that allows you to apply the product gently;
- polishes to add shine to the surface;
- pieces of emery cloths with the required grain size;
- napkins.
Before covering up a large scratch, it needs to be slightly expanded so that the paste to restore the polymer fits into the cavity. You will have to be careful when working with a mounting knife, because the bath can burst from effort. After that, the gap must be rubbed with an emery piece, cleaned, degreased and applied with an applicator to the recess with a mass of liquid acrylic.
Note! The repair agent should completely occupy the cavity; the procedure for the execution technique resembles wall puttying.
When the mass hardens, the polymerization process is completed, the area must be rubbed on top with a polish until a shine appears. It is possible that the shade of the restored bathroom fragment will be slightly different, this can only be noticed upon close examination and good lighting directed exactly at the place of the former defect.
Elimination of cracks and holes
Damage that leaks through is more difficult to repair, but it can also be done by hand. Such cracks should be sealed in the same way as deep scratches. The difference lies in the fact that, not far from the damage, it is advisable to drill small holes on both sides, into which then also place liquid acrylic. Such holes will prevent a further increase in the gap, further strengthen the repair area. As a result, a tightening fastening is formed, the presence of which will increase the strength of the seam.
Then, a fiberglass patch is applied to the area to be repaired, which is larger than the size of the hole. The canvas is sold separately in stores with building supplies or in an acrylic bath repair kit. The reinforcing flap is fixed on the defect area by means of epoxy resin so that the hole is overlapped. After gluing the fiberglass, you need to wait for the glue to dry completely, then return the bath to its original position. At this time, the exhaust ventilation must be turned on in the bathroom.
Elimination of cracks and holes
Damage that leaks through is more difficult to repair, but it can also be done by hand.
Such cracks should be sealed in the same way as deep scratches. The difference lies in the fact that, not far from the damage, it is advisable to drill small holes on both sides, into which then also place liquid acrylic.
Such holes will prevent a further increase in the gap, further strengthen the repair area. As a result, a tightening fastening is formed, the presence of which will increase the strength of the seam.
It is much more difficult to repair an acrylic bathtub that has a hole in it. It is possible to make a high-quality restoration only by removing the structure and turning it upside down. Such a prospect will please few people, will urge users to take care of plumbing. However, everything happens.
To repair holes on the back side, the area around them at a distance of at least 20 cm must be completely cleaned and degreased. Cleaning is carried out with sandpaper, a layer greasy mud filmed organic solvents or special detergents.
Then, a fiberglass patch is applied to the area to be repaired, which is larger than the size of the hole. The canvas is sold separately in stores with building supplies or in an acrylic bath repair kit.
The reinforcing flap is fixed on the defect area with epoxy resin so that the hole is overlapped. After gluing the fiberglass, you need to wait for the glue to dry completely, then return the bath to its original position. At this time, the exhaust ventilation must be turned on in the bathroom.
The remaining stages of repair are carried out from the inside of the washing tank, which must be prepared in the same way as is done when restoring ordinary cracks. The area is sanded with fine sandpaper, poured with a liquid acrylic agent, waited for it to dry, polished with a wax mass until it shines.
Delaminating Acrylic Bathtub
With prolonged use of an acrylic bathtub, swellings resembling bubbles sometimes appear on the surface. The defect is caused by the separation of the polymer layer from the structural fiberglass, which performs the function of reinforcement.
Repair of exfoliated areas is carried out differently than previous types of restoration. The swelling must be carefully pierced in the center so that the tip of the syringe enters the resulting hole. Under the swollen layer, a special glue is introduced that can fix the acrylic layer on the fiberglass, press the polymer coating, wait for the composition to dry completely and set.
At the end of the procedure, the hole is sealed liquid acrylic and polished with a wax composition so that the site does not differ in appearance from the adjacent area.
An acrylic bathtub, made with good polymer technology, can last a long time, usually without requiring repair. Under extreme circumstances, defects can appear on it, which you can deal with on your own, having the information and means for restoration. This procedure can be easily performed by an ordinary home master on his own.
Acrylic baths have become frequent guests of modern bathrooms, because they are much lighter than cast iron, aesthetic, having different kinds design. But over time, such products can be damaged, losing their former neat appearance. How to make an acrylic bath repair with your own hands and without involving the services of professional plumbers?
Common Damage to Acrylic Bathtubs
You can solve these problems by replacing the damaged bathtub with a new one. Or you can repair an acrylic bath with your own hands, restoring the product at a reasonable price.
Subtleties of repair
Before starting the "restoration" of the bath, it is important to determine the color of the product and the material from which it is made. A mismatch in tone can greatly affect the result of the work done, and you don’t really want to redo one work twice!
Required Tools
During the restoration period, you will need the following acrylic bath repair kit. 
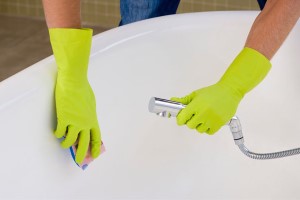
- A pair of rubber gloves.
- Polished disc or sponge.
- Bath paste.
- Sandpaper from 2000 grit to 800 grit.
- Liquid acrylic, to eliminate deeper chips.
- Drill with a 0.5–1 mm drill.
- Alcohol solution.
- Soft, lint-free swab.
Instruction for beginners
- Professionals advise expanding the area of damage so that the adhesion of the old and new material does not differ visually, while the crack in depth and width must be increased by 2 mm.
- The surface to be repaired must be degreased with alcohol in advance.
- It is necessary to apply the mixture to the damaged area correctly, fresh acrylic should not rise above the old one and be deeper than it.
- After the repair of the chipped acrylic bathtubs is completed, it is important to cover the area with tape and leave it to dry completely for 6-7 hours. It is advisable not to use the bathroom during this time.
- After removing the protective film, treat the surface to be repaired with sandpaper, which is included in the repair kit for repairing acrylic bathtubs.
We repair minor scratches and burns
If the damage is not deep, they are superficial, then it will be very easy and simple to repair the acrylic coating of the bathtub.
- Sandpaper of varying degrees of graininess cleans the damage, first large, at the end - fine.
- After finishing sanding, it is required to treat the surface with acrylic bath polish.
- In such cases, repair plastic bath completed, but if the scratch is deeper, then liquid acrylic will not be enough.
We remove cracks
Cracks in the acrylic bath appear due to the fall of a heavy object, wear or other force majeure. They must be removed immediately after detection, so as not to render the entire product unusable.
Cracks in an acrylic bath repair using epoxy putty. The actions are performed as follows:
- First, the damaged side is cleaned with coarse sandpaper.
- Next, a drill drills 1 mm holes on each side of the crack.
- The “blank” for the putty is washed out with a soapy solution, which, after drying, closes the hole.
The applied composition is aged for about 12 hours, after which the restoration area is polished.
How to repair an acrylic bath using repair tape?
The first part of the work, before the cleaned damaged surface dries, is carried out similarly to the above method, but then a part of the repair tape is cut off, the length of which covers the crack by 1 cm on each side of the pothole. Deleted protective film, and the sticky side is firmly glued to the crack.
It is important to remove all air bubbles inside the coating. Three hours for a complete setting will be enough. It is forbidden to use the bath during this period, so that the liquid does not get under the tape and spoil all the work.
Repairing a chip in a bathtub
How can you effectively put the plumbing in order when chips and even holes have formed on the acrylic bath?
To fully restore the functionality of the device, you will need to perform
repair of chipped acrylic bathtubs in 2 stages.

When it comes to deep defects and serious holes, it is better to entrust the work to specialists so that the product will serve its owners flawlessly for many years to come.
For those who are faced with such a task for the first time, it will be useful to watch a video of the repair of acrylic bathtubs, where, using the example of one of the consumers, all the nuances and main technical tasks are described step by step.
Frequently Asked Questions
How to repair an acrylic bath so that the layers of material do not come off after a while?
Such a defect is possible if the elementary rules for installing and operating the product are not observed, and the advanced stage of crack manifestation can cause such troubles. When the edges of scratches or chips move away from the bottom layer of fiberglass, you need to take special glue and glue the base before starting to repair the bathtub.
Instead of glue, you can use a fiberglass repair kit, which is sold at any store.
People say - the eyes are afraid, but the hands do! May your bath be always safe and sound. To the question of how to repair an acrylic bath, you have learned all the necessary answers thanks to the above detailed material.
Using the video during the repair of acrylic bathtubs, you can view in detail all the stages of preparation and specifications restaurant plumbing features.
How to repair a crack, a chip in an acrylic bathtub, so that after the repair there is no trace of restoration left, and the bathtub acquires its original appearance.
If you have an acrylic bathtub from a European manufacturer and you find a real liquid acrylic with the color number of your bathtub, because you still have all the papers from its purchase - you are very lucky. Use the instructions (translation into Russian is not a problem) and eliminate the defects that have arisen. If you do everything correctly, then after the restoration you will not even find the place where you had a problem.
But what to do if you yourself don’t know what kind of bath you have, what manufacturer and when it was made, and it’s hard for you to remember the color (shade) number of liquid acrylic without knowing?
I will share my experience in this area, because. repaired, screens for bathtubs and acrylic liners (inserts) more than a dozen.
To eliminate chips and cracks in European bathtubs (or acrylic bathtubs made from European sheets), I used German liquid acrylic from Roehm Gmbh.
IN Lately I use liquid acrylic BYsan3000 ().
Instructions for use are also provided. In very rare cases, the color matches the color of the bath. Some are satisfied with a slight shade, especially if it is not in the most visible place, and not everyone wants to pay extra for color matching.
Here's more about using BYsan 3000 liquid acrylic. It also has disadvantages - it was learned from bitter experience. It does not work at temperatures below 18 C. I.e. they need to work with room temperature 20 ... 25 C. It was winter, I tried to putty a crack in the cold around zero, maybe 3 degrees. According to the instructions, I thoroughly mixed the components, waited about three minutes, put it in place and started to wait. I waited longer than usual ... But I didn’t wait desired effect. The liquid evaporated or something, but the surface turned out like sticky powdered sugar, but not at all ... polymerization did not go!!! Perhaps the European behaves the same way, I don’t know (I followed the instructions with him clearly). Moreover, German liquid acrylic comes in a tube, in which a capsule with a powder of 2 grams, except for using 35 euros at a time, does not work out. A set of liquid acrylic BYsn 3000 is enough for me for 5-8 small chips or cracks. But it is very important to observe the exact proportions. If the proportions are not observed, acrylic can polymerize for a very long time or lose its reliability properties. If the proportions are correct, liquid acrylic behaves like molten plastic. In the first minute after mixing the two components, it is a liquid like water - it pours easily. But in this state it is still too early to use it, you have to wait for it to begin to polymerize. Over time, it becomes more and more viscous and viscous, when you take it with a spatula, it stretches like hot chewing gum. In this state, I do not advise mixing it, because air bubbles can get into it, and after repair and complete polymerization, when you start sanding and leveling the surface, shells from voids may appear.
In order to get 100% in the color of the restored surface, it is best to use the material of the same surface. To do this, you will need an acrylic thinner. You can purchase acrylic thinner BYsan 4000 or highly purified dichloroethane. In the past, dichloroethane was often used to bond Plexiglas (PMMA). But I do not advise buying dichloroethane, which is sold in radio engineering stores, because. it has a yellowish tint, and after using it, you get a yellow spot. Dichloroethane dissolves acrylates (ABS, PMMA) well, and after evaporation, these polymers become solid again. Be careful, dichloroethane vapors are harmful to health, try not to inhale its smells.
If you have a sheet acrylic bathtub, then find a part of the surface that is not visible when installing the bathtub. These are most often the outer sides of the bath, which are pushed up to the wall, or are closed from the eyes by bathroom items. Take a drill with a diameter of 8-10 mm and drill the acrylic shavings of the surface layer of the bath, trying not to drill to the fiberglass. Drill at low speeds. Prepare a container in which you will create dissolved acrylic. It can be a cork, cap or something small, preferably metal or glass. The main thing is that this container is clean and without paint (dyes). By the way, polyethylene dichloroethane does not dissolve. It is advisable not to use very flat containers, because. the solvent (dichloroethane) evaporates fairly well.
For ease of application, prepare a brush for painting. It is very important that the brush hairs do not fall out and remain on the surface during restoration.
Pour the solvent into the container and slowly add the acrylic shavings, stirring all this with a stick (match) or other clean object. Add shavings until you reach the consistency of sour cream.
Apply the resulting mixture to the part to be restored in thin layers and allow a period of time between each layer so that the solvent can evaporate and the surface becomes harder. As you understand, shrinkage will be significant after the solvent has evaporated. If you apply a large layer at once, then voids (bubbles) may form inside the layer, because. the solvent evaporates starting from the surface. Please note in advance that the acrylic sheet (from which the bath is made) has some light transmission and your solution does not have the same hiding power as regular paint. If you apply a very thin layer, your crack (chip) or previous putty will probably be visible after drying and polishing. Therefore, before starting the restoration, make a small indentation (0.5 ... 1 mm) in place of your restored surface. If you have a through crack or chip on an acrylic surface, then it is better to first putty with liquid acrylic, and if possible, reinforce the back with fiberglass.
After you have applied the dissolved acrylic, it is better to wait a couple of days until the solvent has completely evaporated. A few hours after the restoration, the acrylic will already be hard and the bath can be used, but with polishing it is better to wait, because. hardness is only superficial. If you applied a layer of 1 ... 3 mm, then after two days you can level with polishing paper 1500 and 2500 and polish your bath.
If garbage and dyes have not got anywhere, then the end result should be perfect, there should not be a hint of former problems.
From experience I will tell you that there are acrylic bathtubs and trays that are not amenable to this method of restoration. I have met Chinese bathtubs and pallets made of sheet acrylic, when, when the acrylic shavings are dissolved, it becomes a greenish tint. These plumbing products originally come with a bluish-purple tint, i.e. they are, as it were, white, but if you apply very White color, you can see the difference. I don’t know what kind of components the Chinese add, but there is some kind of reaction with the solvent. In order not to drill chips, try applying a couple of drops of solvent to an inconspicuous part of the bath and see if it turns green under it surface layer or not…
I will be glad if my advice will help you in the restoration of acrylic sanitary ware. Good luck.
August 28, 2016Specialization: facade finishing, interior decoration, construction of dachas, garages. The experience of an amateur gardener and horticulturist. He also has experience repairing cars and motorcycles. Hobbies: playing the guitar and much more, for which there is not enough time :)
Acrylic bathtubs have recently become widespread due to their practicality and hygiene. Their only drawback is that the surface is easily damaged as a result of chemical, mechanical and thermal influences, although in this case the plumbing can be restored. It is not at all difficult to do this, as you can see from this article, in which I will tell you how to repair acrylic bathtubs at home.
Types of damage and ways to eliminate them
First of all, I note that acrylic baths do not tolerate mechanical stress, in addition, they are unstable to acids, alkalis, solvents and others. chemical compounds. Therefore, if the operating rules are not followed, this plumbing very quickly loses its original appearance or even begins to leak.
True, surface damage is not excluded even if these rules are observed, because there are also emergencies, for example, if a heavy object is dropped onto the bathtub. This leads to the formation of chips and cracks.
Of course, you can entrust the restoration of plumbing to specialists. However, the cost of their services often reaches half the cost of a bath.
Therefore, it is much more profitable to repair an acrylic bathtub with your own hands, moreover, as mentioned above, it is not at all difficult. The only thing to keep in mind is that different types damages are eliminated different ways. Therefore, further we will consider how to eliminate the following types of damage:

Removing minor scratches
If the surface of the bathtub has lost its luster or even has small scratches on it, polishing will help to solve this problem. This procedure is performed as follows:
- before removing scratches, you need to thoroughly wash the bath and dry it;
- Next, you need to wipe the area with scratches with sandpaper with the finest grain. You need to rub carefully so as not to add more scratches;
- when the surface takes on a smooth matte look and all scratches disappear, a polish with a fine abrasive should be applied to the prepared area. Keep in mind that you must use special formulations designed for acrylic baths, otherwise you will not achieve a quality result.
After applying the polish, the surface must be rubbed with felt, as a result of which the surface will become absolutely smooth, but not yet completely shiny;
- now you need to apply a wax polish without an abrasive on the surface and rub the area with a microfiber cloth until it shines;
- after polishing, the bath must be rinsed with liquid detergent and wipe with a soft cloth.

On sale you can find a repair kit for polishing, which contains two types of polishes and wipes, i.e. whatever is needed to complete this operation.
I must say that it is not always necessary to sand the surfaces with sandpaper and use an abrasive polish. If the surface has lost its luster, but there are no visible large scratches, you can only get by with a wax composition.
Repair of chips and deep scratches
Now consider how to repair a chipped bathtub with your own hands. Of course, it will not work to clean it with sandpaper, since a notch will still remain on the surface.
In this case, a special repair kit for acrylic bathtubs will help, which contains an acrylic restorer and other components. In particular, it includes an applicator for applying acrylic, sandpaper, a napkin and polishes.
The price of repair kits starts from 500 rubles. This, of course, is much lower than the cost of repair services of specialists.

So, the repair process is as follows:
- if a deep scratch is being repaired, it should be widened slightly so that the acrylic restorer can penetrate into it. You can expand the scratch with a mounting knife;
- then the surface around the chip or scratch must be carefully sanded with fine sandpaper. The width of the stripped area should be about a centimeter;
- after that, the surface of the chip or scratch must be degreased. To do this, you can use alcohol;
- now the damaged area needs to be filled with acrylic restorer using the applicator that contains the repair kit. Align the surface with it so that the composition is flush with the surface of the bath, i.e., in fact, ordinary puttying is carried out;

- after polymerization of the composition, the surface must be sanded with fine sandpaper and polished according to the scheme described above.
This completes the work. I must say that liquid acrylic may slightly differ in shade from the bath. The fact is that it is almost impossible to choose a shade, since even bathtubs of the same manufacturer from different batches can have different shades, which, of course, is noticeable only if you put them side by side.
However, you can only notice that the color is different by looking closely at the repaired area. Therefore, there is nothing wrong with this.
After home craftsmen are usually interested - how to seal the joint with the wall? For these purposes, it is better to use a plumbing sealant that fills the gap. In addition, an acrylic border should be glued to the corner.

Crack repair
So, with the elimination of chips and cracks, we figured it out. But what to do if the bathtub cracked and began to leak? The answer is simple - use the same repair kit for acrylic bathtubs.
I must say that repairing an acrylic bathtub crack is in many ways reminiscent of removing chips and scratches, however, there are some nuances:
- as in the previous case, before closing the crack, it needs to be slightly expanded and the areas around it should be sanded;
- then, on both sides of the crack, you need to drill holes with a diameter of about a millimeter so that it does not diverge further;
- now the surface needs to be washed and degreased;
- further work is carried out according to the scheme described above.
Keep in mind that cracks must be repaired as soon as they appear, otherwise they will be much more difficult to repair. However, the method described above is only suitable for small cracks, several centimeters long. If the crack is large, reinforcement should be performed, as when repairing holes.

Repair of through holes
Often people are interested in the forums - how to close a hole in an acrylic bath? This procedure is the most difficult, however, it is also quite possible to cope with it yourself.
True, if the hole is small - a few millimeters in diameter, then it can simply be filled with liquid acrylic according to the scheme described above. As a rule, such holes remain after self-tapping screws.
If the hole is large, then it must be reinforced. The instructions for doing this work look like this:
- before sealing the hole, it is necessary to prepare the back side. Namely, you need to thoroughly wash and degrease the area around the hole with a diameter of about 15 cm;
- then a fiberglass overlay is glued to the hole from the back. The latter is available in the hole reinforcement kit.
The cover should be glued with epoxy glue. Keep in mind that it must cover the hole by at least 5 cm;

- after the glue dries, another overlay is applied, which should overlap the previous one by several centimeters;
- then, after the surface has dried, a third reinforcing layer is glued, which should cover the hole by at least 15 cm;
- further work is carried out with inside- the area around the hole is sanded and degreased;

- after that, the hole is filled with liquid acrylic and leveled;
- at the end of the work, the repaired surface must be sanded with fine sandpaper and polished.
Often people ask - how to cut fiberglass to the size of the hole? To do this, you can attach the canvas to the hole from the inside and mark it. After that, the canvas is cut with a mounting knife or ordinary scissors.
After completing all these manipulations, the bath is ready for use. As you can see, even the elimination through holes contains nothing complicated. The main thing is to choose the right repair kit so that it contains all the necessary components, including polishes, epoxy glue and fiberglass.

Eliminate delamination
Finally, consider what to do if the surface of the bath is swollen, i.e. acrylic moved away from fiberglass. This defect is eliminated quite simply, the only thing is that for this you need a special glue for gluing polymeric materials.
So, the work is carried out in the following sequence:
- in the center of the swollen bubble, it is necessary to make a small hole and introduce glue into the space between fiberglass and acrylic. To do this, you can use a regular syringe;
- then the acrylic surface must be pressed down so that it adheres to the fiberglass base. In this case, the adhesive that has come out must be removed;
- now you need to close the hole with liquid acrylic according to the scheme described above and then polish the repaired area.
Another unpleasant phenomenon that owners of acrylic bathtubs may encounter is bad smell. There are not so many options for what to do if it stinks. Manufacturers recommend taking a bath hot water and let it cool, and the procedure should be done within a week.
Here, in fact, are all the nuances of repairing an acrylic bath.
Conclusion
At home, you can carry out any repair of acrylic bathtubs, including even the elimination of large through holes. To perform this work, there are special kits on sale. Therefore, the main thing is only to choose the right set for solving certain problems, as well as adhere to the above recommendations.
For more information, see the video in this article. If you have any questions about repairs acrylic sanitary ware, ask them in the comments, and I will be happy to answer you.


