Panettone is an Italian Christmas cake in the shape of a dome, rich, fluffy and very fragrant. According to tradition, it is baked a few days before Christmas, and the more spices, dried fruits and candied fruits are added to the dough, the more successful the coming year will be.
Of course, you can cook it not only on one wonderful holiday of the year. Panettone can be prepared not only for Christmas, but also for Easter. In shape and recipe, this pie is similar to our Easter cake.
Here is an easy and quick light panettone recipe. We invite connoisseurs of complex culinary experiments to follow the link and try to prepare Panettone according to the traditional Italian recipe with sourdough:
Ingredients
- flour – 800-850 g
- milk – 1 glass (250 ml)
- sugar – 1.5 cups
- fresh yeast – 40 g
- butter – 150 g
- eggs – 3 pcs.
- egg yolks – 2 pcs.
- candied fruits - 2/3 cup
- raisins – 150 g
- dried apricots – 150 g
- ground nutmeg – 1 tsp.
- cardamom – 0.5 tsp.
- lemon or orange zest - 1 tbsp. l.
- vanilla sugar – 2 sachets
Cooking time: 3 hours / Yield: 14 servings
Preparation
Large photos Small photos
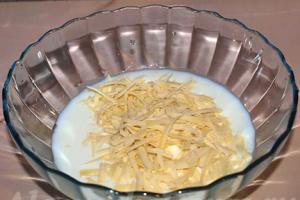
Yeast along with 2 tbsp. l. Place sugar in a small bowl. Grind into a paste and pour in 3-4 tbsp. l. warm milk.

Add 2 tbsp. l. flour, stir. Leave for 10-15 minutes until bubbles appear on the surface. This preparation will help activate the yeast faster, and it will work better in the dough.

Sift 2 cups flour into a large bowl.

Pour in warm milk, stir with flour.

Pour the yeast dissolved in milk into a thick, viscous mass.

Stir the dough with a spoon until it becomes almost homogeneous and viscous.

Cover it with a lid and put it in a warm place without drafts. The dough should stand in a warm place for at least an hour. During this time, it will rise 3-4 times, soften, and become loose.
A sign of a well-suited dough is numerous holes. When the dough begins to settle slightly, it’s time to knead the dough.

Beat the eggs, add the yolks and pour everything into the dough.

Cut the soft butter into pieces, pour sugar into the dough. Stir everything until completely combined with the dough.

Add 3 more cups of sifted flour, all the spices and herbs.

The panettone dough needs to be kneaded very well. At the beginning of kneading it will be sticky, but don’t add a lot of flour, add it literally a spoonful at a time. You need to knead it like any dough - with the bottom of your palm, rotating the lump of dough around its axis. The result should be a soft, plastic dough, homogeneous and buttery. Place it in a spacious bowl and cover. Place in a warm place to proof for about 1.5 hours.

Cut candied fruits and dried apricots into small pieces.

A well-kneaded dough will rise well and increase in volume several times.

Knead the risen dough, add the zest, steamed raisins, dried apricots and candied fruits.

Knead the dough again and let it rise again.

It should fit in the form in which the panettone will be baked. Be sure to grease the pan with oil and line the bottom and sides with oiled parchment. After an hour, the dough will increase 3-4 times - now you can grease it with yolk and put it in a preheated oven. Maintain the temperature within 180-190 degrees, bake the pie for 45-50 minutes. Very carefully remove the finished baked goods from the pan and cool on a wire rack.

Panettone is not usually sprinkled with powdered sugar or decorated with glaze. The pie is being wrapped beautiful paper and tied with a bright ribbon. Traditionally, panettone is served with sweet red wine or a cup of aromatic coffee.
ON A NOTE. Like any rich pastry, the pie must sit, gain flavor, and be saturated with aromas, so cut it no earlier than a day or two after cooking.
For people living next to a river or pond, always topical issue there was convenient access to water. Previously, bridges were built for these purposes, along which one could walk to a tied boat, but now such a device is rarely used anywhere. Basically, more serious structures are erected that require great strength and ingenuity, especially when the question is how to build a pier with your own hands quickly and inexpensively. It’s not in vain that we started talking about ingenuity, because this is exactly what many craftsmen resort to when creating a pier. Let's look at a few various designs makeshift piers.
Bottle pontoon type
This is the easiest device to make. The basis will be ordinary two-liter plastic bottles, the number of which depends on the planned size of the pier. To get started, prepare 300–350 bottles (if using one and a half liter bottles, you may need more, since they are narrower). It is desirable that the bottles be identical, not straight, but with a recess on which the fasteners will be securely fixed.

Be sure to check that the corks are tightly screwed in and that there are no holes in the bottle. To do this, try squeezing the bottle prepared for installation, and if it remains elastic, then everything is in order. Make the base of the pier not solid, but from three blocks, 60 - 80 bottles in one section. Also on the sides you need to make limiters from bottles.
Now you can make a deck for the pontoon from light boards or foam plastic. This floating structure must be securely fastened, otherwise strong winds can simply blow it away. To do this, drive two piles on the shore, to which you securely attach this pontoon.
This design is not heavy and the pier can be removed in winter.
Pontoon type pier made of metal barrels

Now let's see how to build a pier with your own hands from barrels. It should be said right away that it is better to assemble such a structure near the water, since its weight is too large, and it should be sent with
Now let's see how to build a pier with your own hands from barrels. It should be said right away that it is better to assemble such a structure near the water, since its weight is large, and going on a long journey with it will not be entirely convenient. In order to make such a pier, you will need:
- Planed boards.
- Wooden beam.
- 200-liter barrel – 4 pcs.
- Nails (or self-tapping screws).
- Rope.
The first stage of work will be the production of a frame from timber, measuring 2.5x2.5 m, with a cross-section of 100x50 mm. The fasteners can be nails that are long enough so that, having penetrated through the beams being fastened, they can be bent and the connection made more durable. It would be useful to strengthen the structure by inserting into the corners of the frame wooden blocks. Add additional supports from six 50x50 mm wooden blocks to the main frame. They should be installed so that the edges of the barrel rest on them.

Now you need to inspect the barrels. Make sure the plugs are tightly closed. To be more sure that the connection will not depressurize at this point, coat the threads and rubber seal with silicone, and then screw it tightly into the barrel.
Do not forget that metal is susceptible to corrosion, and if you want your pier to serve you as long as possible, then paint the entire barrel, or at least in those places where the original paint has been stripped off. This needs to be done every year!
Place the prepared barrels in the corners of the frame parallel to each other, and after drilling 6 holes for each barrel, secure them with ropes. While the structure is not very heavy, take it to the water with its barrels facing down. Having secured it securely near the shore, continue sheathing. The final stage will be making a bridge so that you can get from the shore to the pier.

In case you need more powerful design, make a permanent pier, which will require screw piles.
In order to make such a pier, you will need:
- Screw piles – 6 or 8 pcs.
- A corner of sufficient strength, the amount of which depends on the size of the structure, since with large spans it will be necessary to weld additional jumpers;
- Planed boards (25-30 mm);
- Nails, self-tapping screws or screws with nuts;
- Drill;
- Welding machine.
It is better to carry out the work in winter, when there is ice on the river, because in order to tighten the piles to great depths, a lot of effort will be required. Agree that it will not be easy to do this from a boat, since first it will need to be securely fastened, and only then deal with the piles. Weld a corner to the piles, and with a small gap that will ensure water drainage and good ventilation, secure the boards with nails or self-tapping screws, but preferably with a screw and nut, placing washers. If you are not afraid of theft, you can use copper fasteners.

If the screws are steel, then to prevent rust, after clamping, pull a piece of hose moistened with nigrol onto each protruding tail of the screw, otherwise, after the board dries, you can tighten it. Otherwise, everything will rust, and in a year the boards will rattle. Don't forget to treat the wood with an antiseptic. Now you can use a high-quality berth for a long time.
Video
We invite you to watch a video about self-construction pier made of metal barrels.
Plan out the basic design of your pontoon. If there are not enough materials, the pontoon may end up too small, and too much material can send you to the bottom the first time you go out on the water, not to mention the cost.
Find a practical location to build your pontoon. Don't forget that you will eventually have to move your "vessel" onto the water, and it is advisable that it gets there safe and sound. You will need a large trailer and a fairly powerful vehicle. But if you're going to build a very large pontoon, it may be much easier to assemble it piece by piece right next to the water - if you have your own access to the water.
Find suitable pontoons. Buoyancy is the main thing required part your raft. On some ruins you can find large pipes, plastic canisters, or even military "drop tanks". Hanging tanks are ideal as they do not rust and are lined with a water repellent material which makes them much stronger. In addition, they are much more streamlined in shape. The main thing is to find a material that, by its shape and composition, can displace a sufficient amount of water and at the same time keep your ship afloat.
Select the material for your raft's frame. In our article we will use water pipe PVC, as this is perhaps the most widely available material. We will also describe the process of attaching a treated pine frame structure. In our example, the length of the raft will be 485 cm and the width will be 245 cm. These measurements are only a guide and you can adjust them to suit your needs.
Lay out two sections PVC pipes 30 cm in diameter parallel to each other on a flat, level surface, covering the ends of the pipes to prevent water from flowing inside. You can seal the ends using a glued cap or a bellless ring and cap. These materials are quite expensive, so try to find them in junkyards or utility waste. Another option is to make a wooden plug and use epoxy glue and screws to plug the ends of the pipe with it.
Cut panels 240 cm long from treated pine and lay them along the length of the pipes you have prepared, at a distance of every 60 cm.
Nail two more 545cm long panels of treated wood 2x4s to the ends of these cross beams. This will be the supporting frame of your structure.
Use a coarse drill and 2 x 6cm hex screws and screw a 54cm long panel along the cross beams to secure them in place. Two screws for each partition will be enough.
Drive nails at an angle or screw screws into the partition.
Place a 16-gauge, 1-inch-wide galvanized strip on each corner of your rectangular structure to support the right angles of your raft's base during subsequent construction steps.
Measure the raft along the diagonals and adjust the corners so that the diagonals are the same.
Attach a zip tie to each cross beam, either by drilling a hole in the cross beams and screwing in galvanized screws 9 cm long, or using a screwdriver.
Install the deck. You can use 1X4 or 1X6 treated wood or shipbuilding plywood. Choose the driest and lightest material available to you, since your tubes have a displacement of 1,572 pounds, and this will determine the number and weight of structures you can build on the raft. Using pressure-treated pine in the sizes listed above, you'll end up with a weight of approximately 600 pounds, plus the weight of your pontoons. Thus, Weight Limit The amount your raft will be able to support at this stage is approximately 600 lbs. This means that you will be able to place a very limited amount of equipment and structures on the deck.
Wontons are close relatives of our dumplings, which came to us from China. This hearty dish is traditionally steamed, boiled or fried until crispy. From our article you will learn how to prepare wontons, a recipe for dough and filling, as well as small culinary tricks that will help make this dish especially tasty.
wonton dough
In China they already sell this dish ready dough, cut into squares or circles the right size. However, you can easily prepare the base yourself and make sure that there is nothing complicated about it. Read how to make wonton dough at home (recipe):
- Sift three cups of flour into a bowl.
- Boil half a glass of water in a saucepan and pour into the flour. After this, add another quarter glass of water at room temperature.
- Place salt, a spoonful of vegetable oil in a bowl, knead the dough and leave it to stand for 10-15 minutes.
Wontons with shrimp and pork
For this recipe, you can make your own dough or purchase it from the store. Divide the required amount of dough into three parts. Cover two with a towel and put aside, and roll out the third and use a mold to cut out circles with a diameter of 5 cm. To prepare the minced meat you will need:
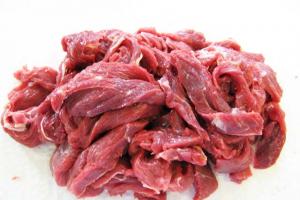
- Mash 300 grams of peeled shrimp with a fork, add 200 grams of minced pork to them and mix.
- After this, chop 120 grams of bamboo sprouts with a knife (you can replace them and add them to the minced meat.
- Season the filling with two tablespoons of soy sauce, two tablespoons of rice (or dry white) wine, salt and pepper.
- Add half the vegetable oil, two tablespoons (can be replaced with starch), one protein and a teaspoon of sugar to the minced meat.
Mix the filling well and place in the center of each piece. After this, connect the edges of the dough so that you get a bag with an open neck. Steam the wontons until done and then serve.

Fried wontons. Recipe with photo
At home they give it different shapes. Sometimes the edges are completely sealed together, sometimes the “neck” is left open, and in Sichuan cuisine they are often given a triangular shape. This time we suggest making bags from the dough and deep-frying them. Read how to make fried wontons (recipe):
- First, let's start preparing the sauce. Take one red chili pepper, remove the seeds and white membranes. Cut the pulp into thin half rings, which should then be combined with a tablespoon of sugar, a tablespoon of lime juice, three tablespoons of water and four tablespoons of soy sauce (you can use fish sauce instead).
- Grind 250 grams of peeled shrimp, add finely chopped green onions, five or six cloves of garlic and a few sprigs of cilantro.
- Mix shrimp with 450 grams of minced pork, one chicken egg, a tablespoon of soy sauce, a teaspoon of lime and a teaspoon of sugar. Season the minced meat with salt, ground pepper and mix well.
- Cover the bowl with the filling with cling film and place it in the refrigerator for half an hour.
- Use 350 grams of prepared wonton dough or make your own. Place a ball of minced meat in the center of each piece, which should be rolled with wet hands. Pinch the edges so that you get a small pouch.
- For deep frying, preheat vegetable oil in a deep pan, and then fry the wontons in it until golden brown.
Serve the finished dish hot with hot sauce.

Sweet wontons
There are many types of fillings with which Chinese dumplings are prepared. In this case, we suggest you stock up on dried berries and nuts. Read the instructions and cook original wontons with us. Recipe of dish:
- Take 75 grams of dried pitted cherries and mix them with 30 grams of cashews. Add sugar and ground cinnamon to taste.
- Prepare unleavened dough or buy ready-made dough. Place a teaspoon of filling in the center of each piece and press the edges together tightly, giving the wontons a square shape.
- Pour vegetable oil into a wok and fry sweet dumplings in it.
Place the finished wontons on paper towels let the oil drain and then onto a plate. Before serving, you can sprinkle them with a mixture of cinnamon and powdered sugar.

Wontons with minced meat. Recipe
Surprise your loved ones with a new Chinese dish and they will thank you. How to cook wontons? Read the recipe below:

Wontons with mushrooms
If you love mushrooms or have eliminated meat from your menu, then check out these vegetarian wontons. Recipe:
- Grind 200 grams of Chinese cabbage and 80 grams of celery using a blender.
- Chop 100 grams of champignons and one with a knife, and then fry in a frying pan until tender.
- Season the minced meat with soy sauce, add onion, cilantro and ginger to taste.
- Prepare the dough (you can find the recipe above) and roll it into a thin layer.
- Cut the dough into squares, place the filling in the center of each and form bags.
Wontons need to be steamed until cooked. You can serve them with an original sauce, which is prepared from the following products:
- Light soy sauce - 30 ml.
- Sesame oil - half a teaspoon.
- Dark - half a teaspoon.
- Red pepper is hot.
- Ginger - one teaspoon.
We hope that you will enjoy the recipes collected in this article and that you will delight your family with new dishes every day.
Moorings, or mooring structures, are special, different types of devices on a body of water, characterized by a wide range of applications. The most common use of boat docks or marinas is for mooring and parking. small vessels, boarding and disembarking passengers, conducting repair work. It is quite possible to make such a structure with your own hands if the construction is based on a competent design.
Types of berths and their characteristics
All berth structures can currently be classified into types depending on their location and design characteristics:
- embankment overpass– a through-structure structure represented by pile supports or shell piles;
- pier– a structure with a projection into the water area and having two-way or three-way access for ships;
- edging– a structure adjacent at the same elevation to the base structures on the berth;
- road pier, installed in an open roadstead and suitable for mooring large vessels;
- floating pier- a type of road berth used in the presence of significant fluctuations in water level.

Depending on the design features, four main types of pier can be distinguished:
- gravitational;
- through or pile;
- thin-walled or bolted;
- combined.
Protozoa hydraulic structures You can arrange it yourself for fishing or for a boat. Piers made from a variety of available materials are used in the following ways:
- floating area for barbecue and relaxation;
- dot Catering on the water;
- berth for catamarans, boats and jet skis;
- fishing raft;
- pontoon catamaran for shallow waters;
- floating bath or sauna;
- area for water activities;
- residential property or cottage.
On rafts, piers and pontoons, made with your own hands, you can sunbathe or dive into the water, transport goods and inspect fish tanks.
How to build a bridge for summer fishing (video)
How to build a simple berthing structure
For homeowners living in close proximity to a river or reservoir, the issue of creating a convenient access to the water is always relevant. Some time ago, for this purpose, walkways or a bridge were built, allowing access to tied boats. Today, preference is given to more serious structures.
Making a floating pier
Unlike a pier, a pier can be located not along the shore, but at the intersection of the water plane at a right angle, with an approach several hundred meters from land. In this case, not only a small vessel, but also a cargo vessel can be moored on both sides of the structure. Quite primitive piers are being built on the lake, located on the same line.
A pontoon or floating pier can be erected in areas of a reservoir that are subject to flooding, but protected from gusty winds. Pontoons are distinguished by their ease and simplicity of assembly, as well as the availability of all necessary documentation. Floating piers are most often metal, plastic or inflatable. The most the best option are floating plastic structures made of elements connected around the perimeter with special fasteners.
A floating pier does not require special maintenance, and if necessary, such a structure can be easily assembled, dismantled and installed in a new location. The modern plastic structure is created from HDPE with the addition of special compounds against the negative effects of the sun and sea salt.

Installation of a floating pier involves the use of additional accessories in the form of handrails, gangways and bollards. The cost of various composite plastic modules for creating a floating pier yourself is quite affordable.
Installation of a fishing bridge
A high-quality and durable deck or bridge can be made quite easily yourself. It is very important not only to choose the right location and develop a competent project, but also to securely secure the structure using a log or pile treated with special compounds. Installation is best done in winter, before the ice crust melts.
You can cut holes with a chainsaw, and the diameter of the hole will depend on the diameter of the support. The standard width of the bridge should be about one and a half meters, so the distance between the supports should not be more than two meters.
It is optimal to use pipes with sufficiently thick steel walls or stainless steel supports as supports. Wooden support Quite quickly under the influence of water it will lose high strength indicators. Some fishermen advise installing the deck on a base made of plastic pipes, not subject to corrosion and rotting. The frame is made of angle steel that can withstand significant loads.

Laying the flooring is made from wooden planks, pre-treated with transformer oil, which will increase service life and prevent rapid rotting. PVL sheets or profile flooring can also be used.
DIY barrel pontoons
Pontoons based on plastic barrels are one of the most inexpensive options. The strength indicators of such a simple structure depend on a properly constructed supporting frame and elements capable of providing a sufficient level of diagonal, longitudinal and transverse rigidity of the structure. Steel, aluminum, wood or plastic can be used to create the frame.
A high level of stability allows the use of a pontoon raft made from barrels for movement and recreation on the water, and when supplemented with a small outboard motor You can get a self-propelled pontoon.

To create a pontoon, alternative options to plastic barrels are often used:
- Foam pontoons are based on a pair of wooden “skis” filled with foam. This design is ideal for arranging motorized, easily controllable rafts;
- inflatable pontoons from large automobile inner tubes are created on the basis of a frame structure, and one failed inner tube can be easily replaced or sealed even during the rafting process;
- the most popular and budget option is the pontoon option from plastic bottles, with which you need to fill large rubberized bags secured under the raft deck.
Homemade catamaran rafts on plywood pontoons are also in great demand. For production, moisture-resistant plywood sheets impregnated with drying oil 3 mm thick, as well as three-meter wooden slats dimensions 25x25 mm or 25x15 mm. Bicycle parts make it possible to create a rowing drive and wheels for a catamaran.
Features of the construction of piers and berths (video)
Before manufacturing, it is necessary to perform simple calculations on the total load capacity, which includes the buoyancy indicators of all float elements. For example, if plastic barrel can keep 120 kg of weight afloat, then for a lifting capacity of 1.2 tons you will need to use at least ten barrels. The optimal reserve of buoyancy indicators is equal to 20-30% of the calculations performed.
What you need to consider when building a small pier for a boat or boat
The coastal zone of a reservoir, equipped with special equipment for mooring, repair work and maintenance, is called a berth. If until recently to create pile foundation wood used hard rocks, then today metal driven and screw piles are most often used, differing in structure and installation method:
- driven piles, presented steel pipes with a sharp tip, are buried using pile driving machines, which often negatively affects the condition metal structure. Such supports are used for self-made berths are extremely rare, due to the need to use special equipment;
- screw metal piles have a lower cone-shaped end with a welded blade and a head to which the base of the manufactured berth is attached. The screw blade is quite easily and evenly screwed into the ground, which makes the risk of deformation of the metal support minimal.

The diameter of the shaft and the wall thickness of the piles depend on the level of expected load. In the cavities of screwed-in piles it is necessary to fill concrete mortar, increasing the load-bearing capacity of the support. The cost of the material used for construction can be reduced by purchasing modern polymers with high water-repellent characteristics.
The surface structure made of such building material is characterized by the following quality characteristics:
- absence of decay processes as a result of exposure high level humidity;
- absence of deformation and cracking as a result of drying out;
- no loss of decorative effect under the influence of temperature changes;
- increased resistance to abrasion and impact loads;
- the presence of a non-slip corrugated surface.

Polymer deck boards used in the installation of floorings do not require protection with varnishes and oils, which makes maintenance simple and affordable.
Decorative descent to a pond near the site
On summer cottages, located near rivers or lakes, decorative metal structures of the platform can also be equipped. In this case, channels No. 12 are most often used as supports. The platform covering and steps are most often made of corrugated steel, and the treads are made of several reinforcing bars. For ease of descent and ascent, you need to install railings. Tikkurila berth paint is used for painting.
How to build a pier on screw piles (video)
It should be noted that any piers that go into the water at a considerable distance from the shore line must be built by professionals using special equipment. It is also very important to monitor the technical condition of the pier and carry out timely repair work.