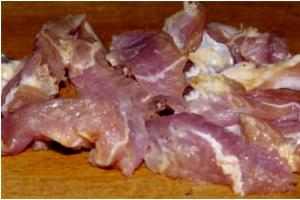
The most popular products on the plumbing market are steel bathtubs. In some ways, they can be called budget class, since their price is relatively low.
However, if handled properly, such products can boast very long term operation.
At the same time, the owners of such bathtubs note a couple of serious shortcomings.
- Firstly, the water in them cools much faster than in their cast iron counterparts;
- and secondly, a very loud sound is made by the stream of water gathering, which can be heard not only in neighboring rooms, but also in apartments.
And these shortcomings can negate the main advantage of such baths, namely, low cost.
However, this is not such a problem, because both the noise and the rapid cooling of the water can be forgotten once and for all if the steel bath is properly insulated. This will be discussed in this article.
About steel baths

Although traditional material For the manufacture of bathtubs, cast iron is considered; nowadays, products made of metal and plastic are quite common. And if in this case most buyers do not trust plastic, then people willingly purchase metal bathtubs.
After all, even over cast iron analogues they have several advantages, among which it should be noted:
- Low cost.
- Light weight.
- Durability and shock resistance.
- The metal heats up very quickly. It is enough to open hot water for a few seconds, and such a bath becomes warm.
Taking into account all the advantages, it can be noted that steel bathtubs are worthy competitors to traditional cast iron ones, but require minor modifications, namely insulation.
Preparing for insulation
How to insulate a bathtub and how to insulate a bathtub? These two questions concern many home craftsmen, and the answers to them are much simpler than they might seem at first glance.
For insulation, it is best to use polyurethane foam. This material is very easy to install, and you can carry out the thermal insulation process with your own hands without any difficulties or problems. Polyurethane foam is a universal insulating material, which is used as insulation for windows and doors.
As the main or additional thermal insulation material, floors, roofing, it is also used to insulate loggias.
Most often, polyurethane foam is used to seal the joints and cracks between the main slabs. However, this heat insulator is often sprayed directly onto the insulated surface in a continuous layer.
To insulate the bathtub, you will need ordinary polyurethane foam, which is sold in cans and does not require the use of any special devices.

Advice!
Insulation should be done before the initial installation of the bathtub, because dismantling an installed and tiled product is a rather difficult task.
Before work, you should make the necessary preparations:
- The product must be assembled and fully prepared for installation.. Install the drain siphon and secure the legs.
- Clean the surface from dirt and dust.
- Before application polyurethane foam the surface should be well moistened. We wet the cloth generously with water, washing away dust and dirt from the bathtub.
- Next, you should prepare the polyurethane foam for the insulation process.. To do this, shake the container thoroughly. If possible, you should warm it up further by bringing it under the stream. hot water. This will maximize the foam output from the can, saving you money and time.
Advice!
If subsequently it is planned to sew and cover with tiles, then with front side bathtubs need to install a UD guide profile.
We insulate the bathtub
The instructions for thermal insulation involve several stages:

We should also talk about wall insulation. Here there may be slight difficulties with applying insulation. So, the foam can subside and flow down in large chunks. In principle, if you carry out the entire process carefully and slowly, without applying foam with a strong stream, then you will not have any problems.
But if you are not sure that you can handle this process, then it is better to wait a little until the foam applied to the bottom dries completely (this will take no more than half an hour).

After this, simply turn the bathtub on its side and continue working in the same way.
Conclusion
Now you know how to insulate a bathtub in a simple and in an accessible way without spending extra money. After treating the surface, you should leave the product alone for eight hours until the sealant finally sets. After this, you can safely install the bathtub in place and enjoy its new characteristics.
In the video presented in this article you will find additional information on this topic.
Insulating a bathtub with your own hands - improving the characteristics of a steel bathtubWhatever you say, steel bathtubs are very popular. This is due to their relatively low cost, simplicity of design and installation.
In this article we will talk about the disadvantages and advantages of steel bathtubs and how to insulate a bathtub, getting rid of its main drawback.
The obvious advantages include, in addition to all of the above, the fact that they have sufficient strength. The thickness of a high-quality standard steel bath should be at least 3 mm. The enamel coating holds up well and is noticeably more durable than soft acrylic, which is easily scratched. Steel bath with careful handling it will last at least 15 years, delighting with its snow-white or colored coating.Unlike cast iron, it warms up very quickly, just rinse it with at least a hot shower and it is already warm and does not cause discomfort if you lean against it.
And now about the disadvantages of a steel bathtub.
Since the walls of the bathtub are thin, it retains heat very poorly. Having filled such a bathtub, you are unlikely to be able to enjoy the warmth for a long time; you will need to periodically add hot water.
The bathtub has a not very pleasant ringing sound, like an empty bucket, when filling. And it irritates not only the owners themselves, but is also heard by all the neighbors around.
There is a fairly simple way to get rid of these two shortcomings.
How to insulate a bath
It is most convenient to do this before installing the bathtub. We turn it over and glue a layer of rubber to the bottom, taking into account the place where the siphon and legs are attached. If you later have the opportunity to bring the bathtub to the installation site, install the legs and siphon immediately. You can use, for example, Vibroplast, it is self-adhesive; raw rubber or just a suitable thickness will also work.

We foam the entire outer surface baths. For better adhesion, lightly moisten the surface with water. It is more convenient to use professional foam under the gun; you can control the amount of foam output, and it is much more convenient to work.
Let the foam harden and, if necessary, cut off the excess. Polyurethane foam does not rot and is not susceptible to mold and mildew. The only thing she is afraid of is that she is destroyed under the influence of ultraviolet radiation, direct contact sun rays, which in this case does not threaten.
A bathtub insulated in this way will keep the water warm and the rattling sound when filling will be eliminated.
That, in principle, is the simple solution to the question of how to insulate a bathtub.
The bathroom should always be warm. After a shower, human skin is especially sensitive to temperature, and even short-term hypothermia can cause colds. In addition to the obvious discomfort and danger to human health, the cold in the bathroom can cause damage to finishing materials. They dry out too slowly, which leads to constant dampness, the appearance of fungus and mold. How to insulate a bathroom in a private house and do without connecting additional heating?
Why is it cold in the bathroom?
Insulation of walls in the bathroom
Of the heating appliances in the bathroom, usually only a heated towel rail is installed. If the owner built his house himself, then there may be a radiator in the bathroom, but it is installed only in cases where the area of the room is large enough. A room may be cold simply because it is not heated well enough. There are other reasons for low temperature:
- Powerful hood. In the bathroom high humidity, so you have to take care of normal ventilation. Together with air and condensate, heat also evaporates through the hood. If a room is poorly insulated but well ventilated, it will be cool.
- Slots in the windows. Many private houses have wooden frames. Over time, they dry out and cracks appear. Insulating the frames alone will not be enough, because... Air circulation through the cracks continues.
- Gaps in walls, floors, ceilings. The building may shrink. The result is the appearance of cracks and crevices in building structures. If they are not insulated, the rooms may be cool even when the heating system is operating normally.

Installing a heat insulator on the walls in the bathroom
How to insulate - from the inside or outside
If the apartments have a layout such that the bathroom does not border external walls, then in private houses it is difficult to arrange it this way. Often the bathroom turns out to be a corner room, and it is almost always cold in it. It is advisable to make high-quality insulation of the walls in the bathroom from the inside and outside.
External thermal insulation of walls is usually carried out before finishing the facades, and materials are selected to insulate the entire house as a whole. But the inside of the bathroom should be insulated separately. It is necessary to minimize heat loss through the floor, ceiling and walls. For each design, insulators are selected taking into account the materials from which they are made.

Materials for thermal insulation of walls and ceilings
The most popular materials for thermal insulation of bathroom walls and ceilings:
- polyurethane foam;
- Styrofoam;
- mineral wool;
- warm plasters.
All insulators have their advantages and disadvantages. Before purchasing, you should soberly evaluate them, because some insulation materials lose their properties when they become damp. If this happens, the money spent on protective measures will be thrown away.
Whatever material the home owner chooses, he will have to take care of preparing the surfaces. It is necessary to remove the old finish and treat the structures with an antiseptic composition. This is necessary to destroy the fungus and prevent its occurrence in the future.
It is best to level the walls, but for the installation of most insulation, perfectly smooth surfaces are not necessary. Minor defects will not affect the quality of the insulation in any way. The main thing is that large cracks, distortions and differences are eliminated in advance.

Option #1: mineral wool mats
Mineral wool absorbs water, and many experts do not recommend using it at all for those home owners who are not ready to invest money in high-quality hydro- and vapor barrier.
Under the influence of moisture, the thermal insulation properties of the material are reduced, so it must be reliably protected from drops of water and condensation. On the other hand, mineral wool does not interfere with micro-air circulation, and this is important for rooms that need good ventilation.
Advice. If mineral wool is chosen as insulation, be careful when installing hydro- and vapor barrier layers. It is necessary that the joints between the strips of materials are absolutely sealed. This largely depends on the quality of the insulators themselves and the installation. Savings will only result in additional costs.

It is better to give preference not to roll insulation, but to rigid mineral wool mats. They are mounted on special frame from wooden slats or galvanized profile. The second option is preferable. Metal carcass lasts longer and does not deform. Thanks to this and the design of the mats themselves, the insulation will not slide off the walls or bunch up downwards.
When installing an insulating layer of mineral wool Areas where heating appliances are installed should be shielded. For this they use aluminum foil. If the heat insulator is properly installed and reliably protected from moisture, it can serve for decades without changing its technical and operational characteristics.

Major insulation of a room with mineral wool
Option #2: foam
To insulate the bathroom from the inside, you can use polystyrene foam. It is often used for external thermal insulation. The material has good performance properties, but has a number of disadvantages. The main one is low vapor permeability.
When installing foam plastic, you need to carefully seal the joints. If even small gaps remain, condensation will accumulate under the insulation. Over time, this will lead to the appearance of fungus, which will be extremely difficult to get rid of: you will have to dismantle and replace the insulation.
The advantages of the material include ease of installation. It is chosen by home owners who plan to do renovations themselves. Foam is lightweight and easy to process ordinary tools. For work you will only need a construction knife, a rubber roller, spatulas, and materials for sealing joints.

Work order:
- Surface preparation. The walls are cleared of old decoration, level and open with a primer. The composition is applied in two layers. It is best to choose a primer with antiseptic additives.
- Applying glue. The foam sheets are covered over the entire surface with an adhesive composition. To apply it, use a notched trowel.
- Gluing foam. The adhesive-coated insulation is pressed tightly against the wall. It is important to calculate the effort so as not to damage the fragile material. To make the sheet stick better, roll it with a rubber roller.
- Sealing joints. To seal seams and joints, use a special putty. The foam plastic should be puttyed in two layers. You can install a finishing finish on top, ideally a hydrophobic one.

Option #3: polyurethane foam
Polyurethane foam is used to insulate the ceiling and walls in the bathroom from the inside. This is a liquid heat insulator that is excellent for rooms with complex configurations. It is applied in a thin layer, which is important if the area of the room is small and the owner is trying to rationally use every free centimeter.
Polyurethane foam has good vapor permeability, adhesion to any materials, heat and sound insulation properties, and is not afraid of fire and water. Important advantage– lightness: no additional load on building construction.
The disadvantages of polyurethane foam are the relatively high price and complex application technology. However, this pays off in the absence of the need to install hydro- and vapor barrier layers.
The material is applied using special equipment, and this work is best entrusted to qualified builders. If the insulation of the walls in the bathroom from the inside using polyurethane foam is done correctly, then cold bridges do not appear, and condensation does not accumulate under the material.
The liquid heat insulator dries quickly, so you can begin almost immediately after applying it. Finishing work. There is no need to shield the areas where heating devices are located, because high temperatures do not affect the effectiveness of the heat insulator.

Option #4: cork agglomerate
Cork agglomerate is a high-quality environmentally friendly insulation made from cork oak bark. It does not absorb water, is not afraid of fire, and has good thermal insulation properties, allows air to pass through. There are no problems with installation: the material is glued to the surface according to the same principle as wallpaper. It is suitable for insulating both walls and ceilings.
There is also a minus - the price. Insulation is too expensive, and many consider the use of such an exotic material for finishing to be an unjustified waste. If costs are not a concern, then for the bathroom you can choose a material with a special wax impregnation. Cork will last for many years without changing its properties.

Black and white cork agglomerate
Option #5: insulating plasters
A great way to insulate a bathroom from the inside is to decorate the walls with a plaster composition with a low thermal conductivity coefficient. Warm plasters are vapor-permeable and can be used to cover surfaces with complex configurations. The insulation effect is achieved through special additives. Depending on them, vermiculite, sawdust, and polystyrene foam plasters are distinguished.
Before applying the material, there is no need to level the surfaces; it is enough to thoroughly clean them of old coatings and prime them. The only negative is that the heat insulator has to be applied in a thick layer. This reduces the usable area of the bathroom. However, insulation with other materials takes up space in the same way.
Note! Application technology warm plasters is quite complex, and without the appropriate skills it is better not to try to do this work yourself.

How and with what can you insulate a bathroom floor?
As thermal insulators, you can choose polyurethane foam, mineral wool, regular or extruded polystyrene foam. Some home owners opt for the cheapest option - polystyrene foam. However, you should always remember that the insulation is installed under the screed, and fragile foam sheets do not always successfully cope with the loads. They burst, and moisture penetrates into the cracks. The result is dampness and fungus.
Best choice for insulation of the bathroom floor - polyurethane foam. If your budget is limited, you can buy extruded polystyrene foam. It is rigid, tolerates loads well, has high thermal insulation properties, and is vapor permeable.
For high-quality insulation, it is necessary to install a thick layer of extruded polystyrene foam, which means raising the floor level. Under concrete screed lay the reinforcing mesh. The material needs good waterproofing. To do this, use a waterproofing film or penetrating compounds.

Video tutorial: thermal insulation of walls in a wooden house
There are many materials for insulating walls in a bathroom from the inside. Each home owner can find a heat insulator that is best suited for a particular room. The main thing is to take into account all the operating features. This will help avoid troubles in the future. Remember, consulting a specialist is never superfluous. If you are not confident in your abilities, do not hesitate to ask for help.
August 22, 2016Specialization: Capital construction works(laying a foundation, erecting walls, constructing a roof, etc.). Internal construction work (laying internal communications, rough and fine finishing). Hobbies: mobile communications, high tech, computer technology, programming.
Recently I performed a task that seemed strange at first glance - insulating a bathroom from the inside. It is rare that you have to install thermal insulation inside this room. But in the mentioned case it was impossible to work outside (due to the lack of equipment for industrial mountaineering), and it was impossible to leave the room without insulation, since cold weather Frost even formed on the walls.
I tried to outline the sequence of actions so that the described technology would be easy to implement with your own hands. I'm sure the material will be useful to you.
Features of bathroom insulation
A bathroom is a room with a specific microclimate, characterized by significant temperature fluctuations and very high levels of humidity. Therefore, its thermal insulation requires a special approach and I have no right not to mention some nuances.

- The need to destroy the bathroom interior. To insulate the bathroom, you will have to dismantle the finishing and then re-cover the walls with tiles, plastic or plaster. All these operations increase the cost of the project, time for its implementation and labor intensity.
- Reducing the area of the sanitary room. It’s unlikely that anyone’s apartment bathroom is spacious. So, an insulating pie will make the room even smaller. So think about whether all the necessary furniture and equipment will fit there after insulation.
- Impaired air infiltration. Vapor-tight insulation does not allow moist air to pass through the walls, so to regulate the humidity in the bathroom you need to design more than just effective ventilation, and forced - using powerful .
- Danger of mold and mildew. This misfortune can only be feared if the thermal insulation is not done correctly.
- Reducing the service life of enclosing structures. If you install insulation inside, the walls of your home will constantly freeze and come into contact with atmospheric moisture, which negatively affects their integrity.
However, in my case, install insulation on the 20th floor of the city apartment building I was unable to, because I can’t pretend to be a monkey dangling at a dizzying height. And I didn’t want to hire a specialist either.

That's why I resorted to internal insulation. Although there are some nuances that need to be mentioned:
- For internal insulation bathtubs must use materials that have hydrophobic properties and do not lose their performance properties when wet;
- it is better to choose materials with the lowest thermal conductivity coefficient so that the insulating layer is as thin as possible;
- for internal insulation, materials with great strength are needed to maintain integrity during finishing and possible mechanical impact.
Selection of materials and insulation technology
Manufacturers of modern building materials offer a huge number of different thermal insulators. This includes mineral wool, expanded clay, penofol, and polyurethane foam.
But if you analyze everything said in the previous section, it becomes obvious that polystyrene foam and its more advanced version - extruded polystyrene foam - are most suitable for the job.

These materials have many positive qualities:
| Characteristic | Description |
| Low thermal conductivity | The material protects the room well from unproductive heat loss, so to protect the bathroom from the cold, a layer of insulation 50 mm thick is sufficient. |
| High strength | Despite its low density (from 25 to 35 kg per cubic meter), foam plastic has a durable surface on which thin-layer cement plaster can be applied or a reinforced screed can be made over it. |
| Hydrophobicity | The insulation has a closed cellular structure, therefore, in direct contact with water, it absorbs no more than 4% (EPS - 0.5%) of the liquid. |
| Light weight | Polystyrene foam consists of 98% air enclosed in polystyrene cells, so it weighs little and does not place much additional load on building structures. |
| Low price | Insulation is cheaper than alternatives thermal insulation materials, which allows you to save some Money, which can be spent on purchasing, for example, tiles. Or Jacuzzi baths. |
For my own work, I purchased polystyrene foam of the PSB-S-35 brand (the manufacturer is unimportant here) 50 mm thick with dimensions of 100 by 50 cm. The letter C means the presence of fire retardants in the polystyrene foam, which contribute to the attenuation of the insulating layer in the event of a fire.

As for other materials, you will need the following “gentleman’s” set:
- Cement-based adhesive for polystyrene foam. For example, Dops Multifix. I will use the same compound to reinforce the foam on top for subsequent installation of the decorative coating.
- Polyurethane adhesive for foam plastic. For example, Tytan Styro 753. I will use it for gluing to one of the walls of the bathroom (which is in contact with the street). It is cold, so the cement glue will dry poorly and hold unreliably.
- Dowels with caps (“fungi”, “umbrellas”). Needed to secure the insulating layer on the surface of the walls. It is better to buy fittings with plastic cores so that metal screws do not become a conductor of cold from the street.
- Reinforcing fiberglass alkali-resistant mesh. It will be used for reinforcement internal corners walls and the entire surface of the insulating layer of foam.
- Waterproofing. This time I will use Ceresit CR-65. This material is sold in the form of a dry mixture and is used for arranging hydraulic structures. Therefore, the resulting waterproof layer will certainly not allow water to pass to the insulation and further to the neighbors.
- Primer for concrete. You need to take a composition that contains antiseptic substances. The latter prevent the appearance of mold and mildew inside the insulating layer. As an example, I can give Dufa Grund Antiseptik.
Among the tools, you will really need a hammer drill (since you will have to drill a large number of holes), as well as buckets, spatulas and graters for applying a layer of plaster to the walls.
Work order
To insulate a bathtub you need to take only three steps, which are shown in the diagram below.

And now about each of them in more detail.
Stage 1 - Surface Preparation
As you understand, we will insulate the walls and ceiling. But first you need to prepare these surfaces for work. The sequence of actions is as follows:
- I empty the bathroom of furniture and plumbing fixtures. This is precisely one of the disadvantages of internal insulation technology. To install foam plastic on the walls, you need to remove the bathtub, sink, washing machine and so on. Therefore, thermal insulation measures are usually timed to coincide with general repairs in the plumbing unit.

- I'm deleting decorative finishing from the walls. In my case, all surfaces were tiled. So I knocked down all the parts using a hammer drill with a chisel attached to it. Moreover, you need to get rid of not only the tiles themselves, but also the remnants in order to get as good a result as possible. Smooth surface. In the case of other materials, you can proceed as follows:
- The wallpaper is simply torn off the walls, after which the surfaces are protected with a spatula from remnants of the backing and glue.
- You don’t have to remove all the paint, but get rid of only those areas that are already swollen or crumbling. The rest of the layer will not interfere with the work.

- I carry out repairs to wall and floor surfaces. Before laying the insulation, you must make sure that the surfaces do not have cracks, potholes and bumps that could interfere with the adhesion of the foam or cause moisture to penetrate into the thickness of the insulating layer:
- Small and shallow cracks need to be slightly widened with a grinder with a diamond blade, then fill it with polyurethane foam. After hardening, the latter is cut flush with the wall or floor.
- Large recesses are cleaned with a chisel to get rid of crumbling areas, and then filled with cement repair mortar. If reinforcement is visible in the recess, it must be cleaned before repair. sandpaper and coat with rust converter.

- I clean the surface from dust. It is best to do this with a vacuum cleaner, which will remove even the smallest particles of dust and mineral chips.

- I prime the walls and floor. The composition I have chosen not only improves adhesion, removes dust concrete plates and gives them antiseptic properties, but also kills all microorganisms that already live on the surface of the slabs. Priming is carried out according to the following scheme:
- First, using a roller (or, to speed up the process, a sprayer), the walls are coated with a primer in one layer.
- After this, you need to give the composition time to dry. This usually takes about 4 hours.
- Then the walls of the room are coated with primer again. After the second layer has dried, you can proceed to gluing the foam.

- I'm laying out the electrical wiring. If you need to lay electrical cables and install sockets in the bathroom, you need to do it now. For installation, polyvinyl chloride cable channels are used, which in the event of a short circuit will prevent the insulating layer from igniting. And the polystyrene foam itself is easy to process, so you can then hollow out recesses in it to mask these cable channels.

Stage 2 - Installation of thermal insulation on the walls
Let's start insulating the walls. I’ll say right away that although the gluing process seems simple, it contains many small nuances on which the quality of the work performed ultimately depends.
The technology is as follows:
- I hit the zero mark. To do this, you need to mark a mark at a height of about 52-55 cm from the floor, following which, using a water or laser level, draw a strictly horizontal line over the entire surface of the walls in the bathroom, which will serve as a guide for gluing the foam sheets.

- If necessary, I carry out marking and cutting of foam sheets. The material is easily cut using a utility knife, a hacksaw with sharp teeth or hot metal wire. Let me point out a few nuances:
- When cutting, maintain the dimensions very precisely so that when gluing, the seams between the individual sheets are minimal.
- To ensure a tighter fit of the sheets, after sawing off the part, you need to process its end using a foam grater.

- I am preparing a reinforcing composition for polystyrene foam. For this, a dry construction mixture is used, to which water is added, after which everything is stirred and brought to homogeneity using a mixer connected to a drill. In this matter, it is important to pay attention to several points:
- After mixing, it is necessary to leave the glue for 5-7 minutes so that the additives and plasticizers included in its composition are activated. After this, the solution should be mixed again.
- Prepare only the amount of glue that you can use in about 40 minutes. After this time operational properties solutions deteriorate.
- To prepare a new portion, you need to use a clean container (or wash the old one well). Otherwise, frozen lumps from the previous batch can spoil the glue and interfere with the correct alignment of the foam boards.

- I spread glue on the first sheet of foam. The glue application pattern will be the same for all sheets, but it has several features that are important to know:
- If the wall is smooth and there is no need to level it with polystyrene foam, then glue is applied to the entire surface of the foam plastic, after which it is spread with a notched trowel.
- If you need to level the wall, then apply the glue with a roller along the edge (at a distance of 5 cm from it with small gaps for air to escape), after which several lumps are placed in the middle so that at least 40% of the area of the material is covered with the composition.
- Polyurethane glue from a balloon is applied in the form of separate lumps (about 6-8 pieces), distributed over the entire surface of the insulation.
- If the foam sheets are joined at an angle of 90 degrees, then the area that is adjacent to another part of the insulation does not need to be coated with glue.
- During operation, care should be taken to ensure that adhesive composition cement-based did not get into the seams between sheets of polystyrene foam.

- I secure the first sheet of foam. You need to start work from the corner above the zero level line (drawn in advance on the walls). The system is like this:
- You need to fix the part on the wall, and then align it vertically, controlling the location using a water level.
- After this, further strengthen it with four umbrella dowels. You need to drill a hole in the wall directly through the foam, then insert the dowel, but do not hammer in the core, but only insert it all the way, otherwise you can knock down the level of the foam sheet.

- I glue the remaining sheets on top from the zero mark. When applying glue and leveling, you need to act as indicated in the previous two paragraphs, as for the remaining nuances:
- When joining two adjacent sheets of the same row, it is necessary to ensure that the parts fit as tightly as possible to each other. If necessary, you can use a polystyrene foam grater.
- When installing the top row on the bottom, you need to make sure that the seams of the material run apart, that is, the seam of the top is separated from the seam of the bottom row of foam at a distance of at least 20 cm.
- In the corners, the foam should be connected according to the principle of a ladder. That is, first a sheet comes from one wall, then from the other, and so on in steps to the very top.
- If the wall has too much vertical difference, a polystyrene foam pad of suitable thickness can be glued under the bottom of the foam sheet.
- All sheets of foam plastic are also additionally reinforced with four dowels, the cores of which are not hammered in completely until the glue has completely dried.
- To glue sheets to a cold wall that protects the bathtub from the street, you need to use polyurethane glue if the work is carried out in the cold season.

- I glue the sheets from below the zero line. It is important to secure them correctly, for which pads are used under the lower part of the part. If necessary, trim the insulation using a knife or saw.
- I fill the foam seams with polyurethane glue. You need to pour the foam so that it fills the entire space between the foam sheets, and not just at the top of the seam.
- I secure the insulation sheets with dowels. This must be done after all the glue has dried. First, the cores of those parts that were already inserted during gluing are completely hammered. Then the number of dowels increases to 6-8 per sheet. It is also advisable to drive fasteners into the seams between the sheets to strengthen them too. The dowel must be hammered in so that its head is submerged and does not rise above the surface of the polystyrene foam.

- I perform final cleaning of the foam surface. To do this, use a polystyrene foam grater. With its help, it is necessary to especially carefully process the foam seams (if there are small differences in height) and outer corners (if any).

- I reinforce the outer corners of foam plastic. In the bathroom where I was renovating, the wall has a complex shape, so the foam insulation formed two external corners. They need to be reinforced using a corner with a mesh. This is done like this:
- A small layer of reinforcing compound (glue that was used to glue the insulation) is applied to both sides of the corner.
- A corner is applied, after which, using a plaster float, it is pressed inside the insulation.
- Then a little more solution is applied on top with a spatula, which is distributed in the direction from the corner outward.

- I reinforce the surface of the foam with mesh. A pre-purchased fiberglass alkali-resistant mesh is used:
- A reinforcing compound is applied to the surface of the insulating layer.
- A mesh is glued onto it, after which it is pressed into the solution with a grater.
- A little more composition is applied on top, which is then carefully leveled.
- At the junction of individual sheets and in the corners of the room, the mesh should be overlapped.
- When leveling, use the blunt side of a plastering float to avoid tearing the reinforcing layer.

- I complete the final plastering of the wall surface with cement mortar. Further technology depends on the chosen finishing material. If you are going to glue tiles, then you do not need to bring the surface to perfection, but for painting and wallpaper you will have to carefully plaster, putty and sand everything.
The last stage of wall insulation is their decorative finishing.
Stage 3 - Floor insulation
To insulate the floor, instead of polystyrene foam, I took extruded polystyrene foam trademark penoplex. This material has a high density, so it better tolerates mechanical loads exerted on the insulated surface.
I will describe the work scheme briefly so as not to abuse your attention:
- A polyethylene film is laid on the prepared floor. It plays the role of a waterproofing membrane and is used to prevent penoplex from getting wet.
- Sheets of thermal insulation material are laid. You can lay one layer 5 cm thick or two layers 10 cm thick. In my case, 5 is enough, since below there is also a living space and there is no need to protect yourself from the severe winter cold. The styling features are:
- The material is simply laid out on the floor without fastening. There will be cement strainer, which will firmly hold the insulation sheets in place.
- The ends of the penoplex are designed in the form of a step, which allows you to tightly connect the parts and avoid the appearance of cold bridges.
- When laying the material in two layers, you need to ensure that the seams of the bottom row are at intervals with the joints of the top row.

- Reinforcing mesh is installed. What is needed here is not fiberglass, but a metal mesh made of steel wire with a mesh size of 10 cm. The laying technique is as follows:
- Individual sheets of mesh are laid out on polystyrene foam in such a way that they overlap each other at a distance of one cell.
- Placed under the net plastic legs, which will hold it at a height of 2-3 cm above the level of the insulating material.
- The sheets of the reinforcing layer are connected to each other using steel wire.

- Beacons are being installed. For this purpose, special aluminum parts and brackets are used. Beacons need to be aligned with water or laser level to achieve a perfectly flat floor in the end.
- The screed is being poured. A solution is prepared, poured into the space between the beacons and leveled with an aluminum rule.

Some nuances of bath insulation

I'll tell you how to insulate steel bath:
- the plumbing fixture is turned over and installed on cardboard, foam rubber or other lining that will prevent scratches on the enamel layer;
- the legs are glued or otherwise secured to the bathtub;
- a layer of polyurethane foam is applied to the surface of the product, which then hardens;
- in the same way, you need to apply several layers of insulation (the more, the more effective the insulation);
- if necessary, the foam can be reinforced with fiberglass mesh.
Summary
Now you know how to insulate a bathroom in an apartment. If you are wondering how to thermally insulate this room in wooden house, watch the video in this article, where the mentioned technology is described in great detail.
What do you think about how to insulate acrylic bath? Should I use polyurethane foam for this or is it better to prefer other thermal insulators? You can post your answers in the comments to the material.
August 22, 2016If you want to express gratitude, add a clarification or objection, or ask the author something - add a comment or say thank you!
Proper bathroom equipment is very important for the owner of any home, because this is the room you need for comfortable well-being and good mood. Proper renovation can not only create a pleasant and comfortable environment, but even improve your health. The entire positive effect is achieved by the warmth and absence of excessive moisture that is necessary for the given territory. The bath itself should not cool down too quickly; the walls and floor should maintain a comfortable temperature regime, it is also desirable that there is no unnecessary noise heard from the operation of the sewerage system, neighboring apartments, boiler, or water supply.
IN this material You'll learn how to install insulation throughout the bathtub itself, the walls, and the floor of the restroom. The proposed methods will not require large financial outlays from you, and you can do most of the work yourself without the need to hire professional builders.
Bath insulation
Many people prefer to purchase a steel bathtub because it is durable, reliable, lasts a very long time, is convenient and is very inexpensive. The only drawback of such plumbing is that it does not retain heat well, the water in it cools down quickly, and the running stream of water makes a lot of noise. However, these negative qualities can be easily compensated for by insulating the device, and you won’t even need the help of a specialist and won’t have to spend an additional large amount of money. You can insulate a bathtub yourself using only regular polyurethane foam. With its help, the bottom will retain heat better and the level of outgoing noise will significantly decrease. You need to purchase at any hardware store large cylinders polyurethane sealant, you will need three or four units.
You need to start working before installing the plumbing and connecting it to the water supply, because it will not be possible to apply an insulating substance from the floor neatly and evenly, but to dismantle it new design Of course, it's not worth it. Therefore, we completely assemble all the parts and install plumbing equipment, which involves installing drain siphon, and also fasten support legs, a guide profile for subsequent cladding. That is, at the stage of complete readiness for installation, the bathtub is insulated with its own hands.
Do-it-yourself bath insulation
To work you will need very few building materials and tools:
- Polyurethane foam with a gun.
- Styrofoam.
- Putty.
- Two-component adhesive.
- Fiberglass.
First of all, it is necessary to prepare the surface for applying polyurethane foam. Keep in mind that absolutely any adhesive and sealing compounds are applied only to clean areas, therefore, first place the bathtub bottom up and thoroughly wipe the entire area from construction debris, dust, lint, dirt, and packaging residues.
The next step is to wet a rag with plain water and generously wet the bottom for better adhesion to the insulating compound. Polyurethane sets well and hardens under humid conditions. Next, take one bottle, shake it well, you can also warm it up a little under the stream warm water from the tap. This technique allows for a volumetric output of the mounting material, which is necessary for maximum application. Point the tube to the bottom from the outside, gently press the lever and begin laying the composition like a snake over the entire surface of the inverted bath. Leave some space around the siphon because it is sometimes replaced. Also, do not fill the area where the overflow will be recorded. When the base is completely processed, wait ten to fifteen minutes and start decorating the side parts. It's better to start from the top, slower than you were before. Be sure to first check to see if the insulation you are using is leaking, and apply the sealant onto the steel in neat strips.
When working with polyurethane foam, be careful and careful; it should not get on other surfaces, especially on the skin. The thing is that this solution is washed off with great difficulty and only when using special chemical liquids, so put on overalls, gloves, cover your hair, lay cellophane or paper on the floor, cover all adjacent appliances, walls, and any surfaces with a protective layer. It is rare, but it happens that cylinders explode, the contents instantly scatter throughout the room and freeze tightly.
Foam construction
There is another option for designing a heat-saving layer; it repeats the technology described above, but involves additional details that will improve and strengthen the entire system - a combination of polyurethane foam and polystyrene foam. You will need sheets 20-30 mm thick. To calculate the required amount of thermal material, calculate the perimeter of the structure (standard length is 1400 and width 550 mm) and multiply by 2. It turns out 3,900 mm - multiply this number by the height. You will have an area that you will cover. You need these calculations because polystyrene foam is sold in the form of meter-long panels. As for the sealant, you should have enough supply of two large packages for each of the two upcoming processing stages.
It is best to apply foam with a special gun; it is sold at any hardware store. It lays the composition evenly and does not allow overspending, which provides you with obvious savings. It is convenient when the liquid comes out not in a stream, but in a neat strip. To make this happen for you, use a professional trick: take a tip from a plastic or polyethylene tube of the diameter that suits you. Heat the very edge of the hole a little, it will flatten, now form a slot - place the resulting tip on a container with foam (video).
The bathtub also turns upside down, but make sure you have easy access from all sides. Be very careful not to deform or damage the enamel. Cover all surfaces of the room with plastic so that any remaining liquid can be easily removed upon completion. Don’t forget to cover the holes for the drain and overflow with tape, and seal the edges.
Continued installation
It was already mentioned above that the best adhesion is achieved when the base is sufficiently moistened. Wet the entire area with ordinary tap water. The nozzle is pressed against the metal at an angle, and the insulation is applied in even stripes. Place sheets of foam plastic on top one by one, distributing them so that they evenly cover the entire bottom. To cover curves, cut the panel into small pieces. The most large detail should not exceed 15-20 cm.
Once all the elements are in place, wait 30-40 minutes and then begin filling the cracks and empty spaces between the panels. Wait the same amount of time again and use a knife to cut off the excess frozen mass. Now you have to final stage, on which it is formed additional protection and provides an increase in the thermal protective layer. You need to put fiberglass.
To do this, use putty or two-component glue. The most important thing is that the adhesive composition must be fully compatible with the foam plates, and it must also be waterproof. To do this, choose from acrylic, epoxy or polyester solutions. The fiberglass fabric is applied in fragments with overlaps to the putty and glue.
Finally, when all the applied layers have dried and hardened well, remove the tape, check for good accessibility to the siphon and overflow necks, trim off excess material if it is inconvenient to install connections to these holes.
Wall treatment
Walls can also retain hot air longer; for this purpose, they are covered with mineral wool and fiberglass coatings. These foundations have long gained popularity because they are effective and reliable, providing high level thermal insulation and waterproofing, easy to process and install and completely inexpensive. To attach them, it is necessary to use a vapor barrier, which is formed from a superdiffuse membrane and a construction film.


Along with them, the installation of extruded polystyrene foam is common, because it is best to lay out ceramic tiles. Tile is considered the best and most functional decorative facing covering.


Many builders use another interesting technique: they apply special thermal plaster on a woven mesh with a layer of 3 cm. In addition to the above-mentioned insulation materials, porous cement-sand mortars, perlite concrete sheets, and expanded clay concrete plates can be fixed. An important heating device in the restroom is a reflective screen installed behind the heated towel rail or behind the heating radiator. Thanks to it, hot air is reflected and distributed throughout the room. It can be made from a sheet of aluminum foil.
When choosing insulation, it is important to remember that a soft cotton base is laid under the drywall. You can choose tile materials, or you can choose roll materials, but their density should not exceed 50 kilograms per cubic meter. A vapor barrier film is always placed on top. The use of extruded polystyrene foam is important under the next layer of plaster. Choose products whose flammability group does not exceed G1. You can also choose a basalt slab as a thermal protective base for plaster and ceramic tiles.
Separately, it is worth noting the cladding, which should not be used as a thermal insulation base for walls - the use of granular foamed polystyrene is not recommended, it increases humidity and can provoke rotting, the formation of fungus and the spread of mold.
Warm floor
The heated floor provides the optimal temperature ratio in the bathroom - around +25-29 degrees below and +20-22 degrees above. Thus, a comfortable atmosphere is created that is beneficial to health; mold and mildew do not arise or spread. The floor can be installed from pipes supplying boiling water or from an electric heating cable (video).

Therefore, the entire system can be configured from:
- Electrical cables.
- Pipe
- Electric film with infrared heating.
If you choose electric floors, then keep in mind that they are based on a heating cable, and it operates from the network. The use of such a system is absolutely safe because it is laid under several layers of insulation. To mount, you first need to draw up an installation diagram, then determine where the thermostat, sensors and connection point will be located. Then the reflector and conductors are laid, thermoregulation is installed and the entire structure is filled with a dense layer of cement screed.

Infrared floors are another functional new product on the market. They are also popular because their installation is much simpler than other systems, and you can do all the work yourself. You will be working with a heated film that can be placed under carpet, tile, parquet or laminate. You need to lay out the canvas on a flat, cleaned base and connect the sensors, check how everything functions, and cover the coating with a protective layer of film or cement mixture.

Also some install horizontal system polymer pipes through which water flows from common system heating. A strong cement screed is also poured on top, but this technology can only be performed by a repair and construction team.

As you have seen, even in old panel or brick houses you can equip a warm restroom; you can perform almost all of the above methods yourself, and Construction Materials and repair equipment is now sold in any specialized store. The main thing is that a dry, heated bathroom is the key to your health and the well-being of your loved ones.