Fresh vegetables, especially in winter, are very rich in vitamins. They contain a lot of vitamins and other useful substances. But many have noticed that the tomatoes or cucumbers that you buy in stores in winter are completely tasteless. It’s not painful to eat such vegetables. Is it possible to grow tomatoes on the balcony? Such vegetables will be healthy and tasty, because you grew them yourself. It turns out that this is quite possible for any owner glazed balcony, and growing a small vegetable garden on an ordinary windowsill is not so difficult. And how to do this will be described in this article.
Selecting varieties
Today, in specialized stores or on the Internet, you can find many varieties of tomatoes that can be grown at home. Among them you can choose Winter, Cherry, Yamal, Japanese Dwarf, Balcony Charm, Snowdrop, Bullfinches and many others. All of them are stunted and have small-sized fruits. This is due to the modest free space on the balcony. Growing large and tall varieties of tomatoes will be problematic, but small bushes and land will require little and will not take up much free space.
Of course, you can try to grow ordinary garden varieties of tomatoes, but the harvest is unlikely to please you. Still, such plants need more air, sun and space. Therefore, when choosing tomatoes for your balcony or window sill, it is better to purchase plants adapted to the room.
 Photo 2. Small tomatoes
 Growing conditions
If you create favorable conditions, then there will always be a harvest. Firstly, such plants do not tolerate waterlogging - if you “flood” them too much, then various rotting will inevitably appear. From excess moisture, tomatoes will quickly die without yielding a harvest. Secondly, these plants are of southern origin, which means they need a lot of sun and warmth. To create favorable conditions for them, you need to follow some rules:
- Seedlings, and even adult plants themselves, should be kept on the sunny side. If the sun rarely hits your balcony, you will have to spend money on additional lighting, and then there is a risk of not getting a sufficient harvest;
- If in winter or autumn period If the daylight hours are less than 12 hours, then it must be artificially extended. For this purpose, lighting from fluorescent lamps or energy-saving lamps is used;
- Must be observed temperature regime. If at night the temperature is allowed to drop to 16 degrees, then during the daytime it should be at least 25-26 degrees. But at the same time, it is not allowed to increase the temperature any more. If it gets hot, it is necessary to ventilate the room;
- Don't go overboard with organic fertilizers. Certainly, appearance your plant will be happy (large green bushes), but there will be very little ovary, but you need the fruits, not the tops.
 Photo 3. Additional lighting
 Growing tomatoes
So, you have chosen and purchased the desired variety of tomato, prepared your balcony or window sill, now you can begin the growing process. Indoor tomatoes on a balcony or windowsill grow from seeds, but before placing them in the ground, they must be processed. This is done to avoid such a “bad” plant disease as late blight. To do this, you need to place the seeds for 20-30 minutes in a weak solution of potassium permanganate.
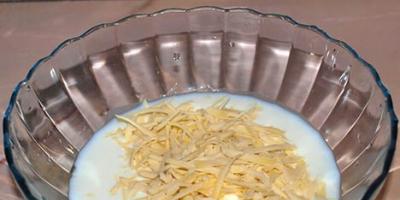
 Photo 4. Seed treatment
 Next, you should prepare the ground. If you don't have your own suburban area or the opportunity to travel to the countryside, you can purchase soil from a specialized store that already contains all the components necessary for plant growth. But you can cook everything yourself. Take five parts of soil and humus, add two parts of sand. If possible, you can add a small amount of peat.
Urea and potassium sulfate are used as top dressing. They should be added one matchbox to a ten-liter bucket of soil. Also, to improve growth, add a handful wood ash. The resulting substrate is poured into peat, paper or plastic cups volume of at least 200 ml.
Next you need to start sowing. Moisten the soil in the cups and place the seeds to a depth of 1 centimeter. You can place 2-3 pieces in one hole, this way you will achieve one hundred percent germination. Then you can simply pull out the weaker plant. To prevent the surface from drying out, cover the container with glass or film. Place the cups with the planted seeds in a warm (but not hot) place.
 Photo 5. Planting seeds
 Now we need to wait for the shoots. To make it easier for the seeds to break through, you can periodically wet the surface of the soil, just try not to overdo it. As soon as the seedlings break through the ground, remove protective film or glass and move the containers to the balcony (or windowsill) closer to the light. All that remains is to make sure that the plants are warm and have enough light. You also need to water the tomatoes, but make sure that the soil surface is not too wet - remember the risks of rotting.
If everything was done correctly, then two true leaves will soon appear on the plant. This will mean that it is time to dive or transfer. Select the strongest and healthiest plants and transplant them into larger containers. An adult plant needs at least 7-10 liters of soil volume.
Proper care
In addition to watering, it is necessary to periodically feed the plants. This is done once every ten days using organic and mineral fertilizers. Such substances are sold in any store for gardeners and gardeners, and the dosages and methods of use are indicated on the packaging (in as a last resort You can use information from the Internet). You also need to carefully loosen the soil around the trunk. This procedure allows the roots to breathe. But this must be done carefully so as not to damage the delicate roots.
Plants, even low-growing ones, have a certain trunk length. In order not to damage the tomato bush (and also so that the plants do not take up much free space on the balcony), the trunks should be tied to a wooden peg driven into the ground of the pot. This should be done as needed.
 Photo 6. Garter of tomato stems
 When the plant grows, it has stepsons. Such stems appear in the axils of the leaves. To prevent the stepsons from interfering with the growth of the plant, you need to get rid of them. It is allowed to leave the first shoot so that the plant can form a second trunk. As it grows, you should get rid of dried leaves. This is especially important in the lower part of the plant. Such leaves can contribute to moisture retention, and therefore increase the risk of tomato disease.
 Photo 7. Removing stepsons
 Tomatoes are self-pollinating plants and do not require bees or other insects. But it is still necessary to help them with pollination. There is nothing complicated about this; it is enough to shake the plant itself during flowering or brush it over the flower with a soft brush. But you just need to do this carefully.
After the ovaries have already formed on the plant, you will have to get rid of some of the clusters with fruits. Your tomatoes are growing in room conditions, so they are not as powerful as garden plants. If you leave all the tassels, the fruits will be small and the plant itself will be lethargic. Therefore, only 3-4 tassels with set fruits are left on the bush, the rest are removed. They also pinch off the top part, this will not allow the plant to grow further, which means it will devote all its strength to the growth of fruits.
To avoid the risk of late blight, it is necessary to periodically spray the plant with a specially prepared solution. To do this, crushed garlic and a little potassium permanganate are diluted with water. As soon as the first fruits begin to ripen, it is advisable to pick them and put them on the windowsill to ripen. cardboard box. This will help the plant focus on growing the remaining tomatoes.
If you follow the sequence of all actions, then growing tomatoes on the windowsill will not be difficult. A little diligence, attentiveness and you will have grown tomatoes on your table with my own hands. A table rich in fresh vegetables (especially in winter) is an important component for maintaining health.
Today I’ll tell you how to grow tomatoes on a windowsill. If only three years ago they had told me that I would grow tomatoes on the windowsill... But there is a simple explanation for this - just grow one unusual herb and off we go... After successfully growing oregano, thyme, lavender, tarragon, chives, lemon balm, cress - salad apparently it’s the turn of heavy artillery :).
Armed with the recommendations of my grandfather, an experienced gardener, I decided on this adventure. Available: a large, bright balcony on the south-east side, cherry tomato seeds (positioned as balcony varieties), soil of questionable quality and 2 pots of 2 liters each (perhaps they will be too small).
How to grow tomatoes on a windowsill
I offer my version of growing tomatoes on a windowsill, in detail and in pictures. So far so good!

2. Balcony golden seeds. I took a cotton pad and moistened it with warm water, poured out a dozen seeds, and moistened them with a spray bottle.

3. Tomato Cherry seeds. Same procedure as for Balcony Gold seeds.

4. Moistened another cotton pad and covered the seeds. A humid environment allows the seeds to wake up and swell a little. One day is enough, I got 2 days. Additionally, I didn’t wet it. I did not etch with manganese, since it is impossible to buy it at the pharmacy.

5. Components for the soil mixture: ready-made with peat and humus, . The soil was pre-calcined in an old pan in the oven - about 2 hours. I wrote about how to disinfect soil.

6. as the first potassium fertilizer and additional soil disinfection.

7. Phytocide returns the necessary bacteria to the sterile soil, without which the plant will not absorb nutrients. I prepare the solution according to the instructions, moisten the soil (not generously, under no circumstances should the soil be turned into mud). I water all the plants in the house with the remaining solution - most likely the bacteria in the water quickly die, so this watering cannot be called a fertilizer.

8. I always add it to the soil. No more than 30% of the soil volume. Vermiculite is a mineral that has been treated at ultra-high temperatures to become porous. The pores in vermiculite are filled with oxygen, absorb a lot of water and gradually release it into the soil, preventing the roots from rotting. It is a natural source of potassium and magnesium. Perlite works almost the same as vermiculite, loosens the soil like sand. The combination of these minerals improves soil quality.


10. I made holes in 100 g cups and filled them with earth. I added 2 seeds per cup and pressed them very slightly into the soil, 3-5 mm. Wetted the surface with a spray bottle. I marked the cups with the letter of the variety. It’s convenient when all the cups are in one tray so that you can turn them at the same time, behind the sun.

11. I quickly built a greenhouse from a bag, bamboo sticks and tape. Thyme sowing was also caught under the film, just for company :). The seedlings sit in the greenhouse until the first shoots appear. The temperature should be about 18-20 degrees, it is advisable to place the seedlings in the shade until they sprout. I covered it with a greenhouse at night for a few more days, watch the weather and trust your intuition.

12. 4th day after sowing. The first time we irrigate the seedlings - carefully, using a spray bottle, do not overwater. We take it out into the light, but watch the temperature - the cups warm up, you can cook the weak roots in the hot sun.

13. 7th day. Yellow tomatoes look much healthier, hatch faster and stretch well. I irrigate the crops a little every day.

14. 14 days. The first true leaves appeared. You can make the first fertilizing with mineral fertilizer. But if you add ash, you can do without replanting it in a pot. We irrigate the soil and spray it on the seedlings - either early in the morning or in the evening. If the weather is cloudy and damp outside, you should not spray the leaves (so as not to provoke fungi).

15. First true leaves on yellow tomatoes.

16. First true leaves on red tomatoes. The sprouts have not stretched, everything indicates that they have enough light and nutrition. Can be moved into pots.

17. I have 2 liter pots. Most likely, this volume will not be enough for the root system of these tomato varieties and they will have to be replanted before they decide to bloom. Moreover, I felt sorry for the beauties, and decided to put a couple of them in pots. The pots must have holes for draining water, 3 cm of drainage (expanded clay).

18. I poured the prepared soil (the same as for seedlings).


19. We remove the seedlings from the glass, turn it over, and hold the seedlings. Everything is very easy.

20. Place the soil cup in the pot.


21. I poured soil into the pot around the tomatoes.

22. I marked the varieties in pots with pictures cut out from seed packets.

23. We could have waited a little longer, the seedlings were too small. But through the glass I saw the roots that had reached the bottom, and I decided not to torment the plants.

24. Yellow bushes are likely to be larger.

25. A little less than a month has passed. This is Cherry.

Fruiting tomatoes on the windowsill are not uncommon among the varied indoor flora developed by amateur plant growers. The methods for growing them have been developed in detail and can be applied in almost every apartment.
Tomatoes can grow in acceptable conditions at any time of the year, but in order to get a decent harvest, it is recommended to adhere to certain deadlines. A “vegetable garden” planted on a window in October-November will produce fruits from about February - March, and if, for lack of open area If you also want to collect the summer harvest right in your own apartment, then it is best to start preparing the seeds in late February - early March. Winter collection provide for the start of work in mid-summer. In any case, tomatoes on the windowsill will ripen a maximum of 4 months after planting the seeds. Depending on the season, care will be a little easier if you grow the plant in summer and spring.
The required amount of seeds is disinfected in a weak solution of potassium permanganate for about 20 minutes. At the same time, defective seeds - floating seeds - are rejected. Keeping in mind subsequent transplants, they can be sown in shallow trays. You can take ready-made soil from the store or make it at home from chernozem and humus, adding a little sand for a better structure. You can add a little wood ash as a mineral fertilizer.
A shallow tray or plastic cups for sowing tomato seeds work well. The soil is disinfected by pouring boiling water over it. Preliminary germination of seeds is carried out between the folds of damp natural fabric.
The depth of the holes for small seeds: 1 - 2 cm, and the distance between them is 2 cm. To prevent the soil from drying out, the sowing is usually covered with film and kept in warm conditions(up to 30° C).
Seedling care and picking
For seedlings, a temperature of 22°C during the day, 15°C at night and good lighting, which is why the pallet is usually kept on a bright window. At this time, drafts are unacceptable, the watering rate must be strictly maintained, do not overfill or overdry, the water must be warm.
Important! Tomatoes do not tolerate close planting.
Transplant the plant to permanent place at the stage of two true leaves for each tomato, you need to use a separate container for this, and for a tall plant you need a special container - at least 6 liters; for dwarf tomatoes you can get by with a smaller volume.
 Caring for grown tomatoes involves gentle watering and providing the home with sufficient lighting and heat. In summer, at home, there is enough light for a plant on the windowsill; in winter, the duration of daylight can be extended with the help of a fluorescent or special phytolamp.
Homemade tomatoes should be watered when the top layer is dry. In indoor conditions, it is convenient to make watering automatic: dig into the soil plastic bottle with holes and pour water into it from above as it is gradually consumed.
Instead of hilling, which when grown in open ground carry out conveniently, indoor tomatoes sprinkle at the root with an additional layer of soil, for which, first, when planting, do not fill the soil in the pot to the very edge. Loosening the soil in potting conditions is not difficult, so it is necessary to do it. Artificially pollinate indoor tomatoes is not required, since even at home this plant self-pollinates.
Tomato fertilizer
Care includes mandatory feeding. Plants require increased nutrition at the stage of the second leaf, then after the sixth; fertilizing is carried out at the beginning of flowering and when fruits form to ensure good harvest.
You can prepare the feeding mixture at home yourself.
To do this, you need to take: superphosphate, potassium sulfate and urea and mix in a ratio of 5:1:1, then dilute in 1 liter of water. As a mineral fertilizer, you can use ash in the form of a solution or sprinkle it dry. Rotted manure (2 tablespoons per liter), mullein solution (1:5), chicken droppings (1:15) are sources of organic matter; they can also be used to fertilize the plant if necessary. Under indoor conditions, these solutions are applied several hours after normal watering, alternating mineral and organic fertilizers.
 Forming a bush growing in an apartment is a mandatory procedure, necessary not only to grow tomatoes on the windowsill in a compact, convenient and aesthetic form, but also to increase their yield. For the most miniature varieties all care for this purpose consists of removing stepsons - extra stems growing in the axils of the leaves. Everyone requires this procedure indoor varieties tomatoes, excess shoots should be carefully broken off with your fingers. To prevent tomatoes growing on a windowsill from bending due to their attraction to light, the pot must be rotated 180° from time to time. Miniature bushes do not require support, taller ones do, you need to stick it into the ground before the root system develops, so as not to touch it in any way.
Special care for tomatoes on the windowsill
Later in the article we will learn how to grow healthy and strong tomatoes on the windowsill.
Prevention begins with disinfection of soil and seeds. In the future, constant attention and strict adherence to the rules of care are required, especially on early stages, because tomatoes grow on the windowsill in conditions that are not quite usual for them. The needs of plants can be determined by the condition of the leaves: normally they are slightly curled, but with a lack of light or moisture they stretch upward. Common problems that occur when growing tomatoes at home are blackleg disease and whitefly pest. Reasons: excessive watering, hypothermia, lack of light, drafts. Maintaining a temperature at home of 25° hardly makes sense, but 20° and above is enough. To prevent blackleg, you can hill up young plants with fine sand.
Through the efforts of breeders, a luxurious selection of homemade tomato varieties has been created for every taste. They should not be grown from seeds from any store-bought fruits. Most of the special ones are compact enough to fit into a small space on the window, the height of the bush is within half a meter, or a little more, there are also dwarf ones: Minibel (30 cm), Bonsai micro (15 cm). The general properties of most varieties for living in an apartment are relative shade tolerance, self-pollination and characteristics of the fruits: they are small, but ripen quickly and produce a good harvest.

The popular variety “Balcony Miracle” performed well, prolific and early ripening, from the first shoots to ripe tomatoes Pink colour takes less than 3 months. “Yellow Pearl” and “Balcony Yellow” also produce yellow fruits. Many small, tasty tomatoes can be collected from home grown varieties: Florida Petite, Balcony Red. The varieties Igranda, Hermitage, and Russian Troika have larger fruits and produce a good harvest. Tall bushes of Bull's Heart or White Fill are unusual for the home and are not suitable for the windowsill, but they grow well on the summer balcony, and most importantly, they produce very tasty large tomatoes. The seed package will usually indicate whether the variety is intended for indoor growing.
Many people grow it on the windowsill green onions, dill, parsley. Some people try to grow arugula and lettuce as a change. Did you know that on the windowsill you can grow not only herbs, but also vegetables, for example, cucumbers, peppers and tomatoes?
This topic is very interesting. You want to enjoy fresh vegetables in winter more than ever, but store-bought vegetables at this time of year, as a rule, leave much to be desired in taste and are not cheap. Not everyone can build and maintain a greenhouse in winter. Growing tomatoes and cucumbers on the windowsill is a good way out of the situation.

Growing tomatoes on a windowsill
Our craftsmen have come up with many ways to grow vegetables on the windowsill: some limited themselves to a couple of bushes in pots, while others organize whole businesses for this hydroponic installations. Today we will look at the technology of growing tomatoes on a windowsill in the usual way, accessible to anyone.
From the article you will learn:
- 1 What is needed to grow tomatoes on a windowsill
- 2 Which tomato varieties are suitable for growing on a windowsill
- 3 Tomatoes on the windowsill: growing technology
- 4 Sowing seeds and seedlings
- 6 Useful video: how to grow tomatoes on a windowsill
- 7 We also recommend reading:
What is needed to grow tomatoes on a windowsill
To grow tomatoes on a windowsill, you will need:
- seeds or rooted cuttings of a suitable variety of tomato;
- containers for growing (boxes or pots);
- nutritious soil for planting bushes;
- a well-lit window sill (preferably on the south or east side of the room);
- fluorescent lamps or agro-lamps for organizing additional lighting.
Which tomato varieties are suitable for growing on a windowsill?
The specificity of growing vegetables on a windowsill is that they grow in an environment completely unsuitable for this purpose. A window sill is not a vegetable garden or even a greenhouse. Its area is limited, as is the height of the window. In addition, daylight hours in winter are short, which also matters.
If you want your tomatoes not only to grow, but also to bear fruit, you need to provide the bush with sufficient space, care and light. It is also important that the fruits ripen as early as possible. Based on this, you need to select a variety for growing tomatoes on the windowsill.

Variety - Balcony miracle
It is best to grow low-growing, early-ripening and mid-early, abundantly fruiting tomato varieties with compact bushes on windows. Some varieties and hybrids meet these requirements. Among them are regular tomatoes and small cherry tomatoes. Small tomato bushes of these varieties are simply strewn with delicious tomatoes when they bear fruit.
Here is a list of tomato varieties that are suitable for home grown on the windowsill:
- "F1 Balcony red";
- "Balconies of Yelou";
- "Balcony miracle";
- "Red Pearl";
- "Yellow Pearl";
- "Ox Ear";
- "Pink Angel";
- "Renet";
- "Bonsai";
- "F1 Bonsai micro";
- "Pinocchio";
- "Craiova";
"Cherry Lisa F1"; - "Bead F1";
- "Thumbelina";
- "Baby";
- "Pygmy";
- "Minibel";
- "Zelenushka F1";
- "Fenik F1".
If you were unable to buy tomato seeds of any of the listed varieties, don’t be upset. There are other varieties and hybrids of tomatoes that can be successfully grown at home on a windowsill. When choosing a variety from those available in the store, pay attention to the height of the bush and the ripening period of the fruit. In particular, the height of the bush should not be higher than 30-40 centimeters. If you want to grow a tall variety, remember that you will have to take care of good support.
Tomatoes on the windowsill: growing technology
The process of growing tomatoes on a windowsill is in many ways similar to growing them in a greenhouse and in open ground. But there is also its own specificity. So, Special attention You need to pay attention to choosing a container for planting bushes, their lighting and pollination. But let's not get ahead of ourselves, let's sort it out in order.
Sowing seeds and seedlings
Most often, tomatoes on the windowsill are grown in seedlings from seeds. But few people know that tomatoes can be grown from rooted cuttings. Both methods have their advantages: in the first case, the bush produces more fruits, in the second, the fruits will ripen a little earlier - the time for forcing seedlings will be reduced.
Seedling method
Dry tomato seeds are planted in seedling boxes or plastic cups. The method with cups is the most convenient: they take up little space, there is no need to pick up seedlings and carry a large box because of several seedling bushes.

Tomato seeds are planted in seedling boxes or plastic cups.
Take regular plastic cups, preferably transparent ones, to control watering. Fill them with soil (no need to make holes in the cups) and pour boiling water over them to disinfect. When the soil has cooled, plant the seeds, deepening them by 2 cm.
You can sow 2-3 seeds in one cup; after germination, weak shoots can be removed. And if the seeds are sprouted in advance, plant one in each glass.
The seeds are germinated like this: soak them in a weak solution of potassium permanganate for 15 minutes. Good seeds will swell and sit on the bottom, while bad seeds will remain on the surface. The solution is poured out, the seeds are placed in a damp cloth and wait for small sprouts and roots to appear.
Next, cover the cups with seeds with film and place in a warm place (25-30°C). After about 3-4 days, seedlings will appear and can be transferred to a windowsill with additional lighting installed.
Start watering the seedlings only after they dry out. upper layer soil to reduce the likelihood of fungal diseases. Water better than a pear, sticking it between the ground and the wall of the cup. This way, you will not wash out the soil or over-moisten the top layer. Water for irrigation should be warm and settled.
When the seedlings are 3 weeks old, they are fed with seedling fertilizer, diluted with water according to the instructions. To prevent fungal diseases of seedlings, you can spray them with 50 g of milk diluted in 500 ml of water.
After a month, the tomatoes are transplanted from small cups into larger containers. Pots with a volume of 3-5 liters are suitable for this. You can fill a balcony box with fertile light soil and transplant the tomatoes into it, maintaining a distance of 25-30 cm between them.
The soil for growing tomatoes on a windowsill should include peat, sand, humus and turf soil (all in equal parts). Low growing varieties can be planted in pots with a volume of 3-5 liters, and tall ones require containers with a volume of 8-12 liters. Place a layer of expanded clay at the bottom of the pot, then a 2 cm layer of sand, place the plant in the middle and sprinkle it with soil up to the cotyledon leaves.
Growing from rooted cuttings
An interesting feature of tomatoes is their ability to root stems and cuttings. Therefore, it is not at all necessary to grow tomatoes on a windowsill from seeds; you can transfer the plant directly from the garden, or root its stepsons or shoots.

Propagation of tomatoes using stems and cuttings
For rooting, you need to take lateral or apical shoots, place them in cups of water and place them in a warm place, protected from drafts. To stimulate growth, you can add a drop of fertilizer for indoor flowers to the cups. Under good room conditions, the cuttings will take root in just a week and can be immediately planted in large containers.
But some gardeners shorten this process even further. For example, the author of the following video actually took cuttings from the garden and planted them in the ground without prior rooting. You can see what she did.
By the way, in the spring, in this way you can significantly reduce the time for forcing early tomato seedlings for the garden. Just root a few cuttings from a bush on the windowsill and the seedlings will be ready in a maximum of two weeks.
Caring for tomato bushes on the windowsill
When the seedlings are ready and planted in containers, the bushes are installed in a permanent place. Tomatoes are light-loving, so they are best grown on the south side. Additional lighting with fluorescent lamps or agro-lamps will not be superfluous, especially in the autumn-winter period. Insufficient lighting usually leads to a lack of flowering and, accordingly, no fruit.

Caring for tomato bushes on the windowsill
An important point in growing tomatoes is pinching - removing shoots that develop in the axils of the leaves. They must be broken off by hand and not cut off. By removing shoots, you increase productivity, because... The development of stepsons consumes plant nutrients that could be used for the formation and development of fruits.
For growing tomatoes on a windowsill, the optimal daytime temperature is 28°C and night temperature is 15°C. Unlike cucumbers, tomatoes are not afraid of drafts. Water several times a week with warm (20-25°C) water, without eroding the soil under the bush. Once every 10 days, feed the plants with mineral or organic (manure, ash) fertilizers.
You can also spray the leaves with a nutrient solution. But do not overdo it with fertilizers, otherwise your greenery will grow greatly to the detriment of the fruits. As the plant grows, it is necessary to tie the stems to a wooden stake.
Pay attention to pollination
Tomatoes do not require artificial pollination, but to be on the safe side, you can tap the stem a couple of times a week during flowering to shake up the flower clusters. At this stage, you can spray the tomato bushes with the preparation “Ovary”, which promotes the formation of fruits.
When the bulk of the fruit is formed, remove the top of the plant and flowering clusters. This way you will ensure full development of the tomatoes. A tomato can bear fruit for 5 years, but still, it bears fruit best in the first 2 years.
A home windowsill can serve not only as a place to grow indoor flowers, but also fresh tomatoes. As practice shows, many amateur gardeners plant different crops in this way. It is especially important to use this method when it is not possible to equip a greenhouse.
Variety selection
At the agricultural market you can find a huge number different varieties tomatoes. To grow on a windowsill, it is better to choose varieties of short tomatoes. The fruits of such crops, as a rule, differ small in size and weight, which is very important when there is limited volume of land. The following varieties meet these criteria: 
- Bullfinch.
- Rowan beads.
- Japanese dwarf.
- Pink Angel.
- Room surprise.
- Little Red Riding Hood.
- Balcony charm.
- Leopold.
If the balcony is insulated, choose varieties with larger fruits and tall stems. The varieties of heavy tomatoes White filling and Bull's heart are suitable for those who have a very wide window sills and it is possible to place boxes or flowerpots. However, remember that over time the bushes will become quite tall and will need to be placed on the floor.
Of the tall varieties, cherry tomatoes are grown on the windowsill. They will delight you with the harvest all year round. This is not a particularly whimsical species that does not need much attention.
Seed treatment and selection of container for planting
First of all, be careful when choosing planting material. Always consider the expiration dates indicated on the original packaging. After purchasing seeds, be sure to check their germination. There are two ways to do this. The first consists of the following steps: wrap the seeds in a clean piece of cloth (10 pieces are enough), wet it a little in water, squeezing out excess liquid, and place it in plastic bag. Now send the bundle to a warm place for several hours. The percentage of similarity will be equal to the number of swollen seeds.
The second method is less labor-intensive. It does not give an exact result, but it allows you to separate high-quality seeds. Dissolve in a glass warm water a tablespoon of salt until completely dissolved. Then throw the planting material into the resulting liquid and mix everything well. All the bad seeds will float (they will need to be drained along with the solution), while the good ones will remain at the bottom. Rinse quality seed under running water and dry in the sun.
Before starting sowing, it is necessary to disinfect the seeds. If there is no ready-made preparation, then a concentrated manganese solution will do. It is enough to soak the seeds in it for 15 minutes, then treat them with a growth stimulator. The latter promotes the friendly germination of planting material and improves its immune system.
Now select a container for growing tomatoes on the windowsill. It is better that it is cylindrical rather than square. Regular ones may suit you cans(for example, from condensed milk) or flower pots. Peat or plastic cups are ideal. Their volume should be at least 200 ml. At the bottom of the selected container, make five or six holes for drainage excess moisture. The container should also be treated with a weak solution of potassium permanganate.
Soil preparation and sowing
The next step is to prepare the soil. You can use ready-made soil mixture purchased at the store, or make it yourself. To do this, mix 5 parts earth + 5 parts humus + 1 part river sand and a little peat. Add a small amount of urea to 10 liters of the finished mixture (no more matchbox) and the same amount of wood ash and potassium sulfate. Mix the mixture thoroughly and pour into prepared cups.
Let's start sowing. If you need to grow tomatoes on a windowsill in winter, then sowing work is carried out in two stages: in October and at the end of November. This makes it possible to receive fruits throughout the winter period and even in early spring. To extend the spring-summer growing of tomatoes, sow seeds in mid-February and in the last days of March. Such variations in time will provide you with fresh tomatoes throughout the year.
So, pour the prepared substrate into containers and moisten it well. Make small indentations (you can use a pencil) and place the sprouted seeds at a distance of about 2 cm from each other. The seeding depth is no more than 1-1.5 cm. Pour warm water over the top again. Cover the pots with a plywood board or glass and place in a warm place. When the first shoots appear (this will happen in a couple of days), you can open the plants and move them closer to the light. This completes the first stage of work. All you need to do is watch the development of the seedlings and water them on time.
 When the plants get stronger, transplant them from the pots into buckets (the volume of the container for subsequent growth should be more than 7-10 liters). First, punch several holes at the bottom of the container to allow oxygen to reach the roots and to drain excess moisture. Fill the container three-quarters full with soil for indoor and fruit plants. Carefully, without destroying the earthen ball, transplant the seedlings into a bucket. At the same time, deepen the roots of the tomatoes by about 2.5 cm. Plant the seedlings one at a time in each bucket and tie them to a peg.
Now let the seedlings take root well without exposing them to the sun for five days. Next, in sunny weather, place the buckets on the windowsill, and on cold days and nights, bring them into the room. When warm weather sets in, you can leave the seedlings on the balcony overnight. After a week, change the small pegs to large ones and tie the plants to them with a clothesline or cloth. When the tomatoes are well rooted and begin to actively grow, add soil to the buckets every ten days until they are filled to the brim. This ends the second stage of work.
Stepchildren will produce seedlings ( side shoots appearing in the leaf axils). Medium-sized tomato varieties should be formed into two stems. For this purpose, leave a stepson under the first inflorescence and tie it to an additional trellis or peg. For low-growing tomatoes, it is necessary to form 2-3 stems. To do this, in addition to the first shoot, leave a second one. It will give another crown with flowers, which will be in no way inferior to the main one. Stepchildren formed after 8-9 leaves at the top of the plant are good.
In addition to the stepsons, you should cut off yellowed and diseased leaves, as well as those that cover the fruits of the lower clusters of the plant. Sometimes they slow down the growing of tomatoes because they block the access of water to the rhizome. The remaining leaves do not need to be removed, as they participate in the synthesis of organic materials.
When most of the fruits have finished forming, pinch off the flowering clusters and the top of the plant so that they do not interfere with the tomatoes’ full development. Also, to speed up the growing season, use a technique such as “tearing the roots.” Grab the plant by the bottom of the stem and gently pull it up, as if trying to pull it out of the ground. This will tear off small roots and limit the supply of nutrients. After this, accelerated development and ripening of the fruit occurs.
Caring for tomatoes on the windowsill
The main part of the work is done. Now provide the crop with proper care:
- During the day, the air temperature for growing tomatoes should be 20-25 °C, at night – 15-16 °C. Be sure to ventilate the balcony on particularly hot days. This will benefit the plant.
- Fertilize with organic or mineral fertilizers once every 8-10 days. Instructions for diluting the drug are always indicated on the packaging. Also, a weak solution of potassium permanganate will be useful for growing tomatoes on a windowsill.
- Don't forget to loosen the soil at the roots. Do this very carefully so as not to damage the root system.
- Tomatoes on the windowsill need watering (preferably drip). Place an upside down plastic bottle filled with water into the soil. The liquid will slowly seep through the unscrewed plug and gradually moisten the soil. Remember that too much watering harms plants (the development of diseases is possible).
- Tomatoes are a fairly light-loving plant. To grow them, choose windows facing south. In case of insufficient natural insolation, provide additional artificial lighting in the form of fluorescent lamps, energy-saving lamps, fluorescent lamps. Specially designed phytolamps are considered especially effective. Place any of these devices at some distance from the top leaves of the seedlings (at least 25-30 cm). The daylight hours for tomatoes are 13-16 hours.
- To improve the pollination process, gently shake the flower brushes during flowering. Also lightly tap the stem of the plant so that pollen from the upper inflorescences falls onto the flowers located below. For this purpose, you can open the windows for air flow. Carry out this procedure very carefully, trying not to damage the bushes.
Another important measure when caring for tomatoes is disease control. Typical problem Late blight occurs for all nightshades. Moreover, tomatoes suffer from this fungal scourge even in winter. To prevent its development, treat the leaves and stems with a tincture of manganese solution and garlic (1/2 g of potassium permanganate + 1/2 garlic per 3 liters of water). You can also use the method of spraying with phytosporin.