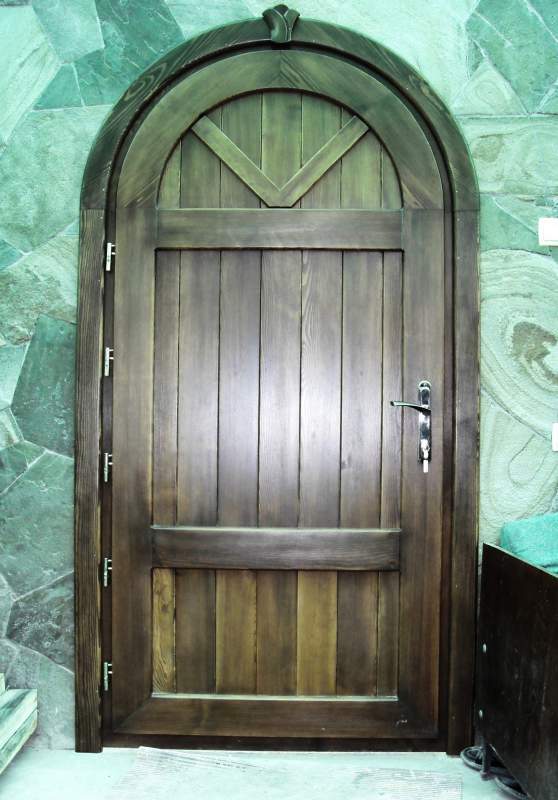
Arched openings make standard apartment interiors stylish and elegant. The arched shape of the doorway visually expands the space, changes the interior beyond recognition. In city apartments, arched openings are not always left open, since it is necessary to ensure the possibility of a full separation of individual rooms. But the curved upper lintel creates difficulties in choosing and installing the door in an arched opening. There are several options for how to close such an opening with a door, they differ both in the complexity of execution and in the principles of approach to solving such a problem.
Options for closing the arched opening
There are two types of situations when the owner installs a door in an arched opening. The first - when the question of installing the door is decided after the manufacture of the arch. In this case, the matter is complicated by the fact that the opening is already ready, and you have to start from ready-made conditions.
The second is when the owner thought in advance about the options for installing the door in the arch, and when making the opening, he prepared the elements necessary for this (niches for a cassette sliding door). From the options below, you can choose the best one, depending on the specific situation.
When creating arches, the opening did not increase, but roundings were made
An important factor in choosing the type of door and the method of installation in the arch is the method of making the opening with the arch. If the radius is inside a rectangular opening, then its actual height will remain the same, but visually it will appear lower.
Closing the opening on one side with a full-height sliding door
Sliding doors are installed from the outside, while the leaves slide along the wall. The size of the canvas is made according to the height of the opening at the top of the arch. Thus, the sash will overlap the arch on one side of the opening. On the other side, the passage will remain open.

Important! In such a combination of a rectangular canvas and an arched passage, the sash should have a symmetrical pattern, either in the form of radius panels, or be made using arched glazing. At the same time, all segments in the web design should have a vertical orientation, preferably without horizontal jumpers. So it will be possible to visually raise the opening.
Cassette door installation
This best option, which is planned at the stage of creating the arch. Arch with sliding sliding door cassette type is also a budget option compared to the cost of manufacturing a door leaf with arched shapes. A rectangular canvas with the same type of pattern is used. This approach will allow you to close a non-standard opening with any shape.

Making a wooden door
If the door is installed in an already finished opening, and sliding structures for some reason, the owner is not suitable, it remains to go to the carpentry workshop and order an arched door.

In wide openings, you can install a double door, each leaf of which is a folding door book.
The opening increased in height
Making an arched portal by cutting out the upper part above the opening in the partition - correct option in terms of aesthetics. Such an arch will look proportionate in the room. A high arch will give more room for imagination, and there are much more opportunities for installing a door into it. The main principle of closing a high arched passage with doors is the use of structures with transoms. With this approach, standard doors of any type can be installed in the opening.

An expensive and at the same time luxurious option is to order a solid wooden canvas with a solid wood box in the workshop. This method is used to close narrow arches designed for a single-leaf door. A cheap option would be a regular door with a transom.
by the most accessible way to close the arch with a door is the manufacture of a rectangular box without a threshold with the installation of an accordion-type folding door into it. These systems are sold in kits, have a variety of designs, and are easy to install. After installing a folding door, you can evaluate how it looks in the interior, and, in accordance with the impressions received, make an upper arched transom and complete the design of the opening.
In addition, folding systems are not designed for intensive use. It is this mode that is usually assumed when installed in an arch, because only in the open state does it look spectacular.
What are folding doors made of?
The bulk of folding systems in stores are made of MDF or plastic. Plastic is light and practical, but it lacks soundproofing properties, and the design itself is noisy and gives the impression of laxity.
Important! Plastic panels have stiffening ribs, therefore, with external fragility, they are rigid and durable.

The plastic assembly assembly is lightweight, so the installer does not need outside help for installation. The plastic itself is easy to cut, and modern movable interlock connections panels allow you to cope with the assembly and installation of the structure in a few hours yourself. In addition, guide profiles in plastic structures are fastened through clips, which simplify the installation process.
Systems with MDF lamellas look solid, but they are more difficult to install. They look organic archway. Due to the mass of the structure, the guides are attached to the opening with self-tapping screws.
The standard folding kit includes the following items:
- Narrow panels. In addition to several identical panels from which the canvas is assembled, there are two half-panels that are installed along the edges, the starting and locking strips.
- Guides. All kits have a top and two side rails. In systems for wide openings or with flexible slats, there is also a lower guide.
- Rollers, stoppers. In some designs, ordinary hinges can be used to connect sections.
Dobory and platbands for the box, locking mechanisms are not included in the package and they are purchased separately.
How to install a folding structure
First, a box is made and installed. It is assembled from extensions in which there is no usual quarter for the door leaf. The box is made according to the height of the straight part of the sides of the arched opening.
After installing the box, it is necessary to measure the height and width of the resulting opening, and only after that go for the purchase of a folding system. So you can accurately calculate the number of sections and pick them up in width.
Important! Having bought a folding door, it is necessary to carefully read the installation manual. Each manufacturer supplies products with detailed instructions.
- In budget PVC models, the lamellas are interconnected through special grooves or with the help of gaskets. The connection process looks like this: the panels are shifted, one lamella is inserted into the groove of the other lamella and pulled to the end.
- MDF sections have special eyes that fit together and a long pin (axle) is threaded through them.

- It is better to install the lock and handle in the lock panel before assembling the leaf.
- The slats are cut to the required height. In a suspended state, they should be raised above the floor by 1.5-2 cm.
- After connecting the lamellas and half-lamellas, a locking panel is attached on one side, and a deaf (fixing) panel on the other.
- The rollers are attached to the upper end of the sections through one, starting from the lock lamella. Before installation, it is desirable to treat them with technical petroleum jelly.
- The upper profile is cut exactly to the width of the opening, and the side profiles are substituted against it from below.
- The procedure for installing the profile depends on the intended method of fastening to the opening. If the profile is attached to the clips, you need to mark up and fasten the clips around the perimeter of the box. To do this, a line is drawn in the center of the upper jumper, and with the help of a level it is continued already on the racks. Clips for the locking vertical profile are smaller than the others. On the upper jumper, the clips are attached in increments of 5-7 cm, and on the sides it is enough to install 4 pcs. After trimming the guides, all that remains is to insert them into the fixed clips. If they go tight, you can use a rubber mallet.
- If the profile is attached to self-tapping screws, then they are first engaged in installing the upper guide. It is screwed on with one screw in the middle. After that, the guide is unfolded so that the sash rollers can be inserted into it. After inserting the sash, it is assembled in the center, the profile is turned back, finally aligned and the rest of the self-tapping screws are tightened. Only after that, the side parts are screwed in level.
- At the end, the blind panel is snapped into the side profile, the mechanism is checked for smooth running. In the lock profile, a striker for a lock or latch is installed.
Finishing the opening with platbands is carried out after the installation of the arched transom.
Installation video of the accordion type folding system:
In small apartments, doors to an opening with an arch must be planned before work begins on its creation. And to close an existing opening without prejudice to the surrounding space, you can use a folding structure.
In contact with
Comments
Unfortunately, there are no comments or reviews yet, but you can leave your own ...
New Articles
New comments
S.A.Grade
SvetlanaGrade
SergeyGrade
SergeyGrade
AlexeiMost interior designers consider interior arches to be an established classic of the genre, arched vaults doorways long ago and seriously pressed the slightly angular rectangle of the classic door. Passages and openings between the rooms remain a kind of bridges that unite islands of living quarters, different in meaning and content, with no less important kitchen, bathroom and toilet. If possible, why not make interior openings no less beautiful and comfortable.
How practical are interior arches
Often, everyone who wants to build interior arches has a doubt about how practical and convenient such designs are in everyday use. The idea of building arcuate arched openings has existed for several hundred years, back in the 50s of the last century, many interior and corridor openings with arches of various configurations were built, until the fashion for savings and a utilitarian approach to interior design finally buried a wonderful idea.
The manufacture of interior arches will require certain financial and time costs in connection with the alteration of part of the doorway. But most often, the owners decide to remake, since the end result fully justifies the costs:
The appearance is significantly improved, even the simplest interior arch looks much more attractive and interesting than the official version of a rectangular door hatch;
The space of an apartment or house visually becomes more spacious, even in small apartments with miniature kitchens and tiny corridors, the room becomes brighter;
An order of magnitude improves heat transfer and air movement between rooms. Fresh air does not seep through ventilation ducts, moves without interference and restrictions along the shortest path.

In most cases, to change the shape and size of the interior opening, arch equipment over doorway owners decide to improve appearance interior space of living rooms. Only a few years later, it is discovered that the installation of an arch and the modification of an interior opening can improve the conditions for distributing heat throughout the house in winter time and coolness in summer heat. And most importantly - without laying additional complex system pipes.
Types of arches
One of the most valuable qualities of the interior arch is the good adaptability of the updated doorway to any interior of rooms and corridors. Door arches are made in the form of frames from steel profile And wooden slats, bricks and gypsum blocks. For exterior finish the surfaces of the walls and ceiling adjacent to the arch and the box of the interior opening use plasterboard sheets, panels, mounting foam, plywood and fiberboard sheets.
For doorways and interior aisles of standard width, up to 90 cm inclusive, an arch with a support frame can be bought at a specialized salon. Such standard arched vaults are most often cast from polypropylene or hand-assembled from wooden blanks.
round arches
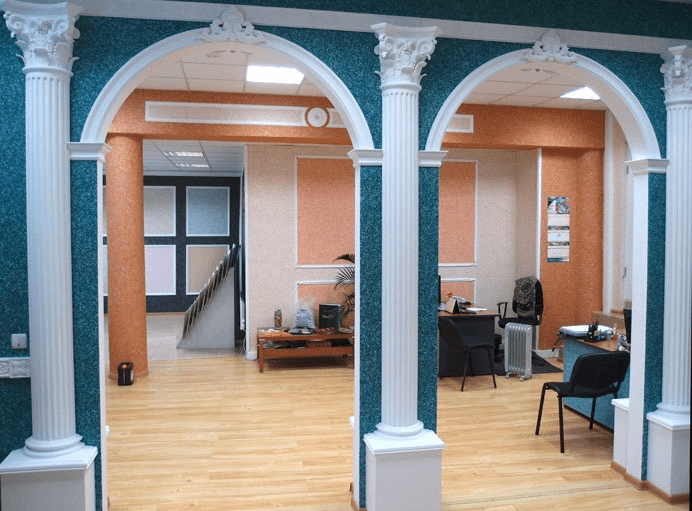
Most often, the arched vault above the interior doorway is associated with the classic round arch, the most common in the architecture of stone buildings and structures. It is the round arch that is most often chosen for the doorway.
Artists-designers and interior designers of residential premises use about a dozen basic configurations of round interior arches with supports on the frame of the doorway.

To get the perfect arc of the interior arch, the galvanized profile is divided into sectors, the side shelf is cut and the metal bar is bent according to a pre-planned pattern.
For your information! The round arch is very popular, primarily because of the simple installation technology.
IN classic version a round interior arch is made in the form of a sector in ¾ of a circle or ½ of a circle, often the shape and curvature of its arc can be supplemented with side elements of arbitrary shape and configuration, but always symmetrical.
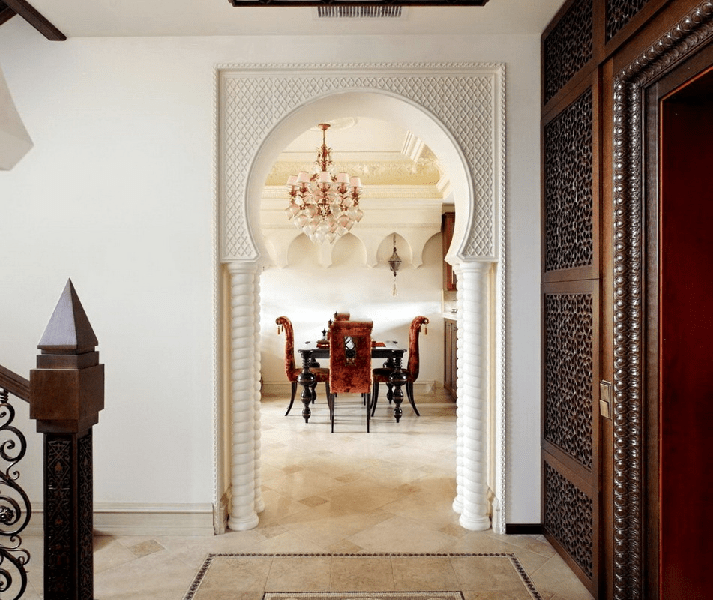
If you need to add oriental motifs to the design of the interior arch, then the profile arched ceiling the span is made in the form of two intersecting arcs. In this design, the interior arch acquires an almond-shaped profile.
Interior arch may be combined with supporting columns, most often with elements of stucco or imitation of the style of the Victorian era.
If necessary, for example, if the size of the doorway is relatively small, the arch can be decorated without any columns and unnecessary decor. It is enough to emphasize the line of the arched arc and close the transition plane to the walls with decorative overlays.
In the event that the dimensions of the corridor allow, the design of the interior doorway can be arranged in the form of one round arch. Instead of a standard rectangular door frame, only a small rounded outline remains, marking the border between the kitchen, living rooms and a corridor.
Round arches are used in cases where the apartment or living space of a private house is built in the form of several small rooms. Full-sized rounded arches very successfully visually combine the rooms into one studio apartment. In order to keep a private character behind the bedroom, kitchen or personal office, the interior opening with an arch is closed with double doors or a light sliding canvas.
Enough interesting solution shown in the photo below.

In one design of the interior opening, a round or annular arch and a rectangular box are used. A stylish doorway makes it possible to add a few very the right details and open an adjacent room or corridor to light and air.
If the ceiling height is more than 2.5 m, and the dimensions of the interior passage are more than two meters, you can use the widespread technique of dividing the space into several sectors.
In this case, the design of the interior opening in the form of two small arches classical form with an intermediate column provides the best quality of ventilation and light filling.
For low ceilings the round arch is broken into several elements or replaced with a rectangular doorway.
Rectangular arches
Arched structures of a rectangular or square shape in their characteristics and functions are no different from the classic round arch. A rectangular shape is resorted to if the interior of the apartment contains a significant number of objects and details with straight lines.
In the vast majority of cases, a rectangular shape for an interior arch is chosen in a situation where precious woods, plastic and a monotonous rectilinear design are actively used in interior decoration.

For example, an interior doorway between the corridor and the living room can be designed as wooden panels assembled in one arched structure. On the one hand, there is enough air and light, on the other hand, the boundary between two rooms that are completely different in meaning and functions is clearly marked.

Rectangular arches are simpler and more technologically advanced to manufacture; installation does not require the use of special marking devices, as in the case of semicircular and round arched structures.
Ellipse arches
It is not always possible to build a doorway with an arch in the form of an ideal semicircle or circle segment. There are certain restrictions on the distance from the ceiling to the top point of the arched arc; for the premises of the apartment, this distance should be at least 40 cm.
In such cases, the arch arch is made in the form of a horizontal semi-ellipse. The excess of the arched arc turns out to be less, and the entire design of the fashionable interior opening fits freely in the dimensions of the rooms and the height of the ceilings of a standard-plan apartment.
According to the scheme with a horizontal ellipse, it is possible to build a fairly wide passage between adjacent rooms according to the scheme shown in the photo.

The ellipse is ideal as a profile for building an interior passage. For example, you can form an opening in the form of a vertical ellipse with truncated edges.
The passage itself turns out to be wide enough to use it, but due to the narrowing of the sidewalls to the top and bottom, the section is smaller than that of a standard rectangular profile or arch of a classical shape. Therefore, in order to increase the amount of air and light through the interior opening, the passage contour is supplemented with side windows.
Trapezoidal arches
The device of the arch in the form of a trapezoid can be considered a natural continuation of the rectangular scheme. Traditionally, door and interior openings with a trapezoidal top are used in attic rooms, especially if the ceiling of the room is made with side bevels.
The shape of the trapezoid provides increased stability of the upper transverse beam of the opening, so such structures are widely used in houses made of timber and logs.

The decorative qualities of the trapezoid are lower than those of interior openings with an arch in the form of an ellipse or a rectangle. However, there is a demand for a trapezoid arch passage, especially in panel projects for suburban and country houses. In any case, an interior doorway with a trapezoid-shaped arch looks much more interesting than a boring rectangular design.
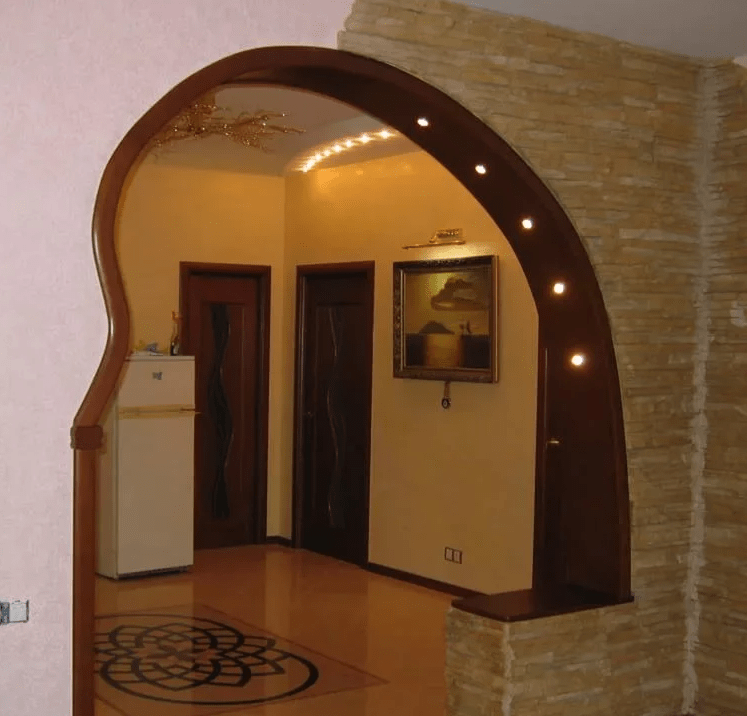
curly arches
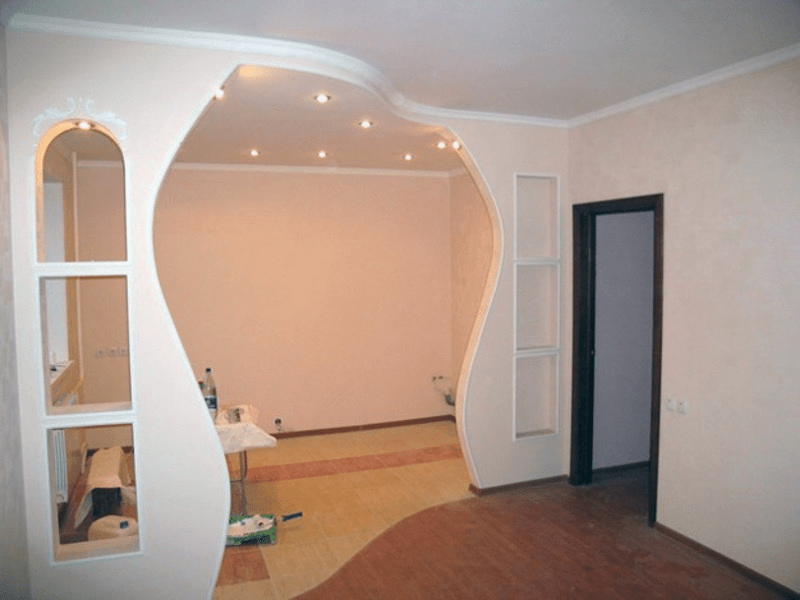
The manufacture of an arched vault of complex shape is in a good way show the talents of an interior designer, imagination and fiction. by the most in a simple way build original arch non-standard form remains the addition of several curved lines and surfaces to the classic arched arc.
For example, if you add a couple of side arches to a simple symmetrical arch, you can get a fairly expressive line of the arched vault for an interior wall.

A small addition to the standard arc or semi-ellipse of several asymmetric elements turns the arch into a stylish interior opening.
Figured arches, as a rule, are made according to complex curvilinear patterns, for example:


The process of designing and manufacturing a figured interior arch is quite complicated for an amateur level, so even the simplest multi-level openings, as a rule, require the knowledge and skills of a professional artist-designer.
Drywall interior arches
In the process of planning a curly arch, you always have to look for a suitable assembly method and material from which it is easiest to assemble a rather complex arched structure.
Most of the home arched interior openings are built of wood and drywall. Sheets of pressed gypsum are perfectly processed, cut, drilled, painted and puttied.
basis drywall arches assembled in the form of a frame from a galvanized profile. A strong corner and U-shaped sheet metal profile can be used as load-bearing element a solid frame or bend an arc of any curvature.

The manufacturing process of the interior arch is as follows:
- The frame is assembled with rivets and attached to the walls and ceiling of the interior opening;
- The base is sewn up with sheets of drywall;
- Seams and cracks are rubbed with gypsum putty;
- Curved surfaces are sanded, painted and finished.
The arched interior opening turns out to be light, durable and of arbitrarily complex construction and design.

Interior arches made of wood
Arched interior openings made of wood and its imitations firmly occupy the second place in popularity of the design. It is very difficult to technologically bend a beam and a lath made of valuable species of wood with the desired radius, therefore almost all interior arched openings made of wood are built in a rectangular shape.

The exception is handmade wooden arches, very beautiful, with carvings and elements of furniture decor. Often, the arc is cut from a solid array of wood and veneered with fine wood veneer.

For your information! A handmade arch is easy to distinguish by surface microdefects and a characteristic veneer texture, while cheap interior arches made of polypropylene look perfectly smooth and one-color.
Arches
Depending on the materials used to build the frame of the interior opening, choose the most appropriate type of finish. Drywall constructions must be primed and puttied, after which the surface of the arch can be pasted over with PVC film with a texture like wood, red brick or natural stone.

A simpler way of finishing involved the use of decorative plaster or wall graphics. Corner joints of interior arches can be pasted over with polyurethane tiles under an artificial stone.
Wooden arches are finished using furniture technology:
- The surface of the wood is primed, tinted and varnished;
- The final coating is applied to match the colors of the walls and ceiling of the rooms adjacent to the interior opening;
- Veneered surfaces of doorways with arches are always varnished with subsequent polishing of the decorative layer of wood.
If the finishing operations are performed in accordance with polishing standards, the decorative layer of wood can last at least 20 years, while the plasterboard finish will last a maximum of 10-15 years.
Illuminated arch
Installing flashlights and backlighting remains one of the most popular ways to amplify decorative effect from the arch.
Lanterns can be installed along the contour of the arch, or placed at the top of the arched arc and covered with translucent polycarbonate.
Instead of spotlights, you can use led strip, monochrome or color.
Interior of interior arches
The most difficult stage in planning an interior arch is the development of a common style, because the doorway must correspond to at least two rooms at the same time. For example, the passage from the living room to the kitchen is best done in light colors. White color, cream and beige shades are considered universal, able to be combined with almost any style of the interior of the hall and kitchen.
Arch in the living room
All other interior arches leading from the living room to other rooms are designed in the style of the interior of the main space of the apartment.

Before planning the shape and dimensions of the arched structure, you will need to take into account the color and texture of the furniture in the living room, the pattern of the flooring.

The concept of designing an arch in the living room is extremely simple - interior openings should visually expand the size of the room, even if this requires removing half of the internal adjacent wall.
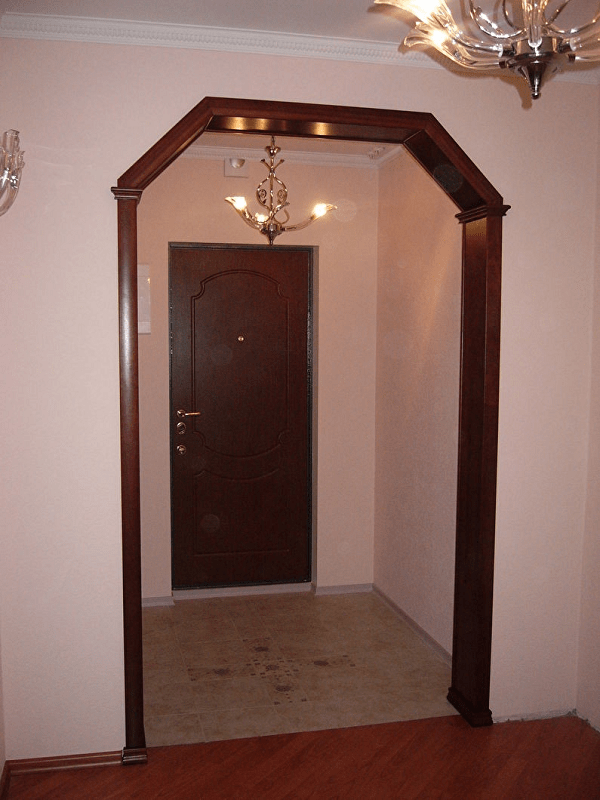
Arch in the hallway and corridor
A similar technique is used when planning arched openings in the hallway. The corridor room experiences the greatest load from dust and dirt brought into the apartment from the street or entrance.
Therefore, the entrance part of the apartment is planned in more muted colors, respectively, arched structures are made with minimal space absorption.
An exception may be interiors with extensive use of wood paneling, parquet and fine wood finishes. In this case, a massive interior arch, decorated in mahogany, can serve as a kind of bridge from a more utilitarian and stuffed hallway to the central part of an apartment or house.

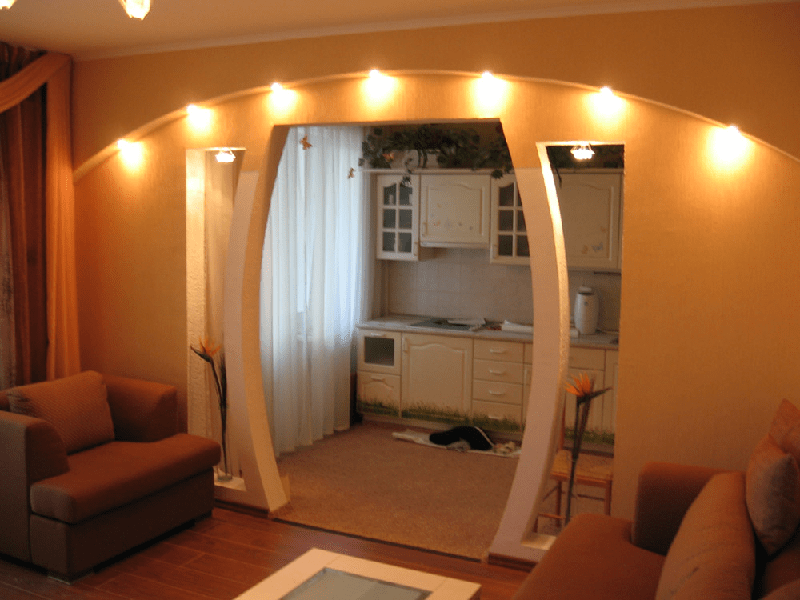
Arch to the kitchen instead of a door
To date, interior openings between the kitchen and the living room firmly occupy the first place in the list of the most popular solutions for redevelopment of old apartments. It so happened that in the vast majority of apartments of the old building, the hall is connected to the kitchen by a long and narrow corridor.

It is very inconvenient, so the hall is connected to the kitchen by a wide and spacious opening with a round arch. In the budget version, the interior arch can be made of plasterboard sheets with decorative plaster trim.
A more complex and at the same time non-standard option for arranging an interior opening is shown in the photo below.

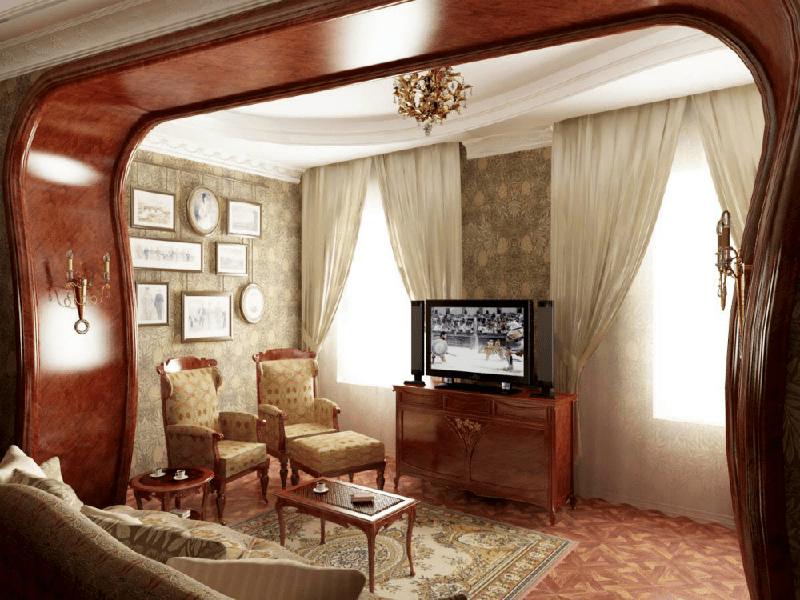
Instead of one passage in the adjacent wall, two symmetrical figured passages with round arches and an asymmetric shape of the opening were built. High ceilings allow you to make the arched part with a certain degree of broadening. As a result, the central part of the wall remains used for the installation of a TV and furniture, while the side sectors are “donated” for arranging the arch.
Arch in the children's room
In apartments with a small living area, with the help of an interior arch, the problem of dividing and delimiting space into the territory of adults and children is solved.

If the room is allocated for several children, then with the help of the arch it is possible to resolve most of the disputes related to the division of the territory. For arranging a doorway, arched structures are used quite rarely.
Arch in the bedroom
For the rest room and bedroom, the color of the walls, the shape and style of the arch are chosen in strict adherence interior decoration and interior space.

As a rule, for the bedroom are used double doors with an arched vault or small-sized interior arches with a monotonous decoration of the walls and the ceiling space.
Conclusion
Arched structures have long won the hearts of apartment and house owners seeking to improve and improve the layout and interior of their home. The interior arch remains one of the most affordable, simple and at the same time very effective ways make the interior of the rooms brighter and fresher. Moreover, the manufacturing process is not so complicated and intricate, and most of the work can be done with minimal cost. Only a small skill of an artist-designer is required, the rest must be entrusted to design professionals.
The topic of this article is the manufacture of arched doors, their installation and the subtleties of these processes. We will talk about the types of doors with arches, note their varieties and features of each type. We will also give recommendations on the independent production of an entrance door in the form of an arch made of solid wood.
To date, arched openings various forms and styles are used in the construction and decoration of most premises. They are used as entrance and interior doors.
From the whole variety of doorways in the form of arches (see), the following classification can be made:
- semicircular arches. They are the most common and are also divided into subspecies:
- Classic (semicircular) - they have an even radial shape.
- Ellipsoidal - performed in the form of an elongated oval.
- Modern - have intricate shapes with various protrusions.
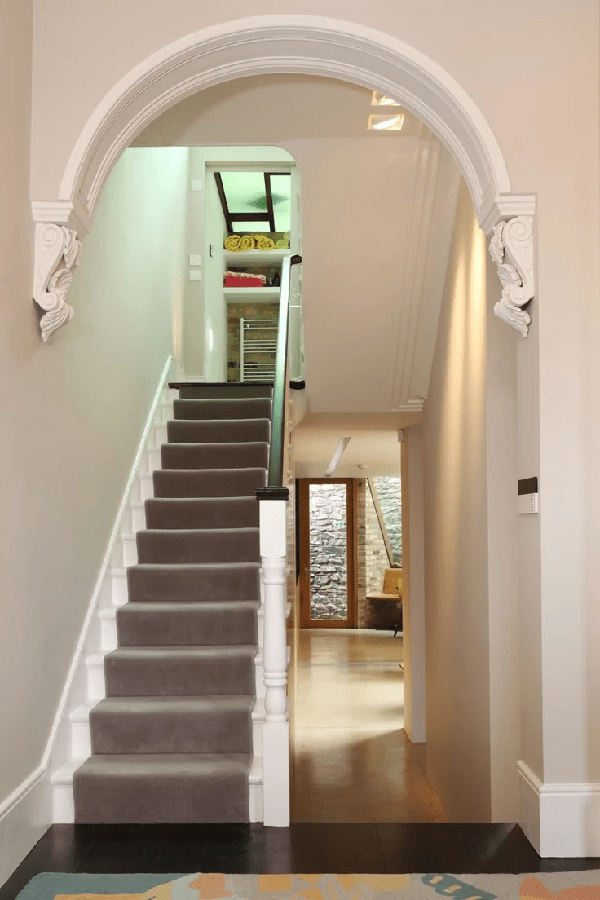
- Romantic - in shape they are more like a rectangle, in which the upper edges are slightly rounded.
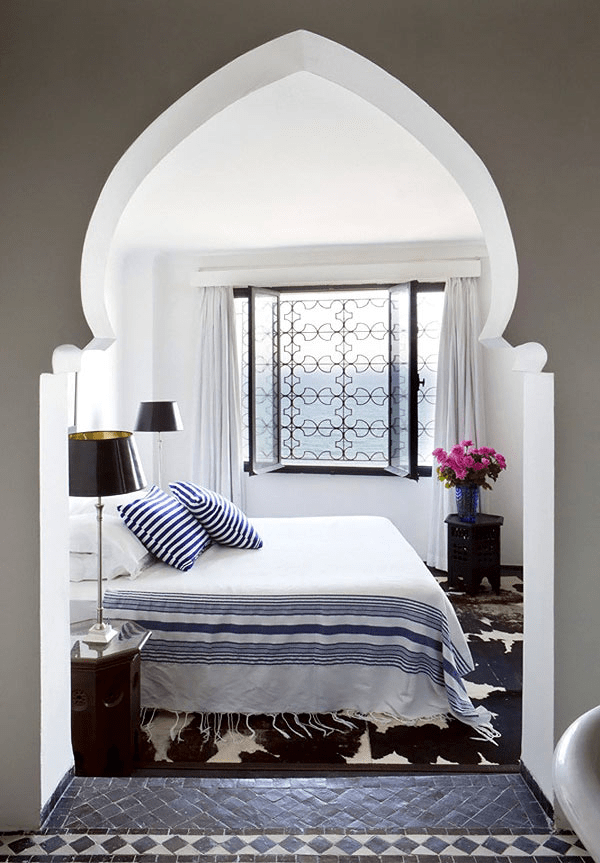
- horseshoe arches. They are horseshoe shaped. They can have not only a smooth semicircle, but also an elongated pointed top. Most often, openings of this type are used to decorate rooms in national styles.
- Gothic (lancet) arches. These structures have an elongated pointed shape, without smooth transitions.
What are arched doors
Arched doors have many varieties and are classified according to various factors: installation site, material of manufacture, design features
Types of arched doors at the installation site
There are two main categories here:
- Arched interior doors- located inside residential and other types of premises. Most often they are made of wood and have glazing. For glazing such structures, stained glass compositions are often used (see).
- Arched entry doors- are used mainly in the entrance groups of institutions: shops, organizations, shopping and entertainment centers. Made from plastic profile.
What are arched doors made of?
In view of the complexity of manufacturing this type of door leaf, the variety of material for their production is not very plentiful:
- Plastic. This material serves for the production of a profile, from which they make not only entrance doors but also windows.
- An array of wood. Wooden door leafs in the form of arches are used for entrance groups in the private sector, as well as inside any type of premises.
Structural features of arched doors
Based on the features of operation, complexity of installation and cost finished product the following arched door structures can be distinguished:
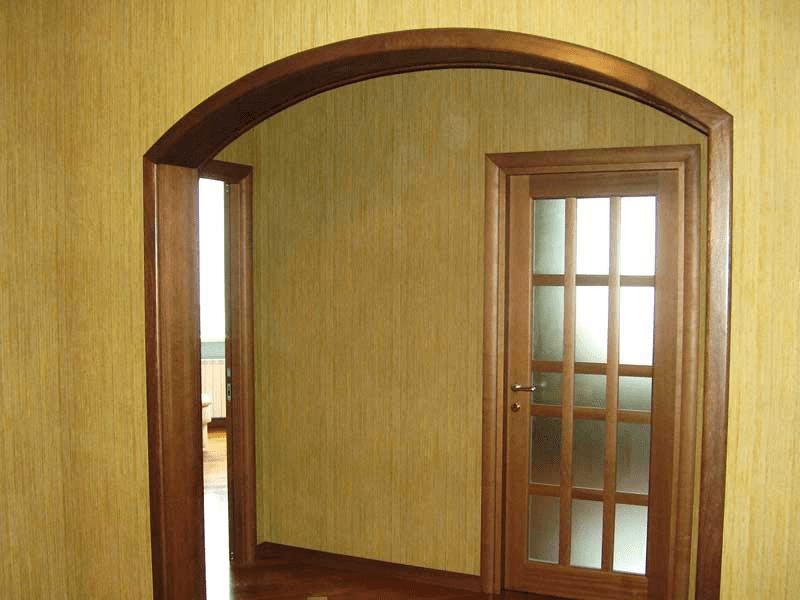
- Cloths that repeat one to one the contours of the opening. A feature of such doors is that their production takes a lot of time. They stand high enough. Such models are made of wood (see), since arched plastic doors are made using a different technology.
- Standard canvases with an arched part fixed above them. Such doors are somewhat cheaper, since the arcuate part of them is mounted separately and does not open together with the leaf. It also becomes possible to use not only hinged, but also sliding options for canvases.
Important! The height of the opening for such doors should be large enough. It is calculated by the formula: Vpr \u003d 210 cm + half the width of the opening.
- Single leaf doors. They are usually used as interroom, as well as input options for private houses and public buildings.
- Double doors. For wide openings, it is advisable to use two doors. One of them can be fixed in the opening with a latch. Actual for entrance groups. In this case, more often the “working” part of the door is 2 times wider than the fixed one.
We make an arched door ourselves
Despite the complexity of manufacturing such canvases, it is possible to do this. Now you will see for yourself. We will learn how to make wooden arched entrance doors.
It is better to order the box part according to your size, and we will make the canvas with our own hands (see).
We prepare everything you need
First you need to prepare a tool, boards and improvised materials.
We will need:
- Electric jigsaw with wood saws.
- Electric milling cutter with two types of cutters: disk (for grooves) and cylindrical.
- Sander with sandpaper of different grain sizes. Best of all - tape.
- Boards, 5 centimeters thick.
- Wedges made of wood.
- Two small bars and 4 wood screws. The length of the screws should be 30mm more than the thickness of the bars.
- Joiner's waterproof glue. Possibly PVA.
We make a blank for the arched part of the canvas
To make the arched part of the door leaf, we first need to measure the final width of the opening. That is, from the total width we subtract the thickness of the “box” part and the gap of 2 mm between the door and the opening (box).
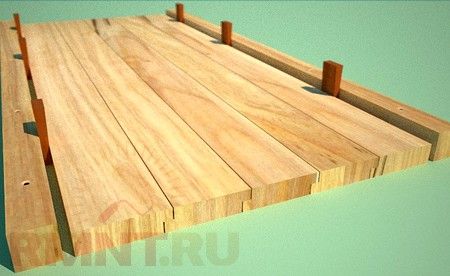
After that, we perform the following work:
- In order for the arch to turn out beautiful, its radius must be made equal to half the width of the doorway. Based on the width of the prepared boards, we calculate how many pieces they will need. Boards will be placed horizontally.
Important! Before you make an arched door, you need to choose well-dried boards. Since if they are raw, then the canvas will warp over time.
- Now, using an electric mill, we make grooves for a tighter connection. To do this, we take a disk-groove cutter. We make grooves in such a way that the protruding part is about half the thickness of the board. That is - 2.5 millimeters. Likewise with the internal groove.
- Next, we clean the entire surface of the grooves from dust and apply carpentry glue to them. After that, we connect all the boards and leave them to dry.
Important! In order for gluing to happen better, you need to take a board and attach pre-prepared bars to it with screws. The distance between the bars should be 10–20 mm greater than the width of the glued workpiece. Place the workpiece between the bars and open it with wedges.
Cut out a semicircle
For this operation, we recall the experience of installing plasterboard arches.
We use one of two options to outline the arched shape:
- If the arch has an even semicircle. We mark the middle of the blank at the bottom. Then we take a pencil and tie a non-sticky thread to it. Cut the thread exactly to the length of the radius of the arch. We attach one end of the thread to the mark and draw a semicircle with a pencil.
- If the shape of the arch (as in the photo) has an elongated semicircular or pointed shape, then we use a different method. It is very convenient to use a long metal ruler to delineate the boundaries of the bend contour. We also mark the middle and draw a line from it strictly vertically to the length of the radius of the arch. Next, put the ruler on the edge and bend it so that with one edge it touches the radius mark, and the other coincides with the edge of the workpiece. After that, draw a line with a pencil. On the other side, we do the same steps.
Important! Make sure that you get a symmetrical shape of the arched cutout.

Next, take a jigsaw and carefully cut the workpiece according to the markup. After that we take grinder with the largest skin and process the surface of our arched part of the door on both sides. After that, we repeat the grinding with a finer abrasive.
Now the most beautiful part of our door is ready. Arched-type interior doors can be decorated with the same elements. However, it should be noted that for interior spaces glazed arches will be more elegant. And their manufacture requires carpentry skills.
Finishing the door panel
Now we have to make the rest of the door. It will be assembled according to the same principle as the previous part. The only difference will be that the boards will not be located horizontally, but vertically.
You should also provide a horizontal part at the very bottom of the canvas. This will help extend the life of the door.
As a result, we have door leaf will consist of 3 parts:
- Horizontal bottom bar.
- Shield from vertical boards.
- Upper crossbar. She is the arched part.
After all 3 parts of the door are ready, we connect them using the spike method. To do this, we perform the appropriate operations with a milling cutter and put all 3 parts on glue. Do not forget to support the canvas with wedges.
The final stage is the treatment of the entire surface of the door with a protective agent and a finishing coating. For this, "Pinotex" or any other protection for the tree is suitable.
If the door is constantly on the sunny side, then it is not recommended to cover it with laminating coatings. In this case, it is better to use an ordinary colorless varnish for outdoor use.
Arched doors are gaining more and more popularity in the construction segment. On the one hand, this is an affordable opportunity to change traditional solutions, on the other hand, it is a correction standard sizes input and interior doors. The theme of the "arch" originated from the appearance of arched corridors, after which it gradually switched to door structures.
The main classification of arched doors is carried out according to the following criteria:
- design features - entrance and interior doors, prefabricated and non-separable;
- arch shape - round, oval and rounded;
- production material - wood, plastic, metal, glass, veneer, mirror, combined products;
- arc shape - rounded or gothic.
In addition to the fact that actually arched doors are becoming more and more in demand, it is worth noting the popularity of arched openings both under the door and as an independent structural element.
Types of arched openings
The arch is a relatively simple design solution that allows you to divide the room into zones without the use of doors and partitions. The most popular place to install an arch is, of course, the entrance hall, but arched openings at the entrance to the kitchen, balcony / loggia, rest room, etc. are becoming more and more popular. This is an opportunity to change the traditional solutions of space organization.
Varieties of forms and materials of manufacture
According to the shape of the outline of the arch are divided into:
- lancet;
- round.
In turn, the round outline is divided into the following main types:
- classic - even radius;
- modernist - an arc (oval) with a rise;
- romantic - with a central straight part and with rounding at the corners of the desired radius;
- ellipse - a regular or irregular oval is taken as the basis of the shape.
- horseshoe-shaped - part of the national interior in the form of a smooth or pointed semicircle;
- Gothic - with an elongated pointed shape without smooth elements.
Types, material of manufacture, design
The main difference and aesthetics of arched doors is the presence of a rounded top, repeating the smooth line of the doorway. Until recently, such a model of doors belonged to the eastern form of space organization and was little used in European culture. After a while, the non-standard shape of the door has won its niche, and today few houses can do without arched openings and doors. The main secret of popularity lies in the association. What is an arched door in the understanding of each of us? This is the entrance to the palace, to a beautiful tower. This is a trend of the past, when kings ruled the world. It is this feeling of a fairy tale that attracts with its special design.
.jpg)
Arched doors can be classified according to a variety of criteria, of which the main ones are:
- place,
- material,
- structural characteristics.
Place of installation and material of manufacture
In this category, there are 2 main types - interior and entrance. The first option is doors installed inside any room. The main material is plastic, wood, combined with glazing.
Entrance doors are the main element of the entrance group of various premises. For their manufacture are used different kinds metal, veneer, wood, plastic, rarely tempered glass
Due to the design features and the complexity of manufacturing canvases, plastic and wood are most often used, for interior doors - a combination with a glass sheet is the most successful. The tree used for the production of the entrance group must undergo a complex treatment against the development of fungi and mold.
Structural features
The first and main feature of arched doors is the structure door structure, which is traditionally subdivided into:
- a single complex of leaf and opening, characterized by a perfect match of the two elements due to point cutting and individual assembly. The most expensive type of doors;
- standard door complete with arched part. In this case, the manufacture and installation of both parts is carried out separately. Recommended for installation when choosing swing and sliding models.
- single-leaf doors - the most popular type of doors, not only arched, but also standard in shape. Can be installed as entrance group as well as in the house.
- double-leaf - perfect solution wide doorways opening. It is recommended for installation even in small rooms, where, due to the wide area, the “working” part will seem to be 2 more focused.
Rounding corners significantly reduces the height of the opening. Calculate it using the formula: 2.10m + ½ of the opening width. This figure may be higher, but it should not be reduced.
Do it yourself
A variety of standard doors allows you to choose suitable product for any size. Arched doors are not yet so popular with manufacturers and therefore you can either not choose any model at all, or not find the right size. Therefore, we suggest that you make the entrance wooden arched doors yourself.
You can really make the canvas yourself, but you will have to purchase the boxed part either in a specialized store or go to the forest.
Tools:
- jigsaw;
- electric milling cutter;
- belt grinder with a set of skins of several degrees of graininess;
- board 5.0 cm;
- small wedges;
- bars and self-tapping screws for wood, while the height of the self-tapping screw is at least 3 cm greater than the width of the bar;
- carpentry or PVA glue.
Procedure
- First, determine the net width of the opening, for which you subtract the thickness of the boxed part from the total width of the opening and plus another 2-3 mm margin.
- The arch will be smooth and beautiful if its radius coincides with the radius of the doorway. To do this, select the boards, and already determine by the width how much is needed, based on the fact that the boards are laid horizontally.
For the manufacture of arched doors, always use only the wood that has passed the stage of forced drying in industrial conditions (chamber, heat, air extraction, etc.). A wet or insufficiently dried canvas will eventually begin to go to the side, sag or warp in a different way.
- Using an electric milling cutter, cut grooves on the boards that will allow you to connect the parts together as tightly as possible. On the reverse side, you also make small shallow grooves for forced ventilation. The grooves are cut at the rate of 3.0 mm wider than the thickness of the board.
- Clean the boards with a soft brush, and apply a middle layer of PVA glue or other carpentry analogue. Allow time to dry.
- Cut out a circle from the workpiece and check the level of the plane.
The outline of the form depends on what the arch will be in the future. So, if you plan an arch in the shape of a semicircle, mark a point at the very bottom. Take a marker or pencil, attach a dense, non-stretching thread to it. Fix its end on a point, and draw a semicircle with a marker.
In the case when the shape of the arch is pointed or elongated, you will need a metal ruler. Put a point at the bottom of the workpiece, from which you draw a line straight up at an angle of 900. Next, put the ruler with an edge and adjust it carefully to the radius mark and along the edge of the workpiece. Draw a line with a marker. You do the same with the other side, observing the complete symmetry of the lines.
- Using a jigsaw, cut the workpiece along the drawn lines and grind it. First with a larger abrasive, then with a fine one. This completes the arch.
- The bottom of the door is prepared in the same way, except that the plank is now laid vertically.
Be sure to add a horizontal piece to the door that will maximize the life of the door.
The finished canvas consists of three elements:
- lower;
- a shield made of vertical slats;
- arched part.
You connect, as already mentioned, according to the tenon-groove principle, for which you cut the spikes with a milling cutter, which should protrude by 2-2.5 mm. Remove the dust, spread with carpentry glue and put the parts on top of each other in order. Be sure to support the already assembled canvas with wedges.
.jpg)
After 2-3 hours, after the glue is completely dry, finish the almost finished door with any protective agent. It can be "Pinotex" (universal impregnation) or any other. by the most best solution will use colorless varnish. On the sunny side, laminating coatings quickly lose their effect, and on the shaded side, it is simply imperceptible.
The arch of the doorway is an original architectural solution that allows you to separate adjacent rooms and give individuality to a typical apartment. Every year, this interior design is becoming increasingly popular, due to its versatility and attractive appearance. Making an arch in a doorway is not difficult, so every homeowner can handle this job.
Varieties of arches in the apartment
Choosing an arched opening should not only take into account taste preferences, but also depending on the width of the opening and the height of the ceiling. It is necessary to properly plan the structure, which should look organically in a particular interior. It will also be necessary to take into account the features of specific premises. For example, an installed arch instead of a door to the kitchen or living room will become great solution, but in a nursery or bedroom can complicate use.
For device door arches can be used:
- wood;
- drywall.

It is drywall that has received the greatest distribution, since it is an inexpensive and easy-to-use material that with equal success allows you to make rectangular and oval arches. Every homeowner who has minimal experience construction work.
In rooms designed in a classic style, it is recommended to choose arches with a semicircular shape, which look great in rooms with a ceiling height of more than 3 meters. Such a design can be made according to patterns, and the subsequent finishing is carried out from wood, stone or decorative materials.
In rooms with a small area and low ceilings, semi-arches in the style of romance, which look like an arc with rounded corners, are suitable. In a modern interior, simple U-shaped portals made of drywall or similar materials look great. The advantage of such straight arches is their versatility, which allows them to be used in rooms with different styles interior.
Step by step manufacturing instructions

When planning repairs in the house, you can turn to professional finishers who will equip the arches from drywall and other similar materials. If you wish, you can do all the work yourself with the simplest tools.
You just need to choose the type of arch, which should correspond to the characteristics of a particular room, make an approximate sketch of the future design, decide on the height, width of the opening, choose the right materials, dismantle the door yourself and make an original and stylish arch.
Taking measurements

Like any other construction work, the manufacture of a door arch begins with measurements. For this, a level and a simple tape measure are used. Take measurements from the opening and passage, determine optimal height and width, you will need to take into account the dimensions of the span between the walls.
All obtained measurements are recorded in the drawing, which greatly simplifies the work and allows you to calculate the required amount building materials. All work is carried out, referring to the sketch, maintaining the calculated dimensions.
Dismantling the old door
If necessary, the old door is dismantled, which is removed along with the box. It is recommended to perform the work as carefully as possible, keeping all the platbands and the canvas itself. You will need a chisel, mallet, chisel and similar tools.
Dismantling old door takes literally half an hour. If necessary, it will be necessary to further level the opening, for which they carefully operate with a chisel, chisel and hammer: large protrusions are removed and the concrete is cleaned of foam and sealant.
Arrangement of the supporting frame
The supporting frame is the basis of the whole structure, which is attached to the doorway and ensures the reliability, rigidity and durability of the arch. The use of metal guides for drywall simplifies the work, while the fastening of the elements can be carried out either directly to the walls or pre-assembled, and then fixed with anchors and dowels.
The frame is mounted as follows:


- Along the lines of the opening, with the help of anchors and dowels, a contour made of metal profile.
- Vertical guides are installed with a slight ledge from the interior wall.
- Parallel to each other, 2 profiles from a metal contour are installed on each side.
- Having mounted the profile, you can begin to fix the drywall. With a GKL thickness of 12.5 mm, self-tapping screws measuring 3.5 by 35 are used.
- Drywall sheathed 2 sides of the frame. It is not recommended to save on self-tapping screws and fasteners, since the quality of fixation and the durability of the completed structure will depend on this.
- The easiest way is to build an arch-arc from a metal profile, for which the metal is cut in increments of 6-7 cm with special scissors. For the manufacture of an arched structure, you will need 2 such blanks.
- The arcuate profile is installed and fixed on the frame. They need to be fixed with self-tapping screws or special suspensions, the number of which will depend on the width and length of the opening.
- With a step of 50 mm along the perimeter of the frame, stiffening ribs are installed, which are fixed by guides from two contours.
The supporting frame will be durable, the homeowner will only have to sheathe it with drywall, plywood and carry out decorative trim. On sale you can find a ready-made curved profile, the use of which will greatly simplify the repair work and the manufacture of the arch.
Bending drywall sheet
Having mounted the supporting frame, you can begin to bend the drywall sheets, which is necessary to give decorativeness and original appearance to the completed arch. GKL is a versatile, durable and pliable material that easily takes the desired shape and guarantees the highest possible durability and reliability of repairs.
There are two ways to bend drywall sheets:
- dry;
- wet.

With the dry method wrong side small cuts are applied to the sheet, parallel to each other. The material is easily bent and fixed on the installed frame with self-tapping screws or other fasteners.
The wet method takes more time, but it is possible to give the material original form. The sheet is moistened, small punctures are made in it, after which, under pressure, it is gently bent according to the pattern. After drying, the surface retains its shape, all that remains to be done is to fix the cut and bent parts in the mounted supporting structure.
Rough lining and puttying

Drywall sheathing of the mounted arch frame is simple. It is recommended to pre-fix the material with adhesive tape, on top of which screws are screwed. The minimum fastening pitch is 5 cm. With a larger distance between the screws, it is simply impossible to ensure high-quality and reliable fixation, and the arch will have to be redone.
After fixing the material with self-tapping screws, it is recommended to clean the edges drywall sheet, which will prevent damage to the edge on which the perforated plastic corner. Having completed the fastening of the GKL, you can proceed to its rough finish and leveling with putty.
A primer is applied to the sheet of drywall, on top of which puttying is performed. To improve the quality of work, it is necessary to putty in several layers, using a special reinforcing mesh and reinforcing the corners of the arch with fiberglass. It usually takes 10-12 hours for the putty to dry completely. For complete drying of the composition will have to wait a day.
decorative trim
Do-it-yourself door arch can get off various materials. Factory wooden linings are very popular, allowing you to give designs original look. You can also sheathe the opening plastic elements, wallpaper, paint, decorate with Venetian plaster.

Popular decoration of doorways natural or artificial stone, which allows you to create an unusual and original interior. Homeowners who prefer environmentally friendly materials, we can recommend a cork, which is additionally coated with wax or varnish on natural basis. In private houses, arched cladding is made with clinker tiles; such a finish does not require maintenance and will last for decades.
In each case, the choice of a particular finish is made based on the preferences of the homeowner, the style of the apartment or private house, and the overall budget. The easiest way is to independently make an arch in the apartment and sheathe the opening with ready-made wooden and plastic panels. Venetian plaster - original decorative material, work with which will require appropriate experience and special tools, therefore, when choosing a finish, it is best to turn to professionals, which will guarantee the quality and durability of the repair.
Read more


