To provide housing hot water There are many ways used: geysers, instantaneous and storage boilers. If for some reason it is impossible to use a gas water heater, then the choice of boiler remains alternative option. Moreover, connecting such a water heater with your own hands is not difficult.
Before connecting the water heater, please note that the units are divided into flow and storage. The design of flow-through systems includes powerful heating elements that provide rapid heating of the liquid flowing past them.
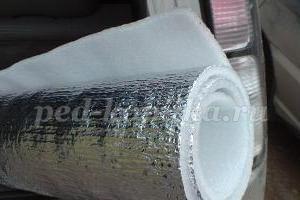
Storage water heaters have tanks different sizes. To maintain the temperature in the tank, it has good thermal insulation . Storage boilers can be divided into types:
- direct heating;
- indirect heating;
- combined.
Direct heating boiler
In devices of this type, heating elements are located inside the tank to heat the liquid. When the boiler has already been connected to the water supply, then cold water It is supplied from below, and the already heated one comes out through the top of the tank.
The temperature of the liquid is regulated using a temperature sensor. Units can be designed for vertical installation, as well as horizontal.
Indirect heating boiler
Indirect heating devices work in tandem with any coolant: heating system or solar system ( solar panels). The design of the device resembles a direct heating device, but the only difference is that there are no heating elements in it. Heating of the liquid occurs due to hot water located in the heating system circulating in the heat exchanger. How to connect an indirect heating boiler will be discussed further.

Combination devices
The device turns into a combined water heater when heating elements are inserted into it (holes for installing heaters may be provided in the tank). This device is convenient to use in the summer, when the heating is turned off or when there is not enough power produced by the heating circuit.
Connecting a storage boiler
To supply and remove liquid, there are installed at the bottom of the water heater (storage) fittings. The connection for hot water is marked red, and the connection for cold water is blue. It is recommended to use polypropylene pipes, which provide a reliable connection.
The figure below shows the simplest and reliable circuit connecting the water heater to the water supply.

The following rules must be observed:
- it should be possible to shut off the water supply to the home using valves;
- branches leading to the unit must have shut-off valves;
- if low-quality water is supplied to the mains, it is necessary to install a water filter after the shut-off valve;
- It is necessary to install a drain valve between the entrance to the tank and the safety valve, which allows you to quickly drain water from the tank if repair or maintenance of the device is required;
- before connecting storage water heater For water supply, it is necessary to acquire in advance various types of fittings, T-branches (tees) and flexible and rigid connecting pipes.
In addition, connecting a storage water heater requires the mandatory installation of a safety group of two valves. Safety mounted to protect the tank from excess pressure. If it rises to a critical level, the valve opens and the liquid is discharged through the drain hose into the sewer or a special container. Back the valve prevents water from flowing out of the tank when the pressure in the line decreases or is absent. Thus, it prevents heating elements from drying out, overheating and burning out.
The connection diagram of the water heater (boiler) to the water supply system is shown in the figure:

The set of parts for connecting the device to the water supply may vary depending on the material of the main water pipes.
For iron or steel pipes
How to properly connect the boiler to the water supply if the apartment (house) has a mains line using standard iron pipes? You can use modern method connection, without use welding work(welding the adapter with thread). In this case it is used adapter “vampire”, which is a clamp supplemented with a hole and thread.

Adapter "vampire"
Installation of the clamp is very simple, and is carried out as follows:
- the place on the riser must first be cleaned of paint and rust;
- The clamp must be placed on the riser using rubber gaskets, and the bolts must be tightened to secure it;
- turn off the water supply and drain the remaining water by opening any mixer tap;
- drill a pipe through the hole in the clamp using an electric drill;
- then, having screwed on the tap, you can begin connecting the required elements.
For metal-plastic pipes
Connecting a water heater to such a water pipeline is the simplest. Metal-plastic bends easily, and to connect elements they are used different kinds compression fittings.

Connection steps:
- cut the pipe to the required size;
- Next, you will need to carefully select the place for the insertion, while you need to take into account the size of the tee minus the part of the pipe that will go into the connection;
- you can use special scissors to cut out a small area;
- it is necessary to remove the nuts from the tee and place them together with the fixation rings on the 2 ends of the pipe;
- flare the ends of the metal-plastic using a special calibrator or screwdriver;
- Insert the tee all the way, after which you need to move the rings and tighten the nuts with a wrench.

There are also fittings for metal plastic pipes, which require crimping (crimping). In this case, additional special tools will be needed.
For polypropylene pipes
Before connecting the boiler to the water supply using polypropylene pipes, you need to prepare: soldering iron water pipes made of plastic, scissors for cutting it, a pair of tees and adapters for the threads that are located on the valves and emergency valve, as well as the number of corners required for the design. Further:
- the connection location is selected;
- a section is cut out in the pipe equal to the width of the tee, minus 2 centimeters (1 cm will go into the tee on each side);
- using a soldering iron, it is necessary to heat the pipe and fitting to the desired state and connect them (they cannot be turned during connection, as this may break the seal);
- using sections of water conduit of different lengths and angles, connections are made to the nozzles of the unit;
- A threaded coupling is soldered onto the end of the water conduit, after which the entire structure is securely connected.
Step-by-step connection of all elements
Regardless of which water pipelines will be used in an apartment or house, the connection diagram for the storage unit and the algorithm for connecting all elements will be the same.

The diagram for connecting the storage boiler to the water supply is shown in the figure:

Electrical connection
It is highly not recommended to plug the device into a regular outlet. This connection option electrical network cannot be considered safe and may cause a fire. And yet, how to properly connect a water heater? The boiler must be connected to the home electrical network through a separate line from the panel. The line is equipped circuit breaker, and the power of the machine must be at least 16A. The factory wire is disconnected from the heater and a new one is connected. three-core cable(copper), having a cross-section of 2.5 mm.
The device is required must be grounded. Otherwise, when bathing in the shower, there may be a slight electric tingling sensation and other troubles, including wiring failure and fire. Grounding is connected in the distribution panel. If you don’t understand anything about this, invite an electrician.


Connecting an indirect heating boiler
The indirect heating device does not have its own heat source, but uses heat energy from other sources (central heating, gas or solid fuel boiler, etc.). Therefore, for each source, an individual connection diagram for an indirect heating boiler is selected.
R heating system
The device with indirect heating has harness, which is connected to the water supply and heating circuit. In this case, you must adhere to the following rules:
- cold water must be supplied through the bottom of the tank;
- the heated liquid exits through the top of the unit;
- there should be a recirculation point in the middle;
- the connection of the thermal energy carrier must be such that it begins to move through the top of the heat exchanger and exits through its lower pipe - thanks to this movement, the maximum efficiency of the device is achieved.

With three way valve
This connection of an indirect heating boiler is realized if the pipeline through which the supply is supplied has circulation pump . As can be seen in the figure, the heating circuit and the unit are connected in parallel, and a three-way valve (controlled by a temperature sensor located in the body of the device) is mounted after the pump.

The valve is connected to the unit with one of its outlets. A tee is cut into the return line in front of the boiler, to which the outlet pipe of the heat exchanger is connected. At this point, the insertion into the heating system can be considered complete.
Operating principle of the circuit
When information is received from the temperature sensor that the liquid temperature in the tank is below the set temperature, the valve switches the coolant supply to the unit and the heating system is turned off. Thus, redirecting the entire flow of coolant through the heat exchanger promotes rapid heating of the liquid. When the liquid is warmed up enough, the valve will again direct flow into the heating circuit.
This boiler connection diagram can also be used to connect to a double-circuit boiler.
R non-volatile system
In the existing scheme, in which the boiler is non-volatile, it is recommended to place the device above the level of radiators. With this arrangement, coolant circulation will occur due to gravitational forces. Although, a pump can also be built into this circuit, but if there is a power outage, there will be no heated water.

With this type of connection, it is necessary that the water pipe going to the unit have a cross-sectional diameter that is 1 step larger than that used for heating. Due to this, priority is achieved.
With recycling
A unit with recirculation allows instant supply of hot water to the consumer. This is convenient because it does not require draining cool liquid until hot liquid starts flowing. This opportunity is provided by the installed pump to maintain circulation in looped circuit. This system is called recirculation. This design often includes a towel dryer.

In the recirculation system in the apparatus piping the following is used:
- a check valve that prevents the flow of heated and cold water from mixing;
- air duct - its task is to prevent air from entering when the pump is turned on;
- safety valve – relieves pressure in emergency situations;
- expansion tank, is designed to compensate for the expansion of the coolant, while the pressure in the tank should not rise above the activation level of the safety valve.
Thus, if you connect the water heater according to all the rules, this will allow the units to operate in correct mode and provide the consumer with hot water supply.
The presence of hot water in a house or apartment is one of the main signs of the level of comfort and coziness in it. In the distant past, its source was wood-burning titan boilers - bulky, smoky and inconvenient to use devices. Then they were replaced by flow-through gas columns, which had a lot of advantages: quick access to operating mode and fuel consumption only during use, but also had disadvantages: the need for a centralized gas supply, explosion and fire hazards if used incorrectly.
Storage water boiler
In parallel with the construction of thermal power plants in large cities, pipeline networks for centralized hot water supply and heating began to develop. They allowed consumers to forget about problems with hot water, reminding them only during planned outages during the summer months. It is at this time that most homeowners think about an additional backup source warm water, affordable and easy to install.
Water heater designs
In most cases, the eyes of householders are drawn to practical and easy-to-use electric water heaters, which are divided into two main classes:
Storage boilers
Such a boiler is a tank of relatively large capacity, thermally insulated with polyurethane foam, equipped inside with:
- thermal electric heater with electrical power of 1.2~3 kW;
- a thermostat regulator that ensures the device turns off when the threshold temperature is reached;
- anti-corrosion protective magnesium anode.
The outer casing of the tank is made of enameled or of stainless steel. The thickness of PPU thermal insulation is usually 2~3 cm.
When turned on, the device maintains, periodically turning on/off, the water temperature at the set level: usually 60~65° - this value is considered the most economically advantageous.
The defining characteristic of storage electric boilers is the capacity of the tank, on which the power of the heating element depends. With a volume of up to 150 l, the power does not exceed 2 kW.
The main advantages of these devices:
- independence from additional energy sources other than electrical;
- low electrical power;
- relative ease of connection to both the electrical network and water supply;
- smooth adjustment of water temperature with a mixer;
- maintaining the temperature of heated water for a long time;
- ease of maintenance, low operating costs.
The main disadvantages of storage-type electric boilers are:
- relatively large dimensions and weight;
- long wait to get back to work;
- decrease in outlet temperature during hot water consumption;
- limited tank capacity;
- heating a large volume of water when a small amount is needed.
Another advantage of storage electric water heaters is the ability to create a completely autonomous hot water supply system, or to be included in ready-made networks as a backup source of warm water.
Flow-through boilers
These devices turn on and produce continuous heating running water only during its consumption. This design assumes the presence of a large heating element electrical power- from 3 kW and above. This parameter is decisive for flow-type water heating devices.
There is a common point of view that flow devices are uneconomical due to their high electrical power. This opinion is wrong.
Let's give an example: a storage water heater with a capacity of 80 liters. with a 2‑kW heating element it heats up to 60° for at least half an hour in the summer, and even more in the winter, while consuming 1 kWh of electricity. A 4‑kW instantaneous electric water heater with a 15-minute shower is the same 1 kWh.
The main advantages of instantaneous water heating devices:
- instant hot water output;
- automatic switching on when opening the tap: electricity is consumed only when using the device;
- small dimensions and weight;
- convenience and speed of installation.
Among the shortcomings we can only name:
- the need for reinforced electrical wiring due to the high power of the device;
- low water pressure at the outlet;
- stepwise switching of water temperature;
- impossibility of working for several consumers - each device is connected individually to only one point of hot water use: kitchen sink, sink in the toilet, shower stall.
- True, over the past few years the cost of these devices has decreased significantly, so the need to purchase two or three devices of this type for the home is no longer an obstacle.
Installation instructions
 We connect the boiler to the water supply
 Installation of flow-through electrical devices is usually not difficult: it involves inserting into water pipe outlet equipped with a ball shut-off valve, as well as connecting an electrical line with a cross-section corresponding to the electrical power of the device.
Installation of storage units is more complex and requires some electrical and plumbing training, at least at the entry level. The installation can be compared to installing a meter in a bathroom.
Boiler installation diagram
You should not start work without a preliminary sketch or drawing of the device connection. The diagram for connecting a water heater to the water supply in an apartment if it is installed as a backup source of warm water is shown in the figure:

The numbers on it indicate:
- Main shut-off valves. They serve to shut off the water supply to the apartment from the common water riser.
Attention! At a time when hot water is supplied to the apartment from the riser, the shut-off valve on the common pipe must be open, and on the outlet to the boiler closed. In the case of water supply from an electric water heating boiler, the valve on the outlet opens and the valve on the riser closes. Otherwise, your water heater will provide hot water to the entire entrance. - Water heater shut-off valves - to perform repair work and maintenance of the electric boiler.
- Safety valve with drain outlet. Designed to relieve excess water pressure in the tank when it is heated.
Note! Pressure equalization is accompanied by the release of excess water from the valve. To drain it not to the floor, but to the side, the valve should be equipped with a drainage tube. - Drain valve with pipe. Designed to empty the boiler, which may be needed, for example, at the dacha when preserving the water supply for the winter.
Important! Emptying the tank from water may also be necessary when replacing a burnt heating element or magnesium anode, which prevents the inside of the device from corrosion.
If there is no coarse water filter in the water supply system, it would not hurt to place it on the inlet pipe from the riser. This will be useful not only for the hot water boiler, but also for other electrical appliances: washing and dishwasher, For example.
If the house is old and did not initially have a hot water supply riser, then the storage boiler can be used as the main source of warm water. In this case, before connecting the electric boiler to the water supply, you should install the appropriate hot water pipeline in the apartment with wiring to all faucets in the bathroom and kitchen.
Selecting a location
Before you begin installing a water heater, you should decide on its placement. As a rule, you need to think through the design of your bathroom down to the smallest detail so that you don’t regret it later.
Electric storage boilers have two designs:
- Vertical - designed for hanging on the wall directly indoors.
- Horizontal - for hidden installation in the attic or attic room, or in the ceiling space.
Vertical devices occupy part of the room space and are more noticeable, but they can be placed in close proximity to the connection point, and therefore are easier to install and require less piping materials and installation work. And useless heat losses in long pipes can be avoided.
In addition, device bodies can be round or flat. The latter is most preferable, as it takes up less usable space and is more convenient to install, as well as aesthetically pleasing. When choosing a location for the device, consider the possibility of access to it when performing repairs and maintenance.
Note! The wall at the installation site of the unit must be strong, preferably solid, capable of supporting the weight of the tank along with the water filling it. If necessary, a non-permanent wall should be reinforced with additional structures.
Installation Tools
 We prepare tools for installation
 Before starting any work, prepare the necessary set of tools. Its completeness depends on the type of water pipes in the house. Considering that copper and polymer pipelines are still exotic, let’s consider a set of tools for standard steel pipes:
- gas pipe wrench No. 2 or an adjustable crocodile, or better yet, both together;
- adjustable wrench;
- metal hacksaw or hand pipe cutter;
- thread-cutting tools with heads of the appropriate diameter;
- electric drill with hammer drill and drill bits for concrete;
- screwdrivers: figured and electric;
- pliers;
- side cutters;
- tape measure or folding meter, ruler, square, level, pencil.
Installation materials
 Connecting fittings for the water heater
 For installation you will also need a mandatory set of installation and consumables:
- shaped fittings: angles, tees, couplings, bends corresponding to the thickness of water pipes in diameter;
- ball shut-off valves;
- pressure safety valve;
- flexible hoses for connecting to the boiler;
- plumbing tow or Teflon mounting tape;
- electric wire;
- screws or hooks and dowels, or anchor bolts Ø 8~10 mm.
Step-by-step instruction
We will start installing the electric boiler by hanging it on the wall in the location chosen for placement.
- Having measured the installation dimensions of the unit or taken them from the technical data sheet, mark them on the wall and drill holes, insert dowels.
- After attaching the screws, hang the boiler and securely fix it with them.
After installing the boiler and checking the reliability of its fastening, proceed to plumbing work:

- Close the shut-off valves of the pipelines to the hot and cold water risers.
- Mark on the pipes the insertion points for the tees-branches under the unit.
- Attention! The connecting fittings of all modern electric hot water boilers are marked blue for cold water and red for hot water. Accordingly, mark the installation locations of the tees under them.
- On each pipeline circuit, cut a piece of pipe with a length equal to the sum of the lengths of the tee and the bend.
- Cut threads from both ends of the cutouts.
- Screw a tee onto one end of the cutout and screw the side with the short thread into it. Screw the locknut and straight coupling onto the long one. Once the tee is aligned, screw the coupling onto the other side of the pipe cutout and secure with a locknut. Make all pipeline connections using tow or Teflon FUM tape for sealing.
- Do the same with the other pipe.
- Screw the bends into the bends, choosing their length so that the free ends are at the same level.
- Screw the ball check valves onto them.
- Having closed them, open the taps at the inlet of the risers and check the tightness of all connections. If necessary, turn off the water and correct problem areas.
- Between the shut-off valve on the cold water outlet and the electric boiler tank, install an additional safety valve and a tee with a drain valve.
- Connect the hot water boiler to the pipes with flexible hoses.
Do not use a rigid connection between the boiler and the pipeline. Temperature and seasonal deformations of the metal of pipelines and building walls will soon cause failures in the sealing of connections. Instead of flexible hoses, you can use a small U-shaped elbow. - Once again carefully checking the tightness of all connections, you can fill the electric boiler with water. To do this, open both shut-off valves. Then, opening the hot water tap on the mixer, wait for a smooth and continuous stream from it.
Attention! It is strictly forbidden to connect the boiler to the electrical network when the tank is empty: this will cause immediate burnout of the heating element.
Having finished installing the pipelines, you can begin connecting the electrical wiring:

- Despite the fact that storage-type thermal units have low power consumption, which standard apartment wiring can withstand, it is better to draw a separate line from the electrical panel to the device, connecting it through a personal RCD - residual current device.
- Very important! Any electric water heaters must have a protective grounding, without which they cannot be used categorically forbidden! If a third grounding wire was not provided in the home electrical wiring, a protective grounding can be made. It is performed with a separate cable connected to the electrical panel housing and the input neutral wire. Under no circumstances should you rely on grounding the water pipes: the neighbor below could have already replaced them with polypropylene ones. Also, you should not connect the body of the device to the zero in the socket: with any reconnection in the distribution box, the zero and phase may change, and the device will be under mains voltage.
- De-energize the power line supplying the device by unplugging the cord from the socket or turning off the circuit breaker on the electrical panel. Only then remove the protective cover from the boiler.
- Make the electrical connection of the device in accordance with the markings on the terminals under the cover:
- L - phase.
- N - zero
- Protective grounding or grounding is connected to the clamp screw on the device body.
- Having completed electrical installation, make sure once again that the boiler tank is filled with water, close the protective cap and turn on the power supply. The red light on the device body should light up. Using a test electric screwdriver, make sure there is no voltage on the housing.
- If the electric boiler is equipped with a dial thermometer, then after some time you can observe an increase in the water temperature.
At this point, the installation work can be considered complete. During operation of the unit, do not forget to monitor the tightness of all connections and reliability electrical contacts. If you constantly use the water heater, it is advisable to replace the magnesium anode approximately once a year; this will significantly extend its trouble-free service life.
Very important! When performing any work, it is necessary to comply with general and electrical safety rules. When cutting metal and performing other operations, wear protective gloves or mittens. When drilling concrete walls Wear safety glasses. Perform all electrical installation work on de-energized electrical appliances.
For home handyman Even with a budget bathroom renovation, the skills to install a faucet and the ability to connect an air conditioner are necessary. If you have the skill, then the work of installing an electric water heater will not cause any particular difficulties, the main thing is attentiveness, accuracy and thoroughness at every step. If experience is not enough, it is better to show it to a more experienced and qualified technician before turning on the mounted device.
It is hardly possible to call living in a house or apartment fully comfortable if for some reason, temporarily or permanently, there is no hot water supply. Even residents of high-rise buildings in large cities are not immune from this - accidents, interruptions in the operation of boiler houses, planned supply stops, etc. occur. And about the inhabitants of the private sector or suburban housing there is a special conversation - all the problems of providing themselves with hot water completely fall on the owners.
How is this solved? Heating water in a saucepan is not even discussed... Install a flow water heater - option good and not too difficult to perform. But it would probably be wiser to always have at least a small supply of heated water - that is, install a storage water heater, in other words, a boiler. This publication will discuss the main theoretical issues and give practical advice on how to choose a similar device, and how to connect the boiler to the water supply.
So, leaving “outside the brackets” instantaneous water heaters, as well as outdated and inconvenient solid fuel"titans", let's pay attention to modern models boilers. They can be divided into direct and indirect heating devices. And according to the type of energy carrier used, direct heating boilers are divided into gas and electric. In addition, there are models that combine several operating principles.
Direct heating boilers
In installations of this type, the incoming energy carrier (electricity or natural gas) is used exclusively for the needs of hot water supply, without intermediate steps.
Gas storage boiler
Such a device is not very widespread - it is quite complicated to install, requires mandatory approval from technical supervision authorities, it requires the construction of a smoke exhaust system of one type or another, appropriate supply ventilation to ensure normal gas combustion. In a number of regions, a mandatory installation condition has become the presence of a special device - a gas analyzer. All this does not add to their popularity among homeowners.
Nevertheless, such boilers still “have a right to exist,” and from the point of view of efficiency, they are, of course, superior to electric ones.
What is the structure of a gas storage boiler:

- Pos. 1 – container in which hot water is heated and accumulated. It is supplied through a pipe (item 5), and taken in through a pipe (item 6). Not shown in the diagram, but the water tank has a fairly thick outer casing with polyurethane foam insulation, which ensures long-term maintenance of the required water temperature.
- The water tank has a common lower heat exchange wall (item 2) with a combustion chamber in which gas-burner(pos. 3). In addition, heat exchange occurs when hot combustion products pass through the central channel (pos. 9) before exiting into the chimney (pos. 10 )
- Control device included installed sensors temperature and thermostat (position 4) constantly monitors the level of water heating, turning on or off the gas supply to the burner (position 3) as necessary.
- The safety group (position 7) necessarily includes an emergency valve that will relieve excess pressure if the thermostat suddenly fails to cope with its task of maintaining a certain temperature.
- To prevent the walls of the tank from becoming overgrown with scale, a magnesium anode is installed in the boiler (item 8). This material has a significantly lower electrical potential, so free ions of salts dissolved in water will be deposited on it. These anodes are easy to change as needed.
So, despite their excellent performance, such boilers have not become “leaders in sales”, since they are difficult to install, and their cost is much higher than that of conventional electric ones.
Electric boiler
This type of storage boiler is the most popular among homeowners. Installation of such a device does not require tedious coordination procedures, major alterations or construction work. If there is a reliable power supply line, probably any good owner who has a basic understanding of plumbing work can install an electric boiler.

How do electric boilers work? They may have different layouts, but circuit diagram still remains the same:
- The outer casing of the boiler (item 1) may have one or another decorative design. From separated from the internal water tank (item 3) with a layer of polyurethane foam thermal insulation (item 2).
- Serve cold tap water is always carried out to the lower part of the tank through a welded pipe (item 4). To prevent the creation of turbulent liquid flows in the container, the incoming water is distributed using a special diffuser (item 5).
- Hot water, on the contrary, is always drawn from the top of the tank through an installed tube (item 9 )
- Water is heated using electric heating elements (heating elements) various types(pos. 7).
- The purpose of the magnesium anode (item 6) has already been described above.
- Thermal sensor (pos. 8) is connected electrical circuit with an electronic or electromechanical thermostat that ensures water heating to the temperature set by the user.
This type of boiler operation works well in practice if the device is selected correctly, taking into account the need for power and volume. Electric boilers are available in a wide variety of shapes and sizes, they are quite compact, and most importantly, they have a very affordable price.
Indirect heating boilers
In those private houses (sometimes in city apartments) where the autonomous system water heating closed type with a single-circuit boiler, indirect heating boilers are often used for hot water supply needs. In these devices, water that is used for domestic and hygienic needs (in other words, sanitary) receives heating not from direct heating, but from heat exchange with the heating circuit through which a coolant liquid (process water or other liquid) circulates.
The basic structure of an indirect heating boiler is shown in the diagram:

External casing (item 1), thermal insulation layer (item 2) and internal tank (item 3) — , everything is similar to a conventional direct heating boiler.
Through the pipe (item 4), cold sanitary water enters the tank, the flow of which is sprayed using a special bumper (item 5). Hot sanitary water is drawn through a pipe in the upper part of the boiler (item 6).
In addition, a circulation pipe is usually provided (item 7). A separate additional circuit is created, for example, through heated towel rail, with constant circulation of hot water. This achieves two goals: firstly, there is always hot water in the DHW pipe at approximately the same temperature; A in– Secondly, such a scheme somewhat simplifies complex system maintaining the required heating temperature of sanitary water.
Connections pos. 8 and pos. 9 – insert into the heating system of the house, entrance and exit to the spiral heat exchanger (item 10), through which thermal energy is transferred from the heating boiler to the hot water supply system. There may be more such “coils”, for example, one is connected to the heating system, and the second to the solar heat storage system.
Large volume boilers (more than 150 l) usually have an inspection window (pos. 11), closed with a flange plug. By the way, it is often possible to install an electric heater – heating element – in this window, thus making the boiler more versatile.
Magnesium anode (item 12) is a mandatory element for all modern boilers.
An indirect heating boiler must have its own safety group, monitoring and control device (item 13), temperature sensors for generating control signals (item 14).
An indirect heating boiler may have a slightly different design, the so-called "tank V tank» :

Indirect heating boiler based on the “tank in tank” principle
Everything is almost the same, only the circulation of the technical fluid of the heating system goes through the external vessel “A2. An internal tank “B” is installed inside it, in which sanitary water is heated. The surface of the internal tank is made corrugated to increase the active heat exchange area.
Indirect heating boilers are characterized by high productivity (naturally, with the appropriate power of the heating boiler) and efficiency. Alas, they also have many shortcomings. Firstly, they are “tied” to the heating system, and when warm days come and the boilers are turned off, they simply stop working. Secondly, such a boiler is a fairly massive structure that takes up a lot of space, which is especially important for cramped conditions in city apartments. Probably, from the point of view of convenience, a double-circuit boiler still looks preferable. And thirdly, indirect heating boilers are somewhat “capricious” in terms of adjustments and maintaining the required temperature - they do not require a rather complex and cumbersome control system and coordination with the heating circuit.
Combination boilers
Both direct and indirect heating boilers have their significant advantages and significant disadvantages. To fully take into account both of them, to create a kind of “symbiosis” of both schemes - this was the task set by the developers of combined boilers.
The diagram shows one of the typical examples of such devices, a boiler from the “SMART” family of models.

As can be seen from the figure, this boiler is assembled according to the “indirect” scheme “tank in tank”, but additionally has its own electric heaters (heating elements). They can be turned on, for example, when the thermal energy of the heating system is not enough to raise the temperature of sanitary water to the required level (this often happens when, during the off-season, in autumn or spring, the heating boiler is not used at rated power). Naturally, when the heating season ends, the heating elements will bear the full load of providing the house with hot water. On the one hand, it is convenient, on the other, the system is quite cumbersome, and besides, a combined boiler does not solve the problem of saving space - it also needs a lot of additional space.
So, to draw a line under the first section of the publication, we can state that optimal choice from the point of view of ease of installation, reliability and ease of operation, there will still be an electric direct heating boiler. And the fact that it is somewhat less economical - this issue should be resolved with a prudent approach to the use of hot water.
How to choose the right boiler
Assortment of modern stores household appliances can easily put you in a “dead end” - which boiler model for an apartment to prefer, what parameters to rely on? It is clear that the device must “fit” into the interior of the room - however, this selection criterion should in no way become decisive. First of all, attention is always paid to the operational characteristics, materials of manufacture of the main components, the availability and reliability of control, monitoring and emergency protection systems.
Required boiler water tank capacity
Boilers are produced in a wide variety of volumes - from mini-devices with a capacity of about 8 ÷ 10 liters, to powerful units with storage tanks of 200 liters or more. The principle “the more the merrier” is here absolutely not acceptable. There is no point in overpaying for a completely unclaimed volume of heated water, and, in addition, wasting precious space in a cramped apartment. It is better to approach the choice from a practical point of view.
The volume of the heater should depend on the number and type of hot water points in the apartment or house, on the number of people living in it, so that the needs of all residents are satisfied evenly and to the maximum extent, without any inconvenience to others.
Boilers are capable of heating water to very significant temperatures, even close to the boiling point. However, from the standpoint of efficiency and safety, the optimal heating level is +60° WITH. Let this value not seem small - this is very hot water, the temperature of which the hand cannot withstand. Naturally, such water needs to be diluted with cold water. The table below shows approximate consumption figures for hot (60°) water and, accordingly, diluted to a comfortable temperature:
| Hygiene and housekeeping needs | Optimal water temperature (°C) | Approximate total water consumption (liters) | Required amount of water heated to 60° (liters) |
|---|---|---|---|
| Routine hand washing | 37 | 1.5 ÷ 4 | 1 ÷ 3 |
| Taking a shower | 37 | 35 ÷ 50 | 17 ÷ 25 |
| Swimming with a bath | 40 | 150 ÷ 180 | 85 ÷ 120 |
| Morning wash, brushing teeth, shaving | 37 | 12 ÷ 15 | 5 ÷ 8 |
| Washing kitchen utensils | 50 | 15 ÷ 25 | 14 ÷ 17 |
Guided by these values and knowing the number of people living in the house, you can, armed with a calculator, calculate the required volume of the water heater, so that there is enough water for everyone without additional waiting for it to heat up. It is clear that in this case one should proceed from reasonable consumption - if someone needs to take a bath, then there will not be enough hot water for anyone else.
To make the calculation extremely simple, a table will be provided from which you can quickly determine the recommended boiler volume for specific conditions:
| Number of water consumers living together | Number of residents taking evening showers directly after each other | Number and type of water intake points in the apartment (house) | Minimum permissible volume of storage boiler | Optimal boiler volume |
|---|---|---|---|---|
| One adult | - | wash only | 10 | 30 |
| One adult | 1 | Sink and shower | 30 | 50 |
| Two adults | 2 | Sink and shower | 50 | 80 |
| Family: two adults and a child | 3 | Sink, dash and sink | 80 | 100 |
| Family: two adults and two children | 4 | Sink, shower, sink, bath | 100 | 120 |
| Family: two adults and three children | 5 | Sink, shower, sink, bath | 120 | 150 |
Nominal and maximum power of the water heater
It is clear that the more powerful the heating elements of the boiler, the more of them, the higher the total load and power consumption of the installation, the sooner the water will heat up to set temperature. However, strictly follow this approach - choose a device with maximum power, would be a mistake. Do not forget that in-house electrical networks have certain load thresholds, exceeding which, at best, will cause constant activation of protective equipment, and at worst, overheating of the wiring and even the occurrence of a fire hazard.
For the conditions of apartments and private houses, a water heater with a power of up to 2500 W will be sufficient. For typical household electrical systems, this consumption is not extreme, and standard ground loop outlets are typically rated to handle up to 3,500 watts of load.
Despite this, any electrician will still give advice - do not rely on wiring that was once made by someone, but run a separate line from the panel to the boiler. Second tip - if you select a boiler with a power of over 3000 W, then the socket will not the best option to connect it - for complete safety of the line, it is better to organize the connection point of the water heater through an automatic machine designed for currents of 16 ÷ 25 amperes.
Dimensions of the water heater and its external layout
Here, it would seem, everything is simple - a boiler of the required volume is purchased, and with the dimensions - as it turns out. Not certainly in that way.
- Traditionally, from the moment they appeared in everyday life, electric boilers had a vertical orientation and were a cylinder hung on the wall or, for very large volumes, permanently installed on the floor. The disadvantage is cylindrical– irrational use of space, since the device protrudes excessively from the wall.

If the boiler is small, up to 30 ÷ 50 liters, the volume can still be raised higher, and it will not pose much of a hindrance, then with larger containers the loss of space becomes significant.

“Flattened” boilers occupy less space, but they also have disadvantages
From this point of view, it will be much more convenient to use a vertical boiler “flattened”, and sometimes - parallelepiped designs. They are located closer to the wall and allow you to more freely manage space in a cramped room. Is it true, similar models much more expensive, and in addition, their internal tank always has several welds, and this is always a kind of “Achilles heel” for any structure that is constantly in contact with water.
- If the room where you plan to install the boiler is wide enough, then it makes sense to consider purchasing a device with horizontal placement on the wall.

In addition to the fact that this saves space, such boilers are praised for quickly heating water. True, the overall performance of such water heaters is still lower than that of vertical ones.
The boiler model based on the type of housing and its placement on the wall must be determined immediately. It is completely unacceptable to change the direction of installation, for example, hang a horizontal one vertically or vice versa - design features Each model is predetermined by its placement and connection to water supply networks only in the position strictly specified in the instructions.
Anti-corrosion protection
Modern boilers are probably no longer produced without magnesium anodes - this simple device allows you to maximize the service life of heaters and the internal capacity of the boiler.

The magnesium anode significantly “delays” corrosion processes onto itself
It is not particularly difficult to purchase such an anode and replace it.
What can be added in this aspect is that there are more modern anti-corrosion systems with so-called inert anodes. The degree of protection of the boiler here is much higher, although the price of such a model is also much higher.
Kinds heating elements
- From the very beginning of the appearance of boilers in everyday life, they were installed so-called "wet" electric heaters - heating elements.

A wet heating element is constantly in contact with water...
They are directly immersed in heated water, which means the heat transfer process occurs more efficiently. However, this is also where the main vulnerability lies. similar devices– the quality of the water may be such that even magnesium anodes do not help, and in a matter of months the heaters become overgrown with scale and corrosive deposits.

... and this contact, alas, does not pass without a trace - such heating elements are not durable
- Heaters with “dry” elements are considered more advanced. This, by and large, is no longer a heating element in the literal sense (not a tubular electric heater), but rather a system of powerful heating coils on a ceramic body.

Dry heaters are much safer and more durable
Such a “dry” heater is placed in a completely sealed capsule, which is located in the internal volume of the boiler. There simply cannot be contact with water, and such a heater lasts much longer. And it’s easier to change it - you don’t even need to drain the water from the tank.
Material for manufacturing the boiler storage tank
- If you approach it from the point of view of the cheapness of the model, you can purchase a boiler with a regular steel internal tank with an enamel coating. Perhaps, apart from low cost, this design has no other advantages - it is the least resistant to increased pressure or temperature - the enamel can become cracked and begin to chip.
- Water heaters with a stainless steel tank are much more practical in this regard. They are not so picky about rigidity and chemical composition the water heated in them is much more hygienic. Stainless steel is a fairly plastic material, so it is not afraid of significant changes in temperature and, accordingly, pressure - steel compensates for all expansion, and deformation will not occur.
Some boilers with a tank made of high-quality stainless steel and a “dry” heating element are not even equipped with magnesium anodes due to the lack of such a need.
- The most modern are water heaters with tanks made of glass-porcelain composite. Here we can talk about absolute neutrality to any chemical reagents, the complete absence of even hints of corrosion or surface deformation.
Under no circumstances will the heated water develop an odor, as often happens with enamel containers. Moreover, the porcelain glass coating even has a certain antibacterial effect.
Such water heaters have one drawback - they are still very expensive compared to other models.
Water heater control mechanisms
At the most simple models There is a simple electromechanical control - a rotating handle, through which the required temperature for heating and maintaining water is set. A mandatory element, as a rule, is a dial indicator - a thermometer and a light bulb (LED) indicating the heating process or a pause.

In principle, such a control and management scheme is quite sufficient in most cases. However, if desired, you can also purchase more “sophisticated” boilers, which have a liquid crystal display of operating modes and the possibility of programming. For example, with setting by switching time, heating power level, etc.

Modern boilers may have multifunctional electronic control systems
Such models can be included in the system " smart House", be controlled using special remote controls, and have other interesting, but probably not so popular functions in everyday life.
Fame manufacturer
The question is also important. Paying even not too much money for an absolute “pig in a poke” is probably not very prudent. Who knows, you might be lucky, but very often the result is just the opposite, and the saddest thing is that there is no one to claim any warranty obligations from.
In the middle price category, as a rule, Italian, Slovak, Turkish water heaters. They have a good, neat assembly, but as components they most often use Chinese spare parts, which cannot be called low-quality, but they are still far from meeting world standards.
If you are aiming to buy - guaranteed quality and longevity, along with the most advanced technologies, then German manufacturers have no equal here. In addition, real heaters from Germany are famous for their excellent heat retention characteristics - a fully heated boiler, disconnected from the power supply, will lose no more than 6 — 7 degrees per day.
How to connect the boiler correctly
Installation of an electric direct heating boiler in its regular place can be divided into several distinct technological stages:
- Choosing the optimal location and hanging the water heater on the wall.
- Connecting pipes to the boiler and connecting it to the water supply system.
- Installation and debugging of control and security systems.
- Connecting the boiler to the electrical network.
Mounting the boiler on the wall
It would seem - what’s easier than hanging a water heater on the wall in the chosen location? However, frivolity in such a matter absolutely unacceptable. Judge for yourself - even a small boiler, say 50 liters, with completely filled will weigh about 70 kilograms. What can happen if the fastening turns out to be unreliable can be seen in the photograph.

Even in the best case, if at the time of the fall there were no people below, this is a broken device, damaged plumbing, probably leaking water, etc. And in the worst case, in addition to impact injury, there is also the danger of being scalded by hot water or being injured electric shock.
- So, wall material must be such that the fasteners are securely held in it. In this capacity, plasterboard walls can not even be considered - in no case should a boiler be suspended without a special metal structure.
- The suspensions themselves - dowels or anchors with hooks - must withstand twice the maximum load. For example, fastenings for a boiler with a volume of 120 liters must withstand a shear and bending force of 250 kg.

Usually, conscientious manufacturers equip their models with fastenings that are guaranteed to withstand loads. If you have to purchase fasteners yourself, then this should work Golden Rule– it’s better to take with a huge reserve than to doubt whether there will be enough or not. Typically, for domestic-class boilers, dowels or anchors with a central rod with a diameter of at least 8 mm and an outer diameter of the collet or plug of at least 12 mm are sufficient. The length of the dowel is about 100 – 120 mm.

- The boiler should not be located too far from water supply points. The “classic” place for its installation is considered to be the bathroom, the wall above the toilet. True, there may be obstacles to such placement. For example, an overly large water heater simply will not fit there. In addition, there are apartments that have more than one pair of cold and hot water supply risers - this happens when the “bath-toilet” block and the kitchen are separated. There is no point in extending long communications, powering all points from one boiler. The optimal solution would be to install two heaters - for the bath, and a second, more compact one - for kitchen needs.
- The boiler must be placed on the wall in such a way that all its indicators and controls remain open for control, so that there is free access to plumbing fittings and the power supply switch.
- It is recommended to leave a distance of at least 100 mm between the boiler and the ceiling. The suspended water heater should not be placed lower than 500 mm from the floor surface.

- Most wall-hung boilers have one or two metal mounting strips or brackets welded to the body with holes for hooks. Before marking, you should carefully measure the distances between these holes so that you can transfer them to the wall. Sometimes in the technical documentation of a water heater, a paper template is attached to the installation instructions for the most accurate marking - this will make it even easier.
There are vertical center and horizontal lines on the wall, with control at help building level. But it marks holes for dowels or anchors. After drilling the holes and hammering the fasteners into them, the hook is screwed in so that approximately 5 - 7 mm remains outside.
After this, you can hang the boiler on the hooks.
- There is another option - the water heater is equipped with a special bracket that is attached to the wall, and on the boiler body there is a “mating part” for hanging on this bracket. Then they are used on hooks, and dowels or bolt-type anchors, with a hex key.
Inserting a boiler into the apartment's water supply system
This is one of the most difficult tasks. Its meaning is that it is necessary to install tees on the cold and hot water mains. Through the “cold” one, water will be taken to the heater. Through the “hot” boiler it will be connected to the internal hot water distribution.
The classic boiler piping scheme is shown in the diagram:

Time-tested electric boiler to plumbing system
Blue arrows show the movement of cold water, red arrows, respectively, hot water.
By. 1 is the water heating device itself.
Pos. 2 and 3 – cold and hot water supply risers. As a rule, at the inlet, in front of the water meters (they are not shown in the diagram), there are shut-off valves - pos. 4 and 5. Important note - when working in autonomous mode, that is, when using a boiler, valve pos. 5 is necessarily in a completely closed state.
Valves pos. 8 and 9 – element, in principle, optional, but highly recommended. With the help of these taps it will be possible to turn off the boiler, for example, for preventive maintenance or for repairs, in no way without affecting the whole the rest of the apartment wiring.
From these valves the supply usually begins (positions 10 and 11) to the water heater itself. Flexible hoses or plastic pipes, polypropylene or metal plastic can be used.
If the hot pipe supply is connected, most often, directly to the boiler, then cold water requires mandatory installation safety valve(pos. 12), which can be connected to drainage system thin flexible hose (pos. 13).
The theory is over. Now let's see how this can be done in practice.
- You will need certain tools and accessories - wrenches (22, 24, 27 and 32), gas wrenches, a cutter for plastic pipes, tow for winding connections and a special paste for the same purposes. You can have several ½ and ¾ inch rubber gaskets on hand.
- First of all, before starting installation work, be sure to close both valves at the inlet (items 4 and 5).
- The next node is the tees. There will be no special problems if the internal wiring in a house or apartment is made of polypropylene or metal-plastic - you can cut out the required fragment of the pipe, weld or mount a tee on the fittings, and then carry out further installation from it to the boiler.

It is more difficult if the pipe is laid in steel, and there are no plans yet to replace it with a more advanced plastic one. This means that you will have to cut in a tee.
In principle, a simple and acceptable solution may be to install a collapsible clamp clip. A hole is drilled in the pipe, a clip is put on top, tightened tightly, and further wiring is made from the resulting outlet.

The tee-holder allows you to solve the problem to some extent, but it is still better to make a “major” insert
However, this option is not considered very successful - there may be leaks, and there is a high probability of rapid clogging in the place of the drilled hole. It is better to cut out a section of the pipe with a grinder, cut the threads with the appropriate tool, and then “pack” a full-fledged brass tee using a conventional drive or, which is much better - using couplings with a union nut - so-called "American women".

The most convenient way is to use connections with union nuts - American ones
Video: how to switch from a metal pipe to a plastic one
- From the installed tee, of course, it’s worth getting closer to the boiler by installing plastic pipes.
It is recommended to install the pipes as close to the water heater as possible. As the last section of the liner, flexible hoses in a metal braid are most often used. So, the shorter they are, the more durable they will be. Long hoses vibrate strongly when starting and shutting off the water, and this causes accelerated wear.
A prerequisite is that if such flexible hoses are installed, they must be of exceptionally high quality.
However, many craftsmen still prefer to make the liner entirely from polypropylene or metal-plastic pipes.

Supply without flexible hoses - only from polypropylene pipes
Don’t forget that it is recommended to install another pair of shut-off valves before the last section of the line.
The hot pipe connects directly to the red connection of the water heater. You can find recommendations to install here an additional tee with access to drain valve- but from a practical point of view special application there is no such element.

Left, on hot pipe a tee with a diverter valve is installed. From a practical point of view, this is not a particularly necessary detail.
Particular attention to cold pipe connections
Here there are much more stringent requirements for connecting water to the boiler.
The main one is the mandatory installation of a safety valve immediately before the entrance to the water heater pipe. This device is essentially represents double acting valve.

Without any exaggeration - the most important safety element, the safety valve
- In a longitudinal cylinder with threaded connection a disc check valve is located - it will not allow water to flow out of the boiler even if there is no pressure at all in the supply pipes.
- The perpendicularly located cylinder also contains a poppet valve, but with a much stronger spring. The force of its compression is calculated in such a way that the valve will open when the pressure in the boiler exceeds a critical point, for example, when the thermostat fails, overheating or even boiling water. In this case, excess liquid will be discharged into the drainage pipe, and the pressure in the device will be normalized. The drainage pipe is often connected by a transparent flexible tube to the sewer or cistern toilet.
Many models have a lever - it allows you to open the emergency valve manually, for example, to drain water from the tank.
You can often hear complaints that water drips from such a valve. You can’t complain about this - you should be happy that the valve is working correctly. A valve that is always dry should cause much more concern - there is a possibility that it is clogged and damaged.
There are smart people who believe that it will be enough just check valve. This is a terrible misconception, which has more than once led to real tragedies.
Another important warning is that no shut-off devices are allowed to be installed after the valve and before entering the boiler.
Video: The Importance of Installing a Safety Valve
The picture shows an installed valve, above which a tee is packed, which has a side outlet through a shut-off valve. This is a completely acceptable and quite convenient improvement to the boiler piping - there is always the opportunity to quickly drain the water or use the water supply when for some reason there is no water in the water supply.

It happens that the pressure in the water supply system of a house is extremely unstable - there are strong surges. This is unsafe for the boiler from the point of view of water hammer. In addition, if the pressure is too high, the emergency valve may be triggered, needlessly releasing water into the sewer system.
It is not difficult to eliminate such a nuisance - you need to install a pressure reducer at the entrance to the apartment or directly in front of the boiler - usually purchased with a rating of 2 atmospheres.

When installing valves and gearboxes, be sure to pay attention to the direction of the arrows marked on their body and indicating the direction of water flow.
“Packing” of threaded plumbing connections is best done using tow using a special sealing paste (for example, Unipack). The tow fibers are wound along the threads strictly clockwise, then coated with paste on top. There is no need to particularly tighten such a pairing with a wrench - it is screwed all the way, but “without fanaticism.” If necessary, it will even be possible to make a quarter or even half a turn back - this should not affect the tightness of the connection. In this regard, this type of winding is much more advantageous, for example, fum tapes.

When connecting flexible hoses and union nuts of American couplings, rewinding is not required - rubber gaskets handle the sealing task.

Boiler wiring is complete
After all the nodes are connected according to the diagram, the quality of all connections is checked, you can carry out a test supply of water to the boiler.
- For this, Firstly, the shut-off valve at the hot water inlet to the apartment is closed.
- Then, at one of the water intake points on the mixer, a “hot” tap opens - the air displaced from the tank will come out through it.
- The cold water supply valve to the boiler opens.
- The water heater begins to fill. It is necessary to monitor the moment until water begins to flow from the open tap - this will indicate that the boiler is full. After this, you should close the tap on the mixer. The cold water supply valve to the heater always remains open for the entire time the device is used.

At this point, the final insertion of the boiler into the water supply system can be considered complete. All that remains is to connect the boiler to a power source, set the required heating temperature on the control panel, and, as it heats up, use hot water wisely.
Video: how to install a water heater with your own hands
In this article we will take a closer look electrical diagram boiler And how to connect a boiler to electricity.
First, let's look at a typical electrical circuit of a boiler - electric water heater, what main components it consists of, why they are needed and how they interact with each other. Then we will look at how to connect the boiler to electricity, i.e. to the electrical network.
Electrical diagram of the boiler.
Let's look at the general electrical circuit of the boiler, when a separate knob for adjusting the water heating temperature is placed on the front panel of the tank, and the temperature regulator and thermostat (thermal relay) are made separately.
The electrical circuit of the boiler consists of the following components:
— thermostat;
- thermostat;
- indicator lamp.
The supply voltage through the zero N (blue) and phase L (red) wires is supplied to the boiler, in our circuit to the thermostat input terminals. The neutral protective wire PE is connected to the housing of the water heater tank using a screw.
From the output terminals of the thermostat, the zero is connected to the first contact of the heating element, and the phase is connected to the input connector of the thermostat. The output connector of the thermostat is connected to the second contact of the heating element. The indicator light is connected to the output zero terminal of the thermostat and to the output connector of the thermostat (phase).
IMPORTANT!
Before connecting the boiler to the electrical network, it is necessary to fill its tank with water. Otherwise, the heating element will overheat and fail.
So, we fill the water heater with water, use the temperature regulator knob to set the desired water heating temperature, turn on the electrical protection device in the electrical panel, thereby supplying supply voltage to the electrical circuit of the boiler.
Since the water is cold, the thermostat circuit is closed, the indicator light is on, indicating that the water is heating, current passes through and the water in the tank heats up.
When the set temperature is reached, which is measured by the temperature sensor of the thermostat, the thermostat breaks the power supply circuit of the heating element, the indicator light goes out, and the water begins to cool.
When the water temperature in the tank drops below certain value, the heating element’s power circuit closes and heating begins again. This is how the process of maintaining a constant temperature of the water in the tank occurs.
The thermostat acts as a fuse. If for some reason the temperature of the water in the boiler exceeds the permissible value, the thermostat breaks the circuit of the neutral and phase wires, turning off the power from the heating element and thereby preventing overheating of the water in the boiler.
In some models of water heaters, the thermostat and thermostat are combined in one housing, but the operating principle of the circuit does not change.
How to connect the boiler to the power supply network.
Now let's look at how to connect an electric water heater to?
In the diagram above, the boiler is connected to the electrical network through an RCD and installed in series with it circuit breaker.
The RCD protects against possible electric shock in the event of current leakage due to breakdown on the housing or damage to the insulation, and the circuit breaker protects the circuit from possible overload or short circuit.
In this scheme, the cable from the electrical panel is directly connected to the boiler input terminals, i.e. removed protective cover, the power cable is inserted, connected to the appropriate terminals and closed back with a protective casing.
For details on which RCD to choose, with what parameters, which circuit breaker, what rating and characteristics, how to correlate the parameters of the machine with the parameters of the RCD, how to calculate the required cable cross-section, see.
The diagram below shows an option for connecting a water heater through an electrical outlet.
It is connected to a cable coming from the electrical panel, and a cord with a plug from the boiler is connected to this outlet.
I would like to note that connecting directly to the boiler terminals, without using an intermediate socket (as in the first diagram) is more reliable and preferable.
Well, instead of a bunch RCD+circuit breaker you can use a difavtomat.
In this circuit, phase and zero are connected directly to the boiler input terminals. In this case, the zeros before and after the difautomat should not have common connections.
This circuit can also use a connection via a socket. The socket is installed in the line after the automatic machine, and a plug with a cord from the boiler is plugged into it.
In the connection diagram of the boiler to the electrical supply network, it is advisable to use a separate line made with a cable of the required cross-section with the installation of a separate electrical protection device.
Watch the video for more details Boiler connection diagram:
Useful materials
If there is no hot water in the house, you can connect electric water heater. Almost anyone can do this; you just need to carefully study the specifics of its design, types of devices and their connection diagrams.
Types of boilers used
There are several types of electric water heating devices:

- Flow-through. The heating element acts as a heating element. The thermal medium in the flow part is heated by a heated metal tube. Devices of this type are not equipped with a water tank, so a constant flow of water is heated to a certain temperature, which explains the high power. Depending on the model, the power varies from 3 to 25 kW. If you plan to use the water heater not only to heat water for washing dishes, but also to take baths or showers, you will need a boiler with a capacity of at least 8 kW. Consequently, the power of the heating element affects the heating time of a specific volume of liquid. The device can be non-pressure or pressure. A gravity water heater has a small capacity and is installed with a faucet or shower head. The pressure type of device is connected directly to the water supply network. These are devices with high power that can provide hot water to several water supply points. This water heater can also be used in a non-pressure method. They may have mechanical and automatic system control, the main task of which is to turn on the boiler and then turn it off in a certain period of time. The advantages of a flow-through water heating device include: a large selection of models with various functions; small size and light weight, which simplifies installation of the device; providing hot water in unlimited quantities without preheating; to do this, just open the tap with the boiler on. The disadvantages are: in case of weak electrical wiring, the operation of the devices high power virtually impossible; when low pressure in the water supply, the heating element of the water heater may fail, so when installing the boiler, the installation of a pumping station is required; inability to obtain a large flow of hot water; high consumption of electrical energy.
- Cumulative. This type of water heater has a sealed steel container and a heating element located inside the tank. The heating tube heats the water to a certain temperature and maintains it throughout the entire time of use. The thermal fluid entering the device from the plumbing system is constantly heated, while little power is used. The heated thermal environment can be distributed over several points water supply network. The undeniable advantages of storage devices are: water is added automatically, which ensures uninterrupted availability of hot water; rapid heating of the thermal environment up to 70 degrees; relatively low power of the device; automatic switching on and off of the device; economical energy consumption; maintaining water temperature for a long time. The disadvantages include: heating water requires a certain amount of time; big sizes devices, however, the latest models are smaller; the need to periodically clean tubular electric heaters from lime deposits; From time to time it is necessary to replace the magnesium anode, which protects the internal tank from corrosion.

Installation Rules
During the installation and operation of the water heater, it is necessary to take into account some points:
- it is important to choose the right wall to mount the device on, it must withstand a load equal to double the weight of the device;
- it is important to determine the capitality of risers and pipelines in the house(sometimes it is advisable to replace pipes before installing the device);
- The electrical wiring must be able to withstand the power of the water heating device. if it is weak, it needs to be replaced;
- Water should be drained from the water heating device only after disconnecting it from the network;
- connection to a water supply system with pressure over 6 atm., without installing a safety valve is unacceptable;
- operation of a water heating device without protective grounding is prohibited;
- installation of spare parts into the device, not provided by the manufacturer, is prohibited;
- cleaning, inspection and replacement of tubular heating elements must be carried out in accordance with the manufacturer’s recommendations, this helps to extend its service life;
- When connecting electrical wires, it is important to pay attention to the markings to avoid connecting the phase to the ground loop;
- throughout the entire period of use of the device access to it should be free.

Connecting the storage boiler to the water supply
Preparing to connect
Before you begin connecting the storage water heater to the water supply network, it is necessary to ensure high-quality fastening.
The fastening process is performed in the following sequence:
- Points for fastening locations are marked on the wall in accordance with the dimensions and fastening points directly on the water heating device, it should be taken into account that when hanging the boiler on hooks, it is raised to the height of the fastening element;
- holes of the required diameter for dowels are drilled, their number depends on the design of the device;
- dowels are placed in the holes and fasteners are screwed into them;
- hanging the device on hooks.
Required materials and tools
During the installation of the boiler you will need following materials and tools:
- water hose (flexible) – 2 pcs.;
- dowel with hook – 2 pcs.;
- safety valve – 1 pc.;
- tap (diameter depends on the pipe) – 1 pc.;
- or flax tow;
- sealing paste;
- hammer drill or electric drill;
- drill;
- Adjustable wrench;
- screwdrivers.
Cold water connection and hot water outlet
Let's look at the stages of this process:

- Cold water input:
- They cut off the water supply to the house.
- A thin layer of tape or tow is wound onto the thread so that there are no gaps. In this case, the pipe hole must be free.
- Sealant is applied to the tape and a tee valve is screwed onto the cold water supply., which is located on the right side of the device.
- Using a wrench, the tee is placed in a position convenient for installing the rotary element and connecting a hose for water drainage.
- A valve is installed on the transverse outlet of the fitting in the same way. with adapter for hose attachment.
- Installation of relief and non-return safety valves. To do this, wind the tape, apply sealant and screw on the valve. To protect the operation of the device, a 6-bar protective valve is placed in the side hole of the tee, to which a compression connector is mounted for a pipe that drains water during high blood pressure. A check valve is connected to the bottom of the tee.
- Next, the shut-off valve is installed, and a connection is made to the adapter of the water heater using a flexible hose. After this, the cold water supply module is ready.
- Hot water output:
- The hot thermal mass outlet requires the installation of a standard fitting with a diameter of 15 mm, which is placed behind the valve. Due to the fact that the fittings have right-hand threads, they should be tightened clockwise. In addition, depending on the location of the pipeline in the house, fittings with a diameter of 20 mm can be used.
- To make all connections you must use tow with sealing paste or PSUL tape.
After installing the connecting elements, you can connect pipes for hot and cold water. At the same time, they are inserted into the connector until it stops, having previously flared its cut end. Do not tighten the nuts on the connector too much; it may become deformed.
Features of connection to pipelines made of different materials
The connection of the water heater in the water supply system is carried out according to a diagram that involves installing a shut-off valve for cold water supply and hot water outlet, as well as installing a safety valve and drain system. Differences can only be made when connecting the unit to a pipeline made of different materials.
Let's look at the main nuances:
- Connection to polypropylene water supply. To carry out the work you will need a special soldering iron and a tool for cutting polypropylene pipes, three American taps and a tee with a diameter of 15 mm, as well as several more tees, compression pipes with a diameter of 20 mm, connecting elements. Regarding installation work, it should be noted that if the pipeline is not hidden in the wall, to connect the water heater it is necessary to cut the pipes for cold and hot water and, using a soldering iron, install tees into them, from which auxiliary pipes are separated to the unit and connected to the valves using an end coupling. If it is hidden in the wall, you will need to open it, then take the pipes out, and then wall it up again. Due to the fact that it will be almost impossible to solder the pipes, you will have to use detachable couplings with tees. In this case, an American one is perfect, one side of which is soldered to the tee, and the other to the free end of the pipe. After the joints have hardened, the detachable connection is assembled, and the subsequent steps for connecting the boiler are carried out in the same way as in the previous case.
- Connection to a water supply system made of metal-plastic material. In this case, it should be taken into account that the metal-plastic water supply system is not installed in a hidden way. Therefore, to connect the boiler, several pipes are cut and tees are installed. Then pipes are pulled from them to the boiler.
- Connection to metal pipes. This type of connection is considered the most complex; it involves inserting the boiler into a steel water supply. Most easy way implies connection via adapters kitchen faucet, a tee is screwed onto each of them, allowing you to connect both the mixer and the water heater to a single pipe without threading or tapping. When it is not possible to use this method, use an insert, a so-called clamp, equipped with a threaded fitting, which is mounted on a pipe with a rubber gasket. Next, using a sleeve and an electric drill, a hole is made through the fitting in the pipe. At this point, the sidebar can be considered complete. All connections are equipped with individual valves, from which pipes of any material are routed to the unit.
Connecting the storage boiler to the electrical network
There are several ways to connect to the electrical network:
- into the socket;
- wire outlet to the distribution board.
When connecting through a socket, the device must be grounded; therefore, a socket with a grounding contact will be required. The socket is placed above the pipes connected to the device.
It is important to know that the socket is not suitable for high-power appliances; it will overheat and spark, which can subsequently lead to a fire in the socket and damage to the water heater.
Leading the electrical wire from the switchboard directly to the device is the most reasonable solution. The function of turning off the device in this case is performed by an automatic switch, which will protect the water heater from negative phenomena and their consequences in the event of network interruptions.
The cable can be hidden in the wall or stretched open method in a fireproof shell. The distance between the cable and the pipeline must be more than 50 cm.
Before connecting the device to the network, you must close the safety cover, which is prohibited from opening when the electrical power is on.
It should also be noted that when the unit’s tank is empty, connecting the power supply is strictly prohibited.
Connecting a instantaneous boiler
Connecting a device of this type is carried out in three stages:
- Installation of a water heater on the wall. The device is hung on brackets, which are fastened with self-tapping screws in holes drilled in the wall. At this stage of work, it is important to prevent distortions or displacements, which could lead to failure of tubular electric heaters. The ideal height is human height.
- Electrical connection. It is not recommended to plug the device into a simple outlet due to the heavy load on the supply wire. Therefore, it is necessary to route the cable to the distribution board, in which an individual circuit breaker is installed that can withstand the electric current of the device. This indicator can be found in the documentation attached to it. Remove the safety screen and insert three cables into the clamping block, observing the color markings, and according to the designations, connect the cores to certain connectors. In conclusion this stage install and connect the residual current device.
- Connection to the water supply system. There are several connection methods: temporary and permanent. The first requires a simple hose or tube from the mixer in the shower, through which the water supply pipe and the inlet pipe of the device are connected. To ensure reliable connections, clamps are used. If a drain is mounted at the end of the pipe on the water supply side, it is advisable to use a shower hose with threaded couplings at the ends. For a permanent connection, a shut-off valve is installed on the water pipe, through which, if necessary, the water supply can be stopped. Next, the water heater pipe is equipped with an American one. An ordinary plastic pipe is mounted between it and the tap. The outlet pipe is equipped with nozzles that come with the device.

- When purchasing a water heating device, you should carefully review the device's passport to ensure that it is fully equipped, as well as whether the warranty card and other documentation have been filled out correctly. It is important to pay attention to the packaging of the water heater. It must be packed with factory film and protected from external damage.
- It is recommended to install water heating devices as close as possible to the shower, bathroom faucet and kitchen faucet. A large distance from the supply taps affects energy consumption.
- Due to the fact that water heaters are high-power devices, experts recommend using a three-core copper cable with a cross-section of 2.5 mm or more to connect them.
- There is no special permission required to install the device. as opposed to installing a gas heating boiler or water heater.
- By connecting the water heater to the electrical network, it is filled with water. This action is performed as follows: cold water is supplied simultaneously with the hot tap open. After all the air has come out and the water flows, the tap is closed.
- The connection diagram of the water heating device provides for the presence expansion tank, which is filled with excess heated water. In its absence, water will go into drains and water consumption will increase. The presence of a tank makes it possible to accumulate unused hot water.