The shoe rack in the hallway is very useful device for storing shoes. It will be especially relevant in a large family, where shoes that are in constant use take up a lot of space. On such shelves you can easily organize everything, even for seasonal use. In addition, the shoe rack has all the conditions for storing shoes, which significantly increases their service life. In our article we will look at what types of shoe racks there are, their advantages and disadvantages, and also tell you how to make such shelves and cabinets at home using the most common materials.
Today there are many options for this furniture, but they all belong to two main categories. Based on this, shoe racks can be:
- open type;
- closed type.
These can be all kinds of shelves, cabinets, benches, both compact and full-size. When combining certain characteristics, several types of such products can be distinguished:
 Shoes- these are open-type shelves, the design of which can be either the simplest or the most elaborate. Their height can also vary depending on the wishes of the apartment owner. The advantage of such products is the ability to install shoes different sizes. Shoes left outside, wet or dry, can be freely placed on such shelves, thanks to open type it will be ventilated, which will ensure its drying. The disadvantage of such products can be called open view shelves that do not always look aesthetically pleasing;
- wardrobe boom- This is a bulky structure, inside of which there are several shelves for storing shoes.
 Such shelves can be located either at right angles or at an angle, depending on the wishes of the owner of such furniture. Deformation of the shoes is excluded, since the entire shoe rests entirely on the entire sole. The dimensions of such a closet allow you to place all the existing shoes in the house, arranging them according to the seasons. The doors of such a cabinet can be made of frosted or transparent glass, and the design of the door itself can be hinged, sliding or accordion-style. The advantage of such a product is the placement large quantities shoes, and the disadvantages include large dimensions that are unlikely to fit into a narrow hallway;
  slim shoe rack- This is a product that takes up little space. They are not too deep, but they have folding shelves that can be opened 45 or 90 degrees. The advantage of such products is the possibility of installation in small hallways, especially since they can accommodate quite a lot of shoes. Their disadvantage is considered to be the inability to store large and tall shoes. Although, now manufacturers are working on this issue and are starting to produce products with different compartments;
- cabinet cabinet- This is a low product with hinged doors, which is ideal for storing seasonal shoes of various heights. The advantages of such a cabinet include
 The functionality of the closet, in addition to shoes, can also accommodate shoe care products. In addition, such cabinets are often equipped with a seat that helps you put on your shoes. The disadvantages include the fact that shoes must be dried for storage;
 - The shoe rack can also be installed in a wardrobe, if nothing else can be placed in the hallway. In this case, the shelves can be of various sizes, stationary or retractable, on which all shoes can be placed, or only according to the season. The advantage of this solution can be considered the saving of free space;

- shops- these are products that are a symbiosis of bedside tables and shoe boots. All shoes are located on open shelves, but the product itself is equipped with a seat for convenience. The advantage of this solution is ease of use and simplicity of design, which you can make yourself. The design of such products can be very diverse, so you can install such a bench to decorate the hallway.

Choosing material for shoe racks
Its service life and convenience will depend on how correctly the material for making the shoe rack is selected. Today in stores you can find various models of these products, and they are all made from various materials. The most popular models are made of wood, plastic and glass, but there are other options:
- wooden, their advantage is considered to be environmental friendliness and beautiful appearance. Wood has always been considered an expensive material that is ideal for making any furniture. Such shoe racks will look perfect in hallways decorated in classic style. Despite their advantages, they also have disadvantages. They are very demanding to care for, in order for the product to please the eye for a long time, it is necessary to use various wood impregnations. Shoes that will be placed on such shelves must be perfectly clean so as not to spoil the product;

- plastic products are considered the most affordable, this is their undoubted advantage. But the appearance is not the same long term operation can be a big disadvantage. Some types of plastic used to make shoe racks are fragile, so cracks and chips cannot be avoided;

- hardware, more durable and reliable, which is a huge plus. Their only drawback is the need for treatment with special compounds with anti-corrosion properties. If you used to make such a shoe rack thin metal, then under the weight of shoes it can bend;

- glass the products have several advantages: they are very durable, as they are made of special glass, and have an elegant appearance, but there are also several disadvantages. Firstly, this design is very heavy and massive, and secondly, various types of prints are very noticeable on the glass, which are very difficult to remove. Therefore, you will have to choose between the aesthetic side or the practical one;

- Chipboard the most popular material for shoe racks that are designed at home. Him affordable price what opens ample opportunities. In addition, products made from it have the following qualities: they are very compact and lightweight, undemanding to care. The only negative is poor resistance to moisture, which can cause the material to crack or swell;

- wicker products are distinguished by their beauty and attractiveness. These are the most sophisticated shoe rack options that fit perfectly into almost all hallway interiors. But the most important advantage of such products is that the shoes installed in them are ventilated.

These are not all the options that can be found on the Internet; the authors’ fantasies are limitless, so you can even see stone products installed in large country houses. Whatever product you decorate the hallway with, it the main task accommodate the shoes of all family members, so you need to carefully choose and, if necessary, make a shoe rack yourself.
DIY shoe rack made of plywood
There are many options for making shoe racks at home. Their design can be the most ordinary, or with the addition of elaborate elements, but the main thing that should be present in any product is a spacious space with shelves on which you can conveniently place your shoes.
The first shoe rack option that we will consider will be a plywood model. Everything you need for this work will be listed below:
- plywood;
- shoe brushes;
- self-tapping screws;
- thorns;
- acrylic paint;
- construction adhesive;
- brush;
- dowels
The design of such shelves can be anything, so you can experiment with both acrylic and gouache. Shoe brushes will be needed as shoe holders.
Making shelves for shoes consists of several steps:

Other options for making shoe racks can be seen in the video presented:
Shoe rack made of wood
If you take wooden boards as the manufacturing material, you can make a fairly strong and reliable design. The thickness of the board should be approximately 1.5 cm.
To work, you need to prepare a standard set of tools:

Work begins with preparing the rear and side parts of the structure. In most cases, the height of the shoe rack can be any, it all depends on your desire and capabilities. If several shelves are supposed to be placed there, then the height should be such that a pair of shoes can fit on each level. The width of the shoe rack in most cases is standard, 23 cm, but this does not mean that you cannot increase it if necessary.
You can attach a key holder to the shoe rack so that the keys are always in sight.
Now you can start making the shelves. Their number depends on your needs, and the width is calculated based on the dimensions of the main product. If the width of the shoe rack is 23 cm, then the width of the shelves is 20 cm.
After preparing all the parts, you can start assembling them:
- First, the attachment points on all parts are marked and holes are drilled along them;
- First, the side parts of the shoe rack are fastened, then its back part is attached using nails;
- All that remains is to install a shelf or shelves and the shoe rack is ready.
Shoe racks in the hallway are a fairly necessary product used for storing shoes. Firstly, you will keep your shoes clean, which will significantly extend their service life, secondly, you will avoid clutter in the hallway, and thirdly, you will not have to shift unnecessary pairs of shoes from place to place every day, choosing what put on your shoes for work today. Thanks to the design developments, you can get ideas for making your own shelves or cabinets, or purchase a ready-made model for storing shoes.
Even a small amount of untidy shoes in the hallway creates a feeling of untidiness and disorder. But what if the family is large and there are a lot of shoes? What if the corridor is narrow? In such a situation, spacious and non-bulky shoe shelves will save you. With their help, you can compactly place all your sandals, shoes, boots and boots, saving space in the lobby. We suggest organizing free space in the hallway and making a spacious shoe rack. Moreover, a DIY shoe rack is a great opportunity to show off your carpentry knowledge and skills, because its design is extremely simple.
Another positive point in favor of making a shoe stand with your own hands is the availability of materials from which you can make it. In addition, if you use available means and materials to make it, you will be able to significantly save your family’s budget.
Wooden shoe rack in the hallway - no one has canceled traditions
The tree is the most common and available material to create any homemade furniture, this also applies to shoe racks. Options for making shelves from chipboard or MDF, from boards or furniture panels. You can make a budget shelf if you make it from plywood with your own hands. Stop your choice on quality plywood from birch.
Except suitable material you will need a standard set of carpentry tools:
- hacksaw or jigsaw;
- sandpaper or sander;
- drill;
- screws and metal corners for fastening the structure or furniture ties;
- special protective agents for processing wooden products.
The first thing you need to think about is the drawings and diagrams of the shelf or rack you like. You can draw them yourself or find suitable ones on the Internet and adjust them to your size.

So, everything is prepared to create a shelf for shoes made of wood, you can get to work.
Shoes underfoot in the hallway create inconvenience and clutter up the space. Buying a special shelf or even a cabinet is expensive for many people, and why should it, if from scrap materials in the house and garage you can create not only a functional structure, but also emphasize the design of the hallway. For assembly we will use both standard wood materials and non-standard ones - PVC pipes, pallets and even cardboard.
Depending on what kind of shoes you store in the hallway, the diameter of the pipes will depend. Let's start with more simple option, which is suitable for storing demi-season, summer, children's, and house shoes. We use as a basis sewer PVC pipes with a diameter of 110 mm. This is enough to accommodate shoes up to size 42. For larger shoes, we recommend using pipes with a diameter of 160 or 200 mm. Additionally, for shoes, you will need a hacksaw, a tie belt, and an aerosol can of paint. The work order is as follows:
- 1. Saw off desired length pipes with a hacksaw. We recommend 30 cm, but you can make the length shorter or longer, it will all depend on the size of your shoes. One such pipe is a cell for one or a pair of shoes. We make as many of these cells as you need to accommodate the entire collection.
- 2. Grind the sharp edges formed after cutting sandpaper
- 3. To make the shelf fit better with the interior, paint it in the chosen color. It is more convenient to work with spray paint, but you can use other materials
- 4. We arrange the pipes in a pyramid and tighten them with a belt.
- 5. Insert shoes into each cell and enjoy the result.
It is better to fasten pipes for such a shelf with liquid nails
But if you need a larger shelf for shoes in the hallway, we purchase PVC sewer pipes with a diameter of 300 mm. It will certainly fit not only shoes and sneakers, but also long boots. We divide the selected pipe into equal sections using a hacksaw and also clean the sharp edges with sandpaper. To decorate the compartments, we suggest using paper wallpaper or self-adhesive vinyl film. Decorate not only the outside, but also inner part so that the shelf has a complete look. Insulating or fabric tape of a suitable size will help hide the joints formed along the edges. Next, we fasten the blanks together using hot glue or bolt fastening. You adjust the number of sections in each row yourself. They can be the same, presented in the form of a pyramid or a honeycomb, your imagination is at work here.
Classic wooden shelving unit
A shelf for storing shoes made of wood is a simple and convenient option. Due to the fact that wood lends itself well to processing, it is easy to work with. To achieve the desired shape and size, you will need a plane, Sander, saw, hammer, set of screwdrivers, as well as a pencil and tape measure for marking. To create shelves, we prepare in advance: wooden blocks and strips, screws, varnish for opening.
We saw off six equal bars 33 cm long. These will be the sides of the structure, 2 for each shelf. Their length is the depth of the rack, which is enough to comfortably store an adult pair of shoes. Using a plane, we make cuts on the sides of the sidewalls that correspond to the depth of the long bars on which the shoes will stand. For each shelf, we suggest providing 4 cross beams about 62 cm long, so that several pairs of shoes can comfortably fit on one tier. We insert the long beams into the recesses made in the sidewalls and fasten them together with self-tapping screws. We carry out the same procedure with the remaining shelves, you choose their number yourself. Sand sharp edges with sandpaper.
The optimal distance between each shelf should be at least 25 cm so that you have the opportunity to place not only short boots, but also long boots. In our case, the total height of the structure will be slightly more than 80 cm and consist of three shelves. To connect the shelves we use wooden planks; we also make cuts in them to the depth of the timber every 25 cm.
In our case, we make the lower cuts at a distance of 25 cm from each other, and the last one at 33 cm. Thus, after connecting the shelves, the upper part of the structure will protrude literally 7 cm, this is enough. We cover the upper side strips with a cross bar, making a side. We grind the sharp edges with a machine or sandpaper, and open the structure with several layers of varnish. The shoe shelf is ready. With your own hands, you can fit at least three pairs of shoes on one shelf.
In order to make this unusual shelf, you will need plywood and shoe brushes, maybe old Soviet ones. First, let's decide on the dimensions of the upper part. We measure the dimensions of the future shelf. The length of the structure will depend on the number of brushes. Make the depth of the shelf 5 cm greater than the width of the brush. We have decided on the dimensions, now we cut out two absolutely identical blanks and connect them together with a “book”, we get an angle of 90°. To connect the parts, we retreat 1 cm from the edge of the bottom of the shelf and connect both ends with a screw. We do the same with the second side. Next, we cut out two identical squares from plywood, the sides of which correspond to the width of the shelf, and fix them on both sides, closing the corner.
Let's do the brushes. If they have handles, cut them off with a hacksaw and smooth out the rough edges with a file. We drill two holes in each brush on each side, using screws we screw them to the bottom of the shelf in one or several rows - it all depends on the quantity. The first part of the structure is ready, set it aside.

If the brushes have handles, they need to be sawed off
Let's take another sheet of plywood. It should be equal to the length of the first part, and its width should correspond to the largest shoe size. On average you will get 35–40 cm, which corresponds to size 43–44. To make the bottom side, we cut out another board of plywood, equal to the total length and width of 15 cm. We fix both parts at 90°, connecting the ends according to the same principle as in the first part of the structure. We get a side for shoes.
Now we connect the first and second workpieces together with screws, paying attention Special attention in the corners. We paint it, and when the paint dries, we make two side holes in the back panel for wall mounting. This shoe rack will fit into any hallway and will not take up much space. Thanks to the brush holders, the shoes will not fall over.
This shoe rack is more complicated. To make it yourself, you will need certain carpenter skills, additional tools and materials that may not be in your arsenal. Let's look at two options for a round rotating shelf with shelves - regular and with soft pouf for sitting.

Using a jigsaw, we create circles from wooden slabs and mark out the sections
For the first option we prepare wooden slab 12 mm thick and cut it into three equal squares of 70 cm each. These will be the bases for the shelves. If you want to make the shelf taller, cut out more blanks. We turn the square shape of the cut slab into a circle with a radius of 35 cm using electric jigsaw. We cut the slab into equal planks - these are the walls of the sector, in each of which there will be a pair of shoes. Moreover, they should not be the same in height in each tier. For example, for the lower shelf they can be made higher, sections for high boots, and the upper ones can be made symmetrical for shoes and sneakers. To make the sectors even, use a protractor to mark the angles of 60°, and use a ruler to make markings on both sides of the circle. We nail nails onto each line of the sector until we bring them all the way. We apply liquid nails to the markings and fasten the board, finally fixing it with reverse side iron nails. We do the same with the rest of the shelves.
Let's do wooden frame To raise the shelf above ground level, connect it to the bottom shelf. Next, paint all the elements in your favorite color, after sanding the edges. We recommend using white paint and a black border for contrast. To ensure that each shelf rotates freely, we install turntables between the tiers, fix them strictly in the center, having previously drilled a hole for the bolt and nut.

The final stage will be painting the shelf
The second option is a rotating shoe rack with a soft seat. General principle its build is unchanged. However, instead of three or more tiers, we recommend making two, adjusting comfortable height for sitting. Also, instead of a frame base, you can attach wheels to make the shelf mobile. We make the upper part of the bookcase soft. We use batting as a base. We cut out two circles from the filler corresponding to the diameter of the shelf, and two more smaller ones, about 7–10 cm. When laying the batting, we get a protrusion. It's time for upholstery. We cut the fabric along the diameter of the circle with a margin of at least 5 cm. We fix it around the entire perimeter using construction stapler. You will learn more about at what distance to fasten the staples and how to select upholstery material in the article about. We cut off the excess fabric, and to hide the staples, we frame the outline with upholstery tape.
Cardboard shelves for shoes, just like the rest cardboard furniture, are gaining more and more popularity in interior design. The base used is ordinary cardboard boxes, which are found in almost everyone’s home. If you don’t have them, think about the nearest store or warehouse, where such boxes lie in a crowd unused. Besides corrugated cardboard To work you will need colored wide tape, scissors, a ruler and a glue gun; if you don’t have one, you can use regular PVA.

Cardboard rectangles are folded into triangles
We prepare the cardboard by cutting out a rectangle with sides 45x35 cm. This size will be optimal for both small and big couple shoes We measure 15 cm from each edge with a ruler and make folds. We cover the sides that we will bend into a triangle with colored tape; this will be the central part of the stand. We fold the cardboard into a triangle along the folds and secure it along the edges and center with colored tape. We repeat the same manipulations with all other sections - we choose their number at your discretion. After you have completed all the sections according to plan, we begin assembling the cardboard shelf. We fasten the bottom row of triangles together with colored tape, and for reliability we go over the joints with a glue gun. We do the same with the remaining rows, fastening them together. When finished, you will have a shoe stand made from triangles. We store shoes in through sections.
Attention, in order for the design to serve you for a long time, shoes must always be dry and clean.
Another budget invention made from cardboard is vertical shelves for shoes. It’s easy to make such a design with your own hands. It is ideal for storing slippers, shoes, sneakers and summer shoes in the hallway and does not take up much space. For work you will need a sheet of cardboard 70x60 cm.
We retreat 2.5 cm along the length of the cardboard from the edges. From these points we measure a vertical line of 25 cm and draw a horizontal segment 20 cm long. We connect the sides, we get a rectangle of 25x20 cm. A square of 25x25 cm is formed between the two rectangles. We retreat the upper corners of the square by 11 cm. We draw diagonals into the lower corners of the square and get two triangles on both sides. Draw a rectangle with sides 35x25 cm from the square down. As a result, you should get a T-shaped blank, where the protrusions are two equal rectangles with sides 25x20 cm, and the central part is a square 25x20 cm and a rectangle 35x25 see. Cut off all excess.

To work you will need a large sheet of cardboard.
Now we bend the cardboard along the lines, first vertical in the center, and then diagonal. To avoid damaging the material, use a ruler to make an even bend. After this, lift the bottom rectangle (35x25 cm), then the T-shaped top and wrap the diagonal bends behind the base on both sides. In your toga you should have a pocket with triangular ribs on the sides. We fix the bends on the back side of the base with regular cardboard glue. For reliability, we recommend a glue gun. We make several such pocket shelves, and then connect them together by the upper protrusion with the same glue. You adjust the number of sections yourself. If desired, the shelves can be decorated, painted and upholstered with twine, and covered with self-adhesive film. At the end, we make a hole in the last section and hang a vertical shelf on the wall.
Simple shelves made from boxes and pallets
You can make a shelf for shoes from boxes that can also be found on the farm. To construct them, you will not need to additionally purchase complex parts and tools. If you are the owner of mesh boxes, we fasten them together in a vertical position using a clamp or strong wire. The front part of the shelf remains open, we put shoes. We choose the number of tiers ourselves, it all depends on the size and depth of the boxes.
You can do the same with wooden boxes. To fasten them together you will need nails and a hammer. This design will look better if it is sanded and the wood is painted. If desired wooden boxes You can not fasten them together, but hang them on the wall in a chaotic manner.
However, the simplest shoe stand is constructed from a pallet. All you need to do with it is sand it and repaint it the color you want. Having placed the pallet in a vertical position, we insert shoes into the spaces between the slats. It will hold up well and will not fall.
In most cases, limited space is allocated for this room, so it is so important to use it wisely.
In the hallway, it is necessary to ensure that each item has its own place: in this case, you will not spend a lot of time getting ready. At the same time, if the clothes are simpler and have hooks, then it is better to provide special shelves for shoes and accessories or in the hallway. They will be discussed in this article.
Homemade shelves for the hallway: purpose and varieties
The shelves differ in the number of shoe compartments and in style. In addition, they can be either open or closed. They differ in depth, height and a number of other criteria.
One of the most common shelves for shoes is the so-called. It is a full-fledged autonomous structure.
Advice! Even if the space allows you to place several “shoe racks,” it is better to assume that the shelves should fit exactly as many shoes as all family members use in one season. It is much more convenient to keep the rest of the shoes in boxes.
Do-it-yourself shoe racks in the hallway: photos in one or another hallway style
If you make shelves with your own hands, then you have great opportunities to fit them organically into. In this situation it is much easier to comply uniform style rooms.
Let's consider which shelves are best suited for this or that popular interior style.
For what is popular nowadays, shelves made of natural materials. A tree would look especially appropriate. Such wooden shelves can be decorated with carvings and patterns. A two-tier model will look very authentic: the shoes themselves are located on the bottom shelf, and various accessories and small items are located on the top shelf. And if this two-tier shelf is “closed” on top with a “lid”, then it can be used as a convenient one for putting on shoes.
Shelves covered with a lid that extends slightly beyond the edges of the shelves look especially harmonious. Such shelves will fit perfectly into. If you are worried that this functional accessory will look too simple, then keep in mind that this is the main concept of these stylistic trends. If you want something more luxurious for the hallway, then it is better to choose styles such as empire style, baroque or.
Advice! When using wood, keep in mind that it should be well soaked and covered with a protective layer.
Brief educational program: “How to make shelves yourself”
You can make shelves for the hallway yourself. To do this you will need time, patience and minimum required materials and tools.
It all depends on the material used to make the shelves. If you have chosen, then it is advisable to prefer ready-made, processed boards, which can be purchased in modern construction stores. In this case, making a shelf will not cause any particular difficulties. However, if you decide to do everything entirely with your own hands, then you will need the following tools and parts:
- plane;
- emery;
- special glue for wood;
- metal corners;
- screwdriver or screwdriver;
- saw;
- self-tapping screws;
- roulette;
- pencil.
We suggest using standard wooden board from 25 to 35 cm wide and a couple of centimeters thick.
First you need to cut out the vertical side walls. Each of them should be approximately equal to 80-90 cm. Prepare support bars, as well as crossbars. Then start cutting out four pieces that will become the shoe shelves. Their size should be approximately 60-70 cm.
When entering a house or apartment, the first thing we do is take off our shoes and, in the cold season, outerwear. Accommodation outerwear never causes problems, but with shoes the situation is different. This problem especially concerns large families, as well as owners of extensive shoe collections.
An ordinary person wears at least two pairs of shoes per season, and if there are three or more people in a family, then it turns out to be at least 6 pairs of shoes, or even more. But don’t forget about out-of-season shoes, which should also be stored somewhere. The problem of storing shoes is most often faced by owners of small apartments and small hallways. The solution to this type of issue is to install shoe shelves, and if your budget is small, then you should make a shoe shelf with your own hands. Making a shelf with your own hands will not only save your budget, but will also give your hallway individuality and exclusivity. Before choosing a shoe rack, you need to calculate how many pairs you will have in it. The number of pairs of shoes directly depends on the number of members in your family. The main types of shelves for shoes include Bona, Slim, Coupe, Cabinet, as well as Shoe rack - overshoe rack. The slip is a kind of showcase with doors and holes for air supply; it is practical to use and has a lot of space for storing shoes. Slim type shelves are made directly from wood; it is advisable to place already dry and clean shoes in them, so as not to contaminate the lower shelves; this is not very practical and causes some discomfort. A Coupe-type shoe rack is very practical; often such shelves are made individually to fit the width and length of the hallway, so they fit perfectly into any interior. The Coupe shelf is usually high, but not deep and must have sliding doors (otherwise it will not be a compartment); due to the shallowness of the closet, the shelves in it are located at an angle (which allows you to put high-heeled shoes on them). Shoe shelf Cabinet - often has a compact and small size (only seasonal shoes fit in it), often such a cabinet has hinged doors, as well as 2 or 3 horizontal shelves, a soft ottoman can be located at the top. Shoe shelf Galoshnitsa is the newest invention for storing shoes, you can not only store, but also dry shoes in it, it can be installed not only in hallways, but also on balconies or storage rooms, it looks like a cabinet. A shoe rack can be made from any available materials; if desired, it will turn out no worse than many expensive shelves sold in stores. The most budget-friendly option is a shelf made from cardboard boxes, which are found in every home. For such a shelf you will need one large or several smaller boxes. Such a shelf will be relevant in the case of a very small hallway, because it will take up minimal space. We make blanks; to do this, use a pencil and a ruler to mark rectangles 30 cm long and wide along the entire side of the box. Then we cut out the future shelves with a special knife or scissors. Then we take our workpiece and fold it into three equal parts, after which the side parts should be folded into a triangle. There should be a pocket, so we fold all the blanks. After that, we arrange the prepared pockets on top of each other, leaving a groove for shoes between each, and then carefully secure everything with tape. For reliability, all pockets can be secured together with staples. It is recommended to mount the resulting structure on a cabinet or wall in the hallway. Also, such shoe pockets can be painted in different colors, or in one desired color, which will give your hallway bright and unusual colors. The next type of shelf for shoes that you can make yourself is a carousel shelf. This shelf can be placed in any standard closet you have in your home. The shoe carousel will be made of four rotating shelves, always round. Wooden pegs will be inserted into the round shelf in a vertical position. The shelves themselves will be mounted on a metal rod. To make such a shelf, you will need tools that almost every home owner has at hand. We will need a cabinet of standard sizes, with a depth and width of 60 cm, and a height of about 190 cm; for shelves we will need 4 disks with a diameter of no more than 55 cm, as well as 9 disks with a diameter of approximately 10-12 cm. To hold shoes there will be you need round pins (022): 18 pieces 35 cm long (1), 24 holders 30 cm each (2), 16 pieces 25 cm each (3), as well as 32 holders 20 cm each (4). To support the shelves you will need a metal pipe with a diameter of approximately 40 mm and the height of the entire cabinet. On one round shelf we should fit 9 adult and 12 children's pairs of shoes. It all depends on your desire and imagination, because it is up to you to decide how many holders you need to install on one shoe shelf. For greater efficiency, you can make shelves with different numbers of holders, for example, on 2 shelves you can place 12 pairs of shoes (for children’s shoes or small ones), and on the other 2 shelves, 9 pairs of shoes (for large shoes). This shelf can be painted in any color, or varnished. It is best not to paint the surface of the supporting parts; this will allow your shelf to slide easily.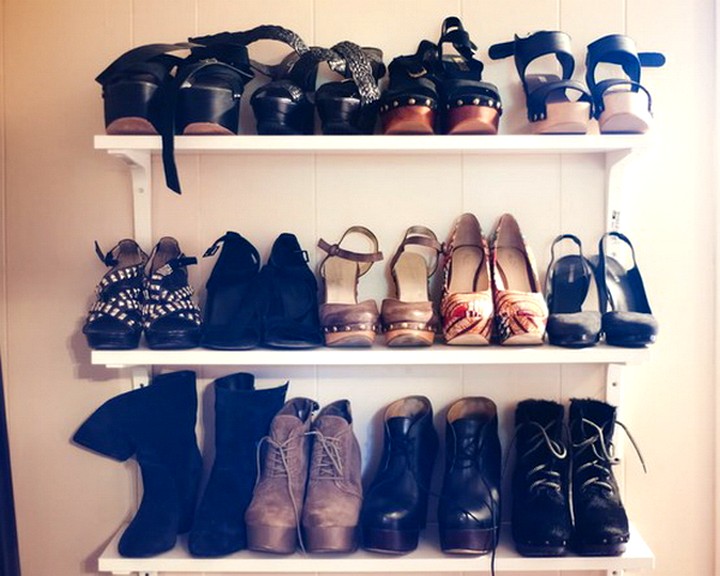
DIY shoe rack


