Laying tiles with your own hands
If you decide to save money on renovating your apartment and want to try laying tiles yourself, then I advise you to think again - this is a complex, nervous and dirty task. Next you will understand why. And another important point: if you are remodeling, then you must beat off the old tiles using a hammer drill and a special chisel attachment. Be sure to do this wearing a mask or safety glasses.
So, let's start with laying tiles on the floor
I would like to warn you right away that before laying the tiles, a MORE OR LESS SEVEN SCREED (evenly poured cement) must be made throughout the entire apartment.
Required tools and materials
Primer, for example, “Staratel” brand

Paint roller to prime the floor

Paint tray (a trough with a primer where we will dip the roller)

Level, for example, ERMAK rail, 1.2 meters long

Large metal bucket 30 liters, or better yet 40

Special needle roller for rolling out self-leveling floors

Powerful hammer drill (Energomash PE-25900)

Mixer attachment for a rotary hammer

Self-leveling floor "Osnovit T-45" (the number of bags depends on the degree of slope and area)

10 liter bucket for dosing water when mixing self-leveling floor

Tile adhesive. I prefer LITOKOL LITOFLEX K80 eco (number of bags based on area)

Notched trowel (notched trowel) for spreading glue on the floor

A small spatula or scoop for scooping tile adhesive out of a bucket


Tile cutter, for example, Zubr Expert

Grout for jointsGERESIT

Bulgarian

Attention! Before laying tiles in the bathroom and kitchen, do not forget to coordinate the piping communications with the plumber, since, for example, pipes must be laid before laying the tiles:
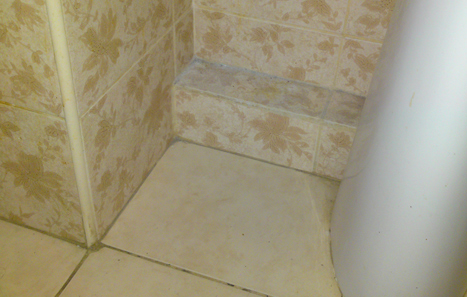
The threshold (center) that houses the bathroom drain pipe and the plumbing cabinet (left).
Floor leveling
The first thing you should do is level the floors. Now this is quite simple, since self-leveling self-leveling floors have appeared. Personally, I liked the Osnovit T-45 the most.
Let's take the kitchen, for example. Using a level (preferably at least 1.2 meters long), we will look at the general slope of the floor and determine the lowest place in the kitchen. Let's sweep the floor and treat it with a primer using a paint roller.
Let it dry for an hour, and then you can start pouring. Next, depending on how large your bucket is, you need to calculate the dosage for the self-leveling floor mixture. I had a 30 liter bucket. I filled it with about 8 liters of water and one bag of Osnovit T-45 self-leveling floor (20 kg). It is important to maintain the proportion! No more and no less than 7.5-7.7 liters of water per bag!
Recipe and mixing method: measure about 8 liters of water into a small bucket and pour it into a large bucket. Next, pour out TWO THIRD bags of self-leveling floor, take a hammer drill with a mixer attachment and mix (splashes, of course, will fly). Stir until a homogeneous solution is obtained (if you also move the puncher itself in a circle, it will turn out very quickly). Next, pour the remaining powder from the bag and mix again. Let the solution sit for 5 minutes, stir a little more, and SMOOTHLY pour it into this lowest place. We slightly roll out the puddle with a special needle roller for rolling.
The floor dries within an hour, after which you can step on it carefully. Again, check the “floor improvements” with a level and repeat the entire procedure - of course, the place where we will pour the second time must be determined again. For a small kitchen I think it will take 5 or 6 bags of self-leveling floor, but again it depends on the curvature and area. After leveling, it is recommended to wait three to four days before starting to lay tiles.
Tile laying
So, let's proceed directly to the laying.
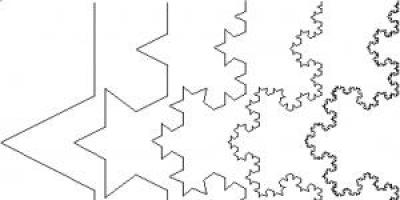
I advise you to lay the tiles in a diamond shape, it’s more beautiful to the eye and hides small irregularities very well, which will happen in any case, since the tile itself is also slightly crooked, and, for example, the geometry of a new house may be uneven due to shrinkage:
Diamond masonry allows you to hide inaccuracies from the eye:

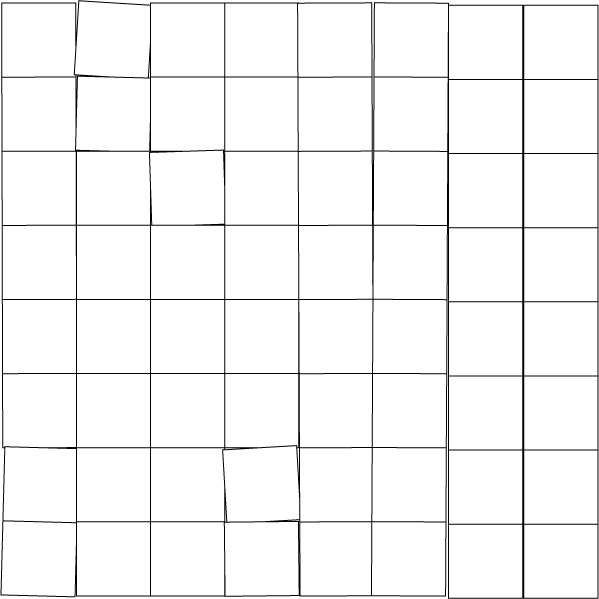
With rectangular masonry, irregularities are possible that the human eye will immediately notice upon entering the room:
The first thing to do is measure the center of the kitchen, drawing lines from the centers of the opposite walls:

And, starting from the point of intersection of the lines, lay out ALL the tiles on the floor (get an idea of the overall picture).
Thus, it will be clear whether the overall picture is smooth, and how many tiles will need to be cut and how:

The tiles that will have to be cut are shown in red:
.jpg)
The most important thing here is the central 4 tiles, which are laid first.
Mark with a pencil the position of the central four tiles, then remove all the tiles:

In a small bucket, using a hammer drill ( PERFORATOR, OF COURSE, IN SIMPLE DRILLING MODE) and mixer attachment, mix the tile adhesive solution. For proportions, read the instructions on the bag. From myself I can say that the glue should be, well, like thick sour cream. After the solution is ready, spread it with a notched trowel (trowel) on the floor, in the place where these four tiles will lie. We take the required height of the solution from the bucket with a scoop or narrow spatula and plop it in the middle of the outlined square, then spread it with a trowel. It is not necessary to smear to the edges of the outlined square. The area of the adhesive solution must be at least 70% of the tile surface. But it’s better not to skimp on the glue and spread it completely over the surface with a layer of at least 5 mm, after all, you’re putting it on for yourself!

We glue the tiles according to our marks.

BE SURE to use cross stitches for seams!
Well, after the first four tiles have been glued, the rest are glued as if in a circle. You need to constantly monitor the level, because... surface curvature is always present.

I will add that after you have glued sixteen tiles, if everything is smooth, then everything else will be fine.

After the tile is glued, we wash it and clean the seams (I did this with an awl, it doesn’t need to be deep). Well, we cover them with grout - it’s not a difficult task, but read the instructions on how to thin the grout on the packaging.
The most difficult (nervous) thing about this work is that the seams begin to come apart. Therefore, I advise you to lay the main part at once, because while the tiles are not yet glued, they can be aligned. I can say from myself that I learned how to catch these seams only the third time, spending a lot of strength and nerves.
Laying tiles on the wall
As a rule, tiles are installed on the walls in the bathroom. In general, it’s easier to put it on the wall than on the floor, but the whole difficulty here is that we have a bathtub, and there are taps going to it, also a heated towel rail, a plumbing hatch, all this needs to be taken into account. Trying to describe the entire process of laying tiles in a bathroom is simply not possible, because... Everyone’s bathrooms and tubs are different, but I’ll at least describe the general provisions.
The store will help you determine the number of tiles. Well, or you can do it yourself - take the width of the wall, multiply it by the height and multiply it by two. Then we measure the second wall and do the same. But it’s still better to work with the seller, who will deduct the area of the door for you and so on.
Please note that before laying tiles on the walls, the walls must be leveled and plastered!
On my own behalf I can add that the masonry uneven wall is fraught with crooked seams, one tile is recessed deeper than the other, and just the overall picture immediately deteriorates.
Also an important point - at the beginning, plan where and what you will have, consult with plumbers, since, for example, the pipework must be done before laying the tiles!
So, when laying tiles in the bathroom, you need to start from the floor, which we already know how to do, but here the floor level must be ideal! In addition, before we started leveling it with a self-leveling floor, we can treat the floors with waterproofing. An important point is that there will be no plinth in the bathroom, that is, the gap between the walls (before the wall tiles were glued, so that this gap could be closed later) and the floor tiles should be no more than 1 cm. Then you need to cover the floor with something so that during the work you don’t break the tiles on the floor - best of all, cardboard or hardboard, or some old unnecessary carpet.
A small digression - if you want to have a heated floor, then of course, first you need to choose the heated floor itself. According to the installation technology, heated floors differ: some are embedded in a screed (which, accordingly, requires removing the existing screed and creating a new one, but with a heated floor laid), some in a layer of tile adhesive (such floors, of course, are easier to lay). I chose the one that is laid in a layer of brand glue.

The choice is due precisely to its simplicity - there is no need to remove the old screed, lay a special heat-reflecting material and, most importantly, this floor heats up faster. Although after reading reviews about warm floors in general, I realized that they break very often and cannot be repaired (well, why not open the floor?!). So let's hope it works for a long time.
Well, let's get back to laying tiles. I advise you to choose tiles with dimensions of at least 20x30 cm. You should start from the bottom from the middle of the wall, but you need to approximately see how the tiles will lie in the corners. That is, we will have to trim the outer tiles, but we need them to be the same. It will be much more beautiful this way.

From the picture we see how the tiles in the corner are cut, and it is desirable that cut tiles of the same size be inserted into all corners! Also, cut tiles in the corner will help hide small slopes of the walls - this is important! Once you put it in, you’ll understand why!
So, we have measured everything and marked the position of the tiles and we can start gluing them.
Using a notched trowel, spread the glue - just like on the floor, only now on the wall.
And we begin to glue the tiles in horizontal rows.

From this photo you can see why the walls are so important that they are even.
During the laying process, you need to carefully monitor the level of EACH tile.

Gluing the tiles creates actual question- we need holes for taps, a heated towel rail, for the toilet (mainly drainage) and for the hood.
And this is precisely the biggest difficulty in laying tiles in the bathroom, because in some cases, the tiles need to be drilled or cut before laying. Again, so that everything is smooth. You can see it perfectly in the picture below.
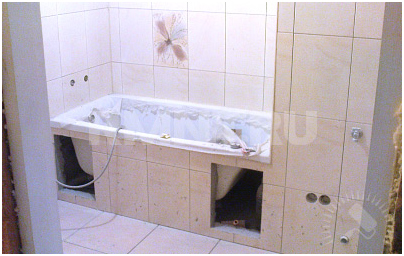
In order to cut a corner in the tile, as was done in the figure, where the hatches will be located under the bathtub, use a grinder with a special disc (INTERSKOL solid diamond cutting disc for tiles).

To make holes in the tiles, there are special crowns (or also called ballerinas) of different diameters, which are mounted on a drill.

The drill must have a sensitive pressure function, that is, the harder you pull the trigger, the more revolutions. I also advise you to practice on scraps first. And don’t forget to cool it in water often.
Conclusion
In the bathroom there are bedside tables, a mirror, a corner, hooks, a holder for toilet paper And so on. To do this, you need to drill the walls and screw in dowels. But for those who don’t know, there is a special drill bit for drilling into tiles (it’s also used for drilling glass).

I advise you to use just such a drill. And here's why: for convenience and accuracy, I use a screwdriver and these drills fit very well with it.

The advantages here are the following: the screwdriver is lightweight, the rotation speed is low, but still sufficient to drill through the thickness of the tile itself (those who have already tried to drill on a smooth tile surface will understand me). Well, then, to go deeper, you need to use a drill and an ordinary Pobedit drill.
Well, that's all.
AND main advice: compare the cost of tools, evaluate your nerves and time and think that maybe hiring a professional is not so expensive.
Comments, reviews, opinions
Andrey: ID: 209 10/01/2012 17:05
The main thing is that the wife chooses the tiles and design, otherwise you will have to remove them later.

: ID: 798 21/10/2013 22:22
and when the mother-in-law has to lay tiles, it’s generally death
Dimon: ID: 1118 12/28/2014 19:48
The main thing is that this is a domestic instrument! Give work to our industry, stop feeding the enemy who wants us to be poor! The money you paid to your man will return to you tomorrow in one form or another.
: ID: 786 10/10/2013 12:00
Thank you...
Vova: ID: 970 10/05/2014 21:36
thank you, I liked it and I want to do this myself. You have to try everything in life, it will come in handy.
Pavel: ID: 802 10/22/2013 11:00
What kind of string is this? Special crowns are a cool thing, they deteriorate quickly
: ID: 803 22/10/2013 11:15
Well, there’s a very controversial question about the wall first...Is your bathroom a perfect rectangle? It’s just that when you first lay the floor, the first row of tiles that are glued to the wall are placed on the floor tiles, which allows us to gain 1 cm, maybe a little more, which is very important if the bathroom is not a perfect rectangle. So imagine that one corner in your bathroom is a little more than 90 degrees, and the tiles on the wall are already glued, and if you put the first tile in this corner, as if pressing it against the tiles on the wall. It fits perfectly, but the next one moves away a little from the wall, the next one a little more, and in the end we get a gap between the first row of tiles on the wall and the adjacent tiles on the floor. Again, the tiles on the floor need to be trimmed, otherwise the cut side will be hidden.
Alla: ID: 1080 27/11/2014 17:29
Hello! help me figure out what is best to buy to level the tile laying, otherwise there are so many things offered on the Internet.....wall tiles 20x30, floor tiles 30x30...you need to choose from crosses (which size is better), wedges and leveling systems tiles...
Evgeniy: ID: 217 12/01/2012 21:34
Pavel: ID: 196 12/26/2011 13:54
Oh, if only everything worked out quickly and the first time in real life...
: ID: 1519 10/02/2016 17:45
It is best to remove old tiles using a hammer drill. If you don't have it, be sure to buy it! You can, of course, knock it down manually, but even for a few linear meters you will spend so much time and effort that you won’t want to put anything down later.
: ID: 1504 10/02/2016 14:15
It all depends on whether you started from the top or the bottom.
If from the top, then glue the last tile with masking tape (only the tape should be good) to the previous row.
If you want to start from the bottom, then try attaching a “guide rail” to the wall; if it doesn’t fit due to the small distance, just put something under it so that the tiles don’t slide. When the bottom rad is dry, calmly continue placing further.
Tatyana: ID: 1091 12/17/2014 09:43
Very useful information - most importantly - accessible!
nickname: ID: 801 22/10/2013 09:11
I am now finishing up laying tiles in the bathroom! Almost everything is contrary to this theme (((First I glued the walls, starting from the edge and in a circle. Then the floor, too, from the edge! But all the “edges”, so to speak, are the most visible places! The bathtub is 11 m2 in size. It took 8 days to work from 18.30 until 23.30 every evening! And friends, use the level - it’s an irreplaceable thing!!!
Alexey: ID: 610 01/13/2013 06:24
I agree, you have to do everything yourself.
andryukha: ID: 298 02/22/2012 14:46
how to lay it on the wall if the floors are not level, do not keep each tile level until the glue sets
: ID: 219 01/13/2012 00:38
I propose to confine myself to the name of the instrument, without specifics regarding the manufacturer))
: ID: 1505 10/02/2016 14:18
Weren't you the one nominated for the Nobel Prize for Obviousness?
Anton: ID: 1502 10/02/2016 11:54
“And another important point, if you are remodeling, then you must beat off the old tiles using a hammer drill and a special chisel attachment.” - after these words at the beginning of the article I didn’t even read further.
: ID: 1171 06/03/2015 15:22
Thank you! everything is very clear! It’s a pity that I’m 64, I could do it myself, I love construction
Tyler: ID: 892 01/18/2014 05:49
It's almost like that. MAIN! - last piece of advice.
Oleg: ID: 609 01/11/2013 20:46
Nowadays it’s not so easy to find professionals, they’re all crazy, it’s cheaper and better (from my own experience) to do it yourself!
William: ID: 197 03/01/2012 20:44
Oh, thank you, I was just wondering how to lay the tiles. Thanks a lot!
: ID: 766 07/09/2013 15:04
If you try really hard, everything should work out...
Sergey: ID: 258 02/14/2012 13:25
Thank you all very much, very succinctly told, we will put it in! :)
: ID: 1533 11/02/2016 00:04
Don't pay attention
: ID: 793 20/10/2013 21:47
Holes different sizes saw out with tungsten wire. Very quickly and accurately (if your hand doesn’t shake).
Administration: ID: 220 01/13/2012 00:46
What we worked on is what we write about. Everything is fair with us.

: ID: 1530 10/02/2016 22:47
Have you read the text you copied?
: ID: 1529
Ceramic tiles are the most popular floor and wall coverings.
Its main advantages: durable, does not wear out, easy to clean, and has high mechanical and chemical resistance. The variety of styles will allow everyone to choose the tile to their taste. For kitchens, bathrooms, and technical rooms, this is the most acceptable finishing material.
Ceramic tiles are the most practical finishing material for a bathroom or kitchen.
But it also has its drawbacks. It is not easy for a non-professional to lay it down with his own hands; it requires certain skills, patience and accuracy. A very important point: you can re-paste the wallpaper and repaint the floor with your own hands. In order to re-glue the tiles, you will first have to break the previously laid ones, which means dirt and a lot of lost money.
Tools and materials

The modern market provides wide choose tools for laying tiles.
- ceramic tile;
- borders (friezes);
- adhesive solution;
- scraper;
- tile cutter (or glass cutter);
- plumb line;
- building level;
- roulette;
- container for mixing glue;
- spatulas (notched, regular and rubber):
- low speed drill;
- mixer attachment;
- Bulgarian;
- crosses for tile seams;
- fugue.
Return to contents
Preparation of adhesive solution
Water is poured into a bucket or other container and the powder is poured in (and not vice versa!), constantly mixed and topped up to obtain a homogeneous mass. Glue that is too liquid spreads, the tiles “float”, glue that is too thick loses its elasticity, making it more difficult to lay tiles. Everyone must choose the thickness of the glue independently, with slight deviations from the proportions indicated on the package. You can mix it with a drill with a mixer attachment or a hammer drill in drilling mode.
The glue hardens quickly, you need to dilute it enough to have time to use it. After the glue is ready, you need to wait a few minutes and start laying. And these days they put it on cement mortar, but this is the technology of the last century.
Return to contents
How to lay tiles on a wall

The glue should be applied while leveling the walls.
You need to start work by carefully measuring the wall in length, height and diagonal. Find the “belly” - the point on the wall that protrudes from it the most. From this point further planning is carried out. In this place the layer of glue will be the thinnest, in other places it can be increased.
A frame is installed along the perimeter of the wall. If possible, lines are drawn on the floor and ceiling along which the baseboards will be installed. A plumb line descends from the top line to the bottom. Ideally, the lines should be in the same vertical plane. Then the tiles on the wall will be positioned strictly vertically.
A tiled plinth is attached to the floor; its purpose is to ensure the joining of wall tiles and the floor and the straightness of the horizontal rows. Performs a similar function ceiling plinth. Skirting boards are attached using dowels or glue.
The skirting boards are closed with vertical guide tile corners, which will ensure the joining of the corners and the vertical alignment of the tiles. Installing them is more difficult: most likely, the angles between the walls will not be straight, and the walls themselves will be curved.
Here you need to decide: either slightly deviate the corners from the vertical so that each one fits tightly with the adjacent wall (you will have to trim it), or align the adjacent wall. The guide corners are mounted on glue or alabaster.
Installing the frame requires attention, precision and accuracy, otherwise it will not be possible to lay the tiles evenly.

When laying tiles, use a strip that will hold the bottom row.
The professionals start putting it on top. In this case, there is no need to trim the top tile, and the wall will look impressive. But this is a difficult method, since the tile slides due to its own weight.
If you start laying from the bottom, the work is much easier. Each new row builds on the previous one. But there is no guarantee that the last row will fit neatly, and the ceiling, most likely, is not strictly horizontal. You will have to cut the top tile or there will be a seam left, which really spoils the look.
The most convenient way is as follows. Tiles and borders from floor to ceiling are inserted and glued into the vertical guide corners. If there is a gap between the last top tile and the ceiling, it moves up until it stops. The bottom tiles are sequentially shifted upward, with crosses placed between them. There remains a gap between the tiles and the floor. Due to this gap, the vertical row of tiles will slide down. To prevent this from happening, the bottom tile must be secured. You can screw a piece of slats with self-tapping screws and place a stack of tiles. This is how both outer vertical rows are assembled at the corners of the wall.
The lower edges of the tile are connected with a thread, and a line is drawn along it on the wall. Now we know how the bottom row of tiles will be located. A rail is attached along the line, which will hold the bottom row.
The work must be completed quickly enough so that the glue does not have time to set. One vertical row needs to be disassembled, the glue from the tiles must be cleaned and mixed with the remaining one.
We place the first row along the rail. The adhesive is applied to both the tile and the wall. The tiles should be carefully tapped with your hands or rubber mallet. There should be no voids left underneath, which will later cause the tiles to peel off.
Crosses are placed between them. They provide the same thickness of seams. You can use nails, placing them not perpendicular to the tile, but along the seam. If the caps are in the way, you can cut them off. Be sure to check the evenness of the top edge of the installation with a level, rule or thread. Next, you should rest until the glue sets and the laid row is securely fixed.
The following rows are laid out similarly. You constantly need to check the evenness of the wall vertically, horizontally and diagonally. The protruding excess glue is removed, and the wall is wiped with a dry cloth.
Once the glue between the seams has hardened, the crosses can be removed.
The lower guide rail is removed. The distances from the glued tiles to the floor are measured, pieces of tile are cut out and glued into place. If you have to join cut pieces of tiles, this must be done in inconspicuous places: in corners, above the front door, in places where equipment or furniture is located.
The bathroom is the most difficult place to lay tiles with your own hands. There is already a bathtub installed, which is problematic to dismantle. It is advisable to remove taps, heated towel rails, sockets, switches, cabinets and reinstall them after laying the tiles. A guide angle is placed on the edge of the bathtub in contact with the wall. After finishing the work, the seams between it, the bathtub and the tiles are filled with colorless silicone.
Return to contents
How to lay tiles on the floor

In order for the tiles to lie perfectly evenly, beacons are placed strictly according to the level throughout the entire area of the room and in the corners.
It is easier to lay tiles on the floor than on the wall - they will not “run away”. All the stages of laying tiles described above are similar, with the exception of installing baseboards and guide corners, which are not needed in this case.
Before installation begins, it is necessary to find the highest point of the floor and carry out further planning from there. It will have the smallest layer of glue, i.e. It will not be possible to lower the tile lower. In other places you need to level with a thicker layer.
As a rule, they begin laying tiles from front door or from the most visible wall. If there are any defects on the opposite wall, they will be covered by furniture.
Other craftsmen begin laying from the center of the floor to the walls. They do this because people first look at the tiles placed in the center. And defects - uneven cuts, chips - will be hidden by the plinth. But in this case, we can say with great confidence that all tiles adjacent to the walls will have to be trimmed.
In order for the tiles to be positioned perfectly evenly, beacons are placed strictly level throughout the entire area of the room and in the corners. The distance between beacons should be less than the length of the level or rule. It is most profitable to take tiles as beacons and glue them temporarily.
A thread is pulled, with the help of which it is checked that all the tiles lie on the same level and their planes are parallel.
Before starting work, it should be ensured that during the day it will be impossible to walk on the floor in the kitchen, bathroom or toilet.
A better finishing material than ceramic tiles has not yet been invented for the bathroom and toilet. It is resistant to both moisture and mechanical damage, and to aggressive cleaning agents. The range of modern ceramic tiles is so diverse that design options for a bathroom can be thought of almost endlessly.
Once you figure out how to lay tiles on a wall, even a novice can complete a bathroom remodel. However, this is a labor-intensive task that requires careful preparation and strict adherence to work technology.
Rules and subtleties of choosing tiles
First you should think about the design of the bathroom decoration. Ceramic tiles differ in a number of indicators:
- configurations;
- size;
- color;
- texture;
- thickness, etc.
A very important point is the materials used to make ceramics. In particular those additives or latest technologies manufacturing that imparts strength, quality of surface texture, color, shine or dullness, and other evaluative indicators.
The table shows the main indicators of ceramic tiles produced by manufacturers
The simplest option is finishing with tiles of the same color and configuration. Even in this case, you can vary the order of laying individual ceramic elements to achieve a specific pattern. But this simple option is almost never used today.
Designers combine different elements in a variety of ways to give a room a unique style.

One of the options for effectively decorating bathroom walls using ceramic tiles, which simultaneously serve as a frame for a large mirror
Strict rules regarding combination individual elements tiles are almost non-existent; the main thing is that the design of the wall decoration is designed with taste. Often the walls are decorated with light tiles at the top and dark tiles at the bottom, separating the color transition boundary with a special border.
A non-trivial finishing option: large light elements separated by narrow strips of bright rectangular tiles laid vertically.

This finish looks impressive in small spaces. pay attention to different variants laying tiles in the bathroom
A plain tile canvas looks attractive when the elements are the same color, but different sizes form a geometric pattern. Typically, elements of two to four types with sizes that are multiples of each other are used for this.
To decorate your bathroom, you can use ready-made mosaic panel or sets of ceramic tiles that, when laid according to a pattern, form a specially designed image. When using tiles of different colors and sizes, it is recommended to choose elements of the same thickness, otherwise the laid tiles will look sloppy.
The order of laying individual elements into a single tile canvas may be different. Among the most popular options are:
- classical, the so-called straight joint, in which the tiles are laid end-to-end to each other, forming long and straight tile joints;
- staggered (with offset), when in even and odd rows the elements are offset relative to each other, imitating a pattern brickwork;
- diamond, when using square elements rotated 90 degrees, the result is beautiful diagonal seams;
- at an angle or diagonally– variations of diamond pattern for square tiles.
Of course, every master has every right to bring any tile fantasy to life. Elements of the correct geometric shape can be combined in any way you like, as long as it is technically possible and does not go beyond the budget.
Preparation of premises, tools, materials
First you need to remove the layer old decoration, and also remove all plumbing fixtures and furniture that may interfere with the laying of the tiles. If you need to leave furniture, a bathtub or other plumbing fixtures in the bathroom during work, it should be covered with some kind of shock-absorbing material to prevent damage from accidental falling of tiles or tools.
The base for laying tiles must be perfectly level and clean. First, it is recommended to eliminate all cracks, chips and other irregularities that need repair. Then the walls are usually leveled with a layer of plaster, checking the result of the work with a building level.
However, if the difference in certain sections of the wall is more than 50 mm, it makes sense to use plasterboard boards for the walls.

There is no such thing as too much primer (adhesive base)! This is the motto of the tilers
Of course, only moisture-resistant drywall should be used for the bathroom. The surface of the plasterboard walls is also carefully leveled.
To calculate the number of tiles, you need to measure the length and width of the walls. Another square meter or a little more is added to the wall surface area. It should be remembered that some elements may break, some elements will have to be cut. In the same way, other decorative elements are taken into account: borders, panels, mosaics, etc.
It is better to immediately buy the required number of tiles, making sure that all packages are from the same batch. There are cases when individual tiles from different batches with absolutely identical characteristics still differ slightly in color intensity. But elements from the same batch are usually completely identical.
Tile adhesive can be purchased as needed. Before starting work, you should carefully study the instructions for use of the composition and strictly follow the manufacturer’s recommendations. An important indicator is the lifetime of the finished composition. You should not prepare glue for future use, since it must be used in a fairly short period of time.
In addition to tiles and glue, you will need a number of materials and tools:
- waterproofing and primer mixtures;
- composition for grouting joints;
- a drill with a special attachment for mixing glue;
- convenient bucket for preparing adhesive;
- building level;
- spatulas;
- sponge;
- tile cutter;
- corundum block;
- roller for priming work;
- metallic profile;
- plastic cross-shaped clamps.

All instruments and Consumables It is now possible to purchase in one specialized hardware store by the list
Experienced tilers can cut tiles with a regular grinder, but beginners are still recommended to use a tile cutter. For home use There are inexpensive models of this tool. It may take a little practice.
The cut edge of the tile is polished with a corundum stone. If you need to make round holes in the tiles, it is recommended to use a drill with a special attachment called a “ballerina”.
In addition, holes in the tiles can be cut with special tile nippers, which will carefully break off unnecessary pieces. To properly lay the first row, a metal profile is sometimes used for support.

A tile cutter is a handy tool that allows you to accurately cut tiles along a straight line. For creating round holes use special pliers or a “ballerina” drill attachment
Different spatulas are used to apply different compositions. Tile adhesive is usually applied with a special notched trowel; the size of the teeth depends on the size of the element. This spatula allows you to apply the glue more evenly, reduce the consumption of the composition, and reduce the amount of excess.
Plastic crosses are indispensable for forming a perfectly even seam between tiles. Excess glue protruding between the seams should be immediately removed with a sponge, preventing it from drying out.

Using plastic cross-shaped clamps, you can easily ensure a uniform tile joint width when laying ceramic tiles
The walls of the prepared room are treated with a primer, then applied coating waterproofing, usually in two layers. The primer layer and each waterproofing layer should be given the necessary drying time, taking into account the manufacturer's recommendations. Failure to comply with this rule can significantly worsen the adhesion of the tiles to the wall.
Step-by-step technology of work
The process of laying tiles on the wall is simple and time-tested. Some instructions on how to properly lay tiles on a wall instruct you to lay the elements from the top edge of the wall to the bottom. In practice, tiles are usually laid from the bottom, since it is more convenient. Important condition: constantly check the arrangement of elements horizontally and vertically.
First, it is recommended to lay the bottom row of tiles without glue, i.e. just put tiles along the walls. It will immediately become obvious whether the tile needs to be cut and where exactly to place the incomplete elements so as not to spoil the design.

If there is a space of more than 25 mm between two adjacent tiles, a different laying pattern should be used.
Typically, attempts to adjust the arrangement of elements to such a large gap are not successful. It is easier to trim the tile from which the row begins.
After this, on the wall with chalk or a pencil you should mark the place of the beginning and end of the row, i.e. first and last tiles. Beat off the first row using a horizontal level. To do this, draw a horizontal line at the bottom of the wall along the entire width of the wall.
If you correctly draw such a line along the four walls of the room, its beginning and end should coincide. The absence of such a match means that the marking was done incorrectly and needs to be redone.

Before laying ceramic tiles on the wall, you should apply the markings necessary for the work using chalk, pencil or marker
Then, using a plumb line, you need to draw vertical lines. During the installation process, the vertical and horizontal positions of the laid rows of tiles should be constantly monitored to avoid mistakes.
Even a small deviation unnoticed at the beginning can subsequently lead to a noticeable distortion, and the entire work will have to be redone. Another important point when marking: the joints of the base plates. The tile seam should not coincide with them.

A laser level can make quality control during ceramic tile installations much easier, but a regular level and plumb line will work just as well.
To facilitate the installation process, work is performed in small sections. It is recommended to mark with horizontal lines the junction of each four rows of tiles. Having selected a small area, apply pre-prepared tile adhesive to it using a notched trowel, and lay the tiles on top. Then check the quality of work using a level and plumb line.

Typically, tile adhesive is applied to a small section of the wall, and then tiles are laid on it in accordance with a pre-drawn diagram
If distortions are found, the work is redone. After this, the next section is laid, checked, etc. To ensure that the distance between the tiles is the same, locking crosses are installed at the corners of each element.
It is very important that the tile adhesive evenly fills the entire space under the tile. Voids can be identified by gentle tapping.
The process of laying tiles on the wall is presented in detail in the following video:
Experienced craftsmen sometimes put glue not on the wall, but directly on the tiles. This method also has every right to exist. It is believed that the surface of the tile in contact with the adhesive may dry it out a little.
It is recommended to wet the tile surface with water before laying to prevent the adhesive from drying out and maintain the recommended humidity. If adhesive protrudes between tile joints, it must be removed immediately using a damp cloth or sponge. Dried tile adhesive is more difficult to remove and can ruin the entire job.
Instead of special tile adhesive, in order to save money, you can use cement mortar, but in this case some problems may arise. To begin with, it will be difficult for novice tilers to prepare the correct cement mortar. In addition, working with such a composition requires some skill.

At modern technologies It is quite possible to obtain a composition with specified properties: hardening time, how firmly it adheres, particle size, how long it will last, etc.
Currently even experienced craftsmen prefer reliable adhesives to cement mortar. When studying the manufacturer's instructions for tile adhesive, you should take into account the recommendations on the tools that need to be used to apply it. The default setting is a notched trowel. Here are some more tips for working with tile adhesive:
- the consistency of tile adhesive for walls should not be too thick and not too liquid;
- when laying ceramic tiles on the wall, you should choose an adhesive with a shorter setting time in order to avoid accidental deformation of the position of the already laid tile;
- When pressing the element to the layer of adhesive laid on the wall, moderate force should be applied so as not to damage the tile or squeeze it out from under it excessively a large number of glue;
- If some of the glue that has come to the surface has dried out, use a plastic or wooden spatula to remove the excess, but not a metal one, which can scratch the tile.
If you need to make an even cut on the tile, it is best to use a tile cutter. On front side The element should be scored, and then quickly run the cutting edge of the tile cutter in the right place several times. After this, the tile easily falls apart along the cut line.
A way to cut tiles without a tile cutter is presented in this video:
After laying the tiles is completed, it begins The final stage finishing works- grouting joints. For grouting, a special grouting compound is used, which must be selected correctly in color. You can choose a grout that completely matches the color of the tiles or a composition of a darker/lighter shade.
If the desired color of grout is not commercially available, you can mix a darker grout with white to achieve the desired effect. Sometimes a contrasting color grout is used to tile joint stood out. To apply the grout, use a special rubber trowel, which is moved not along or across the rows of tiles, but diagonally. At the end grouting works The tiles can be washed immediately.

The grouting of ceramic tiles is carried out using a special composition and rubber spatula, whose movements should be directed at an angle to the seam
Laying tiles is a labor-intensive process that requires careful attention. However, the result is a durable finish that can last flawlessly for many years.
Tiling walls and floors has become an almost obligatory element when arranging a home. Particularly demanding in this regard are auxiliary premises, such as a bathroom, toilet, kitchen. And the point is not only in the ease of maintenance of surfaces, but also in the ability to arrange decorative finishing using different patterns of paintings or mosaic panels. This design is always presentable and beautiful. In this article we will tell you in detail how to lay tiles with your own hands.
Preparatory work
Even having thoroughly mastered the cladding technology, you can ruin any plan by choosing the wrong cladding material.
In this article we will try to draw attention to a number of features of this process in order to avoid such a situation.
Like any construction operation, installation finishing coating on walls and floors requires a certain sequence of actions, the precise execution of which determines the final result. A technology describing how to lay tiles may look like this:
Preparing the walls
Before laying tiles on the wall you must:
- remove the old wall covering, if it is the same material - it is pryed off one by one with a spatula and torn off, the remnants of the old adhesive must be carefully removed. Old paint needs to be treated with a special solution; after a few hours it will swell and can be removed with a scraper. If the paint still remains on the walls, you need to heat it with a hair dryer (up to 600 degrees) and remove it;
- make an audit of the quality of the coating, cut out the cracks, cover them with putty, along with the dents. When the plaster solution has hardened, sand the repair areas with emery cloth;
- Apply a layer of primer to the surface. It can be prepared from tile adhesive by diluting a glass of the mixture in 8 - 10 liters of water. Particular attention should be paid to eliminating oil and greasy stains from the surface, if any;
- measure deviations of angles from the vertical, and, if possible, eliminate their curvature and deviations. To do this, you can use plaster; a popular method is to install waterproof plasterboard.

Removal old tiles can become a serious problem due to the high labor intensity of the process. Therefore, many are considering the question, is it possible to lay tiles on tiles? In relation to wall decoration, we can say unequivocally that this method of cladding is not used. The reason for this is the low adhesion of adhesives to the glossy front surface of the old coating. Of course, you can choose glue for such a case, but there is no guarantee that the tightening forces of such adhesives will not break the old adhesive layer and both layers will not fall off.
An option is possible when you can lay tiles on top of tiles on the floor, but in this case the SNiP requirement must be observed, indicating that the floor level in the bathroom should be 10 - 15 mm lower than in the adjacent rooms. And the thickness of porcelain stoneware or tiled floor tiles of the 4th strength category, together with the adhesive layer, will be about 20 mm.
Selection of tools and accessories
To tiling the walls you will need:
- glue container;
- a nozzle and a drill for stirring it;
- glass cutter and grinder - cutting tiles;
- trowel - for applying glue to the wall, cladding;
- serrated spatulas - for leveling the composition on surfaces;
- construction level;
- a set of crosses and wedges for positioning the tiles at the installation site;
- rubber mallet - for leveling parts on a plane;
- rubber spatula - for leveling and removing excess grout;
- foam sponge - for cleaning tiles from glue and grout residues as work progresses;
- roulette;
- ruler and marker for marking parts before cutting;
- flat and round file (semicircular) - for processing broken surfaces and holes for communications;
- core drills for making holes.

You may also need other tools, in particular wire cutters or pliers for breaking off thin sections.
Calculator for the required number of tiles
Facing ceramic tiles- a great way to deprive yourself of the pleasure of regularly updating worn, peeling, interior surfaces that have lost their visual appeal for a couple of decades. In addition to economic priorities, finishing with tiles facilitates maintenance processes, improves aesthetic and technical qualities floors, walls, fragmentary areas. New series of ceramic tiles that imitate ancient tiles, expensive types of wood, and natural minerals can replace any Decoration Materials. Instead, wear-resistant tiles are successfully used, which are affordable for apartment owners with any income level. Laying tiles done with your own hands will help reduce the cost of tiling by almost half.
Tile is traditionally used for finishing rooms with specific operating conditions. He is placed in utility rooms, requiring frequent cleaning using water and active agents household chemicals. Tile is used to completely or partially lay out surfaces in bathrooms; it is used to decorate hallways and kitchen areas. The material is not sensitive to aggressive environments, water, steam, or temperature fluctuations. It does not wear out and retains its color saturation throughout its entire service life.
It is pointless to convince people of the priorities of facing ceramics, because tiled finishing is found in almost every apartment. However, for owners who have never performed this work, installation seems like a super difficult task. The work is indeed labor-intensive and painstaking, but can be done by a novice master. The future installer just needs to familiarize himself with the technology, after which he can safely begin to implement the idea. In addition to information about the technological rules of tiling, he will need patience, tools and material to decorate his home.
Planning and calculations - a competent start to work
The first step of the performer will be to measure the area, which does not always completely coincide with the BTI data. With a simple tape measure you need to measure the axes and diagonals, study the horizontal and vertical planes, using a triangle, check the parameters of the angles between the mating surfaces in order to identify and plan the upcoming work front.
Important. According to regulatory documentation, the limit permissible deviation equal to 0.2% or two mm per meter of area. The angles between adjacent walls, as well as between the floor and the wall, must be strictly 90°.
Geometric parameters can be checked with the simplest device - wooden beam. To accurately identify deviations in verticals, you can use an elementary plumb line made of a rope, the length of which is equal to the distance between the ceiling and the floor, with a load attached to the end. The horizontal lines can be checked using a homemade level gauge made from two disposable medical syringes with a scale connected by a plastic hose. This device will also be needed for marking.
If deviations exceeding acceptable standards, it will be necessary to level the walls with plaster, as well as level the horizontal plane with a self-leveling polymer layer or a cement-sand mixture, depending on the degree of problems found. Often, leveling precedes the standard list of tile laying works. They should not be neglected, otherwise puddles will accumulate on the floor in the bathroom or kitchen, and collapsed segments on the walls will be “catchy” and require rework. This means that there will also be expenses for purchasing materials for leveling.
Next, a floor plan is drawn and a finishing scheme is developed, which includes only laying tiles on the floor, complete finishing of the floor and walls, or fragmentary tiling of vertical sections around the plumbing equipment, combined with the installation of floor tiles. The calculations required to purchase the material should be slightly adjusted upward, because fragile tiles can be damaged during installation. You need to buy it immediately with a reserve, since later there may not be a similar material (the batch of goods in the store will run out or products with the same nomenclature will have a different shade).
The adhesive must be selected taking into account the conditions in which the tile will subsequently work. For the bathroom and for the kitchen “apron” you will need compositions that do not react to excess moisture after hardening. You immediately need to think about grout, which is now available on the market in different color options. A colored grout mixture can radically change the composition. If there is no need for additional effects, you need to buy regular grouting material in the quantity specified by the manufacturer.
Do not forget. To increase adhesion performance, a primer will be required, and putty will be needed to correct minor irregularities. When pouring the screed, it will be necessary to lay a layer of waterproofing, which is placed in the shape of a bowl with an approach to the walls of approximately 15 cm. If you plan to purchase roll material, you will also need tape to secure the joints. It will be necessary to take into account that polyethylene or foil water-repellent material is laid with an overlap of 10 cm. To even out the verticals, you will need to buy a special mesh that increases the strength of the plaster layer.
Please note. Tools you will need:
- construction mixer for mixing binders, leveling and primer compositions; instead, you can use an electric drill with an attachment;
- a notched trowel, the dimensions of the “comb” of which depend on the size of the tile (large tiles require large teeth);
- a ten-centimeter spatula for the convenience of applying the composition to a toothed device or trowel;
- tile cutter, instead of which you can use a glass cutter;
- a small grinder if you have to cut a lot of tiles to finish a large area;
- “ballerina” equipped with a carbide tip, if the future installer has to make round holes;
- rubber spatula for applying grout.
The most in a simple way for a novice craftsman there will be an arrangement of tile elements “seam to seam”, more complex circuits It is better to master “take-off” or laying in a diagonal direction after already having some experience. The presence of friezes, borders and other decorative elements needs to be determined on preliminary stage and buy the required number of shaped parts, also with a small margin.
Are you afraid of missing out on something? self-installation tiles or have no experience in this type of work? Use our guide and follow the recommendations in the material: .
Preparing surfaces for laying tiles
An impeccably prepared surface guarantees the strength of the tile cladding and superior decorative qualities.
- All plumbing must be removed in order not to spoil it.
- Then you will need to remove the old tile, not forgetting to protect your eyes from dust with glasses and your hands with gloves. Layer old paint can be removed with a hammer drill with a spatula attachment.
- Tap the entire area cleared of old finishing. The peeling of the plaster and the presence of weak areas in the screed will be signaled by a dull sound, the detection of which means that it is necessary to clean the brickwork or concrete.
Aligning vertical and horizontal planes is a separate type of construction and repair work, about which you should read the corresponding article. Let's assume that the walls and floor are already immaculately smooth, all that remains is to rid them of construction dirt, grease, soap solutions, prime, figure out how to lay tiles, and begin the responsible, painstaking work.
Note. The factory primer can be replaced by pure cement remaining after leveling. It needs to be diluted to a consistency equivalent to the thickness of liquid sour cream, and “thrown” onto the surface with slaps.
Walls in wooden house before laying the tiles, they are covered with a metal mesh, for fastening which they are installed wooden slats. Between the walls made of wood, layers of steam and waterproofing are laid. Plaster is applied over the mesh (with a layer of no more than 15 mm), which should not be rubbed to improve adhesion between it and the tile.
Important. Laying tiles over old tiles is not recommended. But this is possible if you need to complete the work in a short time. The installer will need to buy a special adhesive that can firmly hold the old layer cladding with a new decorative and protective surface.
Cutting is an inevitable task when laying tiles
Without cutting, it is almost impossible to lay material elements with the given geometric parameters. It is best to use a tile cutter for this, but in the absence of one, you can get by with a glass cutter. The process is simple:
- Marking is being done; it is better to apply it with a felt-tip pen.
- The element with markings is placed on a table or a special bed.
- The intended cutting line is outlined with a hard-cutting roller.
- The cut parts are separated with a “foot” or nippers.
It is recommended not to make multiple passes with the cutting tool along the same line to avoid getting a “ragged” edge. It is advisable to stick a piece of adhesive tape on the area around the cutting line to form a high-quality cut without notching the enamel.
Useful advice. Before laying the floor tiles, you need to do a kind of “fitting” - lay out the material without gluing it, taking into account the size of the butt joints (2-4 mm). The tiles should be positioned so that the cut segments are removed from the entrance and, if possible, hidden by household equipment or furniture yu.
U-shaped and T-shaped cutting areas are made with a grinder. To make rounded holes, use a ballerina attached to a drill. Trimming work must be treated with special scrupulousness and attention, carefully check the dimensions and set markings. The slightest flaw leads to damage to the material.
Another tip. An inexperienced installer will probably not be able to cut perfectly. It is recommended to hide the edge under shaped ceramic parts, under tiles laid on the adjacent surface, or under casing. If it is impossible to hide poorly cut parts, the cut can be trimmed with a file, sandpaper or a grinding stone.
Wall tiling
Experienced finishers who know how to lay tiles correctly advise beginners to start with wall cladding, since tools that have fallen on the floor, flying tiles, or spilled mortars can ruin a brand new floor covering.
- Getting started - installing horizontal guidelines, which are lighthouse tiles “planted” on alabaster. After laying the row, the guide tiles are removed, cleaned of alabaster residues and installed on a cement or adhesive base. Beacons are located at a distance not exceeding 2 m.
Note. To determine and mark the horizontal line, you can use a level and a rod, which will serve as a guide for the beginning of the first row. You can install plumb slats in the corners and stretch a cord between them.
- Laying tiles on the walls begins with the lowest row from the floor and continues upward.
- The binder composition is applied to the back surface of the tile, after which the tile is pressed with force against the wall to fix it at the designated level. The solution released when pressing around the tile must be removed.
Attention. You should not skimp on the binder. The voids under the tiles will cause the tiles to separate from the surface.
- Spacer crosses made of plastic are used to form seams. The seams do not serve a decorative function; they are needed to prevent cracking of the tiles and separation of elements during thermal expansion.
- Upon completion of the surface covering, it is carried out.
The quality of tile laying must be constantly monitored, checking the horizontal and verticality of the created surface.
The quality of tile laying must be constantly monitored by checking the position of the tiles relative to each other along the transverse and longitudinal vectors
When facing a wall adjacent to a sloping floor, the first row of masonry should be composed of solid tiles. After finishing the entire surface, the cut segments of the bottom row are laid.
When tiling a room, you cannot do without cutting the tiles. We'll tell you how to do this with a grinder and a tile cutter in a special article:.
Technology for laying ceramic tiles on the floor
To lay tiles on a horizontal surface in the simplest direct way, you need to select the position of the first row. To lay the covering in a large room, it is recommended to start from the middle; when finishing a small area, it is better to start from the second row.
- By analogy with wall cladding, beacon tiles are installed. The presence of minor irregularities on rough floor eliminated by applying an increased amount of solution.
- The binder composition (glue or cement mortar) is applied to small area approximately 70 x 70 cm, after which they are leveled with a notched spatula. To ensure uniform distribution of the adhesive composition, the spatula is held at an angle of approximately 60°.
Note. Laying floor tiles on a leveled surface can be done using bitumen mastic, simultaneously with gluing, providing waterproofing.
Large elements of the tiled covering are laid by applying the adhesive composition to the floor and to the tiles
- For elements with dimensions of 20 x 20 cm and larger, glue is applied to the subfloor and to the tiles. The tile with the mortar applied to it is laid on the floor, then tapped with a rubber mallet.
- To maintain clear dimensions of the seams, spacer crosses are inserted between the elements. How larger sizes tiles, the larger the joint size should be, but the limit is considered to be 4 mm.
- By using wooden block Horizontals and verticals need to be regularly monitored. A block is used to check two or three tiles in a longitudinal row, then it is installed on two or three elements from a transverse row.
- Upon completion of the work, the remaining glue or cement composition must be removed from the surface and the crosses must be “pulled out” from the seams without waiting for hardening.
- Before grouting joints, a daily break is required.
Attention. There is no need to walk on freshly laid flooring.
WITH special attention You will need to pay attention to the corners of the floor tiles. If they protrude above the plane, they need to be settled to the general level. If a protruding corner is a defect of a given element, it is better to lower it slightly below the general level.
That's all the simple technology of laying tiles, familiarization with which will certainly convince the careful contractor of the real possibilities of significantly saving money without resorting to the services of installers. Patience, knowledge and diligence guarantee a long service life of an excellent wear-resistant floor.