Shelves located in the corner are designed to maximize the use of room space. The room area is freed from unnecessary furniture, which adds volume and space.
A room with shelves located in the corner looks tidy and stylish. Using shelves you can structure the order of objects in the room.

On the shelves, with corner mount, you can put various small accessories: photo frames, vases, potted plants and other various items.

Placing shelves with corner mounts
Shelves with corner mounting to the wall can be placed in home and work areas.

In the kitchen, shelves are installed directly in front work surface, for ease of use of kitchen utensils.

Cabinets located in the corner can compete with shelves with corner mounts.

Open space on the shelves will allow you to display various accessories and increase the space in the room.

It is convenient to use shelves with corner mounting at home and at work.

You can place all the necessary items for work by filling the free corner of the workspace with a shelf.

A room design with a shelf located in the corner will create an atmosphere of calm and relaxation.

On the top shelf you can place a vase of flowers or potted plant, this will give the room freshness and uniqueness.

A shelf located in the corner is perfect for those who like to spend time reading books.

An original approach to the design of a shelf with books diversifies the simplicity of its purpose.

Shelves located in the corner are versatile and convenient, at the same time they can surprise with a sophisticated look.


Principles for choosing a shelf for placement in a corner
It is necessary to focus on the width and height of the room. In spacious rooms you can place shelves with various fasteners.

For small rooms good decision there will be placement of shelves in the corner.


Placing such a shelf above the interior items in the corner will help increase the space of a small room.

At the entrance to the apartment, a shelf with lighting will look great. A backlit shelf will divide the room into parts and draw attention to a specific place. A shelf located in the corner will fit comfortably and functionally next to the sofa.

The types of shelves with corner mounting are varied: there are universal, unique, vertical or horizontal, located along the wall, as well as a ladder.

A competent design approach requires placing shelves in a chaotic manner.

In a children's room, a shelf with a corner mount will optimize the play area, bring coziness to the room and make the space more open.


In the bedroom, ornate and unique shelves will reflect inner world residents. Shelves made of wood are suitable for a calm bedroom atmosphere.

What are the shelves located in the corner made of?
Depending on the functional significance of the room, the material for making shelves can be varied: wood, stone, plastic, mirror, glass, metal.

So for the bathroom it is better to place shelves made of plastic, glass or metal.

This or that material must be selected based on the design of the room.

Shelves located in the corner can be supplemented with LED lighting or spotlights.


The fastening of the shelves can be hidden, or it can be decorated decoratively. Buttons, ropes, and stone fittings are perfect.

The simplicity and versatility of the shelves, with corner mounting, plays a big role important role in the decoration of the room and the placement of objects.

They save space, are practical and functional to use.

Shelves with corner mounting can be used both at home and at work in unlimited quantities.

A shelf located on the wall will fit beautifully into the interior and turn it into a modern and unique place.

Photo of corner shelves in the interior


Shelves are often used not only to complement and decorate the overall interior of the room, but also for a clearer and more expedient organization of space. Thanks to their use, the apartment owner has the opportunity to conveniently arrange a huge number of small things that would simply get lost in closets.
Today there are a lot of different models on the market that are made from different materials. They also differ in design.

You can choose not only products with classic design, but also ultra-modern designs.

But more and more often people prefer to make such interior details themselves. Wondering how to make a shelf with their own hands, they re-read a lot of literature and look through many catalogs.

However, this does not mean that self-production The shelves are complex and it is beyond the capabilities of a person who does not have special skills. No, that's not true at all.

Familiarization with the literature in this case is necessary in order to create a product with beautiful design, which will fit into the overall interior. Let's take a closer look at what kind of shelves there are.
Types of shelves
Any specialist will tell you that before you start creating a product, you need to decide for yourself what kind of design you want to get and whether it will be combined with the interior. And only after that you can start creating the product.

After all, for a house decorated in a classically styled style, it is completely unacceptable to use trendy and modern shelves. They will look extremely ridiculous.


The most popular and widely known subtype of shelves is the classic shelf. This is due to the fact that it is quite easy to install, and appearance, thanks to its simplicity, it seems refined and sophisticated.
Both open and closed shelves are used successfully. Closed products are most often used for decoration and installation in rooms decorated in more modern styles. Glass and sometimes plastic are used to construct them.

Open structures can be used both in modernly decorated houses and in apartments with a classic design. Over the past few years, this particular type of shelf has gained enormous popularity and is therefore gradually replacing the classic options.

In small rooms, you can often see corner shelves that have a special method of fastening. They are mounted on adjacent walls that are adjacent to each other. They are most often used in bathrooms, kitchens and utility rooms.

In addition to the above types of shelves that are mounted on the wall, there are hanging and floor structures. Hanging shelves are mounted in an unconventional way.

They are installed using cables and vertical racks, and attached directly to the ceiling. This mount looks quite unusual and original.

Floor structures are most often used in hallways. After all, hand-made floor shelves for shoes not only look beautiful, but also help you organize the space of a small hallway. At the same time, making them is quite simple.
How to make a simple shelf?
To create the claimed product, you should purchase or prepare some tools and materials in advance. As connecting elements you can use whatever suits you best. But the most popular are ordinary screws, brackets and dowels.
Note!


For example, let's take a photo of the shelves with our own hands, which is presented below. It shows a product with the following parameters: width 250 mm, height 300 mm, length 1100 mm. For convenience, the manufacturing process will be divided into stages.
Stages of work
At the first stage, you need to complete the markup. To do this, you should lay the boards on a table or any other flat surface and transfer measurements from the drawings. The side walls must be exactly 268 mm high.

This markup is optimal because, side walls will be located between the two parts.

The second stage requires cutting the boards. To get smooth and neat cuts, you need to use a jigsaw. After cutting, you will end up with 2 fairly long pieces and 2 shorter ones.

At the third stage, you can begin processing the resulting workpieces. The resulting sections should be coated with a special protective varnish or stain, having previously sanded them.

Note!

If you only plan to paint the shelf, you can get by with treating it with a regular antiseptic primer. This way you will not only increase the service life, but also achieve a more uniform distribution of paint.

At the fourth stage of making a wooden shelf with your own hands, you begin to directly assemble it. The bottom board should be laid on a flat surface. Step back 8 mm from the ends of the workpiece and draw two lines parallel to the cuts.
2 points should be marked on them with a distance of 5 cm from the edge. At the marked points it is necessary to drill holes for self-tapping screws. The same manipulations must be done with the second workpiece.

After this, you should install the side blanks on the lower section of the board and secure them. Once you are done with attaching the side panels, proceed to install the top panel and secure it.

At the fifth stage, you should attach the brackets to the ends of the side panels, and make several holes in the wall for the dowels. After this, screw in the screws so that they protrude by 5 mm. And now your shelf is ready.

You can make acoustic shelves in the same way, but you need to take into account the size of the equipment itself. Measurements should be taken carefully, because if you make a mistake, the work will have to start again.
Note!


DIY photo of shelves


They are an ideal means for placing a whole mass of small household items. The presence of shelves allows you to create not only an additional useful surface in the interior, but also to add additional decorative decoration to the design of the room.
Methods for attaching shelves to the wall
There are many ways in which you can attach shelves to the wall. However, you should dwell only on a few of the simplest, most accessible and convenient methods. Among them are:
Traditional fastening for shelves involves the installation of various brackets, wooden and metal racks. However, installing shelves on racks in this case seems rational only if the design of such supporting elements matches the features of the interior.
Noticeable progress in bringing the most daring design ideas along with the development of the construction industry, it allows not only to quickly select suitable fasteners for installation wall shelves, but also create the illusion of them “hovering” in space, carefully hiding the fastening elements. Thus, hidden fastening of the shelf is possible if there are brick, plasterboard or cinder block walls with a thickness of at least 10 cm. Otherwise, the shelves can be used exclusively as a decorative element.
How to install a shelf mount: basic nuances
Before you begin installing the fasteners, you should make sure that the support is thick enough to match the weight and dimensions of the shelf being installed. You can use it as a template for mounting. It should be placed on the back side of the shelf, making small holes in the places where the fasteners are installed. This way you can avoid mistakes when creating holes for fasteners in the wall.

Then you can proceed directly to drilling. It is extremely important to remain as precise as possible here, especially if drilling occurs in several stages. The initial holes should be made with a drill of a minimum diameter, and only then expanded to the required size.
If the fastening for shelves requires screwing in a large diameter, in this case it is better to carry out such work using an electric screwdriver. An excellent tool To securely fasten the bolts, threaded couplings are used. Installation of such fastenings contributes to the longest possible operation of wall shelves without the need for repairs.
Tools and materials
For reliable fastening you will need the following arsenal of materials and tools:
- template strip;
- hand or electric drill;
- wood glue to secure the shelf to the fasteners;
- mounting kit;
- threaded rods and couplings;
Shelf mount: installation features
Wooden round pins, pre-lubricated, are driven into the holes drilled according to the prepared template. Next, the wide side of the shelf is placed on the pins. To avoid damaging the surface of the shelf when placing it on the pins, it is enough to use rubber mallet, gently tapping the outer edges of the structure.
How Alternative option You can use a shelf mount in the form of hidden hinged hinges, which are placed on its rear, hidden side. In this case, a replacement for wooden pins can be to install the shelf on bolts and screws mounted on dowels and other fasteners.

- Before finally fixing the structure to the wall, you need to check how securely the shelf mount is.
- It is worth making sure that the wall surface is thick and strong enough to support it.
- It is better to select fasteners in accordance with the type of specific shelf.
- When selecting a fastening set, one should proceed from the purpose of the structure, expected loads, and the weight of the items that will be stored there.
- When ordering shelves, you need to make sure in advance that the walls are sufficiently thick, the fastenings are strong, the availability of suitable fasteners, and check the measurements and calculations.

Finally
If you have no experience in fixing wall shelves, it is better not to hesitate to seek help from specialists. Naturally, calling in specialists requires additional costs, but the quality of work will certainly be much higher.
If you have the skills to work with plasterboard, brick, cinder block and other surfaces, then you can begin installing fasteners under the shelves without delaying the matter.
Reliable fastening of wall shelves, all kinds of cabinets, and small interior accessories can be done using a number of fasteners. The main thing is to approach their selection and choice of fastening method wisely.
Shelves in the interior of a modern room perform two main functions: they become convenient stand for books, useful items or nice trinkets, and also help highlight original style. Not only the aesthetic component is important, but also the technical side, that is, the quality of the products and the method of their fixation. Let's try to figure out when it is necessary to use traditional mounting of shelves on the wall, and when - secret or unusual.
Modern premises Without shelves, it seems unfinished: often they are the finishing touch that completes the interior design. If you look at the catalog of furniture sets, you will notice that in addition to wardrobes, beds and chests of drawers, these miniature products are necessarily present there. They are various shapes, color and size, but always correspond to the general style direction.
Two in one: bright decor and comfortable interior items
Both visual appeal and functional qualities largely depend on durable and reliable fasteners for shelves on the wall, so this article will be more devoted to metal corners, easy-to-mount brackets, and clever invisible hooks and studs.

Inconspicuous fasteners do not distract attention from the design
When purchasing ready-made furniture sets, the fittings and material for fixing are usually supplied complete, however, there is often a desire to make original decor with your own hands, and then it is important to choose The right way fastenings
It would seem that there is nothing simpler than hammering a couple of nails into the wall and hanging a shelf with pre-attached “ears” on them. But it's not that simple. In addition to the most important task - to find the most appropriate place- still needs to be answered whole line questions: what kind of nails, where exactly should the “ears” be attached, will such fastenings support the weight of the structure?

Beautiful metal corners “forged”
Let's consider the simplest option with corners. Let's assume that we have an ordinary shelf made of wood - a simple horizontal product without decorative elements. We select tools and materials based on the following list:
- metal corner (2 or 3 pieces, depending on length);
- ruler, pencil, construction tape;
- laser level;
- drill and drill bits;
- screws or dowels.
If the base is wooden, then instead of self-tapping screws you can use ordinary nails.

One of the corner mounting options
Instructions:
- We choose the most suitable place. Try to choose an area that is within reach - that is, not too high (a mistake many amateur designers make). You should not clutter a surface that has already been previously decorated (for example, with paintings or photographs); it is better to choose free space. We apply the product and see if it fits well into the interior. If everything is satisfactory, we move on to the next stage.
- We carefully examine the bottom of the board and try to choose places for fittings. Ready-made kit metal fastenings for shelves to the wall you can buy in the store building materials. We attach them to the bottom of the structure: we drill small holes with a small drill and fix the metal elements with self-tapping screws.
- We make markings. Again we place the shelf in the chosen place, in the holes in the corners we make marks with a pencil, preferably in each hole.
- Using a drill, we drill holes in the base, trying to accurately hit the marks. For concrete slabs it is better to use dowels.
- We put the shelf in place so that the holes in the corners and in the wall match. We tighten the screws, trying to ensure that they fit evenly and smoothly. The hanging process is complete.
- We admire the result, arrange toys, vases, books.

Decorative fastenings are an additional decoration
Construction tricks: hidden fasteners
All kinds of metal corners for shelves on the wall, convenient brackets, building profiles are appropriate only if they are correctly selected and fully meet the stylistic features of the room. But sometimes technical details do not fit in with the surrounding environment and you have to use a trick - use one of the methods of hidden fastening.

Decorative composition without unnecessary details
There are several generally accepted options by which invisible elements provide a tight fit and rigid fixation. Let's look at the three most popular:
- hidden loops;
- wooden block;
- metal rods.
The first method is the most popular. Hinged flat hinges are attached to the back side of the shelf, then the structure is suspended on pre-screwed screws. The main thing is to accurately measure the distance between the loops, otherwise extra holes They will “give away” the technical trick and spoil the idea. To level the horizontal, we recommend using building level.

The second method is to string the base of the product onto strong metal pins implanted into concrete slab or brickwork. The role of pins can be played by pieces of reinforcement or steel threaded rods of the required diameter provided for this purpose. The heavier the product (including potential filling), the more studs will have to be screwed into the wall. To guarantee stability, the cross-section of fasteners for wooden shelves should not be less than 12 mm, the length depends on the conditions.
The third option is to install a block with a square or rectangular cross-section, which subsequently serves as a base. Masking will take place if the thickness of the bar and the thickness of the shelf hung on it match perfectly. The connecting parts between the two surfaces are dowels - wooden pins. To enhance strength, before joining the parts, they are lubricated with glue.

Wall set of three various designs
If your interior design did not include the use of additional visible elements, hidden fittings will help out.
Original ways to hang shelves
Traditional methods are suitable for placing simple, uncomplicated structures in the interior in the form of one horizontal board or a product resembling a glazed box. However, the imagination of modern designers is so rich that it allows them to create amazing structures in the form of labyrinths, trees, flowers, and snakes. The fasteners can be as unusual as the shelving, although in some cases the same secret hinges or decorative corners are appropriate.
Let's look at several options for how you can attach shelves to the wall if you choose an unusual project for implementation.
Non-standard interior solutions
Using a familiar object - wooden board 17-20 mm thick - you can create a unique design. Scattered on the wall geometric figures different colors, silhouette bat with outstretched wings, an angular tree branch, a huge spiral – stands for interior accessories can take on the most incredible incarnations.

An original composition of a multi-level wall-length shelf in a teenager’s room
A very simple but interesting solution is to create a family tree. The branch shelves are attached on both sides to a vertically located panel - the trunk. The design is so simple that you can build it yourself in one evening. To match the theme, individual boards are painted in natural colors. Fastening material in both solutions remains invisible.

A light and elegant composition of elements in contrasting colors can decorate a kitchen, living room or bedroom. Pay attention to the fasteners: the laconic light corners do not spoil the overall picture, as they blend well with the tone of the wallpaper. The weight of the product is small, so hidden pins could be used for installation.

Contrasting composition
If you use decorative wooden coasters, you get a more ponderous picture.
Option with leather straps
Sometimes the most surprising things are simple solutions, and a couple of improvised parts can become a magnificent interior decoration. As a mount for wooden shelf(of a regular sanded board) a leather belt protrudes. The material of manufacture is not necessarily genuine leather, it can be an artificial analogue or even a wide textile tape. The main quality of suspensions is strength.

Cozy retro composition using belts
Obviously, a horizontal board on hangers, not additionally secured, will not be able to support a stack of heavy books and is not a reliable support for crystal souvenirs. Its purpose is to serve as a decorative wall element, and you can place small souvenirs, accessories, and light objects on it.

The fastening elements for the belts are a pair of long screws with plastic dowels, which will be located at some distance above original decor. The procedure looks like this:
- we paint the boards in the desired color; if it is necessary to preserve the texture, we coat them with varnish;
- prepare two old identical belts (or new ones purchased at the store);
- fold the ends of each belt, trim them, drill small holes at a distance of 2-2.5 cm from the edge;
- Using a drill and hammer, we fix the dowels at a distance of 60-70 cm;
- We fasten the ends to the dowels so that the belts hang down in the form of loops;
- insert the board into the prepared loops and align horizontally.
It turned out neat and beautiful decorative stand. You can complicate the composition by building another similar tier below or above.
Caution: fragile glass
Glass plays in the interior special role. On the one hand, this reliable material, capable of withstanding a lot of weight, on the other hand, it is a fragile matter that can easily be broken with one awkward movement. For the shelves, specially tempered, especially strong glass is used, which is difficult to break even with a hammer. We do not recommend forming parts of the required dimensions yourself; it is better to order cutting from a glass processing service.

Decorative metal brackets for fixing glass shelves
Here's what's surprising: transparent planes create the illusion of free, uncluttered space, which is why glass decor is often used in rooms with limited space. To fix glass panels, special brackets made of metal and plastic with soft elastic gaskets with inside.

Long metal knitting needles serve as fasteners
To carry out installation, first fix the brackets: fasten the dowels, insert the screws that come with the bracket into them, not forgetting to put on the washer. We fasten the brackets and check that they are positioned evenly in relation to each other. We insert the shelf. Sometimes, instead of wall holders, even more curious elements are used - thin metal cables or long pins resembling knitting needles.

Metal cables allow you to create a weightless structure floating in the air
Available materials are used
In interior design are always appreciated original solutions, creative ideas, fantastic incarnations of seemingly ordinary projects. Using the usual fasteners, but replacing the traditional horizontal with some object from the environment, you can build unusual composition harmoniously fits into general style.

Drywall box in polypropylene baguette
We will need leftover building materials, such as trimmings sewer pipes large cross-section, which remained from the construction of the pipeline at the dacha. We fasten parts of the same length on long pins or do without fasteners at all: we tie the pipes with a bundle and install them on the floor.

Cozy storage systems for shoes made of plastic pipes
Old accessories do not lose their relevance, over time moving from the category of fashion items to the category of vintage items. It's time to take the travel suitcases off the mezzanine and decorate one of the free walls with them - you'll get a luxurious decorative composition with a touch of nostalgia.

New life old suitcases
Even from waste material You can create a masterpiece if you want. Decrepit fruit boxes, after cleaning, sanding and processing, easily turn into wonderful shelves with which you will not be ashamed to decorate a nursery, hallway or bedroom.

Old boxes - retro decor
Look around - perhaps your eye will find an interesting object, bored in the corner, and your hands will turn it into an unusual wall decor. But don't forget about interesting solutions and for mounting shelves on the wall: reinforced wooden brackets, forged openwork corners, barely noticeable studs, hidden pins.
Working with drywall: accurately and accurately
Hammering nails into wooden logs or punching holes for dowels with a drill in concrete or brick wall, we know for sure that the fasteners will not fail and will last as long as required. But with drywall everything is more complicated. Convenient, quickly erected interior partitions are not a reliable basis for hanging wall decor.

Illuminated shelves inside a plasterboard box
There are two ways to attach shelves to a plasterboard base. The first is intended for light, small-volume structures, the second - for heavy, weighty products.
To install a lightweight shelf, you should follow the usual technical procedure: carefully drill holes, trying not to crumble the material, screw in dowels, then screws. Reliability can be increased with the help of special dowels - “umbrellas” or “butterflies”.

Butterfly dowel installation diagram
Massive interior items are fixed differently. Their installation must be provided for even before the construction of the partition. In the places where they will be located, you should install an additional vertical or horizontal metallic profile or wooden blocks, to which self-tapping screws or bolts will be attached.

Experts insist on anchor bolts, as they consider them the most reliable for hanging heavy objects.
Interesting videos contain useful information, which will definitely come in handy during repairs or landscaping.
How to hang a store-bought shelf with hidden hinges:
One of the methods of invisible fastening is eccentrics:
Working with drywall:
As you can see, the variety of fasteners gives you an excellent opportunity to choose shelves of various designs. Knowing the secrets of hanging wall elements, you can decorate the room yourself with a new piece of furniture. If complications or questions still arise, contact professionals who know a lot about fasteners.
Today, any, even the most modern and fashionable designer does not use the opportunity to use practical and stylish shelves when decorating the interior. They will not only become an integral part of the future decor, but will also serve as an excellent book stand (mount for bookshelves), for photos and decorative items.
There are two types of shelf mounting available:
- standard method (using hinged brackets, corners, etc.);
- fastening shelves to the wall without visible fasteners.
We will look at the first method in more detail, since when standard version it is difficult to achieve a combination of the future interior with the target design.

- Preparation for fastening
- Detailed mounting instructions with photos
Let's consider the process of preparing the fastening
- The first thing you need to do is assess how secure wall, where our shelf will be mounted directly. If it is a brick wall, then it should be at least 25 cm thick, and if you have a concrete wall, then from 10 cm, which will allow you to place not only decorative elements on the shelves.

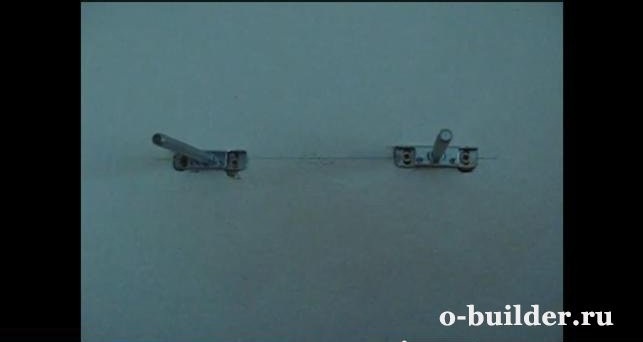
1 – fastening element;
2 – holes for installation;
3 – metal rod;
4 – hinged bracket;
5 – shelf.
2. After this, we move on to determining the thickness of the future shelf.
To do this, you must know exactly what will be placed on the shelf so that there is no deflection or deformation. You can check this by simply taking a board of approximate thickness and placing a weight on it.

- If the interior concept requires thicker boards, then in this case everything should be used according to the recommendations of your designer or the chosen style.
- You will need to take into account the mounting features, since the thickness of the shelf cannot be less than 3 cm. If books are placed, it is better to use a thickness of 4.5 to 6 cm.
- The future shelf will need to be thoroughly dried and soaked before processing.
How to install shelves to a wall without visible fasteners
Step 1. Measure the distance between the holes.


Step 3. After this, we apply our fastening element to the resulting axis and mark holes for it, which should be located on a horizontal line.


Step 5. After this, we clean all the holes from any remaining shavings and dust and drive wooden pegs or plugs under the dowels.

Step 6. After this, take dowels or screws and screw the fastening element to the plugs or pegs.
Step 7. After this, we proceed to installing the shelf itself on the fasteners. If the shelf does not fit very tightly, you can tap it with your palm or a rubber hammer to securely fix it. It should be noted that you need to knock alternately on the left and right, this way you will prevent the shelf from skewing and it will sit evenly on the fastening element.