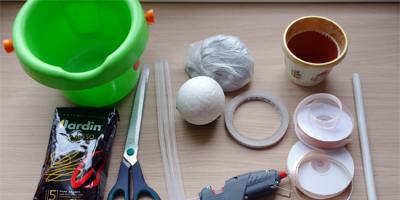
Beginning furniture makers sometimes face the problem of where to buy furniture panels. Factory samples are not always suitable for the intended design, but blanks can be made independently.
To make shields you will need special equipment: planer, grinding machines (belt and surface grinders). Choose boards for work of the same species, without knots, dried, with minimal warping. The best option– buy a log and cut it into pieces of the required size. The cutting angle is 90 degrees. Pine, oak, and birch are suitable for making shields.


Wooden panels are very practical - they do not deform, have slight shrinkage, and the structure of the tree is not damaged, so investments in the production of lumber quickly pay off.
When buying their own home, every happy owner is faced with the question of improving the apartment. Alas, but not always on purchased ones square meters you can place all the desired furniture. The space in the rooms becomes significantly smaller, although in most cases the goal is to maximize the usable area of the room. Today, an impressive number of factories and stores offer furniture for every taste and income, but it does not always meet minimum requirements security. And such pleasure is quite expensive.
You can contact a workshop where they will not only be able to assemble furniture, but will also help you make competent sketches and drawings.

It is necessary to apply varnish to the structure, preferably in 2 layers.
Of course, you can contact a workshop where they will not only assemble the furniture, but will also help you make competent sketches and drawings. But again, it won't be cheap. Therefore everything more people take on making cabinets, shelves and other things on their own. Making furniture yourself is an impressive approach to furnishing in terms of adequacy and reasonableness. living rooms, and at the same time good way diversify the interior of the apartment. The best option for making a cabinet, wall, as well as drawers and shelves would be a furniture panel. This type of material is especially often used to create kitchen cabinets. . The kitchen is the place where the family gathers every evening for dinner and shares the events that happened during the day. Therefore, it is very important to maximize the usable area of the room without overloading it with furniture, leaving more free space.

Aesthetically attractive appearance.

REFERENCE. Furniture board is a material based on natural wood. Produced by gluing bars under pressure. There are several varieties on the market made from various types of wood: spruce, beech, oak, pine. Used for making components, drawers, shelves, etc.
The kitchen is the place where the family gathers every evening for dinner and shares the events that happened during the day.
As you already understand, making home furniture with your own hands is not only an interesting activity, but also quite simple.


Homemade designs with my own hands from furniture board, have a number of advantages over factory samples. There is no need for expensive equipment; it will be enough regular tool, which any owner can find. You just need to show a little ingenuity, patience and a creative approach to the issue - and now you are the happy owner of a modern and spacious wardrobe or a beautiful dining table for kitchen. So, let's look at the positive aspects of furniture made from this material.
- Aesthetically attractive appearance. Furniture made of wood compares favorably with other materials and will decorate any room.
- Safety. As mentioned earlier, it is made from various types of wood, an environmentally friendly material without harmful impurities and harmful components.
- High maintainability. Is the door broken, the shelf lopsided, the countertop damaged? No problem. There is no need to go to a workshop to repair your favorite cabinet. This can be done with your own hands with minimal financial investment in repairs. Working with furniture board is much easier than with the same chipboard, due to the fact that wood forgives some chips and inaccuracies.
- Low cost. In all respects, furniture panels are not inferior to furniture made from cut wood. At the same time, cabinets, kitchen tables and shelves look no worse and are durable and easy to use.

Furniture board is a material based on natural wood.

You just need to arm yourself with patience, inspiration, required quantity the right tools.
Choice of design and possible nuances
First you need to decide on the design of the cabinet or table. It is necessary to take into account the free space of the apartment that can be used. The next step is to create sketches and drawings. If it is not possible to develop a project yourself, then on the Internet there are a large number of drawings for a variety of design options. Based ready plan detailing and quantity calculation are carried out required material. In addition, the design plan will help you decide what size it is better to purchase furniture panels and how to cut them to minimize the amount of waste generated.

Used for making components, drawers, shelves, etc.

Based on the desired size and design, it is possible to produce almost any type of structure for the home.
Don’t forget about the varnish, which is selected individually. Due to the fact that a furniture panel is still wood, and wood needs special care. In order to prevent deformation, swelling of the surface, soaking (this is especially true for kitchen furniture), you need to purchase varnish and cover the surface with it at least 2 times. In addition, the varnish will protect the surfaces from negative influence ultraviolet rays and will give a presentable appearance. Today, the construction market offers a variety of varnishes, not only in a variety of colors, but also in textures. The same can be said about stains, which are successfully used in the processing of wooden products.

Designs made at home with your own hands from furniture boards have a number of advantages over factory-made samples.

Cabinet, desk or kitchen table, which you can easily make with your own hands, will meet all your requirements and fit harmoniously into the overall home environment.
To make almost any design at home you will not need large quantity expensive tools. In the arsenal of every owner there is likely to be a screwdriver, Sander, hacksaw and electric drill. With this set of tools you can easily assemble almost any furniture for your home.

You just need to show a little ingenuity, patience and a creative approach to the issue - and now you are the happy owner of a modern and spacious wardrobe or a beautiful dining table for the kitchen.
Procedure for making a cabinet
You can assemble the cabinet yourself using the example of the simplest model. This refers to a classic double-leaf cabinet made of furniture board for the kitchen with a missing vertical partition. Despite sometimes small sizes, such furniture can be very roomy and ergonomic. After preparatory work to make the future cabinet you will need to cut everything out necessary details and parts. This procedure is performed using a jigsaw and power saw. To assemble a double-door wardrobe you will need:
- doors – 2 pcs.;
- 2 side walls;
- 1 back wall;
- required number of shelves (shelf size may vary).

As mentioned earlier, it is made from various types of wood, an environmentally friendly material without harmful impurities and harmful components.
When all the main parts and frame are ready, you can begin assembly. First, you need to take into account the drawers and shelves that will fit into the closet. To do this, it is recommended to leave 775 mm width when cutting the sheet. Next, you need to fasten the 2 side parts of the wall and the bottom with self-tapping screws. It is best to fasten the structure at a distance of 50 mm from the floor. After these manipulations, you need to start cutting out and installing shelves and drawers. Most the best option To do this, use a narrow furniture panel, the holes in which are best made in increments of 100 mm. This is done to avoid deformation of the material during the assembly process. When the drawers and shelves are ready, they need to be screwed into the cabinet itself with self-tapping screws. Next, you need to install the cover on the frame, fix the back of the wall and secure the base to the corners. As for doors, it is recommended to use a surface with a size of at least 400 mm. Holes for the hinges are made in the doors, and the doors themselves are fixed with self-tapping screws to the side walls.

High maintainability.
Assembling a desk from furniture board
There is nothing difficult in making a multifunctional, compact and comfortable desk from a piece of furniture with your own hands. As with the cabinet, a sketch and drawing of the desired type will be required before the construction can begin. For production you will need:
- square;
- plywood (thickness should not exceed 20x20 mm);
- pieces of timber and plywood.

In all respects, furniture panels are not inferior to furniture made from cut wood.

You can assemble the cabinet yourself using the example of the simplest model.
To assemble the optimal table option, you need to take into account all the nuances and calculate the required number of niches, shelves and drawers. The size is selected according to individual preferences and room capacity. It is better to start making a table by making a table top. To do this, you will need to use a large shield and cut a blank from it. Please pay Special attention on the corners of the table top, which must be processed and reinforced with bars before assembly. After processing the corners of the tabletop, it would be a good idea to round off the most protruding parts. This will not only give the table an aesthetically attractive appearance, but will also make it less dangerous for all family members. After the tabletop, you need to start making drawers, shelves and doors. Two squares measuring 70x70 are cut out of plywood and cut so that they make 4 triangles. These elements are placed on the back of the frame wall. Based on the finished drawing, you should place shelves and drawers in specially designated areas of the table. The boxes must be screwed with self-tapping screws into the almost finished part of the structure, and then begin installing the doors. It is necessary to apply varnish to the structure, preferably in 2 layers. The final stage in the assembly will be the installation of pre-purchased fittings, and the desk is ready for use.

First you need to decide on the design of the cabinet or table.

When all the main parts and frame are ready, you can begin assembly.
Computer desk made of shield
In this case, the principle of making the table is slightly different from the previous one. It is necessary to use 3 sheets, the size of which will be 2000x200x18 mm. This is the most optimal size due to its strength, and therefore durability. When making a table you will need:
- edged board (size can be selected as desired);
- plywood parts.

Based on the finished plan, detailing and calculation of the amount of required material are carried out.

The best option for this would be a narrow furniture board, the holes in which should be made in increments of 100 mm.
As in the case of a desk, before assembly begins, work must begin with the preparation of the tabletop, which is cut out of the panel in accordance with the previously taken measurements and the prepared drawing. It is recommended to make two small recesses on the side surfaces in order to place the table strictly against the wall, avoiding unnecessary gaps along the edges of the tabletop. On a vertical wall, the best option would be to install a transverse panel. Installation is carried out using self-tapping screws on the frame. The cross panel and the presence of plywood will help give the table rigidity and strength. After this, a frame is made for shelves and drawers, parts of which are attached to the finished structure. It is preferable to make as many drawers as possible on this type of furniture for greater capacity. To build the upper shelves with the required number of drawers, the shield must be cut, attaching it to the tabletop with self-tapping screws. For drawers and shelves, it is better to use roller mechanisms. As for the part under the keyboard, it is made of a shield whose size is 40 mm. Next, it makes sense to start installing the doors. After preparing all the components, varnishing should be done, after which final assembly is carried out.

Today, the construction market offers a variety of varnishes, not only in a variety of colors, but also in textures.

Holes for the hinges are made in the doors, and the doors themselves are fixed with self-tapping screws to the side walls.
Finally
As you already understand, making home furniture with your own hands is not only an interesting activity, but also quite simple. You just need to arm yourself with patience, inspiration, the necessary number of necessary tools, and make necessary calculations and drawings. Based on the desired size and design, it is possible to produce almost any type of structure for the home. A cabinet, desk or kitchen table, which you can easily make with your own hands, will meet all your requirements and fit harmoniously into the overall home environment.

Low cost.

The size is selected according to individual preferences and room capacity.
VIDEO: DIY kitchen. Solid wood (pine) Kitchen made from furniture board. Kitchen cabinets..Part No. 1
All photos from the article
How are boards joined into a board? What adhesives are preferable for gluing? How to adjust surfaces? Do I need to provide pressure while the glue is drying? Let's try to answer these questions.

Goals
The purpose of joining the boards is to obtain a so-called furniture panel, which is subsequently used as a tabletop, window sill or furniture facade.
The fact is that getting a solid board 40-60 centimeters wide is very problematic:
- Taking into account the need to debark the trunk and its conical shape, such dimensions in themselves are difficult to achieve;
- Additional problems are created by the stresses that arise in the wood during drying. They result in cracks, “propellers” and other defects in the workpiece.
A stacked furniture panel can be assembled from minimum size blanks.
However: you can get a beautiful surface without conspicuous seams only by carefully selecting the texture pattern between the plots (boards or bars from which the shield is assembled).

Glue selection
Which adhesive compositions used for gluing wooden pieces?
In general, any specialized carpentry:
- Casein (made from crushed low-fat cottage cheese);
- Albumin (on egg white);
- Bone (boiled from animal bones);
- Imported Titebond II, etc.
General construction adhesives, no matter how attractive their price, are strongly not recommended for use on wood. The only exception is polyvinyl acetate glue (PVA): its adhesive seam is noticeably stronger than wood in tensile strength in the direction perpendicular to the grain.
When gluing wooden parts using Moment SUPER PVA D3 and subsequent destruction of the structure, fragments of workpieces remain on both sides of the seam; the seam itself does not collapse.

An important point: when using protein-based wood glues (casein, albumin and bone), they are soaked for a long time to swell.
The glue is ready for use 1-24 hours after it is poured with warm water.
Preparing for work
Tool
Before gluing the boards into a shield, you need to prepare the tools. The following tools are absolutely required:
In addition, it is desirable:
The main tool for gluing - the press - should be given special attention.
His tasks:
- Ensure that the workpieces are pressed against each other with a force of about 10 kgf/cm2;
- Avoid bending of the shield and mutual displacement of the plots relative to each other.
The goal can be achieved in different ways.
Lumber
Many craftsmen practice assembling furniture panels from ordinary unedged boards by sorting and selecting wood without defects. However, it is much easier to immediately take the choice of lumber seriously.
As a sample of the requirements, let's look at what a furniture panel with a thickness of 25 mm should be according to GOST 2140, which normalizes surface defects of glued parts. We will give the parameters for the “Extra” variety: in fact, if we take on self-production furniture, then everything should be done to the highest standard!

It’s interesting: the optimal ratio of the width of the workpiece to its thickness from the point of view of uniform drying of the wood is 3:1.
If you use atmospheric drying blanks and plan to use the furniture in conditions of significant fluctuations in humidity, then it is better to take sections for a 40 mm thick panel with a width of 120 mm.
Procedure
Now let's move on to how to glue a shield from boards with your own hands.
We use the simplest gluing method - in a smooth fugue (without shaped edge milling).
- We pass the workpieces through thickness planer , strict only the sides glued together;
- Place them in a press with one side glued up;
- Apply the adhesive with a brush or roller. If the glue is packaged in a tube, you can apply it in one or two (depending on the thickness of the shield) strips. The instructions are due to the fact that pressing the workpieces will still distribute the glue evenly over the entire surface;
- We turn the plots into working position and squeeze them with a clamp or wedge them. Using homemade press do not forget to ensure that the workpieces are pressed in the plane of the future shield;
- Carefully remove the squeezed out glue and immediately rub the surface with fine sawdust.. They will fill small cracks and irregularities, making the plane of the shield smoother;
- Dry until the glue reaches full strength;

- After complete drying, remove the shield from the press and pass both sides through a thicknesser;
- Cutting the shield to size;
- We grind the plane, edges and, if necessary, make roundings. The product is ready.

conclusions
We hope that the material we offer will help the reader in independently designing solid wood furniture. You can learn more by watching the video in this article. Good luck!
Furniture made from natural wood, very expensive, so not everyone can buy it. And analogues such as MDF and chipboard are rather short-lived, so the shelf life of products reaches only a few years. The most acceptable and budget option is the manufacture of furniture from furniture panels. In addition to the fact that this material is quite durable, it also fits harmoniously into the interior of the room, regardless of the style of the design. But, unfortunately, due to standard sizes, furniture board is not always suitable for the production of non-standard furniture models, so it is much easier to make it yourself. If you still decide, our specialists will tell you how to make a furniture panel with your own hands at home.
What is a furniture panel?
Furniture panel is one of the types wood materials, which are produced by gluing planed bars made exclusively of wood. This material is characterized by fairly high strength and environmental friendliness, due to which it is equated to solid wood. The only difference is the peculiar checkerboard pattern that is obtained as a result of connecting the beams. Furniture panel is used not only for making wooden furniture, but also in the finishing and construction sectors.
Important! Working with furniture panels requires at least basic carpentry skills and knowledge, since incorrect processing or the use of this material may lead to deformation of the finished product.
Advantages of using furniture board:
- Environmental friendliness. It is not an allergen and does not emit toxic substances into the environment.
- The finished furniture looks very beautiful and is similar to products that are made from solid wood.
- Practicality. Even if any damage to the fittings occurs, due to the homogeneity of the wood structure, it can be easily repaired.
- High service life of finished products.
- Due to the natural structure of wood, aesthetic properties are improved.
- The formation of cracks, shrinkage and various defects during operation of finished products from furniture panels.
- Opportunity to create a future piece of furniture the right size and models.
- Furniture made from this material regulates the level of air humidity and absorbs harmful substances.

Types of furniture panels
Depending on the manufacturing technology, the following types are distinguished:
- One-piece type. Such a shield consists of spliced lamellas, the combination of which forms a solid surface. Because of its integrity and strength, this type is also called single-layer or massive. For its production it is used exclusively wooden slats, bars or boards. They are glued together only in the direction of the fibers. The thickness of the finished shield varies from 1.5 to 6 centimeters.
- Spliced type. This type is made exclusively from small bars, which are glued together along the length or width. The thickness of such a shield varies from 1.1 to 6 centimeters.
Important! In a joined-type furniture panel, the number of middle layers should only be odd and with strict observance of symmetry during installation.
Also, depending on the quality of wood processing, furniture panels are divided into classes:
Important! In this case:
- Grade A - complete imitation of the natural texture of wood;
- Grade B—uniform surface, no defects;
- Grade C - presence of small knots and mechanical damage.
Most high class provides for the complete absence of nicks, various deformations and damaged areas on the surface. Middle-class furniture board is characterized by a low price and the presence of a small number of knots on the surface. Low class is characterized by the use of low-quality wood and the presence of knots and surface defects.
Base materials
Before gluing a furniture panel with your own hands, you should also take into account the type of wood that is used to make it:
- Pine. Due to the presence of a large amount of glue in the wood, the finished furniture board is highly durable and elastic.
- Oak. Such shields are intended for the production of load-lifting frames, as they have quite high strength. Due to their beautiful texture, they are ideal option for making furniture. Its only drawback is its high price.
- Larch. Also suitable for further furniture production. It has a beautiful wood texture, a wide variety of different color shades. The most important advantage of this material is its high resistance to moisture and, accordingly, it is resistant to rotting.
- Chipboard. Furniture panels made from this material are characterized by rather low strength, budget price and high susceptibility to moisture.
Important! Furniture board based on chipboard is not safe due to the presence of this material binder resins.
How to make a furniture panel from wood with your own hands?
The process of making furniture panels is quite simple, even at home. The most important thing is having the right tools and knowing how to use them.
Necessary equipment
To work with wood, you should prepare the following tools and materials:
- Circular Saw;
- Drill;
- Milling machine;
- Long ruler
- Electric planer;
- Belt and surface grinders;
Important! If you do not have the opportunity to purchase these machines, then an excellent analogue would be emery cloth, put on the block. A significant disadvantage of this method is the duration of the grinding process.
- Reismus;
- Roulette;
- Clamps;
- Level;
- Hammer;
- Pencil;
- Lumber;
- Adhesive for furniture panels;
- Plywood or thin slats.
Important! When choosing lumber for making furniture panels, you should take boards 2.5 centimeters thick. This is due to the fact that before gluing they will be subject to grinding, due to which the width of the bar will decrease by 0.5 centimeters.
Step-by-step instructions for gluing furniture panels
After you have prepared the necessary equipment, you can begin to work directly.
- Place the boards in the desired position so that the annual rings are most optimally located. Sand the ends of the boards.
Important! In order not to forget the correct layout of the boards, before disassembling, draw a triangle on the surface.
- Next comes the gluing process. To make it go much faster, you can stack the boards and coat several ends with glue at once.
Important! To prevent the glue from drying out quickly and to give you more time to assemble the workpiece, you can wrap the coated areas with a plastic bag.
- Using a clamp, tighten the glued wood.
- Dry the finished workpiece and sand it, while removing traces of glue.
Important! To remove wood fluff from the finished product, you can cover the surface with water, due to which it will rise and be easily removed during sanding.

Basic methods of connecting panel plots
In order to cope with the warping of the board caused by the curling of the lumber, you can use the following methods:
- Gluing lamellas on dowels or using finishing tips. This type of fastening is used to fix short boards. In this case, a tip with a tongue-and-groove assembly is used, which is connected flush to the lamellas.
Important! Depending on the further use of the product, the tip may protrude above one or both layers.
- If the future product will be located in a room with high humidity, you should not join the workpiece with glue. In this case, it is best to use bonding to compensate for wood swelling.
- Depending on the future product, flashing strips can be used to make the workpiece.
- Powerful coupling is used if the future product will be used in conditions of high humidity and with constant mechanical load.
- Gluing onto dowels. This method requires the mandatory use of a drill stand and stop to ensure that the holes are located with perfect accuracy. This is due to the fact that due to incorrect placement, the geometry of the future product will be disrupted.
For carpentry needs, a fairly wide range of adhesive materials is used: various types of PVA adhesives, polyurethane compounds, epoxy resin, contact adhesive, etc. The choice is the most suitable option glue is produced with a focus on the following project features:
- characteristics of the tree itself (oily content, level of adhesion, etc.);
- characteristics of the loads that will fall on the seam (including shocks and vibrations);
- conditions in which the product will be used (humidity, temperature changes, exposure to moisture).
You can learn about the working properties and areas of application of the main types of wood glues.
How to glue wood correctly?
Carpentry adhesives are applied in a thin, even layer to both surfaces to be joined. The only exception is the technology of wood gluing polyurethane glue: in this case, the material is applied to one of the surfaces, and the second is moistened (slightly moistened with water). Applying the compound in excess does not improve the quality of gluing in any way, but only leads to wasted material consumption and smearing of surfaces with squeezed out excess (by the way, this adds headaches at the finishing stage).

When gluing a tenon-groove joint, only the cheeks of the tenon and the walls of the groove are lubricated with glue. This gluing method provides the most reliable connection: the joint is glued “tightly”, not inferior in strength to the surrounding wood. Applying the compound to hangers does not improve the quality of gluing; all you get in this case is just excess bleed through and a waste of time, which is especially valuable in complex multi-component assembly.
What is the most effective way to apply glue?
It is important to distribute the glue over the surface of the wood in an even layer, so you should not limit yourself to simply squeezing strips out of a bottle or tube. For smearing, a small brush with stiff bristles is usually used. But the simplest toothbrush will be a more effective assistant: bristles of optimal stiffness will carefully and evenly distribute the composition over the surface, providing an optimal adhesive layer.

Is it necessary to degrease surfaces and what is the best way to do this?
When gluing wood to wood, there is no need to degrease the surfaces. Although in some cases, for example, when working with oily rocks, this will not be superfluous. In this case, it is advisable to degrease the wood before gluing with white spirit.
When gluing dissimilar elements: wood with plastic, glass and other materials with low adhesive properties, the degreasing process is more important. Degrease only one of the surfaces, wiping it with white spirit.
How tight should I tighten the clamps?
It is important to understand that the strength of the gluing does not depend on the amount of pressing force, but on the quality of surface treatment and their accuracy of fit. There is no need to tighten the clamps too much. A small amount of glue showing through is a sure sign that sufficient clamping pressure has been created.
The use of clamps is not always advisable. If we are talking about gluing small crafts, for example, wooden boxes and boxes, you can use tape or masking tape to tighten them, but, again, provided that the joints are well fitted.

How long does wood glue take to dry?
We talked in detail about the working properties of the main types of wood glues in. To what has already been said, we will add that heat, dry wood and low air humidity are factors that speed up the drying process of the glue. Cold temperature, high humidity environment and the wood itself, on the contrary, slows down drying.
How to clean a surface from dried glue?
It makes sense to remove excess glue from the surface of the wood either while it is completely fresh or when it has completely hardened. If you rush to sand a damp area of wood, you will most likely end up with an even greater aesthetic defect when the fibers deformed by sanding dry. The hardened glue is cleaned off manual grinding(along the fibers) or cut with a chisel.

Before application decorative finishing Check to see if there are any stains left on the product. Otherwise, traces of dried glue will appear under the finishing compound. To more effectively detect defects, wipe the surface of the wood with a cloth soaked in white spirit.
Professional tricks for flawless gluing
A tape clamp is an excellent assistant in matters of miter gluing. This clamp distributes pressure evenly across all corner connections, guaranteeing perfect gluing without deformation of corners and other defects. The absence of a tape clamp is not a reason to give up perfect gluing of miter joints. When gluing large surfaces at home, it is advisable to use a toothed spreader. If desired, it will not be difficult to make it yourself, for example, from an unnecessary plastic card. Use masking tape to protect the surface from squeezed out adhesive. Plastic covers used as gaskets will prevent unpleasant surprises in the form of dents in the fixation areas. Tape and quick clamp will become your assistants when gluing together large projects at home.