Tatyana Zhukova
Moscow
I want to express my gratitude to the DomServiceStroy company, its management and employees. I ordered from them the design and decoration of the new office of my travel company. How everything should look, represented only in general terms. And I had no idea where to get the materials to implement my ideas. Therefore, the services of the designer of the company were very useful to me. I just voiced the main points that were important to me, together they determined general style. Then I chose the best of the three options offered to me. Now my office looks almost like in the picture, clients are immersed in the atmosphere of relaxation as soon as they come to us. And what is especially important for me, they did not miss the deadlines for the completion of the object. Opened when planned.
Svetlana Sergeevna
I bought an apartment on the secondary market in a state that needs repair. I decided to turn to professionals, since there was no time to understand the intricacies of the process myself. The firm was advised by friends, I turned to DomServiceStroy, after reviewing the reviews on the Internet, and was satisfied! The company's specialists took upon themselves not only the actual execution of the work, but also the coordination of redevelopment (I combined the bedroom with a balcony). Made a project. From a larger repair was cosmetic, they made it to me on a turnkey basis, after agreeing on all the details. All I had to do was go into the long-awaited own housing, which began to look like new. Thank you very much!
Alexander
The apartment was purchased in a new building, so there was a lot of work. It was necessary to separate the electrician, and install partitions, and solder the pipes. We contacted DomServiceStroy. We agreed that I pay for the work, plus for every little thing if necessary. And I buy large purchases (solutions, pipes, taps, etc.) myself. All points were signed in the contract, paid in fact only for the work. At first, he came every day to monitor the progress of work, then I realized that the company is serious, they do everything in good faith. So I only went on weekends. As a result, the repair was done about 8 weeks. And then, because my wife and I chose a bath and wallpaper for a long time. In the end, the result of the repair coincided with expectations. Satisfied with the quality and timing. Thank you.
Julia and Vladimir
Moscow
Good afternoon We would like to leave a few nice words to the specialists of the DomServiceStroy company for the repairs that they just recently completed in our three-room apartment. You have completed a truly difficult task, decorating and tidying up our children's room, our room, Big hall and other areas of the apartment. We were delighted with the decision to combine a small and unnecessary balcony with big room. Now in that corner there is a real recreation area overlooking the park and the river. Children are delighted, they now have everything for complete happiness - bright colors in the interior of the room with heroes of their favorite cartoons, a lot of free space around. We ourselves are happy just like children, thank you very much!
Stanislav
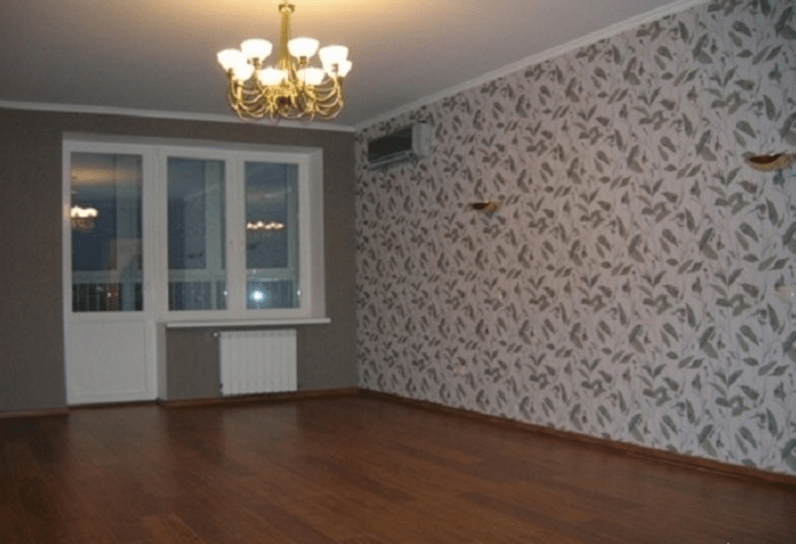
A well-made repair lasts 8-10 years, but sometimes residents get so bored with old interiors that they want to at least update them a little, make the room more comfortable and beautiful. Our company will redecorating on a turnkey basis with low costs - the apartment will noticeably change, and the standard of living will increase.
When do you need to make cosmetic repairs to your home?
It is enough to look around your house with a critical eye to understand that the time has come. We recommend using our services if:
- the first signs of destruction are visible - tiles are chipping off, stains are visible on the ceiling, the floor began to creak, doorways cracks appeared;
- overhaul was carried out more than 10 years ago, cosmetic - more than 5 years, the work is necessary in order to maintain hygiene;
- bad light- redecoration of the room will allow the room to noticeably change, become lighter, more comfortable;
- I want changes, because the situation is morally obsolete or tired;
- a new family member has appeared, so you need to adjust the finish to his requests;
- there is a stale smell in the apartment, or the room has turned into a warehouse of old things.

We are sure that it is also necessary to make repairs when changing social status, obtaining a new position and increasing income. It is also required in order to sell your apartment more expensively, to attract more buyers.
What does cosmetic renovation of apartments include?
The company "Blagodat" carries out professional repairs at affordable prices. This type of restoration of residential and office space does not provide for cardinal changes and significant time costs. It includes:
- drawing up a design project with the development of an individual interior;
- change of flooring;
- painting surfaces, pasting ceilings and walls;
- painting doors and windows of the apartment;
- painting of batteries, risers, heating pipes;
- work with light - installation of additional lamps.

Repairs carried out by our specialists are necessary when the premises do not have significant problems, are not dilapidated or emergency. Finishing will update the interior, add coziness and comfort for all family members.
Cosmetic repairs - price per m2
We offer to repair apartments inexpensively - without sacrificing quality, using only proven materials and with strict control of all processes on our part. How much does cosmetic repairs cost in the BlagoDat construction company?

- 1-room apartment 33 sq.m. - from 193,050 rubles;
- 2-room apartment 42 sq.m. - from 245,700 rubles;
- 3-room apartment 60 sq.m. - from 351,000 rubles;
- 4-room apartment 73 sq.m. – from 427,050 rubles.
Timely finishing is a way to save you money, as it will protect against further damage, which will require more complex manipulations. The cost of a cosmetic repair is several times lower than a major one, and when carrying out turnkey work, you will additionally receive a design project as a gift and a 15% discount.

How do we do cosmetic repairs?
In our company, cosmetic finishing takes place without headaches and nerves for the customer - quickly, efficiently, professionally. We work according to the following scheme:
- We receive the application and agree on the time of the visit, when it is convenient for you;
- We take measurements, consult, find out your wishes - this is completely free of charge, you are not obligated to anything;
- We draw up a contract with the calculation of the estimate, agree on its terms, sign;
- We order and deliver Decoration Materials to the object;
- We spend quality repair, completing it just in time;
- You accept the object, get a guarantee for it.

BlagoDat is the market leader in finishing firms in Moscow. Such a high achievement is due to the professionalism of employees, loyalty to the client, compliance with the terms of the contract and attractive prices. We value our reputation, so there is no doubt about the quality of the cosmetic repairs carried out - it will be done exactly the way you wanted!
From this article you will learn:
- What are the stages of a room refurbishment?
- How to prevent the recurrence of cracks after cosmetic repairs
- How to save money by renovating a room
- How much does a room refurbishment cost?
Quite often, the redecoration of a room in Moscow drags on for many months, it begins to seem too costly, impossible and boring. However, any routine can be turned into something interesting and even an exciting activity. Redecorating a room is not as difficult as it seems at first glance. The main thing is to think carefully in advance and strictly follow the plan.
Stages of redecorating a room
Redecoration of the room involves only updating the finishes. The refurbishment of the room does not include any major changes in the heating, electrical, air conditioning and ventilation systems. Possible small sizes repair work replacement of doors and windows.
Carrying out the correct redecoration of the room is subject to several principles:
- Redecoration of a room is always done from the ceiling to the floor, that is, from top to bottom.
- Sequence of operations "from dirty to clean": first the most time-consuming and dirty.
- If repairs are made in a multi-room apartment, you should start from the farthest from front door rooms and gradually move towards the exit, the final stage is a loggia or balcony.
- Start repair one-room apartment can be directly from the kitchen or room.
First, draw a sketch of the room
The sketch will help to imagine the future interior and draw up a plan for redecorating the room.
If you are not familiar with computer program to build volumetric images, you can simply print a photograph of the room and overlay a sheet of tracing paper on it. Then, with the help of pencils and felt-tip pens, experiment and choose the right shades for the ceiling and walls. Decide what color you want to get in the room: warm or cold, colorful or plain. Decide if ornaments are needed in the future interior, and if so, what kind and size.

Probably, drawing a sketch, you will want to rearrange the furniture, change the upholstery or curtains. The resulting drawing will help you see where you need to focus, complement or diversify the space with decor items.
In the drawing of the future interior, it is desirable to indicate:
- Location of furniture. Highlight the walls that will constantly be in your field of vision in order to decorate them with the highest quality, pleasing to the eye, finishing materials.
- Optimal placement of lamps and chandeliers for the best lighting.
- Availability electrical sockets in the places of installation of household appliances, so that later it would be possible to design a competent installation of electrical wiring in all rooms.
- Carefully thought-out arrangement of various decor items(for example, paintings, posters, mosaics, etc.).
The correct room redecoration plan contains information about the chosen finishing option: wallpapering, painting, etc. The division of rooms into separate zones is also reflected in the sketch. For example, for visual zoning, sometimes they focus on one of the walls, painting it in a different color.

Prepare your room for a makeover
Before starting cosmetic repairs, you need to take out the furniture or cover it with plastic wrap, moving it to the center of the room.

In order to additionally protect the already repaired room from construction dirt, dust and damage, a polyethylene film is hung and fixed from the outside of the door.
Before redecorating the room, it is necessary to prepare all surfaces that are planned to be painted or wallpapered. Old wallpaper after their abundant wetting is removed with a spatula. The paint is also peeled off with a spatula. If irregularities, cracks or dents are found, they are puttied. After that, the surface is primed.
The walls and the stream for painting are prepared especially carefully. Sometimes you have to putty several times, followed by grinding sandpaper(dry method) or damp sponge (wet).
When redecorating a room involves finishing with overhead building materials (drywall, panels, plywood, etc.), it is enough to make sure that the surfaces do not need additional leveling.
In preparation for the redecoration of the room, the frames are removed from the electrical outlets and the plinth from the floor. Window sills, door and window panels are sanded with sandpaper, puttied and primed if necessary.

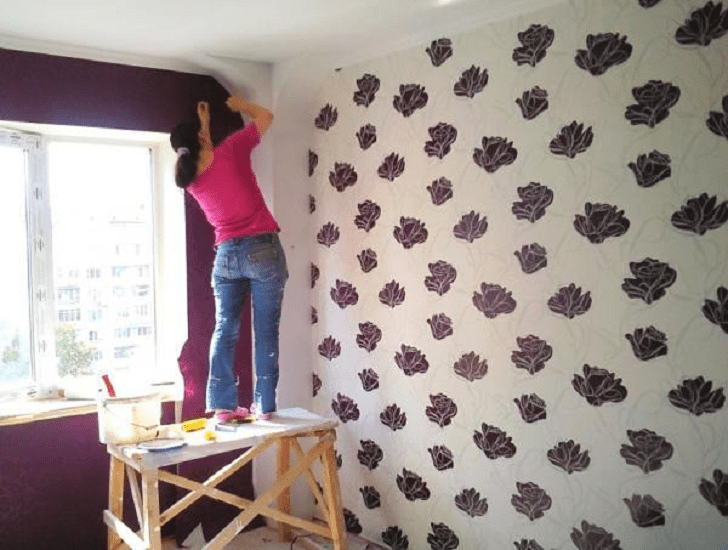
How to make an inexpensive redecoration of a room with your own hands
Not everyone has enough money to hire a construction team. In addition, where is the guarantee that the specialists found on the ad will perform the work efficiently. Therefore, if a radical “coup” of the interior is not planned, then you can make cosmetic repairs with your own hands. This is a fairly simple and interesting job. The most important thing is to buy in advance necessary materials, clearly follow the sequence of actions and do everything carefully and in a good mood.
Before starting the redecoration of the room, you must purchase:
- Wide and narrow spatulas.
- Primer.
- Dry putty or ready-made.
- Wallpaper.
- Flat brush, rag.
- Skirting boards for ceiling and floor.
- Floor covering (linoleum, laminate, etc.).
- Roller with a long handle.
- cuvette.
- Glue for linoleum (if necessary).
- Plastic film and adhesive tape to cover furniture.
Preparatory work, wallpaper removal
To make it more convenient to carry out redecoration of the room, it must be freed from furniture. Non-lifting cabinets can be disassembled or moved away from the wall and carefully covered with a film, fixing it with tape or a stapler.
When everything superfluous is taken out of the room, you can start dismantling. First of all, skirting boards are removed: wooden - with a nail puller, and plastic - with a screwdriver or a screwdriver.

Then remove the old wallpaper, prying them with a spatula below. If they are difficult to remove, then with the help of a roller they are moistened with hot or warm water. After about ten minutes, the wallpaper comes off with a “light movement of the hand”. Now for sale special remedy, which can be used to facilitate this work.
Wall alignment

This process is not as difficult as it might seem at first glance. Besides, it's quite entertaining. With self-decorating the room, you can verify this. The required amount of primer is poured into the cuvette, the roller is lowered into it. The primer is applied to all walls.

The primer composition dries quite quickly, after an hour you can proceed to puttying the walls. In the store you can buy a ready-made mixture. It is sold in sealed bags.
Dry putty is also sold in paper bags. Before use, it is poured into a bucket, filled with water in the ratio indicated in the instructions, and thoroughly mixed with a construction mixer. In the absence of a mixer, the putty mixture is prepared in small portions with a spatula.
After a short infusion of the composition, you can begin to level the walls. To do this, with a small spatula, the mixture is applied to the entire blade of a large spatula, then applied to the wall and smeared evenly over the surface. So continue to do until the complete elimination of irregularities.

At the end of the alignment of the walls, the putty should dry out within a day. The cracks that appear at this time are moistened with water and rubbed with a spatula. After 24 hours, you can start pasting the walls with wallpaper.
- Ceiling renovation.
Without wasting time, while the walls are drying up, you can do a redecoration of the ceiling. The easiest way is to paste over it with PVC panels. They start work from the center, having previously drawn a straight line that divides the ceiling into halves.

Need to apply glue to reverse side tiles around the perimeter and in the center. After attaching the panel to the marked line on the ceiling. Then, having smeared the second tile with glue, install next to the first, trying to make the seam less noticeable. If the redecoration of the room is performed by one person, then it is more convenient to apply the adhesive on several tiles at once and then attach them to the ceiling.
Seeing that a solid tile does not fit near the wall, you need to cut off a piece right size. The tile is easily cut with a construction knife. The tiles near the window and on the opposite side are cut in the same way. After gluing, the tiles can be painted with paint, water-based or latex. Such a coating retains its original appearance longer and attracts less dust.
wall decoration
Having planned the redecoration of the room, they purchase wallpaper for pasting the walls in advance. You need to buy taking into account a small margin, so that you definitely have enough. If the wallpaper is patterned, their consumption increases to fit the pattern.
The industry now offers a huge range of wallpapers. Before buying, it is a good idea to read information on the Internet and see samples. This will help determine what you need for the redecoration of the room: paper wallpaper, non-woven, vinyl or paintable. For each of these types, special adhesives are sold. There is also a universal wallpaper glue suitable for any type of wallpaper.
Wallpapering begins by measuring the height of the wall from ceiling to floor. It should not be forgotten that you need to glue the wallpaper from the window to the right.
The resulting wall height is set aside on the wallpaper and cut off. In accordance with the instructions, the adhesive composition is prepared and applied with a brush to the wrong side of the wallpaper. When gluing wallpaper that is dense in texture, it is recommended to coat with glue the section of the wall where the prepared segment is applied.

Doing a redecoration in a room with your own hands, it is more convenient to glue the wallpaper together. In the case when the redecoration of the room is carried out by one person, you can move the table closer to the wall to be glued or put a stepladder.
The upper part of the wallpaper is applied to the top of the wall, carried out over this area with a clean, dry soft cloth. Then, using the same rag, carefully press the wallpaper in the middle and, making movements from the middle down at an angle of 45 degrees, glue the middle and lower parts. Then, having adjusted the pattern, measure and cut off the next piece and paste it in the same sequence.

So all the walls are pasted over. The places where the wallpaper is joined are given Special attention. It is better to stick wallpaper not overlapping, but end-to-end - this way the seams are less noticeable. Insufficiently high-quality gluing of joints can be corrected with a special glue for seams.
When pasting wall sections where electrical sockets and switches are located, turn off the mains voltage and remove the housings of electrical appliances. At the end of the cosmetic repairs of the room, they are mounted in their original place.
floors
Making cosmetic repairs to the room in which the floor parquet boards are in excellent condition, but the varnish is already outdated and lies unevenly, the floor is cycled. It is quite difficult to work with a manual cycle, so it is better to buy or rent an electric one. After removing the old varnish, the parquet is thoroughly vacuumed. Then, to improve its appearance, a piece of paint mesh is drawn along the boards in the direction of the fibers.

Parquet cycling must be carried out after all cosmetic repairs in the room, but before wallpapering. Otherwise, it will be possible to scrape the floor only with a manual scraper or glass, and this is too laborious a process. The thing is that during the operation of an electric cycle, a lot of dust is formed, which is almost impossible to remove from the wallpaper.
Cover parquet floor better varnish, made on water based. It is odorless, dries quickly and is not as harmful as synthetic. After applying the first layer of varnish, it is allowed to dry for 40 minutes, then covered with a second layer. Four hours later, the parquet is varnished for the third time.

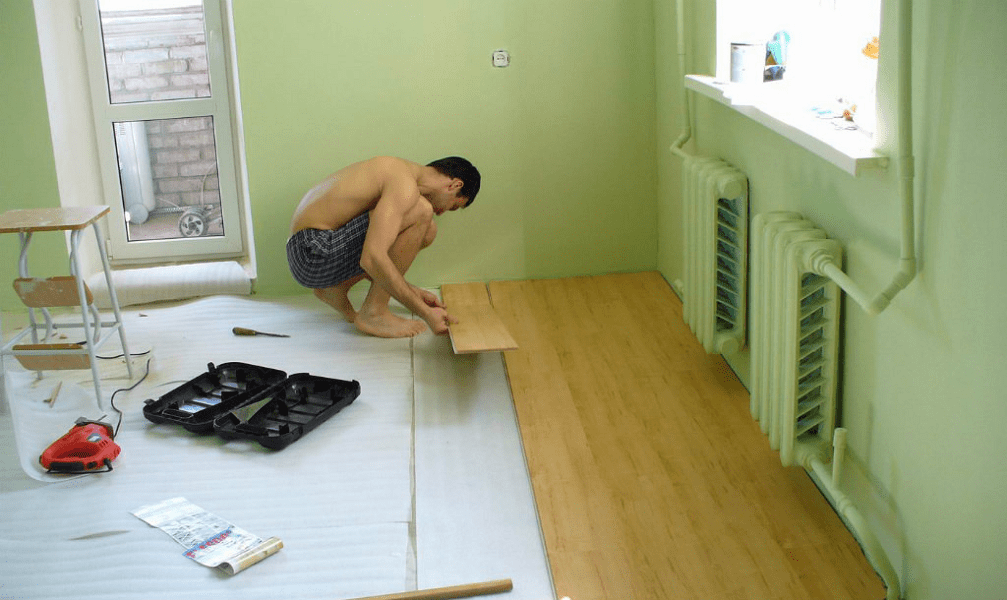
Laying laminate flooring is a great alternative for redecorating a room when there is no way to scrape the floor and buy expensive construction equipment. By the way, the laminate can be laid on the old base, if it is sufficiently even.
With independent cosmetic repairs in a small room (for example, in Khrushchev), you can save money by laying linoleum. Before laying, he is allowed to straighten, then glue is applied and glued. For irregularities on the floor, use a solid substrate (for example, plywood sheets).
Skirting boards
When redecorating the room, after the final drying of the wallpaper, ceiling plinths are mounted. PVC tile adhesive is applied to the wrong side of the plinth, pressed against the wallpaper in the right place and held for 10-15 seconds. Then glue the next one in the same way.

The floor plinth is fastened with screws, wires are laid in its groove, then the upper part is put on.
How to prevent cracking after redecorating a room
As practice shows, cracks quite often appear on ceilings with rust (joints of floor slabs) after cosmetic repairs. Therefore, experts recommend using a "spider web" - this is fiberglass wallpaper, the loose structure of which prevents cracks. It has a thickness of up to 2 mm and is sold in rolls.

At wooden floors or large irregularities, it is recommended to completely cover the surface with a masking grid with cells of 2x2 mm before gluing the "cobweb". It is puttied, sanded, primed with diluted wallpaper paste and paste over with a "cobweb". Such a "pie" reliably protects the ceiling from cracking.
How to save money by redecorating a room
To save money when redecorating a room, you must adhere to the following rules:
- Work hard and not be lazy, and also not be afraid of new types of work.
- Everything capital that has lost its appearance, if possible, do not need to be changed, you can slightly retouch, update.
- When redecorating a room, you should try to extract the maximum savings where it is not conspicuous and does not impair the quality of work.
- Distribute cash and labor costs over time. For example, when planning a redecoration of a room in the summer months, up to this point you need to gradually prepare in order to do everything quickly at the appointed time. In addition, the cost of cosmetic repairs of 200-300 thousand rubles is quite significant for the budget, and breaking them down into parts and investing small amounts within a year are quite feasible.
Tools
It's no secret that good professional tools make work easier. However, they cost a lot of money, so buying them is unprofitable. It is less expensive to rent all construction equipment for redecorating a room.
Season
The best time of the year for redecorating a room is the beginning and middle of autumn. It is still warm outside during these months, and you can do outdoor work, with interior decoration- open windows. In addition, before the winter recession of repair work, the cost of building materials is significantly reduced. Consequently, savings can be up to 15% when selling summer non-liquid items. These are considerable sums. For example, with the planned cost of redecorating a room at 200 thousand rubles, you get a good “bonus” of 30 thousand.
Construction sales

Separately, mention should be made of illiquid assets. The main expenses for redecorating a room are for finishing materials (putty, plaster, mounting glue, sealant), which have a limited shelf life. Construction companies try to sell them before the expiration date. Sometimes the prices are just “symbolic”, stay tuned for sales. For example, professionals will not take a package of 50 kg of Aquasloy, which will become unusable in a couple of months, and this amount is quite enough for you to redecorate a room, and even save it.
Plumbing
When redecorating a room with your own hands for beginners, one of the most pressing issues is the replacement of plumbing. If it has lost its aesthetic appearance, but functions normally, it can be cleaned and painted. But if there are cracks and chips, you will have to change it.
Often new settlers (especially elite new buildings), entering new apartment, make major repairs and change the installed plumbing to a more prestigious and expensive one. And absolutely new equipment ends up in a landfill. On this landfill scavengers have created a profitable business.

On the phone, of course, strangers do not consult. Only through "ours and ours" they are invited to the back room and offer a choice of carefully washed sanitary ware at a cost equal to 1/3 or 1/2 of the market price.
Construction garbage

An equally thorny issue that arises when self-fulfillment overhaul rooms, this is the removal of construction waste. The procedure is quite costly, besides troublesome. An easier and easier way is to collect garbage in bags of plastic sackcloth and put it in a barn, closet, etc. at the end of the redecoration of the room. Then gradually throw it into the house garbage container, there is no crime in this.
Laths, boards, timber and plywood
During the redecoration of the room, plywood and wooden slats. In order to save money, you can buy non-planed slats, slabs. The croaker is sold raw. It is necessary to purchase it in advance in March-April and keep it until autumn in a dry room. Then you will get raw materials that are not inferior to edged lumber in terms of wood quality.
For redecorating a room, plywood may be required. Waste packaging plywood from used containers can be made water resistant as follows:
- We buy a ten-liter canister and two PVA putties; it is cheap and the consistency resembles a very liquid PVA glue.
- We cover the floor in non-residential premises (in the country house, in the barn, etc.) plastic film. The air temperature should not be lower than +13 degrees.
- We lay the plywood, pour a puddle of putty into the center and disperse it over the entire sheet with a brush.
- We cover the plywood with plastic, lay the next sheet, putty, etc.
- On the resulting stack of plywood impregnated with PVA, we put a heavy load (pieces of concrete, metal, bricks, etc.), evenly distributing it over the entire area.
- A week later, we repeat the procedure, turning each sheet of plywood over.
- Waterproof after two weeks flat plywood will be ready for use. Additional exposure under oppression will only improve its quality.
Quite often they post ads for the sale of used cargo pallets. It is easy to get thick timber and boards from them, which may be needed when redecorating a room.
Materials for redecorating a room
Sheathing walls and ceilings with laminate or MDF is a very cheap option for redecorating a room. Using wooden crate from the slab, in most cases, surface leveling is not required, which also saves money, time and effort.

You will get an even more profitable option for redecorating a room if you sheathe the wall with laminate only up to half, and paste it over with non-woven wallpaper up to the ceiling. Here there is savings, simplification of labor and practical benefits - the most problematic sections of the wall are reliably protected by durable material.
To cover the floor during the redecoration of the room, the most advantageous material is marmoleum. In the vast majority of cases (90%) no pre-treatment is needed. However, it is categorically not suitable for bathrooms and toilets.
If you want to have a floor in the room that looks like a plank, you can use a laminate. It is slightly more expensive and requires leveling the base.
The walls of the bathroom during cosmetic repairs can be pasted over not with tiles, but with laminated hardboard. It is quite hygroscopic and does not require pre-training surfaces.
Where it's hard to save
When carrying out cosmetic repairs of a room, there is a type of work where it is impossible to do without specialists - this is the replacement of electrical wiring. You can hire an electrician to service your home. Then it will turn out to save a little, and hacking is not in his interests.
Cooperate with the company "My Repair" - it is reliable and prestigious. The people who work here are professionals. the highest level. The company "My Repair" operates throughout Moscow and the Moscow region.
After reading the recommendations, cosmetic repairs can be done even by those who have never held a spatula in their hands. The article was written based on personal experience. If a non-professional woman was able to update the room, then you will succeed all the more.
Not everyone has the means to hire a construction team to carry out repairs. In addition, people who are not always found on the ad will really do everything in good faith. If you do not need a global reorganization of the premises, you can do the cosmetic repairs yourself. This is a very fun and easy process. The main thing is to purchase everything you need, follow the phased work, do everything carefully and with soul.
Necessary materials, tools
Here's what you need to purchase before you start your redecoration:
- Spatulas - wide and narrow;
- Primer;
- Putty (dry or ready-made);
- Wallpaper;
- Ceiling tiles and glue for it;
- Flat brush, rag;
- Skirting boards for floor and ceiling;
- Floor covering (linoleum, laminate);
- Roller on a long handle;
- cuvette;
- Glue for linoleum (if you lay it);
- Film, adhesive tape for covering furniture.
Preparatory work, wallpaper removal

Remove furniture to free up space. Put things from the cabinets in large bags, bags and also transfer them to another room. If the cabinet is heavy, there is no way to tilt it to another room, disassemble it by carefully folding the components. If this method does not suit you either, move the cabinet away from the wall, cover it on all sides with a wide cellophane film, secure it with a stapler or tape.
After everything unnecessary has been removed from the room, proceed to dismantling. First tear off the old skirting boards. If they are wooden, it is convenient to remove them with a nail puller. If this plastic skirting boards on screws, a screwdriver or screwdriver will help.
If you are doing Khrushchev repair with your own hands, you want to save money, you can lay linoleum on the floor. To do this, they roll it out, put it wrong side up, let it rest, then apply glue, turn it over and glue it to the base. If the floor is uneven, you can lay a solid underlay, such as plywood.

When the wallpaper is completely dry, drape the top of the wallpaper with a ceiling plinth. To do this, apply glue to its wrong side for pvc tiles, attach to the desired place and hold for 10-15 seconds. Once you've glued the first one, move on to the second one.
You will remove the wires in the wall part of the floor plinth, screw it onto the screws. After that, put on the top of the plastic plinth.
- Read an article about with my own hands.
Video about cosmetic repairs in 3 days:
The issue of repairing a room almost always rests on the budget for future work. Most often, the owners of an apartment or house are faced with a choice - to do a cosmetic renovation of the room with their own hands, without putting it off indefinitely, or to plan a major restructuring with redevelopment and a major design update for an indefinite future. Most masters in such a situation recommend a redecoration of the room, during which the vast majority of problems with the interior of the room can be solved.
How to approach the organization of repairs in one room
Starting repairs in a room is always inconvenient and even scary, especially if there is not enough experience, and of the assistants at hand, there is only a cheat sheet on doing a do-it-yourself room renovation for beginners. But, as a rule, uncertainty and doubts pass when the scope of future work becomes clear and the question is resolved in what sequence to make repairs in the room.
Therefore, the first step is to draw up a master plan for cosmetic repairs, and most importantly, before trying to make repairs in the room, it is necessary to draw up a detailed estimate for the purchased materials and consumables. This is a prerequisite, even for repairs in a small room you will need to make a list of several dozen items.

Where to start repairs in the room is not important, you can carry out repairs in the sequence that seems more convenient in these specific conditions. Traditionally, do-it-yourself room repairs begin with the most “dirty” or rough work and end with fine finishing procedures.
A typical list of work or a sequence of repairs in a room is as follows:
- The old finish is removed from the walls, ceiling and floor. Removing the floor covering gives the largest percentage of dust and dirt, so it is removed first;
- A rough preparation of the floor is being carried out for further laying of a new floor covering;
- Wiring is being repaired, lamps, switches are being moved and hung, corrugations are laid out for television and Internet cables;
- Walls and ceilings are cleaned and plastered. If the plans for redecoration involve changing the wallpaper to a more modern type finishing, you will need to align the walls gypsum plaster;
- The ceiling surface is leveled in a similar way. For whitewashing or painting with a water-based emulsion, the ceiling is overwritten, plastered with a lime-gypsum mixture and a decorative coating is laid;
- Performed decorative trim walls, ceiling plinths are glued, lining is changing interior doors;
- Fits new flooring, plinths are installed, lamps are hung, switches are being installed.
Of course, at each stage of repairing a room, a photo, a large amount of debris and dust will be generated. Not only will you have to regularly clean the room and take out rubbish blockages, you will need to try to cover areas with already completed repairs with a protective plastic film to avoid dusting the surface.

What not to include in a room remodel
Master finishers often call redecoration work "for three days", in order to update the interior in a room, more, as a rule, is not required. The list of repair measures does not include the most expensive work:
- Redevelopment of premises with the transfer of interior partitions;
- Replacement of the heating system;
- Installation of expensive multi-tiered suspended ceilings;
- Balcony glazing and replacement of windows with double-glazed windows;
- Underfloor heating equipment in the room.
It is clear that all of the listed components of the repair require serious financial costs and the involvement of qualified specialists in the work. It will take more than a day or two to carry out such serious events. In addition, such is the specificity of the repair in the room that, willy-nilly, dust and construction debris spread throughout the apartment. Therefore, the situation is regulated in this way - either cosmetic repairs are made in a single room, or the entire apartment “gets up” for major repairs.
In general, the redecoration plan includes everything that can be done in a couple of days with your own hands for relatively little money.

The main task of cosmetic repair
The main goal of repair work is to refresh the interior of the room, remove minor defects and damage accumulated over the years, which are insanely annoying and interfere with everyday life.
In rare cases, cosmetic repairs are the result of force majeure, for example, the flooding of the room by the neighbors on the floor above or the preparation of the premises for rent. There can be many reasons, but the main thing is still maintaining the premises in a comfortable condition for living.

Properly performed cosmetic repairs make it possible to save on the volume of future overhauls. For example, performing a floor base screed and leveling the walls will at least reduce the time and effort spent on preparing for a major overhaul, of course, provided that the repair of the room with your own hands is done as conscientiously and efficiently as possible. .
The next stage of repair, distribution of costs and loads
One of the most difficult stages of redecoration is fairly considered to be budget planning and material procurement. Especially if you are planning most repair procedures do it yourself. The reason is simple - amateurs and novice craftsmen have no idea at all how much specific material is required for a particular area of work.
In this case, the problem is solved in two ways:
- Compiled List works and estimates can be shown experienced master, which will help calculate the flow rate by squaring the room;
- Calculate flow on the basis of standard recommendations of building materials manufacturers, increasing the stock of glue, plaster mixtures, wallpaper, flooring by 10% of the calculated indicators.
In the latter case, the cost of purchasing materials will increase significantly, but in the end, the remains of cement, dry plaster and glue can be used to redecorate other rooms in the apartment. In addition, having a list often helps to get a volume discount, so there will be significant gaps in the budget of the future. cosmetic update there should not be a room with a competent organization of the purchase.

Preparatory stages of repair in the room
The first, most time-consuming stage has always been and remains the rough peeling of the walls and ceiling. Usually, repairs in a room begin with the removal of furniture and sealing the front door with a protective awning. You can use thick polyethylene film Or an old blanket. An impromptu curtain will protect the rest of the apartment from noise and dust, which, even with very careful work, the use of a vacuum cleaner and wet cleaning of floors, always accumulates in considerable quantities in the room.
Before repair, lamps must be removed, instead of a chandelier, a cartridge with a light bulb is left in the room. If double-glazed windows are installed in the room, then it will be useful to tighten the window opening with foil before repair. It is clear that the floor covering is also covered with a film, it is easier to roll up the laid polyethylene than to wash out the dirt in the room every evening.
Removing old finishes from walls
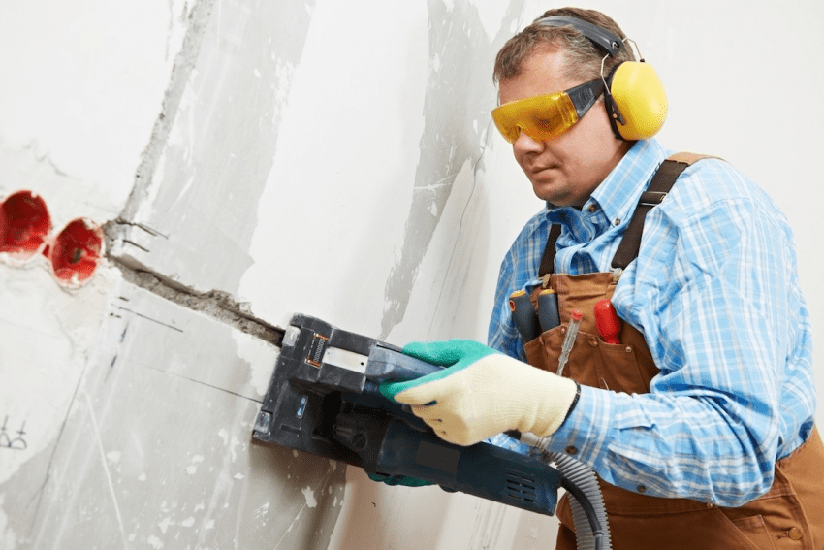
It takes about a third of the planned time to prepare for cosmetic repairs. During this time, you will need to remove the whitewash and wallpaper from the walls of the room. If there are areas with damaged plaster, it will take another day to knock the plaster off the walls.

Old wallpaper is removed either with one panel or scraped off in small pieces for a long time, it all depends on the glue used. Before removing the wallpaper, the surface is moistened with a spray bottle with a small amount of water. After 20-30 minutes, the tapestries can be removed in patches. For especially strong adhesives use boiling water and steam. In any case, after peeling off the old trellises, you will need to go through with a vacuum cleaner and a stiff brush to remove dust and glue residue.
Stripping and restoration of the ceiling surface
The ceiling is free decorative coating much faster and lighter than walls. If the plans for cosmetic repairs include the sticker of polystyrene plates or laying plastic panels, it will suffice to remove upper layer whitewashing.
The situation is more complicated if the ceiling in the room is painted with water-based paint or whitewashed with lime. In this case, it will take at least a day to remove the durable layer of the old finish.
The most common option for restoring the ceiling during cosmetic repairs involves leveling the plane of the ceiling. In any room of any apartment, floor slabs lie with a trim of several degrees, which leads to a difference in ceiling height near the opposing walls of the room from 2 to 5 cm.
If the time and budget for cosmetic repairs allow, then it is best to level the ceiling with high-quality gypsum plaster.

To do this, plastic slats are sewn onto the ceiling and the plane is tightened with a plaster mesh. Reiki-lighthouses are glued with alabaster, guided by pre-stretched marking horizontal cords. The mesh is sewn on dowels. The total time required for the final leveling of the ceiling in the room is 5-6 hours of work.
Can be done in one business day complete renovation ceiling. The next day, you can rub, prime and paint the surface.

Cosmetic repairs to the walls of the room
During cosmetic repairs, the walls are leveled and plastered only in exceptional situations when the situation requires it, for example, the appearance a large number cracks or chipping of plaster. In addition, the total area of the walls of the room, as a rule, is three times the area of \u200b\u200bthe ceiling, which in itself requires a lot of time and materials.
Therefore, during cosmetic repairs, the preparation process is limited to cutting small cracks, followed by puttying and grinding the surface. Sometimes, in order to level the plane of a single wall, especially problematic areas are subjected to grinding with an electric grinder.

In addition, at this stage of the repair work, it is not difficult to change the profile and configuration of the electrical wiring in the room. It is enough to drill channels in the lower part of the walls to the installation site of new electrical outlets, break through the "glasses" for the undercuts and install the outlets themselves. Corrugations with wiring laid in channels can be rubbed with gypsum or alabaster mass. All work will take a maximum of 2-3 hours. At the end of the preparation for finishing, the surface is vacuumed and primed.
Rough floor preparation
After the completion of the most time-consuming work with the preparation of the ceiling and walls, you can proceed to cleaning and preparing the floor. If the floors are concrete, with laminate-based flooring, then cosmetic repairs may be limited to re-laying laminate boards, with or without replacement of the lining material. Most often, damaged plates are changed in the room, after which the coating is polished using wax mastic.
During cosmetic repairs, linoleum coatings are cut out, the base is cleaned to concrete, primed and covered with a heat-insulating lining based on polyethylene foam.
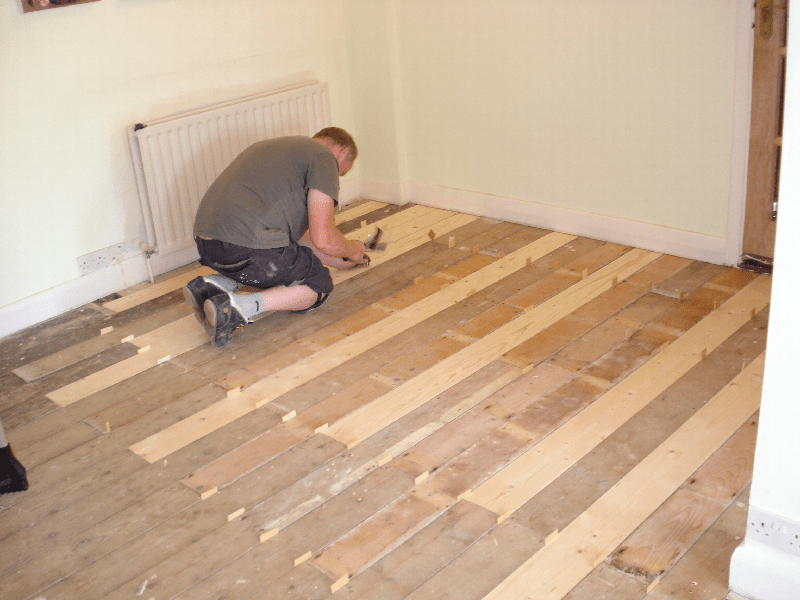
If the room has wooden floors, then first of all the floorboards themselves are cleaned and repaired, then the joints are clogged and minted, after which the surface is polished and prepared for painting.
Don't forget about debris and dust
Any repair work, even the most simple and superficial, is always accompanied by the formation of a large amount of debris and dust. Before repair, you need to prepare two or three polypropylene bags, in which all the garbage from the room will be collected daily. At the end of the day, after each finishing operation, the walls and floor are cleaned of crumbling crumbs and plaster residues, and before finishing, the walls are vacuumed or wet brushed.
If it is supposed to level the walls of the room with gypsum plaster, then the amount of garbage will increase by five to six times. It will be necessary to think in advance and find a way to collect and remove from the premises 150-200 kg of cement-sand garbage screenings. You cannot send it to the garbage chute or garbage cans; you will need to order a special service for the removal of construction waste.
Fine cosmetic repairs in the room
First run fine finish ceilings. Usually the repaired and sanded surface is primed and painted acrylic paint light tones.

If wallpaper is used in the interior of the room, the ceilings can be decorated with non-woven or vinyl wallpaper to match the future wall decoration. A common practice for decorating lamps and chandeliers is the use of imitation styrofoam moldings and decorative ceiling plinths.

The fine finishing of the walls in the room is considered one of the most responsible and at the same time time-consuming cosmetic operations. Even taking into account the fact that half of the walls in the room will be covered with furniture, a certain part of the walls will still be clearly visible to everyone in the room. If during the cosmetic repairs it was not possible to qualitatively level the surface of the walls, you can hide the flaws only under the wallpaper. Best trellis on fabric basis or with a pronounced embossed textured surface. It will take 7-8 hours or a full day to paste over the room.
Repair of doors and floor in a small room
The wooden plank floor of the old layout often has to be hidden under linoleum or laminate. In this case, the surface of the floorboards is polished with a sander, and the joints are sewn together with nails hammered at an angle to the board. At the next stage of the repair, the floor surface is sewn up OSB boards, after which you can lay linoleum or any other type of flooring in the room.

The situation becomes more complicated if the concrete floors are aligned with the level of the screed throughout the apartment. In this case, any floor covering in the room will lead to the appearance of a threshold, so the laying of laminate or parquet must be planned simultaneously in all rooms.
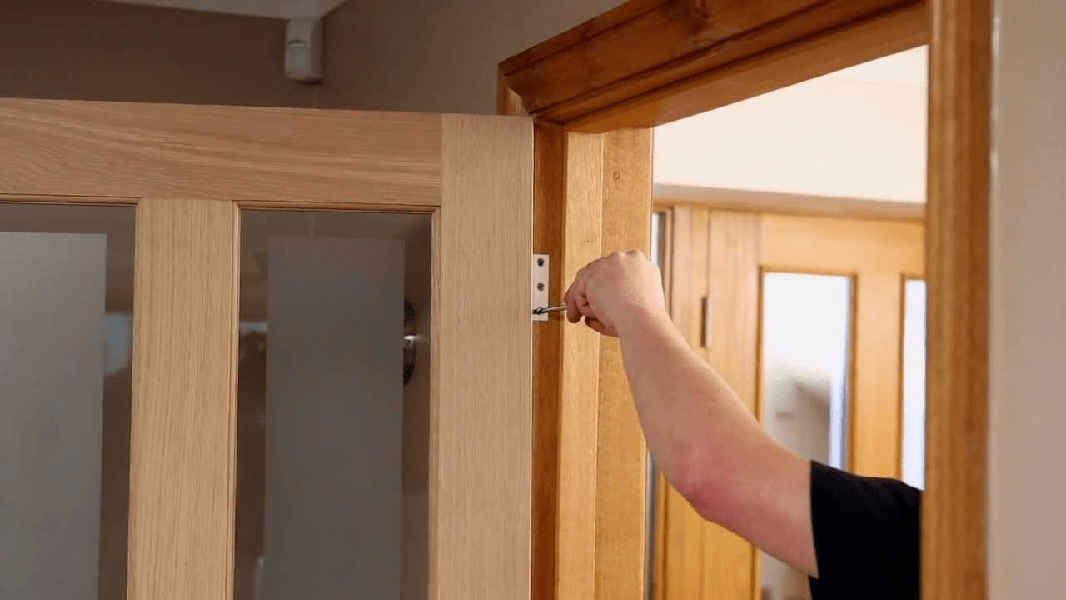
The final stage is the restoration of interior doors. The hatch and the door itself, if they are in good condition, can not be changed, but restored with cleaning and polishing of the surface. External cladding door frame during repairs, they are traditionally replaced with a new one. The replacement of doors with a carrier frame is planned for a major overhaul, usually so that the entire apartment or house has doors of the same style and design.
Conclusion
Repair of a room, even in a cosmetic version, requires careful preparation, first of all, in the details of the future interior of the room, the method of decorating walls and floors. Any attempt to postpone the decision to the future, to do it randomly, as it happens, will lead to a significant increase in costs and increase the time required to restore the room by two to three times.


