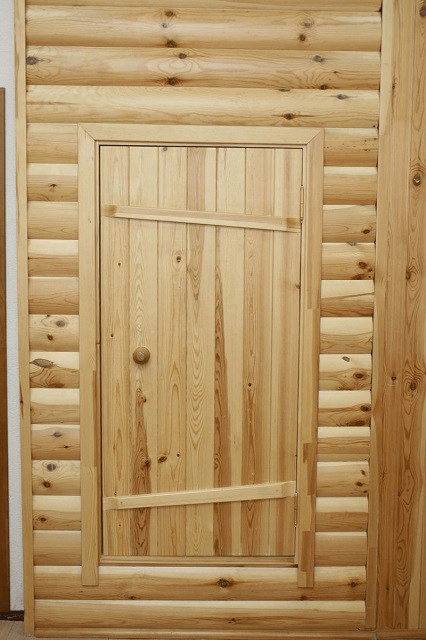
Reliable door in a bathhouse, made with your own hands from wood or other material, not only serves to retain heat inside the building. This is also an element general design, which must meet the aesthetic needs of the owner. Selecting material for bath door need to be given Special attention: the entrance can be made of treated tongue-and-groove boards or lining, lined with insulation. Internal doors do not need heat-insulating properties, therefore both wooden and glass doors to the steam room are considered equally good.
You can make a classic wooden bath door with your own hands without any special skills. But for this you have to choose quality wood, which requires minimal processing. The lumber should not have knots, cracks or traces of rot, and its surface should be smooth. The boards must be well dried, otherwise the door made from them will move.
The best materials for making doors:
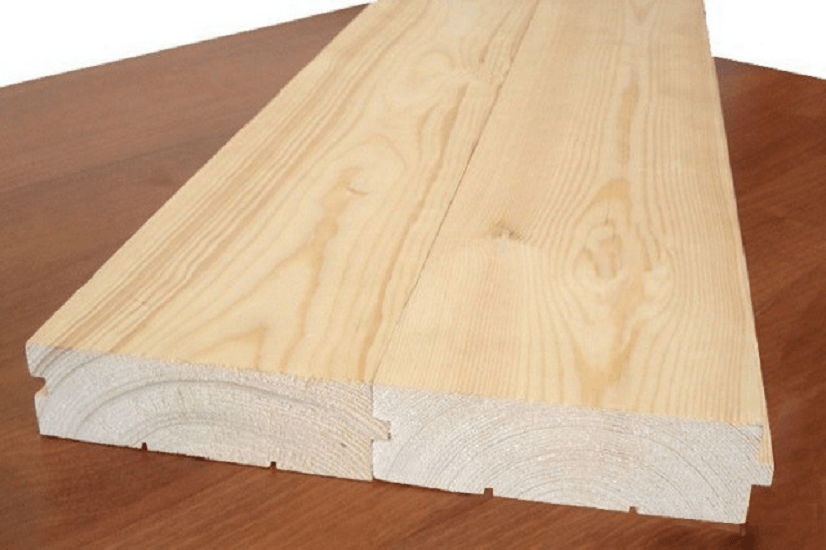
- boards that are processed at the enterprise so that they have a groove and a protrusion (tongue and groove);
- eurolining, which is a ready-made wooden elements with a groove and a tenon for connecting the canvas;
- plywood and bars (suitable only for the entrance area).
If the owner has the skills of a carpenter and necessary tools and equipment, then he can afford to independently make a paneled structure from edged boards.

When making a door for a bathhouse in entrance group you can choose any type of wood: it is less exposed to high temperatures than entrance structure to the steam room. It is better to make interior panels from wood hardwood(oak, linden, etc.) that do not emit resin.
To insulate the fabric, you may need an EPS sheet, roll insulation and upholstery material (leatherette). When making internal doors in a bathhouse, they are not needed.
How to make doors to a bathhouse with your own hands?
There are several ways to make a door leaf that are accessible to a person with minimal woodworking skills:
- assembly of a massive shield from boards and bars;
- production of typesetting fabric from transverse elements (eurolining);
- frame-panel fabric made of sheet material.
Installing a door in an opening consists of the following steps:
- making a box;
- securing the box in the opening;
- hanging canvas;
- insulation of the entrance door.
To make a door to a bathhouse, you need to perform all these operations sequentially. The final result depends on the accuracy of the work and the accuracy of the fit of all parts door block.
Tools
To complete each stage of work, you need your own tools, but if the farm does not have complex instruments, you can rent them. To collect input or inner door to the bathhouse with your own hands step by step, you will need the following:
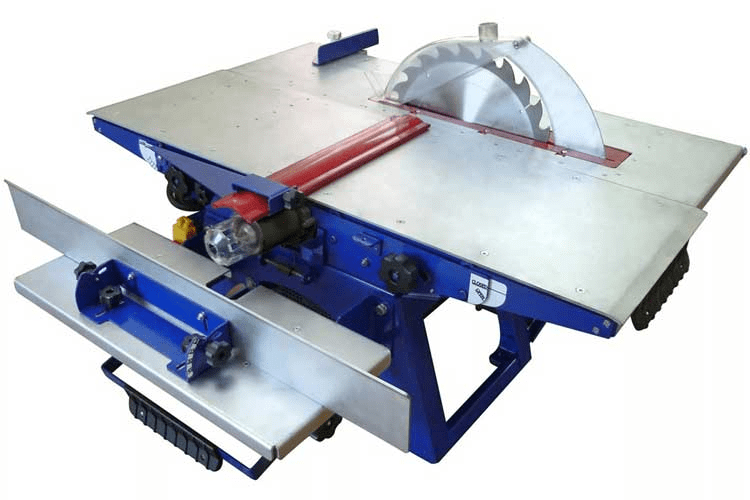
- hand saw or circular saw for cutting wood;
- plane and sandpaper;
- jointer (for selecting quarters);
- chisel and hammer;
- drill with screwdriver;
- hand router;
- fasteners (screws, nails);
- measuring instruments and building level;
- polyurethane foam.

The fittings for bathhouse doors may differ from those used for hanging doors in the house. The loops serve as a decorative element, and the design wooden bath allows the use of forged and shaped products. You can make your own handles from wood. When buying ready-made ones, you should prefer the same material, because in a steam room it does not heat up as much as metal.
Measurements
The size of the door for a bathhouse is determined by the size of the opening. For accuracy, measurements are taken in two places, vertically and horizontally. If the door needs to be inserted into a log bathhouse, then the opening should be prepared first, and then measurements should be taken:
- a groove is made at the ends of the logs facing the opening;
- a 50 mm thick block is inserted into it so that part of the casing protrudes into the opening;
- make a crossbar and threshold from a thick board with a recess for casing bars and secure it at the top and bottom of the opening;
- measurements for the box are made between the side bars and the upper and lower casing strips.

It is easier to determine the dimensions of the door leaf after installing the frame in the opening, measuring the vertical and horizontal distances in the vestibule.
Fabrication
The simplest option DIY doors to the steam room - solid wood panel. To make it, you need to select tongue and groove boards and lay them out on a flat surface. At the ends there are curved stripes - traces of the annual rings of the tree. Adjacent parts should be positioned so that the direction of the rings is opposite to each other. This way the door strips will not be damaged by moisture.
The grooves of the boards and their protrusions must be connected so that a minimum gap remains. Cut 2 bars, the length of which is equal to the width of the door leaf. The bars are mounted on a board panel at the top and bottom of the structure. The connection can be made different ways:
- Place the block on the surface of the boards in the transverse direction. Fasten with self-tapping screws, screwing them in from the side of the block so that there are no traces of fasteners left on the front side. Sometimes they act differently and drive the fasteners with front side doors, recessing the heads into the wood. The recesses are covered with a special composition of glue and small sawdust. For the strength of such a structure, it is advisable to install a jib located diagonally between 2 parallel sections of the bar.
- Connection without fasteners is more difficult. To make a canvas, connect the boards and place a 5x5 cm block on top, cut on both sides. Its profile resembles a trapezoid. The narrowing is 1.5 cm and is performed smoothly along the entire length of the part. Draw lines on the canvas corresponding to the profile of the bar. Cut out a groove, deepening it by ½ the thickness of the block and observing the angle of inclination of the side surfaces. Remove the wood from the groove with a chisel and level the surfaces. Push the bars in from the wide side of the groove. In a room with high humidity, the mount will not dry out.
From lining
To assemble a door from a lining, you need boards at least 2.5 cm thick, with selected quarters on the sides facing the inside of the panel. The length of the vertical bars of the strapping should be equal to the height of the canvas, and the horizontal bars - to its width. Connect the frame parts using the half-timber method, selecting part of the wood at the ends of the planks. Lubricate the recesses with glue, connect the parts and tighten them with clamps. After drying, drill through holes and insert wooden dowels into them using glue.

Cut the lining into equal sections. Their length is equal to the distance between the boards in the selected quarters (vertical or horizontal). Cut off the side with the groove at the outer lining, and place the part in the frame, in the groove of the selected quarter. The remaining elements are joined, pressing the tenons tightly into the grooves. Cut the last board so that it fits tightly into the remaining gap. Attach a wide glazing bead around the perimeter of the frame.
Frame-panel

When making such a sheet, it is worth considering that in order to insulate it, a heat-insulating layer must be placed inside the door. Therefore, you need to prepare an EPS sheet or other material in advance. Make the frame from a 3x3 cm block:
- choose ½ thickness at the ends for a length of 3 cm from the edge;
- connect long and short bars into a frame, placing the selected parts on top of each other so that the joining surfaces form one plane;
- screw the screws into the joints of the planks;
- make 1-2 transverse spacers, choosing a groove in the long planks in the same way as at the ends.
Attach plywood or MDF to the frame on 1 side of the door. Place insulation between the bars and foam the gaps between the EPS and the slats. Cover the top with a sheet of plywood and attach it with self-tapping screws around the perimeter and to the crossbars.
Insulation
If the entrance door to the bathhouse is made of boards or lining, then it must be insulated to reduce heat loss during heating. For insulation, felt, batting or polyethylene foam is used. The material must be measured according to the size of the door, cut and secured to the canvas with furniture staples or nails, leaving free edges at least 5 cm wide.

Leatherette is well suited for door trim. The material is cut in such a way that the edges can be folded under the insulation by 2-2.5 cm. To ensure that the upholstery lies flat, the material must be fastened from the middle. The fasteners are decorative upholstery nails with large heads. To form a convex pattern between the nails, you need to pull the line tight.
Along the perimeter of the door you need to attach leatherette rollers, inside of which there is insulation. The edges of the rollers are nailed to the door with decorative nails in small increments (5-10 cm). The seam can be made decorative: hammer nails tightly, in 2 rows, in a zigzag, etc.
Making a box
The door frame to the bathhouse is made of thick block (at least 5 cm thick). Along the outer edge of the parts, on the side where the door will open, you need to select quarters along the entire length. Their depth should be equal to the thickness of the canvas, and their width should be about 3 cm. Connect the door frame parts in the corners with screws or nails, having first removed part of the internal projection in the vestibule.
Installation
The door frame is installed using anchors if the bathhouse is made of concrete or brick. The box must be fixed in the opening with wedges, aligned vertically in two planes. Check that the threshold is horizontal and top bar. Drill 2 holes in the sides for the anchors and insert the fasteners. Fill the gaps with polyurethane foam.
If the bathhouse is made of a log house, then on the inside of the sidewalls you need to make a groove for the previously installed casing. To do this, parallel cuts are made, and the wood is selected with a chisel. The box is attached to the beam, and not to the logs of the log house. The threshold and top cross member must be nailed to the casing strips. This design of the doorway in the bathhouse is not ventilated, and the gaps cannot be foamed.

After installing the frame, you need to hang the bath door. When using shaped hinges, the blade should be installed in the opening and secured with wedges to obtain a uniform gap of 2-3 mm around the perimeter. Attach the hinge bracket to the frame with nails or self-tapping screws, and the shaped strip to the canvas.
If the hinges are overhead, then you will need to make recesses for them on the edge of the canvas and in the vestibule. Attach the hinge cards in the recesses so that they do not protrude above the surface of the wood. The pin parts are fixed on the frame with the pins facing up, and the mating part is fixed on the canvas.
Finally, platbands are attached around the box, which cover the junction of the wall and the box. Door handles are placed on comfortable height. If necessary, install a padlock, latch or hook for locking.
Real wooden sauna It is rightly considered not only a place for taking hygienic procedures - washing, but also an excellent means for relieving psychological stress and restoring strength after hard working days. However, to achieve this effect, it is necessary to create optimal conditions to maintain a certain atmosphere in the premises - the required temperature and humidity conditions.
Doors and windows are those elements of the building through which people can enter the premises. cold air, therefore, when choosing and installing them, you need to act especially carefully and carefully. Making a door to a bathhouse with your own hands, step by step moving from one stage to another, is within the power of anyone who knows how to work with carpentry tools and has the opportunity to purchase suitable material.
It should immediately be noted that to create appropriate conditions in the bathhouse you will need not one door, but at least two. One of them is installed at the entrance to the building itself, and the second will separate the steam room from the dressing room. But if the bathhouse has several rooms in addition to the main ones, for example, a relaxation room, shower room, washing room, toilet, etc., then more doors will be needed, since each room has a specific mode.
Several types of doors are used for installation in a bathhouse. They are mainly divided according to the material of manufacture - these are glass, combined, consisting of wood and glass, Euro-variants, which have increased tightness, and traditional wood, which can be called the most popular.
For the entrance door of a bathhouse, if it is not the only one, almost any of the listed types will be suitable. But each of them must be well insulated and provide the maximum possible closing density of the opening.
Glass doors
Glass doors, as a rule, are an attribute of saunas, separating the dry steam room from the dressing room or washing room. They are produced in various color scheme, the surfaces of some models are decorated with drawings. The glass can be transparent, translucent or frosted, installed in a frame or attached to the door frame using special fittings.

It is quite difficult to make glass doors with your own hands - you can only install them yourself. When choosing such a door for a sauna, you need to carefully consider the fittings included with the product. Important criteria when choosing are practicality, reliability and safety of these elements, and only then – their beauty.
The handles installed in the glass sheet should not burn your hands, and the canopies should securely hold it in the box.

Glass sauna doors are always supplied with silicone seals, which provide the necessary tightness when closing it.

A magnet installed in the handle and door jamb is used as a latch, which ensures good fixation of the door in the frame when closing. Such a lock is always operational and never jams.
Sometimes, instead of magnets, ball latches are installed on the doors. They are less reliable, as they begin to jam over time, so magnets for glass bath doors are the best option.

It is recommended to choose models with three hinged hinges, as they will not only more securely hold the panel made of high-strength tempered glass 8 ÷ 10 mm thick, but will also ensure comfortable opening and locking when closed.

The door frame for installing glass panels is usually made of an aluminum profile, into which it is convenient to install seals, and where the door itself fits perfectly. Thanks to these materials, the set is completely waterproof. Its only weak point will be the seals, which wear out over time under the influence of high temperatures and high humidity, but these elements are easy to periodically replace with new ones.
Installation of glass doors
To install any door efficiently, you need to calculate everything very accurately, and glass version t requires a special approach.
- Glass doors are mounted in a frame that does not have a threshold, and thus a gap of 5 ÷ 7 mm is left between the floor and the leaf for free movement.
- When installing the kit, it is very important to install the door frame perfectly correctly, since the glass door leaf it will not be possible to fit it. Therefore, the vertical and horizontal parts of the frame must be located strictly at right angles to each other, otherwise the door may not fit into the designed opening or will not fit tightly to the jamb.
- The box is exhibited at construction level and is attached to the wall with self-tapping screws. The frame should be slightly smaller than the doorway, so that during installation it will be possible to align it and fix it in the desired position, spreading it with wooden wedges, through which the self-tapping screws will be screwed into the wall.
- The gaps formed between the frame and the wall are filled with polyurethane foam, and the excess that protrudes beyond its boundaries is cut off after hardening.
- Next, a silicone seal is placed in special grooves in the box.
- If the frame is installed securely and correctly, it will be easy to hang a glass door into it. The finished canvas has holes for mounting canopies - you just need to carefully fix them, not forgetting to install special silicone gaskets between the metal and glass.
- After this, the door is exposed and screwed to the jamb.
- The next step is to secure the handles with latches. This point should not be difficult - special holes are provided for them, just like for awnings.

- The last step is to close the foamed gaps between the wall and the frame with decorative trims.
Today, glass doors are increasingly preferred to wooden or combined ones. They are used for different types baths, but the only thing you need to be prepared for is the fairly high price of glass door panels.
Doors with double glazed windows
A metal-plastic door with insulation is also suitable for the entrance door to a bathhouse. It is hermetically sealed and will not allow cold air to enter the premises; the bathhouse premises from the entrance are not cooled down.

Such a door is suitable for a shower room, as well as for a rest room, but for a steam room you can safely choose a wooden panel with installed double-glazed windows.
Since the bathhouse premises have high humidity, a door made of oak, cedar or larch is chosen for them. This wood has a dense structure, so it almost does not absorb moisture, and with appropriate finishing it becomes waterproof.

A modern wooden door equipped with double glazing consists of wooden frame, which is reinforced with aluminum inserts. One or more double-glazed windows can be installed in the canvas, which create additional lighting for the room.
Such a door does not need special care or periodic repairs, since wood processed using a special technology not only does not react to moisture and does not swell, but also does not dry out. Thanks to this, cracks do not form on it, and it does not require their sealing or periodic painting. The surface of the canvas only needs to be wiped soft cloth, A double glazed windows - cleaning on both sides using window cleaner.
Such doors will last much longer than ordinary wooden ones, without causing any worries.
Door installation
Installing a door frame with double-glazed windows is in many ways similar to installing a jamb for a glass door. It should also be leveled and leveled using wooden spacers. But the box is often attached to the wall with special metal plates or through “ears” attached to the box jambs.
The cracks formed around the frame during its installation are also sealed with polyurethane foam, and then covered with platbands, which should come complete with the door frame and leaf.
On installed box The door itself is mounted - it is put on the scales. The convenience of this option is that everything connecting elements have already been adjusted and secured to the door and frame, all that remains is to combine them into a single structure.
Wooden door
Despite the appearance modern designs, wooden doors for baths do not go out of fashion, as they are traditional for these buildings. They are made from larch and cedar, pine and oak, that is, from wood that resists high humidity well. Doors for bathhouses are made of paneled, massive or multi-layered frames.

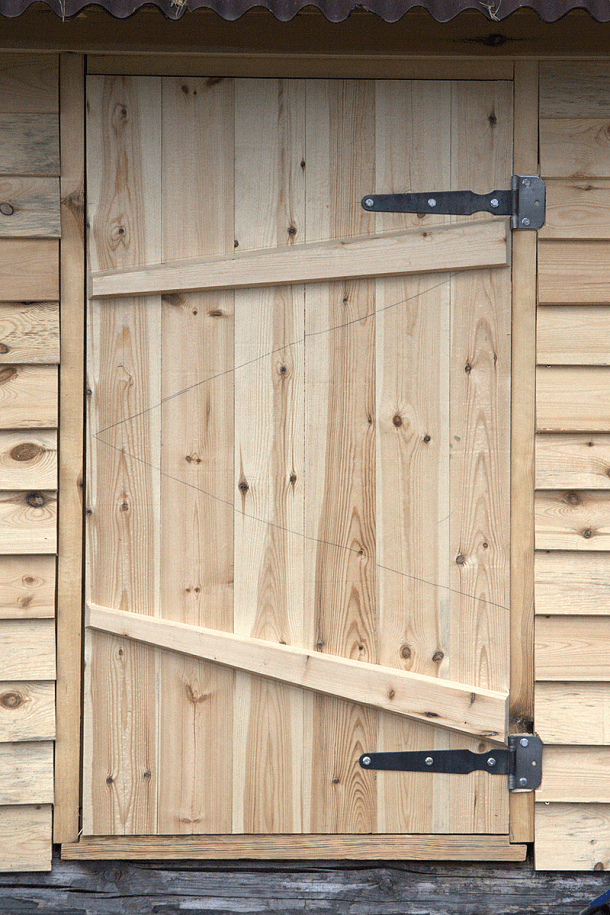
- Massive doors are made from thick, moderately dried tongue and groove boards. For doors installed at the entrance to the steam room, the required elements are cross beams - the so-called dowels. They are necessary to securely fasten the boards of the shield and prevent its deformation. These crossbars are mounted in two places of the assembled canvas. Sometimes, if necessary, they are supplemented with a diagonal brace.

- A paneled door is more difficult to manufacture, as it consists of several shaped parts that must be assembled into a single panel and fit perfectly together.

A paneled door is perfect for installation at the entrance to a bathhouse, but it would not be very appropriate to install it in a steam room. Very significant temperature changes can negatively affect the mating of individual parts of such a design.
Prices for tongue and groove boards
tongue and groove boards
Video: in detail - about the manufacture of a paneled wooden door
- And this diagram clearly shows how a multilayer frame door to the steam room. In this case, the door consists of:

- Inner door trim.
- Vapor barrier material.
- Insulation can be polystyrene foam or mineral wool.
- The door frame is made of 50 mm thick timber.
It should be noted that a door consisting of several layers is more suitable for saunas, since they use dry steam for procedures. In the steam room of a Russian bath, it is recommended to install a massive one, assembled from thick boards.
Making a solid door
It will be difficult to make a paneled door without experience, but you can try a massive one, taking into account some recommendations and following the sequence of work.
Bath door size
When building a bathhouse, all actions should be aimed at maintaining the required temperature in the premises Important stages are high-quality insulation, vapor barrier, internal and external finishing. Of particular importance are the height of the ceiling and the dimensions of doors and windows. The bathhouse has door and window openings, usually, are made in smaller sizes than in residential buildings. Thus, the entrance to the steam room is usually limited to a height of 1600 ÷ 1700 mm. This is done so that the steam stays inside the room longer and does not escape outside when the door is opened. In old Russian baths, the doors were even lower, the doorways were only 1450 ÷ 1500 mm high.
The width of the entrance to the steam room is 600 ÷ 750 mm, while the doorway in a residential building is usually 800 mm.
The opening for entering the steam room of a Russian bath must have a high threshold, at least 150–200 mm. The size of the door will be measured from the threshold. If there is a passage to the sauna, then it is not necessary to create a threshold, and a ventilation gap of 5 ÷ 10 mm is left between the door leaf and the floor.
Materials for making a door
Depending on the choice of door design, different building materials may be required.

To make a door from a solid board you will need:
- Timber for crossbars - keys, cross section 50×45 mm.
- tongue and groove batten with a tongue-and-groove lock, 50 mm thick, its width should be a multiple of the door width.
- Stainless metal hinges 3 pcs.
- Wooden double-sided door handle.
- Beam for the box, section 60×80 mm.
To make a prefabricated door you need to prepare:
- Beam for strapping and boxes, section 60×80 mm.
- Tongue-and-groove floorboard, section 36×120 mm.
- Wooden lining, size 12x96 mm.
- Hanging loops 3 pcs.
- Door handle 2 pcs.
- Pins for fastening furniture parts.
Wood selection
Separately, it is necessary to say about the choice of wood for making doors, since quality and durability depend on this. The type of wood was mentioned above, so just a few words about the quality of the material.
The optimal moisture content of wood for comfortable processing and its good “behavior” after assembly of the structure is 12–15%. It is best to purchase lumber dried in special camera– such parts are definitely not deformed and will not move.
Boards and beams need to be checked for evenness by laying them on a flat surface and trying to connect them together. They must not have a waveform or be cranked in the form of a propeller.
The boards are selected to the desired thickness, which can vary from 25 to 50 mm. Before using the material, it must be brought to a smooth state using grinder or manually using fine-grained sandpaper. For convenience, the sandpaper can be secured to a piece of wooden block.
Woodworking tools

To work with wood, you need to have the following tools on hand:
- Jigsaw or saws with different sizes teeth
- A regular and rubber hammer.
- Screwdriver.
- Plane.
- Sanding machine and sandpaper of different grits.
- Clamps for compressing glued panels.
- Chisel.
- Manual or stationary milling machine– this will significantly simplify a number of operations.
- Building level.
- Tape measure or folding meter.
Making a door from solid wood
When starting work, you need to remember that the steam room door should only open outward - this is necessary to ensure safety. Hinges and crossbars are located outside to avoid exposure to high humidity and temperature.

Installing doors in a log house has a very important feature. When cutting out an opening, the relationship between the logs of the log house is weakened, and this must be somehow compensated for. The second feature is wooden frame gives a very significant shrinkage, and this process is very long and difficult to predict. Therefore, I always make the opening for the door much larger than the frame itself and the door leaf. It is considered optimal to leave at least 100 mm of margin.
To prevent the log from rolling into doorway, logs or beams must be connected with one common vertical piece. There are two ways to do this:

Select material along the ends of the logs in the opening so that a tenon is formed (item 1), onto which the door frame parts will be placed - a corresponding groove is prepared in them for this purpose.
- Cut a groove (pos. 2) in the doorway into which a beam (pos. 3) is inserted, which becomes a tenon for installing the door frame on it. This method is considered more preferable and simpler to implement.
In any case, the door frame is given a certain degree of freedom - it is not tightly attached to the logs of the log house, which will not allow the door structure to warp during shrinkage or wedge.
Video: how to install a door in a log house
| Illustration | Brief description of the operation performed |
|---|---|
 | If the door will be installed in a log bathhouse, then before installing door frame, a vertical groove is cut in the end part of the logs for laying timber measuring 50 × 60 mm into it, which is buried 30 mm into the logs. The beam should fit freely enough so that it can be moved up and down, but not dangle in the groove. The beam is not fixed with glue or fasteners |
 | The protruding part of the beam will serve as a tenon for installing jamb elements on it, in which U-shaped grooves are selected with a router. |
 | Grooves are also cut out in the threshold, into which the jamb beam is installed. Such reliable fastening of the frame to the ends of the walls will allow you to hang even the heaviest door on it. |
 | The door frame itself is made of timber with a section of 60 × 80 mm. A groove is cut along its wide side, which fits into a tenon mounted into the end of the wall. Having prepared the elements of the box, it is fixed in the opening and the threshold established in advance. The gap between the top lintel of the jamb and the opening is 100 mm. |
 | Since the door from the steam room should open outwards, inner edge boxes are glued and a strip 10 ÷ 12 mm thick is screwed on. Its width is determined depending on the thickness of the door. Another, more difficult option– milling a ledge along the entire length of the door frame parts. |
 | After this, the exact dimensions according to which the door leaf will be made are taken from the outside of the frame. In this case, it is necessary to take into account the gaps between the leaf and the door frame - they should be about 4 mm, since operation is expected in conditions of high humidity. |
 | Next you can move on to making the door. The board prepared for the blade is marked and sawn in right size. |
 | When assembling a shield from boards, you need to ensure that the structural pattern of the annual rings is located equally. |
 | The boards are laid out on a flat workbench and assembled into one plane using wood glue. If necessary, they are knocked out rubber mallet- they must be tightly fitted to each other. After assembling the boards into a shield, the remaining tenon on one side of the finished canvas is carefully cut off, and the edge is processed. Then, in two or three places, the assembled shield is pressed using clamps and left until completely dry. |
 | Next, the entire surface must be leveled, if necessary, using an electric planer. Often, the shield is additionally trimmed using a router, achieving a perfectly smooth surface of its edges. |
 | The finished shield must be fastened from the outside with crossbars - dowels that are made from timber. The length of the dowels should be equal to the width of the finished panel. The diagram shows the shape and dimensions of such dowel bars. They are usually made in the form of a straight prism with an isosceles trapezoid in cross section. |
 | Having made the key, it is laid with its wide side on the surface of the shield and lines are drawn that are transferred to the depth of the part’s penetration into the shield. |
 | Notches are made in the shield, first on one side and then on the other, observing the angle of inclination of the side edges of the key. The depth of the figured groove should be approximately 10 ÷ 15 mm. Next, carefully remove the wood from the groove using a chisel. If you have a tool and work skills, it is more convenient to use a router instead of a chisel. |
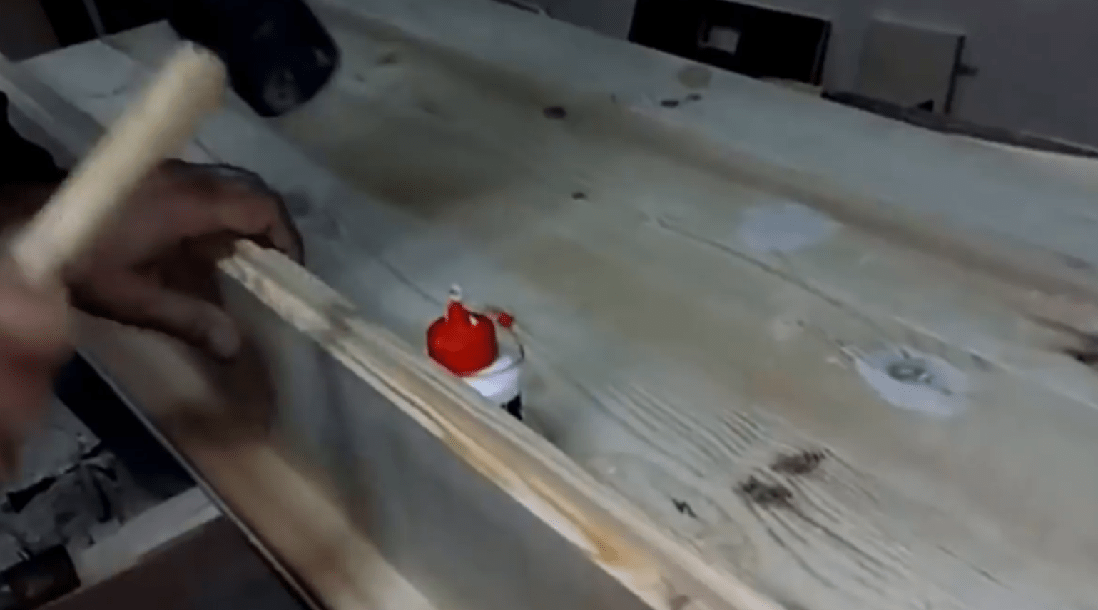
 | Wood glue is applied to the finished groove, and then the key itself is hammered into the side. In order for it to fit in there more easily, the bottom plane of the groove must be made as even as possible. When installing a key in the groove, it can be tapped with a rubber hammer. |
 | This is what the door panel will look like with installed lintels - dowels. |
 | Hanging loops are screwed onto the finished shield with installed crossbars. After this, the location for fixing the mating parts of the hinges is marked on the door frame. To do this, you need to take the exact measurement between the hinges on the door and transfer them to the frame jamb. Having determined the exact location, the hinges are secured to the jamb, and then the finished door is hung on them. |
 | Finally, wooden handles are installed on both sides of the door. |
Making a frame door
This type of door differs from the version made from solid boards in that the cladding elements are mounted on a frame made of timber.

If you plan to make a door 50 mm thick, which will be sheathed wooden clapboard 10 mm on both sides, then for the frame, accordingly, it is necessary to take a beam 30 mm thick. For ease of fastening, the width of the beam can vary from 60 to 80 mm, this is especially important for the outermost vertical beams.
- The first step is to prepare the timber for making the frame. The simplest fastening frame elements is a half-tree connection.

Half-tree connection
To do this, grooves are cut out at the edges of the beam, with a length equal to the width of the beam and a depth of half the thickness, in this case 15 mm.
The timber is connected using glue and wooden dowels. To begin with, the frame parts are glued together and clamped with clamps. After the glue dries, through holes with a diameter of 10 mm are drilled into them, into which dowels are carefully driven onto the glue.
This figure shows in detail how the frame elements are connected using the “half-tree” method, and where the dowels are driven in.

- Frames may have different designs, but the simplest one consists of a frame assembled from timber with one or two transverse bands.
This figure shows the types of frames for panel doors, but they can also be used as structures for the base of a frame door.

- The frame must have a certain rigidity, and all its corners, both external and internal, must be aligned with a square. In addition, you must definitely check the size of the diagonals - they must be the same.
- If you plan to make a door with glass in a certain place, then this must be provided for in the frame. To install the glass, additional bars are installed inside the main frame, in the form of a frame. This makes the work somewhat more difficult.
For the door leading to the rest room, sheets of moisture-resistant MDF can be used for cladding instead of lining. The trim of such a door is mounted in the following sequence, starting from the bottom layer:
– The vapor barrier material is attached to the frame first, since it is indispensable to protect the insulation in humid conditions.
– Then, an MDF sheet cut to its dimensions is attached to the frame beam.
– Next, insulation is laid between the frame bars. Here you can use polystyrene foam, in this case, 30 mm thick, or mineral wool. In any case, the material should be placed as tightly as possible between the frame beams.

– Another one is fixed on top of the insulation vapor barrier layer.
MDF prices
Then the entire “pie” is covered with the top sheet M DF. But still, most often wooden lining is used for the bathhouse door.
- After covering the door with clapboard, handles are attached to the door. These elements are usually made from wood or purchased ready-made.

- After the door is ready, it is hung on the door frame, which is made and installed in the same way as described in the first option, if it is mounted in a log wall.
If the wall is built from a different material, then the box is made from timber prepared to size. The frame should be 30 ÷ 35 mm smaller than the doorway - this will make it possible to properly position the frame and secure it with wedges.

- The exposed box is secured to the walls through wedges of spacers, and the gaps between the wall and the box are filled with polyurethane foam.
- Then the hinges are mounted on the door system and the door is hung in place.
- The last stage is the installation of platbands, which will close the gaps and give the structure completeness.
Prices for lining
In conclusion, it should be noted that making any door yourself, without experience in carpentry and knowledge of all the intricacies of calculations and manufacturing, is very difficult. In addition, in order for the door to look “professional”, special tools will be required to work on it. hand tools and carpentry electrical appliances, which themselves are quite expensive. It is not profitable to purchase them just for the manufacture of one door - it will be cheaper to order a ready-made design from an experienced craftsman.
Think about doors in advance!
What kind of doors will be in the bathhouse under construction needs to be decided at the initial design stage. How the project is drawn up in general terms is discussed using an example in a special article on our portal.
Many, tired of the bustle of the city, try to find an “outlet” for themselves in a private home or on suburban area and often decide to build a bathhouse. In this case, it often happens that we do not know how to correctly carry out all the stages of its construction and, in particular, how to make a door for a bathhouse with our own hands.
In this article we will tell you how you can make such a structure with your own hands, what dimensions it should have and much more.
Specifics of the door in the bathhouse
The bathhouse must have at least 2 doors installed - the entrance and the one that will lead to the steam room.
The door to the steam room has its own specifics:
- it should not heat up;
- should not deform due to increased humidity and temperature changes.

Whatever kind of sauna you plan to build, do-it-yourself sauna doors must first of all reliably retain heat and steam in it, and only then serve as an interior item for the building. In this regard, bath doors should be wooden and solid and preferably made using old Russian technology ().
Advice! If your bathhouse will be heated “on white”, then it is recommended to install a door with one leaf. If you prefer a smoky bath, then the door should have two leaves.

Dimensions
When making a door to a steam room with your own hands, pay attention to its size.
In order to retain heat better, it will need to be made several sizes smaller than for a living space:
- its height from the floor should be no more than 170 cm;
- width no more than 70 cm;
- threshold - 15 cm higher.

In the steam room, it is advisable to install single-leaf structures that open outward. The gap from the door to the floor should not exceed 5 cm.
Materials
For a steam room, it is advisable to make the door from linden, alder or aspen. Can also be used conifers wood, but then you will need to treat their surface so that the resin does not release.
Necessary materials for the manufacture of such a design:
- for lining you will need timber measuring 65x80 mm, and for the canvas, tongue and groove pine boards with dimensions of 36 by 120 mm, for cladding the inside of the room - lining 12 by 96 mm;

- Apart from wood, the door to this room can be made from any other material. His choice will primarily depend on the planned interior design our building. IN Lately has become fashionable or models made of heat-resistant plastic. But only this will change the price of the manufactured product.
We make the canvas
The door leaf for the bathhouse is made in a certain sequence.
We will now tell you how to make a bathhouse door with your own hands:
- prepare the end board and remove the tenon with a plane to the level with the body of the board;
- The assembly of the canvas must be carried out from tongue-and-groove boards on a flat surface. You need to start work from the first board using the “tenon and groove” technique. Next, use a pencil to mark several points from the end board to the desired width size and connect them together in a straight line;

- cut the last board lengthwise using a circular saw;
- assemble the canvas according to the tongue-in-groove principle, first applying PVA glue;
- after installing the last board, secure support boards with a gap along the long sides of the canvas and press them with wooden wedges until they stop against each other;
- Check the quality of your work after the glue has dried. If there are gaps, seal them with glue and sawdust. Remove any unevenness using a plane and sandpaper;
- using a square, tape measure and ruler, draw the contours of a canvas with a length of 1720 mm and a width of 570 mm, based on the line of adjacent sides in the supporting strip of the ends and the outer edge of the first board;
- draw along this line with a circular saw, and sand the cut area with sandpaper;

- then make a symmetrical veneer with a width of 15 mm and a thickness of 26 mm along the entire perimeter of the canvas. You need to use base strips and a router; they are usually attached along the side of the door that was being processed;
- the planks must be installed so that their upper edges are placed strictly horizontally and must be in the same plane;
- the plane of the blade should be parallel to the top edges, since they will serve as a support for the router;
- Place the router on the base planks and mill the longitudinal tenon in several steps;
- After processing the entire contour, turn the canvas over and repeat all the steps with one difference, that you will need to control the thickness of the tenon using a caliper.
Note! The spike should be a little larger so that later, when planting, it can be added to the harness.
Assembly
Assembling a bath door involves installing a frame around the door leaf.
For this:
- you will need pre-prepared blanks; they will need to be inserted into the tenons of the canvas on all sides without tension or with slight tension. If necessary, we mill a groove or tenon;

Note! Gaps between the groove and the tenon are not allowed.
- After checking the quality, you can start final stage making a bathhouse door with your own hands. To do this, you will need to glue the joints using PVA glue and secure the strapping with self-tapping screws;
- self-tapping screws will need to be embedded into the canvas from the side edges of the trim, while maintaining a step of 200 mm, in such a way that they do not interfere with installation later door hinges. In addition, you will need to fasten the strapping elements at the corners.

The side of the door that will be exposed to steam should be protected with a vapor barrier material, on top of which you can then sheathe the structure with thin boards. A structure that will not be affected by moisture can also be made from a frame, which will need to be sheathed on both sides with special sheets of fiberglass.
The space between them will need to be filled with foam plastic or mineral wool.
Installation
The main factor when installing a door to a steam room is the arrangement of the threshold. Ideally, its height should not exceed 15 cm. As for the structure that will separate the steam room from the washing room, in this case it is not necessary to create a threshold.

It is customary to leave a small gap between the floor and the door in the lower part for the passage of cold air into the steam room. The height of such a gap should not be more than 5 cm.
The entrance door to the bathhouse is mounted with your own hands using a frame, using ridges on the logs and grooves in the casing to eliminate the possibility of deformation of the structure during shrinkage of our structure. We will make the box for the opening from square or rectangular thick beams. It will need to be installed in the opening using the ridge method.
In the walls of our building, on the lower horizontal log, make nests and cut out ridges. You will subsequently insert bars with pre-selected spikes into them. Place a massive log at the bottom of the doorway to later use as a threshold.

If your bathhouse was built from brick, then you should make the frames for the doorway more massive. For these purposes, take boards 6 cm thick and 10 cm wide.
The depth of the quarters, which are selected from the blank, must correspond to the dimensions of the bath structures. Their average width should not exceed 3 cm. The connection must be made using spikes.
The box must be assembled and installed according to this principle so that the bath door can open outward. Level the box and secure it to the wall. When adjusting the structure, if possible, make sure that the box fits as closely as possible to the jambs and threshold.

Conclusion
Now you know that you can not only build a bathhouse yourself, but also make a door in it so that it can maximize heat retention in the room. this room. All you may need to implement your plan is a little patience, attentiveness and a little free time, and at the end of the work you will receive an ideal product that will help you extend the service life of the structure you have built several times (
Assembling a bathhouse door with your own hands is possible for anyone who has at least a little experience in carpentry. The easiest way is to equip the entrance to the bathhouse from a pre-dried and calibrated board; special equipment and assistants will not be needed, since the weight of the door leaf is small, and most of the work associated with installing the door in the bathhouse can be done independently.
Preparation of material for bath doors
If a door structure needs to be installed in someone else’s room, then the first thing you need to do is look at the scope of work, assess the location and size of the future entrance to the room, and measure the thickness of the walls. And most importantly, before making a door to a bathhouse, it is extremely important to check the quality of the material from which you plan to assemble the door leaf and frame. Timber and boards are almost always crooked, but worst of all, if there are already cracks or chips on the surface, such wood needs to be disposed of.
Before starting work, boards prepared by the customer are subjected to additional processing:
For example, the thickness of a standard magpie board after finishing is reduced to 35 mm, the width of the material becomes 10 mm smaller due to the leveling of the plane. As a result, it turns out that in order to make wooden doors to a bathhouse with dimensions of 180x80 cm with your own hands, you will need at least five boards, 160 mm wide, without taking into account the dimensions of the door frame.
Dimensions and assembly technology of a bath door
Typically, the dimensions of a door to a bathhouse with a frame, or more precisely, the future opening in the wall for installing a trap, are determined by the number of whole boards laid in the door leaf. To do this, take the width of the processed board, multiply it by five, and adjust it to more or less acceptable dimensions of the bath door. Next, 2x35 mm is added to the desired width - the thickness of the two sides of the door opening plus an installation gap of 10 mm. The height of the door for a bathhouse is calculated in the same way, and for the bottom edge you will need to add another 5 mm for shrinkage.
In addition, you need to take into account the peculiarities of the technology for assembling entrance doors for a bathhouse. The door leaf for the entrance to the bathhouse can be assembled in two ways:
- Cut a tenon and groove at the ends of a standard forty, as is done for a tongue and groove board. In this case, the total width of the canvas will decrease by 10x5=50 mm;
- Mill a groove 15 mm deep at the ends of the prepared and cleaned wooden workpiece; the joining of two boards is carried out on an inset dowel. In this case, the width of the doors and the dimensions of the opening in the wall of the bathhouse do not need to be adjusted.
You can make doors for a bathhouse using both methods, there is not much difference, although doors with dowels are more flexible and durable. The question of technology, how to make a door to a bathhouse, depends on the wishes of the customer and the availability of woodworking equipment.
For your information! For a novice carpenter, it is easier to make a door to a bathhouse step by step with your own hands using a doweled connection of the canvas.
Firstly, keyed doors for a bathhouse are considered classic version manufacturing, and secondly, in case of accidental defects, you can always replace the key and redo the joint.
Tools for building the entrance door to the bathhouse
It is very important, before making a door to a bathhouse with your own hands, to realistically assess your capabilities, namely, the availability of tools and devices for the job.
If you have at least basic carpentry experience, in order to assemble the entrance door to a bathhouse with your own hands, you will need a minimum set of tools:
- Manual electric router with a set of end trim and through cutters;
- A long metal ruler, you can take a two-meter plaster rule or any aluminum strip at least 200 cm long, fairly even and strong;
- Building level and plumb line for a mason;
- Electric grinder, belt or vibrating;
- Carpenter's chisel, wooden or metal tamping hammer;
- A set of carpentry clamps for clamping boards, 20-60 mm thick;
- Wood glue, you can use PVA-M, one bathhouse door will take at least 7-10 liters, linen or jute tow.
In addition, to install a door in a bathhouse with your own hands, you will need to make cuts in the wall, so you will need to rent an electric or gasoline chain saw for at least one day.
Making a door leaf for the entrance to the bathhouse
It takes a professional carpenter one day to make a wooden bathhouse door with his own hands. For amateur builders, this period is approximately twice as long, but usually they agree with the customer to make one entrance for the bathhouse and one door for the steam room in three days. It won’t work faster, since before installing the door in the bathhouse, at least a day must pass for the glue to dry and shrink.
If the customer insists on the size and shape of the door to the bathhouse, then it would be correct and far-sighted, before trying to make a bathhouse door with his own hands, familiarize the future owner with the design, discuss the level of rise of the threshold and the method of sealing the cracks in the doorway. As a rule, the customer does not object to your option for entering the bathhouse, but it is still better to inform him in advance.
Cutting grooves and making keys
The first step is to cut a groove on the end surface of the boards for installing the connecting key. The two strongest and most beautiful boards selected and prepared for work are set aside in advance; in these parts the groove will be cut on only one side. These parts will go to the left and right sides of the door leaf.

Milling the groove is performed in the following sequence:
- The board is fixed in a horizontal position using clamps on carpentry workbench. A milling line is drawn along the end with a ruler and pencil;
- A metal ruler or rule is placed along the marking line and firmly fixed. This will help make the groove and, ultimately, the door leaf of the bathhouse as flat and even as possible;
- The groove is cut using an end mill with a diameter of at least 10 mm; too large a width will weaken the blade, a small cut will not hold the board, and the entire structure may sag in the bathhouse doorway.

The next step is to make the fastening dowels; to assemble the canvas you will need five slats. Fastening material You can cut it from the remnants of prepared bath boards or buy it ready-made.
Important! The blank for the key is laid on a workbench and ground so as to obtain the same thickness along the entire length of the lath. It is very important to achieve uniform thickness so that the key does not fall out of the groove at one end of the board and does not jam at the other.
The key-rail should fit into the grooves of adjacent boards with a slight interference to make it easier to insert it into the groove, sandpaper Small chamfers are removed on the edges.
Assembling the door leaf
The next stage in the manufacture of a bath door is the assembly of the door leaf. Initially, the boards are joined with dowels “dry”, without any gluing of the joints. Assembled door laid out on the workbench and tapped wooden hammer for complete seating of the keys in the grooves.
Dry assembly is required to ensure that all parts of the bath door fit correctly. In addition, the protruding ends of the boards and dowels along the upper and lower edges of the canvas are trimmed.

If there are no problems, each joint is disassembled one by one, coated with glue and knocked back together. The glued bathhouse door is laid on a workbench and secured with clamps until the adhesive seams are completely dry. While the glue has not hardened, excess adhesive mass is carefully removed at the joints. This must be done immediately, otherwise within a day the door surface will be covered with irremovable dark spots of adhesive film.
We put horizontal crossbars on the door
The next day, after the glue has completely set, it is necessary to make horizontal crossbars. Essentially, these are two thick wooden bars, laid on the bathhouse door horizontally or at a slight slope.
Crossbars perform two functions:
- Pull the fabric horizontally;
- They transfer the load from the weight of the structure to the canopies and door frame at the entrance to the bathhouse.
Hinges for doors to the bathhouse are also installed on the crossbars, which allows you to unload the door leaf and transfer most weight directly onto the loot.

The design and method of fastening the crossbars of bathhouse doors differ significantly from similar parts in conventional doorways, used in sheds, garages, warehouses, summer kitchens. Horizontal bars are installed on the bathhouse door, without any fasteners, and the connection is ensured by a dovetail locking profile.
The sides of each block are cut using an electric milling machine so that the cross-section of the crossbar forms an isosceles trapezoid. The same cutter is used to cut grooves on the sauna door leaf.

To prevent the door from moving horizontally, the grooves of each lock in the door leaf are not cut strictly horizontally, but with their own slight slope. After adjusting the dimensions, the bars are placed in locks, glued and fixed with clamps until completely dry.
The finished, dried assembly must be sanded with an electric grinder, this will remove burrs and make outer surface as flat and smooth as possible. If the need for additional finishing arises, the door to the bathhouse can always be painted or covered with film.
Features of making a bathhouse door yourself are shown in the video
Making a loot and installing it at the entrance to the bathhouse
After installing the crossbars, the actual dimensions of the doors to the bathhouse become known. You can cut an opening at the entrance to the bathhouse, but first you need to make a door frame.
To make the loot, the same forty board is used as for the door to the bathhouse. For the vertical sides of the door, two boards are cut out, 200 mm wide and 60 mm longer than the door leaf. Similarly, two short horizontal boards are cut for the threshold of the door frame and top crossbar. We lay out the cut sections along the perimeter of the assembled door leaf and temporarily sew them together at the corners with the remnants of the slats and upholstery nails.

Since the bathhouse door should only swing outward, the panel will need to be recessed into the hole from the entrance side. To do this, mark along the contour inner surface box a strip 10 mm deep, which will need to be cut with a router or any other available tool.
Next, on the outside of the side posts of the door frame, you will need to cut a groove with which the loot will be held in the doorway of the wooden bathhouse. We connect all the parts of the door frame using self-tapping screws. The side posts should be adjacent to the ends of the door leaf with a gap of 1.2-2 mm; in the area of the threshold the gap is increased to 5 mm. We strengthen the box at the corners with temporary slats and spacers; as soon as the loot is in the doorway of the bathhouse, the stuffed slats will be removed.
We put the frame and hang the door leaf
The first step is to measure the outer dimensions of the box; using them you will have to mark the contour of the cut of the doorway at the entrance to the bathhouse. This should be done only by practical measurement, and not by calculation, otherwise there is a possibility of making the cut in the bathhouse wall too large.
The opening for the box should be 6-7 cm smaller than the width of the finished canvas. When making a cut in the bathhouse wall, you should also take into account the width of the cut. Initially, mark the height of the threshold in the bathhouse, then measure the height of the box, draw the axial one and set aside the width of the tray. Using a plumb line, markings are applied to the wall of the bathhouse under the cut line.
After an opening has been cut in the bathhouse for installing the frame and the future door, it is necessary to cut a vertical tenon line on the wall using a router or manually with a hammer and chisel. The width and height of the tenon must fully correspond to the dimensions of the groove cut on the sides of the loot.
Next comes the assembly of the box. The threshold is installed first, then the side posts are stuffed onto the spikes, and the top cross member is attached last. In the upper ceiling part of the box, between the wall and the crossbar, there should be a free space 5-7 mm high, which is filled with flax or jute fiber and will subsequently be covered with platbands. The gap must be maintained to compensate for the settlement of the bath. If the construction of the bathhouse is made of brick, the gap is simply filled with foam.

Before knocking down the parts of the box, you need to place the finished door leaf in it and align the entire structure horizontally and relative to the facade of the bathhouse and wooden wedges.
Hinges for bath doors
On last stage When arranging the entrance, they hang the door leaf. Before installing hinges for bathhouse doors, the door leaf is slightly raised in the frame using two small wooden wedges. Gate canopies are the easiest to install; they are located entirely on the outside of the door leaf. The short part is attached to the scuttle, the other side is sewn onto the crossbars.
If, according to the design conditions of the facade of the bathhouse, it is necessary to completely hide the elements of the canopies, then screw-in hinges can be used.
If the entrance room in the bathhouse is well isolated from the dressing room and steam room, then the doors can also be hung on standard butterfly hinges. The main advantage of such canopies is their high strength and reliability; one pair is enough to hang the heaviest door in a bathhouse.

To attach the hinges you will need:
- Mark the contours of the fastening on the slit and on the end of the canvas;
- Use a chisel to cut grooves on both parts and secure the canopies with ordinary self-tapping screws.
All that remains is to hang the canvas on the mating part of the loop and adjust the pressure so that the door to the bathhouse closes without touching the trap. After installing the trim, seal, handle and lock, the door to the bathhouse is considered ready.
Conclusion
The entrance door to a bathhouse is the simplest thing that can be done in bath room self-taught novice carpenter. When planning the design of the entrance to the bathhouse, it would be correct to provide in advance for the installation of insulation, sealing rubber bands and comfortable door handle, without which she is beautiful wooden surface It will darken very quickly from hand marks.
Anyone who has the ability to make their own bath doors can the right tool, special skills, as well as quite a lot of time and desire.
In any bathhouse there are several rooms that perform different functions, so each will need its own door to enclose it. There should be at least two doors in the bathhouse: the entrance and the one from the steam room to a special relaxation room.
There are three types of bath doors:


Main features of bath doors
When creating these doors, two main criteria should be taken into account - high temperature and humidity level inside the bathhouse. The first distinguishing feature of such a door is its size, the second is the materials used, and the last is the fittings used.
Bath door size
When making bath doors, all sizes are determined according to the principle of greatest heat retention at the moment of closing and opening the doors. In this regard, all bath doors are smaller in size when compared to ordinary ones. The required height of sauna doors is 165–185 cm from the floor itself, and the width is 65–70 cm. It is worth paying attention to the threshold, the height of which should be more than 15 cm. However, such small door sizes are used exclusively for steam rooms.
Materials for the correct manufacture of bath doors
For bath doors you can also use glass, And wood. Glass must withstand very high temperatures. However, the best material for bath doors is still wood.
Here, as a rule, it is used - linden, larch, aspen, oak.
Accessories
Fittings for bath doors must be made of materials with very low thermal conductivity and resistance to high humidity. If you use, for example, metal latches and handles, you can easily get burned from touching them. In this regard, fittings are usually made of wood.

This applies to latches and handles, but it is advisable to take brass hinges, but if you couldn’t find similar ones, then metal hinges should definitely be painted with a special anti-corrosion paint. Since the sauna doors open outwards, the possibility of getting burned is almost impossible.
Manufacturing of bath doors
After determining the type of doors, you can begin special work by creation. For beginners, this process may well seem quite complicated, but this is purely a matter of experience. If you have never made a door before, then first you can buy cheap boards and practice on them at will. Next, this will allow you to make bath doors without problems.
Since the most optimal door for a bathhouse is considered to be a door made of wood, we will use its example to look at the entire process of creating bathhouse doors. Before making bathhouse doors, as a rule, you need to make purchases. Here you can't do without materials:
- tongue and groove floorboard (width 50 mm, thickness 30 mm);
- special pins and screws;
- linings (dimensions - 12x96 mm);
- loop (three pieces);
- timber for strapping (dimensions - 60x80 mm).
The tool you can't do without is:
- hand circular saw;
- hammer and mallet;
- milling cutter with a set of cutters;
- screwdriver;
- clamps;
- level, caliper, depth gauge, tape measure.
Making a door leaf
Making a door should always begin with the formation of the leaf. To do this you need to do this:
- It is necessary to take special tongue and groove boards and cut them to the required length.
- Then you need to cut off the tenon from one of the boards, after which the surface is jointed on both sides of each board, you need to get an absolutely flat surface. As a rule, it is enough to remove 2 mm to achieve the desired result. Ideally, you should get smooth boards with a thickness of 26 mm.
- You can start assembling the door leaf. First, you should make a rough assembly, insert the tenon of the board into the groove of another, and connect them as tightly as possible. As a result, you can get a canvas slightly larger in width than necessary. It's not scary. To get the canvas of the required width, you will need to cut a little from the last and first boards.
- Having measured the required size, which is 60-70 mm smaller than the width of the entire door, and marked it on the canvas, you need to remove the last and first boards. On circular saw everything unnecessary is cut off from them. It is important not to cut off the side on the last board where the groove is located, but on the first board the side where the tenon is located.
- Next, the boards are assembled into one sheet. To do this, you need to lay out the boards on the surface of the workbench and insert the tenon of one board into a special groove of the previous one, having previously coated the groove inside with ordinary PVA glue. For a good connection, you should hit each board with a mallet.
- The canvas is left to dry for two to three days. To ensure that the canvas does not move at all during the drying period, it must be securely fastened to the workbench. To do this, you need to fix two strips of wood on a workbench, between which the door leaf is placed longitudinally. For normal fixation, you need to drive wooden wedges between the door leaf and the strip. A special chipboard sheet and presses it against the table with clamps.
- After drying, you need to check the canvas for minor defects. The cracks are sealed with a special mixture of sawdust and glue, and all irregularities are smoothed out with a regular plane.
We make fittings and door trim
While the canvas dries, you can start creating bolts and handles, as well as a special trim for the door:

- In the previously obtained bar blanks, you need to select a groove. To do this, using an end mill and a router, you first need to select a deep and narrow groove. Its width is approximately 26 mm, depth - 25 mm. After this, a wide but shallow groove should be selected on top of it (depth is 10 mm and width is 50 mm). A similar stepped groove in the trim is needed for fabric that has been lined with clapboard. The wide one should fit the lining, and the deep one should fit all the tongue and groove boards.
- On horizontal bars By means of a cutter, a stepped tenon is made that corresponds to the groove. When finished, you need to assemble the trim box and check the correctness of the angles with a square. If necessary, sharpen the groove with a milling cutter to obtain absolutely right angles.
- To make bolts and handles, it is necessary to use scraps of boards and bars or pre-purchased blanks.
Cladding, door assembly
Now all that remains is to cover the canvas with clapboard, assemble the wooden bath doors together and make a door frame. To do this you need to do the following:


After all this, you can begin creating the door frame. To do this, we use beams with dimensions of 100x100 mm. To create boxes from them, it is enough to cut them to a certain length and select the quarters using a cutter. It is important that the depth of such a quarter is approximately 5 mm greater. This is extremely important, because in a bathhouse, under the influence of constant humidity, the wooden door will swell and can easily jam. In addition, you need to remember that the vertical top bar will be slightly smaller than the width of the box, and the threshold should be at least 10-15 cm in height. To combine the box beams, you need to cut grooves along all the edges of the racks from the bottom and top, and along the edges of the top cut out tenons for the trim and threshold. Before installing the door frame, you need to assemble it and check with a square that all the angles are correct. If necessary, you need to sharpen the grooves and process special means from rotting and begin installing the door in place.
How to easily install bath doors
When the doors are completely ready, they can be installed. Installation begins with making special grooves in the doorway. We make them approximately 10 mm larger than the width of the door frame, this is necessary so that during installation you can easily adjust the vertical position of your doors and spread them out using wedges. Then the box is installed in the grooves. It is important not to confuse exactly where the doors will open.

Important! It should be remembered that the doors in the bathhouse should swing outwards.
Then you need to place a horizontal top beam and support it vertical posts. After this, you need to place the threshold on the bottom. Using a level, we monitor the absolutely vertical position of the box. Having been well aligned vertically, wedges should be driven into all gaps between the frame and the wall, this will fix the box in place. We fix the door frame to the wall using dowels, having drilled special holes for them in advance. When the frame is well secured, you can begin installing hinges for the door leaf. The very first hinge should be at a height of about 25 cm from the top of the door, the second - 50 cm, and the third - 25 cm from the bottom edge. This will help protect your doors from skewing, especially if your door is very heavy. Now you need to hang the door leaf, fill the entire perimeter of the frame with a felt roller and seal all the cracks.
Making a sauna door is quite a difficult task, and it must be approached responsibly. True, the result can exceed all the wildest expectations.