The Asparagus or Asparagus plant genus belongs to the Asparagus family and has more than 300 species. In the wild, Asparagus can be found in the European part of Russia and the Caucasus, most often in arid areas. The plant is cultivated in Western Europe, Japan, India, USA, and China. There was a time when asparagus belonged to the lily family, but nowadays it has its own family, Asparagus.
Asparagus is a perennial plant. Externally, it consists of branched herbs and subshrubs, and sometimes vines. Asparagus has a very developed root system.
Description
 Asparagus has highly branched stems that can grow up to one and a half meters high. Most plants lack green leaves, and those species that do have them most often grow underdeveloped and very small.
The leaves form hard spurs at their base. There are very small flowers, which are usually concentrated in the leaf axils. Flowers grow in thyroid or racemose inflorescences.
Asparagus flowers can be either unisexual or bisexual. The flowers have six petals, which are arranged in two rows.
 IN room conditions most common Common asparagus. It is also planted in gardens as a vegetable, and is also often used in making bouquets of flowers. This species was discovered more than 2000 years ago.
During times Ancient Egypt Asparagus was grown as a vegetable, used for medicinal purposes, or as a simple ornamental plant. The roots of Asparagus vulgaris are very rich in nutrients, including vitamin C.
Now let's take a closer look at how to grow Asparagus at home and in open ground.
Growing asparagus: how to grow asparagus from seeds, planting and care
 The most the easy way planting Asparagus - planting seeds. Such seeds can be purchased at any specialty store. Asparagus seeds are quite large, and sowing them will not cause any difficulties.
Asparagus is planted in early spring. Seeds are sown in light, moist soil. The substrate should consist of equal parts of fertile soil and sand. The seeds are sprinkled with a thin layer of soil. Then the container is covered with glass or transparent film on top. The container with the seeded Asparagus is removed into the room with room temperature and sufficient light. If excess condensation appears on the glass, the glass must be removed for a short time. The first shoots of Asparagus will be visible within a month.
Location and lighting in the home
 Asparagus - very photophilous plant, so it prefers a fairly well-lit place. However, you should avoid exposing the plant to direct sunlight. In particular, this applies to the summer period, when the days are especially long.
A pot of Asparagus will do well on the east and west sides. If the plant is placed on the south side, then it necessary shade and create diffused lighting to avoid direct sunlight. In the summer, Asparagus can be taken out open air, also placing in partial shade.
Pot size
 Pot size for Asparagus directly depends on the type of plant. If the plant was purchased in a store, then it is better to immediately transplant it into a new pot. But so that in size it does not differ much from the previous one, so you should not select a pot for Asparagus with a reserve.
Otherwise, this can lead to acidification of the soil and death of the plant. The shape of the pot also does not play any role. This most often depends on where Asparagus will be placed or on decorative preferences. Some types of Asparagus look very attractive in:
- hanging flowerpots;
- miniature pots on windowsills;
- large pots standing on the floor.
Soil for growing
 Asparagus is very unpretentious in terms of soil. Part of the soil can be taken from a vegetable garden or garden, add part of deciduous soil, which can be taken from a forest or park. You can add a little coarse sand to the mixture, which will crush the substrate.
This soil mixture provides Asparagus with all necessary nutrients, and also promotes moisture and air to circulate freely. It would be very nice if you put a thin layer of pieces on the bottom of the pot. charcoal. This will prevent the process of rotting in the soil and the development of fungal diseases. Thus, maintaining the composition of the soil will significantly affect the health of the plant.
Transplantation and after care
 Before starting the transplant, necessary prepare a new pot and soil in advance. Then the Asparagus is carefully removed from the container without damaging the root system. You can knock on the sides of the pot, turn it over and carefully remove the earthen lump.
If after this procedure, the plant is still difficult to remove, then it is necessary to water the soil so that it becomes very wet. A small stone or expanded clay is poured into the bottom of the new pot as drainage, which will allow water to flow freely in the water and not stagnate in the pot.
Next, a layer of substrate is poured into the pot. At Asparagus attentively The root system is inspected and damaged roots are removed. Old soil is shaken off the roots. Then the plant is placed in a new pot, carefully straightening the root system. Soil is gradually poured on top. You can’t crush the soil, but you shouldn’t leave air voids either. The final stage replanting will be watering Asparagus warm infused water. After transplantation, the plant must be placed in a shaded place for a couple of days.
Fertilizers and fertilizing are the key to successful cultivation
 Caring for and growing asparagus also requires regular feeding. During intensive growth of Asparagus, concentrated fertilizers must be added to the water during irrigation. The frequency with which the plant should be fed depends on the time of year and the condition of the Asparagus itself.
Usually plants start feed in early spring, and finish feeding late autumn. In winter, when the dormant period begins for Asparagus, it is not recommended to feed the plant, and watering itself should be reduced. In the summer, when Asparagus is outside, you can feed it organic fertilizers. Chicken manure works well.
 It is also worth remembering that Asparagus should not be fed for the first two months after transplantation. During feeding it is necessary strictly maintain the concentration, following the instructions on the package, otherwise you can burn the root system of the plant.
 The first sign of presence spider mite There will be a change in color of Asparagus leaves. They will become yellow color and will begin to dry out a little. You can see small cobwebs between the leaves. Small white cottony spots also appear on the leaves of the plant.
When attacked by a pest, Asparagus leaves must be wiped soap solution . If this method no longer helps, then you can turn to insecticides for help. But it is worth remembering that Asparagus does not tolerate processing well. chemicals, so it is best to avoid infecting the plant spider mite, observing the temperature conditions.
Growing asparagus in open ground
But how to plant and grow Asparagus in open ground?

Bloom
 Whatever the care and maintenance, at home it is very difficult achieve Asparagus flowering, even if everything the necessary conditions will be respected. But even if it is possible to achieve flowering of a plant, the flowers look rather inconspicuous.
Externally they are very small flowers white , which are formed on the upper segment of the shoots. After some time, after artificial pollination, the flowers form into small red fruits, the aroma of which resembles an orange. You should avoid getting these berries into the hands of small children, because Asparagus fruits are poisonous.
Reproduction
There are three main ways to propagate asparagus:

Rest period
The dormant period for Asparagus is from November to early March. At this time, the plant must be provided with sufficient air humidity and watering must be reduced. Feed the plant during the dormant period No need.
Plant toxicity/beneficial properties
Asparagus berries are poisonous, so the plant should be placed further away or higher so that its fruits are not accessible to small children.
Asparagus, or asparagus, is a crop that is quite demanding on the soil and conditions in which it is grown. In this regard, it is very important to follow agricultural practices when cultivating it and provide the plant with proper care.
Asparagus agricultural technology
Asparagus plants grow especially well in loose, sandy loam soil rich in nutrients. If the soil is not fertile enough, there is a very high risk that the shoots will be too fibrous when they ripen. Practice shows that asparagus generally does not accept acidic soil and closely lying groundwater. At the same time, a good asparagus harvest can be obtained only if the crop is sufficiently moistened.
When answering the question of how to grow asparagus without problems, one cannot help but note the culture’s love of light. Accordingly, the planting area should be sunny. It is advisable to plant asparagus after potatoes or cereals.
Important! If the asparagus bed is located next to a fence, protect the seedlings from negative influences weeds from the street can be removed by digging a sheet of slate into the soil.
Despite the fact that for a plant such as asparagus, growing and caring for it in open ground requires a certain amount of effort, in last years The demand for culture is becoming increasingly greater.
Appearance
Reproduction
Regarding the question of asparagus, how to plant and grow this plant, one cannot fail to mention methods of propagation. Most often, the crop is propagated in two ways:
- dividing the bush;
- seeds.
If you propagate asparagus by dividing the bush, the plants should be replanted as soon as spring arrives and fresh shoots begin to appear. Autumn, in principle, is also suitable, but autumn division of the bush is less common. To obtain seedlings, selected healthy and strong plants are completely dug out of the soil, cut into several parts, leaving 2-3 shoots, and sent to grow in a pre-selected and prepared place. The seedlings are planted in fairly large holes so that the roots are located freely. A small amount of superphosphate, potassium chloride and humus should be placed at the bottom of the hole. A crop such as asparagus should be grown in such a way that the distance between plantings is at least half a meter.
Important! Autumn breeding should be done after the asparagus wilts, but at least a couple of weeks before the onset of frost. If winter is early, fresh seedlings will not have time to take root and will inevitably die.
When looking for an answer to the question of how to properly grow asparagus from seeds, one cannot help but mention that this particular method is used especially often. Before starting the process, it is important not to forget about pre-soaking the asparagus seeds. The seed material is wrapped in a wet cloth and placed in plastic bag and sent to a warm place for a couple of days. This procedure speeds up the seed hatching process.
Planting seeds
If the soil has managed to warm up to +10 degrees, asparagus can be planted directly from seeds into open ground. This is done at intervals of 30 to 40 cm to a depth of no more than 4 cm. If there is even the slightest threat of frost, the seedlings should be covered with film. It will be necessary to open the bed immediately after the first shoots appear.
If you start sowing seeds when the soil has not yet warmed up well enough, it will be better if the planting does not leave the house and warmth at first. To do this, sowing is carried out in separate cups. It can be transplanted into the garden later, when there is no threat of frost.
Planting seedlings

In regions such as Siberia, the Leningrad region, the Moscow region and the Moscow region, seeds for seedlings in the spring are first planted at home and only in early summer are they moved to open ground.
Before planting, special holes are prepared on the site, the depth of which is at least 30 cm and the width is 40 cm. The distance between the holes should be slightly less than a meter. Loose soil is poured into the hole and a seedling that has managed to grow from seeds is placed in it. First, its root needs to be slightly shortened, to about 3 cm. The hole is filled with soil, lightly compacted and watered. After all the water has been absorbed into the ground, it is recommended to additionally mulch the planting site - this will significantly simplify caring for the plant. The plant will not need any more transplants - With proper care, asparagus grows in the same place for many years.
Create optimal condition Even the most inexperienced agricultural technician or gardener can grow asparagus - just periodically weed, loosen the plants and water moderately. A couple of weeks after planting, the plant requires feeding.
Asparagus care
The answer to the question of how to grow asparagus begins with finding a way to plant asparagus correctly and ends with organizing proper care for the crop. In general, caring for the crop is quite simple - the plant is unpretentious.
Loosening
It is enough to loosen to a depth of just over 5 cm. In this case, it is important to make every effort so as not to harm the root system. Proper care involves loosening at intervals of 2-3 weeks throughout the entire growing season.
Advice. During the first two years of a crop’s life, it is recommended to plant certain green crops in the inter-row spaces.
Watering
In the first two weeks after planting, it is recommended to water asparagus very generously. Over time, both the number of irrigations and the volume of water are significantly reduced. Optimally, the soil should be slightly moist at all times. If you water the plant rarely, this will affect the taste of the asparagus - it will become more bitter.

Irrigation
Top dressing
As for feeding asparagus, it must be done without fail. The slurry solution should be added to the soil in a ratio of 1:6 a couple of weeks after the first weeding. After another couple of weeks, it will not be superfluous to feed the crop with a solution of bird droppings in a ratio of 1:10. The last fertilizer is applied just before the onset of frost. In this case we are talking about complex mineral compositions.
Important! If the area was fertilized before planting asparagus in open ground, fertilizing should begin in the second year of crop growth.
Disease and pest control
Rust
This is about fungal disease, which leads to a slowdown in plant development. Typically, crops that are grown in areas with soil that does not permeate moisture well or are close to groundwater are susceptible to the disease.
Note. Frequent rains also contribute to the development of rust.
Root rot
Another disease that affects asparagus is root rot. It can occur when creating the same conditions for the plant as in the case of rust - when high humidity soil.
Asparagus leaf beetle
Of the pests, the crop is most often attacked by the asparagus leaf beetle. This is a dark blue beetle that feeds on the tops, flowers and fruits of the plant. The insect appears in the spring, the peak of its invasion usually occurs in mid-summer. If the crop is affected by this pest, you can forget about the royal harvest.
Asparagus fly
Another problem that gardeners who grow asparagus face is the asparagus fly. This insect pest is a brown insect with yellow limbs that feeds on plant shoots and makes tunnels in the stem. As a result, the plant begins to bend, wither and eventually die.
Advice. Protect asparagus from diseases and harvest at the end of the season good harvest Preventative spraying of plants will help Bordeaux mixture or any other fungicide. Karbofos will help fight insects. In addition, it is strongly recommended to carefully inspect all beds and, if clutches of eggs are found on them, destroy them.
Harvesting and storing asparagus
Having figured out what asparagus is and how to grow this crop at the dacha, all that remains is to figure out how to collect the plant and its subsequent storage. You can collect shoots starting from the third year of growing the crop. The first two years will be needed for the root system to become sufficiently strong. Edible shoots must be cut. This should be done in May, until the heads open. You need to rake away the soil from them in the place where a crack has formed in the ground. The stumps should be left 1 or 2 cm high. It is not strongly recommended to remove more than five shoots from one bush in the very first year of growing asparagus. This approach can significantly weaken the plant. When the crop becomes more mature, at least thirty shoots can be removed from the bush every year.

Harvesting
Homemade asparagus should be stored in the refrigerator, wrapped in a slightly damp cloth. Depending on the variety, the plant will live quietly from two weeks to a month. Under no circumstances should you store foods that have a strong odor near asparagus. The plant will absorb it. The shoots must be laid vertically. Otherwise, they will become deformed.
Today, the business of growing asparagus in our country is still underdeveloped; if the crop is planted, it is only for personal use. But there is every reason to believe that the situation may change in the foreseeable future.
Asparagus - in demand vegetable crop, often called royal. And it got this name for a reason. The most famous representative of the Asparagus family has a unique composition. It contains ascorbic acid, carotene, magnesium, iron, calcium, selenium and many substances vital for humans. Have you long dreamed of planting asparagus in your garden? This article will help with this!
Asparagus is a perennial vegetable plant valued for its unpretentiousness and frost resistance. It reaches a height of 1.5 m. It can grow in one place for up to 25 years, forming more than 60 shoots during this time.
The stems of asparagus are highly branched, the roots are well developed and powerful. The flowers are small, collected in racemes. The fruit is a berry with seeds hidden in a thick skin.
Young shoots that have just emerged from the ground are suitable for food. If buds appear on them, the branches become tough and unsuitable for consumption. The crop's yield is modest (up to 12 shoots per whole season). It is this circumstance that explains the high price of asparagus. But the cost fully justifies the maintenance.
A few sprigs of asparagus (the second name for asparagus) are a source of valuable substances that have a beneficial effect on the functioning of all internal organs.
When can I plant?
Asparagus is planted in spring or autumn. In spring - before buds sprout. Before planting, the soil is fertilized with humus (10 kg per 1 m2). Dig a 30 cm trench, carefully straighten the roots, cover with soil and water generously. The optimal distance between holes is 60 cm.

If you are planting in the fall, carefully dig up the soil and apply to each square meter superphosphate (60 g), potassium sulfate (30 g), ammonium sulfate (20 g). The distance between the trenches is the same as during spring planting.
Pay attention to one important point. When planting in spring, plant so that the plant is in a depression, which will help maintain the desired humidity. In autumn, on the contrary, form a small mound - this will protect the roots from frost.
How to plant?
Several methods of planting asparagus are practiced. Let's take a closer look at them and decide which one is the best.
Asparagus from seeds
Many gardeners consider this method the most labor-intensive due to poor germination. Actually this is not true. If the technology is followed, problems rarely arise.
Work will begin at the end of April. First, the seeds are soaked in water for 2 days, then for 2 hours in a pink solution of potassium permanganate. Prepare a soil mixture consisting of garden soil, sand, manure, peat in a ratio of 2:1:1:1 and spread the seeds on the surface. Lightly sprinkle with substrate, spray with a spray bottle and wait for germination, remembering to constantly moisten the soil. You can cover the plantings with glass, creating a greenhouse effect.

The temperature should remain at +26 degrees. Seeds take a long time to germinate - 6 weeks. So be patient. On permanent place residence, asparagus can be moved in mid-summer.
Asparagus from roots
Growing asparagus using the root method is the fastest, and therefore the most common, option. In this case, the probability of rooting is 99%. Experts advise planting asparagus before winter. The soil should be prepared: remove weeds, dig, apply fertilizer. If you decide to grow asparagus in the spring, then the soil is flavored with compost (10 kg per 1 m2).
The rhizome is purchased one day before planting. Choose strong-looking roots that are brownish-gray in color.
Soak them in warm water for 30 minutes. Dig trenches 30x30 cm. When planting in several rows, the interval between them is 0.5 m.

Pour a nutrient substrate into the center of the hole, place the roots there at a distance of 30 cm from each other, sprinkle with soil and water. As the asparagus grows, the soil will settle - be sure to add new soil. When the trench is filled to the top, add dry leaves, sawdust or tree bark on top.
Asparagus by dividing the bush
Asparagus can be grown by dividing the bush. This method is suitable for any time of the year. It is better to divide the bush during replanting. So, young asparagus is replanted annually, adult - once every 10 years. One shoot at a time is planted in the prepared holes at intervals of 50 cm.

The roots should be 10 cm below the surface of the ground. If you decide to plant plants in one line, then all perennials located nearby will have to be eliminated.
The nuances of forcing asparagus
How to get asparagus in winter or early spring? To do this, the rhizomes of plants aged 5-6 years are dug up in the fall and stored in the basement until winter. The temperature should be kept at +2 degrees.

At the beginning of December they are planted in a greenhouse. Planting density is high. At least 20 pieces per square meter. The seedlings are covered with humus and covered with polyethylene. For the first week, maintain the temperature at +10 degrees. After the rhizomes begin to grow, the temperature is raised to +18 degrees. Temperature preserved throughout the entire harvest period.
How to care?
You need to water frequently, but in minimal portions. Asparagus does not tolerate stagnation of liquid - watch this. It is better to loosen the soil immediately after irrigation. 30 days after planting, a water infusion of mullein is added to the soil. At the end of June, the ground is fertilized with superphosphate, urea and potassium salt (30 grams of each item per 1 m2).
During flowering, spray with insecticides. In July (when the shoots begin to grow again), the plants can be pampered with minerals or organic matter. The fourth time is fed before frost (in October), using complex fertilizers.
In autumn, the old stems are cut off, the lower ones are hilled up and sprinkled with peat or compost. The lower part should be well covered, at least 5 cm in height. This will help the plants survive the winter. In the 2nd and 3rd years of life, in the spring, asparagus is fertilized with complex mineral supplements (30 grams per 1 m2).
A little about harvesting
Shoots that are eaten appear in the 4th year of life. The harvest is harvested in May; if the winter was warm, then in April. You can break out asparagus when it begins to lift the soil crust. Have you seen cracks in the ground? Carefully dig up the soil and, when you see a seedling, cut it off. Do not touch young shoots and roots. Fill the holes that appear after cutting with soil.

In the first year, try to harvest within a month - a long harvest will weaken the young plants. You can collect from old bushes until the end of June. The higher the thermometer, the faster the asparagus develops. However, after the shoots emerge from the ground, they change color and begin to crumble.
To avoid losing your harvest, harvest asparagus twice a day - morning and evening. After harvesting, the trenches are leveled and the soil is fertilized with ammonium nitrate or slurry.
That's all you need to know in order to be able to grow healthy asparagus. Apply the acquired knowledge in practice, and the queen of the beds will always be favorable to you - you will be provided with valuable vitamins and microelements!
Video review of asparagus harvest
Asparagus - perennial herbaceous plant asparagus family. Since ancient times, the crop was grown as a medicinal plant, and a little later the tender sprouts began to be eaten. This delicious vegetable has long been intended for the nobility, its taste is so delicate and pleasant. It is possible that this is why asparagus was dubbed royal.
Description of asparagus
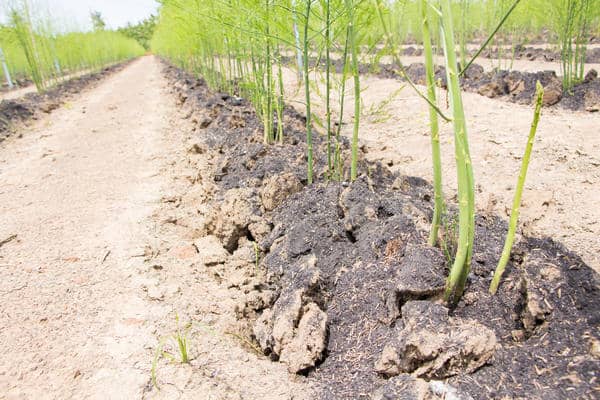
The value of asparagus lies not only in its content large quantity vitamins and useful macro- and microelements, but also in the fact that it is an early vegetable crop. Young asparagus sprouts are the first to appear in our gardens, and this usually happens in April. Shoots of milky ripeness taste like green pea. Asparagus can be boiled, baked, steamed or added to salads - it is good in any form.  In early spring, asparagus shoots are the first to appear in the garden beds.
In addition to practical benefits, asparagus is also an ornamental plant. Tall bushes with heavily dissected leaves resemble Christmas trees and are sometimes planted by gardeners not in special beds, but in flower beds. Florists use beautiful asparagus panicles when arranging bouquets - the delicate greenery goes well with flowers and retains a fresh look for a long time.
 Planted in a flowerbed among flowers, asparagus enlivens the composition
 Asparagus sprouts are available in green, white and burgundy colors. The point is not in the varieties, as it might seem, but in the timing of collection and methods of cultivation. If asparagus grows in a regular bed, we get green sprouts. To grow white or purple shoots, asparagus is hilled up, depriving it of sunlight, but in the first case this is done immediately, and in the second - when the shoots stretch out slightly and turn green.  Applying various ways growing, you can get asparagus sprouts of different colors
Growing methods
Asparagus is usually grown from seeds - in this case, the first harvest can be obtained in the third year. When planting ready-made seedlings or root cuttings, the time is significantly reduced, and the first shoots will appear next spring.
Sowing seeds for seedlings
Before sowing, asparagus seeds are soaked for two days in a solution of Epin or another biostimulant. Considering the difficulty of seed germination, this measure will not be superfluous. You can start sowing at the end of March or in April. The soil for asparagus should be light and breathable. You can use store-bought soil for seedlings, adding sand and vermiculite to it in a ratio of 5:1:1. Instead of vermiculite, coconut substrate is often used.
Sowing seeds in a container:
- Fill the planting container with prepared soil and lightly compact it.
- Place the seeds on the surface at a distance of 3–4 cm from each other.
- Sprinkle the seeds with a layer of soil no more than 1 cm and press lightly.
- Moisten the soil with a spray bottle.
- Cover the container with film and place in a bright, warm place.
The main conditions for germination are warmth and humidity. Condensation will accumulate on the film, so the container with seeds must be ventilated every day. At an air temperature of at least 25 o C, seedlings will appear in about a month and a half.
 Six weeks after sowing, lacy asparagus shoots appear
Planting seedlings in open ground
For asparagus, choose a sunny, flood-free place with fertile, light soils. On poor soils, compost or manure (one bucket is enough for 1m2) and complex mineral fertilizers are first applied. If the soil on the site is heavy and clayey, add sand for digging. It is advisable to carry out all these events in the fall.
If you plan to plant asparagus seedlings in the fall, then instead of complex mineral fertilizers, apply phosphorus-potassium or nutrient mixtures marked “autumn.” The fact is that the nitrogen contained in complex fertilizers, stimulates the growth of shoots, but in the fall it is undesirable. At this time, the shoots must ripen and the root system strengthen, so phosphorus and potassium are what you need.
You can plant seedlings in open ground from the second half of June. By this time, the soil has time to warm up, and the possibility of return frosts is unlikely. The fertilized deoxidized area is dug up well, removing clods of earth and roots of weeds.  Grown asparagus bushes are ready for planting in open ground
It is more convenient to plant seedlings in trenches at least 30 cm deep. Asparagus grows in one place for about 20 years, growing both in height and width. Therefore, if it is not planned to replant the grown plants in the future, then the seedlings are placed 35–40 cm from each other. The distance between rows is 1 m or more.
Landing rules:
- Mounds of fertile soil are placed in the dug trench.
- The roots of the seedling are straightened over the mound so that they are directed downward, without bends. Long roots are shortened, leaving 4–5 cm.
- Sprinkle the roots with soil and lightly squeeze.
- The trench is spilled with water and the planting is mulched with peat or rotted sawdust.
Sowing seeds in open ground in spring
Asparagus can also be grown by direct sowing in open ground. The bed is prepared in the same way as for planting seedlings, but instead of trenches, grooves 4–5 cm deep are made. At the end of May, the seeds are soaked for a day in a biostimulator for quick and reliable germination. Sowing is carried out in a prepared bed, placing the seeds in grooves. If there are a lot of seeds, it is advisable to sow them thicker, since not all of them will sprout, and the excess can later be cut out with scissors. Sprinkle the furrows with a small layer of soil, compact and water. After the water is absorbed, mulch the bed. Asparagus seeds take a long time to germinate, so it is advisable to cover the bed with agrofibre - this will prevent moisture loss and speed up the emergence of seedlings.
Video: sowing asparagus for seedlings
Reproduction by dividing the bush
The easiest way to propagate asparagus is by dividing the bush. This procedure can be carried out in spring, autumn, and even in summer, if there is no extreme heat. The dug out bush is divided into parts so that each section has one sprout. This is usually done with your hands or, if that doesn’t work, use a sharp knife. Separated plants are planted in trenches in the same way as seedlings obtained from seeds - at the same time and according to the same scheme.  The preferred method of propagating asparagus is by dividing the bush
Using the same principle, asparagus is propagated by dividing the rhizomes. This is usually done in the spring, before new shoots grow. Dig up the root and divide it into parts so that each has a bud. The cuttings are planted in the described way - in trenches on mounds. Parts of asparagus rhizomes are planted on a hill
Parts of asparagus rhizomes are planted on a hill Caring for asparagus in open ground
Planted plants need to be kept moist, especially at first. When the seedlings take root and become stronger, watering can be reduced, but the soil should not be allowed to dry out. Mulch will help keep the soil moist. In addition, the mulched area does not need to be loosened, and weeding is purely symbolic in nature - to remove individual blades of grass that have emerged.
In the first year until autumn, it is not advisable to prune asparagus shoots so as not to interfere with the full development of the bush. The first edible sprouts will appear in small quantities next spring, and in the third year you can harvest.  If you don’t trim asparagus shoots in the year of planting, then by next summer they will be beautiful mature bushes.
Fertilizing
If the bed was well fertilized when planting asparagus, then fertilizing is not needed in the first year. Young plants begin to be fed from the second year. In early spring, dry nitrogen-phosphorus-potassium mixtures are scattered between the plants and the soil is loosened well. Then, until mid-summer, once every two weeks they are fed with green fertilizer or mullein infusion. At the end of summer, fertilize with autumn mineral fertilizer, which can be applied dry or prepared as an aqueous solution according to the instructions.
Preparing the plant for winter
To protect asparagus from freezing, the bed must be properly prepared for winter. In autumn, all the stems of the plant are cut short and this must be done before frost. Then the plants are hilled up - with what harsher than winter, the higher the hill should be. The top of the ridge is sprinkled with peat or compost.
I planted my first asparagus about 20 years ago. We didn’t have the Internet then and I, as a novice gardener, knew nothing about this plant. I saw seeds of something new on sale and bought them. There is minimal information on the bag - I only found out that edible sprouts will appear in the second or third year. I sowed the seeds directly into the garden bed, without any special tricks - one row and that’s it. For a long time no shoots appeared, and I managed to happily forget that I had such seeds. Closer to the middle of summer, I saw a row of slender fir trees of a soft green color and began to think what it could be - I had never seen asparagus shoots before. I remembered when the bushes grew, at the same time it became clear with what greenery the grandmothers used to decorate simple bouquets of their gladioli. By autumn, the bushes had grown and were already about a meter high, with 5–6 shoots each. In the fall, I cut off all the greens and my asparagus went into the winter without any hilling or insulation. No frost had any effect on my plants, and in the spring we picked the first shoots. The first time I tried this plant was from my own garden; before that I didn’t even know the taste. Pleasant, tender greens - we didn’t cook any dishes, we just ate fresh, slightly sweet, pea-like sprouts. Since then, we have had asparagus in our garden and this is the very first plant that we harvest in the spring.
Growing asparagus does not require special knowledge and is not difficult even for beginners. The only problem is waiting for the harvest. It’s more common for us to plant seeds in the spring and get our vegetables in the summer. Asparagus takes three years to grow, but it doesn't have to be planted every year. With minimal care, the plant will delight the eye and enrich the owner’s menu for many years. This is the advantage of a perennial culture.
Asparagus, or asparagus, is a cold-resistant crop grown on personal plots with mineral-rich soil. The height of asparagus stems reaches 1.5 meters. Growing asparagus is most favorable on sandy loam soils. The plant, being in the ground, can tolerate the most severe frosts - down to –30 0 C, but may not withstand frosts on the soil surface in early spring. In this case, the root system of asparagus can die even at -5 0 C. The plant, being in the ground, activates its growth in the spring, when the air temperature is +10 0 C. By mid-June, the stems and leaves of asparagus straighten out, and fruits appear. Planting asparagus is possible in spring and before winter.
Features of growing asparagus from seeds
 Preparation planting material to boarding at spring soil takes place in the last weeks of April. To prevent seedlings from diseases and damage by garden pests in the open ground, this type of care will be required: the seeds are soaked for 2 hours in a solution of manganese (also known as potassium permanganate), after which they are laid out on damp sawdust for germination. In the spring, peat capsules are also suitable for growing crops.
Tip: Germinating asparagus seeds in gauze before planting in the ground is not recommended due to the possibility of entanglement and damage to weak sprouts.
Propagation of asparagus after planting by seeds should include:
- Moderate humidity, plenty of light, average temperature of +25 0 C during the week.
- Sowing seeds with sprouts in spring in peat boxes or plastic cups measuring 100-200 ml. The soil is taken from the site, sand and manure are added to it.
The seeds are covered with a soil layer of several millimeters. A week after planting, asparagus stalks will appear from the ground. In summer, asparagus seedlings are planted in the garden. Next season, the strengthened asparagus rhizomes will be suitable for transplanting to a permanent area in the open ground.
Root method of planting and propagation
Growing asparagus in the ground using roots is the easiest way, as the plant is most likely to take root. It is better to plant asparagus before winter.
 To plant in the soil, you need to carry out preparatory work: remove weeds, roots from last year’s harvest, loosen the soil and apply mineral fertilizers. After deep digging of the site, the soil should be fertilized with the following agricultural components: 15 g of ammonium sulfur, 30 g of potassium phosphate and 60 g of magnesulfate.
If you plan to grow asparagus in the soil in the spring, add compost to the soil. It is poured into the furrow in an amount of 10 kg per 1 m 3. It should be noted that it is impossible to apply other fertilizing before planting the crop on O open ground.
Advice: Self-selected fertilizers can burn asparagus rhizomes and destroy the future harvest.
If asparagus is planted in the spring, then the roots of the plant are placed in the soil in the garden bed and covered with soil. This must be done so that the level of the hole is 5 cm below its edge. This is necessary for the correct irrigation procedure.
Before the process of planting asparagus in the fall before winter, special care will be required. It is necessary to form a medium-height mound above the rhizomes brought into the ground. This method will protect plants from winter frosts in open ground.
Homemade method
Growing asparagus on your own site is possible through artisanal propagation. The right choice planting material is thick, well-grown roots. In the spring they are divided into parts, but with one shoot intact. After a month, rhizomes will grow in the soil, the beds are loosened without affecting the rhizomes.
 One healthy plant at a time is planted in the prepared holes, 50 cm apart from each other. The rhizomes of asparagus seedlings require correct landing and care in the first week. The rhizomes should be straightened into the ground and located 10 cm below ground level. Pegs are driven in next to the seedlings, to which their tops are tied as the plants grow. If the area of the plot is small for growing and planting one plant at a time, asparagus is planted in several rows 1.2 meters wide.
Tip: When planting a crop in one line, you should remove all perennials, located nearby.
After planting asparagus, the bed is watered and covered with a layer of 8 cm of soil. In the first years of asparagus life, care is required, the holes are leveled. During the growing season of asparagus and the amount of mineral fertilizer applied, a roller will form where bleached asparagus shoots will develop. To extend the period of growing asparagus in the same area, it constantly requires care: it is watered and fertilized strictly according to the instructions with special agricultural components.
In the fall, after pruning, the garden bed needs care: the earth mound is raked to ensure a flow of oxygen to the rhizomes. To obtain bleached shoots, in the spring the asparagus bed is covered with agrofibre or dense polyethylene, preferably dark.
Tip: To protect asparagus stems from natural elements, you can cover them plastic bottles without a bottom, and put sawdust on top.
If necessary, the stems are raked and the shoots are cut off at the base, without affecting neighboring bushes. After pruning, the rhizomes are covered back with soil.
Rules of care
Asparagus is enough unpretentious plant. Main care for growing crops consists of timely irrigation, loosening and fertilizing. The asparagus bed should be irrigated constantly, but in small quantities. The main requirement for growing asparagus is not to overdo it with watering, but also not to let the stems dry out.
 Growing asparagus requires loosening the soil. It is better to do this after watering, when the water is well absorbed into the root system. Weeds are a pest; they should be removed from beds and rows so that they do not grow and draw useful minerals from the ground.
Mullein is an excellent fertilizer for asparagus. It is brought into the ground, having previously been infused in water in a ratio of 1:5. Fertilizing the soil is carried out 20 days after planting asparagus in the garden. Having counted the same amount of time after feeding with mullein, diluted bird droppings with a calculation of 1:10.
Advice: The last phase of fertilizing asparagus beds is carried out using complex mineral fertilizer, usually before the first frost.
In the second year of life, asparagus will produce shoots, but it is not recommended to pick them due to the spring weakness of the plant. Growing asparagus during the ripening process requires care, which consists of the same actions as in the first year of asparagus development and growth.
Diseases and pests
Asparagus is a plant that is resistant to diseases and pests, but serious damage is caused by the fungus Helicobasidium purpureum. During the process of growth and development, plants require careful care. Infection with fungal spores occurs within a few days and can destroy an entire asparagus bed.
 Fungus damage can be determined by weakened plants. In this case, the root system dies, after which the leaves and shoots fall off. Asparagus disease can be eliminated by treating plants with Fundazol. The drug contains a small percentage of chemical elements, but it is recommended to use it strictly according to the instructions, and extreme cases. Additional insecticides for treating asparagus are Actellik, Fitoverm, Fufanon.
So, in the first year after planting asparagus, you won’t be able to enjoy its shoots, since the harvest will appear only in the second year of the crop’s life. But given the ease of growing and caring for the plant, as well as the extraordinary taste of asparagus, it’s still worth waiting a year or two.