Before going out, each of us double-checks or takes everything we need with us. For some it may be a watch, for others mobile phone. But very often we all forget our keys. But this is a very important thing, without which we cannot close our house or start our car. Particularly stressful situations arise when you need to rush to work or an important meeting, but the keys are nowhere to be found. Therefore, to avoid such cases, it is better to purchase a key holder, which will become the keeper of your time. In this article we will look in detail at what types of key holders there are, and how to make one with your own hands.
Types of key holders
A key holder is a special device that allows you to store all your keys in plain sight. The design of this product is limited only by the personal tastes of the owner of the house. Key holders are divided into several types:

The purpose of key holders is not only to store keys. They can also be used to store glasses, phones, flash drives and other items that will always get lost somewhere. In addition to these things, you can store notes. If you set out to store not only keys, but also other items, you need to equip your device with additional fasteners. Also, do not place the key holder too close to front door. Because this way a possible attacker will have a greater chance of stealing your belongings.

Key holders are available in several options for their customers. It all depends on the purpose for which they will be purchased. For example, office buildings usually choose metal constructions, which are locked. This is very convenient, as it maintains access restrictions and organizes a control system. Hotels usually prefer products that are specifically tailored to the interior of the room. Key holders in warehouses have no special design, but are made in the usual shape and color. The main thing is that the product performs its standard function. But if you are doing home renovations, you should approach the making of a key holder more individually, so that in the future your taste will definitely be appreciated.

A simple key holder made of wood
Although this option looks quite simple in appearance, but very effective solution where to keep the keys. You can start making the product by purchasing an ordinary rounded board. If you don’t want to change the shape of the object, you can immediately start sanding the surface sandpaper.

If you want to keep the current color of the board, you can simply embellish it with varnish. If you don’t like the color, you can immediately start painting or covering it with fabric. To quickly find the area with clues in the future, apply black color to the outline of the shape. In this way, the key holder will stand out against the background of painted walls or wallpaper, and you will quickly find the key you need.
You need to drill as many holes as the keys will be stored. If you wish, you can decorate the key holder with additional figures made of paper or other material that can be glued.

Original key holder from a branch
If you are a creative person, then it is not a problem for you to turn any little thing into a delightful decorative element. In the case of making a key holder, you will need the following:
- wooden branch;
- several metal hooks;
- drill and hammer drill;
- screws and dowels.
It is best to take a piece of wood from an oak tree. The material will be more durable. However, you can take branches from other trees. The main thing is that they can withstand the load from the tools, and that the hooks are freely screwed into the wood and hold well during subsequent use.

Stages of work:
- Sandpaper is used to remove tree bark.
- Using a drill, you need to drill as many holes as you have hooks. The diameter of the holes should be slightly smaller than the diameter of the hooks themselves. Also, you need to drill the main two hinged holes.
- If you are not satisfied with the color of the product, use stain to give the wooden key holder the shades that you like best. Excess layers will need to be removed with sandpaper.
- Varnishing will improve it somewhat appearance products. You have a choice of glossy and matte varnish. You can choose according to your interior needs.
- The future decorative element is applied well to the wall surface in order to fix exact marks for further installation.
- Two holes are machined with a hammer drill, after which the move follows the dowels and screwing of the key holder.
- Since the caps of the screws will be visible, they can be covered with putty.
- All that's left to do is screw it in required amount hooks and calmly hang out the keys.

Key holder in the form of a frame
Perhaps you have some old photos that you can't find a place on your wall. In this case, there is no need to hang dusty paintings, but it is better to adapt their frames for more creative purposes. For example, you can inhale new life in old frames if you use them to decorate a key holder. To do this you need the following components:
- glue;
- a piece of plywood;
- hooks

If for some reason you don't like the current design, you can always change it. For example, sanding and painting. Part of the plywood is cut in proportion to the size of the frame. Also, in addition to painting, you can decorate the frame with fabric, but for this you will need to make gaps on each side. The hooks are also attached with glue. After all these steps, the key holder in the form of a picture can be hung on the wall.

Closed house-shaped key holder
This type of product is similar to a house or birdhouse that has doors. Such key holders are made of wood, plastic and textiles. But as practice shows, many prefer wooden style. For manufacturing you will need the following materials:
- a piece of plywood;
- sandpaper;
- fasteners for doors;
- screws;
- hooks;
- dye.

Stages of work:
- A sketch of the key holder is drawn.
- According to the developed pattern, parts for the house are cut out.
- The cut parts need to be sanded.
- Cover with a triple layer of varnish.
- When all the parts are ready, assembly is carried out (tightened screws should not be visible from the outside).
- Securing the doors.
- The lock is installed.
- The hooks are screwed on.
- Design occurs by painting or gluing a separate image.

Plywood key holder for the whole family
When a large family lives at home, a large plywood key holder is perfect. It is convenient because the keys of each family member will always be in front of their nose. Parents and children will not be confused or forgotten. This is due to the fact that a certain sign will be inscribed above each keychain. For example, you can give the contours of a drawing of a car, a house, or children. This kind of approach serves as key sorting.


Stages of work:
- The plywood board is carefully processed using sandpaper (the corners are rounded if desired).
- You need to plan in advance the background for the large key holder (drawing or picture).
- The image is transferred to the work area using a pencil or any other hard object.
- After drawing the contours, you can take a jigsaw and carefully cut out the required shape.
- In the area of individual figures you need to pierce holes for the key rings.
- The surface is polished again to avoid any debris from the piercing.
- The product is coated with varnish or paint, and then hung on the wall.
Magnetic key holder
The original version with a magnet looks very nice and comfortable. It is better to make such a magnetic key holder in a minimalist style. Because the lighter its weight, the better the magnet will hold hanging keys.

Materials such as plywood, cardboard or plastic are selected for manufacturing. Cut from these materials required form, and then glued with a magnet. And it turns out to be a simple but reliable key holder. Can be used as decoration various materials: ribbons, patterns, drawings. A universal option Phosphorus sprays are considered. This way, at a late hour, even before the lights turn on, you will be able to recognize the location of the keys.

Using the decoupage technique in decorating a key holder
Using this technique allows you to display your planned design or pattern on the surface of the material being processed. This process takes place by decorating the selected image on the working surface.

What you will need for this:
- wood blank;
- napkin;
- glue;
- acrylic lacquer and white paint.
Before applying the drawing, you need to treat the surface. Therefore, first it is sanded, and then a white compound is applied in two layers. When the layer of mixture has dried, select a suitable area. Apply the drawing to the desired area. Next you will have to apply glue evenly starting from the middle. Don't forget to get rid of any bubbles and excess air. After the glue has dried, decide on the overall tone of the picture. It is desirable that it matches the image itself. Any excess can be decorated with paint and a piece of washcloth, which you can press into a clothespin for convenience. And now, the decoupage technique is finished. True, it is better to apply a special varnish as a protective layer. Turn the key holder to the side of the light and where you see bald spots, apply protective varnish in two layers. Sand again to remove any possible defects. As for hooks, there is complete freedom of your taste.

The key holder can also act as an organizer. We are talking about a small box in which some household utensils are usually sold or clothespins are stored. Also, such an item can be easily assembled from plywood. In addition to storing keys, you can store glasses or a mobile device in it, which is also sometimes forgotten when leaving the house.

Other options
Acceptable options for the key holder are: children's performance. If your children love to play with Lego construction sets, they have a great opportunity to build a home key holder. Overall, the construction process itself will be fun and educational for your child. And in the case of a large family, absolutely everyone can take part. So, you will need the most basic large panel on which to build other elements. Multi-colored building bricks with three holes can act as keys so that you can pick up a keychain. If your construction set does not contain building elements with holes, you can make them using an awl. The whole advantage of a Lego key holder is that you can choose any color that suits you; add brick hooks in addition to additional elements decorations (you can even add some kind of winged inscription).

As mentioned earlier, sometimes you have to carry a large collection of keys in your pocket at all times. For this reason, pockets become worn and holes form. And if you also put the gadget with the keys, you will damage everything at once. That's why, alternative option there will be a pocket key holder. You can also make it yourself or purchase it in a store. But the first option will be more original and beautiful, if of course you try.

The keys are very important things, which provide us with access to everything we need. And if you have a tendency to constantly forget them, try making your own key holder. Even if you are not one of the forgetful people, this item storage will be useful in any case. It will save you time searching for the right thing, and will serve as a decoration element for home interior. Of course, you can buy a key holder, but by making it yourself you will achieve greater originality and superiority.
96 new photos of key holder ideas


This article contains 7 step-by-step master classes- how to make a key holder with your own hands on the wall in the hallway on a very budget! This does not require a lot of materials and time, because they can be made from scrap materials such as wood, branches, old toys
And with the help of the original design of a key hanger, you can emphasize the style and interior of your home or apartment.
Sometimes, looking at familiar things from the other side, you can notice completely new possibilities for their use.
Here we offer a new look at using Lego. We perceive it as an educational children's game (of course, adults too, because it's no secret that parents sometimes buy toys more for themselves than for their children). But with the help of a few tools you can use it to make not only different figures for games, but also an original wall-mounted key holder.

Key tag - also made from a construction element

Wall-mounted key holder made of plastic Lego
You will need:
- Lego pieces: a flat rectangular platform and as many small pieces as you want to hang keys
- Drill with fine bit
- Screws, dowels (2 are enough)
- Keychain rings
- Ruler
- Marker
- Lace
- Scissors
Manufacturing:
- On small parts of the construction set (square or rectangular to your taste), on one side, mark the middle with a marker and carefully make a small hole with a drill.
- Tie a string to the ring and to the small part of the construction set (pass it through the drilled hole and tie a knot).
- On a large flat platform, make two symmetrical holes for screws.
- Attach the platform to the wall (depending on what kind of wall, use dowels)
- Put your keys on rings, hanging from small pieces and attach them to the platform.
Enjoy using it and don't lose your keys again!

Master class No. 2: Original key tags
Let's look at how to make a simple wooden key holder that can be mounted on the wall. This Master Class is very simple, for complete beginners in tinkering with their own hands.

Materials:
- Dremel 8050 Micro multi-tool or similar model(possible separately grinder, saw, drill)
- wooden block approximately 2.5 cm x 5 cm x 14 (we made it for 4 keys, if you need a different number, take the appropriate size)
- two small pendants for shelves (consider the selected size of the bar)
- leather lace (we used 1.5mm thick, but a regular strong lace can also be used)
- screwdriver
- 4 small opening rings
- 4 pendants around the neck (you can take the keychains you like)
- wire cutters
- round pliers
- pencil
- ruler

Step 1: To make the holder you need:
- Sand the wood block.
- Fix it and go through it first coarser grinding disc to remove irregularities and protrusions, then medium and smooth.
- Mark with a pencil the place for the hangers on the back side of the block and use an engraving cutter to make recesses with a depth of approximately 3 mm(the bar is symmetrical, so choose one of the two back sides at your discretion).
- In the place where there is an opening in the suspension, make recess another 3 mm.
- Place the hangers on the block and secure them with screws.
- On the front of the block, make marks for 4 openings(parallel, as in the photo) and using a cutter attachment, make indentations about 1 cm deep.
- Attach the block to the wall.
Step 2: All that remains is to make the keychains:
- Regardless of whether you took a pendant or a keychain, remove the mount (the keychain is too thick for the opening, and the pendant is too long). Use wire cutters if necessary.
- Place the release ring on the key. Can be clamped with pliers.
- Cut off from leather lace 4 even parts, thread through the key ring and keychain, tie.
Instead of a wire polygon, you can use any object, for example, any toy or ball.

Key tags can be made of any shape and type
Master class No. 3: Key hanger made from tree branches
The easiest way to make a key holder is to use tree branches.
- How to do it right .
- Then we decorate them at our discretion, either varnish or paint with paint.
- We buy in the store hooks, they must be sharpened on one side and carefully hammer it into the wood.
There are many design options for such hangers - look at the photos and choose!

Boho style key hanger


Very simple and beautiful!


Different options for hangers for keys and not only using branches

Master class No. 4: Made from wood and old keys
It sounds strange, but it is true, in this master class we will actually make a key holder, the hooks of which will be made from old and unnecessary keys.

Retro housekeeper
You will need:
- Rectangular wooden board
- Old keys (3-5 pieces depending on how many hooks you need)
- Nails (short and thin, but the head should be wide enough)
- Pliers
- Sandpaper
Manufacturing:
Using a saw, give the board the desired size and shape, and round the corners. Then use sandpaper to remove all burrs. If you are lucky enough to immediately find suitable board, this step is skipped.

Attaching hooks to the base of the key holder
- Lock the key head, and bend the blade with pliers to form a hook shape. Repeat this step with the remaining keys.
- Place evenly hook keys on a board.
- In the place where there are holes in the key heads, drive in the nails(the cap must be larger than the hole on the key to hold it).
- The key holder is ready, all that remains is to hang it on the wall. This can be done by attaching hangers to the back of the board or driving two nails into the wall and making holes in the board and hanging them by them.
It looks very original and immediately reminds of its purpose.
Master class No. 5: Key holder with a vase
In fact, such a board with hooks can be used not only as a key holder in the hallway, but also as a kitchen hanger for potholders and towels, or for the bathroom.

Key holder with vase
It looks interesting and unusual, because it’s not often that you see a vase of flowers on a hanger.
Materials:
- Rectangular wooden board
- White paint for wood
- Hooks (3-4 pieces)
- Jar (maximum 0.5 l)
- Metal pipe clamp (must fit the jar)
- Hangers for fastening
- Screws
- Drill
Manufacturing:

- Paint the board in White color . This will perform two functions at once: aesthetic and protective, the latter is especially important when used in the kitchen or bathroom to reduce the effect of heat and moisture on the wood. Let the paint dry.
- Attach the hooks and clamp to the board using screws and a drill.
- The hooks have special holes for screws, but most likely they will not be in the clamp, so you should use a drill.
- Attach the hangers to the reverse sides e boards and hang them in the chosen place.
- Insert a jar with a bouquet or sprig of flowers into the clamp.
The result is a beautiful key holder in soft colors. It will complement the interior well and will serve as an additional accessory for decorating the apartment.
We also described in more detail how to make such a mount - as in the photo below.

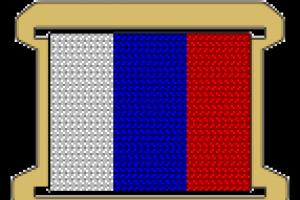
Master class No. 6: Housekeeper “like in a hotel”
Such a housekeeper has not only original design, but a definite advantage over others described here is clarity and orderliness. It’s not for nothing that they are used in hotels, because each key location can be signed.
Only we will indicate not the room number, but the purpose of the key: for a house, work, dacha, car, mailbox, parents’ apartment, staircase etc. Often the keys to different rooms look the same, such a key holder will once and for all save you from situations when, instead of keys to the office, you put the keys to the dacha in your bag, and then you cannot open the door.

Large wooden key holder

Necessary materials:
- Thin wooden strip (approximately 8 cm wide)
- Frame strips
- Set of metal tags
- Hooks (threaded)
- Dye
- Suspensions
- Small nails or screws (very thin)
Assembly steps:
Step #1: Prepare the base
Saw the wooden plank into 5 equal parts. When choosing the length of the planks, keep in mind that you will then glue them together to make a rectangle or square; calculate the dimensions for the desired shape.

- Form a frame the right size from planks for frames.
- Staple 5 planks and frame special glue for wood, as it shown on the picture.
- Now we need to paint this entire structure.
You can first apply a wood antiseptic, wait until it dries, and then apply several layers of paint one after another. Wait for it to dry.


If you wish, you can give the wood an antique effect by rubbing it a little with sandpaper.
Step 2: Attach tags


- It's time to attach the tags. Think about how the board will hang: so that the slats are vertical or horizontal (in our example they are vertical). Lightly with a pencil mark the mounting locations, they should be at the same distance. You can place them under a ruler or make a stencil out of paper. Attach the tags to the wooden base with nails or screws.
- Under the tags in the center of each of them Make thin holes for the hooks with a drill, use the thinnest nozzle.
- Screw the hooks into the holes.
- Attach With reverse side key holders pendants and hang it on the wall.
- Insert notes about the purpose of the hooks into the key tags and hang the keys.
Use it to your heart's content!
Ideas for key holders using improvised means
From a tennis ball
Easy way to make a key holder from a tennis ball:
- fasten with liquid nails a ball to the suction cup (bath hooks are sold like this),
- make a cut with a sharp knife in the center
- decorate: attach eyes (can be taken from an old doll) or draw with a marker.

Wall-mounted key holders fit perfectly into the hallway - plus you don’t have to look for keys throughout the house. This is the main advantage of any key holder: saving time. In a couple of weeks, you will develop the habit of hanging the key on it in the evening when you come home from work, and taking it off in the morning when you leave for work. As a result, you no longer need to search the apartment in search of missing keys, and you are always aware of who is at home from your family - just look at the key holder and see if all the keys are in place.
The practical side is not the only advantage. There is also aesthetics, because the key holder can be decorated in any style. Do you have an eco-friendly hallway? Nothing will fit into it better than a key holder made from a tree branch. High tech ? A small stylish metal key holder will go well with it. Provence? Decoupage with flowers or birds. Classic? Wooden varnish board of strict shape.
You can find something that suits your needs at any home improvement store. But there is another approach: make a key holder with your own hands.
It has advantages:
- Originality. A thing made with your own hands will always be different from a similar one, but produced on an assembly line. Features of processing inherent in each master, interesting design solutions - even when making a key holder according to the instructions, you will know for sure that no one else has the same one.
- Diversity. At home, even without experience, you can make more than a dozen different key holders. From wooden cut, from a box, from wire, from a branch, even from forks - there will always be material, you just need a little patience to handle it carefully.
- Harmony. The key holder you bought may be perfect for your hallway, but you need to find it first. If you made it yourself, it will fit like your own - after all, you will work on it, coming up with a design and knowing how it will fit in.
- Interesting experience. Making something with your own hands is not only useful, it’s also fun. If you have kids, you can team up with them, turning the simple act of making a key holder into a real adventure. And if there are no children, you can simply enjoy the process.
Homemade key holders come in different varieties - from different materials, different designs. Before you get down to work, you need to figure out what kind of work you need.
What types of key holders are there?
There are two ways to classify key holders.
The first is by design:
- Open. These are usually made by hand because they are easier to make. They are any kind of hooks on which you can hang keys driven into anything. Board with nails? Open. Branch with twigs? Open. Leather cut with pockets? Open.
- Closed. These are more difficult to make - it will take some carpentry. They are a cabinet that closes with a door. The door will have to be hung on hinges, otherwise it will quickly fall off. They allow you to hide what exactly is inside and protect the keys from prying eyes. Shelves can be built into them useful little things, hang a mirror on the door and expand the practical application in another way.
The second method is based on the materials that were used.
Wine bottle corks can be considered a type of wood - they can also be used to make a beautiful key holder. But you can’t make it out of paper - it will wear out too quickly. It will also not come out of glass or stone - the material is difficult to find and even more difficult to process.
Advice
When choosing a material, focus on three indicators: what will be easiest for you to work with, what will fit best into your hallway, and what you will definitely be able to get. Having decided, proceed.
How to do it yourself?
Before starting work, it remains to remember the basic rules that guide all masters:
- You should not be disturbed during the process. Ask your family to give you a couple of quiet hours, close the door and avoid distractions.
- The work place should be well lit. Doing something with your hands in the light of a dim light bulb is not only harmful to the eyes, but also simply inconvenient.
- Everything should be in its place. This is important when you are working with sharp objects. When you finish cutting plywood or metal sheets, you should put the jigsaw or knife in a visible place, where you won’t lose it. Otherwise you might get hurt.
The simplest: cardboard key holder
Cardboard is the simplest material from which you can make a key holder. You will need:
- sheets of thick cardboard - regular gray, can be found in the house, or you can buy a set;
- a suitable drawing on photo paper - you can print it in any stationery store, and choose it according to your taste by searching on the Internet;
- decorative screws with beautiful heads, an awl;
- a piece of wire, brushes, varnish, glue, sponge.
The instructions for performing the work are simple:
- cut out the desired shape from four sheets of cardboard - a circle, a square, a heart, it all depends on your imagination;
- use an awl to pierce two holes in the upper part of one blank figure - for a loop;
- insert the wire into the holes, twist it so that it does not fall out;
- Glue the remaining pieces to the side where the twisted wire remains;
- On the front part, mark the holes for the screws and pierce them with an awl.
At this point, the key holder itself is prepared. The rest is essentially decoration:
- put the photo face down, wet the sponge, soak it upper layer, and then roll it up, pressing lightly;
- dry the photo, coat it with glue using a brush and stick it on the workpiece;
- coat everything together with varnish to achieve greater strength;
- insert screws.
The result is a simple key holder. It is not very durable, it is afraid of moisture, it can tear if you pull it hard, but it is easy to make, the materials cost almost nothing and the result looks decent. Especially if you like bright lacquered designs, and you have a simple renovation in the hallway, without designer frills.
Advice
This key holder is a good gift for older relatives. Grandparents will be delighted to receive a little thing with a photo of the faces of their beloved relatives and at the same time useful in the household.
Ideal eco-style: made from a branch
A branch used as a key holder is fresh, original and fits perfectly into eco-style. You can find it in the nearest park (you may have to spend several days), and it won’t be difficult to apply for it. Will be needed:
- dry branch - a wet tree will quickly begin to rot and lose its appearance;
- stain, jigsaw, drill, sandpaper, hooks (you can buy special ones in the store, you can use thick nails).
If desired, you can place a varnished design above the branch that will complement it. You can hang beads, feathers and decorative keys on bright threads from it. You can carve anything on wood - from a few letters to a simple design.
For connoisseurs of strong drinks from corks
It’s good to make a key holder from corks together with children, since this process is most similar to trying to assemble a mosaic without a picture that shows the end result.
You will need:
- photo frame - you can glue it yourself, or you can buy it;
- about twenty wine bottle corks;
- PVA glue - not a pencil, but in a jar;
- nails with beautiful heads or hooks.
What follows requires only skill:
- take a cork, coat the sides and ends with glue, insert it inside the photo frame so that it fits against the frame from the inside;
- take the next cork, spread it with glue, and attach it to the first one.
The process is close to meditation: you need to fold the corks so that they perfectly fill the space of the frame. The resulting result should be left to dry overnight, and then varnished and hooks for keys inserted into soft cork wood.
The advantage of such a key holder is its uniqueness. Just as no two branches are alike, no two photo frames are equally filled with corks. To make the design chic, you can paint the corks in different colors, burn them, or cut out letters on them.
A simpler option, more suitable for eco-style, is to find a thin stick and hang corks from it on bright threads. Drive a hook into each plug and hang the key on it.
Advice
A simple option with traffic jams will look appropriate only in a minimalist interior or in a hallway that is full of fun accessories. It has no place in strict styles - the same classics and hi-tech.
Classic beauty: made from sawn wood
Despite the impressiveness of the result, the process of making such a key holder is no more difficult than working with a tree branch. The only problem you may encounter is the difficulty of finding pine cuts when living in the city. But you can either find a fallen tree branch and cut off a piece from it, or turn to village relatives.
You will need:
- a round cut of a tree - a circle two to three centimeters thick, cut from the end of a log, and it is best if it is pine;
- stain, sandpaper of different grain sizes, varnish;
- wide brush, hooks, drill, screwdriver;
- printout of an image that has previously been flipped as a mirror image.
It all comes together simply:
- sand with sandpaper - first medium grain, then fine, and exclusively along the fibers, otherwise unsightly scratches will form;
- moisten with water so that the wood swells slightly, leave to dry;
- cover with stain (preferably water-based, since it hardens longer and all mistakes can be corrected in the process) three times to get a beautiful bright color;
- varnish the prepared printout, then cover it with the same front side back, press the printout against it, gently smooth it out so that there are no bubbles;
- After the print has dried (this will take two to three hours), moisten it warm water, slowly remove until the pattern appears - clean off the remaining white;
- On the back side of the key holder, use a drill to drill holes for the hook on which it will hang, and on the front side - holes for the hooks on which the keys will hang.
The drawing can be anything, the main thing is that it is black and white - the colors can be conveyed using varnish, but they will not be as bright as on the original. You can do without it altogether, then the hallway will be decorated with the noble texture of processed wood.
Advice
Wooden sawn fits well classic interior. Good decision will also select its shade so that it matches the color of the furniture. IN as a last resort, you can go over it with a dry brush and acrylic paint to get the color you want.
Quality for decades - made of metal
Working with metal is difficult, especially if you have never done it before. But if you start with a key holder made of ordinary wire, it will become clear that perseverance will overcome any difficulties. You will need:
- thick wire - several millimeters in diameter;
- sharp scissors - best for metal, but regular wire cutters will do;
- pliers, hammer.
The manufacturing process is simple:
- find an interesting contour drawing on the Internet - for starters, something simple, like an intricate spiral, square, circle, stylized cat;
- try to repeat the pattern using wire - you should bend it by holding one end in pliers and fixing the other with your free hand;
- sharp corners can be obtained by pressing them with the head of a hammer; smooth lines can be simply curled with pliers;
- When the figurine is ready, you need to attach hooks made of the same wire to its lower part, and attach a thin wire to the back, on which you can hang the entire structure.
An interesting variation of this same idea is the use of a hanger. It does not need to be bent with pliers or hit with a hammer. It’s enough just to hang hooks on its lower part, and decorate the main part with anything, from the gears of an old watch to banal flowers made of colored paper.
A more complex way to make a metal key holder is to use a thin sheet of metal, which can either be found in renovation scraps or purchased at a hobby store.
You will need:
- thin metal sheet;
- sharp scissors, nail, sketch drawing, hand drill, hooks;
- a product that will make the metal airtight and protect it from rust.
The design cannot be anything - only the kind that can be cut out of metal. Silhouettes are best - animals, fish, plants, castles. Any is enough simple shapes. You can show your imagination and come up with an abstract figure.
Before what remains is:
- cut out a silhouette from a sheet with a pattern;
- attach the silhouette to a metal sheet, circle it with the tip of a nail;
- carefully cut along the contour, making sure that no unsightly jagged edges remain;
- use a hammer to bend any sharp edges that may arise during the process;
- use a drill to drill holes for the hooks;
- coat the resulting base with a sealing agent and let dry;
- Insert the hooks into the holes and secure the mount at the back.
It is better if the metal sheet is black, this will make it more stylish. You can, however, use shiny, polished options, but they tend to fade over time, losing all their chic appearance.
Advice
Do not use metal that is too thick; it will be difficult to cut. In addition, the nail on which it will hang may not withstand the weight.
This will be interesting to you:
Decoupage technique - made from a frame
If you like simple paintings of flowers, birds, animals or landscapes, you will also like this method. You will need:
- a frame from an old painting or photograph - you can even glue it together yourself;
- a piece of plywood - always of good quality;
- acrylic paints, varnish and primer, plus a wide brush;
- sandpaper, decoupage drawing, file, stationery PVA;
- hooks, drill, jigsaw.
The technique for making a key holder is more complicated than the previous ones. You will have to not only glue, drill, use sandpaper, but also cut out with a jigsaw.
The sequence looks like this:
- measure the dimensions of the frame, cut out the plywood with a jigsaw so that it coincides with them and can be inserted inside - you need to act carefully, otherwise it will crack;
- drill holes in the plywood through which the self-tapping screws will go in, which will fasten it in the frame, cover it with acrylic primer and leave for several hours;
- sand the plywood first with medium-grain sandpaper, then with fine sandpaper;
- place the decoupage design face down on the file, moisten the inside with water;
- coat the plywood with glue, attach the file, smooth it out properly so that there are no bubbles left, carefully remove;
- dilute acrylic paint, cover the frame with it so that it matches the color of the picture;
- Insert hooks into the holes drilled in the plywood and attach it to the frame;
- varnish the result.
Instead of plywood you can use thick paper or fabric with embroidery. You can even leave the frame empty, attaching hooks directly to it - this will also be beautiful in its own way.
Advice
It is important to ensure that the design matches the interior. For high-tech, birds with flowers will be foreign, for rustic style the city of the future will not work either.
Artistic cutting from plywood
The most difficult of the open key holders is perhaps this one. Plywood that you might have left after renovation, in the form of a shelf from unnecessary furniture or a back wall from something, the material is cheap, but capricious. If you work with it carelessly, it can crack, after which it will not look as beautiful as you would like.
But you can give it any shape, cut out any silhouette or word from it.
You will need:
- jigsaw, drill, spatula, wood putty, varnish;
- hooks for keys, directly a piece of plywood.
You will also need a sketch. As is the case with metal sheet, simple silhouettes are best: a cloud, a cat, a word, a flower, even an ordinary circle that can be turned into the Moon. You can go further and make a double key holder: give it a shape, and then cut out the individual elements.
This idea can often be found: a house-shaped key holder, separately cut elements in the form of human figures. Each one has a key attached to it. When a person wants to take it, he takes out the figurine and leaves with it in his pocket. By the remaining voids, you can easily understand who is at home and who is not.
Regular hooks - an economical option
The technology, however, is the same:
- take the plywood and secure it well so that it does not slip out;
- start cutting, carefully removing a thin layer of plywood - the movements of the jigsaw should be directed in one direction, intensifying from beginning to end;
- drill holes for hooks;
- sand the edges; if cracks appear, seal them with putty;
- coat the product with varnish and let dry;
- insert hooks into the holes.
To make the key holder brighter, you can paint it in any color using acrylic paint before varnishing. You can put a design on it, you can cut out a simple pattern with a jigsaw. The main thing is that the result looks harmonious and matches the main interior.
Advice
A plywood key holder can suit any style. The question is how you design it.
Elegant simplicity: uncomplicated models
The cardboard key holder is simple, the design made from a branch is also not complicated, but there are simpler ones:
Cutlery. If you have unnecessary spoons and forks around the house, they can make excellent key holders. Simply bend them to form hooks and secure them to a wooden or plywood board using a drill and self-tapping screws. The teeth of the forks can be beautifully bent, twisted into a spiral using pliers, or bent so that they resemble bent fingers. Spoons can be engraved, drilled or decorated in some other way.
Leather. Leather key holders - perfect solution for those who like to sew and not work with a jigsaw. It is enough to take a large piece of leather, give it a shape using scissors (from an abstract spot to the silhouette of a cat or bird), and then either drive small nails into it or sew leather pockets onto it. You can even sew in bright threads so that they hang down, and the ends are provided with small hooks. Embroidery, decoupage, ribbon bow, badges or buttons - all means will be good for decoration.
Lego is creative and interesting way diversify the interior
wooden plank. It does not need to be sawed with a jigsaw, like plywood, and treated with stain, like sawn wood. You just need to attach the hooks you bought at your local store to it. hardware store. For beauty, you can burn a picture or a few words on wood, cut out a simple pattern or apply a drawing - either guided solely by your imagination, or by translating it using carbon paper.
Watch. An old, non-working, beautiful watch is a great base. They can be attached to a board, drilled holes in it, and secured with hooks. Or you can use a clock without a board, if it is old and there is enough space to screw in the screws.
Threads. You need to drive nails into the board in a random order, and then connect them with bright threads so that you get something like a pattern. You can form it point by point, like a constellation, or you can leave it abstract, simply an interweaving of bright colors. Drive the hooks in at the bottom and calmly hang the keys on them.
In addition to the shape, it is also important to position the key holder correctly. It should be approximately at the height of your chest so that it is convenient to reach .
If there are children in the house, you need to either substitute a chair for them or hang the structure lower.
It should be placed so as not to interfere with anything, and at the same time close enough to the door so that a person standing with shoes on the rug can easily reach it. Do not place anything additional under the key holder; do not overload the hallway with accessories.
We will send the material to you by e-mail
Every apartment should be in order, and all things should be in their places, this also applies to keys. Every person has a bundle from their home, garage or office. In order to keep the item always at hand, a small but very important accessory was invented at one time - a wall-mounted key holder. Making it with your own hands is as easy as shelling pears, you just need to show a little imagination and follow the recommendations of our review.
The most original ideas for your home
In general, key houses can be divided into two main categories: open (metal, wood, leather) and closed models (used for careful or strict storage).Open wall key holders are lightweight design with a holder that simply complements general design apartments.
Closed key holders are the most presentable; they look like a small “house” for keys.

To make a key holder for the hallway with your own hands, we will need:
- Wooden blank in the form of a house.
- Napkin with a picture.
- Adhesive composition for decoupage.
- Tassels.
- Matt lacquer.
- Light colored soil mixture.
- Scissors.
- Texture paste.
- File.
Do-it-yourself decoupage of a wall-mounted key holder, the first stage of work:
| Photo | Description |
|---|---|
 Preparing the surface Preparing the surface | First we prime wooden house two layers, then plaster. |
 Cutting out the image Cutting out the image | Cut out the desired image from a pre-prepared napkin. |
 Place the file face down Place the file face down | It is imperative to separate the layer where the drawing is depicted and apply adhesive composition. Then we place the image on the file with the pattern down. Spread the resulting result with glue on top. |
 Place the image and apply varnish Place the image and apply varnish | After this, we pick up the stationery file and attach it to our house. We place the image with glue applied and go over the file with a roller. After all the work, carefully remove the file and let the product dry completely. Paint over the borders light color and wait until our key holder is completely dry. After this, apply several layers of matte varnish. |
Decorating the house
At the second stage, we do the decoration ourselves wall decoupage housekeepers We will need a template brickwork and structural paste for further actions.

First you need to glue the roof and, using a palette knife, apply a layer of paste, which gives structure.After drying, apply glitter and silver paint. Let it dry again, then the house is varnished, dried and the fasteners for the keys are installed.
Decoupage of a pocket key holder
In addition to wall-mounted and tabletop key holders, there are also pocket models. Such a thing is not just the image of the owner, but also performs several functions. We will describe in a little more detail how to make a pocket key holder with your own hands. Let's take the simplest but most popular option. For this we need:
- Leather flap, size 150*105 mm.
- Studs that match the leather color.
- Blank for key storage with carabiners.
- Punch.
- Scissors.
The pocket keeper will be much cuter if it has rounded edges. To make the markings correctly, you can use a regular bottle cap.

- First, we attach the blanks with carabiners.
- We lay out a bunch of keys and wrap the edges to determine the location for the rivets and make notes.
- We make a spacer under the keys to strengthen the whole model.
- We make holes along all the marked marks using a punch.
- We fix the workpiece with rivets and attach the rivets to the lapels.
Decorative stitching made of contrasting thread with a slight indentation from the edge will add a special highlight.
Article
It’s great if in your home each item has its own place. This is especially true for small things that tend to fall over something and get lost. First of all, this applies to keys. They cannot always be found quickly if they are abandoned in an unusual place, even if it is in plain sight.
The solution to this problem is a key holder - a special item in which keys are stored. It may look like a locker or small wall shelf with hooks.

Types of key holders
All types of home key keepers are wall-mounted, since it is quite convenient if they are located at eye level. This makes them much easier to use. Key holders can be wooden, metal, leather, plastic or glass.


The most common key keepers are those made from wood. These models are distinguished by environmental Safety and identity. They can be made from valuable wood and decorated with intricate carved designs. Made by hand, wooden key holders can look like real works of applied art.

Metal products are usually not intended for home use. They are most appropriate in schools, offices and various offices, i.e. in places where there is a need to store a lot of keys.

Royal key holders made of metal alloys can add solidity to your home. They will fit perfectly into an environment decorated in styles such as hi-tech, techno and loft.

Do you want to give your hallway a special charm? Opt for a leather key holder. Its main difference is its small size. Therefore, owners of small hallways usually prefer to purchase this model.

Photos of wall-mounted key holders clearly show that they are divided into open and closed. A closed key holder is a small cabinet with hooks for keys, and an open one looks like a shelf.


Today, manufacturers offer multifunctional key holders, the design of which may include a shelf for correspondence, a chalk board, etc. In addition to dividing by type of design, products for storing keys are divided depending on their purpose - for home and office.

In our country, wooden key holders are the most popular. They can be purchased at finished form in most souvenir shops or do it yourself. It is possible to make a key holder with your own hands from pieces of board, pieces of plywood or branches.

Finished products delight the eye with amazing variety design solutions. Collage key holders decorated with applique look amazing.

Variations made by hand from noble wood are considered especially valuable. It can be oak, walnut or teak wood. Such models will be appropriate for a hallway designed in both a modern style and a classic style.


Key holders with leather inserts look no less decorative. Chromed metal elements can be used as additional decoration for them. Eventually similar products features an elegant and stylish appearance.

What is better - an open or closed key holder? The advantage of the first is ease of operation (there is no need to open anything in order to hang or remove the key). The advantages of the second are a more advantageous appearance and the ability to disguise certain unaesthetic details of the hallway (counters, doorbell mounting, etc.). Therefore, when choosing such items, it is better to focus on your taste and interior style.

A key keeper in the shape of a regular quadrangle with a glass door will add solidity to the atmosphere. And a product decorated using the decoupage technique will always look great. It will undoubtedly please all family members. The theme of the drawing can be vintage or fairy tale motifs.

Some key holders immediately stand out in the interior due to their brightness and beautiful appearance. Others are difficult to notice at first glance - they can be hidden in other details of the situation, i.e. be secret.


An example of the latter is the key holder built into the clock. This extraordinary design idea will appeal to all those who like to receive guests and those who prefer not to keep their keys in plain sight.


Where is the best place to place a key keeper?
Everyone knows that the place of the housekeeper is in the hallway. But where exactly should it be hung? There are no strict recommendations here. Any free and convenient place is suitable for its location.

It would be optimal to place the key holder closer to the front door or to the hangers for outerwear. We got ready, threw on a jacket or coat, grabbed a bunch of keys - and headed out. Or, on the contrary, they returned, closed the door behind them, and removed the key. This location of the key house minimizes the risk of leaving them in another place and forgetting about it.


Instructions for making a key holder-pots
You will need:
- fiberboard board (base);
- old flowerpot;
- putty;
- putty knife;
- a set of acrylic or gouache paints;
- aerosol type varnish;
- glue;
- subtle matter;
- hooks;
- decor (beads, bugles, ribbons, feathers, braid, lace, decorative figures).

In order to make a key holder, you need:
- Take the base and apply a little putty on it.
- Before it dries, make markings stylized as brickwork.
- Cover the base with paint and then a protective layer of varnish.
- Soak the material in PVA glue.
- Stretch the fabric over the pots, forming beautiful folds.
- Paint the resulting blank in dark colors. After the paint has dried, apply gold or silver patterns.
- Do some decorating.
- Glue the pots to the base and decorate the surface with additional accessories. Place the finished key holder in the frame and attach the hooks.
- Place fresh or artificial flowers, dried herbs, leaves, or beautiful feathers in the pots. The key holder is ready.

A key holder is an excellent solution for maintaining order in the hallway. In addition to its direct purpose, it can play the role of one of the key interior details, without which it is impossible to create a cozy atmosphere. A well-chosen key keeper will add the necessary zest to the hallway environment and add charm to it.

Photo of a wall key holder