Swing gates can be considered an ideal design, if not for one significant drawback - the tendency to spontaneously close from the slightest gust of wind. The result is scratches and dents on your favorite car, and sometimes even injuries of varying severity on the body of their owner.
Allows you to avoid trouble simple fixtures- clamps for sashes, which are popularly called stops. Those who have not realized the need to use them can support the swing gate with any object that comes to hand, or go to the store for a ready-made stopper. And you can strain your own mind, and make emphasis with your own hands.
Stoppers-constipation

The easiest and favorite option for home craftsmen. The stopper works much like an old-fashioned window latch, but its size is much more impressive. Such a device has not yet been mass-produced, but it is quite possible to make it yourself. For this you will need:
- two steel tubes (one for each swing gate leaf) about 15 cm long and 1.6 cm in diameter;
- steel plates 10 cm wide and 15 cm long;
- pins freely entering the branch pipe, at least 20 cm long.
The whole process of making a latch with your own hands consists of several stages:
- Steel tubes are welded to the plates and then attached to the bottom of the gate. For sashes sheathed with wood, this is done using self-tapping screws; the plate is simply welded to metal sashes.
- A lever is welded to the upper end of the pin at a right angle, which plays the role of a handle or just a pin, preheated on gas burner, which is bent and inserted into the nozzle.
- Now we open the sash and find a place where it will be necessary to drive the counterpart of our “espagnolette” to a depth of about 30 cm. We take into account that the pin should enter it by at least 10 cm. Do not forget that the gate leaf can be located slightly higher than the entrance level.
- So that the pin does not interfere with opening the swing gates, we weld a hook above the lock, on which the pin handle will rest.
But consider the disadvantages of this device. The return pipe, into which the pin should be lowered, can be covered with snow in winter and will have to be dug out, for which there is not always time. You can do without a counterpart, but in this case, the ends of the pins should be pointed. Such a latch will, of course, be less reliable than the original version, but extreme case and he will fit. If not steel pipes the desired diameter, you can slightly modify the fixture. Replace it with two or three loops. It turns out a simple, but quite effective design.
Stops on carabiners

An original and cheap solution to the problem of creating with your own hands. For implementation, you will need (for each of the wings of the swing gates):
- cargo sling with a metal hook at the end;
- small carabiner;
- eyebolt with M8 thread.
From the tools you need a drill with an F7 drill, an M8 tap and a wrench for it, any adhesive-sealant. If you have experience using the above tools, then mounting the latch will take no more than half an hour. The process will consist of the following steps:
- On a frame with inside two holes are drilled at the same height, and a thread is cut into them.
- The eyebolts are coated with sealant and screwed into the prepared holes.
- Carabiners are put on eyebolts, and cargo slings are threaded through them.
The hooks can be hooked onto the adjacent garage door. But nothing prevents the use of a bracket fixed on a fence post or wall for these purposes. Can be attached to any nearby solid construction and get a cheap and reliable stop, devoid of the shortcomings of the latch-constipation. Unfortunately, the appearance of this device is not very attractive, which many may consider a significant disadvantage.
Hook for aesthetes

A very simple device, but it does its job perfectly. It has a respectable appearance and even allows you to fix swing gate leaves in two or more positions. For manufacturing you need (on both wings):
- metal corners 50 mm long, 80 cm and 15 cm;
- a steel bar with a section diameter of 12 mm and a length of approximately 1.2 meters;
- welding machine, self-tapping screws, drill, vise.
And now we perform a few simple steps:
- In a larger corner, which will play the role of a hinge, three holes are drilled on one side for fastening to the gate frame. On the other hand, there are two holes at the edges, of such a diameter that the end of the steel bar freely enters into them.
- Now the hardest part is making the hook. One side of the heated steel bar is bent into a ring (do not forget to leave a gap so that the hook can be put on the canopy!). The other side is given U-shape. It's difficult, but quite possible.
- Now a canopy is made from a smaller corner, for which two holes are drilled in it on one side for fastening to the sash, and in the middle of the other side - one hole for fixing the hook.
- We fix the corners so that the larger one is on the gate frame, and the smaller one is on the sash. You can use self-tapping screws (for wooden gates) or welding (for metal ones) for these purposes. We put the hook on the canopy and finally bend the ring.
That's all, the length of the hook and the location of the holes will have to be calculated empirically, experimenting with the gate leaves. The result is a simple but reliable do-it-yourself emphasis. It will allow you to open the sash completely or leave the swing gate ajar.
Stopper

A simple device that can be used by someone with a gate lined with wood. To make it with your own hands, you will need a wooden block and a window hinge. One end of the loop is rigidly fixed at the end of the bar, the other is movably fixed on the gate leaf.
You can also make a metal analogue of this device, consisting of a pipe movably fixed to the sash. In the non-working position, the pipe rises up, and here it is held by a rope loop. To fix the gate, it is enough to lower the pipe. To increase the stop area, the top of the pipe should be cut at an angle.
Trap catch with pawl and spring
A more complex device that has the advantage of allowing the gate to be locked automatically. It consists:

The pipe with the dog is attached at the right distance from the wall. The bracket is fixed on the gate leaf. The principle of operation is quite simple. When the sash moves, the bracket attached to it raises the pawl, which then lowers and securely fixes the sash.
A similar device can be placed at the bottom of the gate, you just have to supply it with a spring. It will return the dog to a horizontal position. To subsequently close the gate, it is enough to slightly lower the dog with your foot.
Trap without spring
To make it, you need a thick steel plate that needs to be bent on one side and a handle welded to the bent end. A steel bar is welded to the bottom of the plate, which is subsequently inserted into brackets fixed to the ground.
Important condition! For correct operation stop, it is necessary that the flat part of the plate be much longer, and, therefore, heavier than the curved section. Then the gate leaf, when moving with its mass, will lower the curved end of the plate. After that, the remaining flat part under its own weight will lower, raise the curved end with the handle and fix the gate. To close the swing gate, just push the handle down.
The described clamps are far from all options for wind stoppers for do-it-yourself swing gates. Perhaps the described devices will serve as an impetus for your imagination, and you will come up with your own. original way problem solving. And we can only wish good luck to the master!
Today, there are many options for manufacturing entrance gate to the surrounding area of a home or business. One of the simplest, most reliable and economical ways production of gates - the use of profiled metal sheets.
Gates made of corrugated board have high strength properties, have an attractive appearance And long term services. At the same time, the technology for installing such gates is quite simple, which allows you to make them yourself.
Structurally, gates made of profiled sheet are a frame made of metal profile with fixed profiled sheet. The frame is mounted on the poles with the help of hinges - and the gate is ready. Pillars can be both metal and wooden. For wood best option diameter - 200 mm, for metal, the thickness of the column may be less.
The depth of the pillars is carried out by about a third of their total length. At the same time, the height of the above-ground part should be 500 mm greater than the height of the gate leaf to provide some clearance from below and above. It is necessary to make a gravel or sand cushion in the pit, and it is advisable to fill the column with concrete - this will increase the reliability of the entire gate structure.
For installation on a frame, it is recommended to choose a profiled sheet marked "C" as a canvas. It denotes relatively light wall sheets made of galvanized steel with a small height of the ribs. Due to its lightness, working with such a sheet is quite simple. Also, the low weight reduces the wear of the hinges, extending the overall life of the gate.
One of the main problems of gates from corrugated board (as well as fences from this material) - high wind loads. Because of them, a sheet of corrugated board can simply be torn off from the frame, not to mention the fact that the gate can spontaneously open, etc.
To strengthen the gate from corrugated board, various methods can be used.
- Firstly, this is a high-quality installation of pillars, that is, the use of a pillow and concrete pouring. If the pillars are installed securely, then the gate will not go anywhere.
- Secondly, the gate frame can be reinforced with metal profile stiffeners. The simplest option is to install diagonal beams crosswise (in the form of the letter "X"). The profile in this case is welded in places corner connection frame beams. The stiffeners not only prevent the sheet from bending under the influence of the wind, but also serve as additional attachment points.
- Thirdly, fastening. The step of fastening the corrugated board to the frame or stiffeners should not exceed 150 mm. As fasteners, it is best to use rivets, not self-tapping screws. The latter can be torn out, both by the wind and by intruders. With rivets, turning such an operation is more difficult.
- Fourth, pay attention to the quality of welding of the frame under the gate. It is on the quality of the assembly of the frame that the overall strength of the gate will depend.
- Fifthly, special holes in the leaf web will help reduce wind loads. This method is applicable only if you are not afraid of the possibility of prying eyes on the site, and you do not feel sorry for the sheet itself.
Before we talk about how to install swing gate posts, let's highlight the product - gate posts. There is always misunderstanding with gate posts. Basically, there is disagreement whether to consider gate posts as part of the gate itself or not. For some reason, many Customers are 100% sure of this and are perplexed when they are explained that this is not so. The client believes that the gate, in principle, cannot exist only in the form of two separate wings, and even more so without welded gate hinges. Or another extreme, when the Customer still admits the existence of such a complete set of gates without poles, but it should be quite cheap. Of course, it is easiest to direct such a Customer to further search for the gate he needs and not save his nerves for explaining elementary things that are axioms for the gate manufacturer. But the fact that there are no extra Customers is a fact. The opinion that swing gates must be completed with gate posts is completely groundless. Like, if there are gate leaves, and they cannot hang in the air, the gate hinges must be attached to something, and if so, then the gate posts must also be included in the set of gates. Such logic at the expense of the gate can only be for a person who is very far from construction work, does not represent the technology for installing the gate and the sequence of installation of products when erecting a fence. In reality, gate posts are installed much earlier than the gate itself, and it is the dimensions of the gate that will be taken from these posts. That is, the gate posts are already ready and look good, but the gates themselves are not even in the sketches. Posts for the gate, it is more correct to say, part of the fence configuration. An intelligent builder erecting a fence is always interested in where the gates and gates will be. And he always begins work with the installation of pillars for gates and gates. And then he lays brick or other material.
Installation options for posts for metal gates
Installing gate posts is not an easy job. If you do not have experience in correctly installing gate posts, then the result will be disastrous. The gate posts will tilt over time, the gate will wedge or stop working properly. All this can be avoided. What you need to know before you start installing gate posts.
The first is to pay attention to the material of the gate posts. A suitable material would be thick-walled rolled metal. For example, a hot-rolled channel 14, 16 or a smaller channel, pre-welded into a box. Profile pipes with a cross section of 100 x 100 mm and a wall of at least 5 mm can also serve as metal pillars for gates. The thicker the pipe wall, the stronger the gate post.
Secondly, in the design of metal gate posts, lower crossbars must be present at the base. IN ideal, the post before concreting should rest on the cross of the corner 50, 63. And the other cross should be sunk 100 - 200 mm from the ground. The length of the crossbars of the cross varies from 500 mm to 1 meter.
Thirdly, this is the obligatory concrete pouring of the base of the metal pillars for the gate. At the same time, the gate post must be installed at a depth of at least one and a half meters, and somewhere more. It all depends on the composition and properties of the soil where the gate posts will be installed.
Fourth, do not neglect pouring into the gate post, liquid concrete mortar. This will allow the hollow pipe to be converted into a strong reinforced concrete pole with external reinforcement, thereby achieving the most rigid pole design possible.
Fifth, it is more reliable if the foundation of the gate posts will be part of the general foundation of the fence. And concreting during the installation of pillars for the gate will be carried out simultaneously with the general pouring of the foundation.
Sixth, it is more expedient to provide an additional fastening between the gate post and the fence in its upper part. If you are laying out a brick fence, then the brick pillar inside which the gate post is hidden must be additionally tied with a thick metal strip with the fence itself. It often happens that a brick pillar bends from the load of the gate and breaks away from the fence masonry, forming a crack between them.>
Seventh, sometimes, in difficult clay soils, it is impossible to install gate posts in a strictly vertical position and fix them securely. In this case, you need to use additional upper and lower crossbars (lintels) between the goalposts. The lower lintel is made of metal, similar to that used for gate posts, and is buried in the ground to a depth of 300 - 400 mm. In the future, a normal passage is arranged on top of the lower jumper. The upper crossbar is installed along the upper ends of the gate posts. Of course, the upper jumper will not add beauty and neatness to the gate, but this is a necessary measure and very effective. The upper crossbar must be made removable to ensure passage in the case of a tall car or the transportation of bulky cargo through the gate.
How to install gate posts is a much more difficult task than it might seem at first glance.
If it is quite enough for the fence that the pillars simply stand and do not fall, then the gate is a mechanism for the coordinated operation of which, it will be necessary to observe a certain position of both of its wings.
Therefore, the installation of pillars for is the most difficult and important task in their construction.
According to the rigidity to the pillars, all the gates can be divided into groups:
- Gates that are bolted electronic lock; gates with heavy doors; gates that can be damaged by passing trucks.
- Gates that are locked with a chain or barrier.
Products of the first type are usually placed where they often need to be opened and closed - for example, at the entrance to a large trading base. Usually such a passage has a significant width - about five.
And in some cases - and more, so that two cars can easily pass, up to eight meters wide. The sashes in this case can weigh from 500 kg to four tons.
Yes, and in a private house, many will want to have gates that close with an electronic lock - they can be opened and closed without getting out of the car or just look out the window who has arrived and open the gate for him without leaving.
Before you install gate posts, you need to know that the most stringent requirements are imposed on them here. They must ensure the reliable operation of the bolt mechanism, the stable position of both wings relative to each other.
Gates that are locked with a chain do not impose any special requirements on the rigidity of the pillars.
The chain, although it does not provide sufficiently reliable protection against penetration, will still be an obstacle to the penetration of thieves.
Here it will be enough to ensure sufficient strength of the poles themselves - after all, when using the gate, it is still possible that they will be hit by a trailer when.
It will not be superfluous to also ensure the maintainability of the pillars. Barriers also do not impose any special requirements on the poles. An exception is electronic barriers with beam fixation when lowering on the stop.
In this case, the same requirements are imposed on the pillars as for the gates of the first type. In addition, they should be stronger - the barrier at the entrance is easier to miss in the dark than closed gates. The disadvantage of gates that are locked with a chain is that you have to open and close them manually.
Gate material
- Definitely the most best material for pillars today is a metal pipe - round or square. It has not too much mass so that the pillar can be put up by one or two people without the use of technology. Pouring concrete inside the pipe or filling with lime will create an electrochemical positive potential on the surface of the pipe and increase rust resistance by several times, in addition, products from galvanized pipe can be ordered.
- The second option is reinforced concrete. For heavy gates, this is not very good - constant bending, cyclic loads, the likelihood of an accidental dynamic impact by the side of the trailer or wheel will quickly render them unusable. Reinforced concrete poles are much more suitable for a fence. Brick pillars have the same drawback - except when there is inside metal pole, and the loops are attached directly to it with the help of remote anchors, through the thickness.
- Finally, the third option is wood poles. Wooden giants will be rather exotic and are used quite rarely - due to low resistance to decay and low bearing capacity.
Installation of posts for gates with deadbolts or heavy gates
To install gate posts so that they do not walk, you can only make a reliable foundation and ensure their rigid connection with each other. Communication can be made at two points - at the bottom of the entrance, at the crossing through the gate and at the top of the pillars. Usually they are welded together at these two points, laying two I-beams between them.
But for the upper fasteners there is a rather serious limitation - sometimes it may be necessary to pass vehicles that exceed the dimensions of the pillars and the upper beam in height. Therefore, the latter is made removable.
When equipping the entrance to your own site, when you plan to drive only your car, it is quite possible not to make a solid foundation for the gate, but to make separate ones for each pillar. At the same time, the pillars are simply welded in the lower part with a thick I-beam, and the same beam is made on top, but removable, inserted into the welded nests and having welded pins for insertion.
Thus, you can safely enter and leave on your own, while good stable work will be ensured. electronic lock and the opening mechanism, and the skew of the pillars can be avoided.
However, this does not negate the laying of the foundation for each pillar separately, which must go below the freezing depth for such gates. A concrete platform is usually made in the entry zone. It will be very good if the I-beam, which is welded between the pillars below, will be thicker than it. In a layer of concrete, it will be reliably protected from rust, since concrete gives a slightly alkaline reaction of the environment and prevents the oxidation of the metal.
For heavier gates, it is necessary to make a solid foundation. Usually it is made in the form of the letter "H" with a cross bar strongly elongated horizontally.
The foundation is usually poured solid,. Its depth should be below the freezing depth. Everything is done according to the same rules as the construction strip foundation for home. The thickness of the foundation grillage is about 50 cm. Theoretically, 30 cm will be enough, however, a width of 50 allows you to save on formwork and pour the foundation into a gap with the walls of the trench.
Near the pillars, extensions-buttresses are made in both directions, perpendicular to the entrance. Usually, even for heavy gates, a buttress in the area of \u200b\u200bthe column with a total length of one meter is enough. The foundation is reinforced before pouring.
Between the pillars at the bottom of the entrance, near the surface, an I-beam is welded. Then it is poured into concrete, together with reinforcement - the concrete will be for it reliable protection from.
At the top of the pillars, it is desirable to install an I-beam. Considering that usually heavy gates require large and heavy posts, the beam must match.
It will be difficult to remove and put it in place - you will have to fit it every time crane. Therefore, it is better to immediately lay a significant margin in height in the pillars and simply weld the beam tightly to them, once and for all.
Poles for the gate
Using the same technology, you can install posts for gates and gates - with the difference that the posts here can be taken thinner, it is enough to put round ones with a diameter of 50 mm or square ones with a width of 50 mm, wall thickness - 3 mm.
It is undesirable to take a smaller wall thickness - to thin metal it will be difficult to weld the hinges, and this will affect the durability of the gate.
Considering that 2.5 meters is enough for a person to pass, the poles can be connected without any fear at a height of 2.5 meters by welding a cross member.
The second bundle is at the bottom, where the entrance is. It is desirable to concrete it so that it does not rust. The standard width of the gate is 90-120 cm. You can freely enter such a passage in winter clothes, and with a baby stroller, and even bring a wheelbarrow with earth.
How to concrete gate posts - on the video:
Noticed an error? Select it and click Ctrl+Enter to let us know.
You will need
- - pipe Ø100 mm;
- - corner 100x100 mm;
- - angle grinder ("Bulgarian");
- - welding machine;
- - cement;
- - sand;
- - edged board and timber for formwork;
- - carpentry tool;
- - shovel and bayonet shovels.
Instruction
Cut out the blanks for the gate. For racks, use a pipe Ø100 mm or a corner 100x100 mm. Their length is determined by the sum of the height of the gate and the length of the ends embedded in the ground (0.8-1 m). With a planned gate height of 2 m, the length of the blanks should be 2.8-3 m.
Make a jumper connecting the racks from a 100x100 mm corner. Its length should be equal to the width of the gate. For standard gates, it is assumed to be 3 m. If a pipe is used as posts, cut off one corner flange on both sides at an angle of 30 ° and give its edge a concave shape. This is done so that the edges of the corner fit well against the uprights when they are welded.
Assemble the gate frame from the blanks on the ground, choosing a more even place for this. It should look like the letter "H" - two racks and a jumper laid between them at a distance of 2 m from their top (or 0.8-1 m from the bottom). In this case, two conditions must be ensured: the parallelism of the racks between themselves and the perpendicularity of the jumper with respect to the racks.
Weld the jumper to the uprights. Both shelves of the corners must be securely welded with a continuous seam. Weld any pieces of metal to the jumper in two or three places, pointing them down. They will play the role of reinforcement, firmly connecting the jumper to the foundation.
Dig a trench for pouring the foundation. Its width should be 350-400 mm, length - 3.5 meters (for a 3-meter gate). Required depth trench is determined taking into account the depth of soil freezing, its type, level ground water. For simplicity, you can take it equal to the depth of soil freezing in your area, which can be found on construction sites.
fabricate wooden shields from edged board and assemble formwork from them. Its dimensions in plan should be 0.3x3.3 m. It is desirable to make the walls of the formwork slightly expanding towards the bottom - in order to avoid the expulsion effect of the soil on the foundation.
Place the gate into the formwork so that the lintel is flush with the ground and the posts are vertical. To do this, place supports made of stones or metal under the racks or lintel and secure the racks on both sides with stops. Lay reinforcement from any type of metal in the formwork - wire, metal profile scraps, etc.
cook sand-cement mortar with a ratio of 1:4 (cement:sand) and pour it into the formwork. To use less mortar, fill the formwork with stones and broken bricks. During pouring, tamp the solution with a shovel. The surface of the poured foundation should be flush with the ground and the lintel. Before hanging the gate itself, give the solution time to harden - at least a week.
When the territory of the site is fenced off, the question always arises of the need to install a gate. They come in several types: swing, retractable, opening in one direction or lifting. You can install on your own only hinged or opening in one direction gates. The rest are installed on special structures with the participation of specialists in this field.
You will need
- - hinges
- - bolts or welding machine
- -pillars
- - flat bar
Instruction
In summer cottages and in private houses, swing doors are usually installed gates. This design is the presence of two wings, welded from iron or made from tesa. In some cases, carved or forged gates.
To install the gate, dig in the pillars by measuring the manufactured doors. Poles can be installed iron or wood. Fill both of them with cement mortar for strength and reliability.
Hinges can be welded to poles and gates m or fasten using bolts. Store hinges are not suitable for installing gates. They are unreliable. Order powerful homemade hinges from any turning organization or purchase from a market that sells homemade parts. They should be on a ball mechanism, which will make it easy to open gates without making any effort.
The most difficult process is the installation and fixing of the gate. It is impossible to carry out this procedure alone, because the doors made of any material are quite heavy. They need to be hung at a distance from the ground that does not prevent them from opening.
Place a block of the desired size down the gate along the length of both wings. Install one sash on it and weld or screw the hinges. First it is done from above, then from below.
The second gate leaf must be installed in accordance with the first one and welded or hinged. And do the same. First, the hinge is screwed or welded from above, then from below.
If you installed a bar, then both wings should be at the same distance from the ground so that distortions do not occur when they are closed.
Related videos
The owners of their own plots try to install such gates so that they are both beautiful and comfortable, and would fit well into general design. Wood structures are considered the most accessible and simple to implement.
Those wishing to make their own wooden gate First you need to draw up a design drawing. This helps to more accurately represent the scope of work, to purchase the necessary materials in advance. When drawing up a drawing, you must try to ensure that all the details and structural elements are in full accordance with each other.
How to install gate supports
From wooden beams you need to make vertical supports. Their value must be calculated as follows: add another meter to the height of the gate for deepening. The greater the depth at which the supports are installed, the more stable and durable the structure will be. So during the operation of the gate, the likelihood of warping is reduced.
Remove debris from the place intended for the installation of support poles. Dig holes - their diameter should be 20 cm larger than that of the supports. Tamp the bottom of the hole and make a cushion of rubble. That part of the column that will be filled with concrete must first be treated with a compound that will protect the wood from decay - for example, bituminous mastic. Use a plumb line to check the verticality of the post. The pit with the installed post must be filled with concrete and wait until it dries.
Gate manufacturing
To make one of the goal posts, you will need one bar for the top and bottom, two bars for the side posts, two for the middle lintel. The calculation of the dimensions for the gate is done depending on the size of the machine. All parts must be treated with antiseptic impregnation.
The frame parts are laid out on a flat surface, holes must be drilled at the joints. Pins are inserted into them - they give rigidity to those places where the parts are connected. In the middle of the frame, jumpers made of timber are installed. At the corners, jibs are attached, which are bars with cuts at the ends at an angle of 45 degrees.
When calculating the height of the frame, it must be taken into account that the sheathing boards should protrude 20 cm from below and from above. The boards must be prepared before sheathing - cut to the dimensions required by the calculation and work with a planer. They can be attached to the frame and tightly to each other, and with certain step. After all the sheathing boards are installed in place, the top must be cut and stripped sandpaper. Now hinges are attached to the sashes - for this, self-tapping screws with screw threads are used. Self-tapping screws can also be used to fix the mounts to the racks.
The distance from the bottom of the gate to the ground must be at least 5 cm. Closed gates are fixed with latches, latches or locks - the owner chooses the method. It is better to paint the gate in assembled form.
Related videos
The fence is an important element of the fence. During its construction, it is necessary to determine what kind of supports it will have. Its reliability and longevity depend on it. pillars can be wood, metal or concrete. Once you've made your choice, get to work.
You will need
- - pillars;
- - cord;
- - pegs;
- - saw;
- - drill;
- - gravel;
- - bitumen;
- - wedges.
Instruction
Installation of poles for fence start by marking the fenced area. Do it with string. Correctly calculate the number of posts, crossbars and canvases.
Hammer in stakes at the posts. Once again, check the correctness of the intended line. The pegs should be strictly on the marking step. A crooked fence will not be strong.
Mark the height of the pole. She must be taller than herself. fence by a few centimeters. Considering the underground part, saw off the excess.
The gate is the face of the garage. The quality of their insulation determines the microclimate in the room. How well they function depends on whether you can open the garage at any time and drive the car out of there.
Insulate garage doors and Maintenance most car owners can on their own. Appropriate tools and materials are available in every private household.
Garage door insulation
For many car owners, a garage is more than just a place to park a car. Here you can equip a small workshop, make a warehouse of useful things, and finally spend time in the company of friends.
The garage needs to be maintained optimum temperature both winter and summer. According to building codes, in a heated room, this figure is +5 degrees. This will allow you not to warm up the car before starting and avoid the accumulation of moisture in hidden cavities.
Is it necessary to insulate garage doors (with an automatic mechanism, swing, lifting, sectional, rotary, etc.)?
To determine whether it is necessary to insulate the garage door, just look at the thermal image. It shows that most of the heat leaves the room through non-insulated gates.
This factor is especially important for owners of built-in garages. Often, the heating of such a room is included in the general house system. And heat loss through non-insulated gates will affect the entire house as a whole. Heating costs will increase.
Consider the types of gate structures and evaluate the need and possibility of their insulation.
- Roller shutters, consisting of separate aluminum lamellas. Some models have polyurethane foam inside. The web itself is wound on a shaft located above doorway. In view of design features insulation is not possible.
- Sectional doors. It is based on sandwich panels filled with foamed polyurethane. Additional insulation not required, however, you can stick the foam on inner part sections.
- Swing gates. The most common design, consisting of two flaps hung on welded hinges. In the very simple version consist of sheet metal welded to the steel frame. It is advisable to insulate such a structure even at the construction stage, however, this can be done independently, after installing the gate.
- The lift-and-turn design consists of one sash. You can make it yourself or purchase products from a well-known manufacturer. A factory sheet is a panel of durable sheet steel and insulation, which is often polyurethane foam. A thickness of 45 millimeters is sufficient to prevent heat loss. Homemade gates must be carefully insulated.
Such gates do not require additional insulation.
The choice of material for insulation (foam, penoizol, etc.)
When choosing a quality insulation, you need to keep in mind a few nuances. Yes, for warmth. garage doors not suitable mineral wool and other porous materials. Most often, the thickness of the walls of the garage is much less than that of a residential building. Often, corrugated board or a similar product acts as the main building material. Using porous insulation a dew point forms in it. As water accumulates in the pores, its density and thermal conductivity increase. Ultimately, this minimizes the effectiveness of insulation.
Among the most suitable materials are:
- Styrofoam. Inexpensive insulation obtained by dry heat treatment of polystyrene granules.
- Styrofoam. It is also developed on the basis of polystyrene, however, using melting. There are several varieties: extruded, pressed, non-pressed. The main advantages are lightness, durability and ease of processing. The disadvantage is poor vapor permeability, as a result of which increased requirements are imposed on the insulated room in terms of ventilation.
- Penoizol, which includes elements such as orthophosphoric acid, resin and carbide. Strong and durable material, resistant to burning. However, low-quality penoizol can release toxic formaldehyde when burned.
- Polyurethane foam is a sprayed insulation with excellent heat saving performance. The material is actively used in various industries.
Inexpensive insulation for gates and walls
When insulating a garage door, it makes sense to choose between Styrofoam and Styrofoam. Materials have the following differences:
- Strength. Styrofoam is a hitch individual elements. Expanded polystyrene is a single substance. The bending strength of the latter is several times higher.
- Permeability. Standard foam has voids that liquid can seep into. The water absorption of expanded polystyrene is much greater.
- Price. Polyfoam is much cheaper.
If resistance to heavy loads is not critical for you and you want to insulate the door in the garage with a simple and inexpensive material, your choice is foam. In other cases - polystyrene foam.
Save on insulation is not worth it. Otherwise, the efficiency of the work performed will be zero. The thickness of the layer depends on the climate in which the garage is located. So, in the European part of the country the weather is moderate, not too cold, however, sometimes the temperature reaches minus 25 degrees. In such conditions, the following thickness of insulation is sufficient:
- Polyurethane foam: 70 mm
- Extruded polystyrene foam: 80mm
- Styrofoam: 100 mm
Tools and materials
Before installation, you should carefully measure the garage door and calculate the amount of materials that will be required for insulation and cladding.
There are many facing materials on sale:
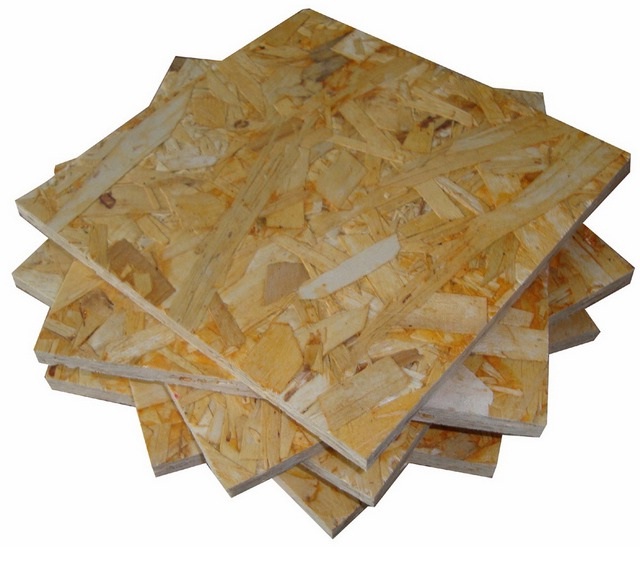
For garage door cladding, 10 mm OSB-3 or OSB-4 boards are suitable, designed for rooms with high humidity. Standard size products - 1250*2500 mm. Two plates are enough for finishing.
The cladding is attached to the crate. In this capacity, small wooden blocks 40 * 40 mm, fixed on the bearing part of the gate structure. Boards are installed around the perimeter and on the canvas area.
Insulation sizes may vary. They are selected based on the location of the crate: avoid a large number scraps and strive to ensure that whole sheets of polystyrene foam are located between the individual bars.
In addition to materials, for high-quality insulation of the gate you will need a set household tools that most home craftsmen have:
- Electric drill.
- Electric screwdriver or a set of screwdrivers.
- A set of drills for wood and metal.
- Hacksaw. If necessary, you can notice with a jigsaw.
- Brush for metal with stiff bristles. Required for surface cleaning.
- Sandpaper
- Measuring tools: tape measure, ruler, square.
- Construction knife.
- Fasteners - screws, wood screws.
- Anticorrosive primer and solvent, antiseptic.
How to insulate with your own hands: step-by-step instructions
The simplest way to insulate a gate is to lay a sheet of insulation directly between the frame posts, without any preparatory work. After that, a suitable finishing material. However, the resulting design will be short-lived and will not retain enough heat in the room.
Professional insulation of garage doors takes place in several stages:
Preparation
First of all, you need to treat the bars with an antiseptic in one or two layers. Be aware of personal protective equipment: wood impregnations contain harsh chemicals.
After processing, the bars should dry out. At this time, you need to prepare the gate for insulation. The surface of the canvases is carefully inspected, if rust is detected, it is cleaned to metal with a stiff brush or a drill attachment. If there is peeling paint, it must also be cleaned off. The resulting surface should be free of rust stains and contamination. After this, the canvases are sequentially treated with a solvent and a primer.
After drying, the surface of the garage door must be waterproofed. If standard foam is used as a heater, this operation is required; when using extruded polystyrene foam, it can be skipped.
Waterproofing can be done in various ways:
- By gluing isolon - a two-millimeter foil film made of polyethylene foam.
- By gluing a membrane with a vapor barrier function.
- Processing with bituminous mastic.
Lathing installation
First of all, bars of the required size are cut. Places where ventilation holes and locks are located are bypassed around the perimeter and will not be insulated.
In places where the bar will be attached to the frame, you need to drill holes with a 4 mm drill. The optimal step is 20–25 centimeters. If you want the head of the screw to be flush with the canvas, you can make small indentations. For this, an eight-millimeter drill is used. It is important not to overdo it and remove only the amount of metal that is necessary to hide the head.
Before fastening, the bars are attracted to the frame with the help of clamps. To prevent the wood from cracking, you can additionally drill holes equal to the depth of the self-tapping screw. For this, a 2 mm drill is used.
All the bars located around the perimeter of the frame are installed in a similar way. Additional transverse crossbars are fastened with a self-tapping screw to the end in increments of 20–25 centimeters.
Insulation sheets will be laid in these cells.
Insulation installation
The space between the elements of the crate is filled with foam or expanded polystyrene. For this:
- The size of each cell is measured.
- In accordance with the dimensions obtained, the insulation is cut. To do this, you need a construction knife and a ruler. On each side, you need to leave a small margin - about 2-3 millimeters. This is necessary so that the elastic foam fits more tightly between the boards of the crate.
- The insulation is fixed in the cells.
There are several ways to attach foam between the bars:
- With the help of facing materials. The foam itself in this case is not attached, but is pressed against the OSB boards.
- With the help of "liquid nails".
- With mounting foam. The material has excellent adhesion. If you choose this method, the surface must be moistened before applying the foam: hardening occurs only in direct contact with the liquid.
After installing the insulation, the remaining joints are sealed mounting foam. After it dries, the excess is cut off with a knife.
In this case, the gate is insulated with foam
Gate lining
IN fine finish garage doors after insulation, OSB boards are often used. Products close the crate and insulation, make the doors more presentable.
The main condition is either the absence of joints, or their location on the bars. Therefore, before cutting the sheets, it is necessary to measure all surfaces.
For cutting, it can be used as an ordinary hacksaw for wood or an electric jigsaw, as well as a powerful a circular saw. Finished sheets are tried on at the place of future installation. If necessary, holes for locks, ventilation holes, etc. are cut into them. After that, the lining can be fixed.
The standard fastening step is 12–15 centimeters on racks located around the perimeter, and about 20 centimeters on cross bars. To avoid cracking the wood, before tightening the screws, you can drill small holes with a nozzle with a small diameter.
OSB boards can be used as facing material
Repair work: how to fix problems
Quality garage doors can last for decades. However, with such a long operation, it is inevitable to carry out a number of works on their current maintenance and repair. Most operations can be performed independently.
How to lift garage doors that are sagging
The main reasons why it may be necessary to change the geometry of the gate structure are:
- General metal fatigue. Usually occurs after prolonged use.
- Loop drop.
- Possible deformations associated with poor-quality installation.
- Doorway recession.
- Other factors - for example, in hot sunny weather, deformation of the structure under the influence of high temperature is possible.
There are other reasons why you need to raise the gate. The most common is the purchase of a new car, which is slightly out of height.
Every problem needs individual approach to correct the geometry of the gate. Many methods are available for independent work using everyday tools.
Elimination of sagging loops. To lift the hinges on the gate leaf, a special spacer washer is used. The work is as follows:
- The sash returns to its place. Using this method, you can correct minor distortions of the gate leaves, raise the gate and make the movement of the structure more free. Important: the alloy from which the ball or washer is made must be harder than that used to create the loop.
- A washer of a given thickness is put on the axis of the lower loop. If it was not possible to find a suitable part, a metal ball of the required diameter is inserted into the loop hole.
- The canvas is taken off.
If you need to change the distance from the ground to the bottom of the sash, you can simply cut off part of the structure with a grinder and attach a rubber strip over it. This will help hide the gap. This method can be used if the lower beam is located beyond the edges of the skin. If the crossbar is located close to the ground, you need to do the following:
- carefully cut the horizontal crossbar with a grinder.
- cut the gate leaf to the required height.
- if necessary, attach a small rubber strip to the gate, equal in width to the distance from the bottom of the gate to the ground.
- weld the horizontal bar to the frame in a new place.
Sometimes the sashes warp due to deformation of the opening. In this case, you will either have to raise the opening itself, or correct the skew on the sash itself. To slightly raise part of the structure without touching the frame, you need to cut the horizontal beam near the place of deformation, cut it off with a grinder 5-7 millimeters, lift part of the sash, press the vertical beam and weld it. This method is used for small gaps. For reinforcement, a metal strip is attached to the welding site, since the risk of permanent deformation remains.
If other methods have not helped, an increase in the height of the gate opening itself will be required. In practice, such work is associated with certain difficulties. It is necessary to install temporary supports, to clarify whether reinforcement passes inside the masonry. If you do not take into account all the nuances, there is a possibility of the destruction of the wall or the collapse of the roof.
Raising the level of the gate opening is quite difficult. Requires additional equipment and the ability to lay bricks
Proper reinforcement and protection
For mounting, durable metal pins up to 20 centimeters long are used. After installation, they are cut and sanded to ensure smooth opening and closing of the wings. Gates are hung on the frame.
Additional reinforcement of the garage door makes sense if you are the owner of a solid concrete building. To reinforce the walls next to the structure, you can use metal carcass, welded from the corners and scalded with a mesh. It can be installed both at the stage of construction of the building, and subsequently, from the inside of the room.
Strong metal rods welded to the hinges make sawing much more difficult for an intruder. Additionally with reverse side cloths can be welded nuts and bolts.
Placement of stiffeners on the example of swing gates with a separate door
To make the sashes more tightly pressed against each other, you can use an eccentric latch. A wide strip of metal is welded onto one of the canvases, thanks to which an attacker will not be able to use a crowbar or similar tool.
To strengthen the wings themselves, horizontal and vertical stiffnesses are welded to the frame. These are transverse metal racks located at some distance from the edges of the canvas. Their number depends on what degree of rigidity is needed. The length of the crossbar is determined based on the dimensions of the canvas as the distance between the opposite racks of the frame.
If there is a door in one of the wings, the vertical stiffeners are welded on both sides of it, otherwise the leaf may be deformed. If there is no door, horizontal or vertical crossbars are welded to the frame anywhere, most often in the center of the structure.
Replacement
Garage doors may need to be replaced for a variety of reasons. Perhaps the old structure is rusted or deformed. Or have you purchased a new gate, best quality or decoration.
The first stage is the dismantling of the old structure. Before this, it is necessary to clarify whether there are additional "inserts" from thieves, such as those welded to the frame above door hinges bolts, pieces of reinforcement or other similar elements. If they are, they need to be dismantled.
The easiest way is to dismantle metal swing gates. It is enough to open both doors and remove the canvases from the hinges. After that, if necessary, remove the hinges themselves (with a sledgehammer, grinder, etc.) and you can install new gates.
In case of deformation or corrosion, it is better to replace the hinges
To mount the curtains in the existing frame, you only need to take the necessary measurements, weld the hinges and hang a new gate on them.
If the gate is changed along with the frame, old frame needs to be dismantled. It is better to entrust this work to professional builders, as damage to the masonry is possible. After dismantling, a new supporting frame is installed, leveled and fastened to the opening with long self-tapping screws. For a conventional design, 4-6 pieces per side are enough; when installing a reinforced frame, the number of dowels reaches 10.
If garage doors are installed without a frame, on poles, their replacement takes place in several stages:
- Door opening to the stop.
- Removing fabrics from hinges.
- Dismantling the hinges (if necessary).
- Cleaning of surfaces from rust, elimination of possible damage. Treatment with anti-corrosion compounds.
- Welding new loops.
- Hanging and adjusting sashes.
Adjustment in case of misalignment
Warped gates are a problem with older garages. At some point, the doors stop closing, cling to each other and to the ground. Among the main reasons for such malfunctions are the following:
- Poor quality welding when installing the gate.
- Soil subsidence, the presence of trees nearby, whose roots can swell the foundation.
- material corrosion.
Due to the problems described above, the gate leaves sag and deform. The load on the hinges and the opening mechanism increases, as a result of which the gate stops opening.
To correct the problem and prevent the occurrence of such situations in the future, you must perform the following operations:
Additional stiffening ribs are equipped along the perimeter. These are transverse metal crossbars that reinforce the structure. Their installation is as follows:
- From profile pipe, fittings or other suitable building material, blanks are cut. The size of each corresponds to the distance between the opposite racks of the frame. The stiffeners are horizontal and vertical, respectively, before making them, you need to measure the distance between the horizontal or vertical crossbars of the frame.
- The blank is laid on the canvas and set according to the level and building corner. Its ends should adjoin the racks of the frame or lag behind them by a few millimeters.
- The stiffeners are welded with welding machine to the frame. They can be attached to the canvas using standard metal screws.
With prolonged and active use of garage doors, it is necessary to monitor the position of the hinges, if necessary, correct them, and in case of significant wear, change them.
Garage doors must open and close freely and let the car through
At self-mounting hinges to swing gates and subsequent adjustment, several nuances must be taken into account:
- The welding seam, which is formed when the loop is welded, must be directed exclusively upwards.
- Welding takes place with small tacks, twice on each side in turn.
- All elements are welded flush to the rectangular garage door post.
- Before work, it is recommended to make a small substrate under the bottom of the loop. Its length is half fastener. The top of the substrate is tacked from the side of the end.
- Before welding the gate hinges from the inside, you need to check how easily the leaves open and close. In case of incorrect operation of the gate, they are additionally processed by welding from the outside.
- Before finally fixing the gate, the leaves are closed. To avoid sagging, a small stand is placed under the middle of each sash.
The gates open only after some time after the end of work. This is necessary in order for the loops to cool. When heated, the metal is very brittle and subject to deformation. If you overload the structure too early, all work will have to start over.
If your lifting gate is jammed, the reason is in the opening system. In the simplest case, it is enough to lubricate the roller mechanism with oil to ensure the best sliding of the door along the guides. Damage to individual parts, such as a shaft or a spring, is also possible. Faulty elements are replaced with new ones that are identical in functionality.
Video: Garage door insulation
Although self-insulation and garage door repairs do not require specific skills, remember: the health of your iron friend depends on how carefully the work is done. If you have any doubts about the conduct of a particular operation, it is better to contact a specialist.
How to strengthen the garage door and protect the room
Strengthening the garage door
Strengthening the garage door is one of the components of the room equipment. After all, this is the protection of the premises, so we will consider this work as the main one. How to strengthen the garage door, we will tell in this article.
Here everything can be done with your own hands and therefore the price of work is not high. Here, the quality of execution will come first. There are a lot of photos on this topic, now we will summarize them and choose the most useful and necessary.
Strengthening the gate in the garage has to be done even if you purchase an expensive product from a well-known brand. And if your garage is equipped with conventional swing gates. then know that the frame of such a design must be carefully strengthened, so you must understand this.
- To do this, you need to weld a metal belt to the gate, this is done from the inside, then the design turns out to be more reliable and practical, as it should be.
- You also need to pay attention to the stiffeners, because the metal should not "play".

Distribution of stiffening ribs in the gate
Attention: It is important to remember that the garage door must comply with necessary requirements security. For example, on their outer side there should never be handles without protrusions, because it is often thefts of cars and other items that are committed in such garages, remember this.
- But in order not to encounter such a problem, and to exclude the possibility of breaking the lock, during installation it is necessary to prepare a special recess on the surface of the gate, after which the lock can be mounted.
- In the event that you want to rent out a garage, then know that it is imperative to put a reliable and high-quality lock on the gate (see Garage locks with a secret: which one is better), because in any case, then you will find a tenant faster.
- I would like to note that first you need to remove the old gates from the hinges, laying them on flat surface, as for fastening, then everything old must be removed, this also applies to the hinges, then they need to be put in place, but already in a holistic and working condition, of course.
- The gates need to be covered with sheets of metal, it is customary to fasten the sheets with self-tapping screws, and the screws should be positioned so that they can enter the middle of the beams, in case you notice that the sheets will protrude along the edges, then they need to be bent inward. After all, this is done, first of all, to get a more attractive appearance.
- In those places where the gates will be attached to the walls, it is necessary to install steel corners made of rolled steel, and fittings must be mounted in the places where the gates are attached, because this is an important condition.
- Now you can mount the gate, doing it efficiently and carefully, without having experience in this area, of course, you won’t be able to do it accurately and correctly.
Garage security: what you need to do
Of course, you want to be able to be in your garage with special security, while you need to understand that any building has vulnerabilities that attackers can take advantage of, so your main task is to find out where these places are and make sure that no one couldn't get into them.
Attention: When purchasing ready-made gates, you should definitely look at the recommendations for installation. They pay attention to security issues. There are also recommendations there.
- In the event that the garage is a capital concrete structure, then you should definitely make additional cementing of metal hooks.
- In order to properly strengthen the walls of the garage, it is customary to make a special metal frame from the corners, they, in turn, must have a suitable size, remember this.
- The frame needs to be scalded with a metal mesh, of course, it is best to do such work even during construction, but if changes are included in an already finished structure, then the frame is best built indoors, of course, if space allows it.
Attention: Remember that you must carefully try to strengthen the garage gate, because it is through them that intruders often enter such premises, which means that you should pay special attention to this place.
- You can weld special metal bars onto garage hinges, and they, in turn, will seriously complicate sawing, so this condition is important. On the reverse side of the gate, you need to weld bolts and nuts, while securing additional loops, do not forget about it.
- In order for the sashes to be securely pressed against each other, it is necessary to arrange eccentric locks (see Locks on garage doors: varieties and features), making this a must. On one of the gate leaves, you will need to weld a wide metal strip, which, in turn, will not allow scrap or any other tool to be inserted between the leaves, so you definitely need to know about this important advice.
- The hinges intended for the padlock must be cut off and completely removed inside the gate surface, if, of course, there is such an opportunity, while not forgetting to leave a minimum opening that serves to hang the lock.
- To protect the garage from intruders, you can install a simple alarm that will work when the gate is opened.
Conclusion
Each owner wants to properly protect the property of his garage from theft, this also applies to the car. Therefore, it is imperative to strengthen the garage door by any means, now you know how it is done, in addition, it is imperative to think about the safety of the garage as a whole, today such problems are easily and effectively solved, so it all depends on you.
In the event that you turn to specialists, they will always help you choose one or another way to protect your garage. But now you know exactly how you can strengthen the gate from this room, the decision is yours. The instructions will help you in this matter.
Of course it needs to be strengthened. For some reason, there are more and more people who want to profit "for free" from someone else's good. It is very important to minimize their chances. Even the appearance of strong and high-quality gates can scare off lovers of easy money. About padlocks (there are unique ones in which only they are in garages) - it's better to forget at all - they are cut off in 3 seconds. Well, it's best to duplicate all security measures GSM alarm Thankfully they are already cheap.
http://1pogarazham.ru


